AI Summary
Do you want to know how to start an online store? With the right tools and preparation, your eCommerce site could turn into a profitable business.
In this article, we’ll walk through the tools and services you’ll need to use to start your online store. By the end, you’ll have all the info you need to get started.
Create Your WordPress Form Now
Can You Start an Online Store With No Money?
Yes, it’s possible to start an online store with no money at all.
Of course, the cost of starting a store depends on what you’d like to sell and the platform you want to use. If you want to do everything without spending money, you’ll have to work on the site yourself.
Even then, you might still need a small budget for marketing, software, or content.
We’re going to show you how to get a store online for less than the price of a take-out coffee each month. That’s enough to get a really good hosting account, a domain name, and business email address too.
How to Start an Online Store Step-By-Step
In This Article
- Step 1: Decide What to Sell in Your Store
- Step 2: Choose Your Online Store Platform
- Step 3: Get Web Hosting and a Domain
- Step 4: Create Your Order Forms
- Step 5: Choose a Theme For Your Store
- Step 6: Add WordPress and WooCommerce Plugins
- Step 7: Add Products to Your Store
- Step 8: Write Your Store Policies
- Step 9: Set Up Your Email Marketing List
- Step 10: Prepare to Launch Your Online Store
- Step 11: Add Social Proof
Step 1: Decide What to Sell in Your Store
The first big decision is the theme or niche for your store.
Maybe you already produce a product and you just need to set up a payment form. Alternatively, you might want to use a platform like WooCommerce to sell hundreds of products on your website.
We’ll look at both methods later on.
But if you haven’t decided what to sell yet, think about:
- Your own interests and hobbies – Starting a store is much easier if you’re excited about what you sell because you’ll find it a lot easier to get other people excited about it too.
- New and trending niches – Try to find a gap in the market, or look for a new trending product that you can sell. Being the first to market will make it easier to attract customers.
- Costs and overheads – You can start a store with no money. For example, a dropshipping store requires no storage overheads. But over time, you might need to invest in advertising, or pay for software. Do the math now to make sure that you can still make a profit as your costs increase.
- Look closely at competitors – If other stores have a head start in your niche, you’ll need to find ways to make your store more appealing. eCommerce Market research can help you to identify opportunities and gaps in the market that you can use to your advantage.
- Physical or digital? – Selling digital products can be a profitable business. As we work through this guide, we’re going to look at the example of a store selling physical products, but you can use the same tips to list digital products with a few tweaks.
Decided on that to sell? Great. Now let’s look at 3 platforms you can use to get your products online.
Step 2: Choose Your Online Store Platform
Now’s the time to make the biggest decision of them all. Which eCommerce platform is best for you?
There’s no easy answer to this. It depends on:
- Your product range
- Your market
- The payment and shipping services you want to integrate
- Your own time and level of skill.
Of course, you’ll also want to choose a platform that lets you easily create clear, accurate listings.
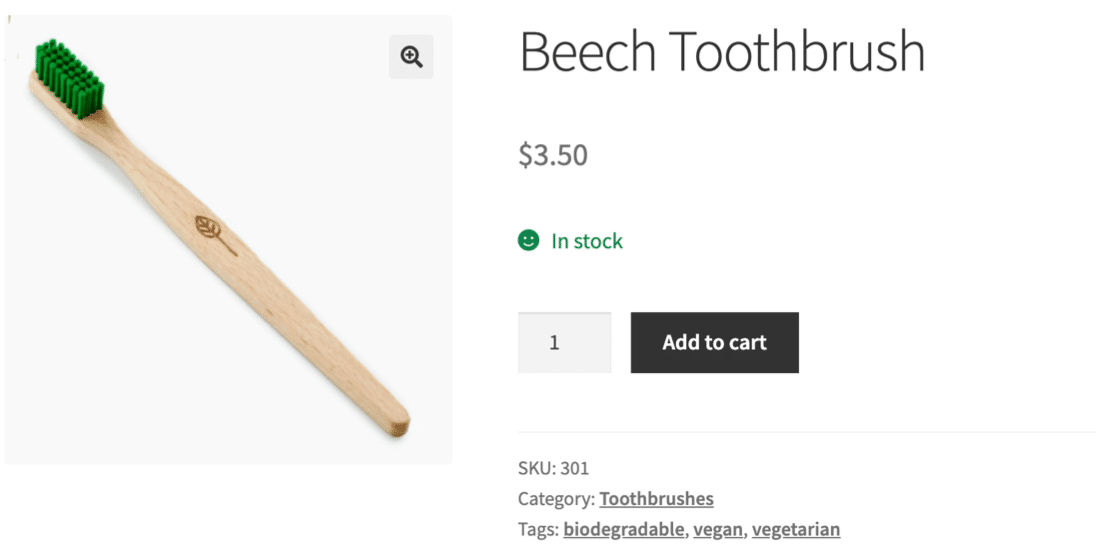
Once you get set up with 1 platform, it can be tricky to switch to another one. So you’ll want to think about things like:
- Software costs – Some platforms start cheap, but as your store grows, you will need to scale up. Think about addons and plugins you might need to buy as your store gets busier.
- Platform features – The features you need will depend on what you’re selling and how much you want to customize your store. But keep in mind that adding features to any platform might increase the cost.
- Appearance and branding – You can use free themes and get a free logo for your store. Will these look professional enough, or do you need to look at paid options or hiring a designer?
- Management – Don’t underestimate the amount of work that goes into managing a store. Listing products, dealing with inquiries, marketing your store… it all takes time, and you need a platform that you find easy to work with so it’s all manageable.
- Fulfillment – If you’re selling physical products, will out outsource the fulfillment or do it all yourself? If you outsource it, can your chosen fulfillment center access your store easily?
Let’s look at 3 popular tools you can use to start a store: WPForms, Shopify, and WooCommerce.
Option A: Make Order Forms with WPForms
WPForms is the best form builder for WordPress. It lets you create order forms easily and place them anywhere on your site.
You can connect WPForms with popular payment gateways including:
- Stripe (all plans)
- Square (Pro)
- PayPal (Pro)
- Authorize.Net (Elite)
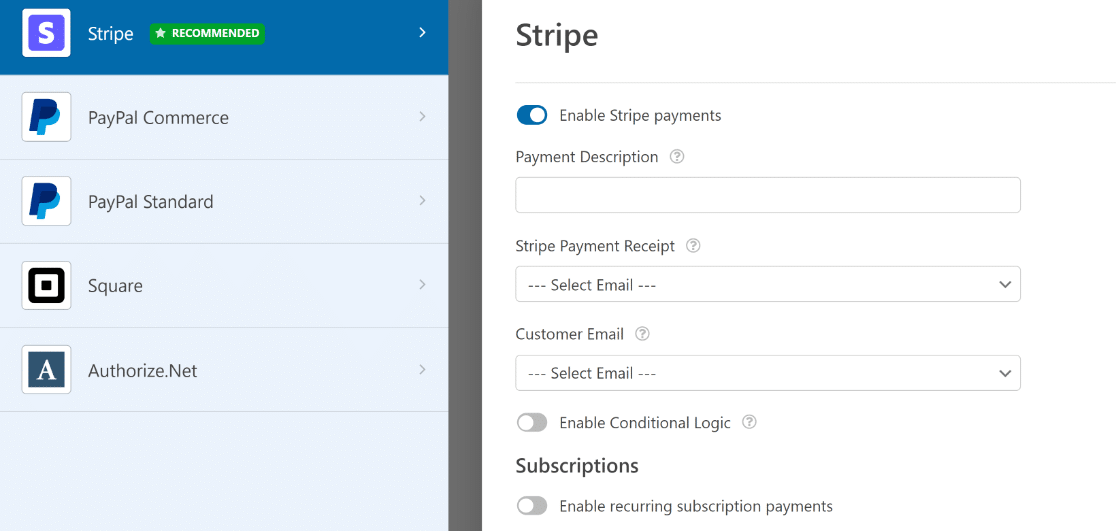
Not all payment providers are available in all countries, and there can be extra transactional fees depending on your plan.
To get a flavor of the differences, we compared Stripe vs. PayPal on transaction fees and features. You can also check out this list of PayPal integrations for some ideas on how you could use it.
WPForms also has tons of features you can add to make order forms smarter and easier for your visitors to fill in. For example, you can:
- Let customers upload a document and make payment at the same time
- Automatically redirect the customer to a digital download after they’ve paid
- Add a coupon field to any form
- Create a one-click checkout form
- And more.
Adding smart features and payment fields is easy in WPForms. The drag and drop builder shows you exactly what the result will look like.
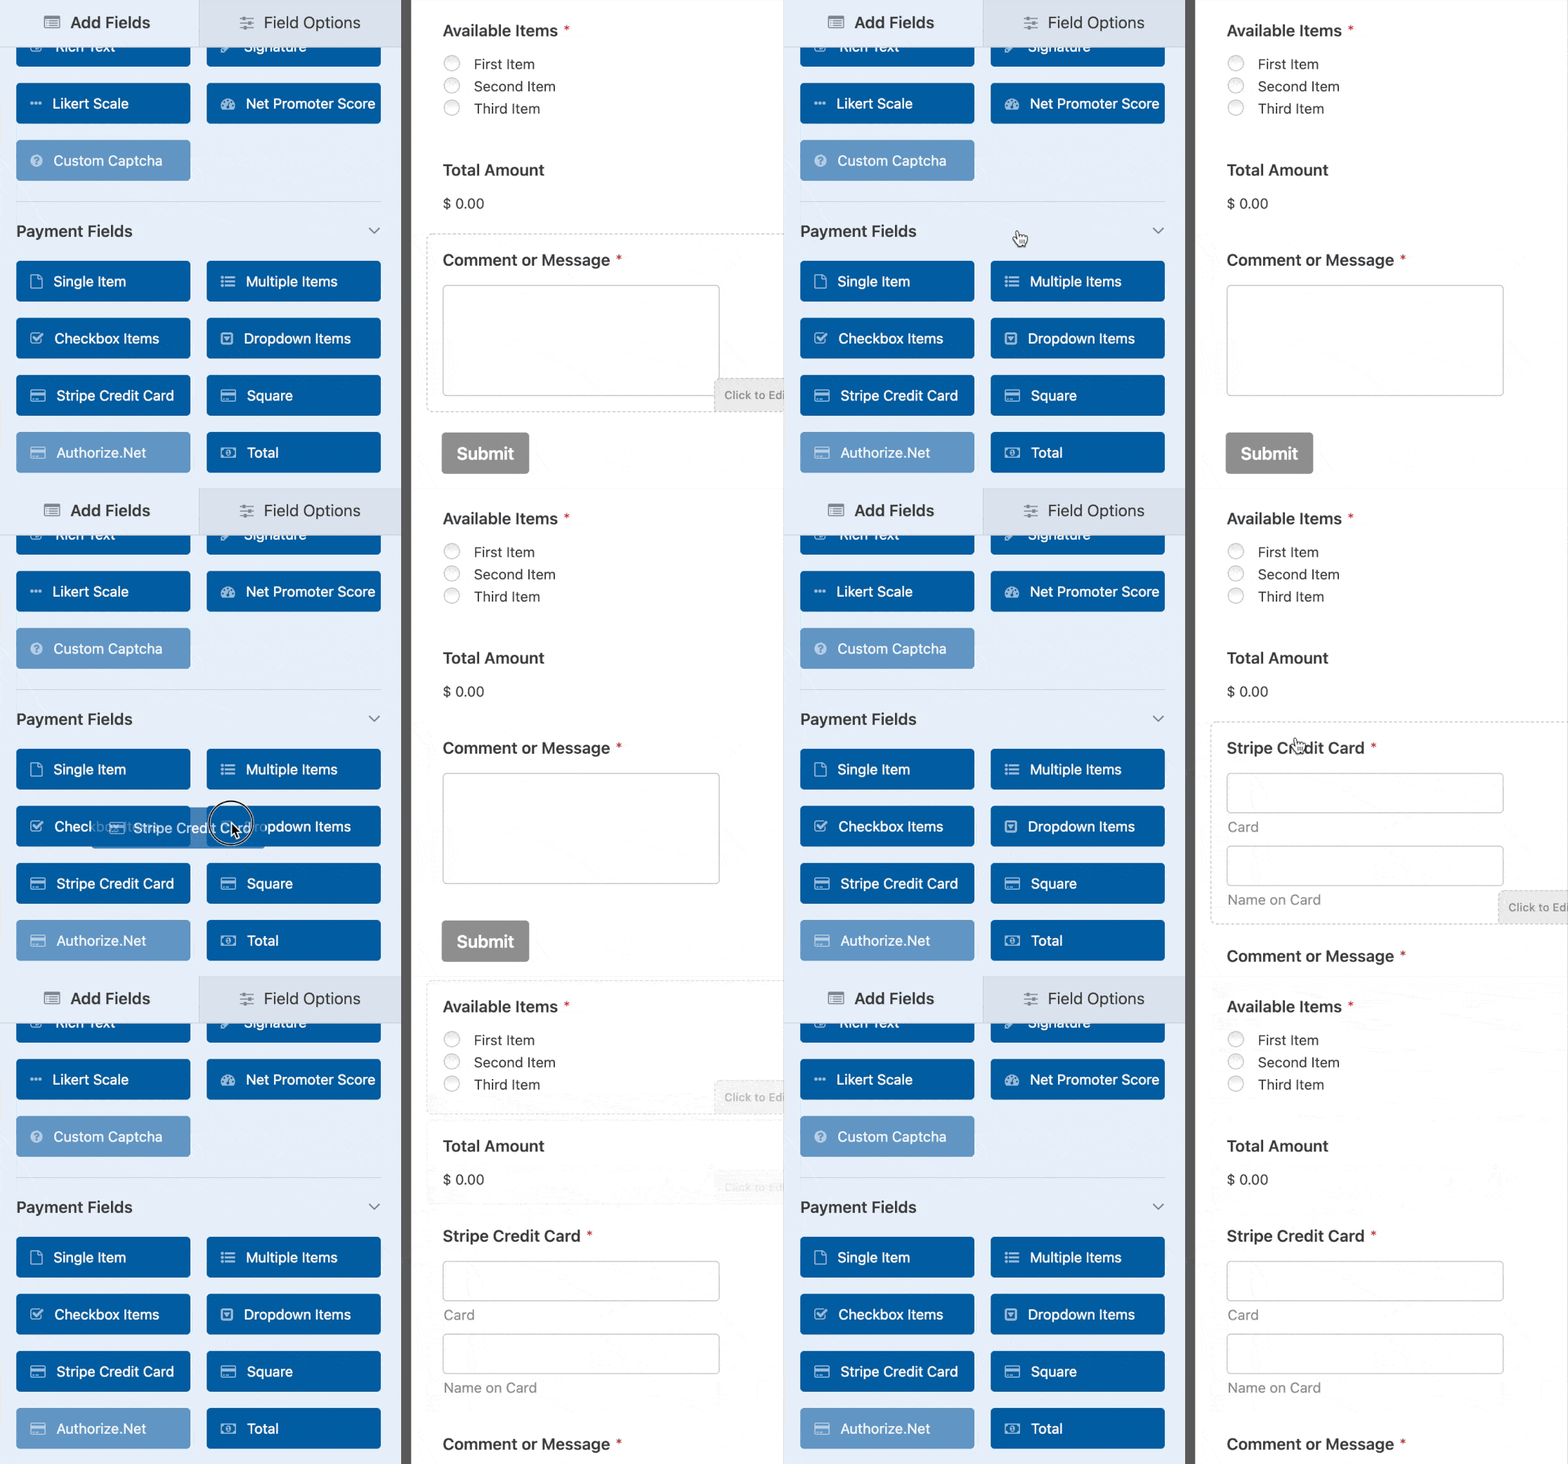
And if you use WPForms’ payment addons, your site will be PCI compliant. That means your store meets the required standards for securely managing payment data.
What if you need more eCommerce features? We recommend that you compare Shopify vs WooCommerce. Let’s look at the features you get with them.
Option B: Create an Online Store With Shopify
Shopify is a super popular eCommerce platform. It lets you:
- List products
- Track inventory
- Optimize your listings for search
- Add vendors
- Add images to a gallery.
Here’s what the Shopify dashboard looks like when you add products.
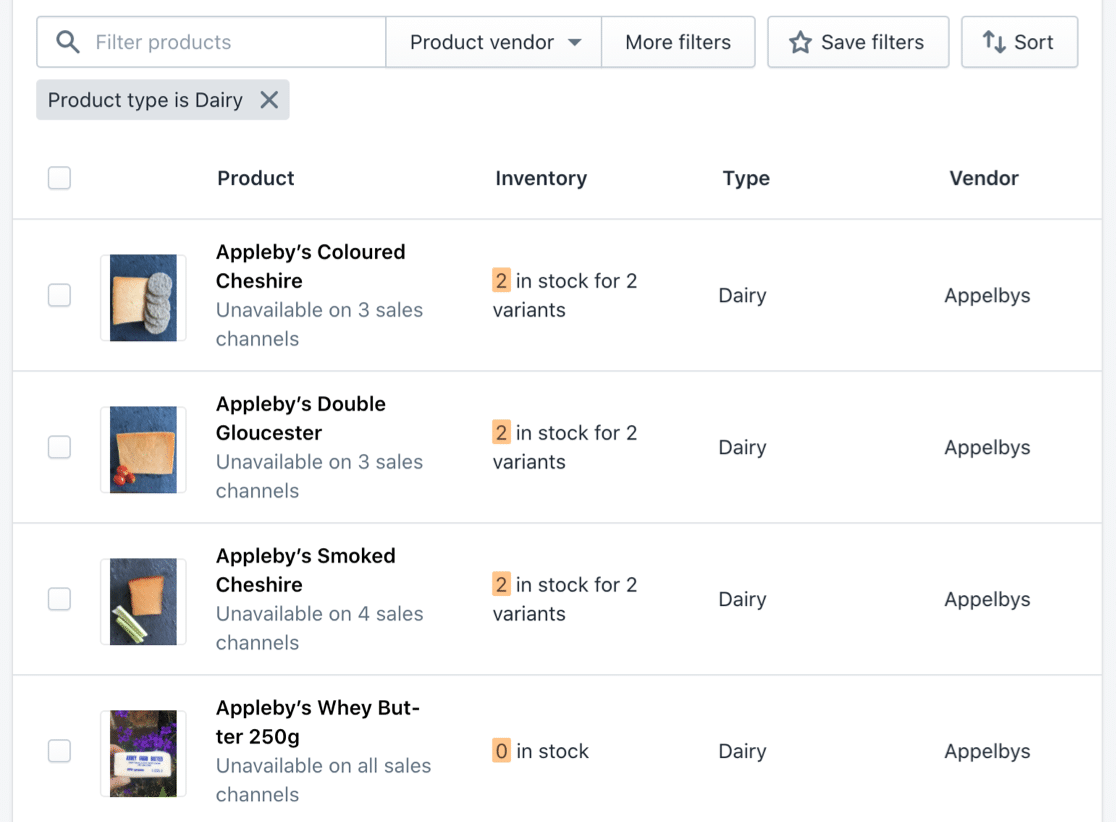
And here’s what it looks like when you edit a product in Shopify.
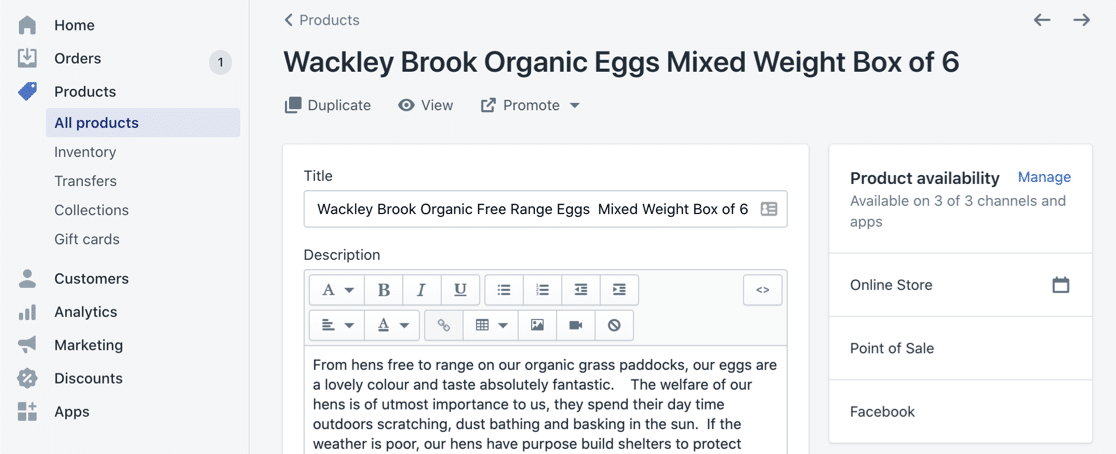
You can easily format your product listings and add images.
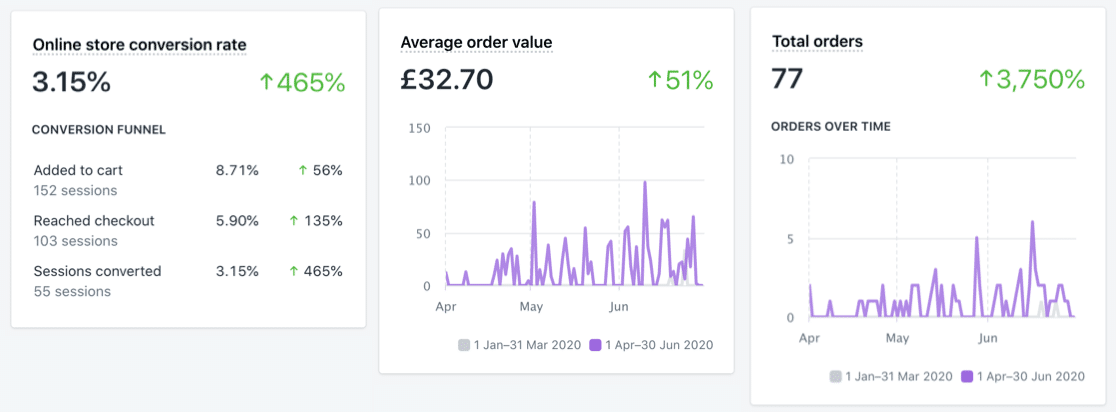
Shopify also has its own reports and analytics. These charts make it easy to track your sales over time.
One downside of Shopify is that its blogging and comment management tools are super basic compared to WordPress.
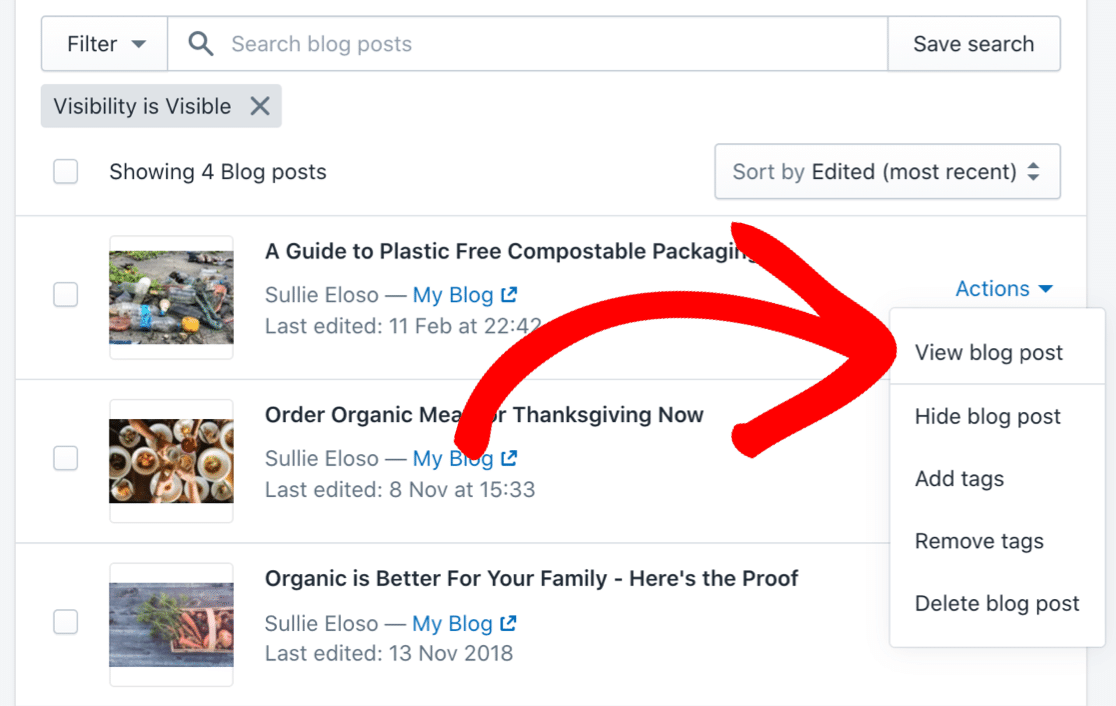
The store and the blog are also completely separate. For example, the image gallery for your products will be separate from the image gallery for your blog, so it’s a little bit more awkward than WordPress.
There’s also no option to add a custom SMTP server in Shopify. Instead, you have to rely on Shopify’s mail service, which limits your control over store emails.
Shopify also has its own theme store with both free and paid themes. Its themes are written in Liquid, a coding language that was created by Shopify. Liquid is not as widely used as PHP, so it might be more difficult to find a developer if you need help.

Finally, we need to talk about pricing, because this is the main area where Shopify and WooCommerce are very different.
After the first 14-day free trial, Shopify costs $29/ mo for the Basic plan.
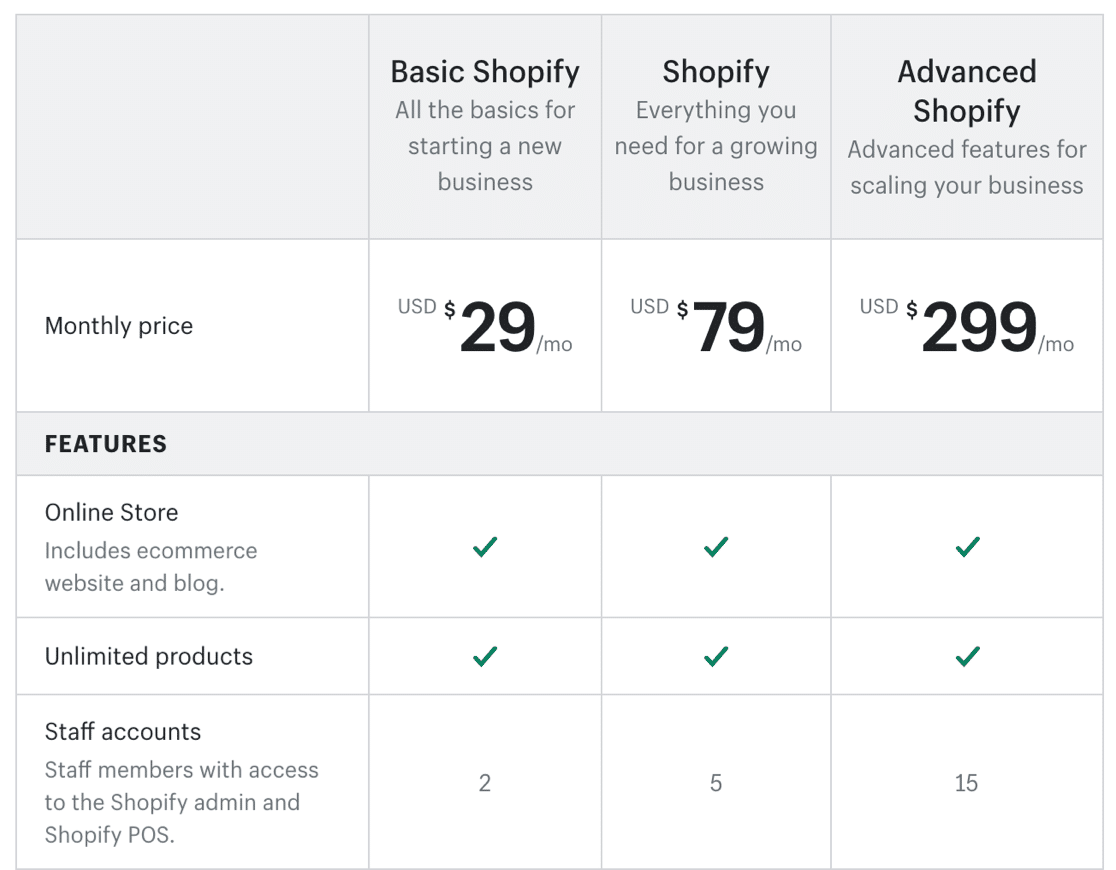
This includes hosting for your store, but it doesn’t include things like:
- A domain name
- Email addresses at your domain
- Unlimited logins for your team.
There’s another hidden extra called carrier calculated shipping, which you’ll need for most shipping plugins. This costs $20/ mo extra on Basic, in addition to the cost of the shipping app you want to use.
Already, you can see that the cost of getting started is creeping up.
On top of this, you might need to budget for Shopify apps. Apps add features like marketing integrations or SEO features.
Here’s a guide to some of the best Shopify apps for your store.
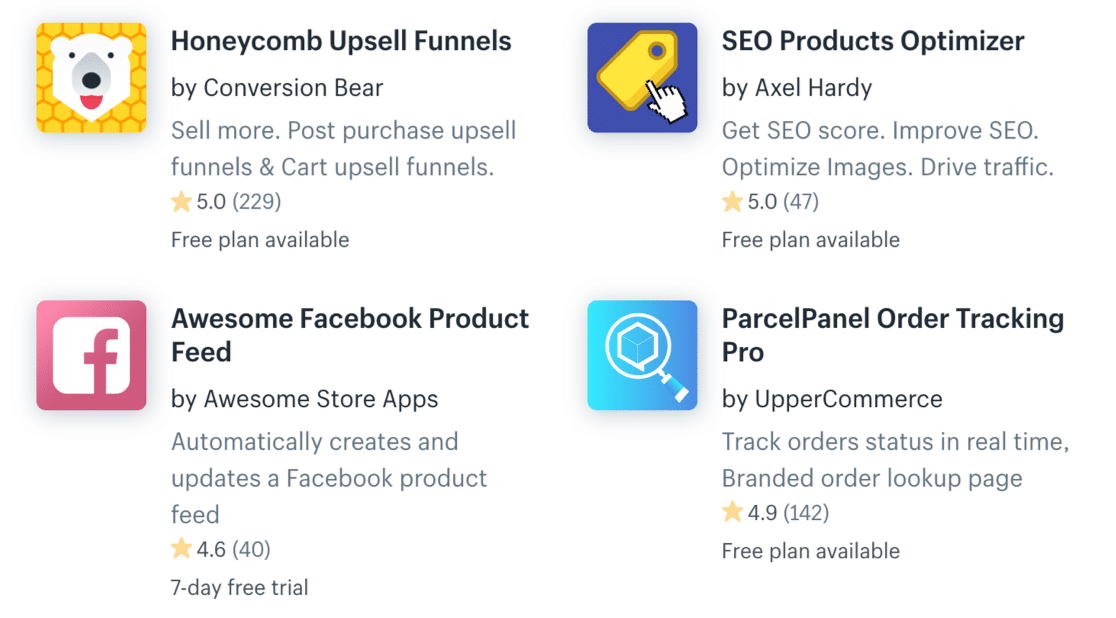
Overall, it’s fair to say that Shopify is great for beginners. It’s easy to use, and the themes look really professional. But once you start adding apps and growing your traffic, the cost can add up.
Let’s take a look at WooCommerce as an alternative.
Option C: Build a Store With WooCommerce
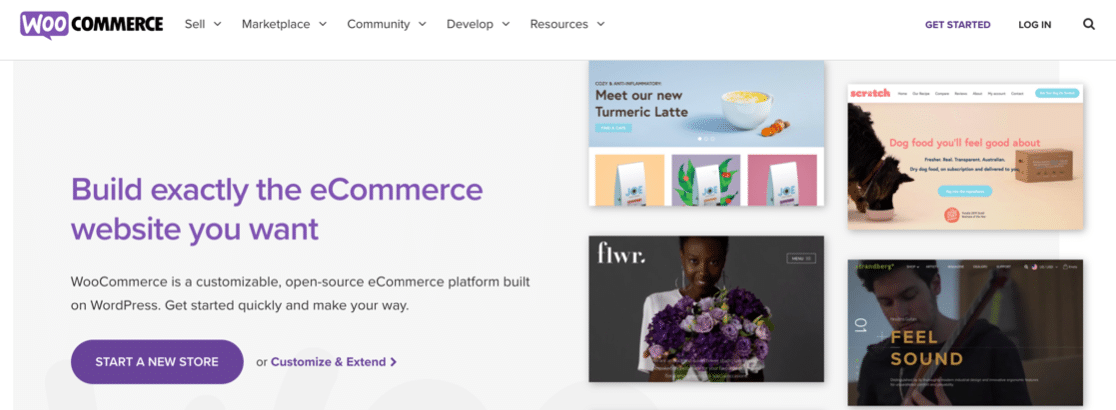
WooCommerce is a free WordPress plugin. It lets you easily start an eCommerce store on your WordPress website.
If you already know how to use WordPress, WooCommerce will probably be a no-brainer for you. It makes sense to stay with the platform that you already know how to use.
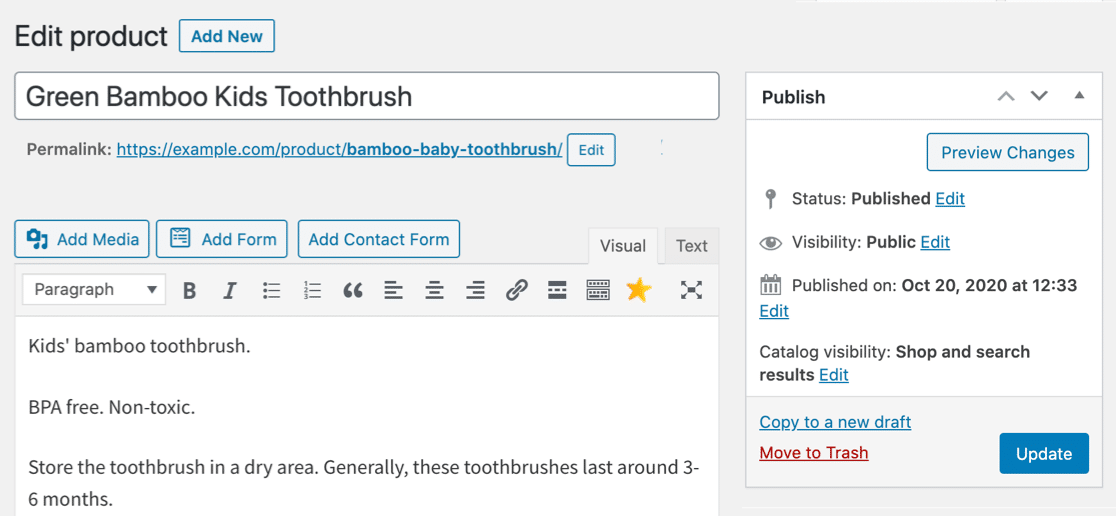
Once you install WooCommerce, you’ll see a new set of eCommerce tools and features in your WordPress dashboard. For example, here’s the product screen. It’s very similar to the screen you use to write blog posts.
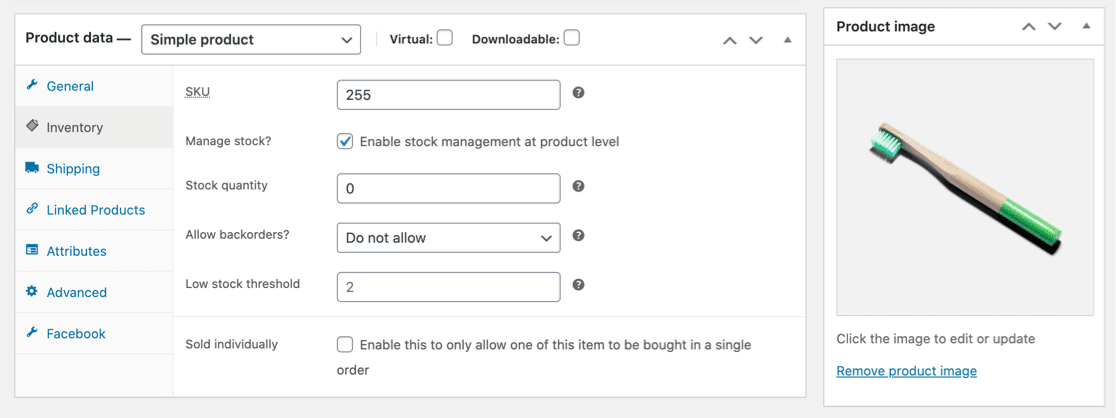
And when you scroll down, you can add your product data, inventory, pricing, and more.
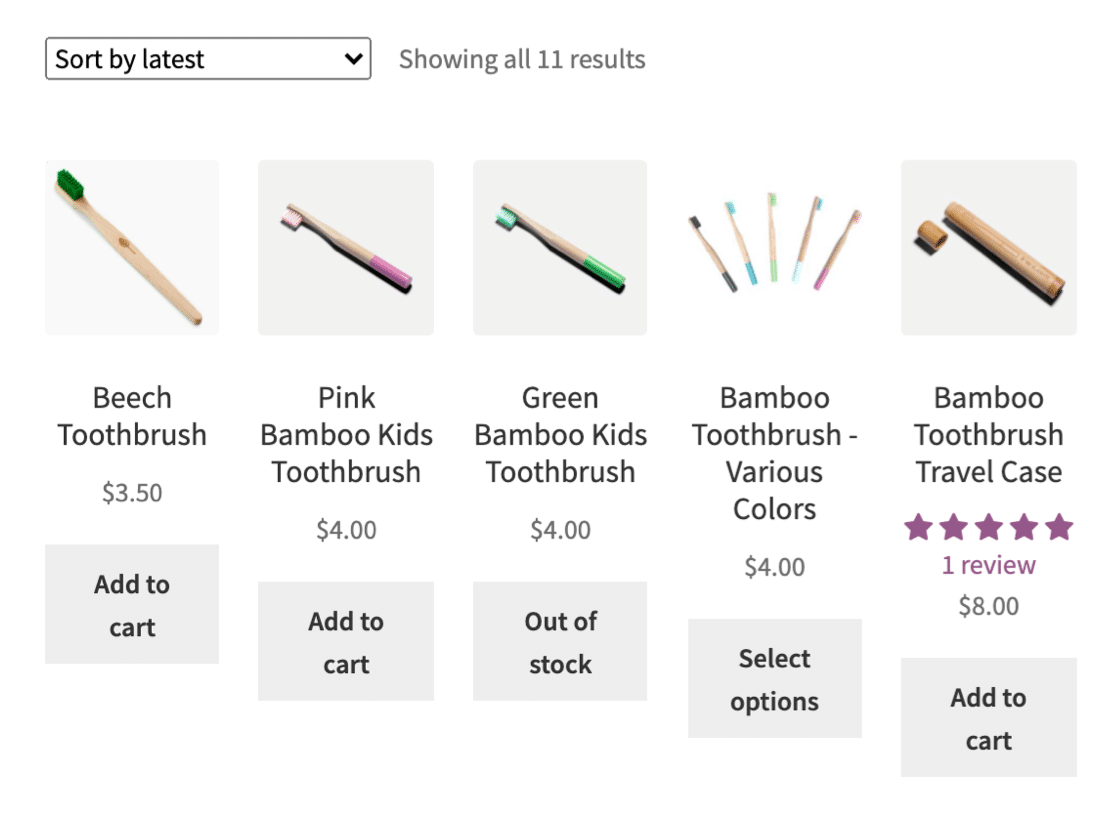
The store layout is intuitive and lets your customers sort and view products easily.
If you’re thinking about how to start an online store with WooCommerce, here are some other good features to know about:
- Getting started is free – WooCommerce is a free plugin, and you can install WordPress on your own computer if you want to try WooCommerce without paying for web hosting.
- Easy to customize – You can work on your site yourself or hire a developer. It’s easy to add plugins to control the way it works. And while you’re building your site, you can easily make a coming soon page with a countdown timer to announce the launch.
- Unlimited logins – WooCommerce lets you create as many accounts as you want. So you can set up secure logins for all of your employees, bloggers, and developers without increasing the cost.
- Lots of plugins – Generally, we found it easier to find free plugins for WooCommerce than it was to find free apps for Shopify. This will vary depending on exactly what you want to do.
- Free themes – Some of the best WooCommerce themes are completely free, and many page builders are also WooCommerce-compatible.
- Excellent blogging features – You still get to use the powerful features in WordPress for your blog and static website pages. That’s a big help, because WordPress is the best blogging platform. And the images you upload to WooCommerce will be available in your Media Library if you easily reuse those images in blog posts.
- Easy to troubleshoot – There’s tons of help content for WooCommerce, and because it’s made with WordPress, you can do a lot of troubleshooting yourself. For example, if WooCommerce isn’t sending email, it’s easy to fix the problem with a plugin. If you had the same issue with a hosted service, it might be more challenging to solve the issue.
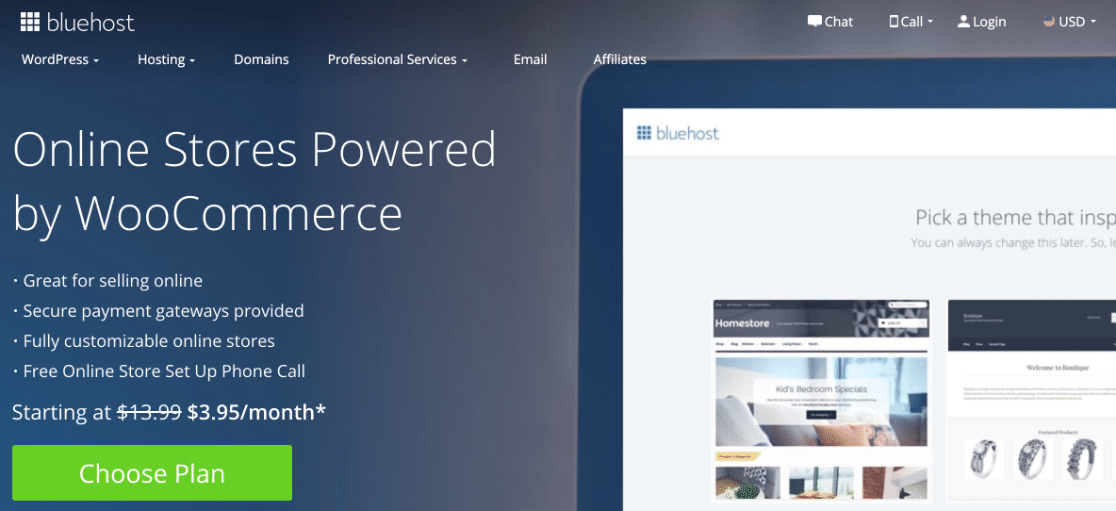
You might be thinking that WooCommerce is more hassle because you need to set it up yourself. But when you buy WooCommerce hosting from Bluehost, your website and theme will be installed for you. So everything is already set up and ready to go.
Sounds good, right? Let’s look at hosting in more detail.
Step 3: Get Web Hosting and a Domain
We’re going to move on and set up web hosting account for WooCommerce. This type of hosting will work for WPForms as well.
For selling online, we recommend that you buy a Bluehost hosting plan.
WooCommerce Starter hosting costs just $3.95/mo at Bluehost.
Here’s a quick summary of what you’ll get:
| Plan | Standard | Premium |
|---|---|---|
| Normal monthly price | $24.95 | $39.95 |
| Our special price | $12.95 | $24.95 |
| WooCommerce preinstalled | Yes | Yes |
| Bandwidth | Unmetered | Unmetered |
| SSL | Free | Free |
| Domain name | Free | Free |
| Email Marketing | Yes | Yes |
The Premium plan also includes several WooCommerce addons, including bookings and appointment scheduling, subscriptions, and product customizations.
Keep in mind that Shopify costs from $29/ mo without hosting or email. You can really see the difference in the start-up costs here.
Bluehost is great because it’s recommended by the makers of WordPress. And all plans come with a 30-day money-back guarantee.
And if you’re looking for a budget option, you can get regular WordPress hosting with Bluehost starting at just $2.75/ month. You’ll just have to install WooCommerce yourself. Check out this guide to installing a WordPress plugin for help.
Aso, did you notice that all Bluehost plans come with a free SSL certificate?
SSL encrypts information between the server and the visitor’s browser. If you’re running an eCommerce store, SSL is essential. Your payment plugins and addons won’t run without it.
When SSL is set up on your store, you’ll see a small padlock next to your website address.

Bluehost will help you set everything up in a free call, so you don’t need to worry about getting SSL working by yourself.
To sign up, just click the plan that you want to use. Bluehost will as you to choose your free domain name, or type in the name of a domain you already own:
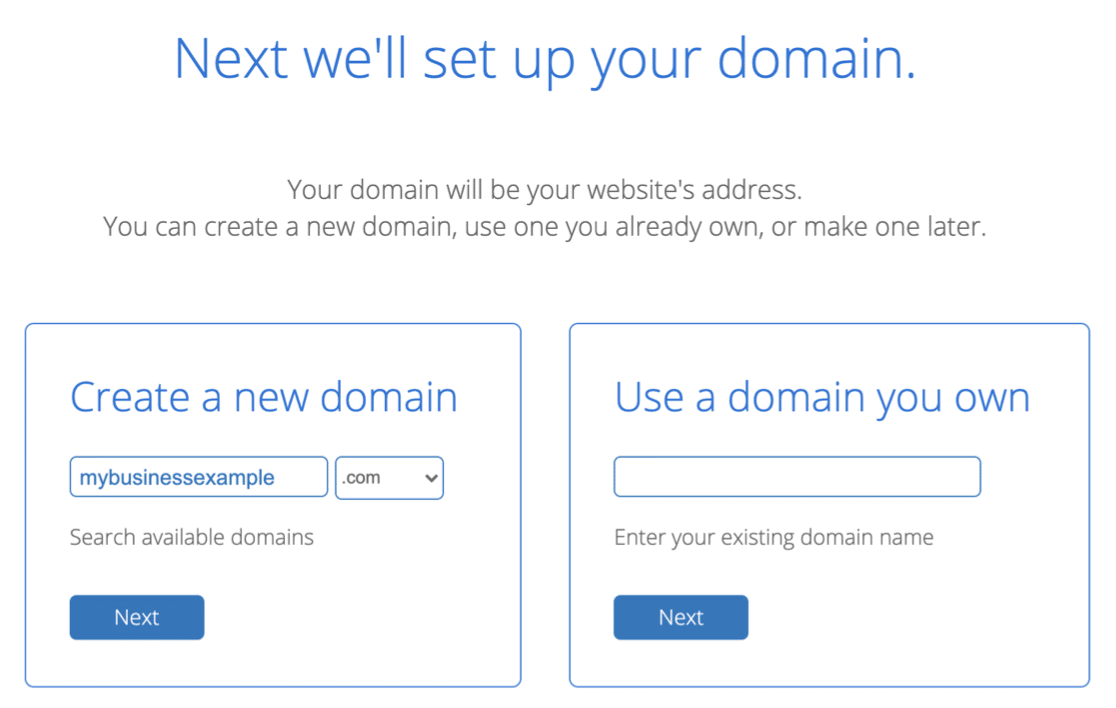
Once you type in your billing details, Bluehost will set up your hosting account in just a few minutes.
One last thing: you should hide your WordPress site until it’s ready so you have time to test your store before the big launch.
All set? Let’s look at the best way to add a simple order form to your new website.
Step 4: Create Your Order Forms
Now you have your hosting account with Bluehost, WordPress and WooCommerce will already be installed for you.
But before we dive into WooCommerce, let’s talk about order forms.
If you want to take payments through a form, it’s easy to set that up with the WPForms plugin.
You can create order forms for different use cases, like:
- Wholesale order forms
- Avon order forms
- Order forms with image choices, which are perfect for selling products.
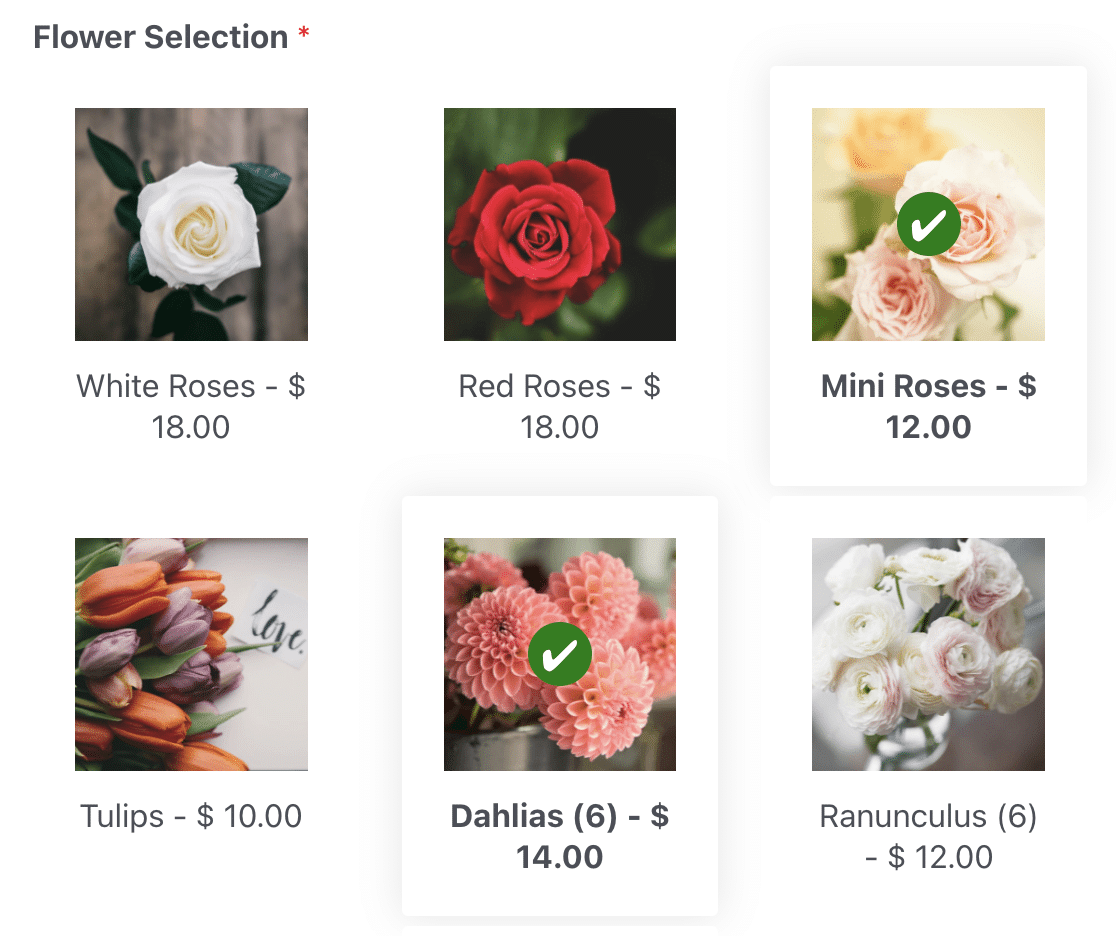
To get started with your order form, you’ll want to install and activate the WPForms plugin on your new site. Then, you can start to create your order forms using one of our 2,000+ form templates.
All of these templates can be customized so that they work exactly how you need them to.
On any order form, you’ll want to use the WPForms payment fields. Then, all you have to do is add a Total field and WPForms will add everything up.
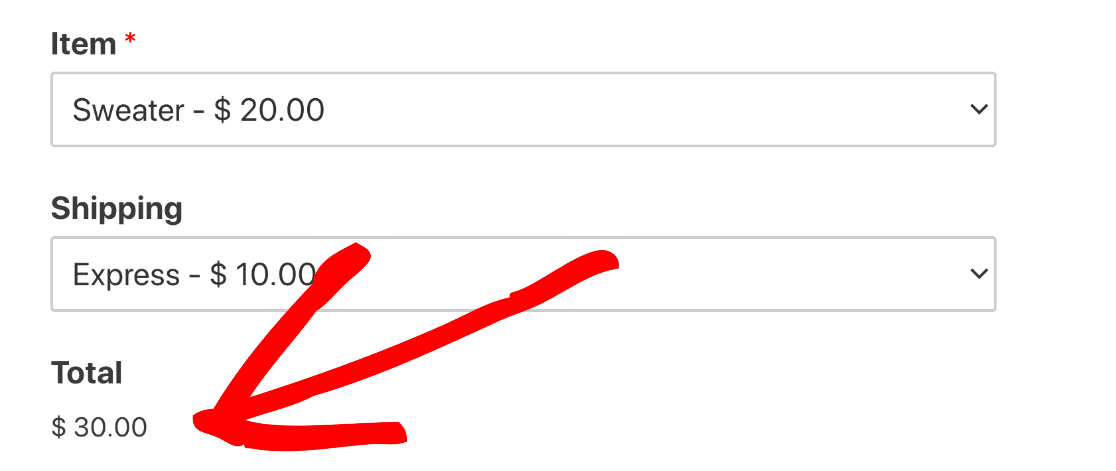
To see how to create your first payment form, check out this guide to creating an order form for dropshipping in WPForms.
Next, we’re going to customize the way your website looks.
Step 5: Choose a Theme For Your Store
Choosing the right theme for your store helps to reinforce your branding and make your site look more professional.
If you’re using WPForms, you can use any WordPress theme you like. But if you’re using WooCommerce, we recommend that you use a specially designed WooCommerce theme.
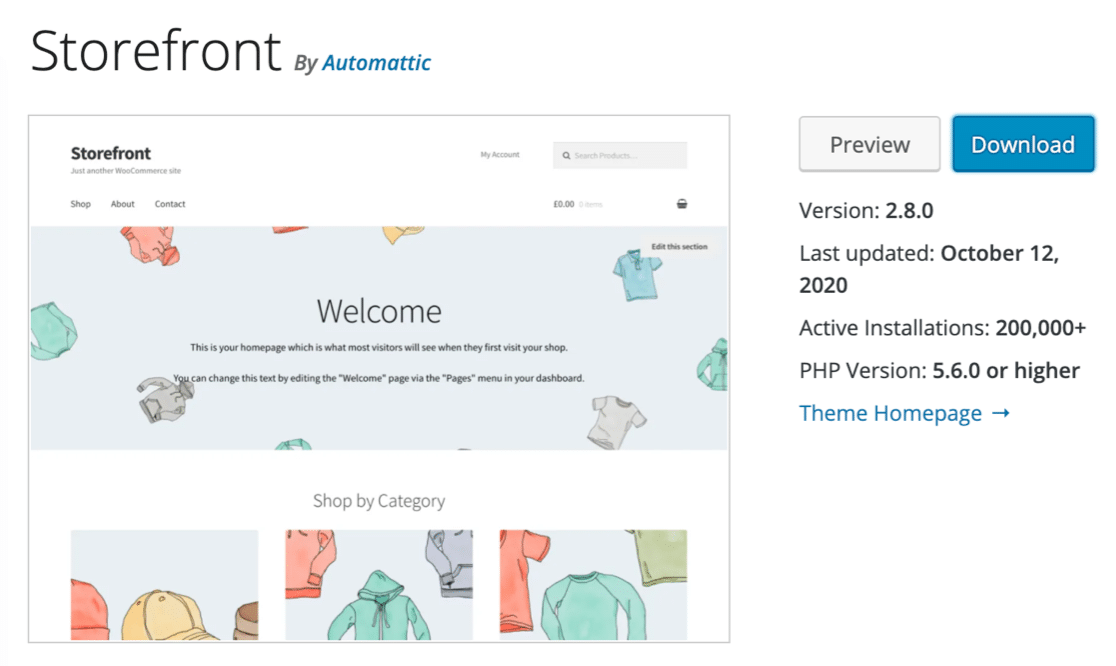
All Bluehost eCommerce plans come with the free Storefront theme preinstalled for you. Storefront is the official WooCommerce theme, and it’s really easy to use right out of the box.
If you want to customize Storefront, you can edit the settings just like you’d edit a regular WordPress theme.
As your store grows, you might want to upgrade to a paid theme. Check out this guide to the best WooCommerce themes to see some of the free and premium themes you can use.
Happy with your theme? Now it’s time to extend your site with plugins.
Step 6: Add WordPress and WooCommerce Plugins
The basic features in WooCommerce are great when you’re getting started. But to get your store working the way you want, you’ll eventually want to add some plugins.
Storefront Extensions is a bundle of starter plugins that you can buy for any WooCommerce store. But there are tons more options to explore.
If you’re wondering how to start an online store with free plugins, check out these recommendations.
Contact Forms
- WPForms – Make easy order forms for your store, create contact forms, collect email signups, and more.
- WP Mail SMTP – Make sure all of the emails from your WooCommerce store and contact forms are successfully delivered.
Store Features
- Order Delivery Date – Let your customers pick a delivery date.
- Perfect Brands – Let customers browse your products by brand.
- Extra Product Sorting Options – Let customers sort products by name, reviews, availability, and sale status.
- Product Stock Alert – Automatically email customers when items are back in stock.
- Sidebar Category Accordion – Let customers collapse and expand your store categories.
Marketing
- SeedProd – Build landing pages with custom WooCommerce blocks and integrate your email marketing list. Check out our review of SeedProd to see how it works.
- OptinMonster – Create optins and marketing popups to get more conversions and subscribers. See more details in our expert OptinMonster review.
- RafflePress – Easily create giveaways and contests to help your store go viral. See all the features in our RafflePress review.
- All in One SEO – Optimize your product descriptions, static pages, and blog posts for search engines.
- TrustPulse – Display social proof notifications to increase urgency and FOMO.
- Smash Balloon Social Wall – Show all of your store’s social media feeds in 1 place.
- PushEngage – Send browser notifications to your customers when they abandon their cart. You can also send push notifications when you reduce the price of products they’re interested in.
Store Management
- Sucuri – Block hacking attempts and secure your logins.
- UpdraftPlus – Automatically back up your store to Google Drive or Dropbox.
- WP Rocket – Speed up loading times by automatically compressing your code.
- Imagify – Automatically shrink product images so your store loads as fast as possible.
- WP Accessibility – Add a font switcher and high-contrast view to any theme.
- Say What? – Easily customize the wording on your WooCommerce buttons and links.
- List Backorders – List all backordered items in your store in 1 place.
- Checkout Field Editor – Add, remove, and rename checkout fields on your store.
- Custom Order Status – Add custom order statuses like ‘Out for Delivery’.
- Custom Shipping Methods – Add your own shipping methods and rules.
Analytics
- MonsterInsights – See exactly where your customers are coming from, track affiliate links, and get detailed eCommerce reports.
If you need help getting started with WooCommerce plugins, check out this beginner’s guide to installing a plugin in WordPress.
Now you have everything set up the way you want it, it’s time to finally start adding products in WooCommerce.
Step 7: Add Products to Your Store
Now your store is set up, it’s time to start adding products.
And if you’re using WooCommerce, that means writing tons of product descriptions.
It’s important that every product on your store has a unique description that gives your customers the information they need to make a purchasing decision.
If you’re not sure where to start, consider these tips first:
- Always write unique content – It’s tempting to copy and paste descriptions from suppliers or manufacturers, but you might run into duplicate content penalties which can cause issues with your website’s search rankings. Read this post on Google ranking factors to learn more about the things search engines take into account when ranking your store in search results.
- Describe all items in detail – When writing a product description, remember that your customers may never have seen the product before. It might be difficult for them to imagine how big it is, for example, unless you provide context. So be sure to include the product’s weight, size, colors, and materials so that your customers get exactly the same information that they would if they held the product in their hand.
- Up-sell and cross-sell – Use the product inventory features in WooCommerce to link to additional products that the customer might be interested in buying. These products will appear right next to the listing when it’s viewed. Up-selling and cross-selling are a great way to increase your average order value. Check out these up-selling tips and examples to get ideas for the best things to up-sell.
- Pay attention to the fine print – If you sell items like food or cosmetics, be sure to list ingredients for people with dietary preferences or allergies. You might also mention that a product is recyclable, or free from a particular ingredient. Adding an FAQ is a good way to add all of this information to the description easily.
When you’ve set up your products in WooCommerce, we also recommend that you install the All in One SEO plugin so that you can optimize your product descriptions for search engines.
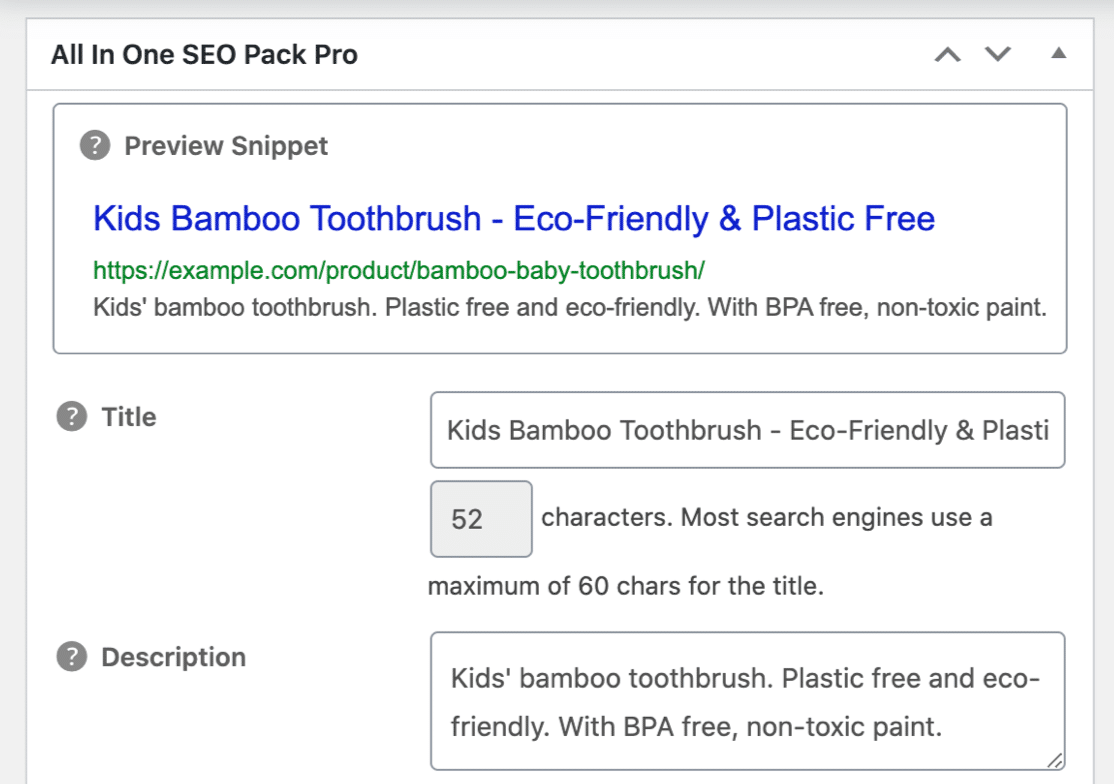
All in One SEO lets you tweak the name and description that show up in search engine listings without changing the title and description that show up on your site. For example, you might want to add some extra keywords in the search engine listing that aren’t in the product name.
Once your products are set up, you’re nearly ready to launch. But you’ll need to spend a bit of time writing out your pages and policies.
Step 8: Write Your Store Policies
Now that your products are set up, you’ll want to pay attention to your static pages and legal terms.
Be sure to add all of the terms and information that your customers will look for to make sure that you’re trustworthy and legitimate. This includes things like:
- Contact forms and phone numbers for your store
- Information about taxes or customs fees
- Delivery rates and policies
- A returns policy
- A privacy policy
- Your terms and conditions.
If you’re selling to customers in the European Union, you will also need to get advice on GDPR compliance so that you can be sure to store customer data legally.
Customers will look for policies and delivery information before making a buying decision. That’s why it’s so important to include these pages when you start your online store.
Step 9: Set Up Your Email Marketing List
Did you know that email is 40x more effective at acquiring new customers than Facebook or Twitter?
Now your store is almost ready, it’s time to think about setting up an email marketing list so that you can build a database of people who might buy from you in the future.
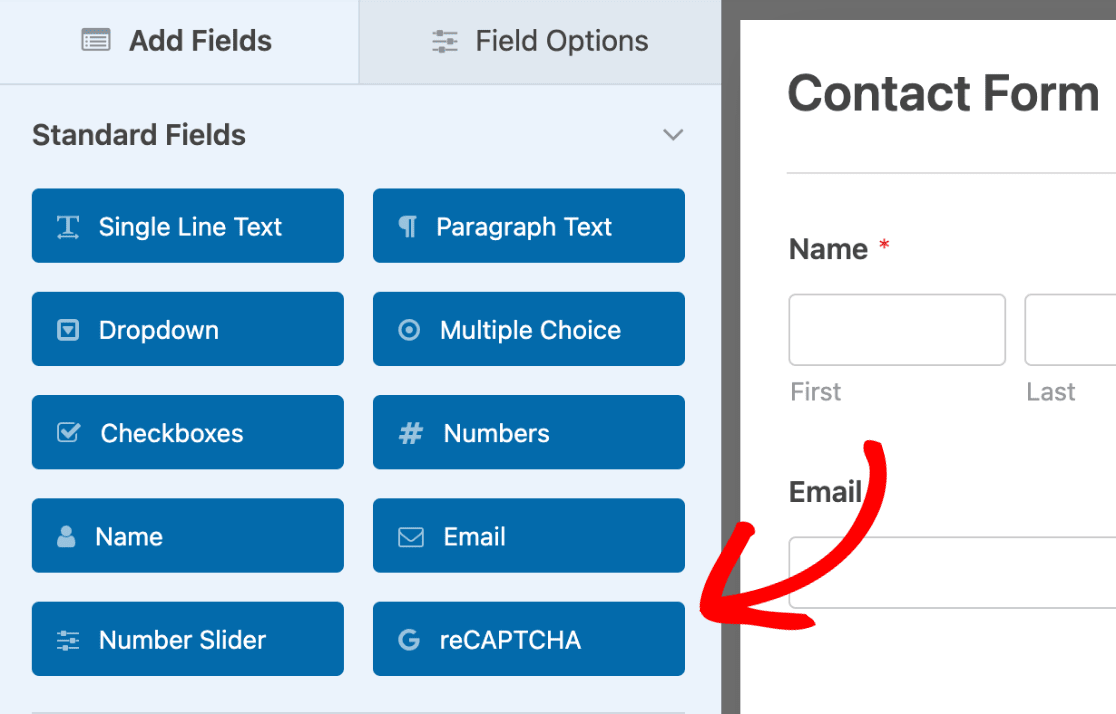
The easy way to start is to create an email newsletter signup form in WPForms. You can even add spam protection, hCaptcha, or reCAPTCHA to your form so that you don’t get junk or bot signups.
WPForms makes it really easy to integrate your newsletter signup form with services like:
- Constant Contact
- Drip
- GetResponse
- AWeber
- Mailchimp
- Campaign Monitor
- Brevo (formerly Sendinblue)
- MailerLite
You can also use WPForms to trigger automated email campaigns that send out emails automatically based on the actions people take on your WooCommerce store. This is an easy and powerful way to get more conversions.
Check out our beginner’s guide to email automation to find out how to set it up.
Step 10: Prepare to Launch Your Online Store
OK, we’re almost ready to launch your store now. There are just a few things to do before you go live:
- Make a basic marketing plan – Think about how you’re going to announce your launch using this pre-launch marketing guide.
- Plan your blog posts – Write and schedule a few posts now so that they go live over the first few weeks after launch. Read this checklist to launch your blog for some help generating topic ideas when you start your online store.
- Create your social media accounts and set up social media marketing tools. This will save a lot of time manually marketing your products later.
- Check all of your payment forms and checkout flows work – Test the payments on your forms or store checkout pages now.
- Try out your forms – Test your contact forms so you can be sure that customer inquiries will reach you.
And that’s it! You’re ready to launch your store and start selling.
On launch day, don’t forget to deactivate your coming soon page so that all of your visitors can access your store.
Step 11: Add Social Proof
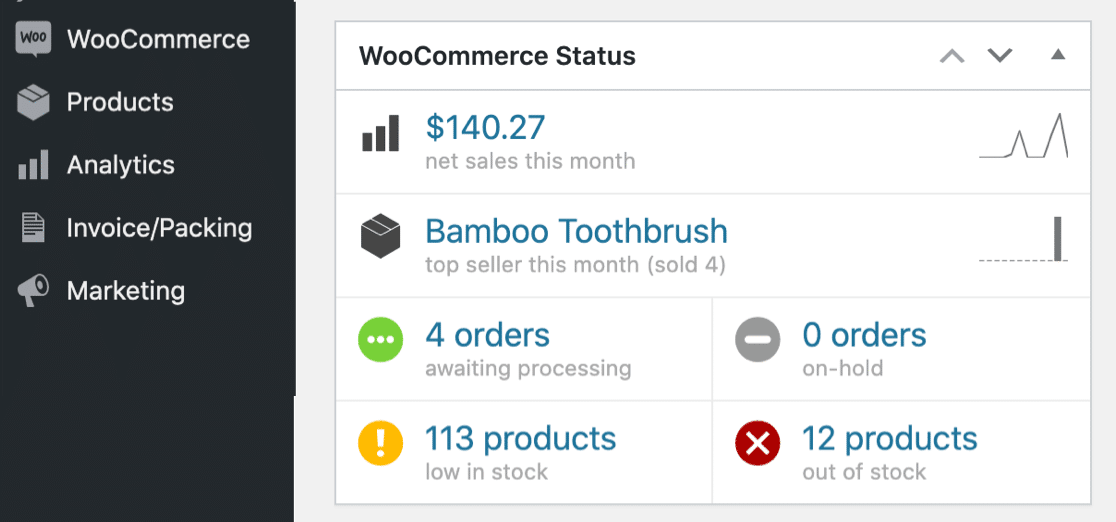
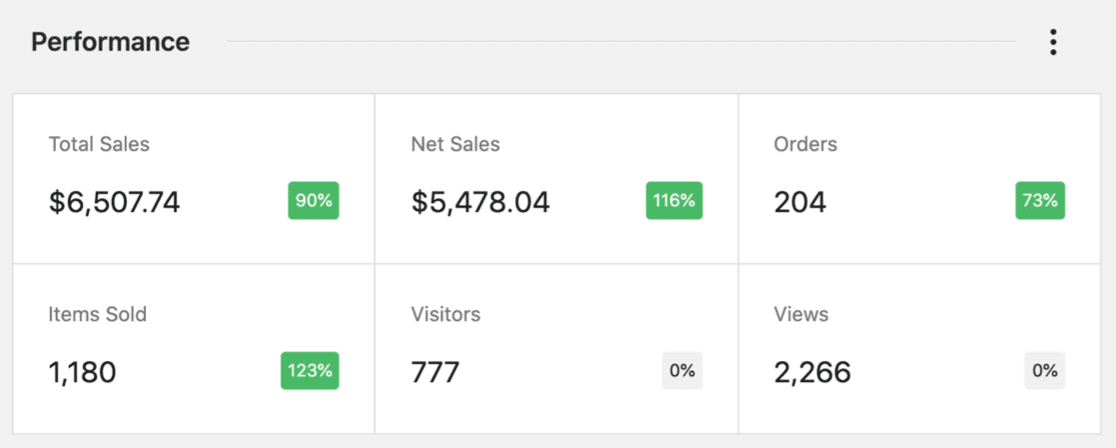
Now that your store is up and running, you’ll see your performance and sales right in WooCommerce. This data is only visible to you.
But don’t walk away and leave your store to run itself. Now’s a great time to keep building up the traffic and sales by adding social proof to your website.
Social proof shows people that your store is real and trustworthy. When new visitors come to your website, they’ll be more likely to buy if they can see that other people have already shopped with you.
The best way to do this is to show customers what other people have bought.
TrustPulse is an awesome service that integrates with WooCommerce. It automatically shows real customer activity on your site.
TrustPulse automatically detects every sale you make, then turns the basic information into a popup. The next person who visits your store will be able to see that someone just made a purchase.

Once TrustPulse is set up, you don’t need to do anything else. Just let it run by itself and generate more sales for your store. You can see more details in our TrustPulse review.
And that’s it! Now you know how to start an online store and market it to your first customers.
Create Your WordPress Order Form Now
Next, Make a Customer Support Form
Once your online store is up and running, you’ll want to make sure your customers have a great experience so that they come back and buy from you again.
Learn how to make a customer support form with WPForms the easy way.
And if you’re wondering if it’s worth paying for a WPForms Pro license, we’ve put together this handy comparison of WPForms Lite vs Pro.
Ready to build your form? Get started today with the easiest WordPress form builder plugin. WPForms Pro includes free order form templates and offers a 14-day money-back guarantee.
If this article helped you out, please follow us on Facebook and Twitter for more free WordPress tutorials and guides.


