Looking for an easy way to add a one-click checkout form to your WordPress site?
Today’s online shoppers expect convenience and speed from online stores. Allowing your customers to save their payment details so they can check out with a single click will save them time, help to reduce shopping cart abandonment, and reduce checkout errors.
In this tutorial, we’ll show you a quick, easy, and free way to create a secure, one-click credit card checkout form in WordPress without the need for HTML, CSS, or Javascript.
Create Your WordPress Checkout Form Now
What Is One-Click Checkout?
One-click checkout is a convenient way for customers to purchase items online at the click of a button without the need to enter their full name, address, card details, and other payment information.
One-click checkout works by storing a customer’s details securely during their initial registration. When the customer logs in again, they can complete their purchases without the need to enter all their information again, improving and speeding up the checkout experience.
How to Create a One-Click Checkout Form in WordPress
Amazon was one of the first sites to start using one-click checkout, but it’s now a common feature of eCommerce websites.
Several payment processors, including Stripe, now offer a one-click checkout feature. This means the customer can use one-click checkout at any online store that uses that payment processor rather than creating a user account and entering payment details at every website they shop at.
Keep reading for a simple step-by-step guide to setting up one-click checkout with WPForms and Stripe.
In This Article
Step 1: Install WPForms
WPForms is the best no-code form builder plugin for WordPress. All versions of the plugin include Stripe payment functionality so you can easily create payment forms, expense approval forms, and more.
There are even 2,000+ form templates that come with WPForms, including several payment and checkout forms. In this tutorial, we’ll use a Stripe order form, which you can customize to suit the checkout of your online store.
To get started, install the plugin by navigating to Plugins » Add New in your WordPress dashboard.

Type “WPForms” in the search bar to find the WPForms plugin and click the Install Now button.
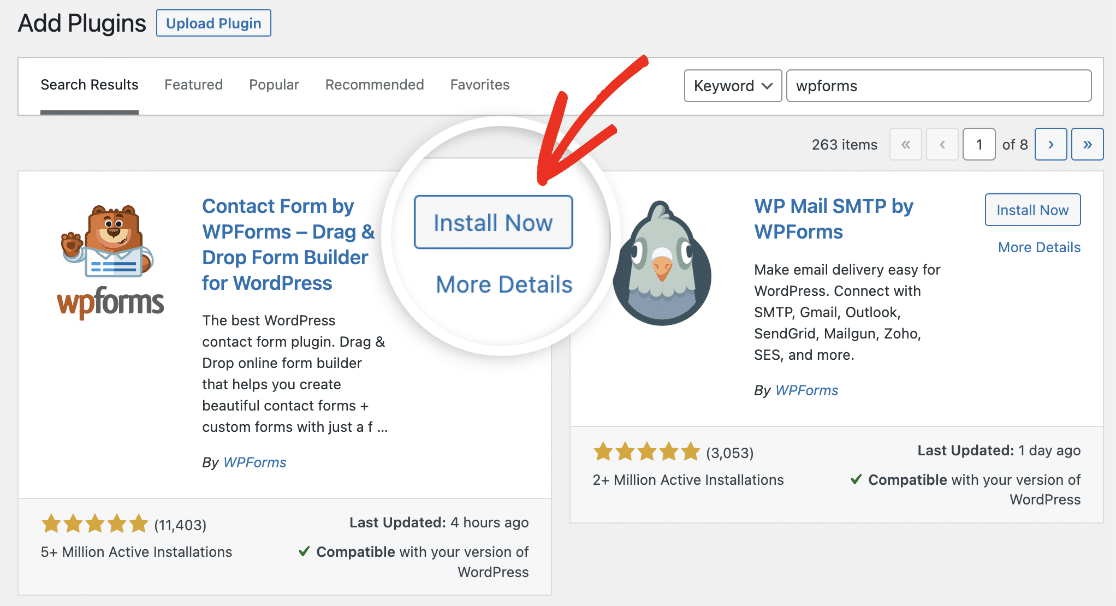
Wait a few moments for the plugin to install, and click the Activate button.
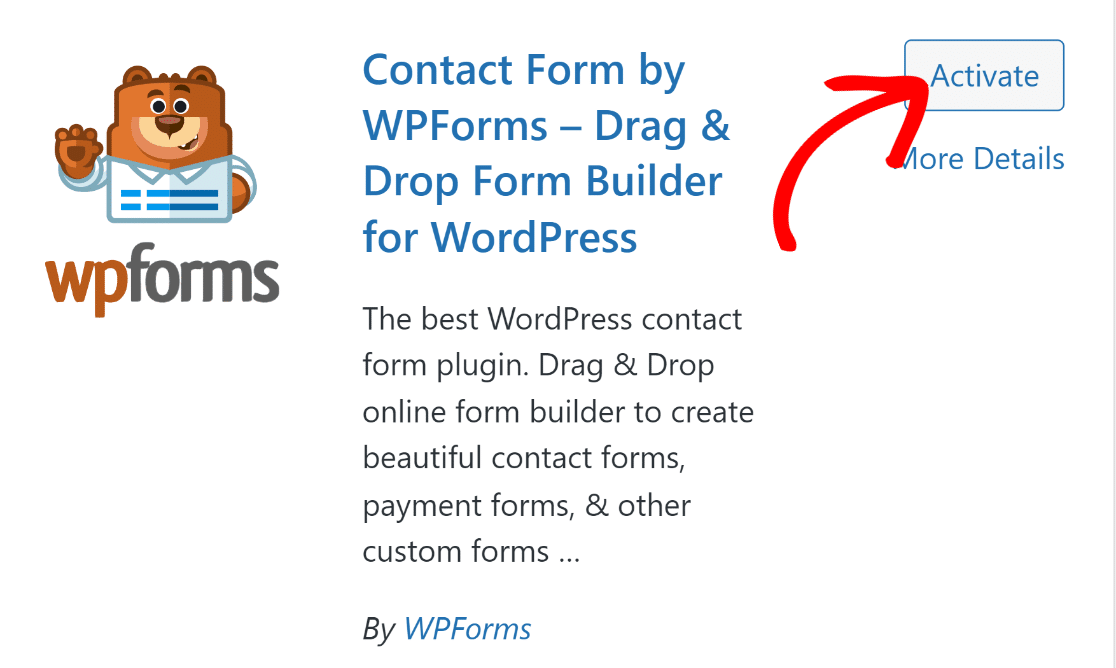
Once the plugin is active, you’re ready to set up payments and create your checkout form.
Step 2: Connect Your Stripe Account to WPForms
WPForms comes with several free order and payment form templates, but you’ll need to set up a payment gateway to use them. Payment gateways allow you to securely collect customer payment details and authorize card payments in exchange for a small transaction fee.
WPForms integrates the API of several payment gateways such as Paypal, Square, and Authorize.net. But if you’re looking for the most affordable option offering one-click checkout, you can use Stripe, built into WPForms Lite. There are no additional charges for using Stripe to take payments; you’ll only be charged a 3% fee per transaction, plus Stripe fees.
You can connect WPForms to your Stripe account by navigating to WPForms » Settings and clicking the Payments tab.
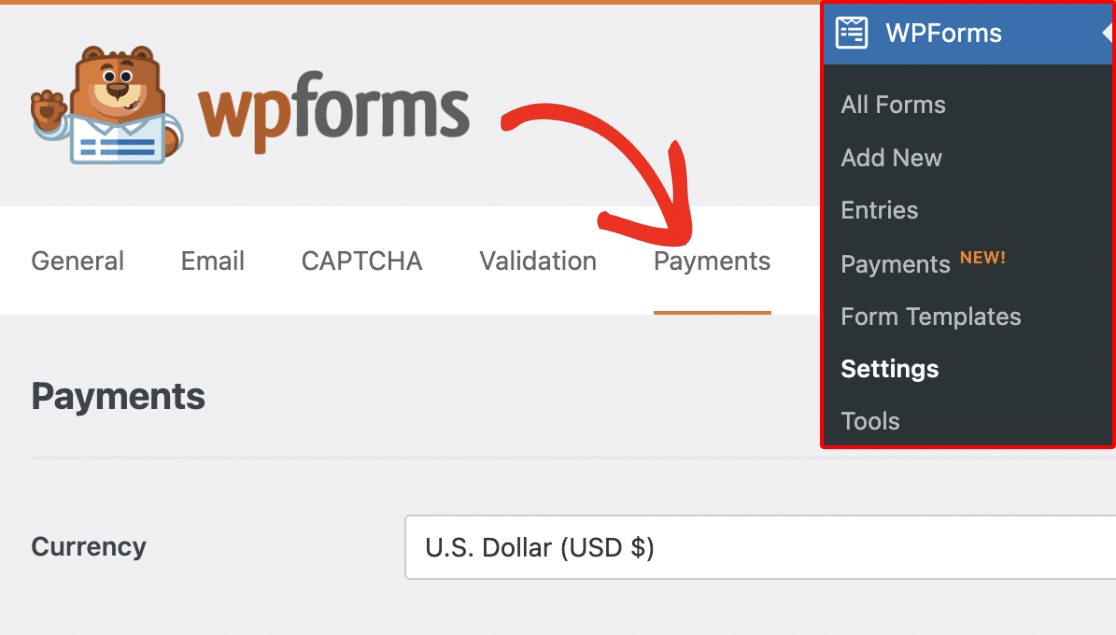
On this screen, you can change the currency to accept payments in from the dropdown selection.

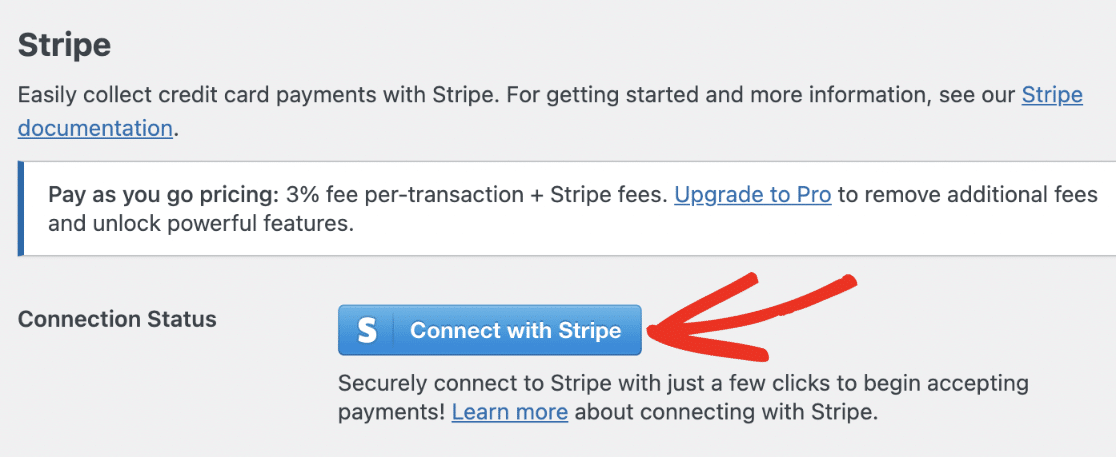
Scroll a little further down the page and click the Connect with Stripe button.
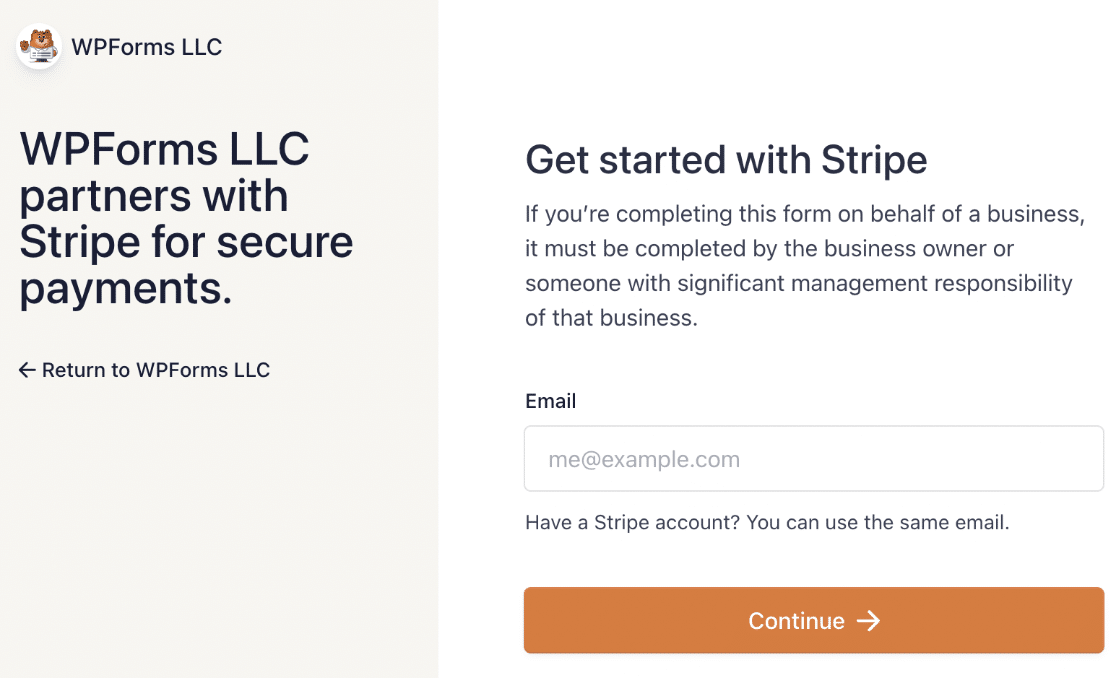
This will take you to the Stripe connection wizard, where you can connect to your existing account or set up a new account.
After completing the connection wizard, you will return to your WordPress dashboard, where you should see confirmation that WPForms is now connected to your Stripe account.

You’re now all set up and ready to accept payments on your site. All you need to do is create your checkout form.
Step 3: Create a Checkout Form
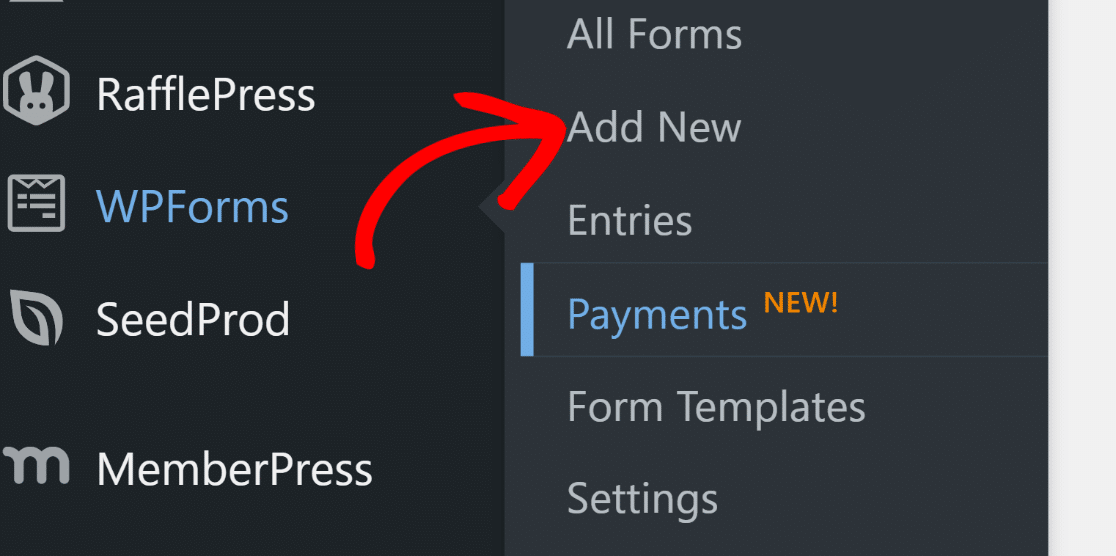
Navigate to WPForms » Add New to browse the form templates.
Enter a name for your form at the top of your builder. You can call it “Checkout” or anything descriptive that suits your purposes.

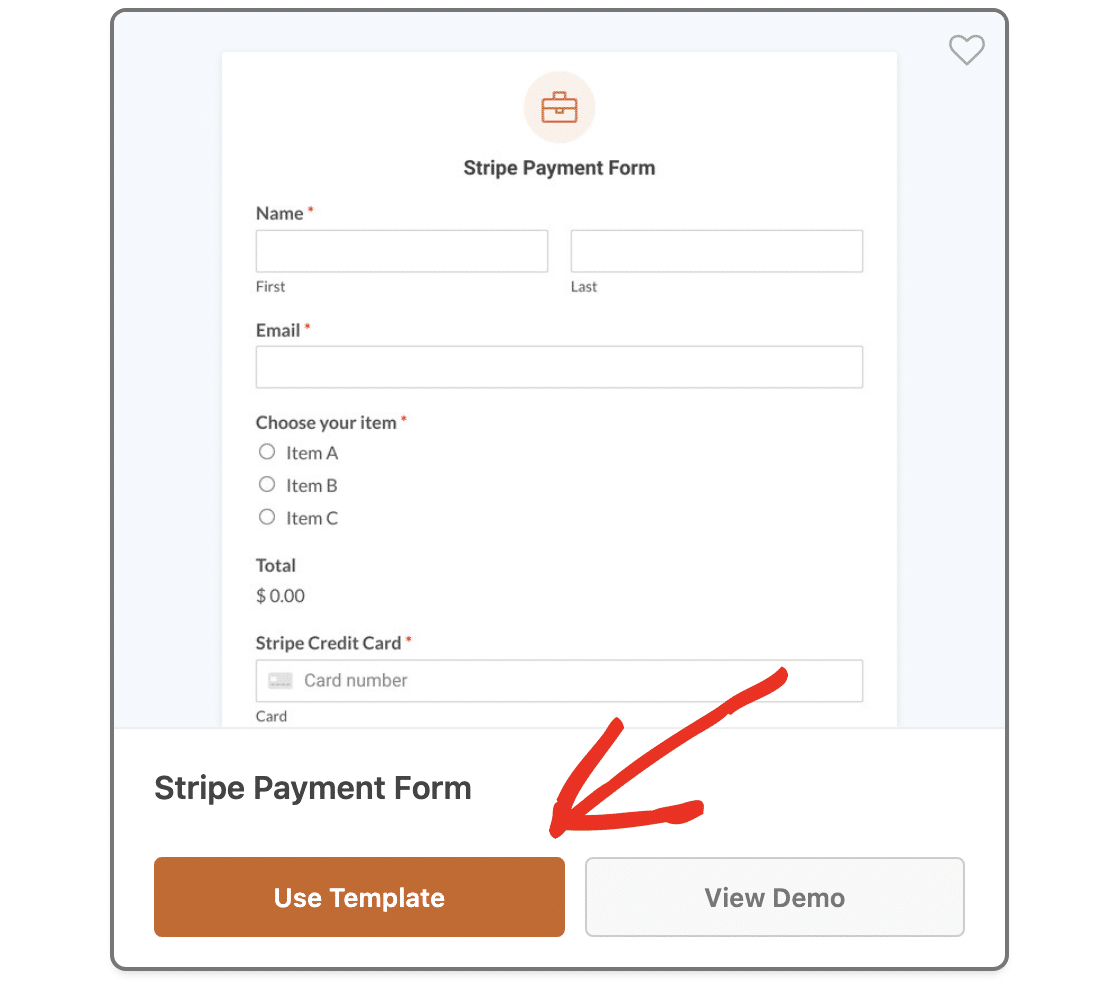
For this tutorial, we’ll be using the Stripe Payment Form Template. This is a simple payment form that you can customize to suit your needs.
Type “Stripe” in the search field to the left of the template browser and scroll down to the “Stripe Payment Form.” Click the Use Template button.
This will take you into the drag-and-drop form builder. Here you can customize the form to suit your online store.
For example, the template includes a multiple-choice radio button field that allows a user to choose a single product, but you may want to change it to a checkbox payment field so they can order multiple items.
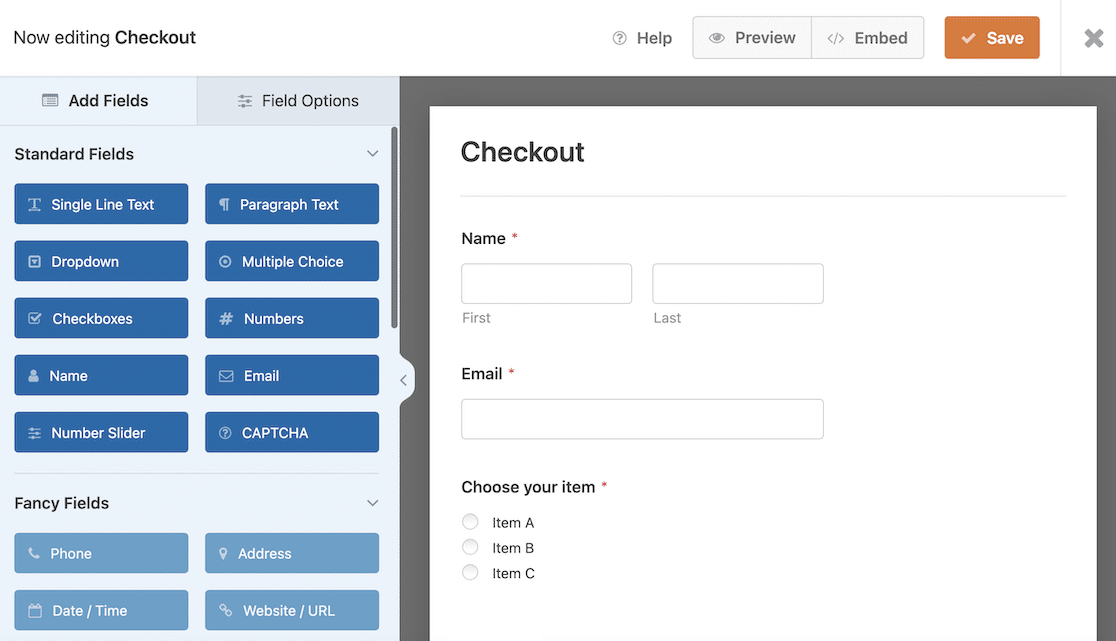
To add additional form fields, drag and drop them from the Add Fields panel on the left. However, try to avoid adding unnecessary fields, as this will increase the time it takes for the user to checkout, reducing the effectiveness of the one-click feature.
Stripe already provides fields for customer information such as shipping address and billing address, phone number, and credit card number, so you don’t need to add these to your form.
To edit the text on your form, click on the input field and change the label or placeholder text in the Field Options panel.
Don’t forget to adjust the pricing and name of the items so it matches your products. See our full guide on customizing field options if you need more help with this.
Step 4: Activate Stripe Link
To allow users to complete checkout in one click, you’ll need to activate Stripe Link. This is Stripe’s one-click checkout solution that securely stores customer details and allows them to reuse them on any site that supports Link.
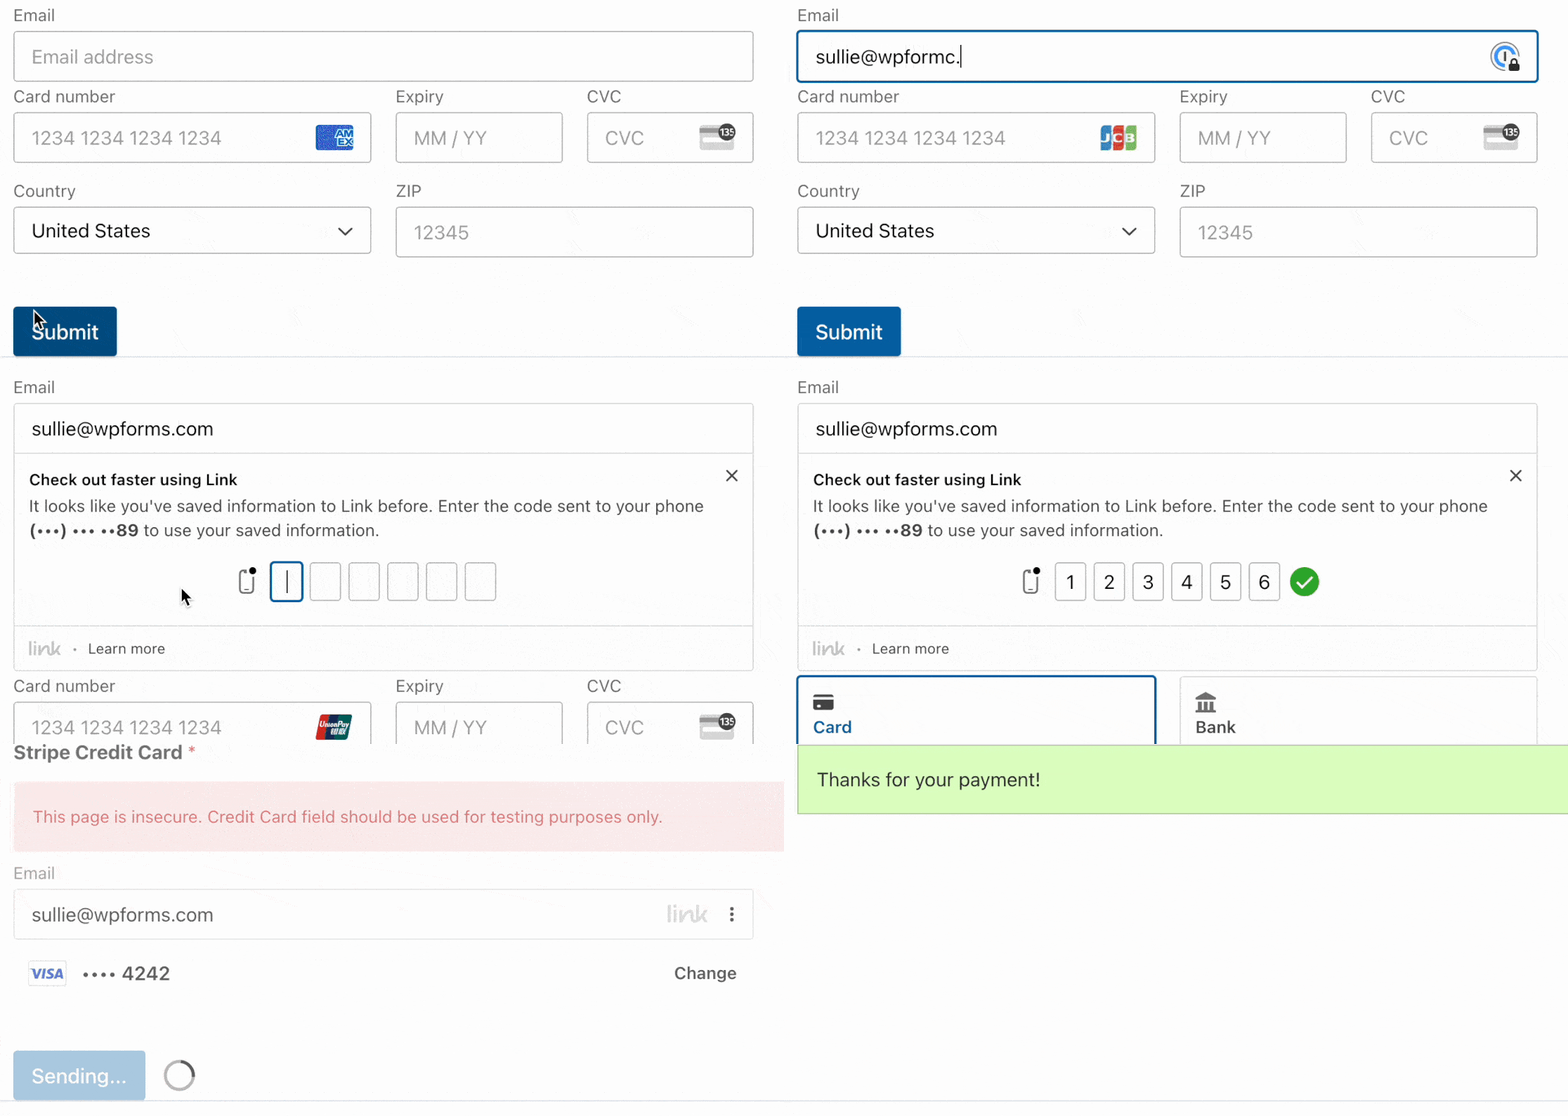
After registering with Link, the customer will receive a one-time passcode for authentication. After this is entered, their payment details will be pre-filled in the checkout form, so all they need to do is submit the form to make the payment.
Completing checkout with Stripe Link takes just 6 seconds and can increase conversion rates by over 7%.
To make sure Link is activated, go to Payment Settings in your Stripe account settings and choose “WPForms LLC” from the Select Your Platform dropdown.

This will bring up the payment methods and settings for WPForms. Scroll down to the Wallets section and make sure Link is set to On.

Once Link is active for your Stripe account, you can go back to WordPress to finish setting up your checkout form.
It’s a good idea to test your form and Stripe payment setup before you make it live. Go through our guide on how to enable Stripe test mode in WordPress for detailed instructions on how to do this.
While you’re in test mode, you can experience just how easy it is to complete one-click checkout yourself:
Step 5: Publish Your Checkout Form
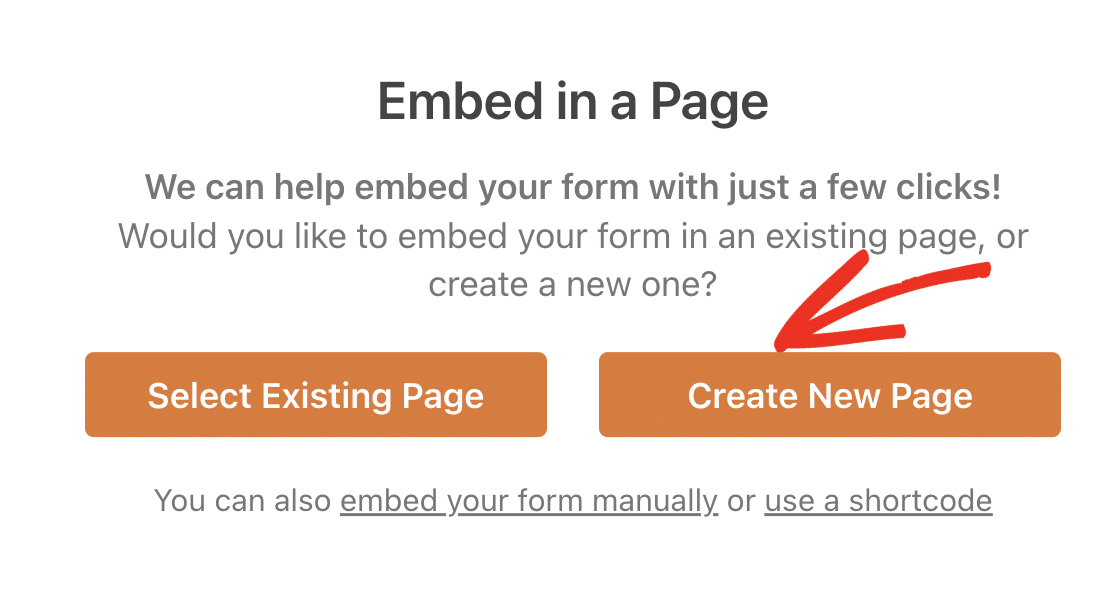
Now it’s time to get your checkout form live so you can start making some money! Click on the Embed button at the top of the form builder.

A popup will appear asking if you want to embed your form in an existing page or create a new page. You can click the Create New Page button to create a separate checkout page for your online store.
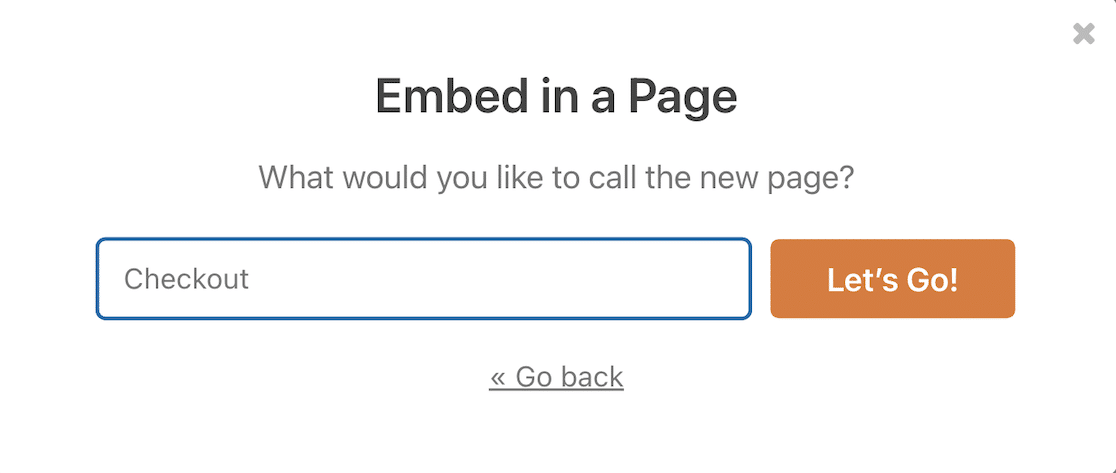
Enter a suitable name for your page and click Let’s Go! to create the page.
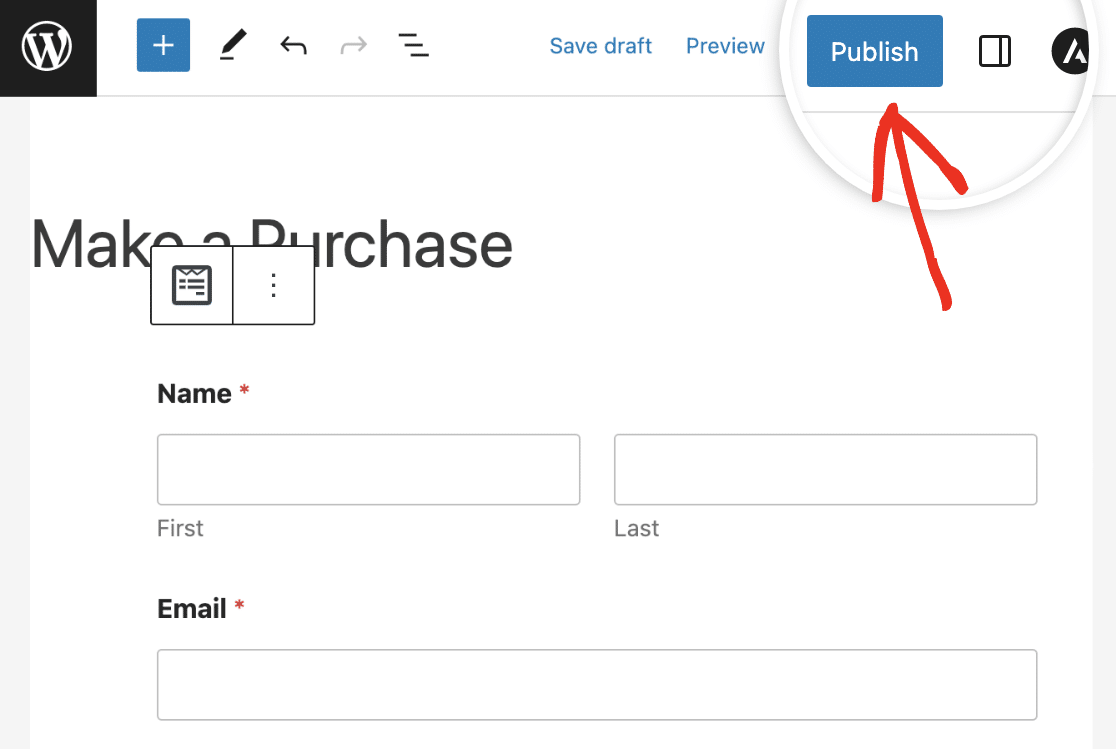
Now all you need to do is hit the Publish button in the top right to make the checkout page live.
Your payment form is now good to go, and your customers can complete the checkout process and card validation with one click!
Next, Learn How to Accept Recurring Payments
To save your customers even more time, learn how to activate recurring payments in Stripe so you can offer subscriptions. You can also read about some of the most common customer complaints about payment forms to help you improve the forms on your site.
Create Your WordPress Checkout Form Now
Ready to build your form? Get started today with the easiest WordPress form builder plugin. WPForms Pro includes lots of free templates and offers a 14-day money-back guarantee.
If this article helped you out, please follow us on Facebook and Twitter for more free WordPress tutorials and guides.

