Do you want to create an email newsletter in WordPress?
If you’ve got an email list, don’t sit on it! You could be skyrocketing your sales by engaging your leads and inviting them back to your website through email marketing.
In this tutorial, we’ll show you exactly how to create an email newsletter so you can start growing your business online.
In This Article
How to Create an Email Newsletter (Step by Step)
There are a bunch of different newsletter plugins available for WordPress. For this tutorial, we’ll use The Newsletter Plugin, which is one of the most popular ways to create a newsletter for small businesses and bloggers in WordPress.
Step 1: Install and Set Up Newsletter Plugin
On your WordPress dashboard, click on Plugins » Add New. Then type in “newsletter plugin” within the search field. You can choose any newsletter plugin of your choice, but we’re going to install Newsletter as shown below.
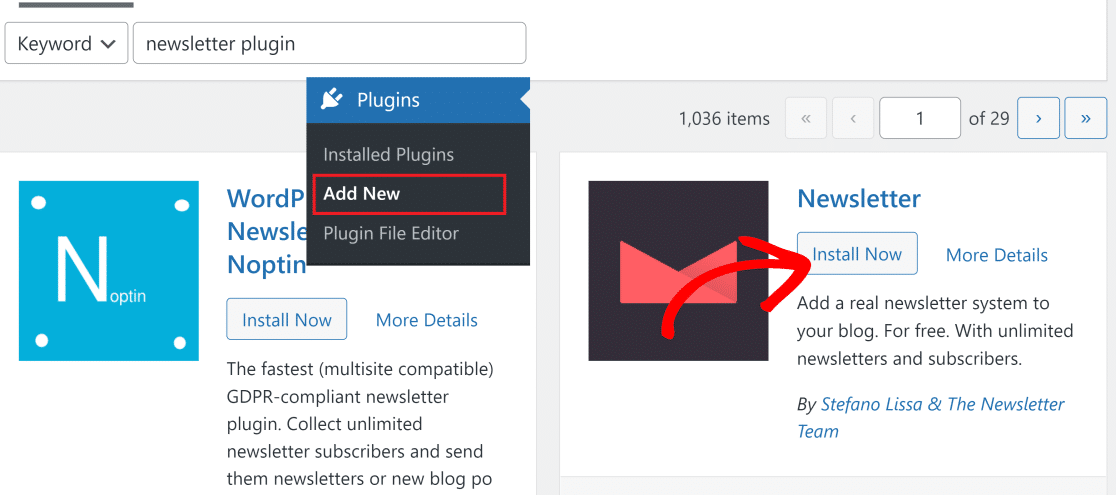
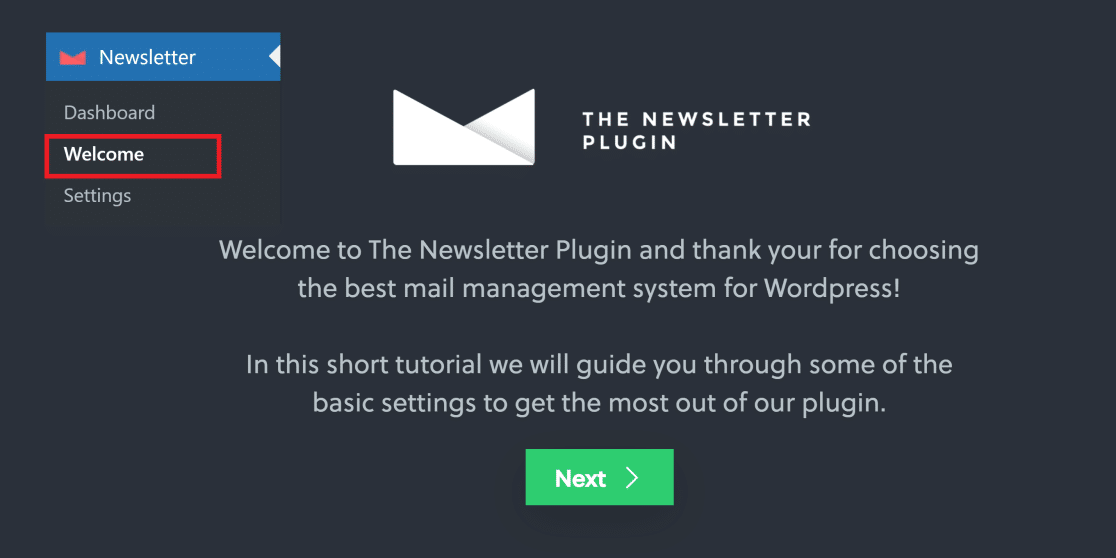
After the plugin has been installed, the Install Now button will change to Activate. Press it to activate the plugin, which will then take you to the Newsletter setup wizard. You can also manually launch the setup by clicking on Newsletter » Welcome.
Then, click on Next to start the setup.
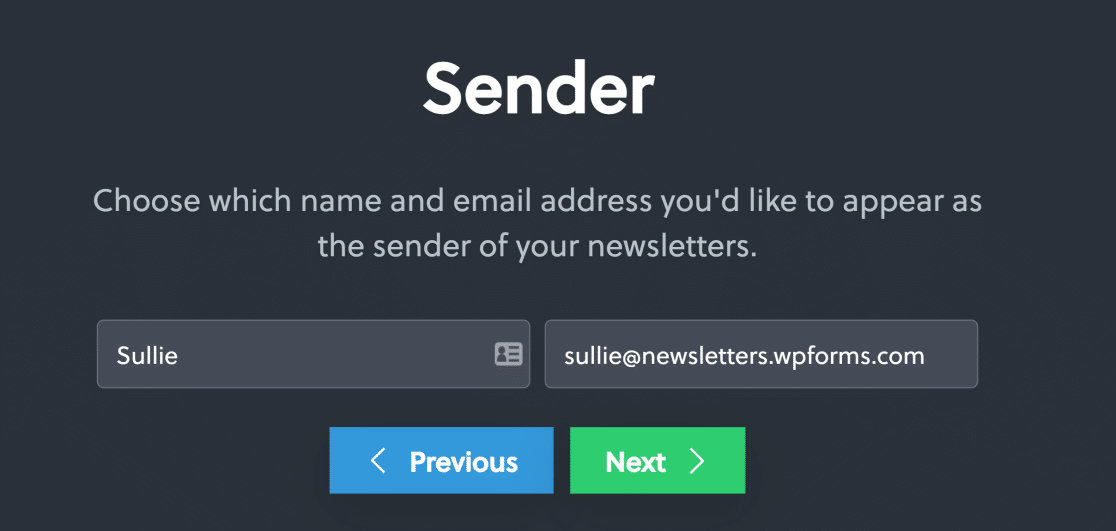
The first thing you’ll need to do is provide your sender name and email address. We’ve used an email address at a subdomain, but you can use your standard email address here. Click Next after entering the sender information.
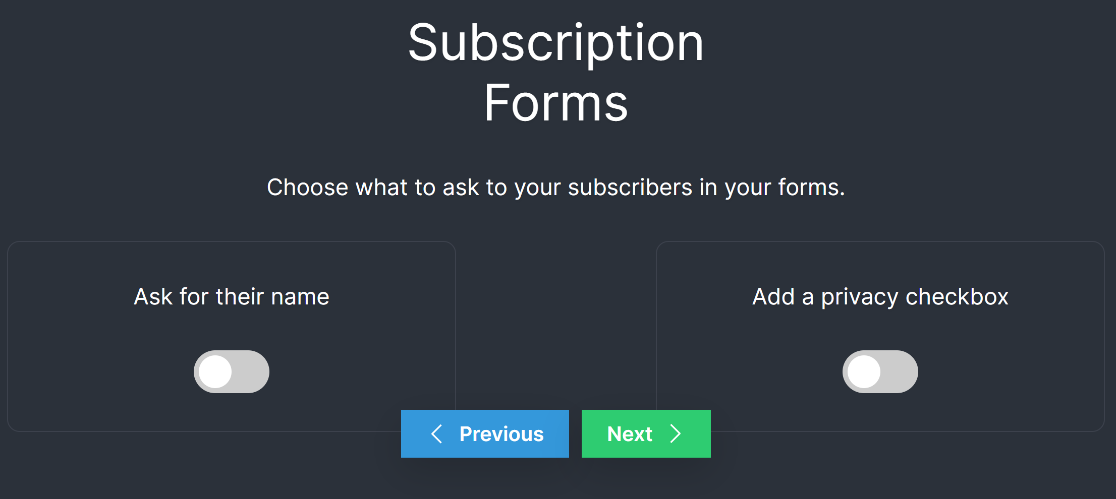
On the next screen, you can use the toggle switches to choose the fields in your newsletter signup form (besides the email address). Press Next when you’re done.
The plugin will now automatically create a subscription page on your site containing a form with the fields for your email signup form as you chose in the above step.
Forms created with The Newsletter Plugin are extremely basic, with very limited customization options.
If you want more control over your email signup form’s fields, functionality, and design, WPForms is a much more powerful solution. In fact, you can integrate WPForms with The Newsletter Plugin if you upgrade the latter to the paid plans.
Create Custom Signup Form With WPForms 📨
In the next step, you can perform some tests to make sure emails are sent properly from your site. Enter your test email address and click on Send a test message.
You’ll get a browser prompt confirming message delivery. Press Next to continue.
Note: It might take a few minutes for the test email to arrive in your inbox.
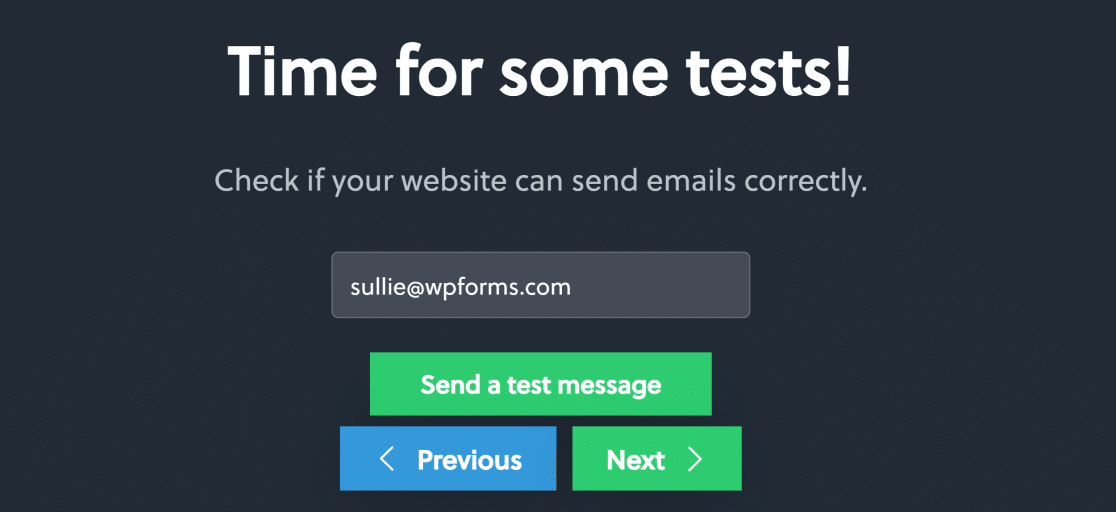
If the email arrives in your inbox, it’s time to start creating your newsletter. But if you still haven’t received the email, you likely have some deliverability issues that you’ll need to fix with SMTP first.
Step 2: Create a Newsletter
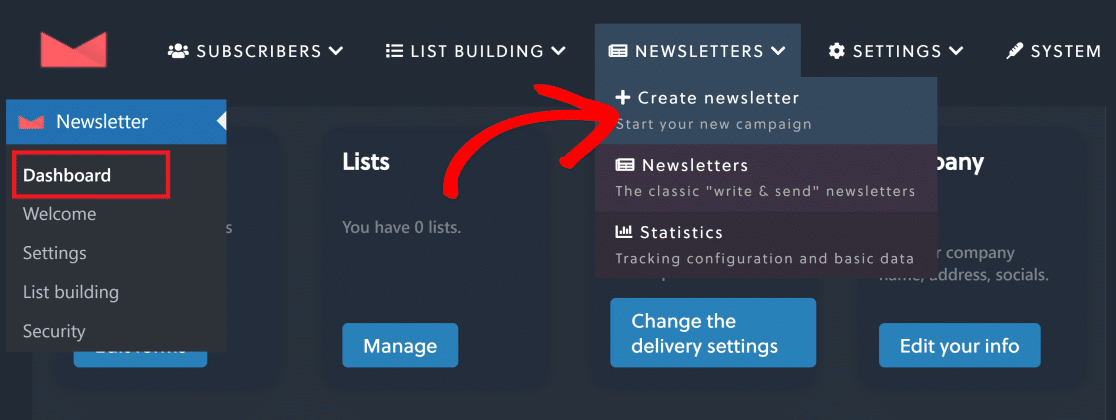
Now, click on Newsletter » Dashboard. From this screen, hover your mouse over the Newsletters tab and press Create newsletter.
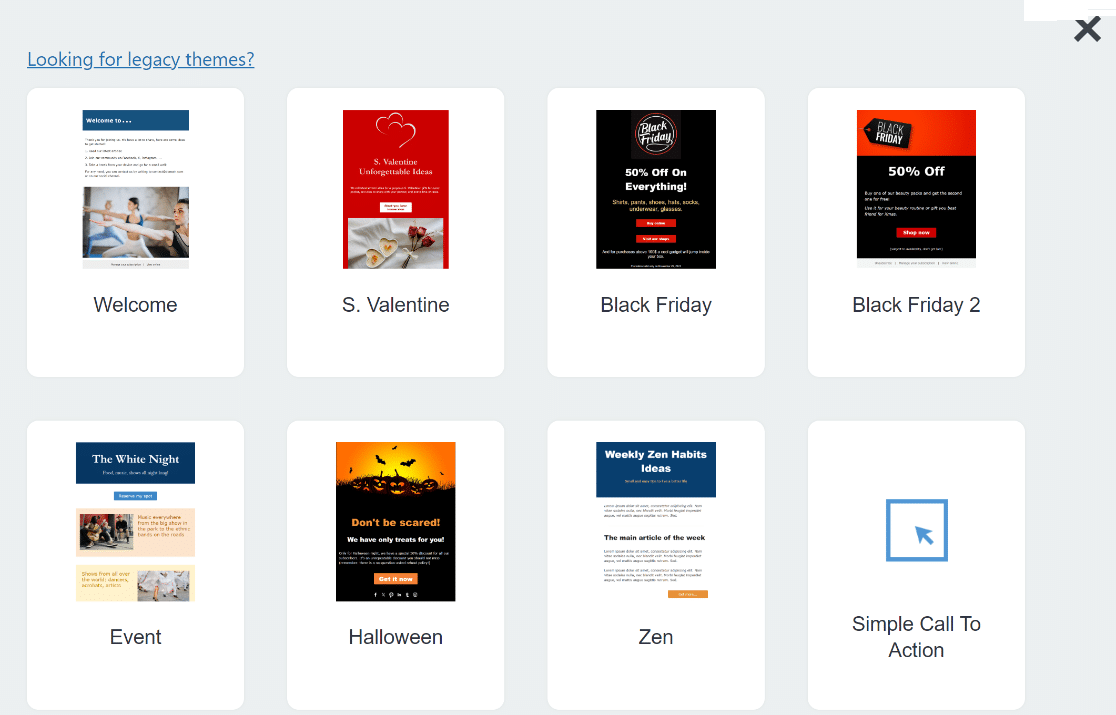
Now, you’ll see different newsletter templates. Pick one that matches your newsletter goals the best. We’re going to use the Last news from your blog template.
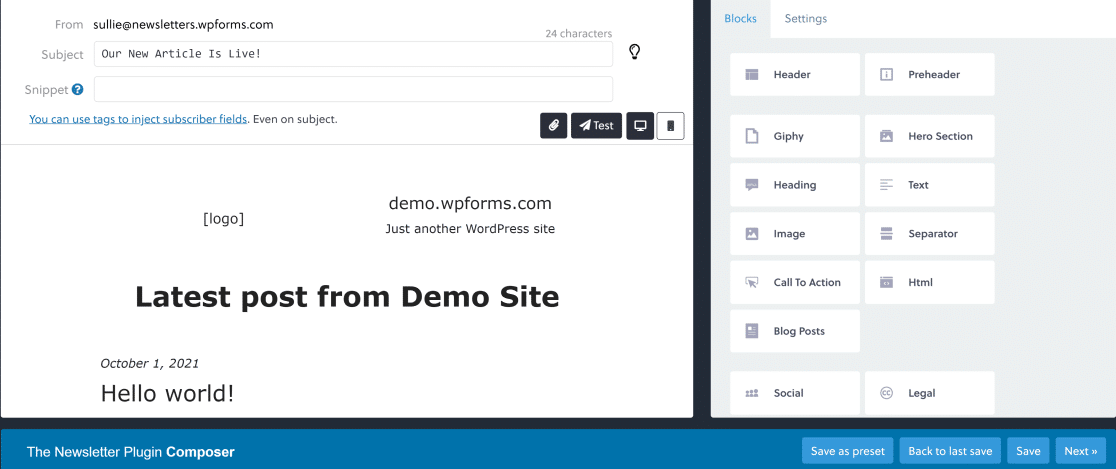
After selecting your template, you can edit your actual newsletter using an easy drag-and-drop interface.
This lets you write the email subject and add elements like social icons, recent blog posts, call to actions, images, and a lot more by placing blocks within the editor.
When your newsletter looks the way you want it to, click on Next on the bottom right of the screen.
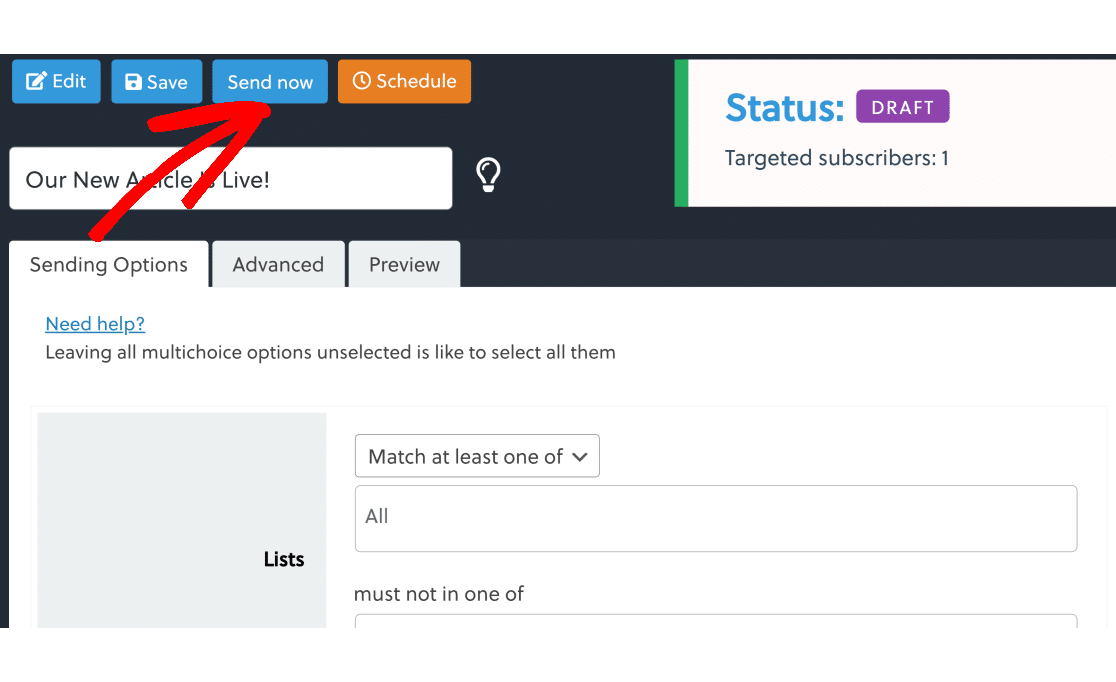
On this screen, you can use sending options to choose the email list (if you have multiple) you want to send the newsletter to and also target your subscribers based on gender.
The Advanced provides some additional options like choosing whether you want to track email opens and clicks and change sender email or name.
When you’ve reviewed the settings, click on Send Now if you want to immediately send the newsletter. You can also press the Schedule button if you want to send it at a later time.
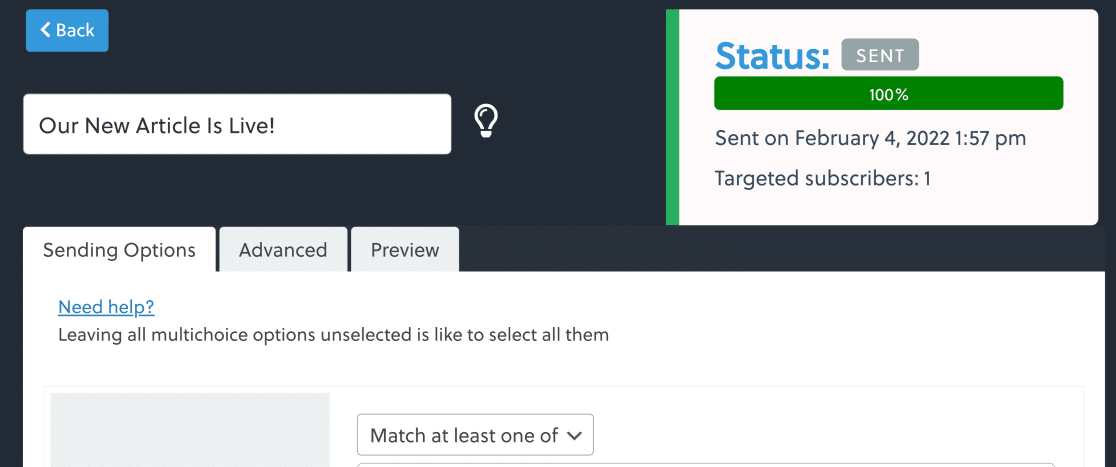
When the newsletter has been sent, the status will read Sent.
Next, we’ll see how to view the open and clickthrough rate of your newsletter.
Step 3: Track Email Statistics
Go to Newsletter » Dashboard and under the Newsletter section, click on the bar chart icon next to the newsletter whose statistics you want to see.

On this screen, you’ll find data for:
- Reach: The number of people who received the newsletter
- Opens: The ratio of recipients that opened your newsletter
- Clicks: The ratio of recipients that clicked your newsletter.
![]()
With this data, you can monitor how well different newsletters with different subject lines are actually performing. This is great for experimenting with and improving your subject lines for better open and clickthrough rates.
While The Newsletter Plugin is great for tracking your newsletter emails, it can’t track other types of emails (such as order emails) that you’re sending from your WordPress site.
If you want to track your emails across all sources on your WordPress site, see the steps below to learn how.
WP Mail SMTP for Email Tracking
WP Mail SMTP is an email plugin that fixes your WordPress email deliverability issues. Even better, the Pro version is the best email log plugin for WordPress.
You can keep a log of all of your outgoing WordPress emails (including newsletters), and track opens and clicks for all emails.
So if you want to track emails across all of your WordPress plugins and view statistics in a single dashboard, WP Mail SMTP is the best solution.
Install WP Mail SMTP
To get email tracking with WP Mail SMTP, your first need a WP Mail SMTP Pro license or higher. This is because the email tracking feature is not supported on lower level plans.
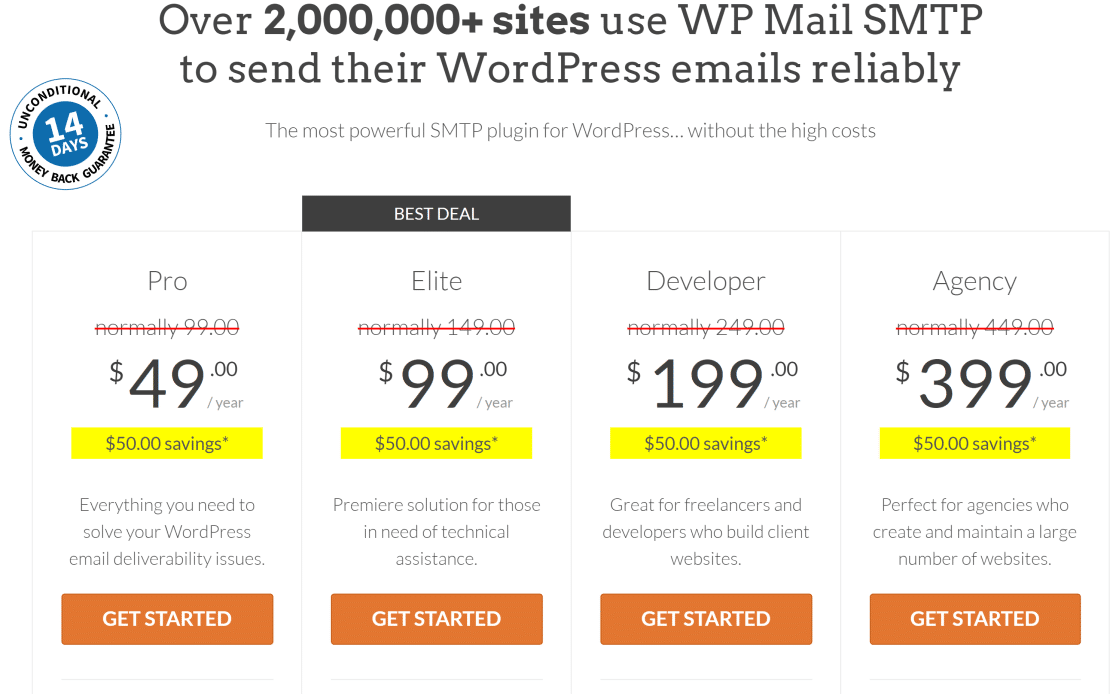
When you’ve purchased the plan, go ahead and install WP Mail SMTP on your site. If you need help setting it up, see these instructions for installing WP Mail SMTP.
When you’ve installed WP Mail SMTP and activated it on your site, you’ll be taken to the setup wizard. For help with configuring the plugin, please see this doc on how to use WP Mail SMTP setup wizard. It will help you connect your site to a mailer like SendLayer.
When WP Mail SMTP is successfully installed and configured on your site, move to the next step.
Enable Email Logging, Open Tracking, & Click Tracking
Once you’ve installed WP Mail SMTP on your site, you can enable email tracking to monitor clicks and opens for every email newsletter you’ve sent to your subscribers.
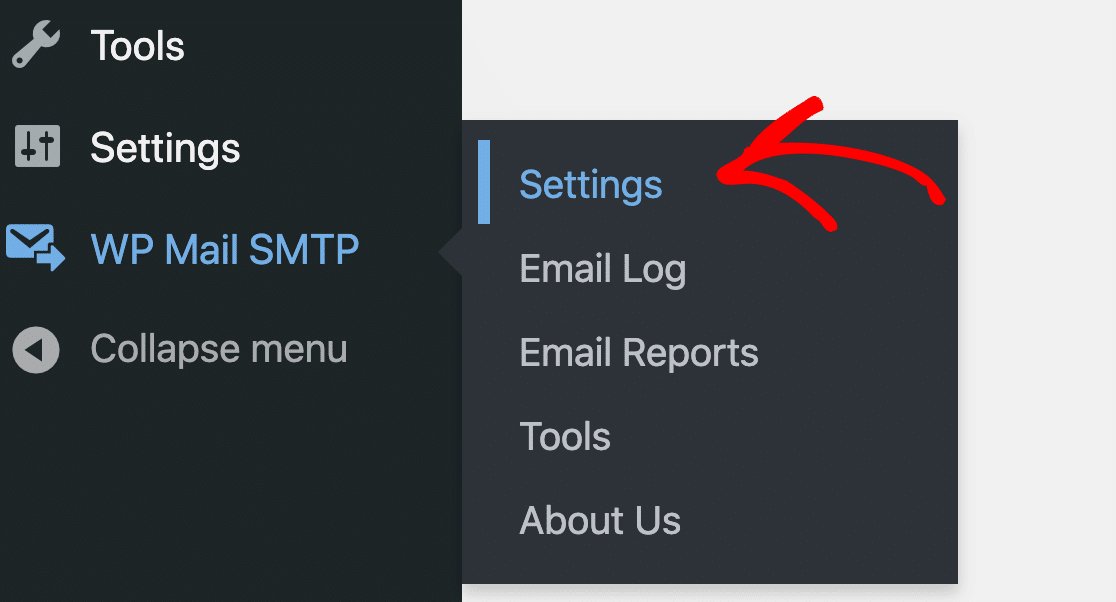
To enable email tracking, go to WP Mail SMTP » Settings.
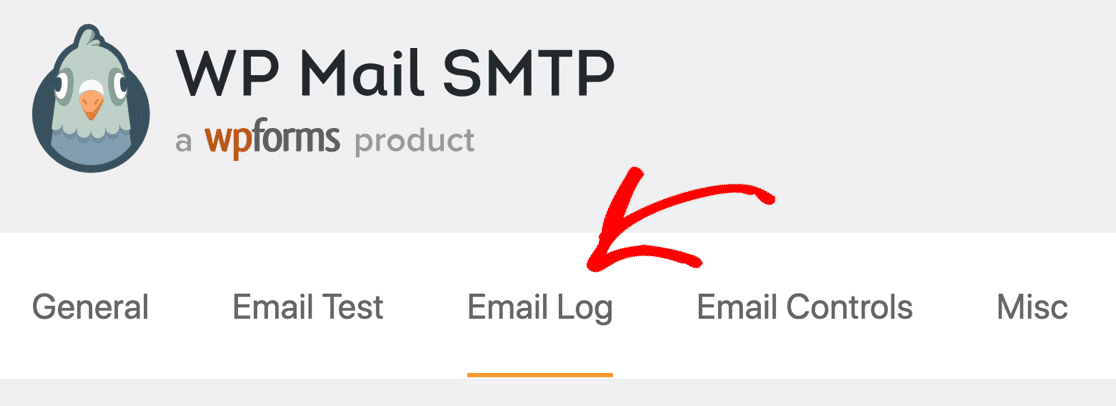
Then click on the Email Log tab on the navigation menu under the WP Mail SMTP logo.
On this screen, click on Enable Log to expand the list of tracking options.

Now scroll down and make sure both these settings are enabled:
- Open Email Tracking: With this tracking feature, you can see how many times your email newsletters were opened by recipients.
- Click Link Tracking: Enable this to see which links within your newsletters were clicked by users.
![]()
Click on Save Settings after enabling these features.
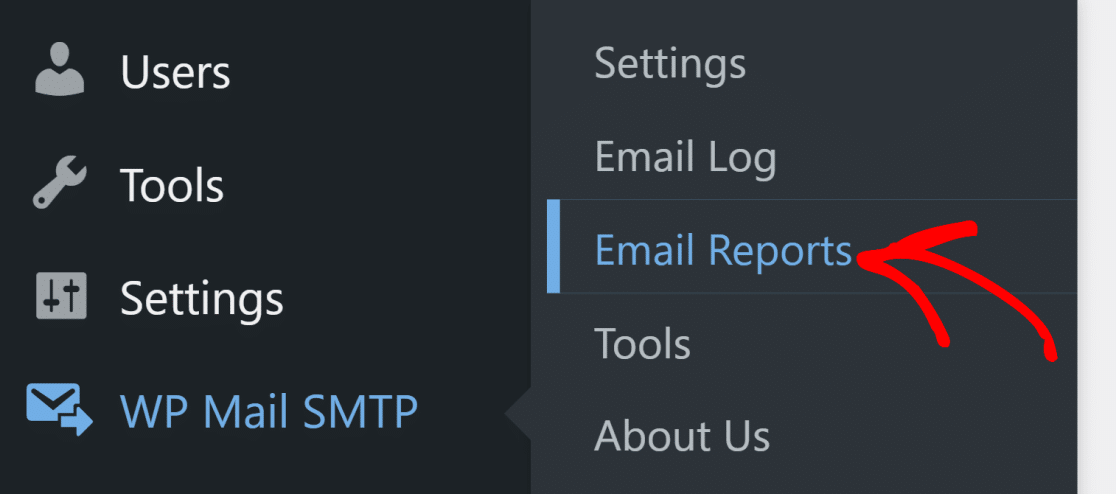
In order to see the open and click stats for your newsletters, click on WP Mail SMTP » Email Reports.
You will now see a dashboard displaying all of your emails by subject lines along with the open and click counts for each.

This is what makes WP Mail SMTP so special because whether you’re sending out newsletters, order confirmation emails, any other automated messages, or all of these, it can track all of your sent emails.
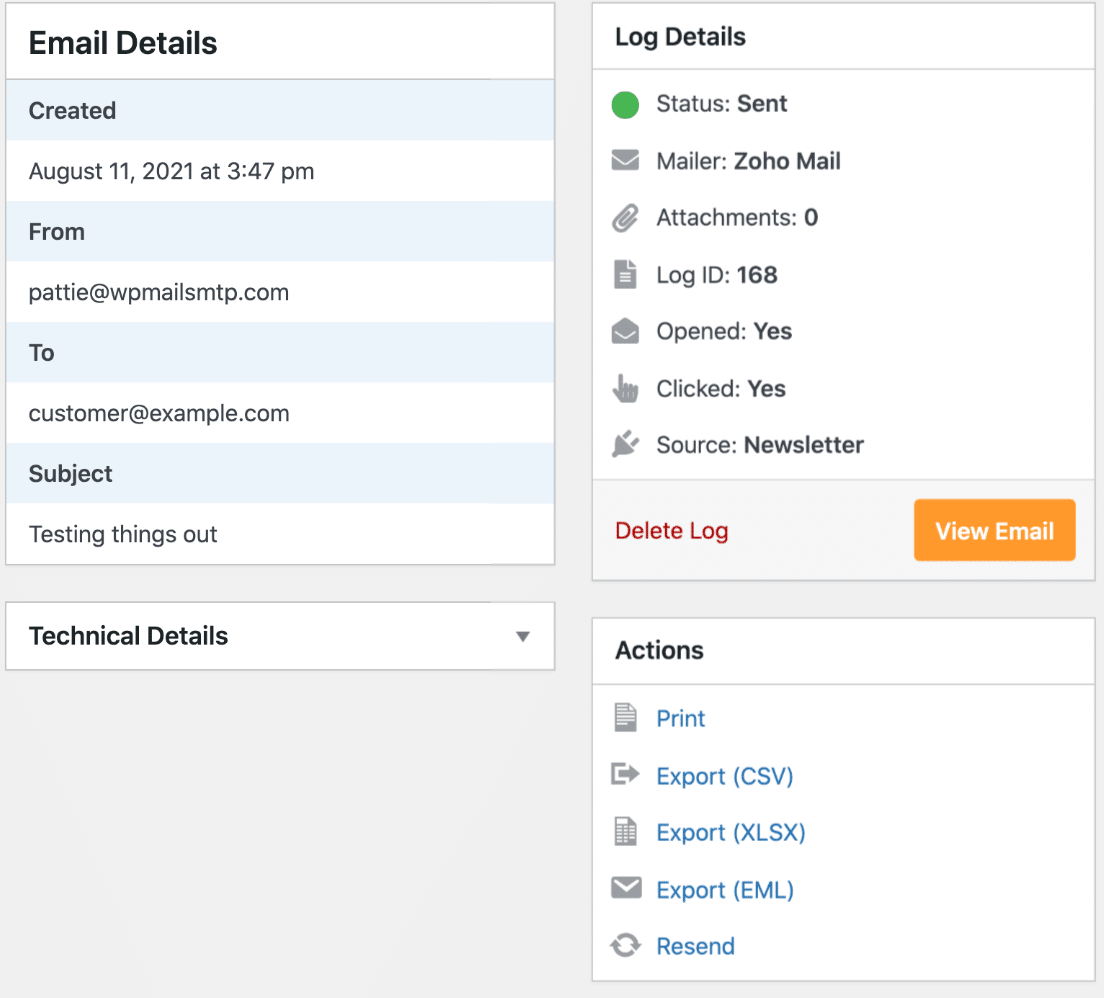
What’s more, you can also view additional details for each newsletter, such as the recipient and whether they opened it, delivery status, number of attachments, and more.
In the next step, we’ll see how to resend emails that failed delivery.
Resend Newsletters in WordPress
Now that you’re able to track the status of each of your newsletters, you can easily find out if your newsletter failed delivery to some recipients.
In that case, WP Mail SMTP lets you resend your newsletter with a single click.
To do this, first go to WP Mail SMTP » Email Log.
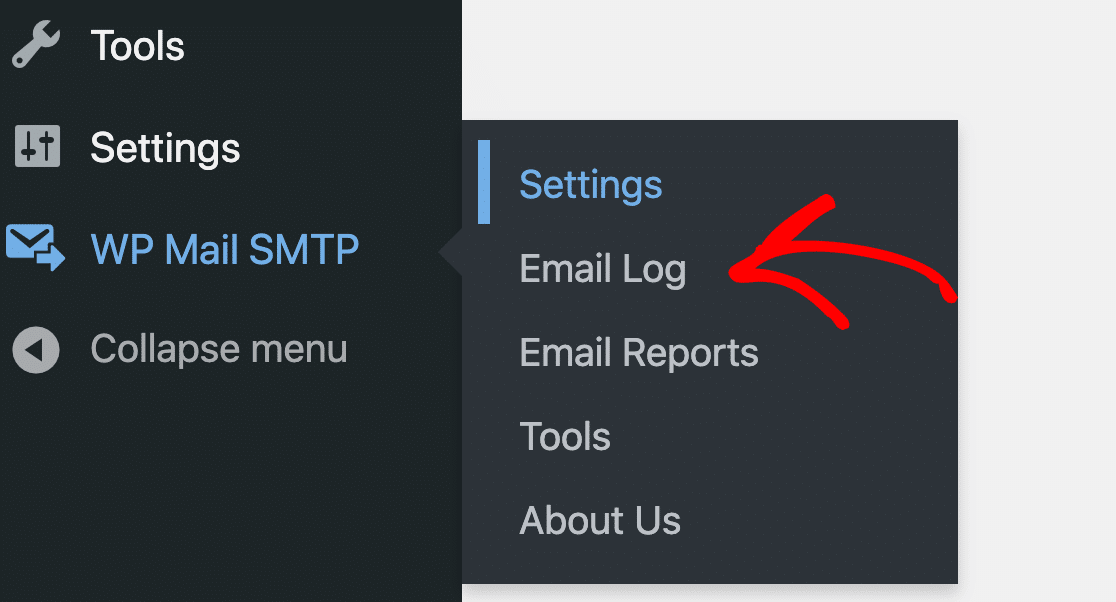
Now, hover your mouse over the email you want to resend and click on View Log.

Now, click on Resend.
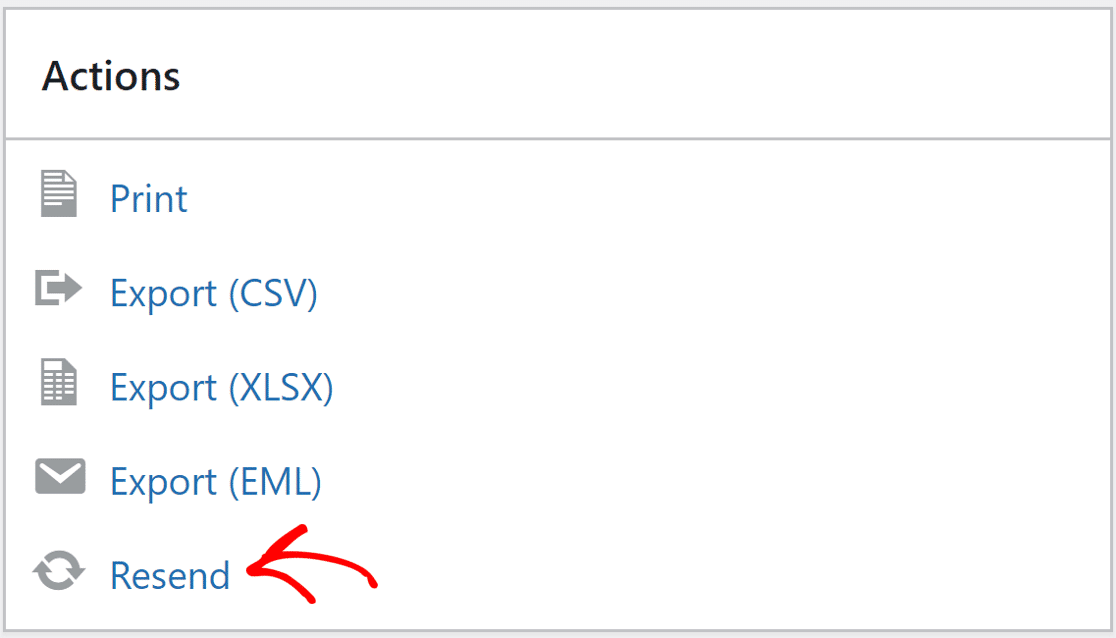
You will now get a prompt where you can edit the email address before confirming the resend. It’s a good idea to check the email address because a wrong email address is one of the main causes of failed newsletter deliveries.
When you’ve checked everything and are satisfied, click on Yes to resend your newsletter.
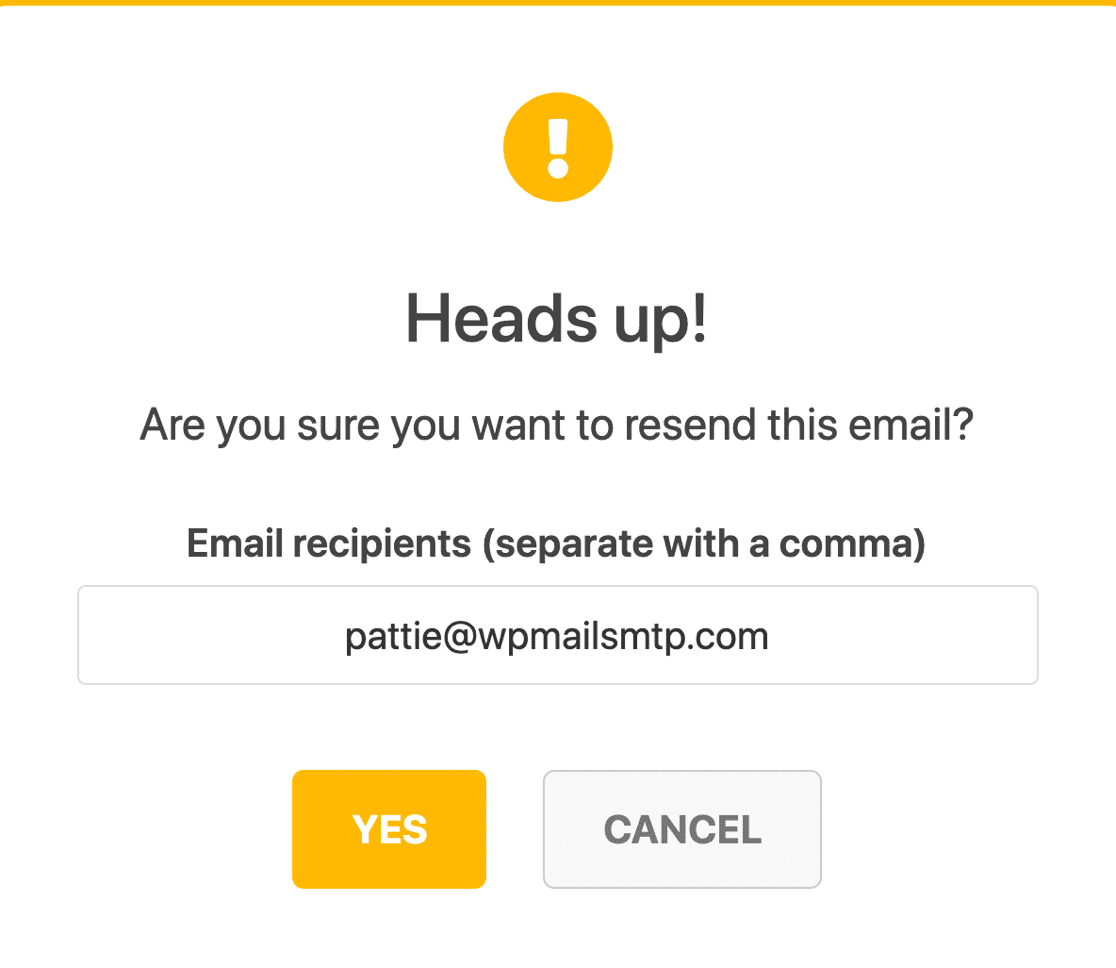
WP Mail SMTP will now attempt a second delivery. If the email address is correct and you’ve set up everything correctly, it should instantly reach your desired recipient.
WP Mail SMTP is excellent for fixing deliverability issues generally across your WordPress site. For instance, if you’re having trouble with WooCommerce, you can count on WP Mail SMTP to resolve WooCommerce email sending issues.
And there you have it! You can now create email newsletters in WordPress and track clicks to get better insight into your email campaigns!
FAQs on WordPress Email Newsletters
Here are a few common questions we’re usually asked about sending email newsletters:
Why Do You Need a Newsletter?
Newsletters play an important role as a lead nurturing strategy. If you’re making all that effort into producing value-driven content on your site, it deserves to be read by your subscribers. Newsletters make sure that the right audience is finding your posts through email.
So if you want to ensure that your blog and site content is drawing recurring traffic, don’t ignore sending newsletters to your subscribers.
How do I create a successful newsletter?
When planning your newsletter, it’s important to pay attention to these details:
- Define Your Audience —Ask yourself who your target audience is and what their needs are. If you don’t know yet, consider creating a survey form to find out.
- Set Your Goals — Do you simply want more traffic? To engage readers? Are you gearing up for a seasonal sale? Once you decide what you want to get out of your email campaigns, you’ll be able to decide on what kind of content to create and send.
- Choose the Frequency — Marketing emails can be annoying if sent too often. Decide how often you’ll be emailing your list, be it weekly, monthly, quarterly, etc.
- Gather Your Best Content — You don’t have to start from scratch with your newsletter. Make a list of the most helpful content from your site and build an editorial calendar around those posts to win over readers with your great advice.
- Use Emojis in Subject Lines — If it matches your tone, try using emojis in your subject lines. Subject lines heavily impact your open rate, so give them a lot of love and research.
- Write with Care — Regardless of whether your email recipients are new leads or existing customers, your newsletter needs to be a well-crafted piece of content. Check for typos and use a conversational tone.
- Use Calls to Action — Make sure your emails include Calls to Action. Meaning, ask the reader to do something such as clicking a link or button that says ‘Click here to get more details’. CTAs are how you’ll convert readers into customers and bring them back to your website.
So now that you’ve got an idea of how to create a successful newsletter, let’s dive into our tutorial on how to create an email newsletter.
What elements should I include in my newsletter?
Almost every newsletter includes a few essential elements that are common:
- Subject line – A short, specific, and clear subject line can effectively draw more clicks. You can also try adding emojis to make your email stand out more in the recipient’s inbox.
- Pre-header text – This appears right after the subject line, allowing you to complement your subject with important additional text to draw clicks.
- Call to Action (CTA) – Every newsletter should have a CTA focused on a single specific goal such as promoting your latest blog post.
- Content – Aim to provide relevant content that matches your audience’s interests to ensure they remain engaged with you. You can also add images (sparingly) to your newsletter to boost engagement.
How often should I send out my newsletter?
The common sending frequency of an email newsletter can be anywhere between weekly to monthly, depending on how frequently you post on your blog.
If it makes sense for your business, I recommend sending a weekly newsletter. This is the “sweet spot” for an email newsletter because if your sending frequency is longer than a week, you risk letting subscribers forget about you and become less interested.
Conversely, if you’re sending emails more than once a week, it could result in a higher unsubscribe rate and spam complaints if people start getting annoyed.
An alternative, quite effective strategy is allowing subscribers to choose how often they’d like to receive emails from you during signup.
Can I design a newsletter without coding experience?
Yes, if you’re using a user-friendly plugin with comprehensive drag-and-drop form-building functionality, you can design a newsletter without code. For instance, you can use WPForms to build your newsletter form and also customize styling of your form using the WordPress block editor with no coding experience.
Next, Get More Done with Email Automation
Next, if you’re interested in using email automation, check out our guide to making a SendFox WordPress form.
Also, adding your email list to a popup is one of the best ways to grow it fast. Check out our post on the best WordPress popup plugins to find one that works for you.
Create Your WordPress Form Now
Ready to build your form? Get started today with the easiest WordPress form builder plugin. WPForms Pro includes lots of free templates and offers a 14-day money-back guarantee.
If this article helped you out, please follow us on Facebook and Twitter for more free WordPress tutorials and guides.



Hello,
I have installed the WPforms, but there seems to be a problem occurring with the newsletter box. I have set up the newsletter form, however, I am not able to type anything in that “email” search box. I was wandering if there is a solution to fix this problem? Thank you in advance.
Best Regards,
Stepas
Hey Stepas — We are sorry for any trouble. In order to make sure we answer your question as thoroughly as possible and avoid any confusion, could you please contact our team?
If you have a WPForms license, you have access to our email support, so please submit a support ticket. Otherwise, we provide limited complimentary support in the WPForms Lite WordPress.org support forum.
Thanks.
I have installed the newsletter plugin on my wordpress site. But I see that it can only send 100 emails an hour. What do you suggest for an add-on or another plugin to send out 2000-5000 at a time?
Thank you
Hey Jaimie, Unfortunately, this would depending on a number factors including your hosting reason but I’d recommend taking a look at some of the recommended WP Mail SMTP Mailers as outlined here.
I hope this helps.
Can I use this newsletter if my site is running on classic wordpress rather than block editor?
Hey Kathy – You should be able follow the steps shared in our blog post and create the newsletter form in block editor. In case you face any issues, please drop us a line in support so we can assist.
If you have a WPForms license, you have access to our email support, so please submit a support ticket.
Otherwise, we provide limited complimentary support in the WPForms Lite WordPress.org support forum.
Thanks 🙂
I have a question, I creat a form with dropdown field and check “multiple option select” in dropdown field, email sent to customer when i use smart tag {field_id=dropdown ID(with mutil choice} is not separated clearly, just by a space, is there any way to change it to comma , or –
Hello Nam,
It looks like you’re trying to customize how the Dropdown field looks in notification emails. We currently do not have that feature by default.
For a personalized advice, you can get in touch with our Trusted Advisors in the support team if you have a WPForms license. Please submit a support ticket and they will get back to you as soon as possible (usually within 1 working day).
If you’re using our free version, please head to the WPForms Lite WordPress.org support forum and open a new thread.
Thanks!