Are you wondering how to create a price calculator for your website that allows users to select products and make payments instantly?
You’ll be pleased to hear that WPForms allows users to create order forms for a variety of businesses and use cases that automatically calculates prices.
Create Your Price Calculator Now
So, without further ado, let’s dive into the steps you need to take in order to create a price calculator for your website!
How To Create a Price Calculator For Your Website
Creating a price calculator for your website using WPForms is incredibly straightforward. Follow the steps below to get started!
In This Article
1. Install and Activate the WPForms Plugin
WPForms is a great tool for making forms like contact forms and order forms. It has over 2,000+ WordPress form templates you can use.
To use the Calculations Addon, you need to get WPForms Pro. This gives you more features like order forms with customizable total fields.

To get started, buy the Pro license. Then, install WPForms on your website. If you need help, follow these instructions on how to add a plugin to WordPress.
2. Connect WPForms with Stripe
After you have WPForms, you need to add the Stripe Pro Addon.
If you want, you can install the addon for another payment processor, such as PayPal or Square, but we recommend Stripe for creating price calculator forms.
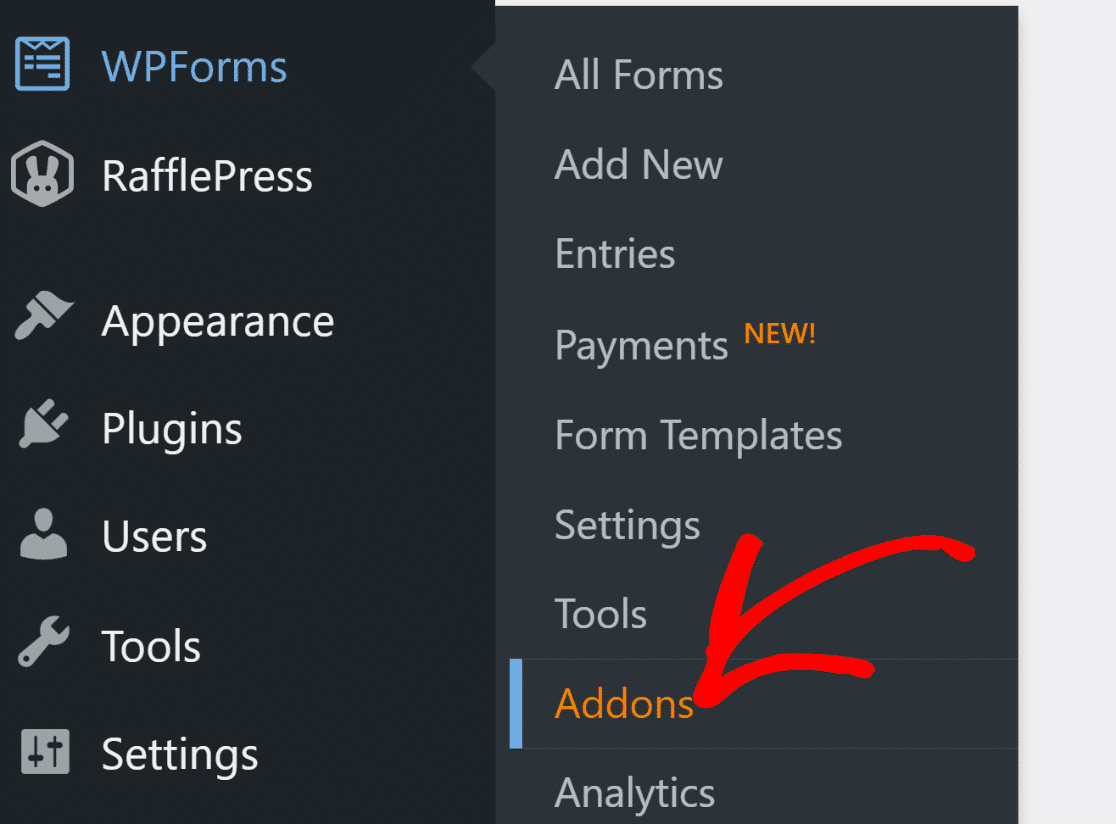
That said, go to WPForms in your WordPress menu and click on Addons.
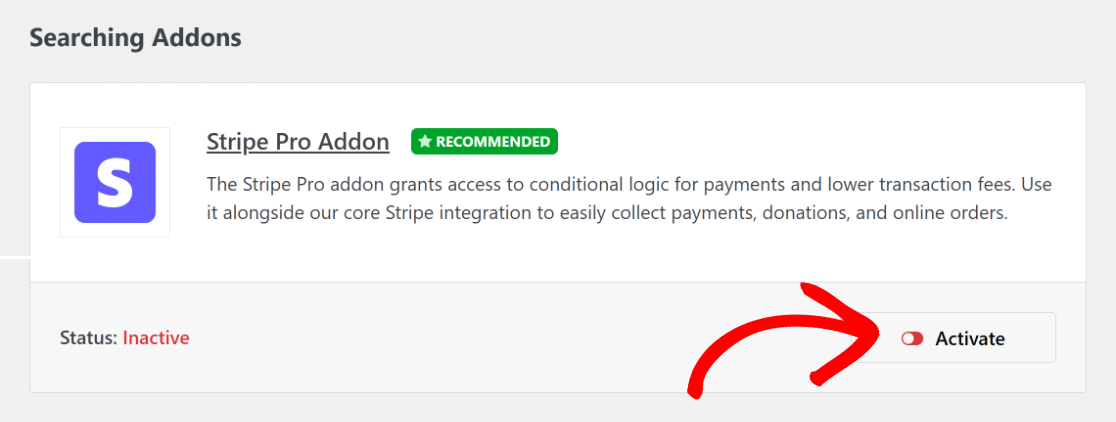
Look for the Stripe Pro Addon and install it on your website. To do this, simply click on the Install button and then the Activate button.
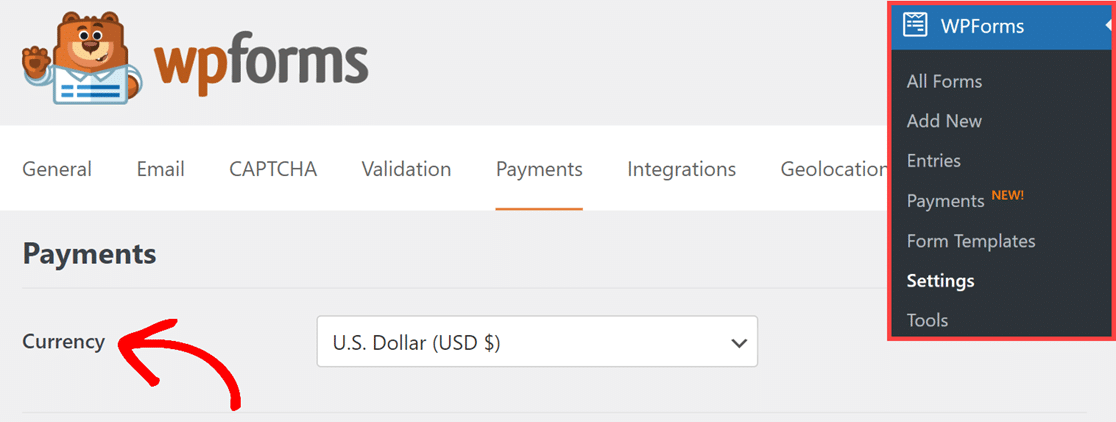
Next, go to WPForms » Settings and click on Payments. Here, you can choose the type of currency you want to use.
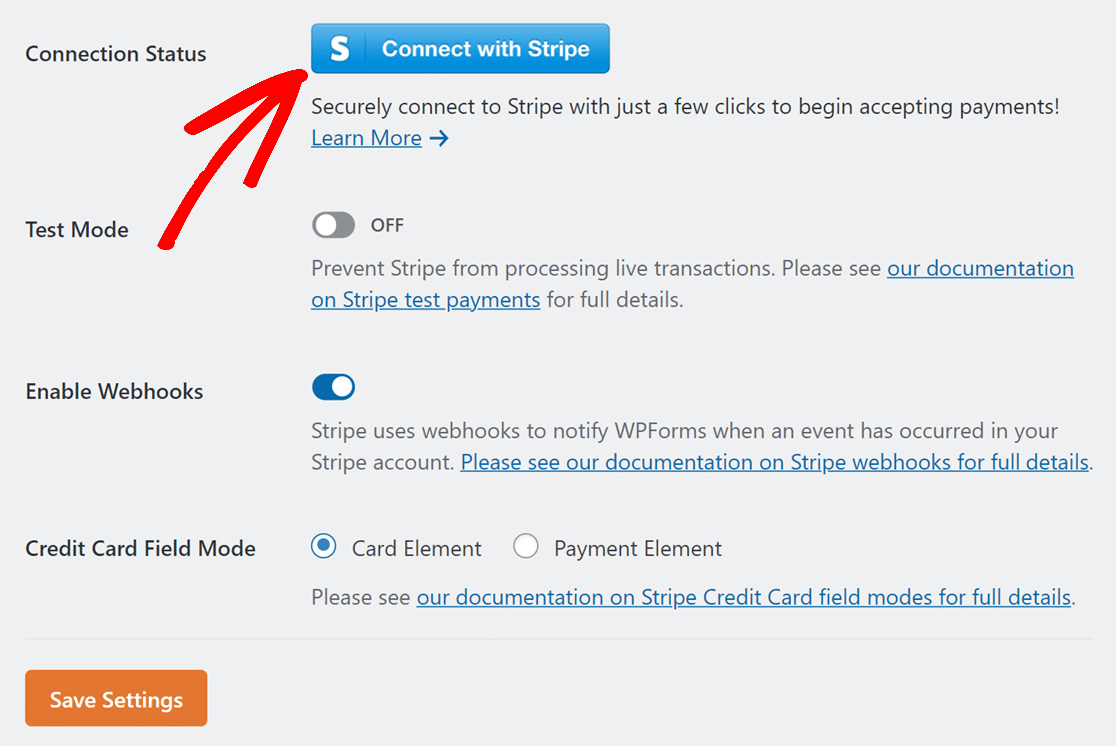
Then, connect your site to Stripe by clicking the blue button and entering your Stripe details. If you don’t have a Stripe account, you can make one now.
Once you connect to Stripe, go back to WPForms » Settings » Payments. You should see a green check mark showing you are connected.

Now, you can make your order form with a price calculator feature and get payments with Stripe instantly!
3. Select an Order Form Template
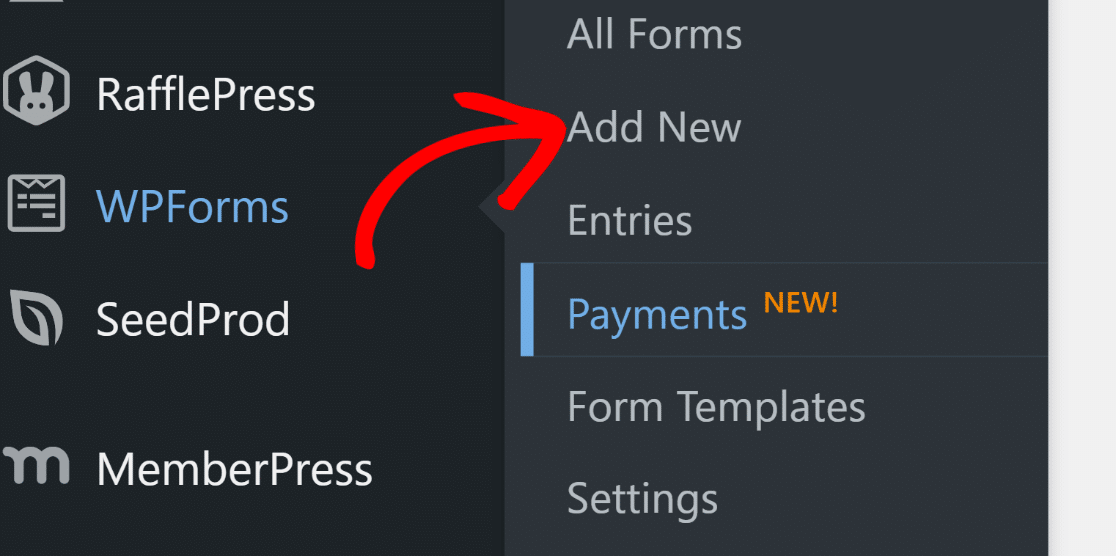
Let’s create your order form now. Go to WPForms from your WordPress dashboard and click the Add New option.
After that, give your form a name and pick a template. For this guide, we’ll choose the Billing / Order Form to speed up the form creation.
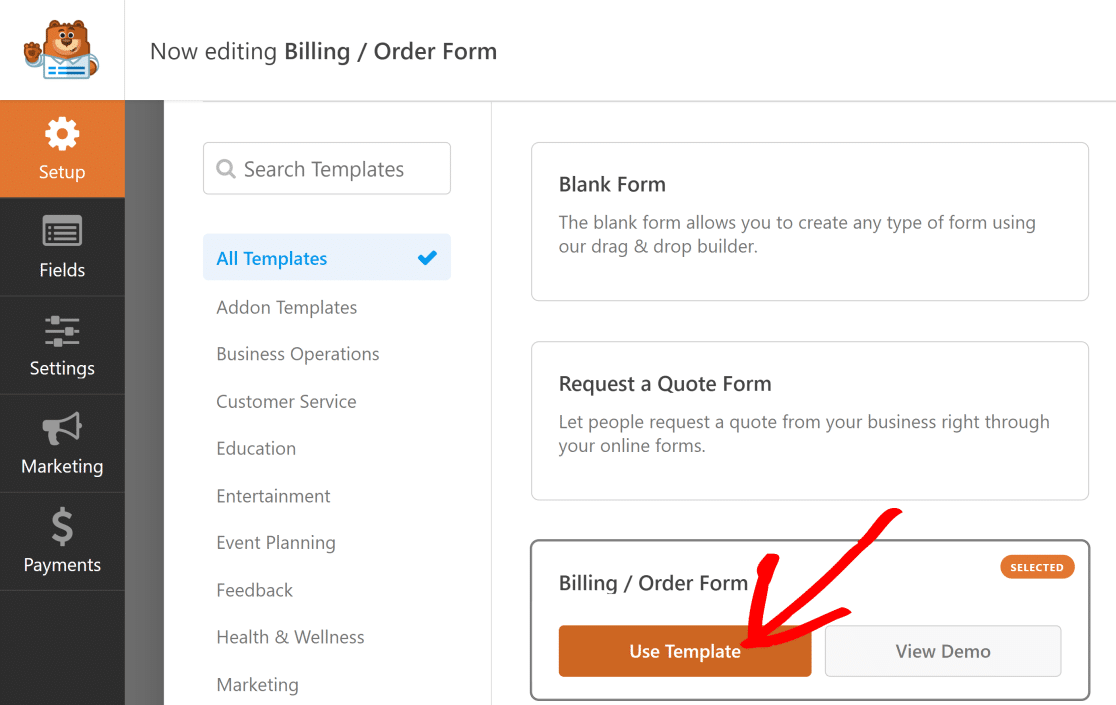
This template has a Multiple Items field and a Total field. You can change the form to add different kinds of products and work out the total price.
Making Changes to the Multiple Items Field
In this guide, we begin with a normal Multiple Items field and change it to include different types of shirts.
Click on the Multiple Items field to change what’s in it. Here’s what you can do to make the form more relevant to your business:
- Label: This is the name for the choices.
- Items: These are the different things you can choose and their costs.
- Show price after item labels: Check this if you want to show each item’s price.
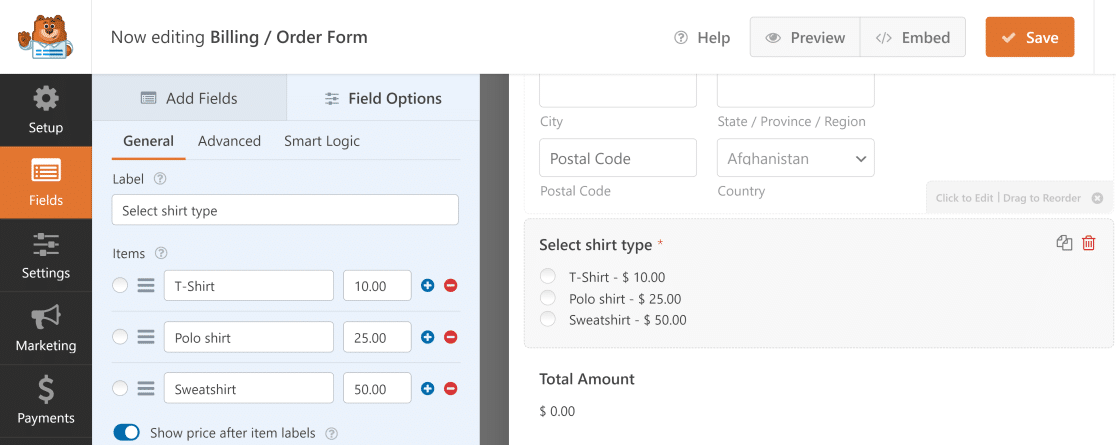
Once you’re done, whenever someone picks a product, the total price changes right away to match what they chose.

You can also create a coupon code, which customers can use to receive a discount on their total order amount.
Choosing More Than One Product
Maybe you want to let people pick more than one product. You can do that easily with various fields and customization options.
For instance, if someone wants to buy a T-shirt and a sweatshirt, they can pick both on the same form.
Go to the Payment Fields section and use the Checkbox Items field. Here, you can list all the products.
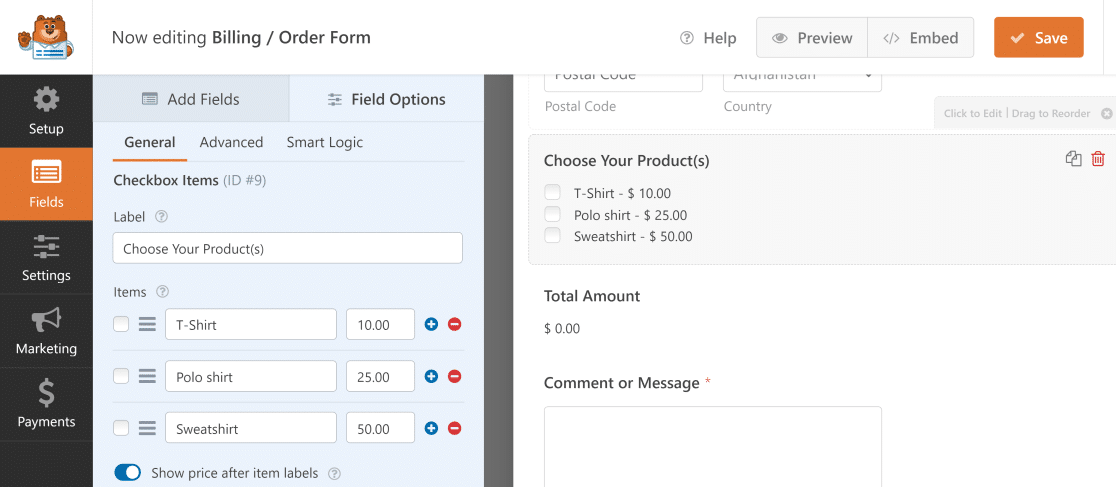
Now, when someone picks more than one product, the total price will add up all their choices.

Adding a Stripe Credit Card Field
The most important part of an order form is letting customers pay easily online to ensure you receive the payments and can proceed with dispatching the order.
Earlier, we added Stripe Pro and connected it to WPForms to allow you to accept payments on your site. Now, it’s time to add Stripe to your form.
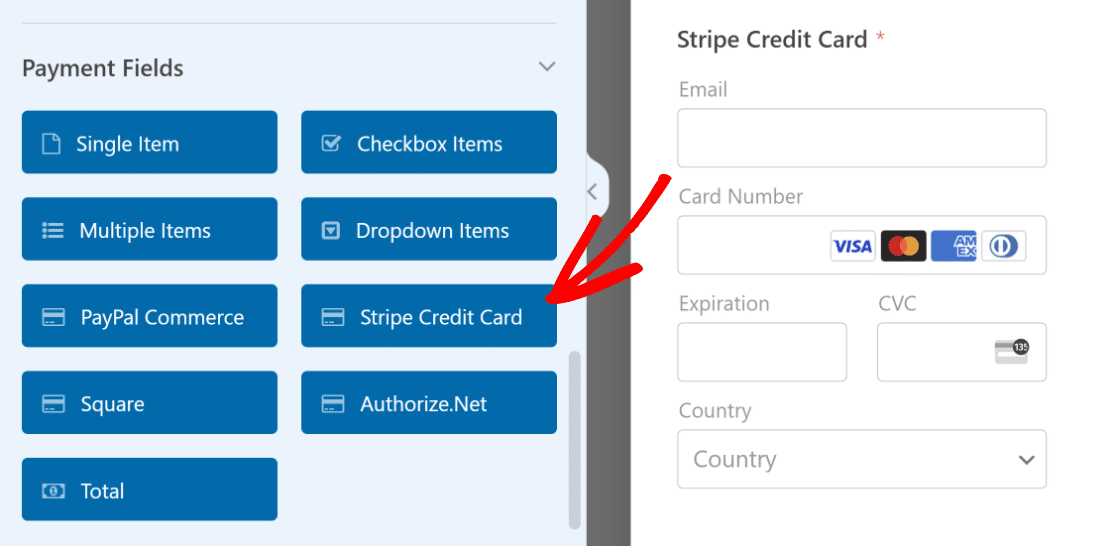
To set up Stripe payments on your form, find the Stripe Credit Card field under Payment Fields and add it to your form.
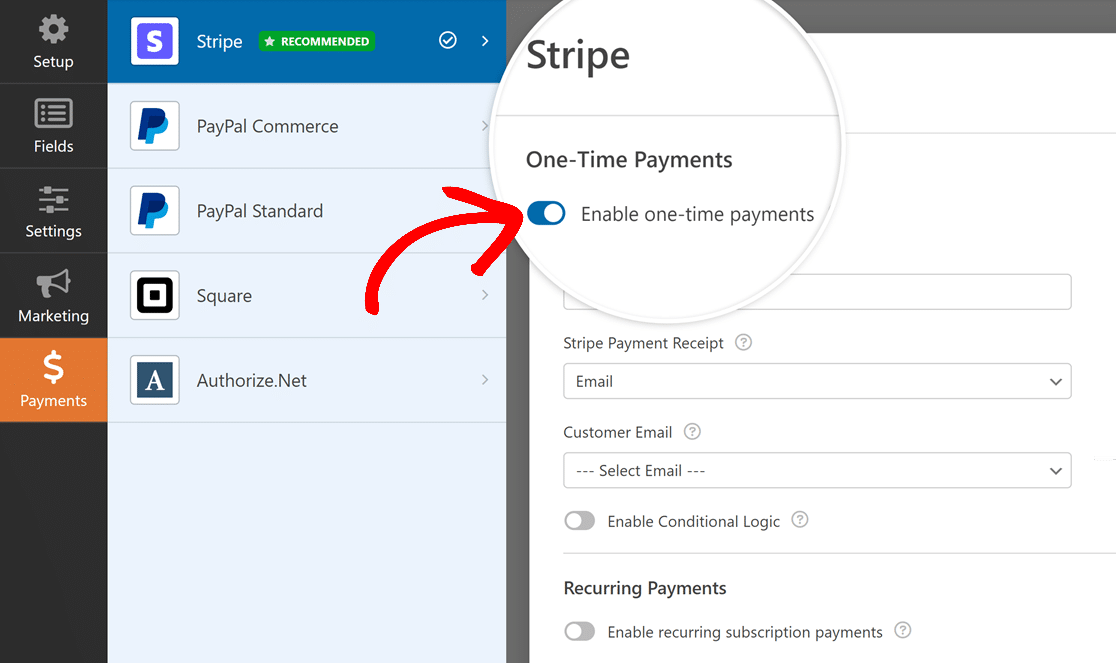
Next, go to the Payments section and look at the Stripe settings. Turn on the option for Enable one-time payments.
Now, your customers can pick different products, see the total price, and make their payments all in one form!
4. Use Custom Formulas for Advanced Totals
If you want to do more with the total prices being displayed to your customers on the order form, you can use the Calculations Addon.
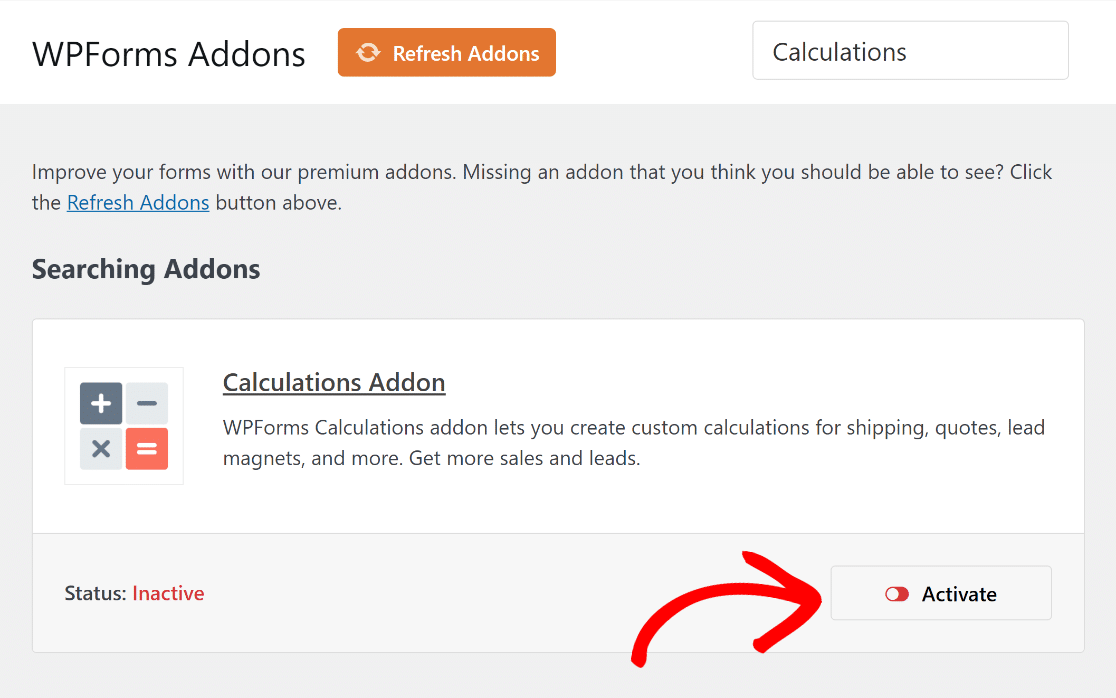
Go to WPForms » Addons and look for the Calculations Addon. Then, click on the Install Addon button. After that, click on the Activate button.
Now, you can make complex formulas for your total price. For example, you can add a field for quantity or insert a sales tax deduction.
Adding a Quantity Field
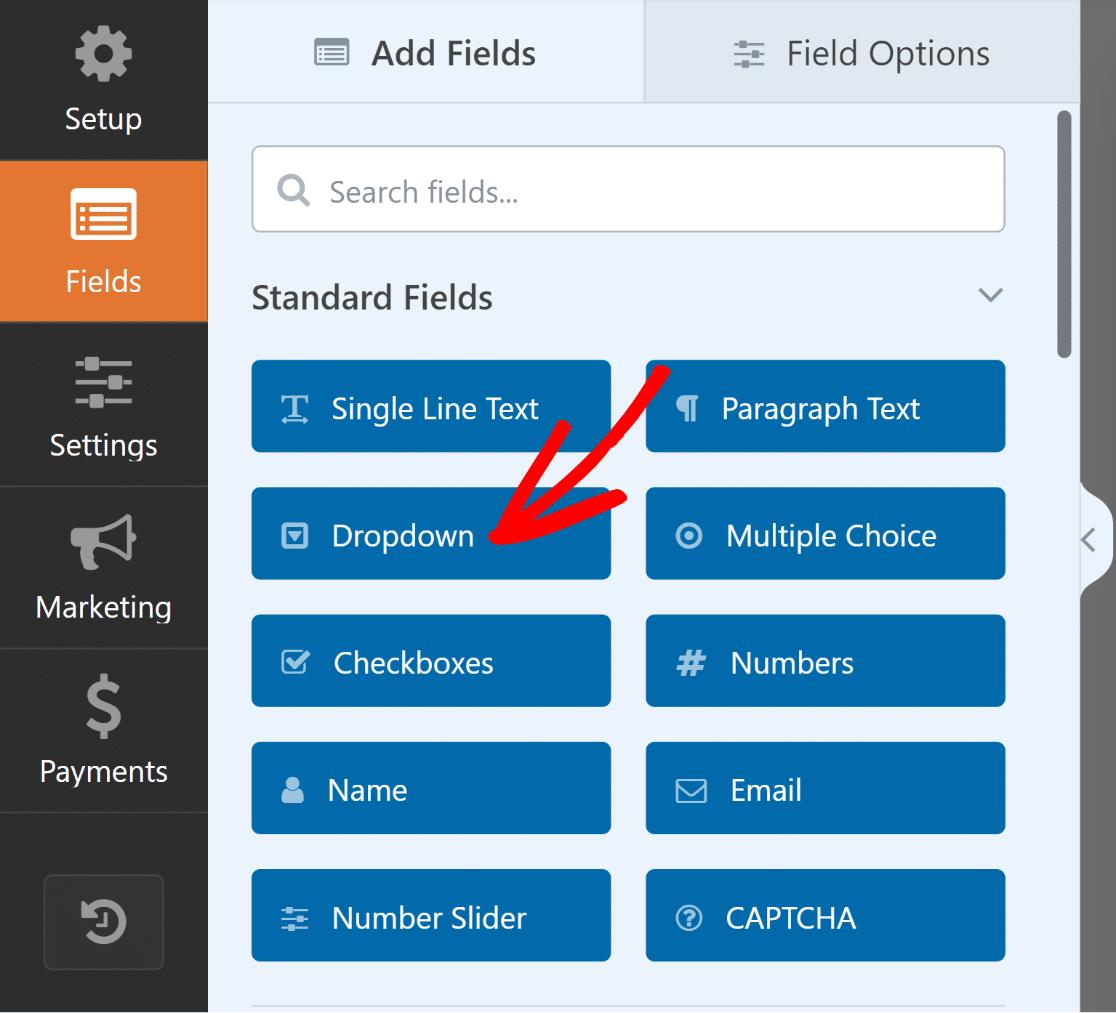
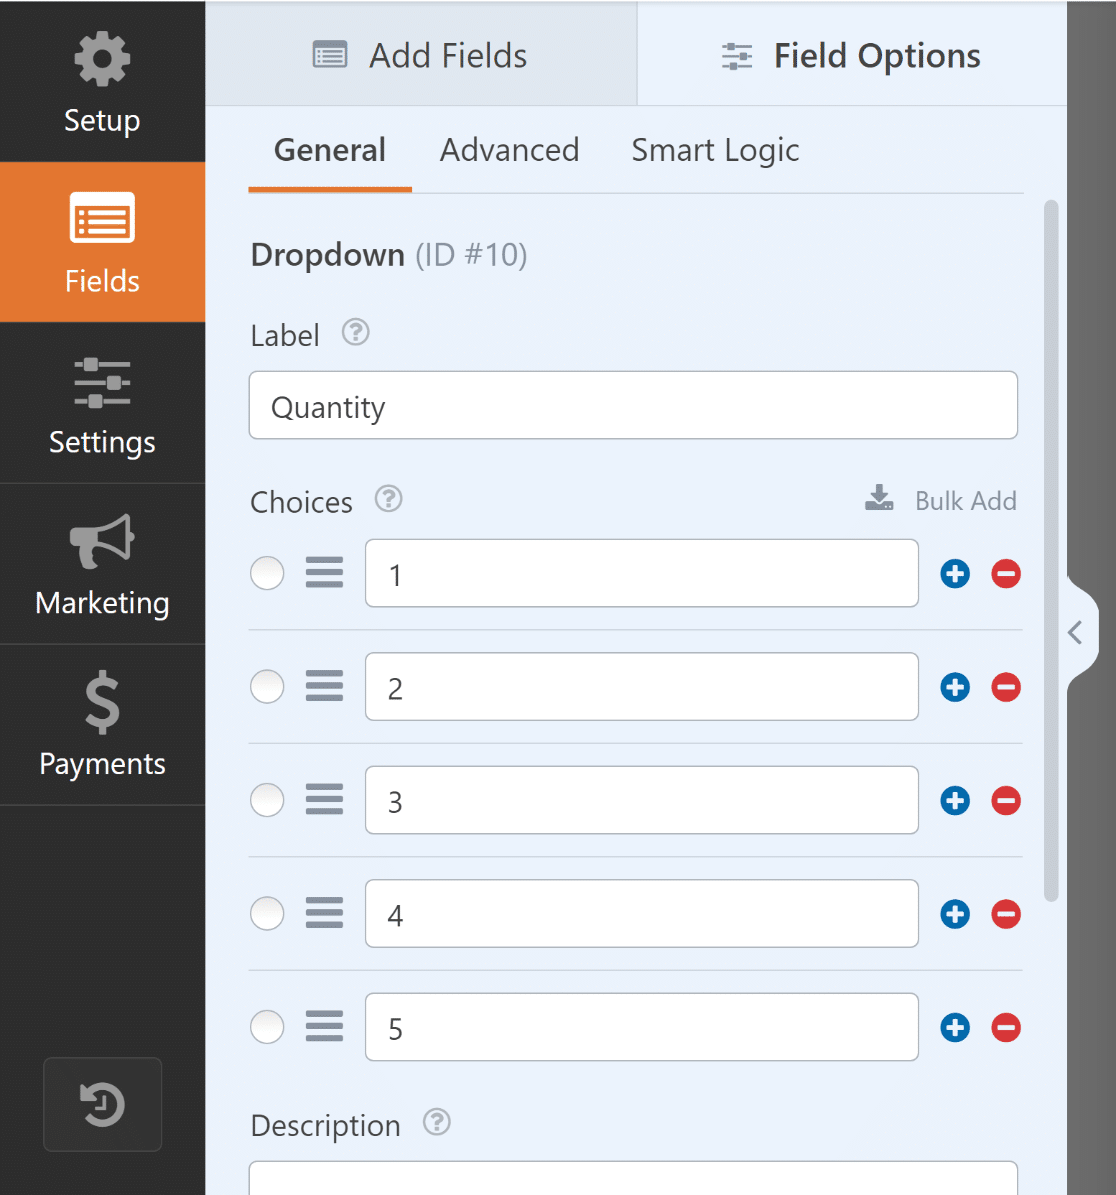
Want to let people choose how many products they want? Add a quantity field to your form. Just move a Dropdown field to the form area on the right.
Next, go to the Field Options for this Dropdown field. Change its name to “Quantity” and put in the numbers people can choose from.
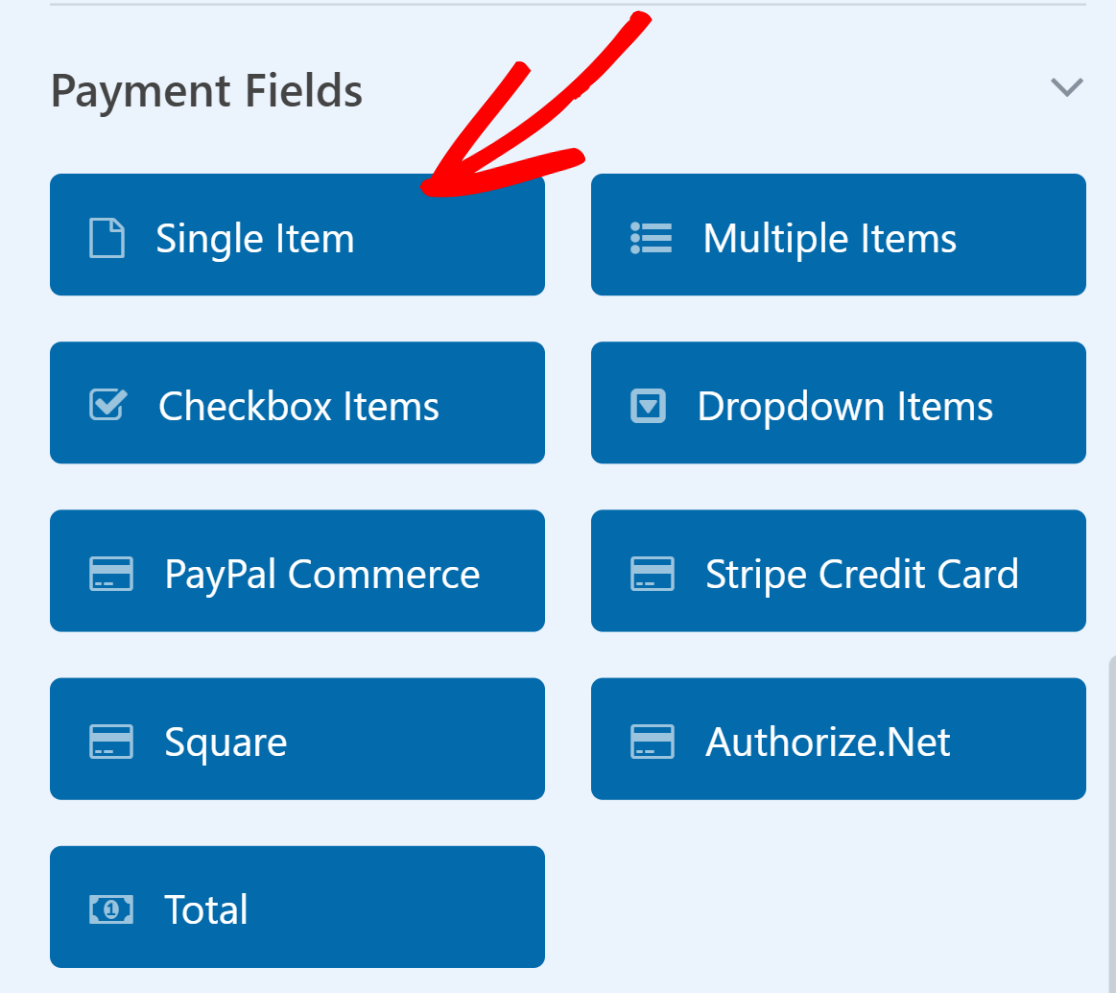
Now, add a Single Item field to your form. You can do this by dragging and dropping it on the preview or simply clicking on it.
Change the Label of this Single Item field to something like “Total Price.” Then, go to the Advanced tab and turn on Enable Calculation.
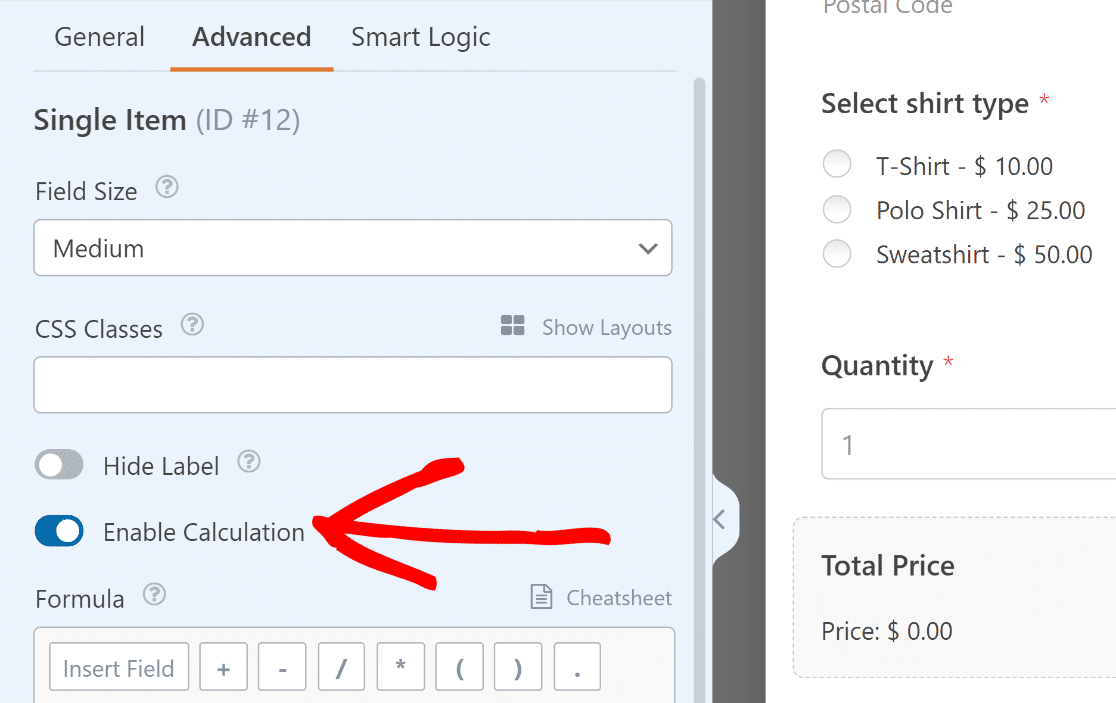
In the Formula box, connect the Multiple Items field to the quantity Dropdown field. You can do this with a simple multiplication formula.
$FX_amount * $FX
Here, $FX is the value of the field with ID #X, and $FX_amount is the price value of the payment field with ID #X.
Open the Multiple Items field and note down its Field ID. You’ll find this in Field Options under the General tab.
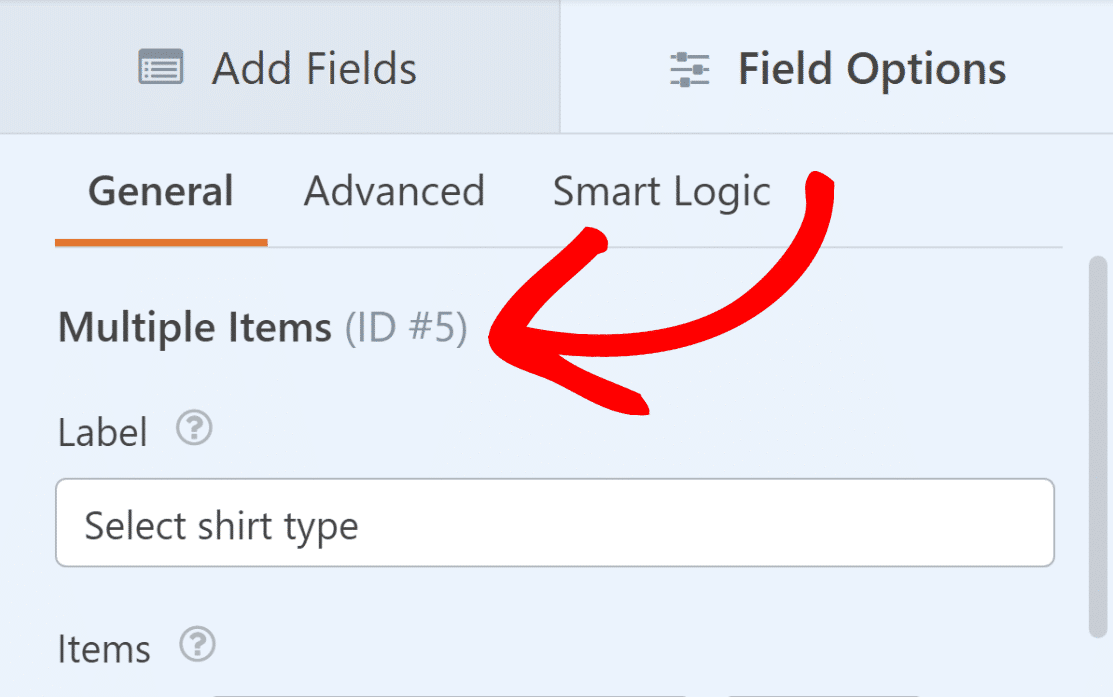
Do the same for the Dropdown field named “Quantity.” This is important for the next step, as that’s where we create the formula.
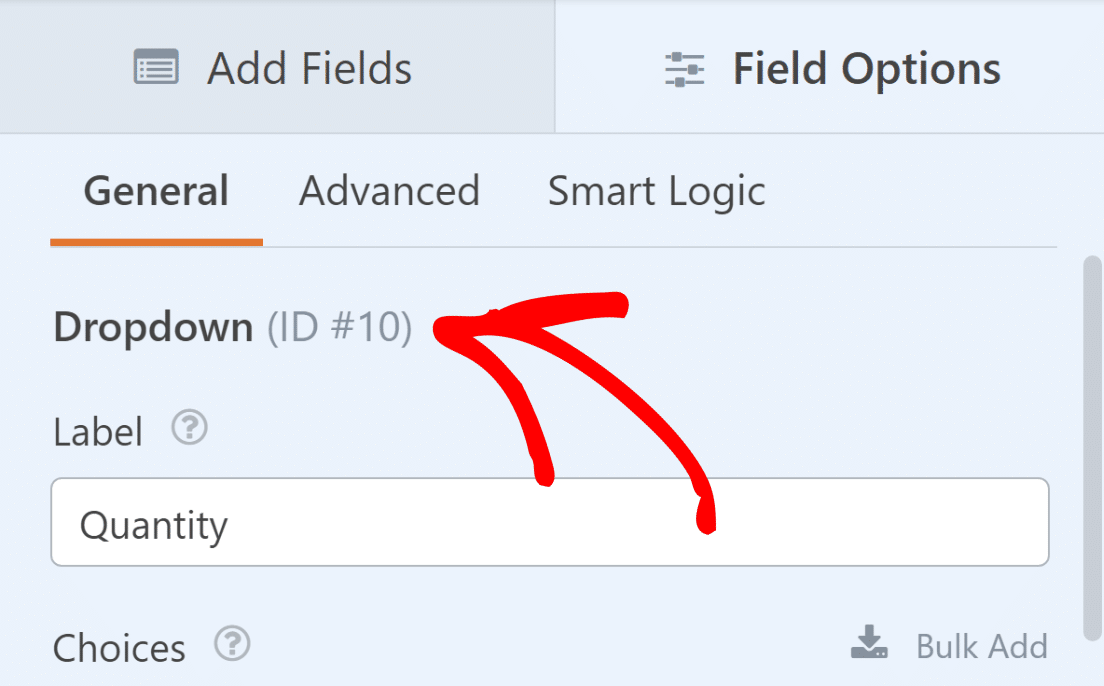
Now, all you have to do is put these IDs into the (product price times quantity) formula. So, $FX_amount * $FX will become $F5_amount * $F10.
Type the formula $F5_amount * $F10 into the Formula box of the Single Item “Total Price” field. Then, click on Validate Formula to make sure it is correct.
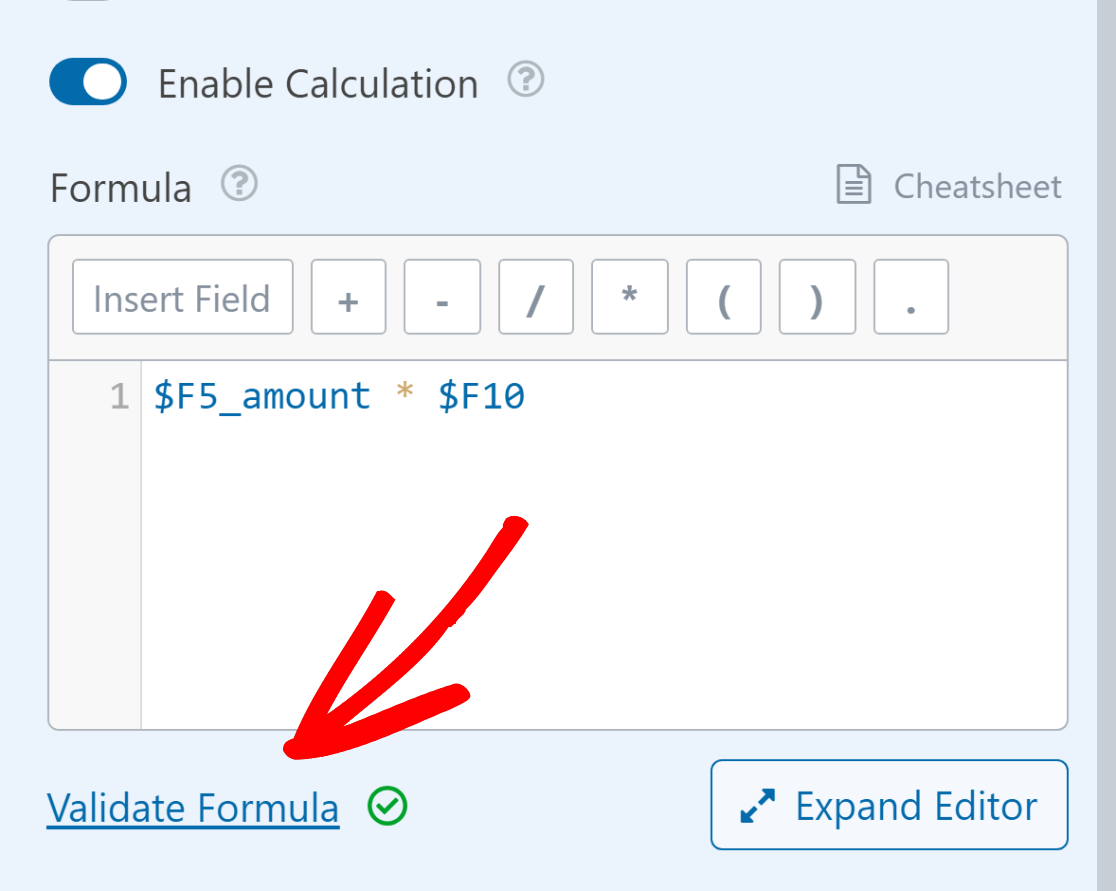
Now, when someone picks a product and its quantity, the total price will be automatically calculated, thanks to the custom formula you added!
Inserting a Sales Tax Deduction
Take a look at our Sales Tax Calculator Form Template if you’d like the sales tax for your state or nation to be automatically calculated on your order forms.
When you want to figure out taxes, you usually multiply the subtotal (price of the item times the number of items) by the tax rate.
As you learned in the last step, the formula for our use case (price of the item times the number of items) is:
$F5_amount * $F10
Let’s assume the sales tax amount is computed as 10% of the subtotal. The standard tax calculation formula is as follows:
0.10 * ($F5_amount * $F10)
The grand total, which incorporates the tax, is determined by adding the subtotal and the tax. The following will represent the equation:
($F5_amount * $F10) + (0.10 * ($F5_amount * $F10))
This can be added anywhere you want to show the final amount. We’ll use the Single Item field that we’ve named “Total Price + Tax.”
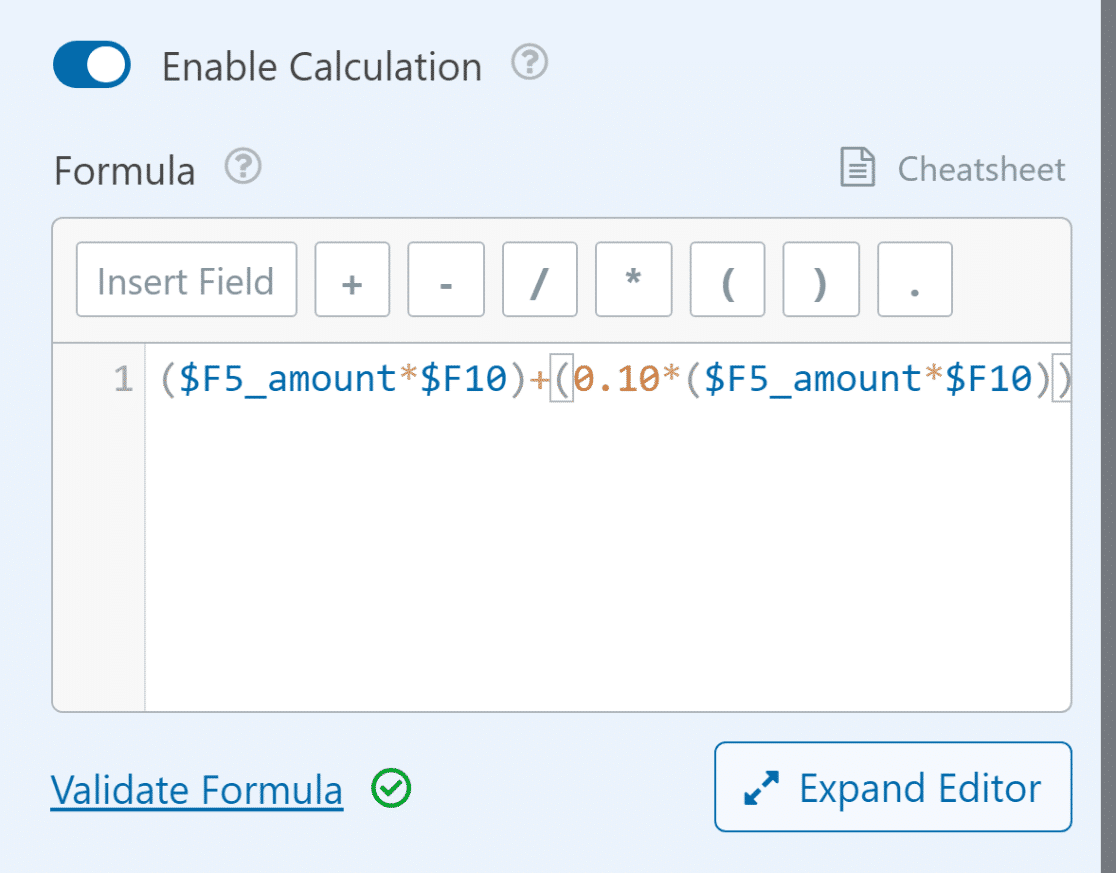
Remember, when you create a formula, you need to use the right Field ID so the math works out right. For additional information and help creating formulas, check out this Calculations Cheatsheet
Great job! You’ve successfully created a price calculator for WordPress with WPForms, but the benefits don’t just end there.
With the Stripe webhook integration, you can also view your Stripe refund status, subscription data, or transaction history directly from your WordPress dashboard.
5. Publish Your Billing / Order Form
WPForms makes it easy to publish your form and take it live on your website. After you finish making your form, click on the Save button.
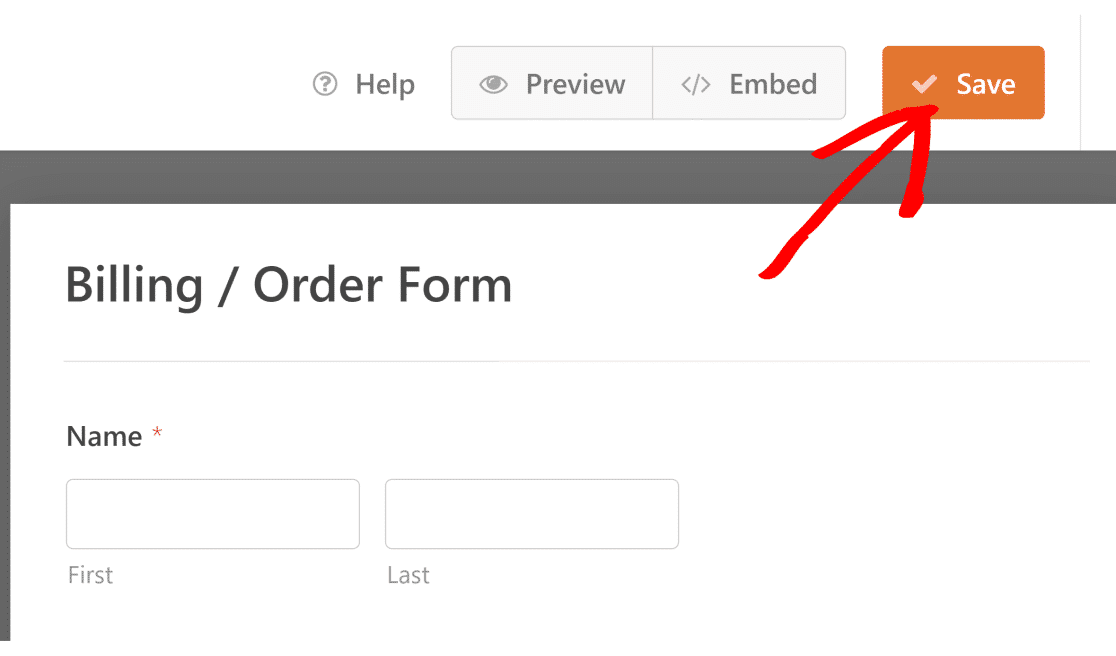
Then, click on Embed next to the Save button. You can choose to publish your form on a new page or an existing one.

WPForms will take you to the WordPress editor without you having to do anything. Your form will already be there on the new page.
To activate your order form and online calculator with WPForms calculations, all you need to do is click on the Publish button.
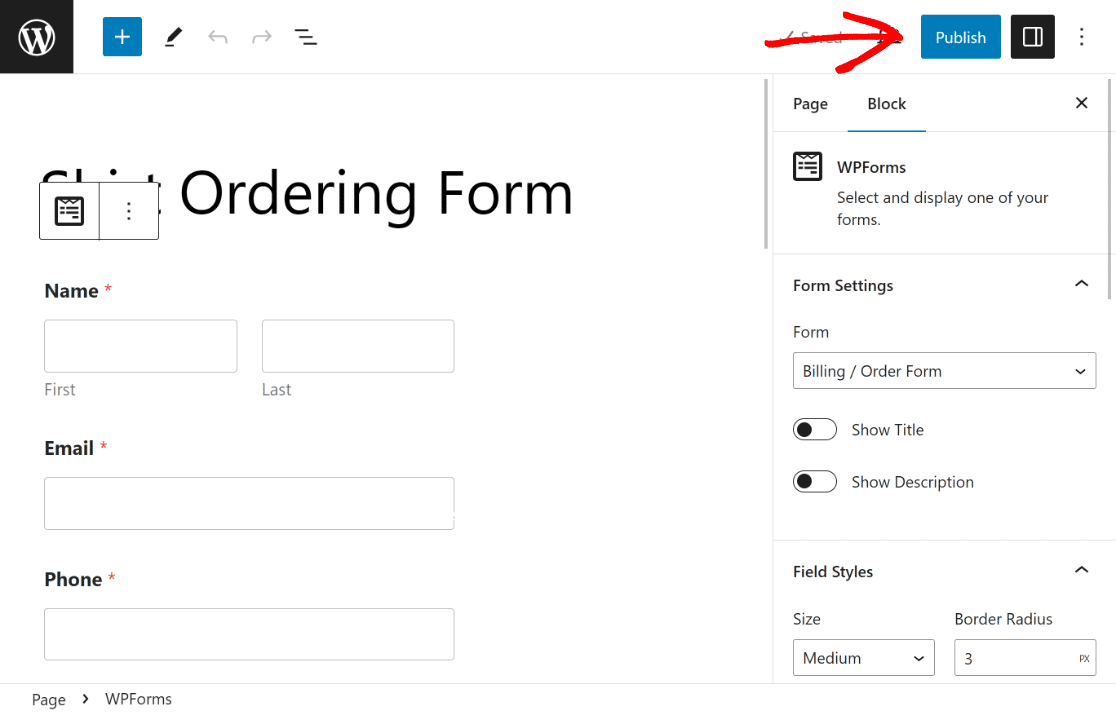
After publishing, as a precautionary measure, test the embedded form to ensure it works as expected and rule out any concerns.

FAQs about Creating a Price Calculator for Your Website
Calculations are a popular topic among our readers. Here are answers to several frequently asked questions about it.
How do I create a custom calculator for my website?
To create a custom calculator for your website, you can use WPForms Pro with the Calculations Addon. First, install WPForms Pro on your WordPress site.
Then, use the drag-and-drop builder to add fields for inputs like quantities and product selections to complete your order form.
Once done, enable the Calculations Addon to create custom calculators, such as a Macronutrients Calculator for a health & fitness website,
How do you add calculations to a website?
To add calculations to a website, consider using a form builder like WPForms Pro, which offers a Calculations Addon.
After installing WPForms, create a new form and use the Calculations feature to add mathematical operations to your fields.
You can create various formulas using basic arithmetic or complex expressions to calculate values dynamically based on user input, which is ideal for order forms, booking forms, and more.
How do you create a price formula?
To create a price formula on your website, you can utilize WPForms Pro along with the Calculations Addon.
Start by setting up a form with fields for the items or services you’re offering. Assign prices to these items.
Then, use the Calculations Addon to create a formula that multiplies the item prices by quantities and adds any additional fees or discounts.
Next, Learn How to Create a Custom Mortgage Calculator
Want to create a custom mortgage calculator for your website? By using an online mortgage calculator, loan officers can pre-screen applicants faster and reduce messy paperwork. Check out this guide on how to make a custom mortgage calculator using a WordPress template.
Create Your Price Calculator Now
Ready to build your form? Get started today with the easiest WordPress form builder plugin. WPForms Pro includes lots of free templates and offers a 14-day money-back guarantee.
If this article helped you out, please follow us on Facebook and Twitter for more free WordPress tutorials and guides.


