Do you want to create a WordPress form with a date picker?
It’s super simple to add a WordPress date range picker that visitors can use to select date and time on a form.
So in this article, we’ll show you how to easily add a Date/Time Picker form field in WordPress, plus a few tips if you’d like to customize it.
Create Your WordPress Form Now
In This Article
- Step 1: Create A WordPress Form
- Step 2: Add the Date Picker to Your WordPress Form
- Step 3: Advanced WPForms Date Picker Customizations
- Step 4: Advanced WPForms Time Field Customizations
- Step 5: Configure Your Date Picker Form Settings
- Step 6: Configure Your Form Notifications
- Step 7: Add WordPress Date Picker Form to Your Site
How to Create a WordPress Form With a Date Picker
Using WPForms, it’s super simple to add a field that lets people select a specific date, time, or both.
Here’s a step-by-step tutorial on making a WordPress form with a Date/Time Picker:
If you’d prefer written instructions for adding a WordPress date picker to your forms, see the steps below:
Step 1: Create A WordPress Form
The first thing you’ll need to do is install and activate the WPForms plugin. You’ll need a paid version of the plugin as the Date/Time Picker field isn’t available in the free version. For more details, see this step-by-step guide on how to install a plugin in WordPress.
Once you’ve purchased and installed the WPForms plugin, go to WPForms » Add New to create a new form.

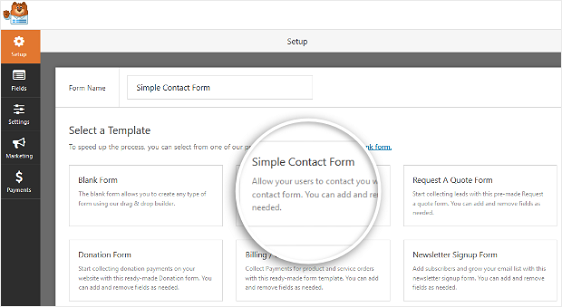
On the setup screen, name your form and select the form template you want to use. The great thing is that WPForms comes with 2,000+ WordPress form templates.
In our example, we’ll use the Simple Contact Form template.
Now let’s customize this form and add the date picker field to it.
Step 2: Add the Date Picker to Your WordPress Form
You can add additional fields to your selected form template by using WPForms’ simple drag-and-drop editor.
So let’s go ahead and drag the Date/Time field onto your form, wherever you’d like it.
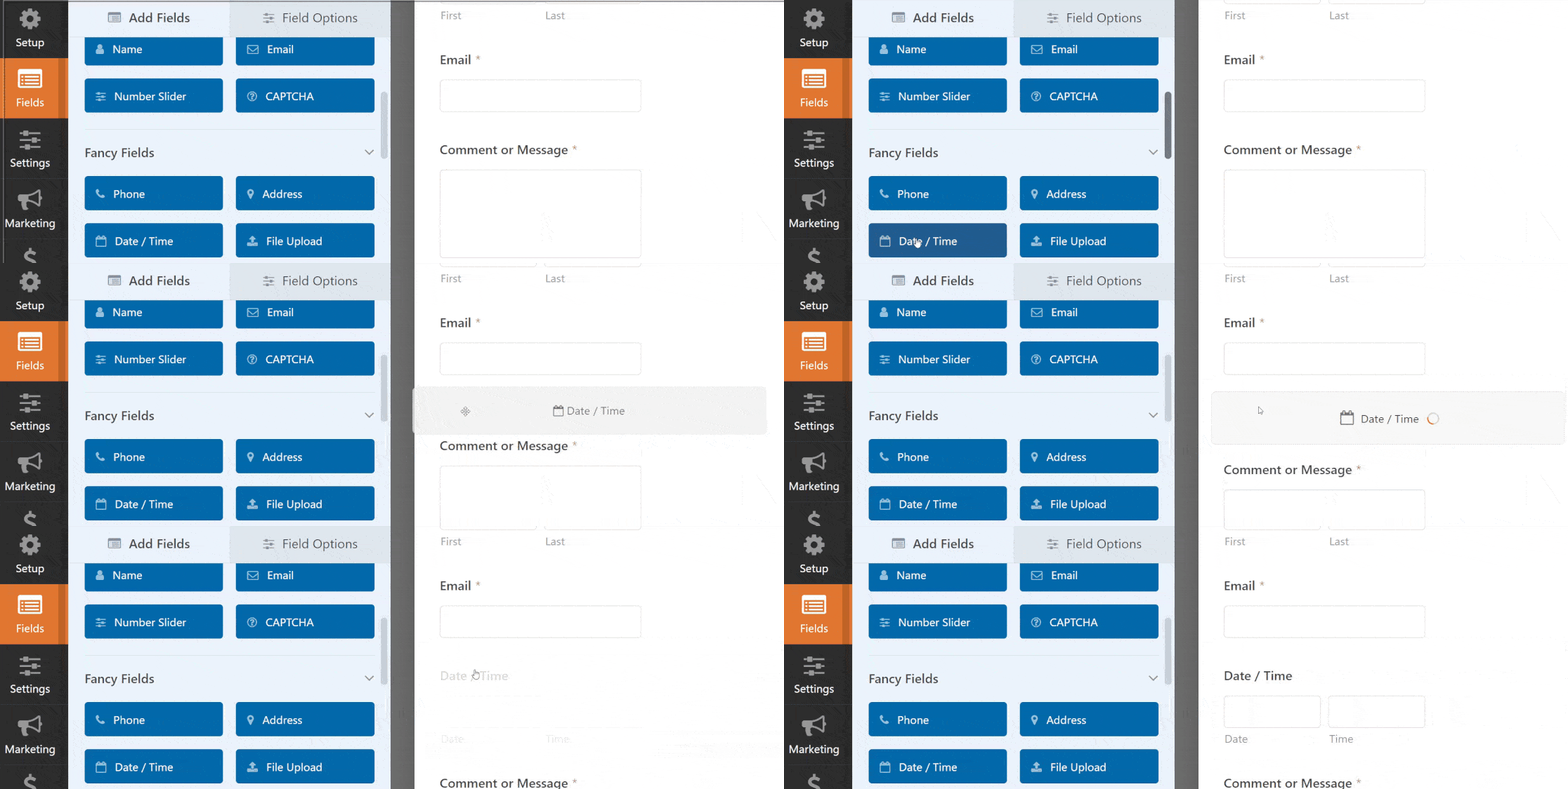
Once it’s on your form, you can drag it up and down to place it somewhere else and click the field again to open its settings and customize it.
When you click on the Date / Time form field, you’ll see the following options:
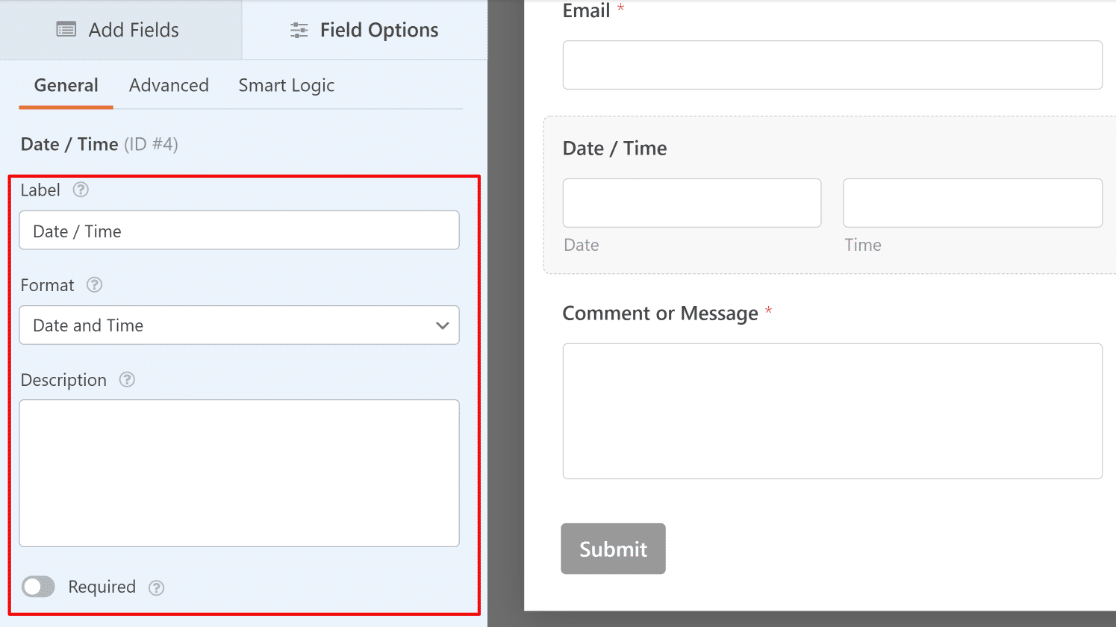
- Label: This is the title of the field that site visitors will see on your form.
- Format: Choose whether you’d like this field to include both date and time, date only, or time only.
- Description: Add a description for the field. This is a good spot for adding instructions or details for your users.
- Required: Enable this toggle button to prevent users from submitting the form until this field is filled.
If you scroll down and click on Advanced Options, you can customize the Date/Time Picker field even more as we’ll show below.
Step 3: Advanced WPForms Date Picker Customizations
By default, the date picker field in WPForms is set to the calendar view format.
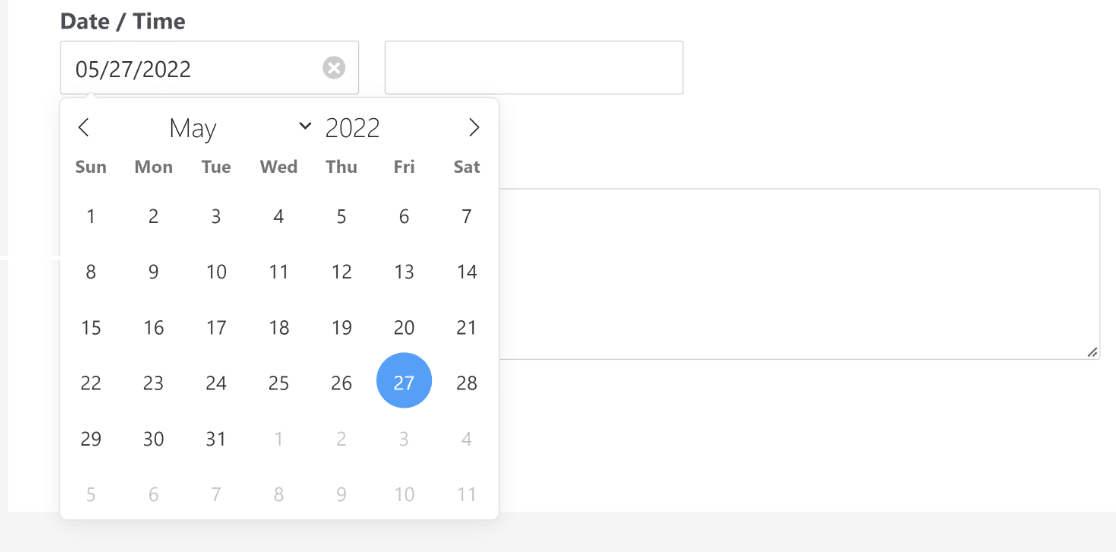
The formats for the Date/Time field are easy to change in WPForms. To do so, first click on the Advanced tab under Field Options. Then, you can customize the following options:
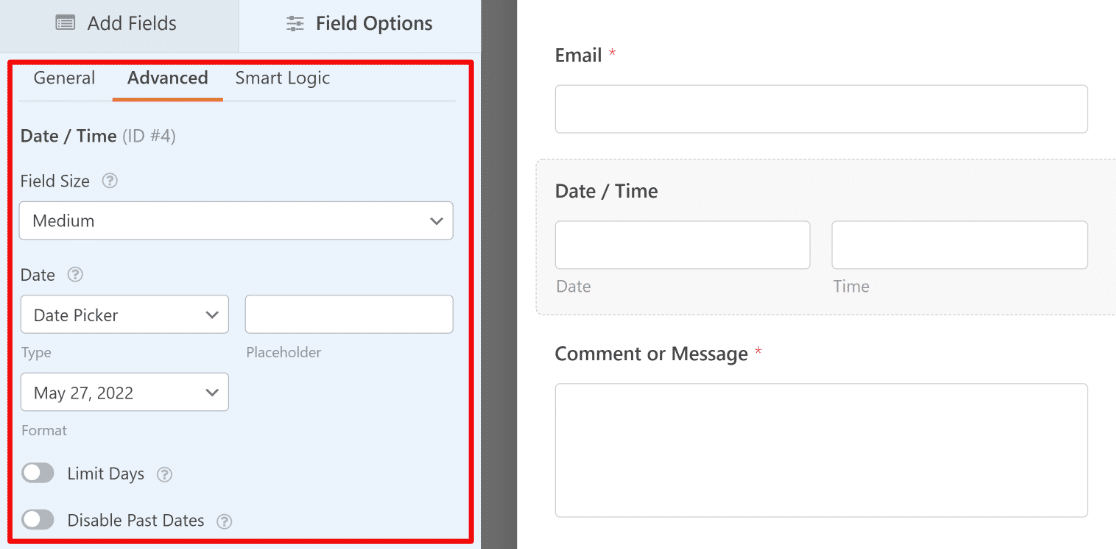
- Type: You can choose between Date Picker (the default calendar view) or Date Dropdown (adds separate dropdown fields for the month, date, and year).
- Format: Here, you can select different date formats (m/d/y or d/m/y).
- Limit Days: Toggle this option in to select which days of the week users are allowed to pick.
- Disable Past Dates: With this option, you can prevent users from selecting any past dates.
Next, we’re going to look at the customization options for the Time section of the Date/Time field in WPForms.
Step 4: Advanced WPForms Time Field Customizations
Similar to the date picker settings, you can customize options for the Time section of the Date/Time field.
By default, the time format is set to a 12-hour clock with 30-minute intervals:
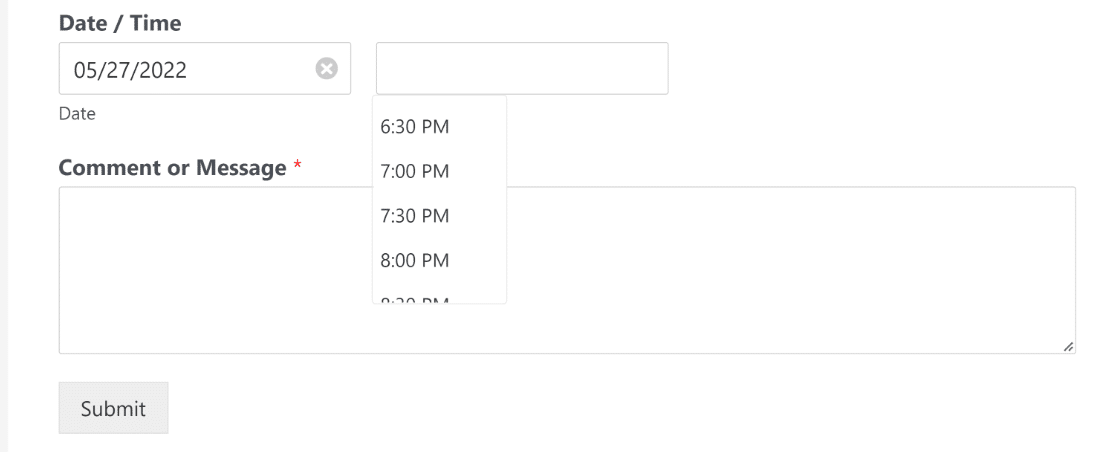
As before, you can change settings for the Time field by going to the Advanced tab under Field Options. Here’s what these settings look like:
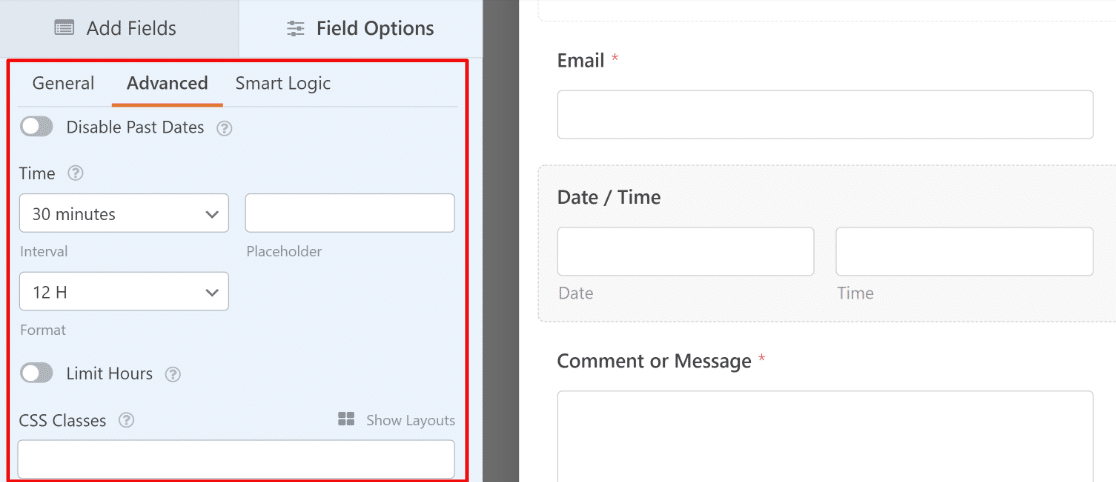
- Interval: WPForms lets you choose between 15-minute, 30-minute, and 1-hour intervals for the Time field.
- Format: Lets you pick between a 12-hour clock or 24-hour clock.
- Limit Hours: Define the range of time that users can select.
Whichever format you pick, know that the Date/Time Picker field is a great way to get accurate data on your forms. The date will always be validated and in the correct format within the Date/Time Picker field.
Only want someone to fill out your Date/Time Picker form once? If you’d like to see how to limit entries for users, check out this tutorial on how to limit the number of WordPress form entries.
Once you’re done customizing your settings, go ahead and click Save.
Step 5: Configure Your Date Picker Form Settings
Form confirmations are messages displayed to people once they complete your form. Confirmations let them know that their form has been processed and offers you the chance to tell them what steps they need to take next.
WPForms has 3 confirmation types to choose from:
- Message: This is the default confirmation type in WPForms. When a site visitor submits your form, a simple message will appear, letting them know their form is being processed.
- Show Page: This confirmation type will take your people to a specific web page on your website thanking them for filling out the Date/Time Picker form and let you tell them what they need to do next. For help doing this, check out our tutorial on redirecting customers to a thank you page.
- Go to URL (Redirect): This option is for when you want to send people to a specific page containing related information that’s found on a different website.
So let’s see how to set up a simple form confirmation in WPForms so you can customize the message people will see when they submit their Date/Time Picker form.
To start, click on the Confirmation tab in the Form Editor under Settings.
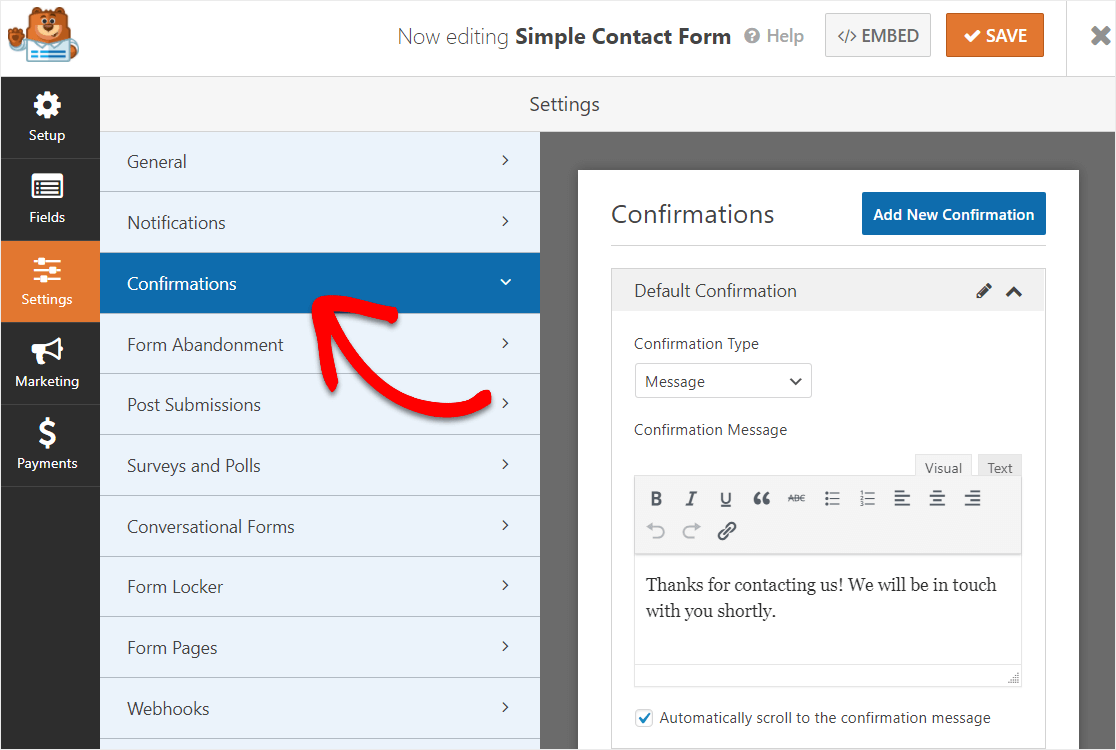
Then, customize the confirmation message to your liking and click Save.
For help with other confirmation types, see our documentation on setting up form confirmations.
Now, let’s set up your form notifications.
Step 6: Configure Your Form Notifications
Want the date and time that someone fills out your forms sent to you right away in an email? Let’s set up your form notifications to do just that.
Notifications are a great way to automatically email yourself, your employees, and the person who filled out your form.
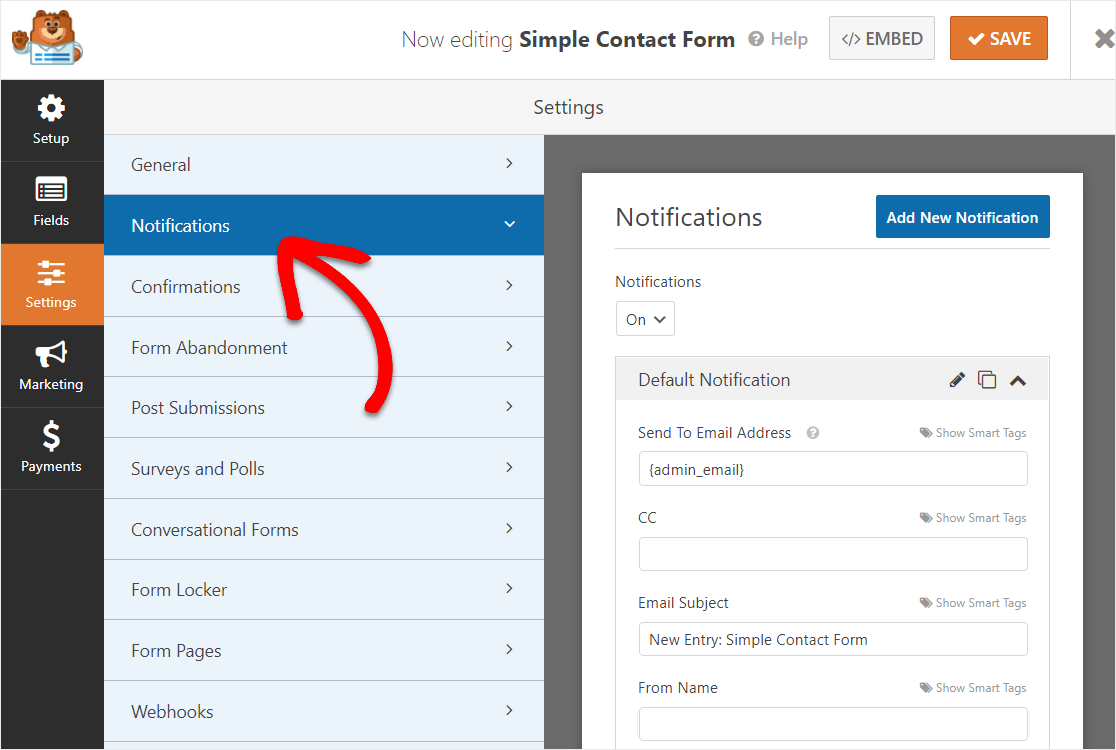
Unless you disable this feature, whenever someone submits a form on your site, you’ll get a notification about it.
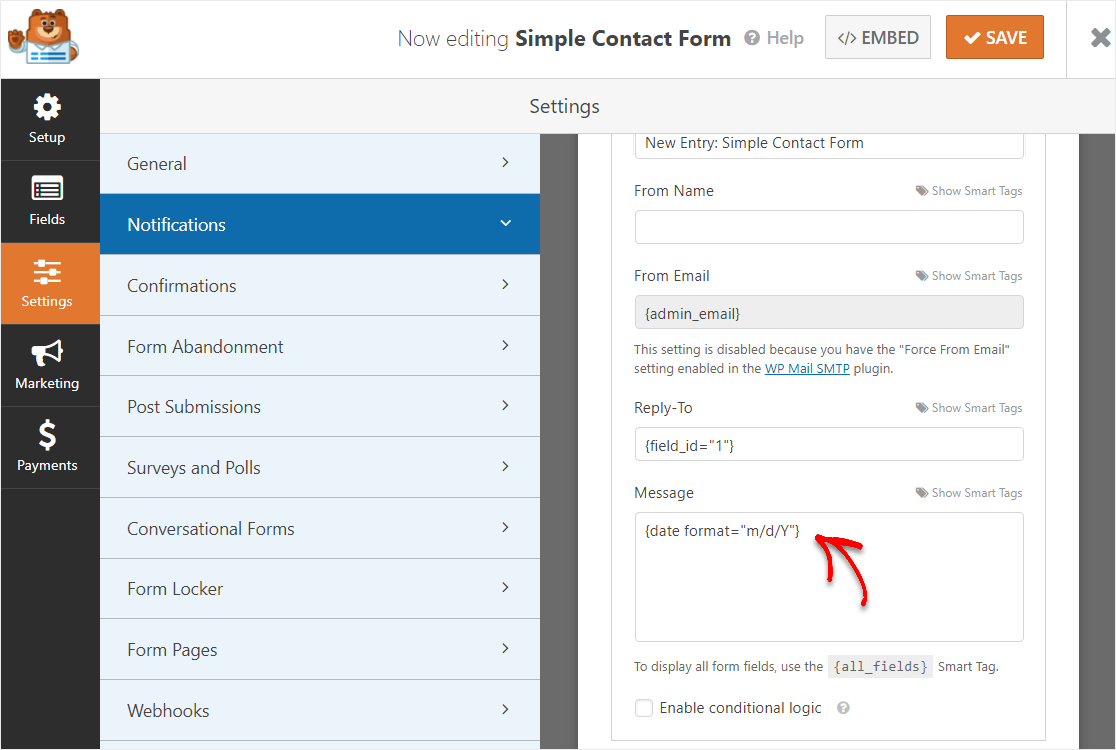
If you use Smart Tags, you can also get just the date and time sent to you in your form notifications.
To do this, simply add a timestamp into your notification email by using this smart tag – {date format=”m/d/Y”}
Great job! You’re now ready to add your Date/Time Picker form to your website.
Step 7: Add WordPress Date Picker Form to Your Site
WPForms allows you to add your forms in various locations from your blog posts, pages, footer, and your sidebar.
Let’s take a look at the most common option: embedding your form in a post or page.
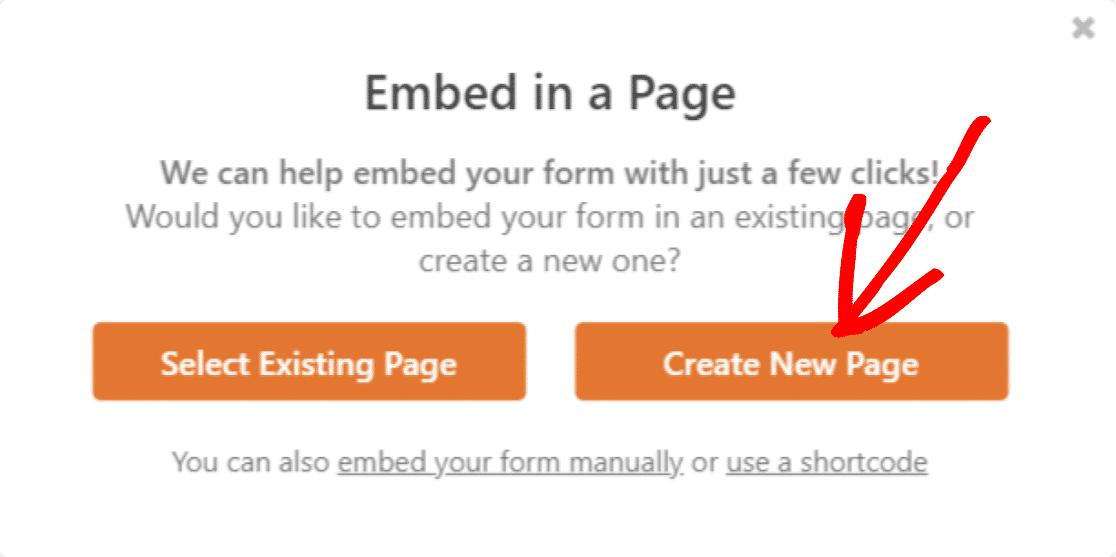
Click on the Embed button on the top-right of the form builder.

Then, click on Create New Page.
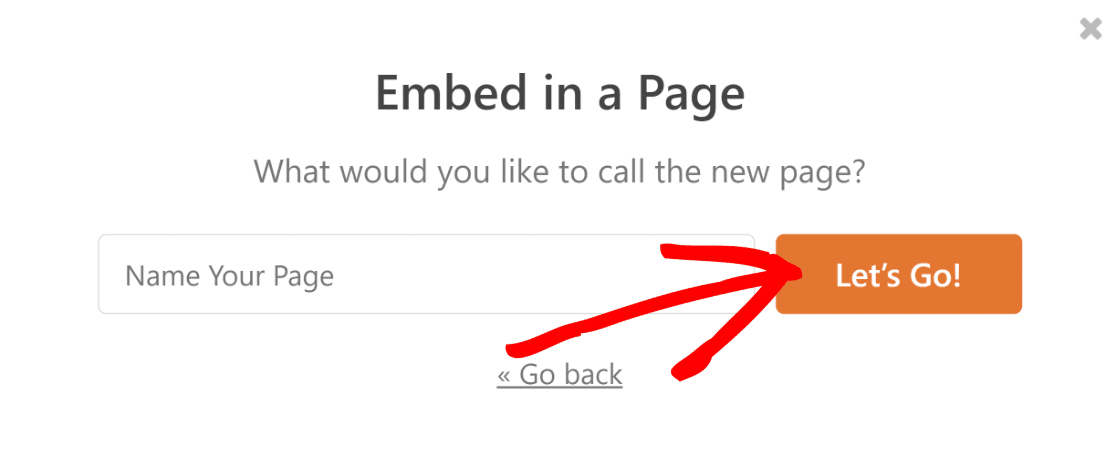
Give your page a name and then select Let’s Go.
This will take you to your WordPress block editor for a new page with your form already embedded in it. Press Publish to go live with your new WordPress date picker form.
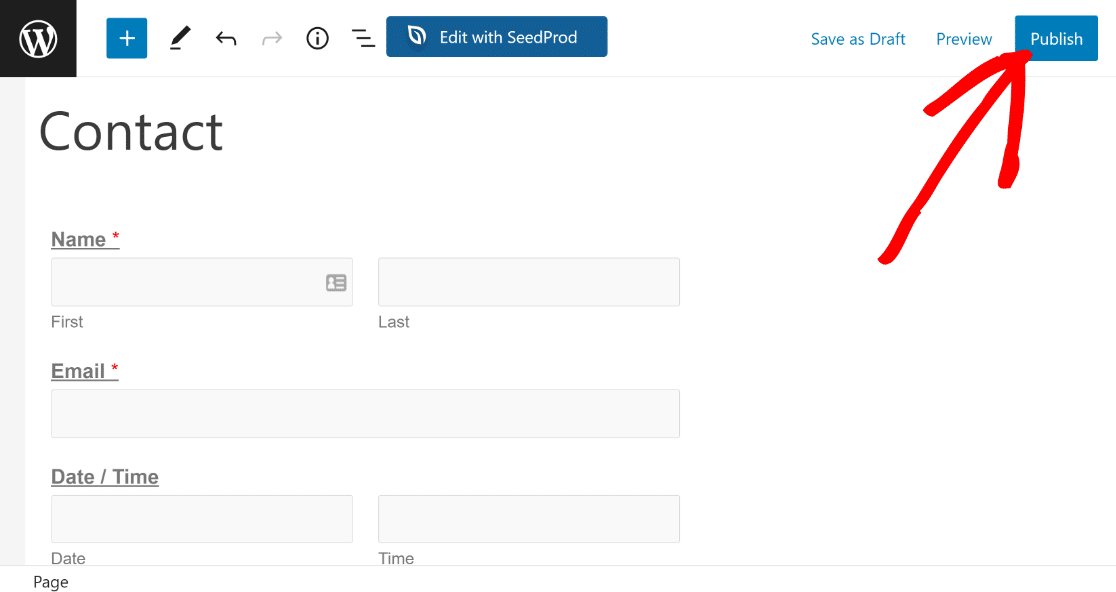
Congratulations! Your form with a date picker is now published.
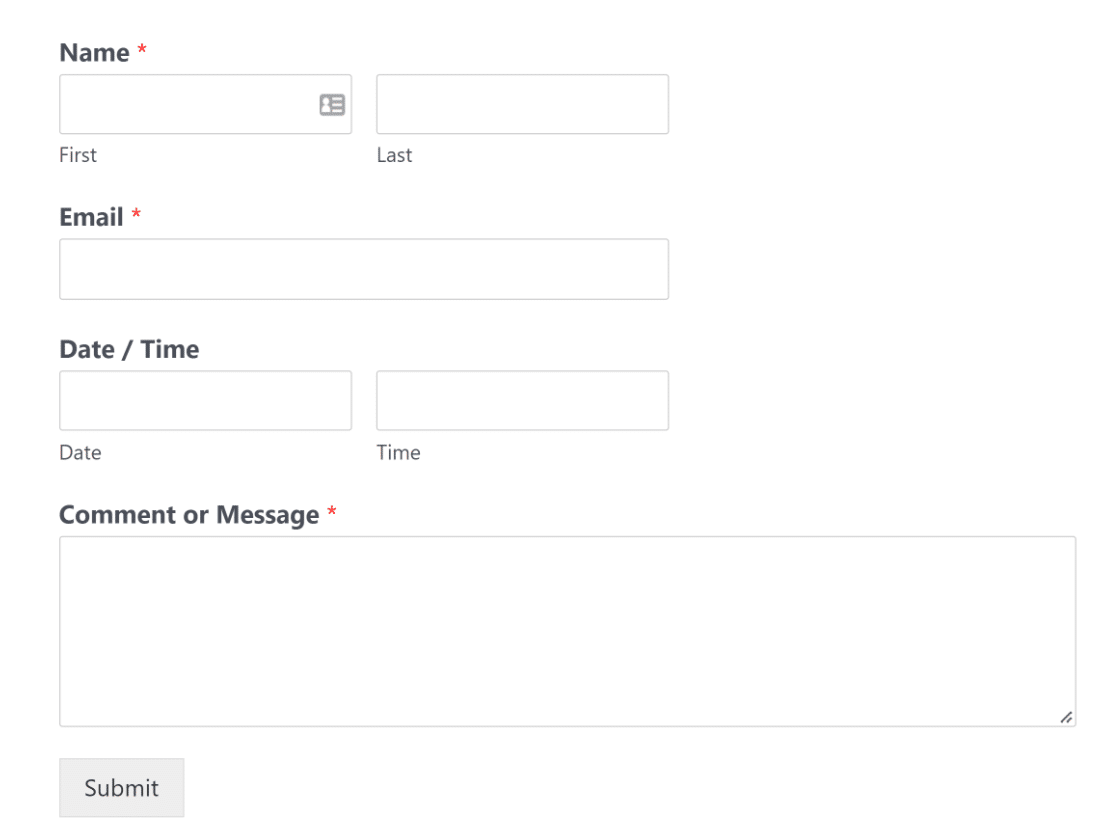
And there you have it! You now know how to add a WordPress form with a date picker to your website.
Next, Try Business Form Templates
If you’re looking to speed up your form-building process, here are a few business form templates that can help.
You may also want to check out our guide on customizing the WordPress password reset form.
Create Your WordPress Form Now
So, what are you waiting for? Get started with the most powerful WordPress forms plugin today.
And don’t forget, if you like this article, then please follow us on Facebook and Twitter.




But how do you make a time no longer available once it’s been chosen? I created a form date picker, and multiple people can choose the same date and time.
Hi Sabrina,
We do not have a date inventory feature that keeps a track of already chosen dates and display the not chosen dates. I have gone ahead and added your vote to consider this feature request for future enhancements.
Thanks for the suggestion though! 🙂
I need this option!
At no point do you mention that we have to $49 to use any kind of date option at all. Thanks for wasting everyone’s time
Hey Derek – Apologize for any confusion, but it’s clearly mentioned in the first step. Here is a screenshot for your reference.
If you have any other questions please feel free to let us know. Thanks 🙂
Is it possible to restrict future dates from being selected?
eg 1. Dontallow dates on Christmas Day “5th Dec
eg 2 Date picked must be a minimum of 2 days ahead of today’s date?
Thanks
Hey Mark – Sure, for the first one, you can use this code snippets and customize as per your need.
For the sedond one, you can use this code snippets. Simply change the +1), to be however many days (in your case, you can use +2) out you wish to restrict the picker.
I hope this helps. Thanks 🙂
I added an arrival date and a departure date field. The issue is that a user can choose an arrival date in the future, but a departure date before the arrival date. Is there any conditional logic I can use to limit the departure date to any date AFTER the arrival date?
Thank you,
Tony
Hey Tony- it is possible to achieve this with WPForms. You can use a PHP snippet to compare two dates inside the same form to ensure that the departure date is equal to or greater than the arrival date. The snippet would check if the second date is less than or equal to the first date, and if so, it would display an error message. This functionality can be implemented with any WPForms license
Kindly check this tutorial with details and the custom PHP code that you need to enter into your site.
In case it helps, here’s our tutorial with the most common ways to add custom code like this.
Hope this helps. Thanks 🙂