
AI Summary
Do you want your WordPress forms to send subscriber data straight to Brevo automatically?
Brevo (formerly Sendinblue) is a popular email marketing platform with solid automation features and a generous free tier. But connecting it to your WordPress forms isn’t always straightforward if you’re starting from scratch.
In this guide, I’ll walk you through the steps of creating a Brevo WordPress form using WPForms. By the end, you’ll have a working form that automatically adds subscribers to your Brevo contact lists whenever someone hits submit.
How to Create a Brevo Form in WordPress
I’ve broken this down into 6 clear steps. You’ll install WPForms, connect your Brevo account, build your form, and publish it on your site.
Step 1: Install the WPForms Plugin
WPForms is a drag-and-drop form builder that connects directly to Brevo through a built-in addon. It comes with 2,100+ form templates, including pre-built newsletter signup forms and lead capture forms that pair perfectly with email marketing platforms like Brevo.
You build your form, connect it to Brevo, set up conditional logic to control who gets subscribed, and embed the form on your site without ever leaving the WPForms interface.
The Brevo addon is available on the WPForms Pro. This will also get you access to all 10 email marketing integrations, including Mailchimp, Kit, Drip, and others.

To get started, buy the Plus license. Then, install WPForms on your website. If you need help, follow these instructions on how to add a plugin to WordPress.
Step 2: Connect Your Brevo Account to WPForms
With WPForms installed, you can now turn on the Brevo addon. This lets your forms send data to Brevo directly, adding subscribers to your contact lists whenever someone submits a form.
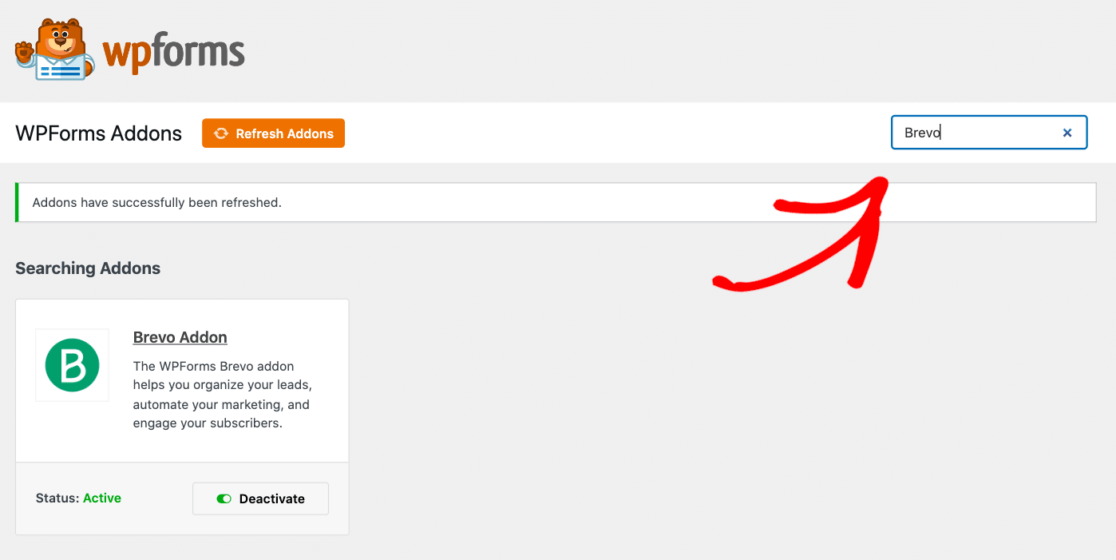
Head to your WordPress dashboard and go to WPForms » Addons. Search for “Brevo” and click Install Addon, then Activate. For more details on this step, check out the guide on how to install and activate WPForms addons.
Now that the addon is active, you need to link your Brevo account to WPForms using an API key. This is what authorizes WPForms to send subscriber data to your Brevo lists.
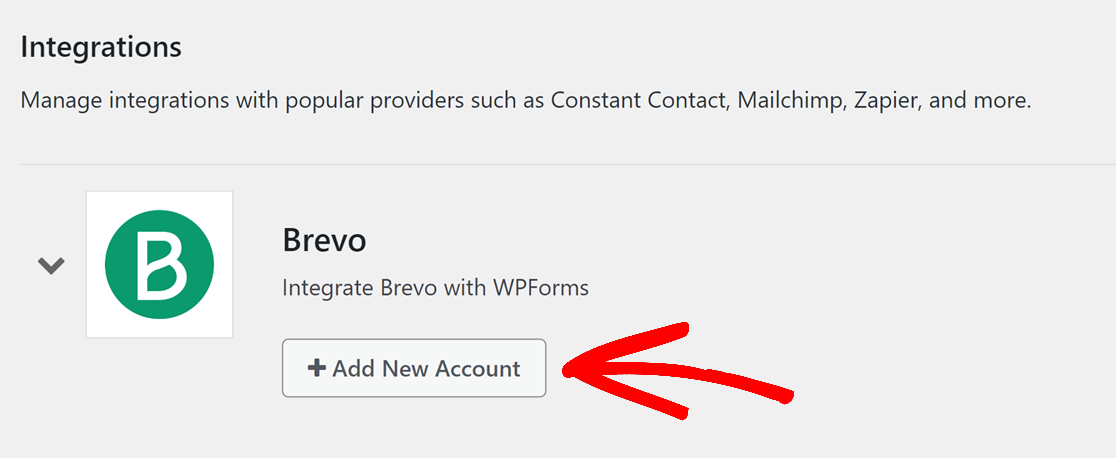
Go to WPForms » Settings and click on the Integrations tab. Click on the Brevo logo to expand its settings, then click the Add New Account button.
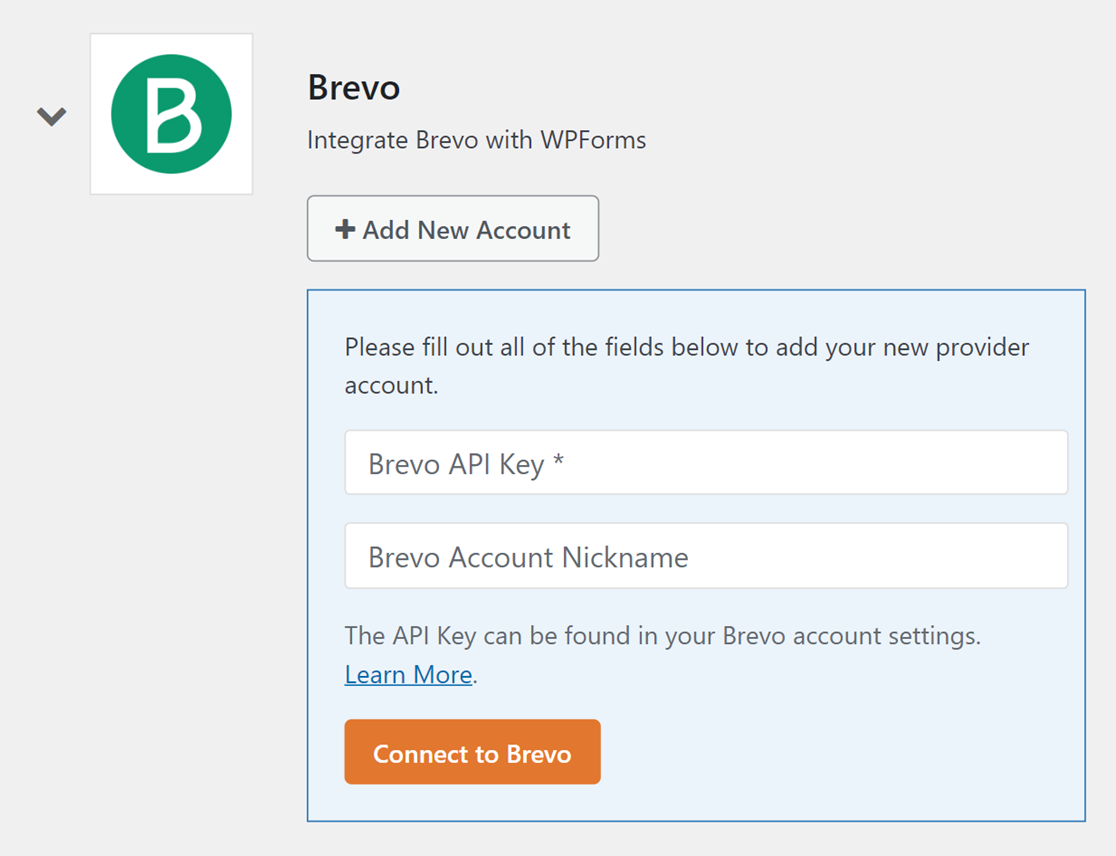
You’ll see two fields. One is for your Brevo API key, and the other is for an account nickname.
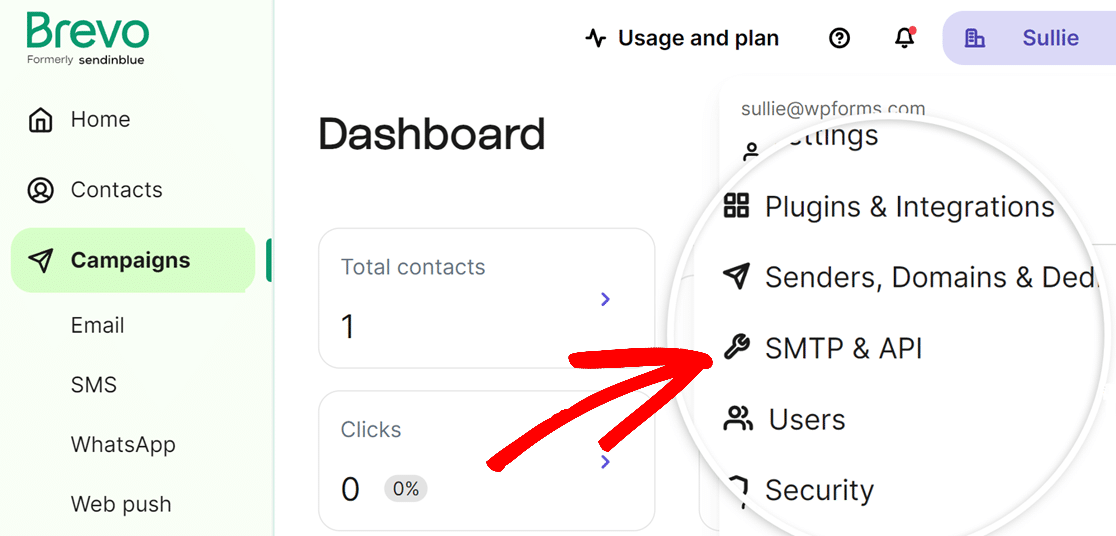
To get your API key, log into your Brevo account. Click on the main menu in the top right corner and select SMTP & API.
From there, generate and copy your API key.
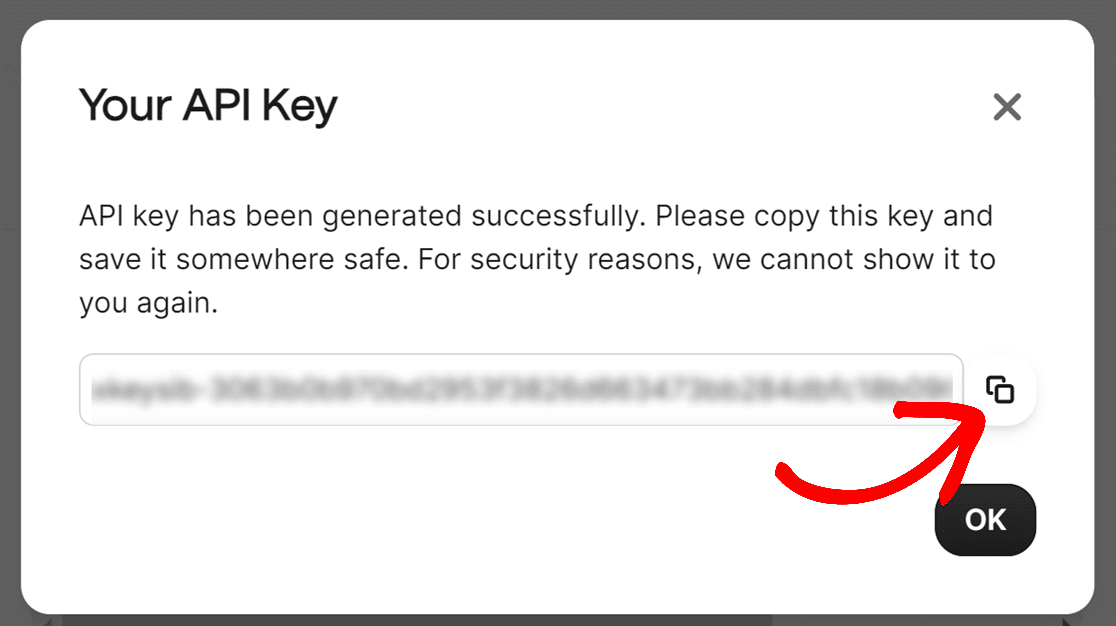
Go ahead and paste the API key into the Brevo API Key field back in WPForms.

Then add a nickname in the Brevo Account Nickname field. This is for your own reference, which is helpful if you plan to connect more than one Brevo account later.
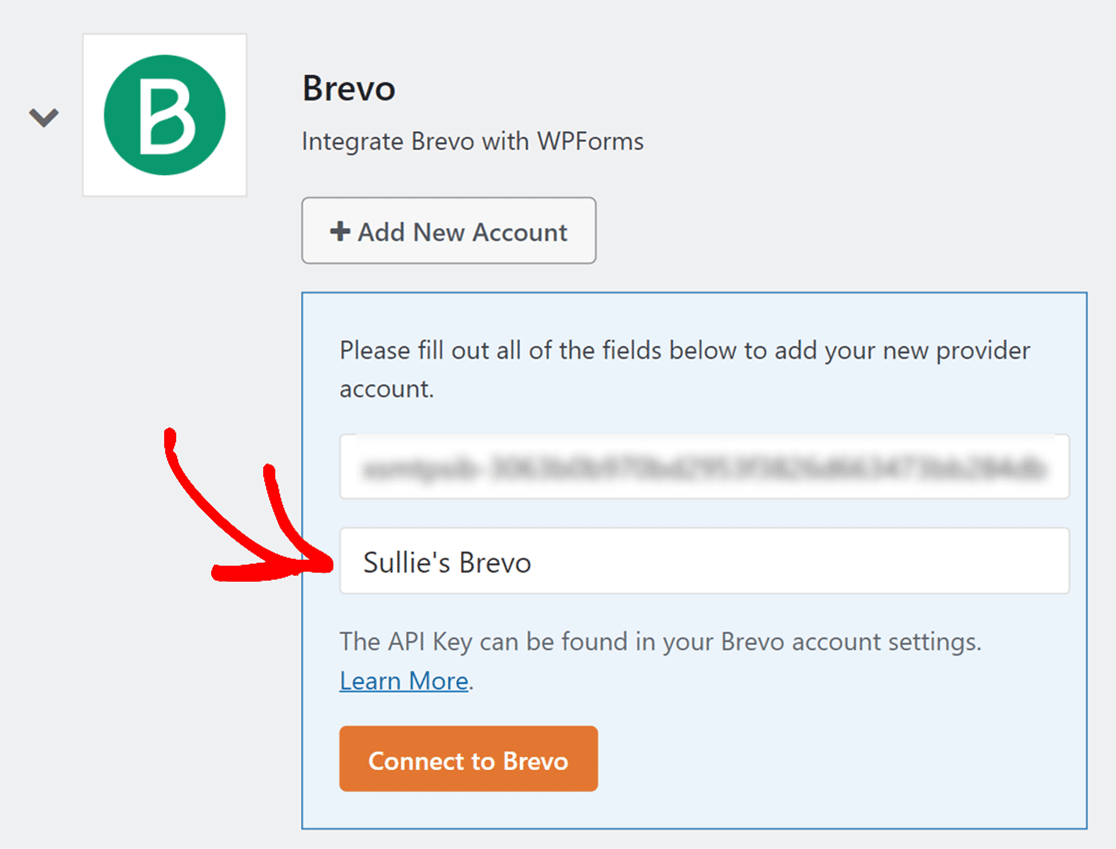
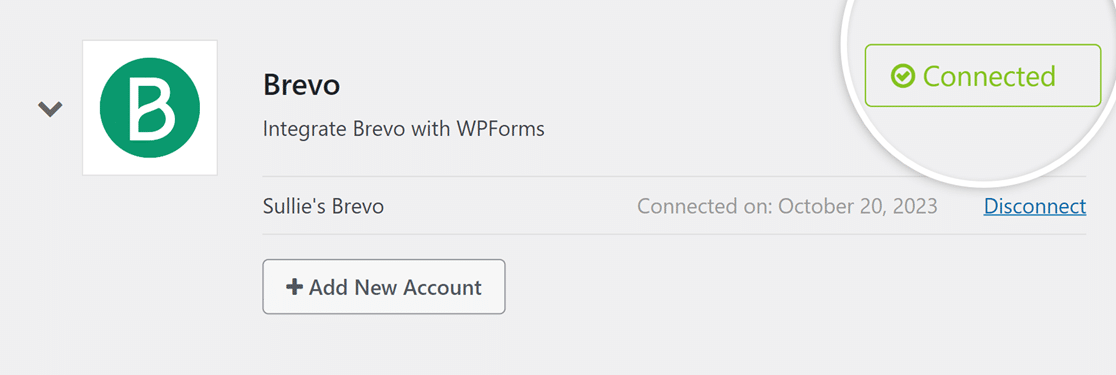
Click Connect to Brevo. When the connection goes through, you’ll see a green Connected status next to the Brevo integration.
That’s the account-level setup done. Now let’s build a form and connect it to Brevo.
Step 3: Create Your WordPress Form
Before you can connect Brevo, you need a form to connect it to. You can either create a simple contact form from scratch or start with one of the pre-built templates.
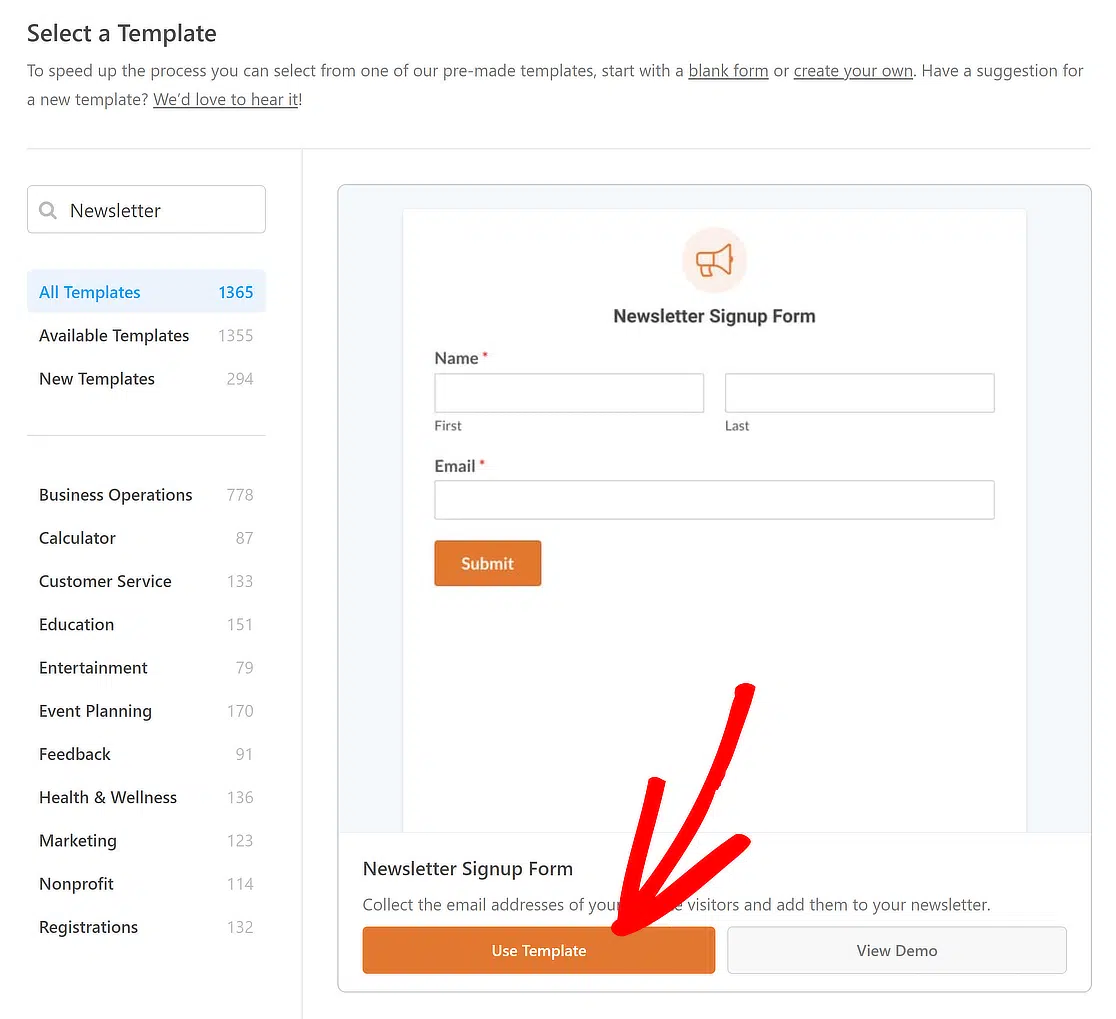
Go to WPForms » Add New. If you want a quick start, pick a template. The Newsletter Signup Form template is a great fit for Brevo since it already includes name and email fields.
Another option is the AI form generator, which allows you to describe what your form should do like “I need a newsletter form with name, email, phone, and a consent field” and WPForms builds it for you.
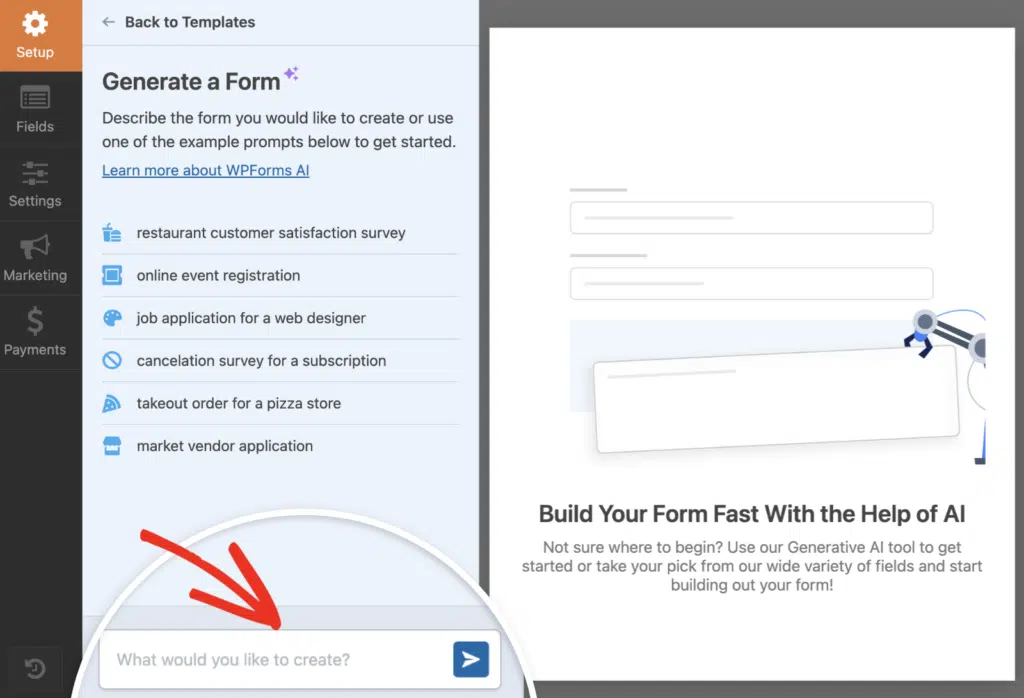
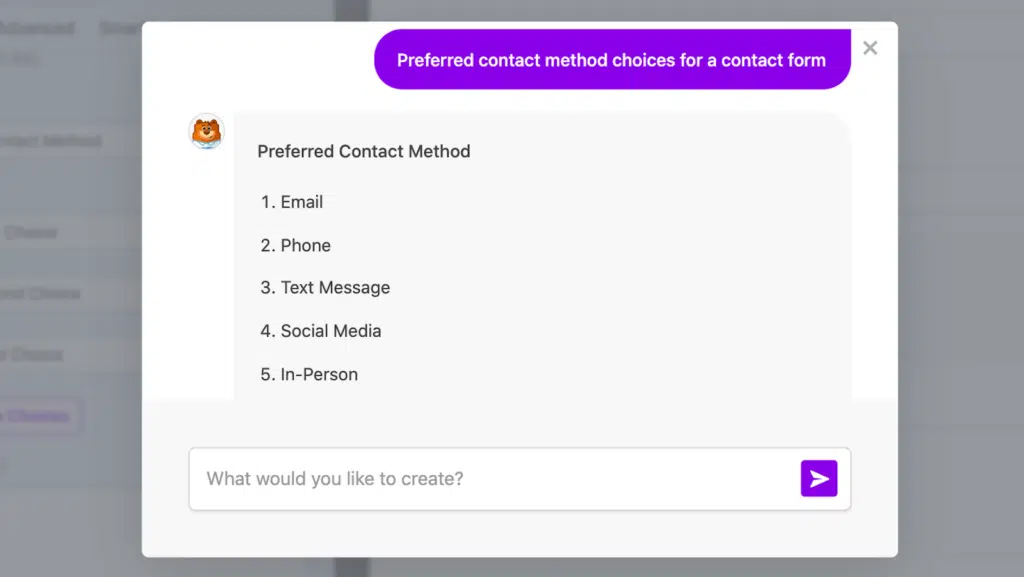
The AI also works for populating field choices. If you add a dropdown for “How did you hear about us?” and don’t feel like typing out all the options, AI Choices will generate a relevant list you can edit.
You can also start with a blank form and add fields yourself. At minimum, you’ll want a Name field and an Email field since Brevo requires an email address for every contact.
Customize the form however you’d like. Add extra fields, change labels, or rearrange the layout. WPForms gives you full control over the design.
Step 4: Connect Brevo to Your Form
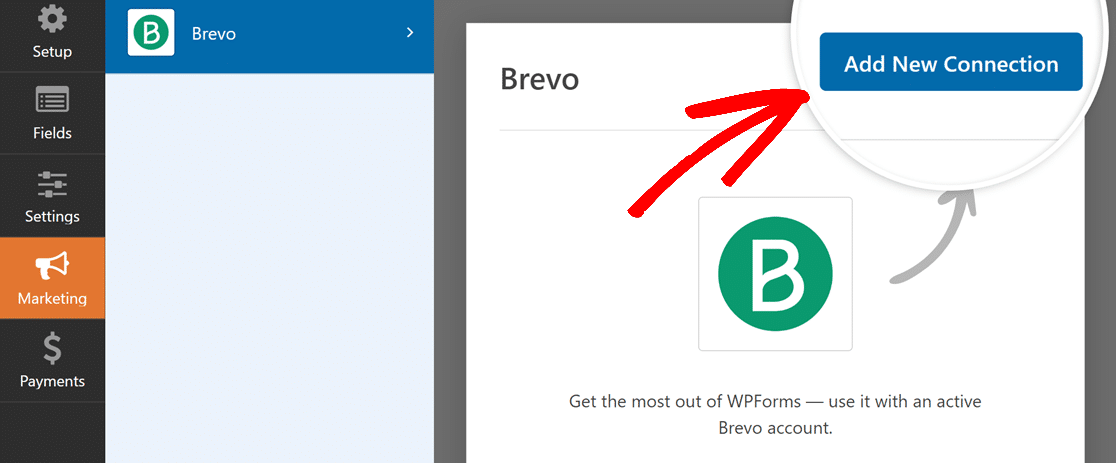
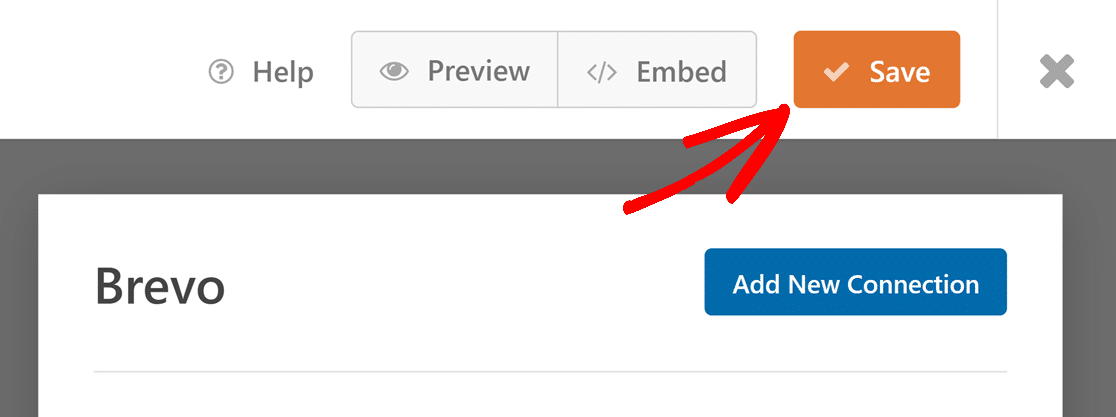
Once your form looks good, keep the form builder open. You’ll connect Brevo to this form in the next step. Go to Marketing » Brevo in the form builder. Click the Add New Connection button.
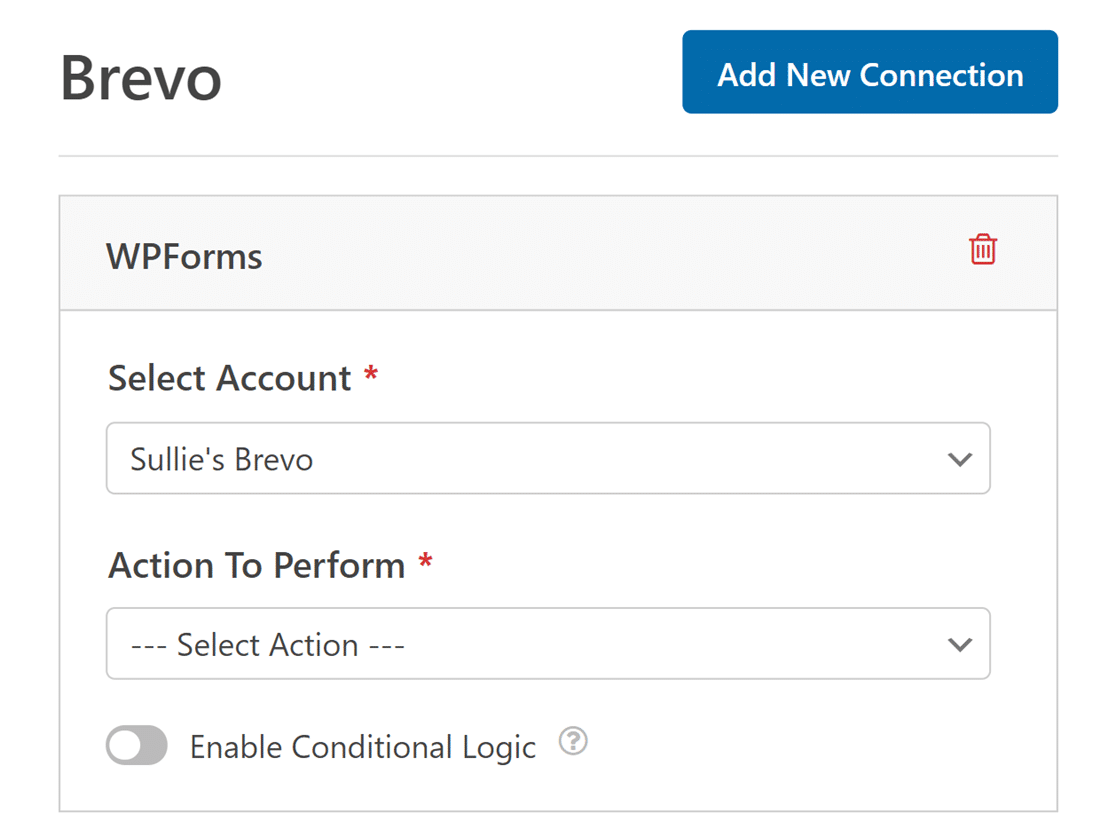
Give this connection a nickname. It can be anything since it’s just for your own reference.

If you have more than one Brevo account connected, select the right one from the Select Account dropdown.
Under Action to Perform, choose Subscribe. This tells WPForms to add whoever submits the form as a new contact in Brevo.
After selecting the action, you’ll see additional settings for mapping your form fields to Brevo.
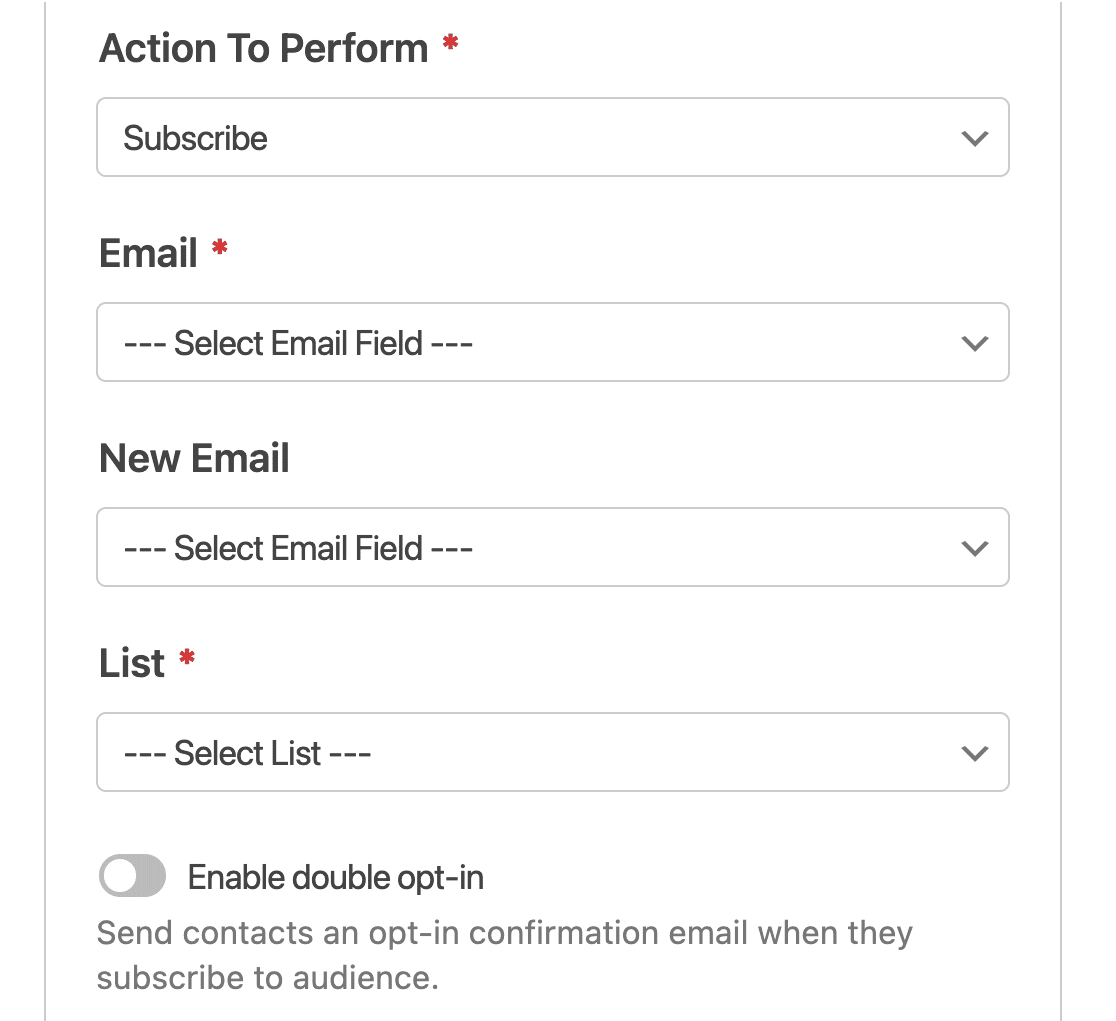
Here’s what each setting does.
- Email: Maps to the form field that holds the subscriber’s email address. You’ll almost always pick the Email field here.
- New Email: Only needed if you’re updating an existing contact’s email in Brevo. Leave this blank for new signups.
- List: Where you choose which Brevo contact list the subscriber gets added to.
The email field is required (marked with an asterisk). Once you’ve mapped everything, click the Save button in the top right corner of the builder.
Step 5: Customize Your Brevo Form Settings
Before you embed the form, there are a few extra settings worth configuring to get more out of the Brevo integration.
Conditional Logic for Subscriptions
You might not want every person who submits your form to be subscribed to Brevo. On a contact form, for example, you’d only want to subscribe people who explicitly opt in.
WPForms lets you use conditional logic to control this. Add a checkbox field like “Subscribe to our newsletter” and set a condition so the Brevo connection only runs when that box is checked. This keeps your Brevo list clean and respects your visitors’ preferences.

Custom Field Mapping
Beyond the email address, you can map other form fields to Brevo contact attributes. First name, last name, phone number, company name, and any custom attributes you’ve created in Brevo can all be mapped directly.
This gives you richer contact profiles in Brevo from day one, which makes segmentation and personalization much easier when you start sending campaigns.

Multiple Lists
If you have different Brevo lists for different purposes (one for blog subscribers, another for product updates), you can create multiple Brevo connections on the same form.
Each connection routes subscribers to a different list. Pair this with conditional logic, and you can let subscribers choose which updates they want.
You can also set up confirmation emails so subscribers get an immediate response after signing up through your form.
Step 6: Embed Your Form on Your Website
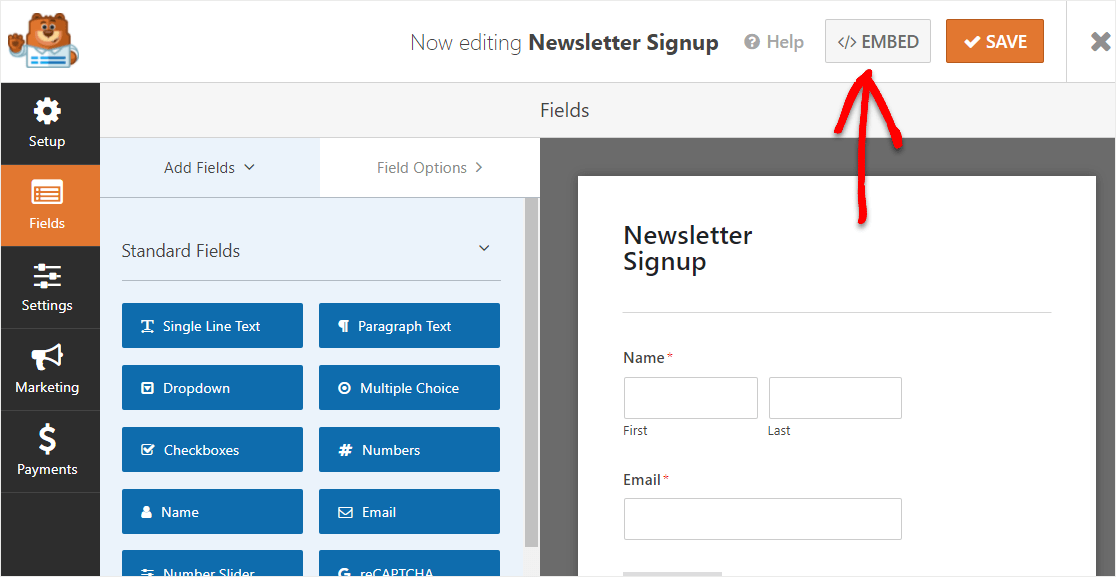
Now it’s time to put your Brevo WordPress form on your site. In the form builder, click the Embed button.
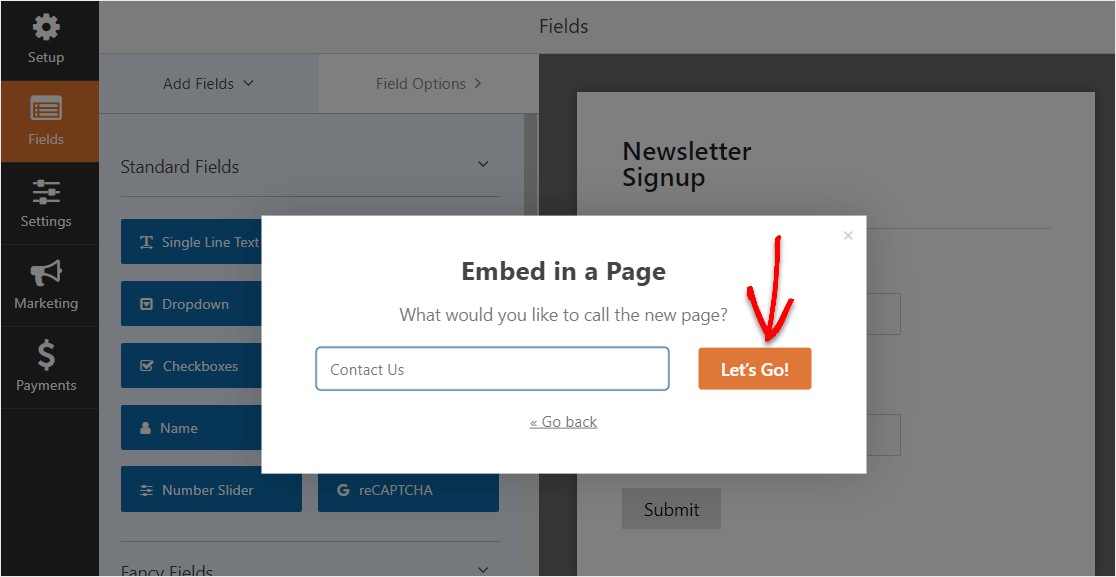
When the embed dialog pops up, click Create New Page to add the form to a fresh page.
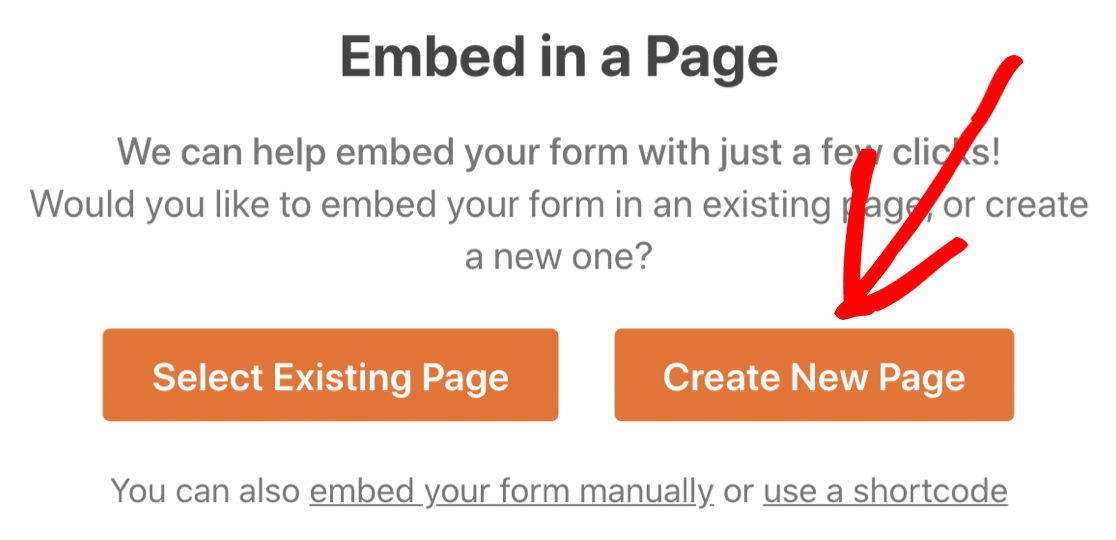
Type a name for your page and click Let’s Go!
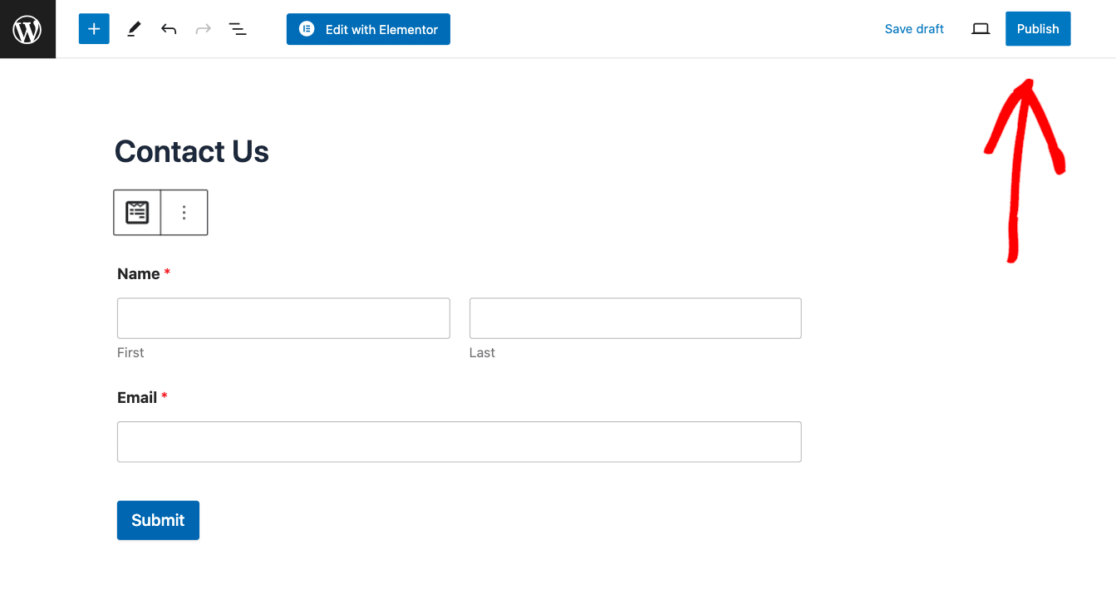
You’ll be taken to the WordPress editor with your form already embedded. Click Publish in the top right corner.
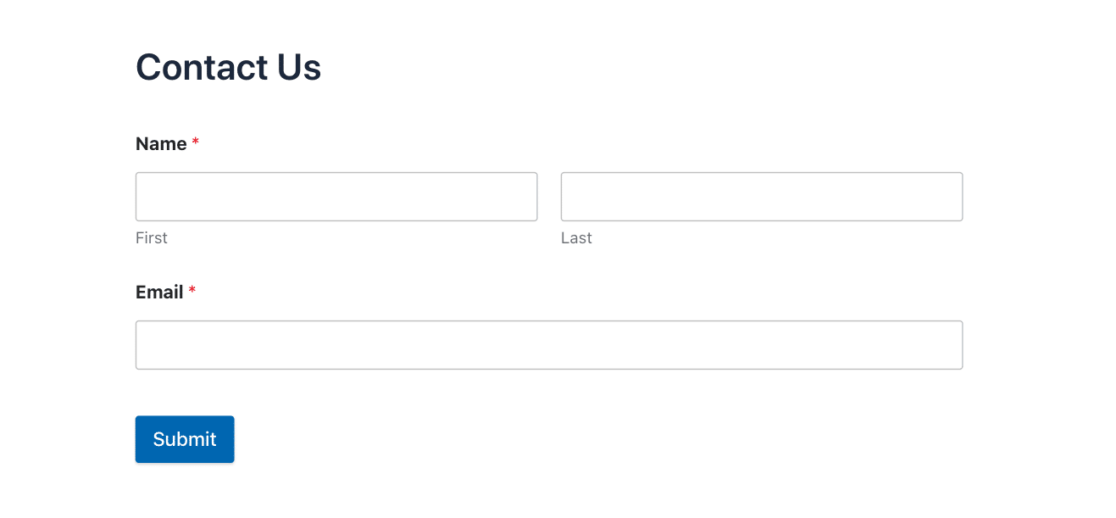
Your Brevo form is now live on your WordPress site.
You can also embed a form on your website using the WPForms block in the WordPress editor, a shortcode, or a sidebar widget if you’d rather place it on an existing page instead.
Submit a test entry and check your Brevo contacts to confirm the data comes through correctly. If the new contact appears in your list, you’re all set.
Why Use WPForms for Your Brevo Forms?
Brevo has its own built-in form builder, so you might wonder why you’d use WPForms instead. I’ve built signup forms using both Brevo’s native builder and WPForms with the Brevo addon, and the difference in flexibility became obvious pretty quickly.
With Brevo’s native forms, you’re limited to basic signup fields and simple styling. If you want multi-step forms, payment collection alongside email signups, conditional logic that controls who gets subscribed, or lead forms designed for higher conversions, you need a dedicated form builder.
WPForms also keeps you flexible. If you ever switch from Brevo to Mailchimp or any other email marketing service, you just swap the addon connection. Your forms, design, and embedded placements stay exactly the same.
And because WPForms stores every submission in your WordPress dashboard, you can track your form conversions and see exactly how your forms are performing without relying entirely on Brevo’s reporting.
FAQs About Brevo WordPress Forms
Here are answers to some of the most common questions about using Brevo with WordPress forms.
What’s the difference vetween Brevo and Sendinblue?
They’re the same company. Sendinblue rebranded to Brevo in 2023. All features, integrations, and pricing stayed the same. If you had a Sendinblue account, it’s now a Brevo account with no changes to your data or settings.
Is the WPForms Brevo integration free?
The Brevo addon requires WPForms Plus ($99.50/year) or higher. You’ll also need a Brevo account, but Brevo’s free plan (which includes 300 emails per day) works perfectly with this integration. You only pay for WPForms.
Can I use conditional logic with Brevo in WPForms?
Yes. You can add conditions to your Brevo connection so subscribers are only added when specific criteria are met. For example, you could subscribe someone only if they check a “Send me updates” checkbox or select a particular option from a dropdown field.
What happens to existing Sendinblue forms?
If you previously had the WPForms Sendinblue addon configured, it was automatically renamed to Brevo. Your existing connections, field mappings, and list selections all carried over. No migration or reconfiguration needed.
Next, Improve Your Email Deliverability With WP Mail SMTP
Now that your forms are sending subscriber data to Brevo, make sure the confirmation emails and form notifications actually reach inboxes.
Set up WP Mail SMTP with the Brevo mailer by following the step-by-step tutorial on how to set up Brevo with WP Mail SMTP.
You might also want to learn how to create an email newsletter so you can start sending campaigns to the subscribers your forms are collecting.
Start Collecting Brevo Subscribers Now!
Ready to build your form? Get started today with the easiest WordPress form builder plugin. WPForms Pro includes lots of free templates and offers a 14-day money-back guarantee.
If this article helped you out, please follow us on Facebook and Twitter for more free WordPress tutorials and guides.

