


AI Summary
Do you want to create a MailerLite contact form in WordPress?
If you’re using MailerLite for your email campaigns, did you know you can connect your WordPress forms with your MailerLite account?
In this article, I’ll show you how to create a MailerLite contact form in WordPress to easily manage your email subscribers.
Create Your WordPress MailerLite Form Now
Does MailerLite Have a Contact Form?
Yes, MailerLite has its own WordPress plugin that allows you to create contact forms. It’s limited in functionality, though. To create more functional forms that boost conversions, integrate your MailerLite account with WordPress plugins like WPForms.
Connecting MailerLite to a form builder plugin lets you create more dynamic and sophisticated forms while still collecting leads in your MailerLite account.
How to Create a MailerLite Contact Form in WordPress
It’s fairly simple to build a MailerLite contact form in WordPress. Once you connect WPForms to your MailerLite account, any form you create can send contacts straight to your subscriber list, and you get to decide exactly who gets added and when. Here’s everything I’ll cover in this tutorial.
- Step 1: Install the WPForms Plus Plugin
- Step 2: Install the MailerLite Addon
- Step 3: Connect WPForms to MailerLite
- Step 4: Build Your Contact Form and Connect MailerLite
- Step 5: Control Subscriptions With Conditional Logic (Optional)
- Step 6: Embed Your MailerLite Contact Form in WordPress
- Enable Double Opt-In for MailerLite (Optional)
Note: The tutorial below assumes that you already have a MailerLite account. If not, you can get started with MailerLite for free.
Step 1: Install the WPForms Plus Plugin
Before you can send anything to MailerLite, you need WPForms on your site. It’s the most beginner-friendly WordPress form builder around, with more than 2,100+ ready-made templates and a drag-and-drop editor that never asks you to touch a line of code.
What I like most about WPForms for this kind of form is how it handles the connection. Native marketing integrations, conditional logic, and field mapping are all built in, so a single contact form can collect messages and grow your email list at the same time.
The MailerLite addon is available on WPForms Plus and higher, so you’ll want at least a Plus license before you begin. Pro and Elite include it too, along with more advanced addons if you find you need them down the road.
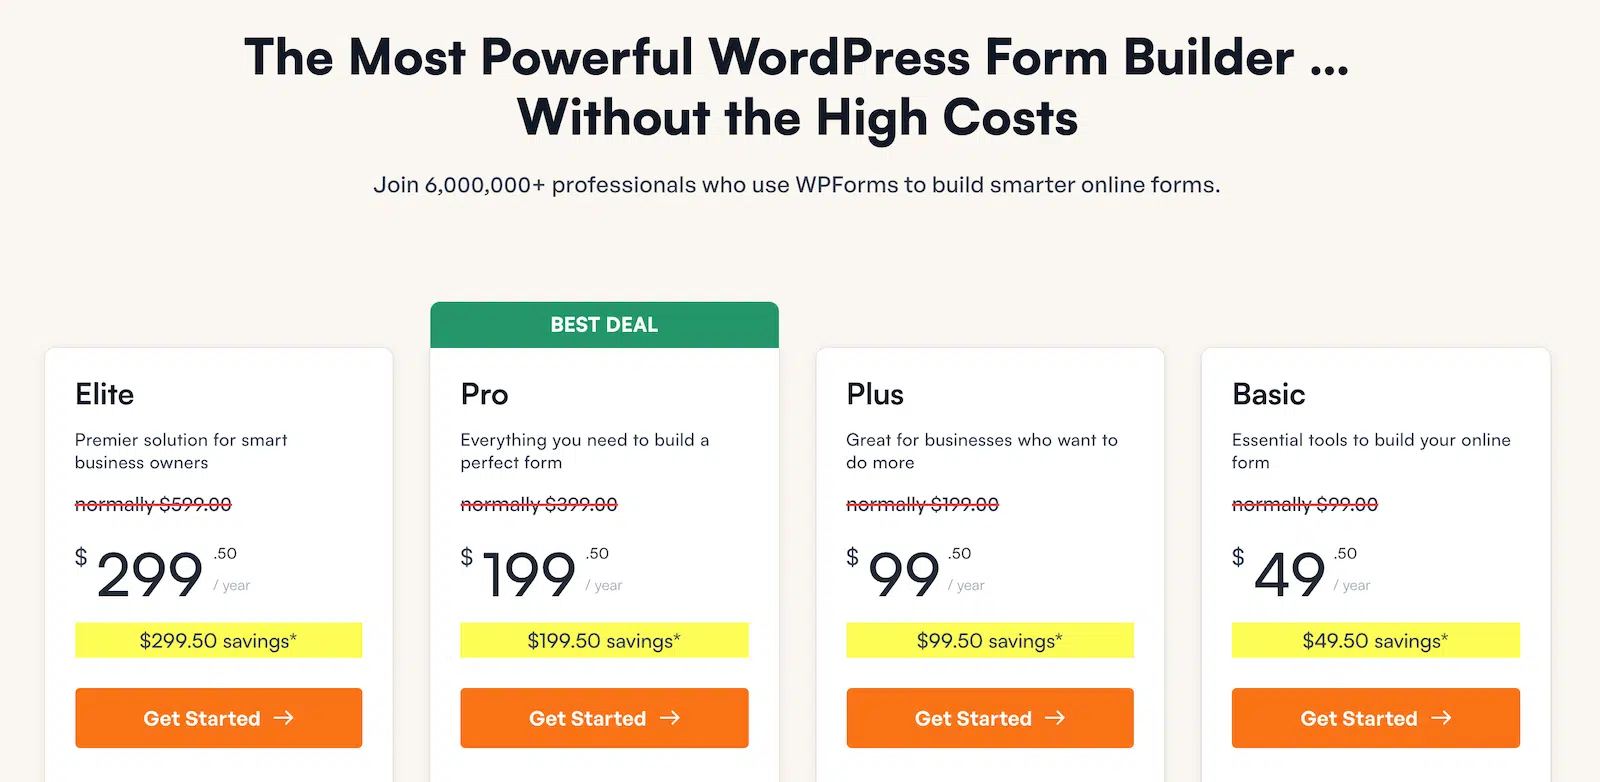
To get started, go ahead and buy the WPForms Plus license. Then install WPForms on your website. If you’d like a hand with the setup, follow this guide on installing WPForms on your site.
Step 2: Install the MailerLite Addon
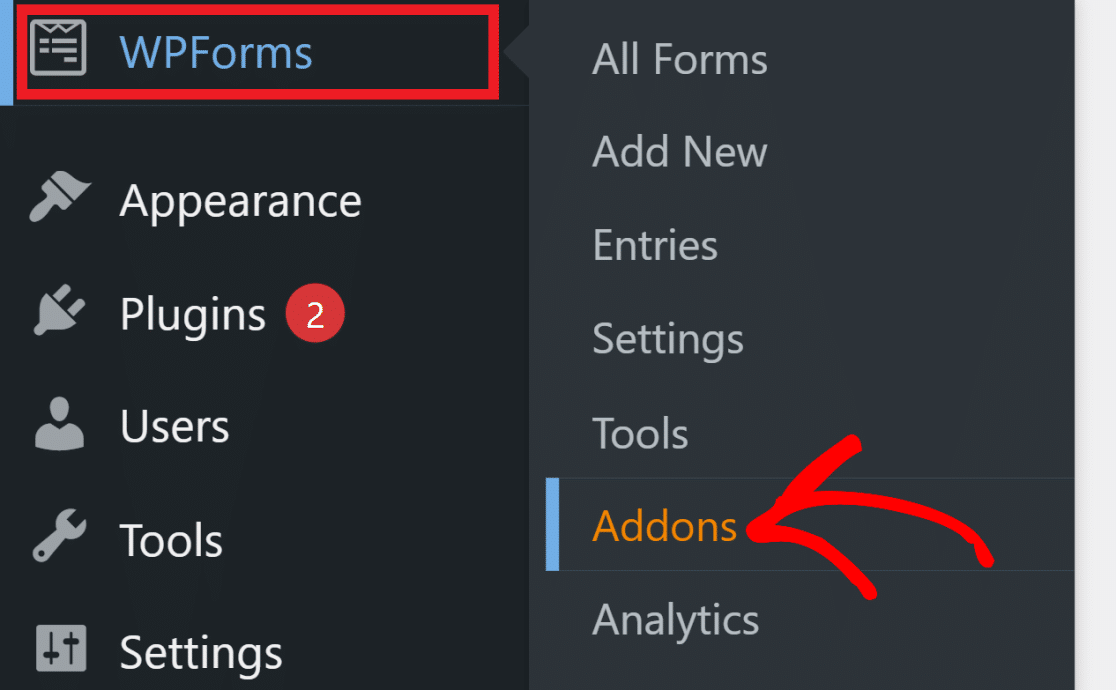
Once WPForms is active and your license is verified, you can add the MailerLite addon. From your WordPress dashboard, go to WPForms » Addons.
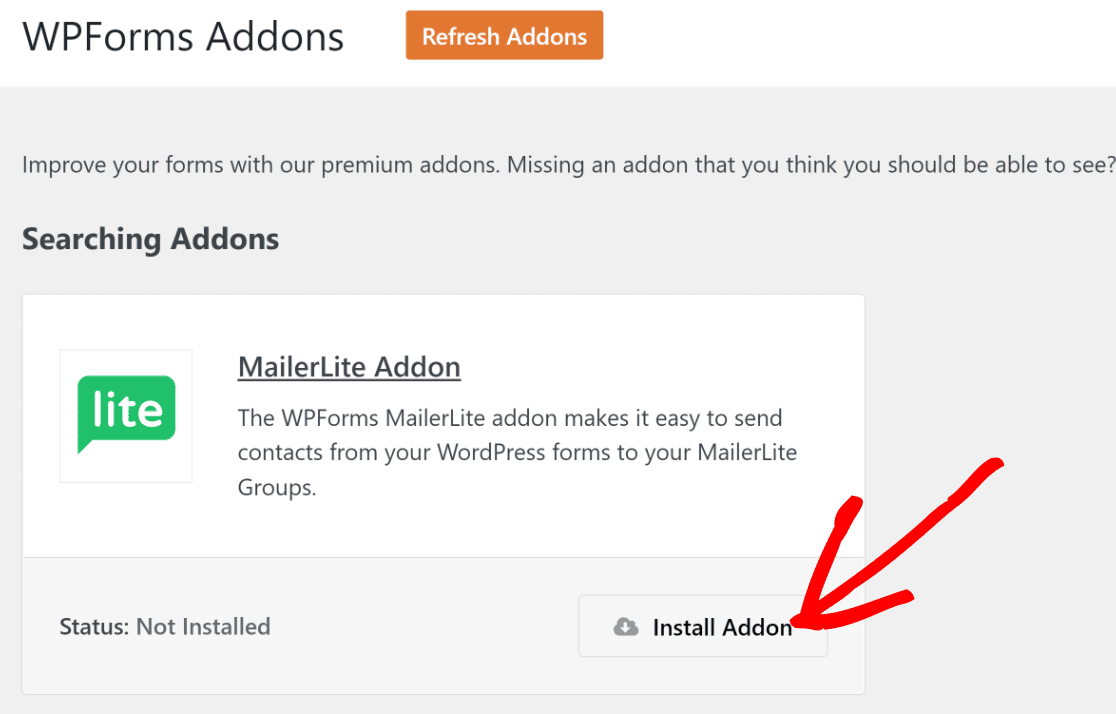
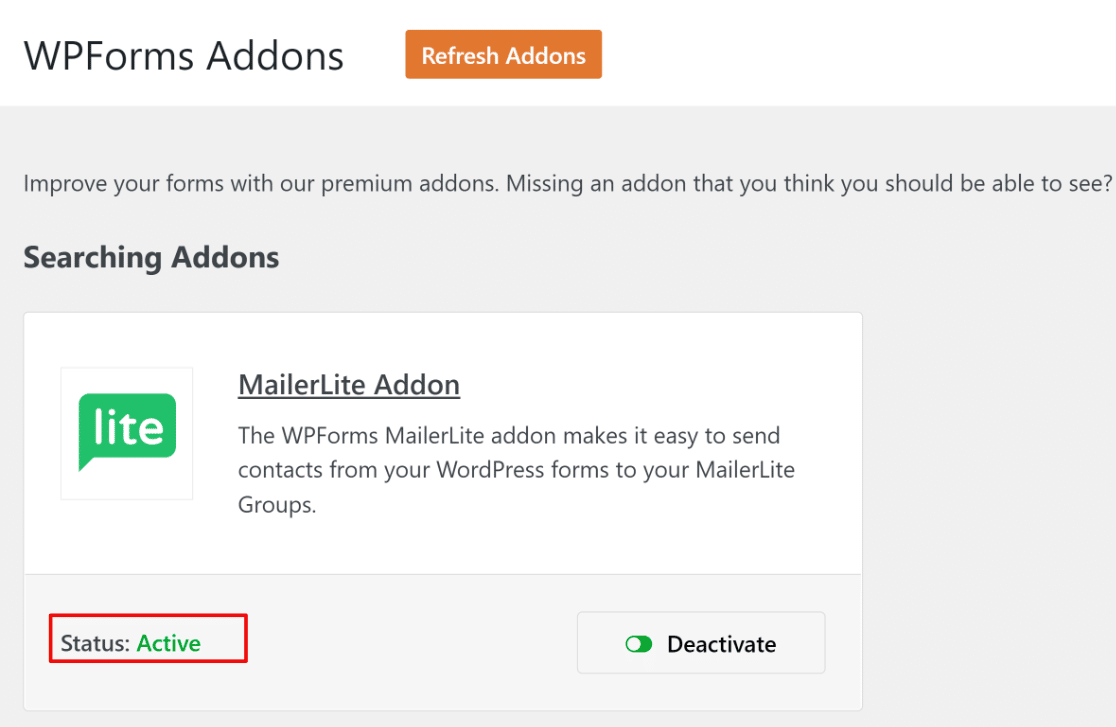
Look for the MailerLite addon on this page, then click the Install button underneath it.
The addon only takes a few seconds to install and activate. When it’s finished, the status will change to Active.
With the addon active, you’re ready to connect WPForms to your MailerLite account.
Step 3: Connect WPForms to MailerLite
To link the two accounts, you’ll need a MailerLite API key. Leave WordPress open in its current tab, then open a new tab and log in to your MailerLite dashboard.
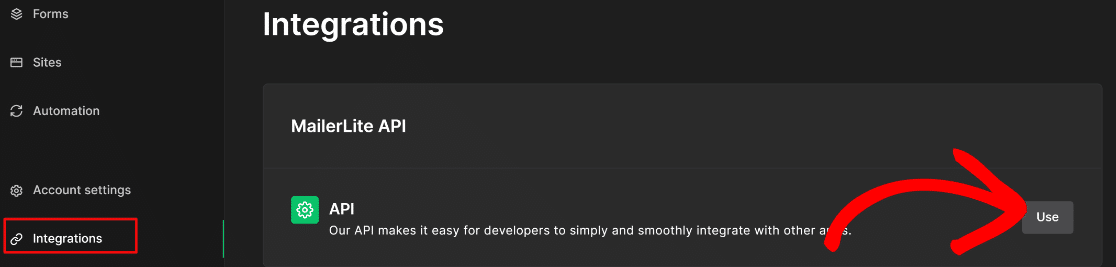
Click on Integrations, and under MailerLite API, click Use. After that, click on the Generate new token button to proceed.

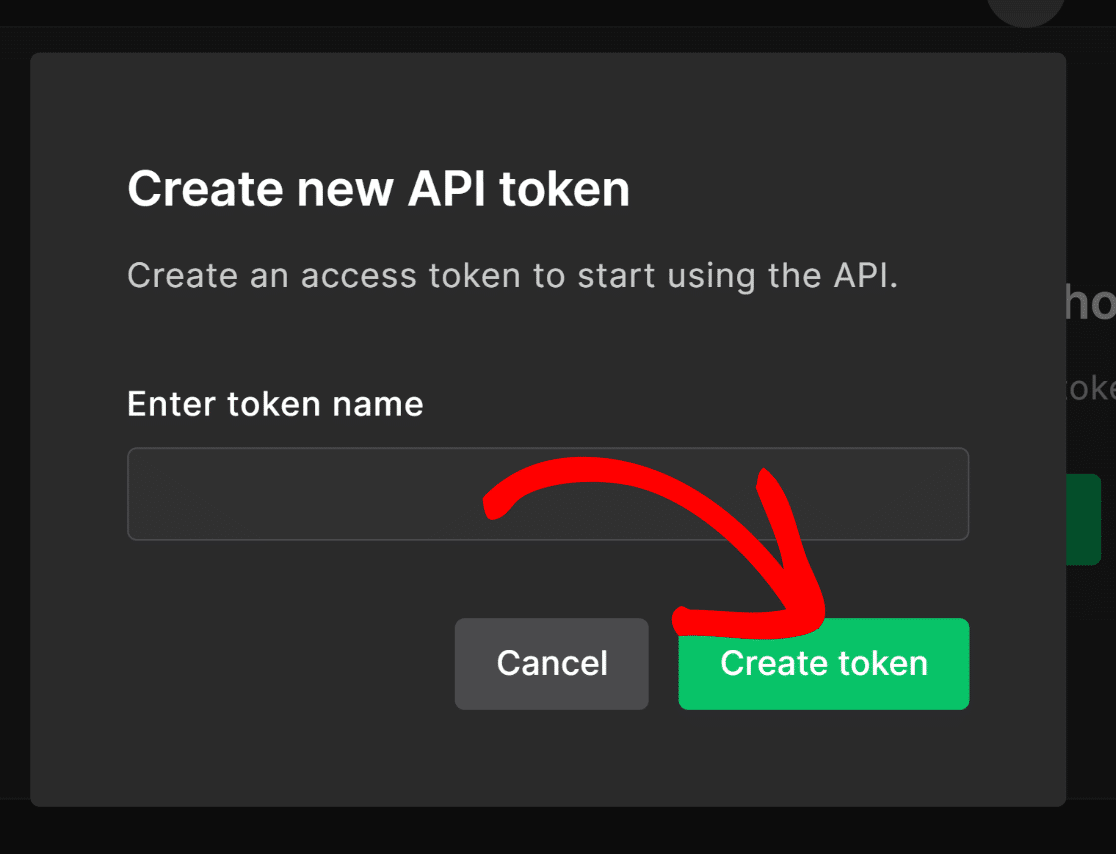
Give your token a name so you can recognize it later, and choose an option for IP restrictions based on your own security needs. When you’re ready, click Create token.
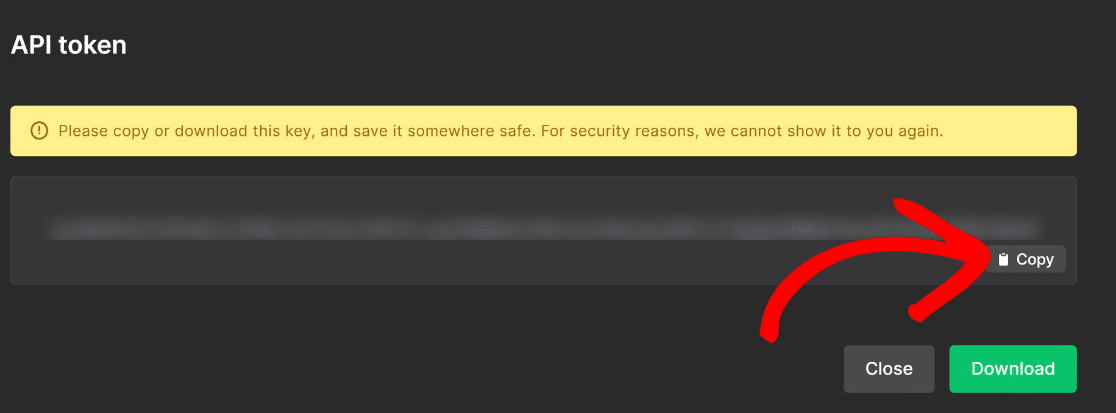
MailerLite will generate your API key. Click Copy to save it to your clipboard. One thing worth knowing is that you won’t be able to see this token again after you close the popup.
So I’d recommend saving a copy somewhere safe. You can also use the Download button to keep a backup.
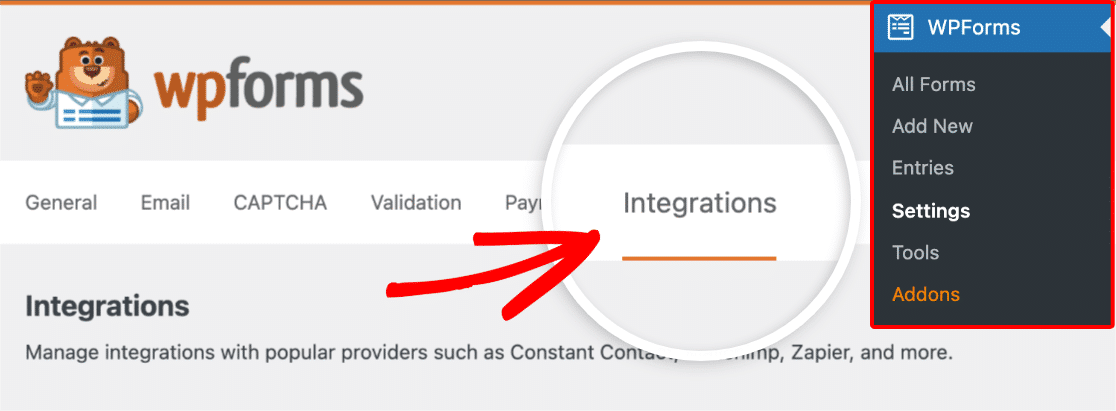
Now head back to the WPForms tab. From your WordPress admin area, go to WPForms » Settings and select the Integrations tab.
Find MailerLite in the list and click it to expand the options, then click Add New Account.

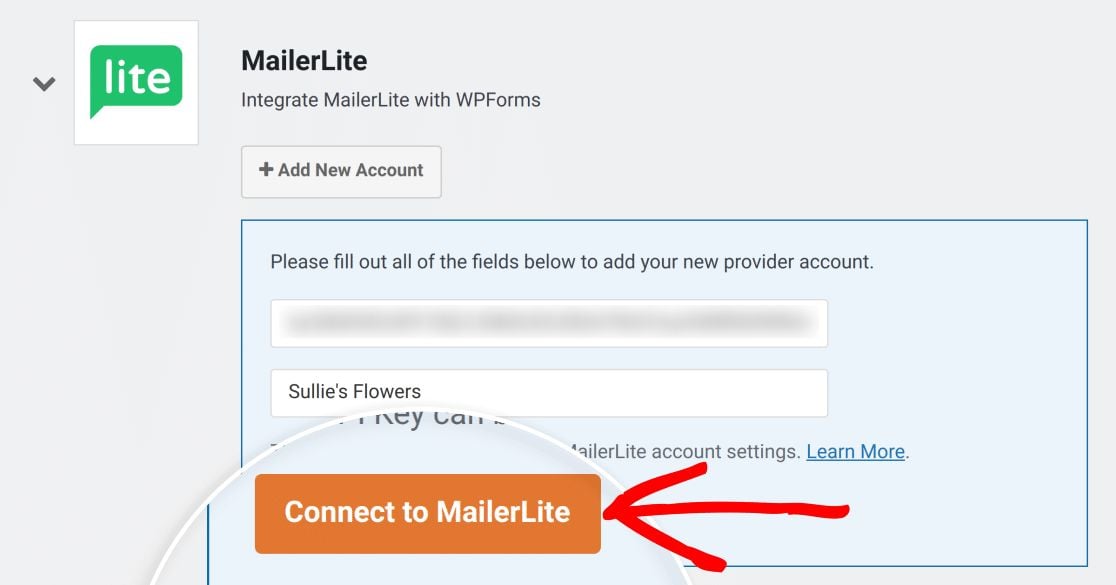
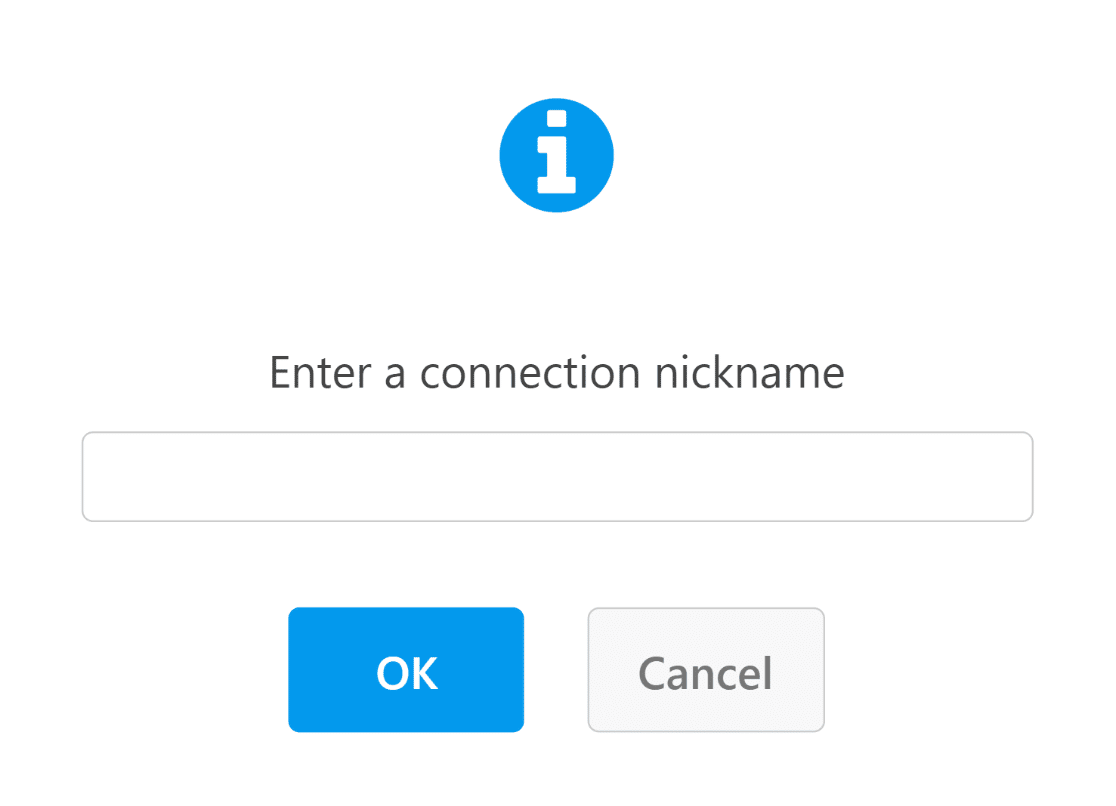
Paste your API key into the MailerLite API Key field and give the connection a nickname, which can be anything you like. Press Connect to MailerLite when you’re done.
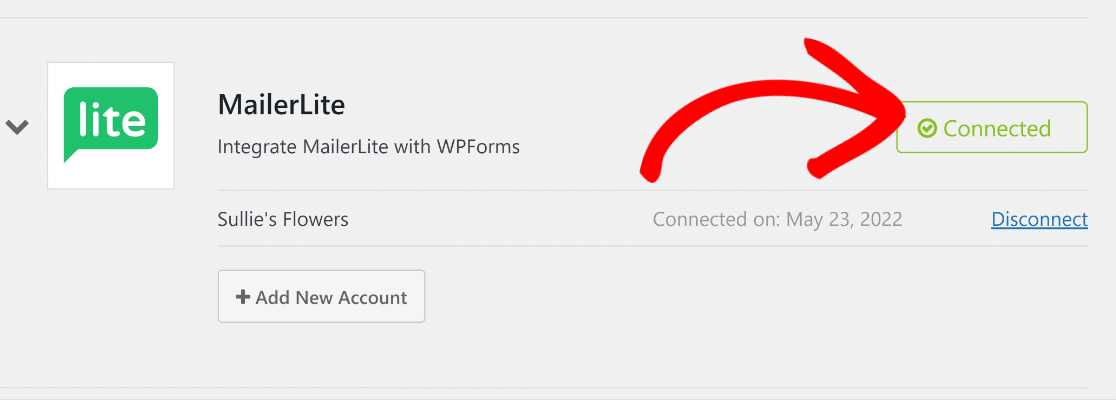
Once the connection goes through, you’ll see a green Connected status appear.
With your accounts linked, you can start building forms that talk to MailerLite.
Step 4: Build Your Contact Form and Connect MailerLite
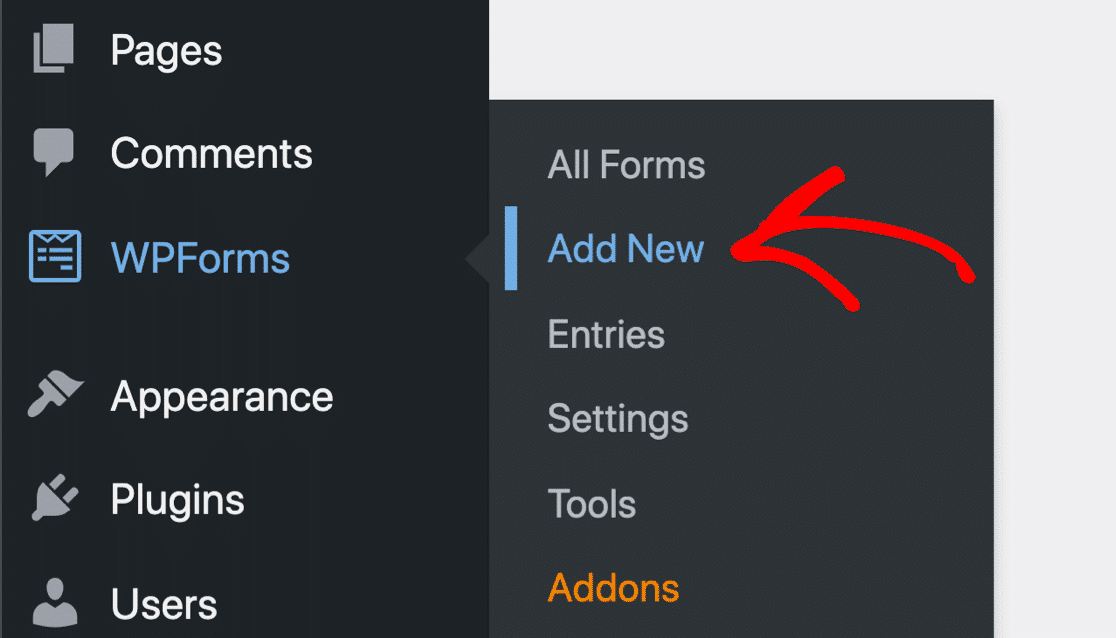
Now for the fun part, actually building your form. From your WordPress dashboard, go to WPForms » Add New.
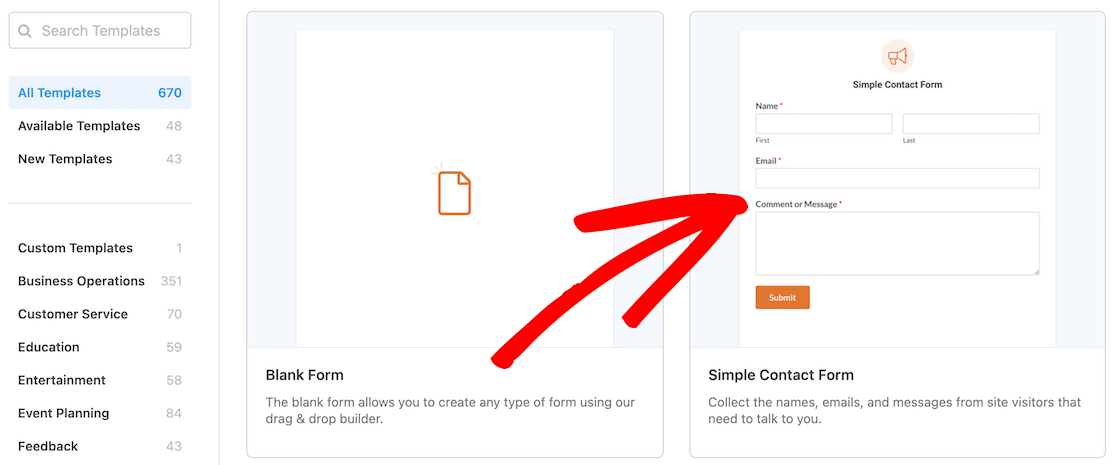
Give your form a name, then pick a template. You can start from any of the form templates in the library, and for this tutorial I’ll use the Simple Contact Form template.
If you’d rather start with something built for this exact job, there’s also a ready-made MailerLite email signup form template designed for collecting subscribers.
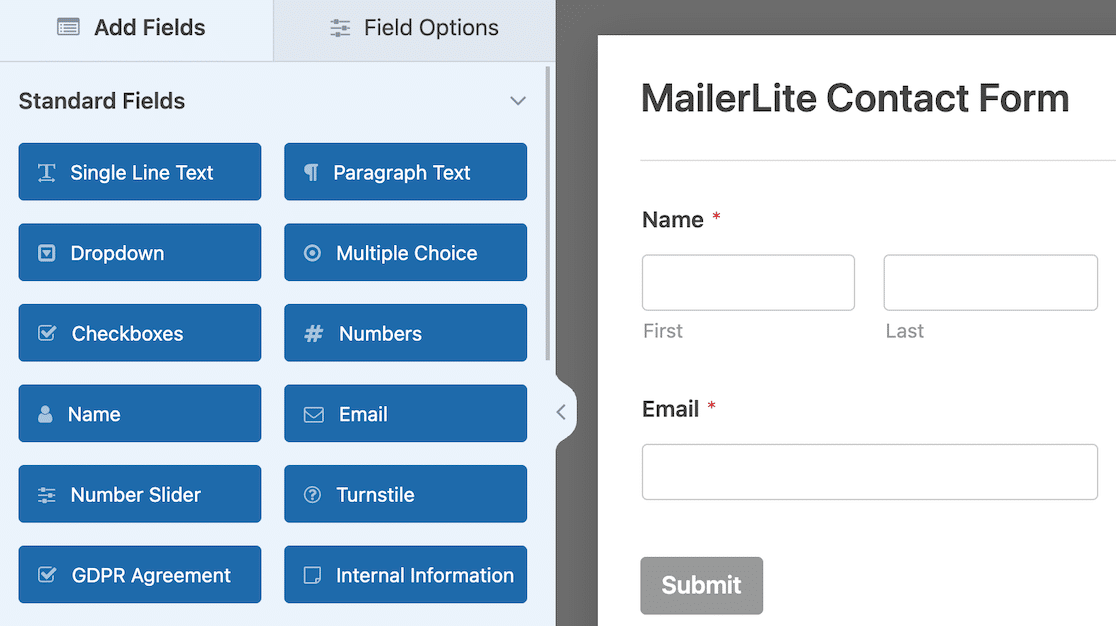
Once you’ve picked a template, the drag-and-drop builder opens up. You can add, remove, and rearrange fields until the form collects everything you want.
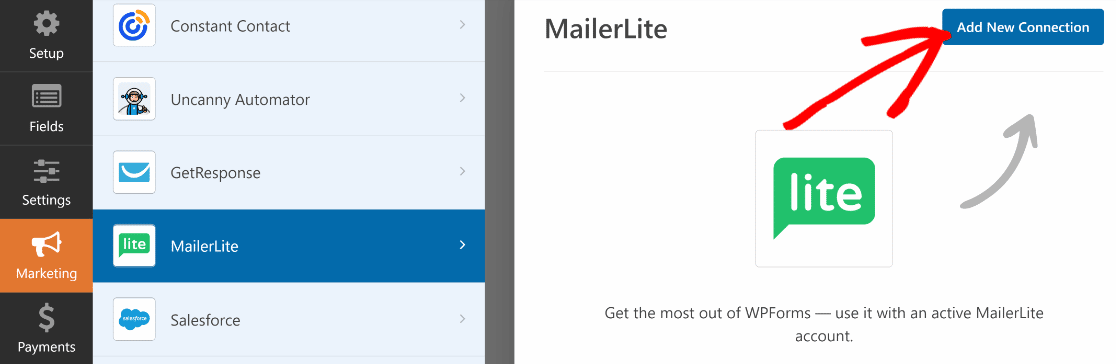
To connect this form to MailerLite, click the Marketing tab in the left sidebar, choose MailerLite, and press the Add New Connection button.
Give your connection a name and click OK.
Now you can use the dropdowns to set up how the form talks to MailerLite.
One thing to know upfront is that the addon only pulls addresses from Email type fields, so make sure your form has one.
Here are the main settings you’ll work with.
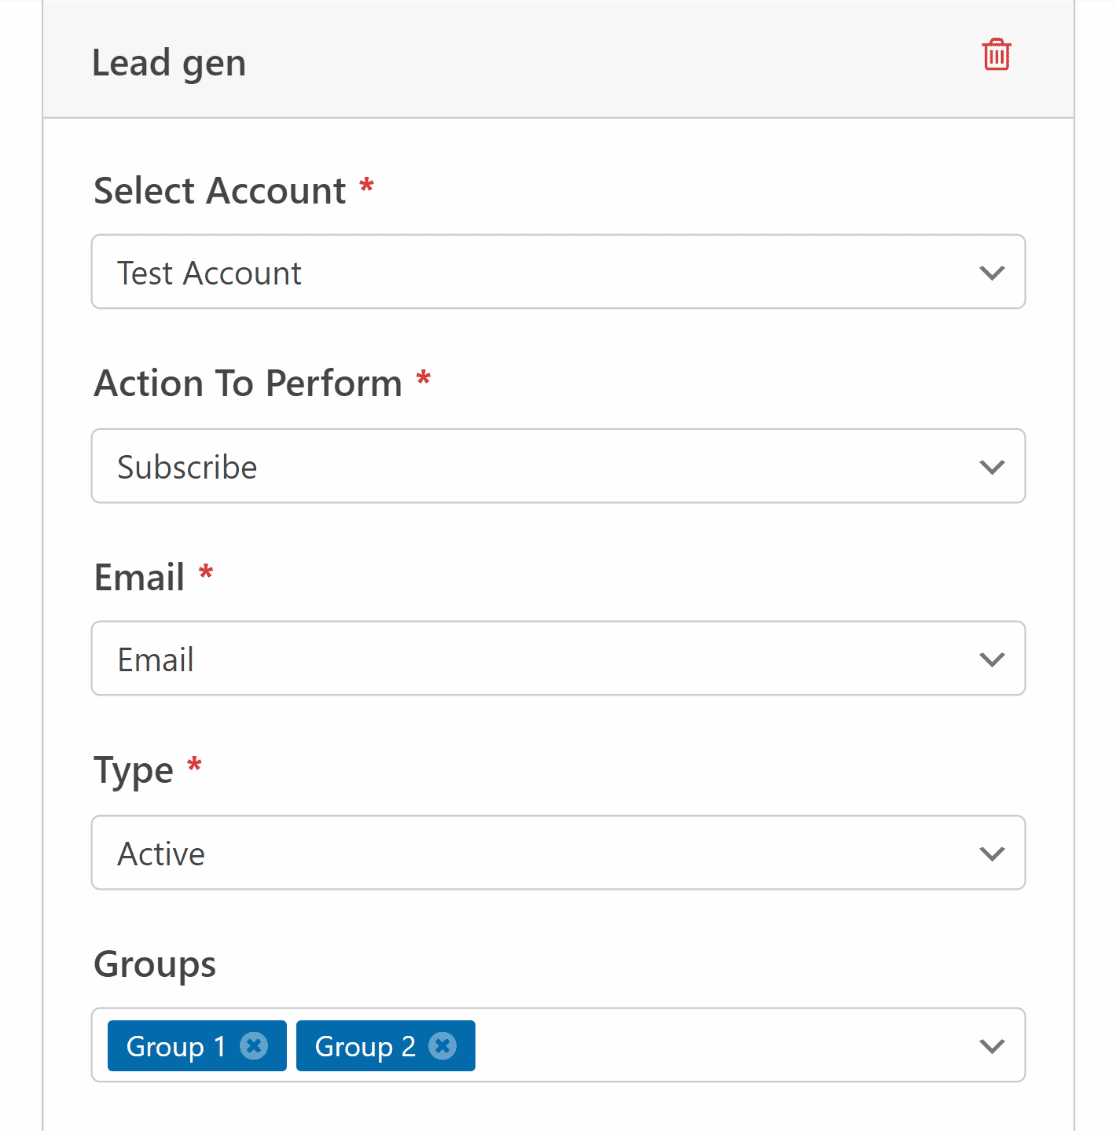
Note: Fields marked with an asterisk (*) are required.
- Select Account: Pick the MailerLite account you connected by its nickname
- Action To Perform: Choose what happens when someone submits the form (Subscribe, Unsubscribe, or Delete)
- Email: Match the email field from your WordPress form to the email in your MailerLite subscriber area
- Type: Choose which list new contacts join (Active, Unsubscribed, or Unconfirmed)
- Group: Assign contacts to any interest groups you’ve already created in MailerLite
These settings are enough to get contacts flowing into MailerLite. If you want to collect more detail from each person, the addon also lets you map custom fields.
Map Custom MailerLite Fields to WordPress Form Fields
If you’d like to collect more than just an email address, you can add extra fields to your WPForms form and map them to custom fields in your MailerLite account.
Just use the dropdowns to match your MailerLite custom field names with the fields you’ve built in WPForms. In this example, I’ve mapped the name fields from WPForms over to MailerLite.
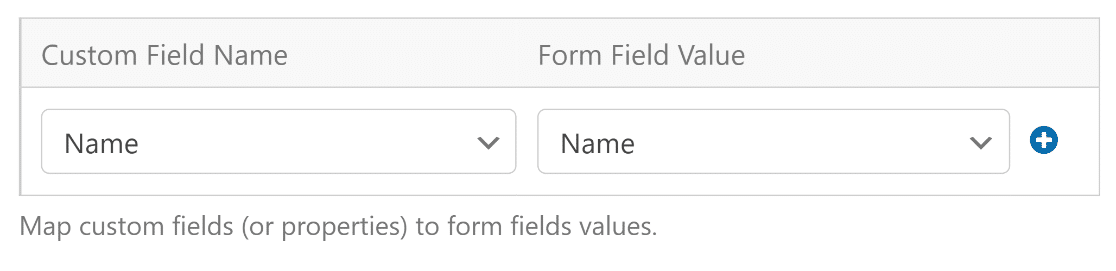
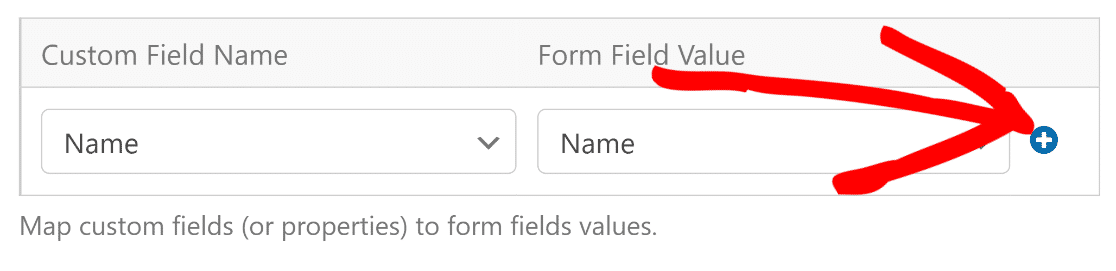
To add more mappings, click the blue plus (+) button. Next, let’s look at how conditional logic gives you control over which contacts actually get sent to MailerLite.
Step 5: Control Subscriptions With Conditional Logic (Optional)
Sometimes you only want to add certain people to your mailing list rather than everyone who submits the form. WPForms includes conditional logic that changes how the MailerLite connection behaves based on what someone selects.
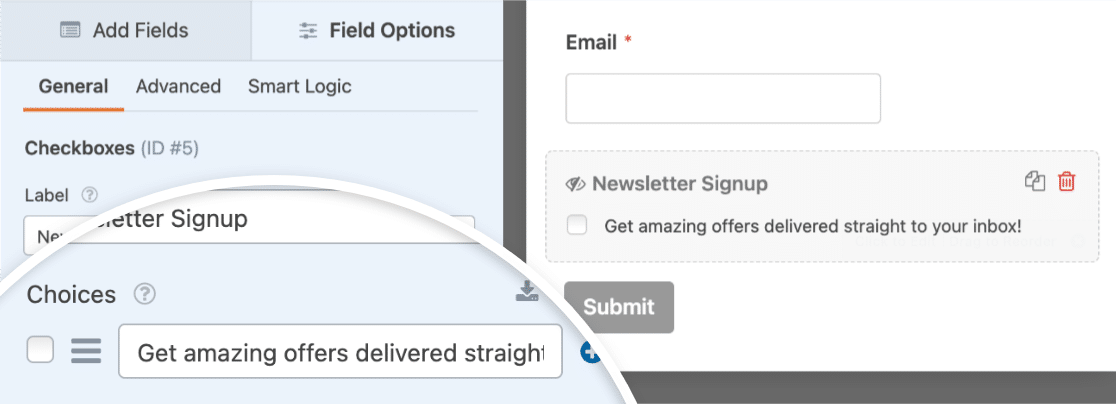
A popular way to use this is to add a newsletter opt-in checkbox to your contact form. One form then handles both jobs, and people choose for themselves whether they want to join your list.
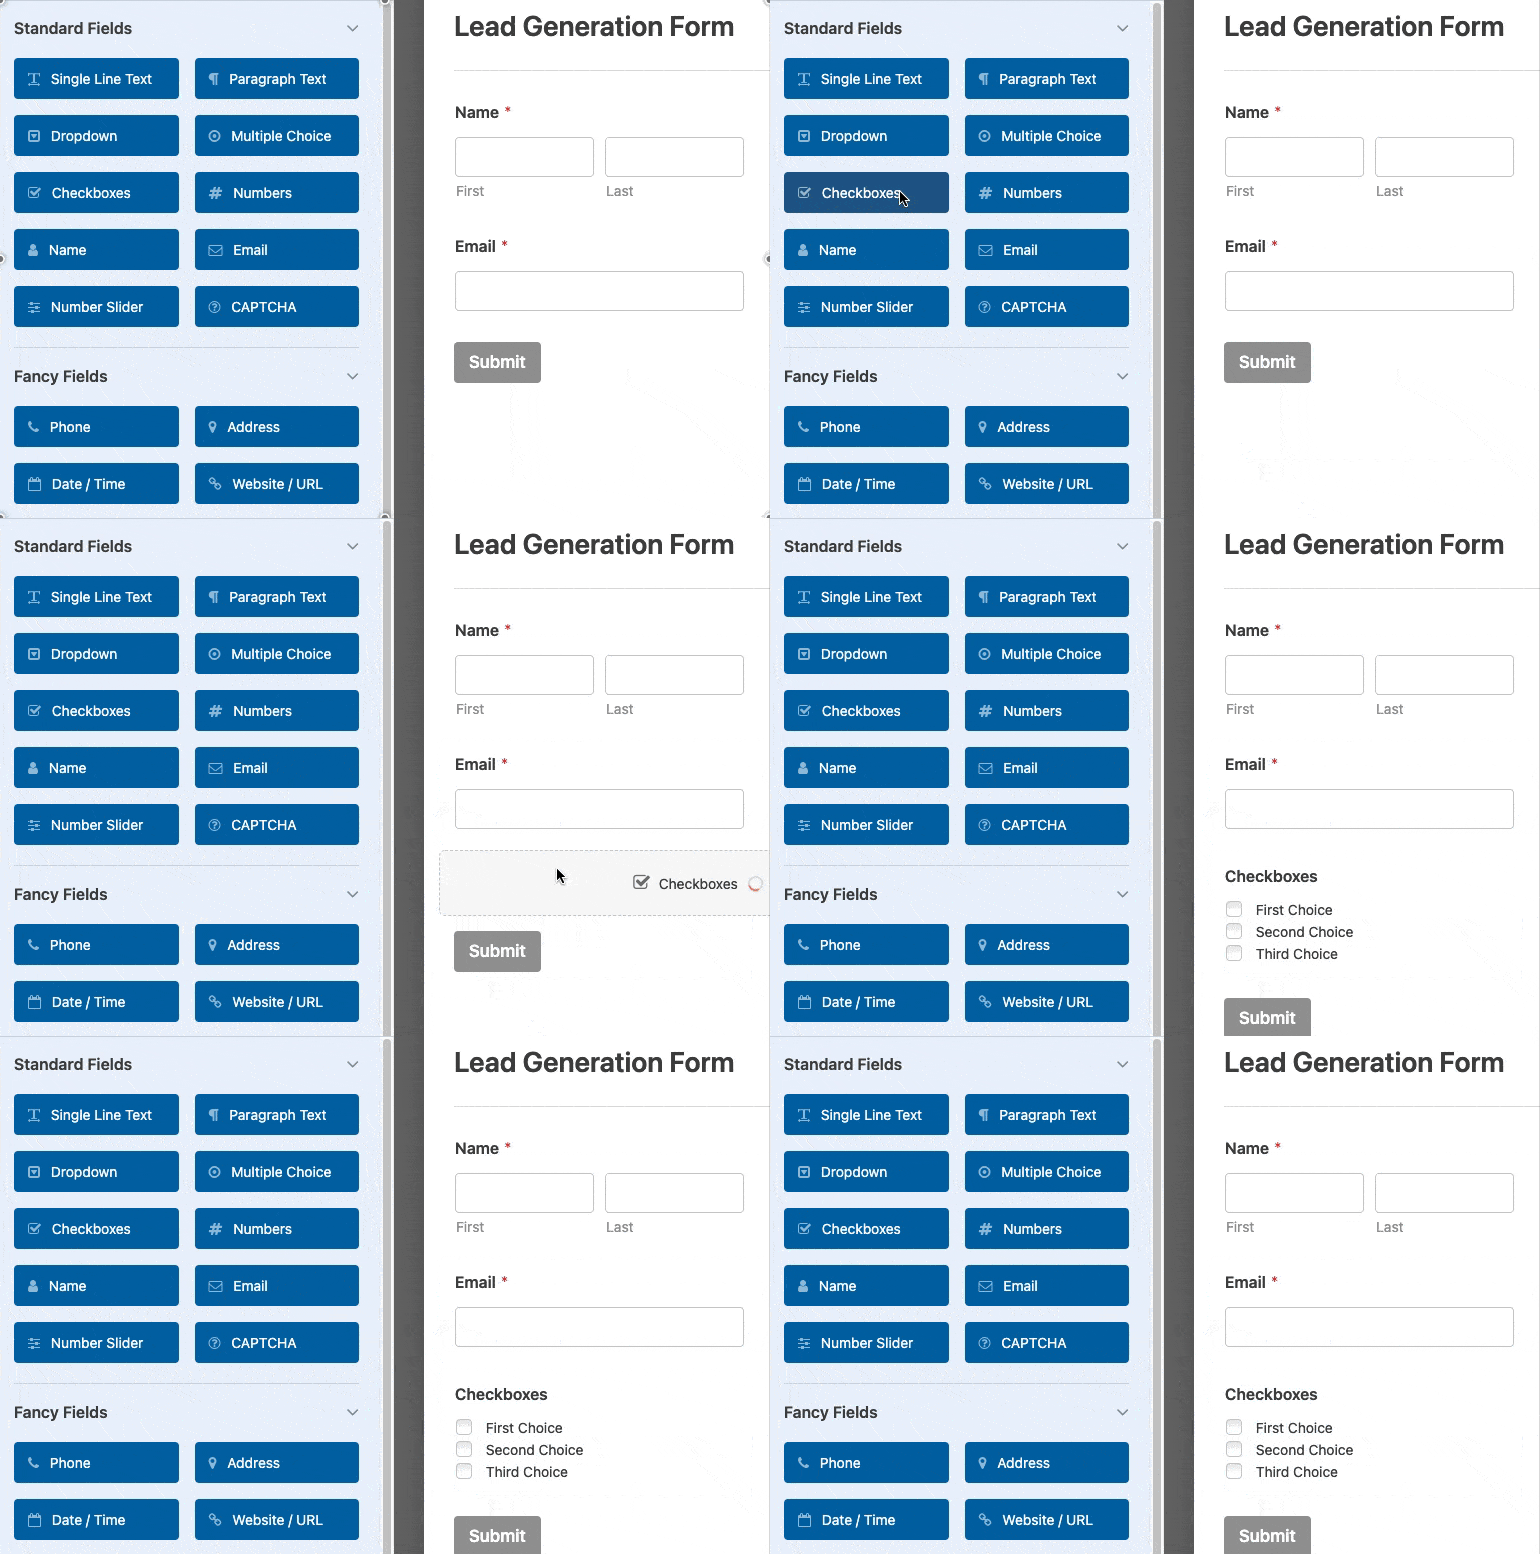
For this example, I’ve added a single Checkboxes field with one choice that works as a newsletter opt-in.
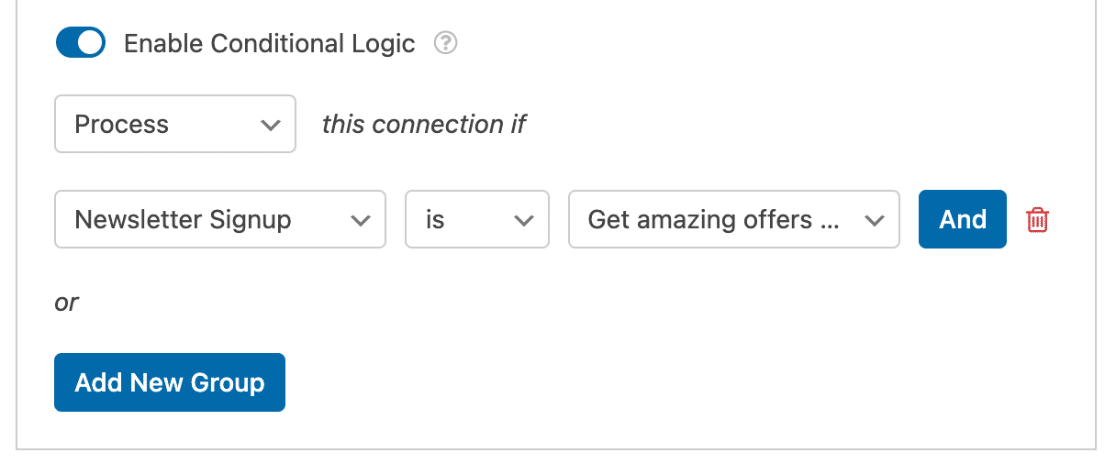
Next, go to Marketing » MailerLite in the form builder’s left sidebar and toggle on Enable Conditional Logic.

From here, I’ll set a rule so the connection only runs when the Newsletter Signup box is checked. You can put this together with a couple of dropdowns.
Don’t forget to press Save at the top right of the builder before you move on.
Step 6: Embed Your MailerLite Contact Form in WordPress
With your form built and connected, it’s time to put it on your site. Click the Embed button at the top right of the builder.

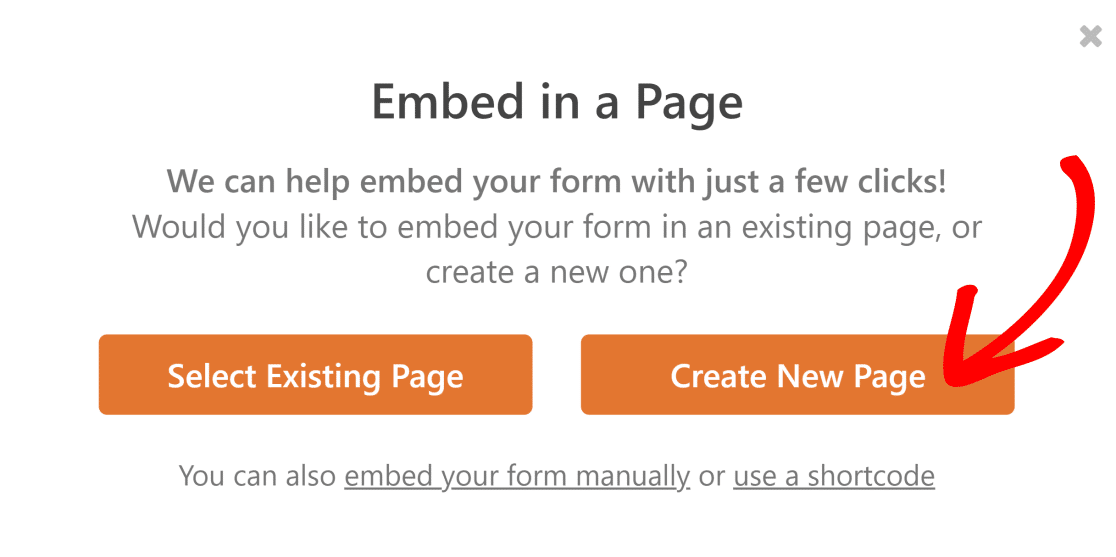
WPForms will ask whether you want to add the form to an existing page or create a new one. For this example, I’ll choose Create New Page.
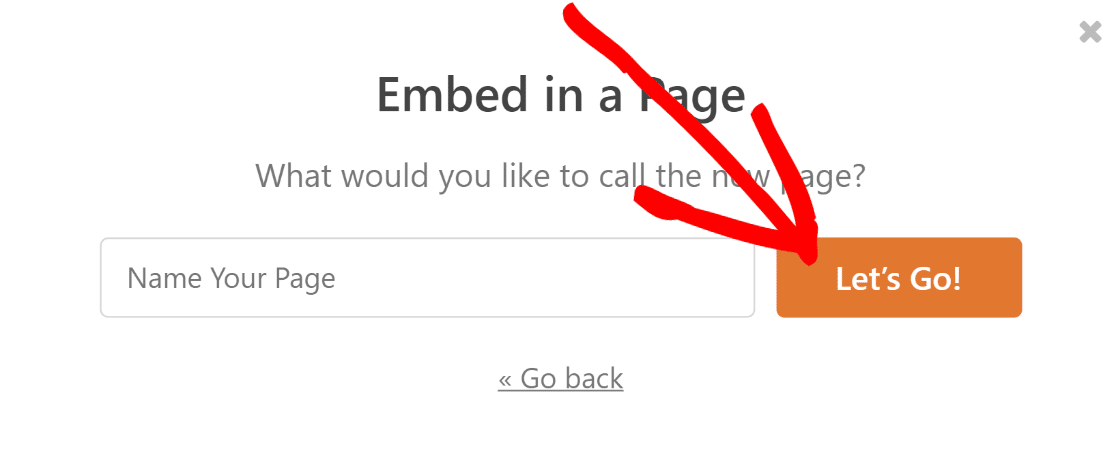
Give your new page a name and click Let’s Go.
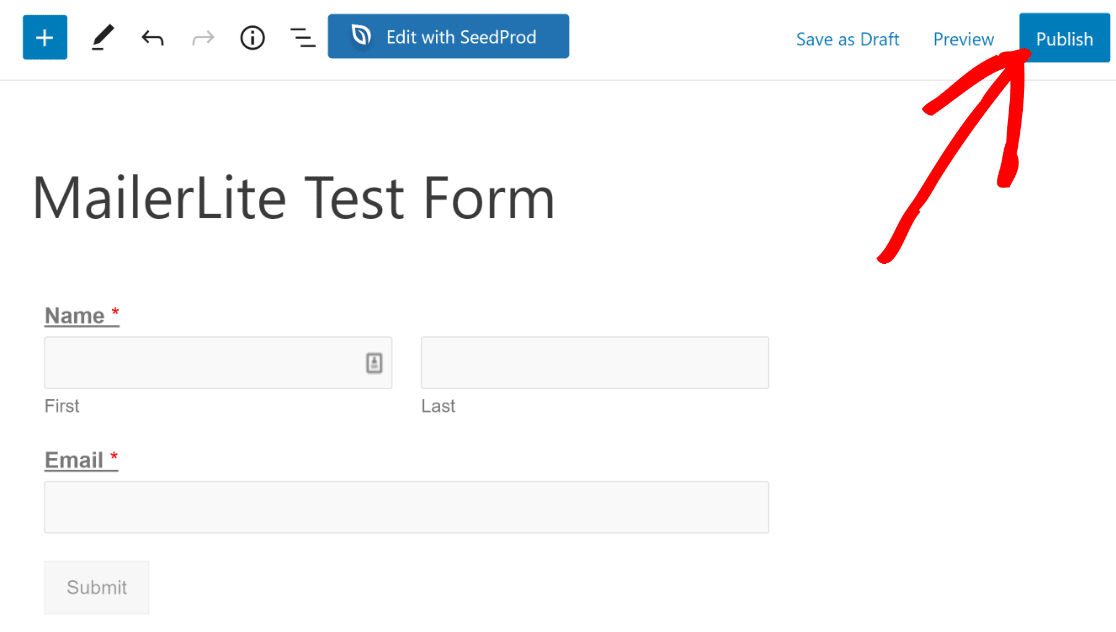
WPForms drops you into the WordPress block editor with your form already embedded on the page. You can adjust the other page elements the way you normally would, and when you’re happy with how it looks, click Publish.
Run a Test
It’s always a good idea to check that everything works before you rely on the form. Go ahead and send a test entry to yourself, then confirm the data comes through the way you expect.
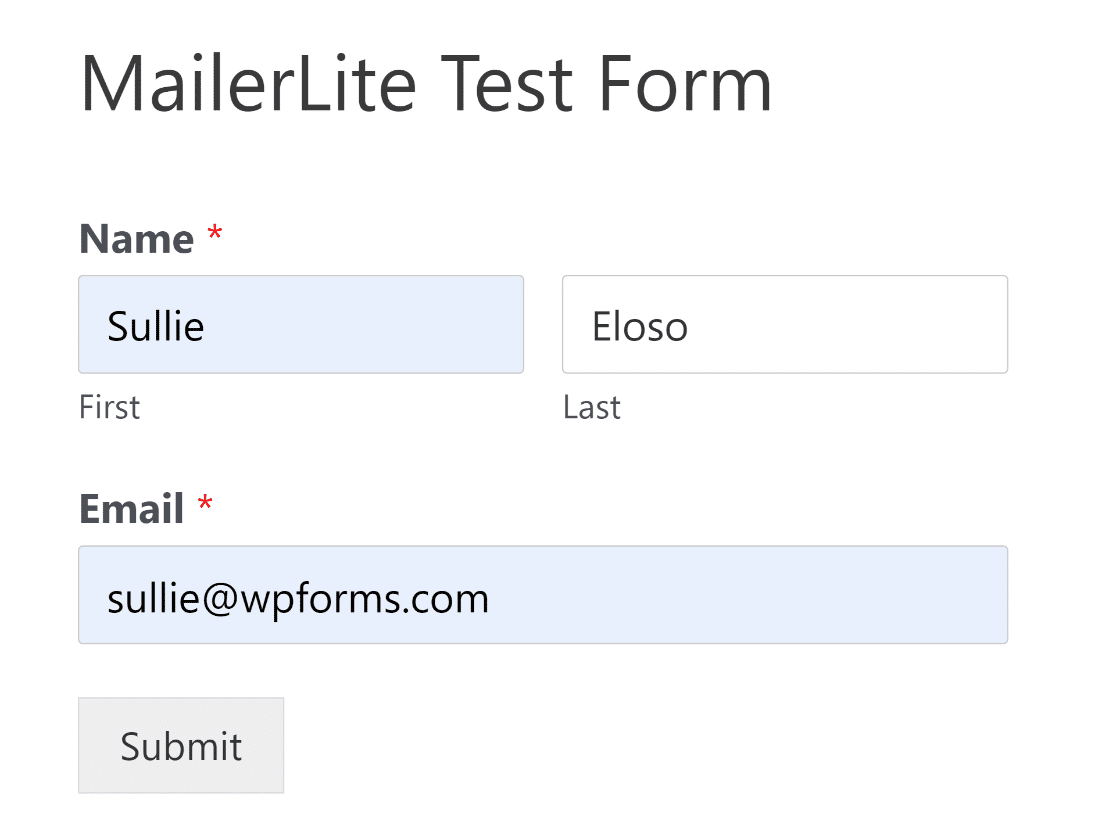
After you submit the test, open your MailerLite account and check that the new subscriber shows up.
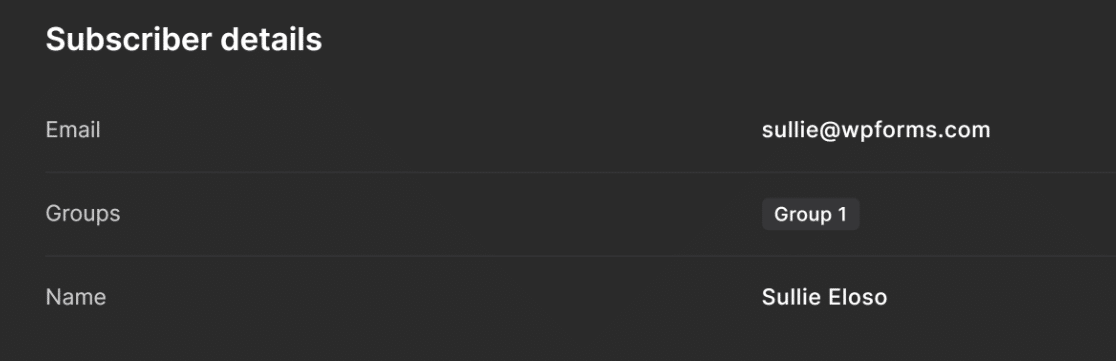
If your test contact appears in MailerLite, your form is working and you’re all set.
Enable Double Opt-In for MailerLite (Optional)
If you collect subscribers from visitors in Europe, double opt-in is worth setting up. It asks each new subscriber to confirm their email before they’re added to your list.
This helps you stay on the right side of GDPR and other privacy rules and keeps your list full of people who genuinely want to hear from you.
To set this up. log in and open Account settings, then select Subscribe settings and toggle on Double opt-in for API and integrations. From there you can set up the confirmation email subject and sender details.

Back in your WPForms form, open the MailerLite connection settings and set the Type dropdown to Unconfirmed.
This step is required for the double opt-in confirmation to work properly, since it tells MailerLite to hold each contact until they confirm.

FAQs About MailerLite Contact Forms
Here are answers to the questions that come up most when connecting WPForms to MailerLite.
Is the MailerLite addon free in WPForms?
The MailerLite addon is available on WPForms Plus and higher, so you’ll need at least a Plus license to use it.
MailerLite has its own free plan, so you can start collecting subscribers there without paying for the email service itself.
Do I need the MailerLite WordPress plugin to connect my forms?
No, WPForms connects to MailerLite through its own native addon and your MailerLite API key, so there’s no need for MailerLite’s separate WordPress plugin.
That’s what lets you build a full contact form and still send subscribers to MailerLite from one place.
Can I connect multiple MailerLite accounts to WPForms?
Yes, you can add as many MailerLite connections as you need under WPForms » Settings » Integrations, as long as each one uses its own API key and nickname. Any form can then use whichever account you choose.
Why aren’t my contacts showing up in MailerLite right away?
WPForms sends data to MailerLite in the background after someone submits your form, so it can take a moment to appear in your dashboard.
If contacts still aren’t coming through, double-check that your connection is active and that you’ve mapped an Email field, since the addon only pulls from Email type fields.
Next, Grow Your Email List With WordPress
With your MailerLite contact form live, every message you receive can also turn into a new subscriber.
If you want to get more out of your email marketing, take a look at our roundup of the best email plugins for WordPress to help with deliverability, notifications, and list growth.
You might also want to know how much an email marketing campaign costs before you scale things up, or explore the best lead generation plugins to grow your email list once you’re ready to capture more subscribers.
Start Building Your MailerLite Contact Form
Ready to build your form? Get started today with the easiest WordPress form builder plugin. WPForms Pro includes lots of free templates and offers a 14-day money-back guarantee.
If this article helped you out, please follow us on Facebook and X (Twitter) for more free WordPress tutorials and guides.





