Do you want to require payment on a WordPress file upload form? Getting a file and payment at the same time will save time and help to increase your conversions.
In this article, we’ll show you how to make sure your visitors pay when uploading a file on your website.
Create Your File Upload Payment Form Now
How to Require Payment on a WordPress File Upload Form
In This Article
Step 1: Install the WPForms Plugin
In this example, we’re going to create a quote acceptance form for a business website using WPForms Pro. In order to start the project, our visitor will need to upload a file and pay a deposit.
To start, let’s install and activate the WPForms plugin. If you need help with this, jump over to this guide on how to install a plugin in WordPress.
Next, let’s set up payments. Stay in the WordPress dashboard for this next part.
If you’re considering Stripe vs PayPal, the good news is that WPForms lets you use both. You can also take payment using Authorize.Net and Square if that’s what you prefer.
We’ll use Stripe in this example, which is included in ALL WPForms license levels (even WPForms Lite).
To start, you’ll need to click WPForms » Settings in the left-hand navigation menu. Then click the Payments tab at the top.
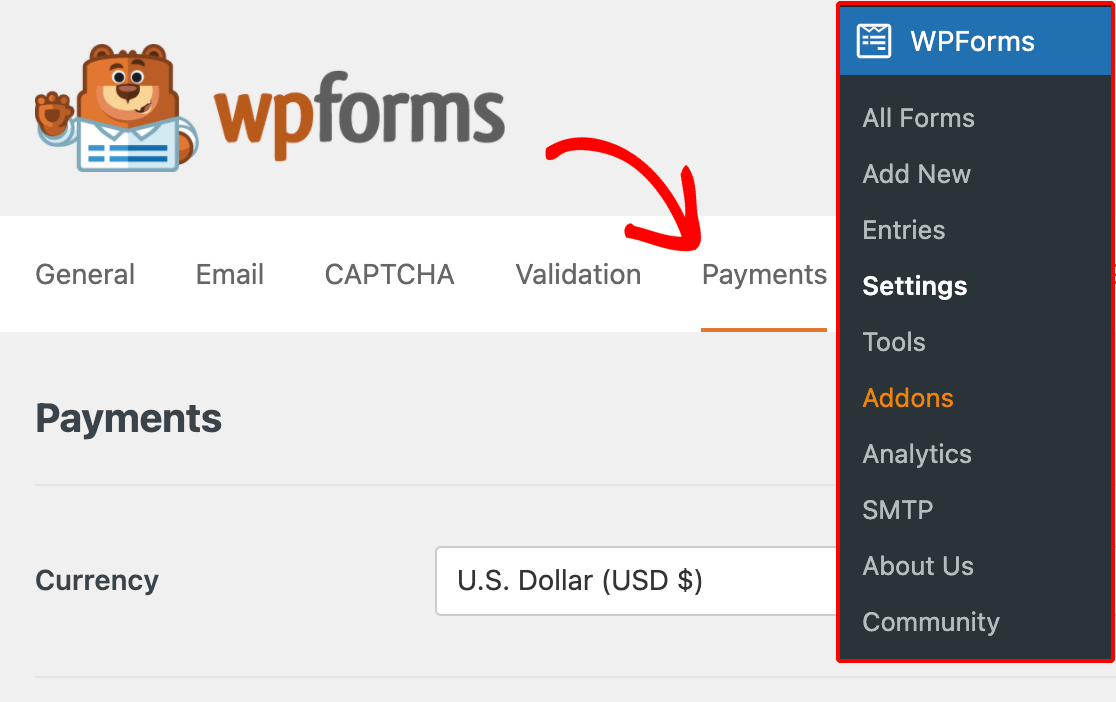
First, check that the Currency is set correctly. If it isn’t, you can go ahead and change it in the dropdown.
Then scroll down to the Stripe section and click the blue Connect with Stripe button.
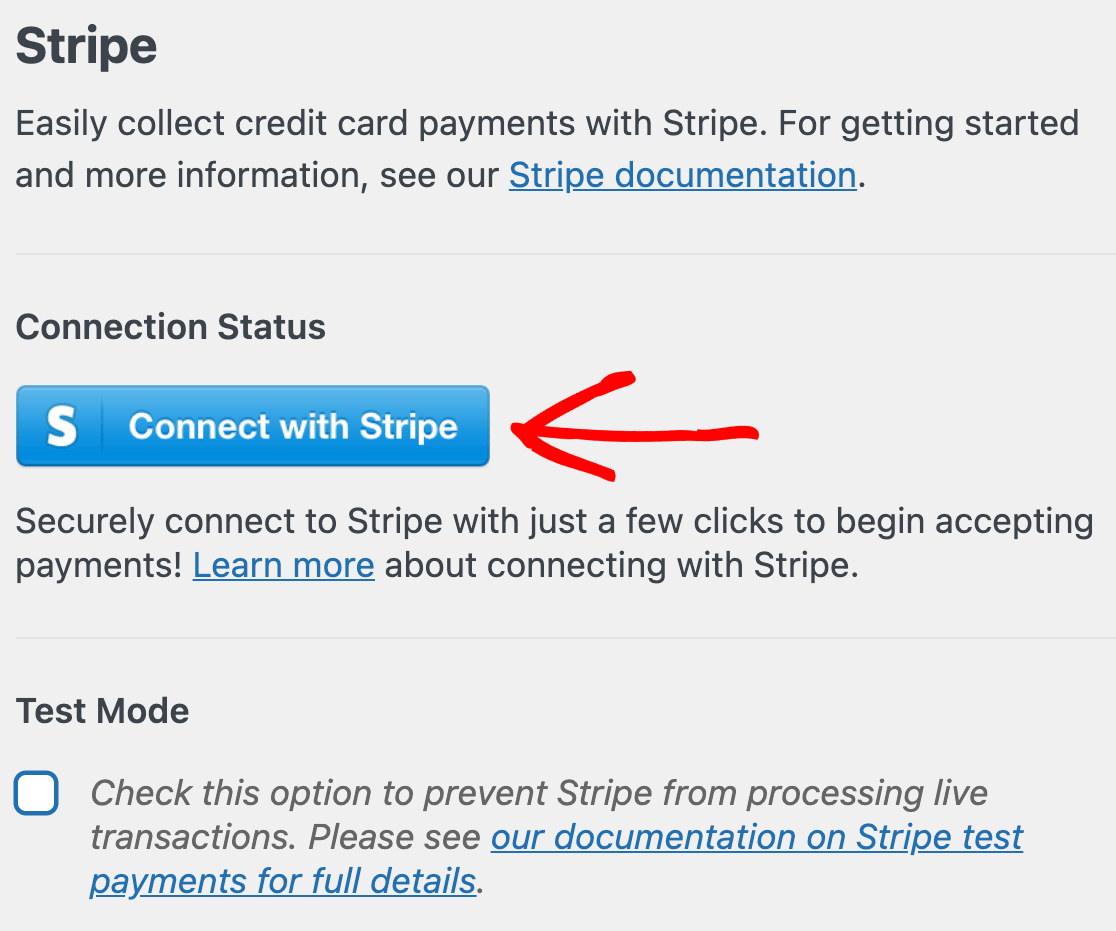
You can create an account for Stripe now, or sign in to your existing account.
Once Stripe is connected, you’ll see a message in the Stripe section of the page to confirm it’s all set up:

Did you notice that we’re running Stripe in test mode? If you want to try out your form without making real payments, you can check the Test Mode box to turn that on.
By default, the Stripe integration is set to the Payments Element mode which allows credit card payments as well as alternative payment methods like Apple Pay and Google Pay.
If you’re upgrading from an older version of WPForms and were previously using Card Elements, you can switch to Payment Elements (otherwise, it’s selected by default).
Make sure to save your Payments settings before you move to the next step.
Step 2: Create a File Upload Form
Now we’re going to create a form for our customers to accept a quote. In this form, they’ll need to pay a deposit and attach a document.
The form will look similar to a regular file upload form, but with some extra fields for Stripe.
WPForms is the best WordPress file upload plugin. It comes with 2,000+ form templates, so making any kind of form is really easy. Let’s use the File Upload Form template and customize it.
So to start, click WPForms » Add New in the WordPress admin menu.
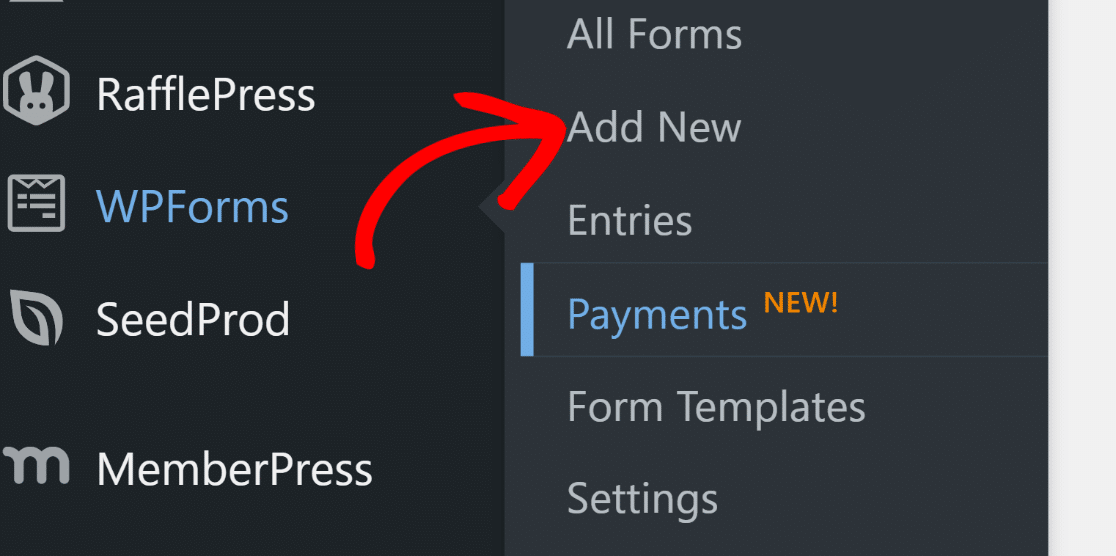
In the form builder, type a name for your form at the top. Then find the File Upload Form template and click Use Template.
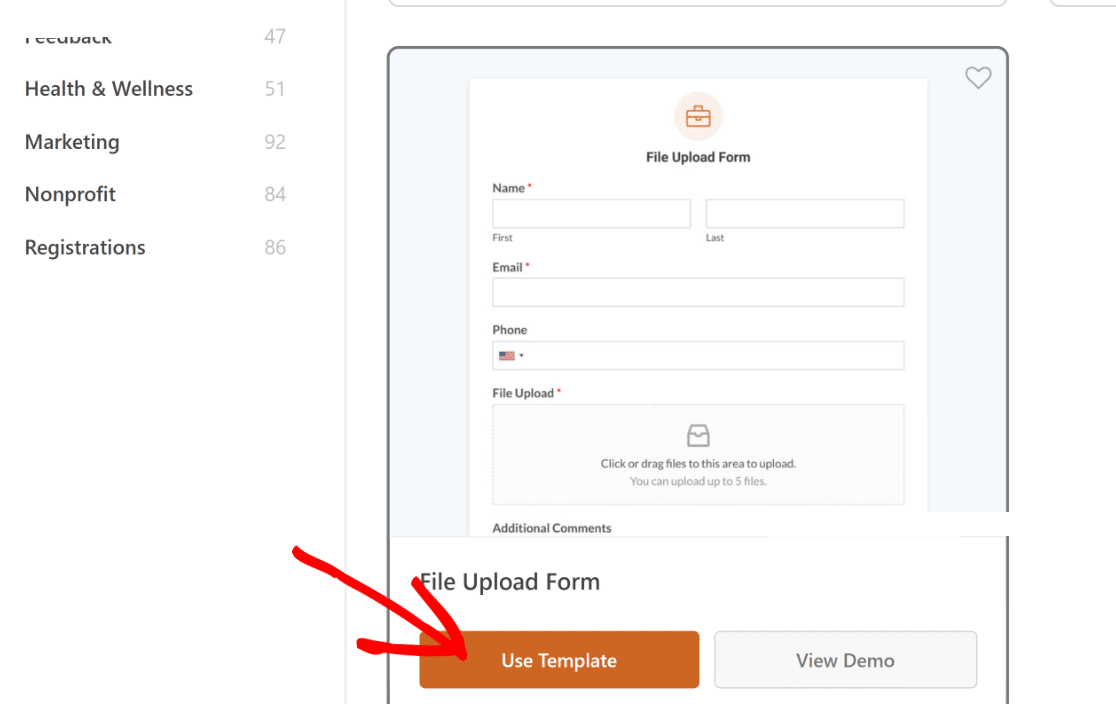
The WPForms form builder will open in your browser.
Notice how the right-hand pane always shows a live form preview that makes it easy to see what the finished form will look like. On the left, you’ll see a list of fields that you can add to your form.
You can also click on any field in the preview to open its options on the left side of the builder. Make sure that the Required setting is on for the File Upload field.
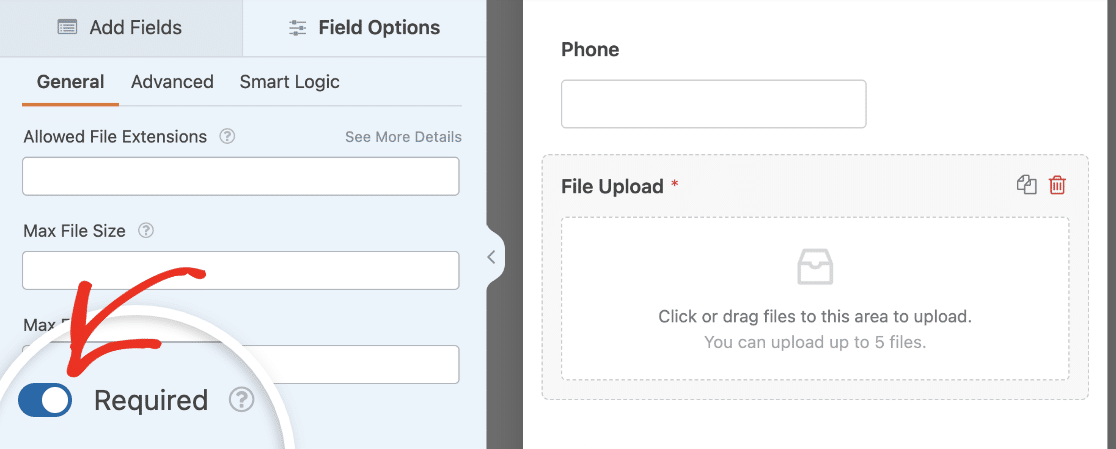
Now if the user doesn’t add a file, the form won’t submit.
Add any other fields you need for your form and configure their options. Then click Save at the top of the screen to save your progress so far.
Step 3: Add Stripe Payment to Your File Upload Form
Now that we have a working file upload form, all we need to do is add a secure payment field to accept the deposit from the customer.
For this form, let’s make a really simple example with 2 fields:
- Single Item
- Stripe Credit Card
Go ahead and drag these 2 fields from the left-hand pane onto the form on the right.
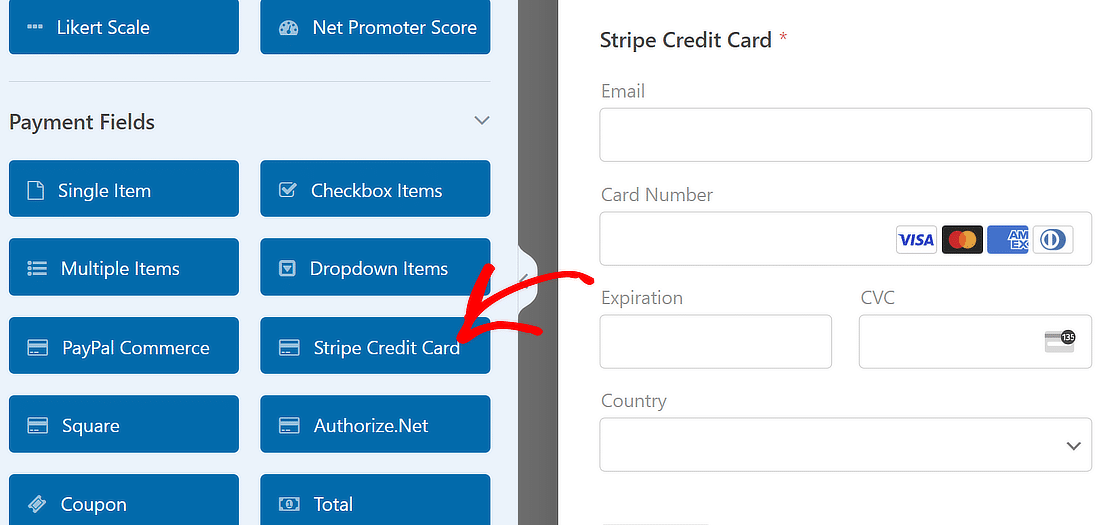
Want to make your payment form more dynamic? WPForms lets you show payment fields based on specific dates, which is perfect for early bird pricing or seasonal deposit rates.
For the Stripe Credit Card field, you can click on the field in the preview area to change its label and description.
You might have noticed the Email subfield in the Stripe Credit Card field. This lets customers use Stripe Link to checkout more quickly.
In the Advanced field options, you can choose to use the Stripe Credit Card Email subfield or a different Email field from your form.
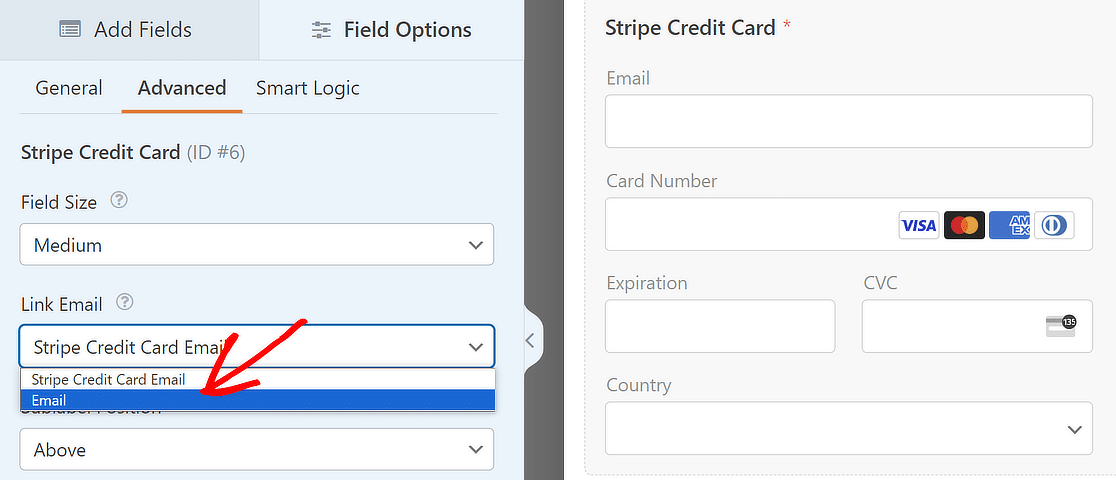
Once you’re done with the Stripe Credit Field options, click on the Single Item field to open the settings. In Item Price, type the price you want to charge your customer.
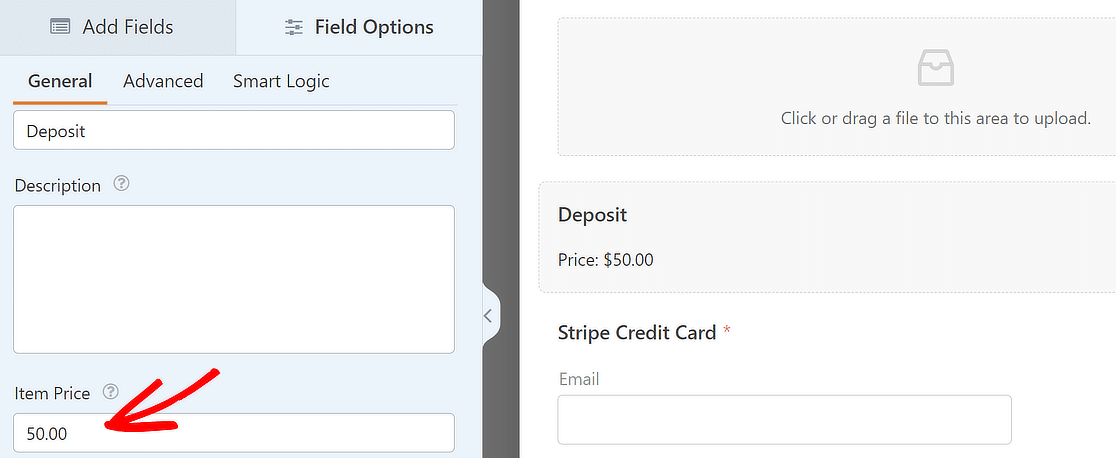
That’s it. The payment fields are done!
If you want to add more payment fields, check out this guide on how to require a payment total on your form. Adding a Total field will help to prevent anyone from sending a $0.00 payment. In this case, we don’t need a Total field because we’re using 1 fixed price.
OK. We’re done here, so let’s move on to the form settings.
Step 4: Configure Your Form’s Settings
Now that all of your form’s fields are set up, you can configure its settings. Click on the Settings tab on the left side of the builder, then on the General section.

Here you can change your form’s name and description, add form tags, change the submit button text, and more.
Next, go to the Spam Protection and Security settings.

You can enable a variety of anti-spam options, including custom filters and CAPTCHAs.
Then you can go to the Notifications section. Whenever someone submits your form, you’ll receive an email with the entry details. The notifications settings are where you can customize this email or add multiple email notifications.
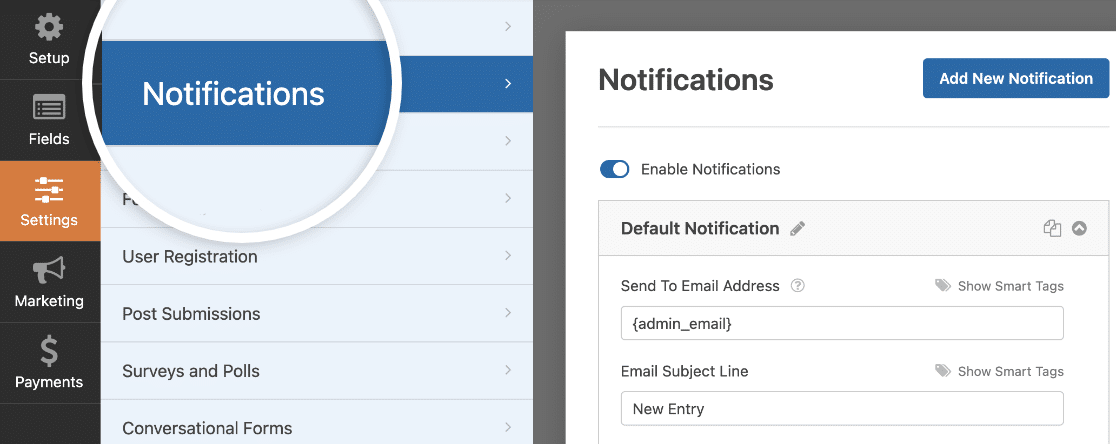
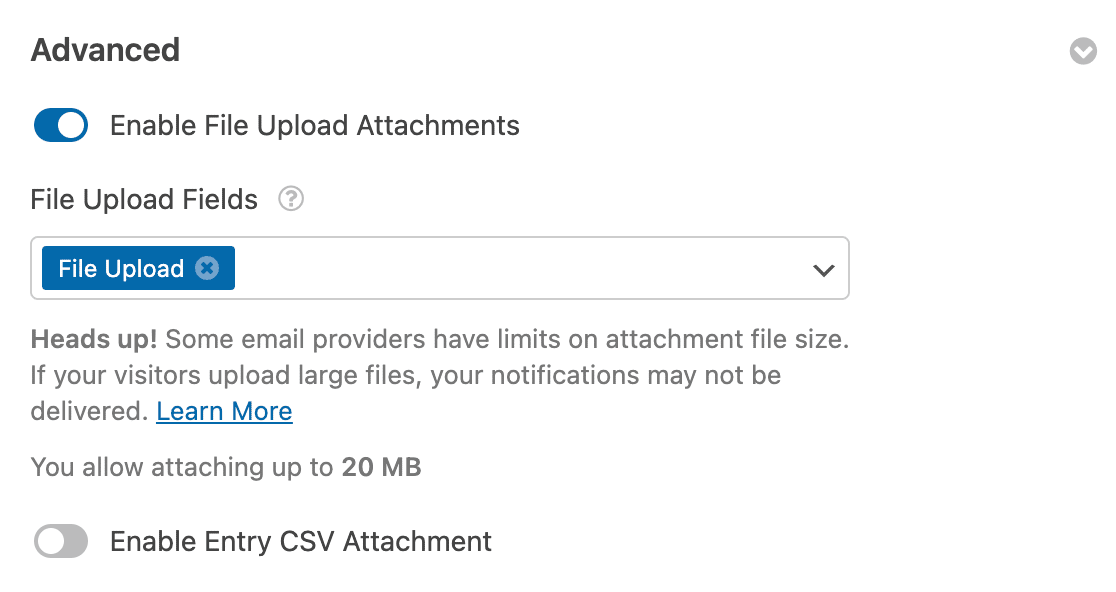
If you scroll down on this page, you can also include users’ file uploads in the email notification.
Finally, the Confirmations settings let you create a custom message to show users after they submit your form. Check out our tutorial on how to create form confirmations for more details.
Now that your form settings are good to go, you can move on to the payment settings.
Step 5: Configure Your Stripe Payment Settings
The hard work is done! We’re in the home stretch. We just need to tell WPForms exactly what we want to do in Stripe when the form is submitted.
Stay in the form builder and click Payments » Stripe. From there, toggle on the Enable Stripe payments setting.
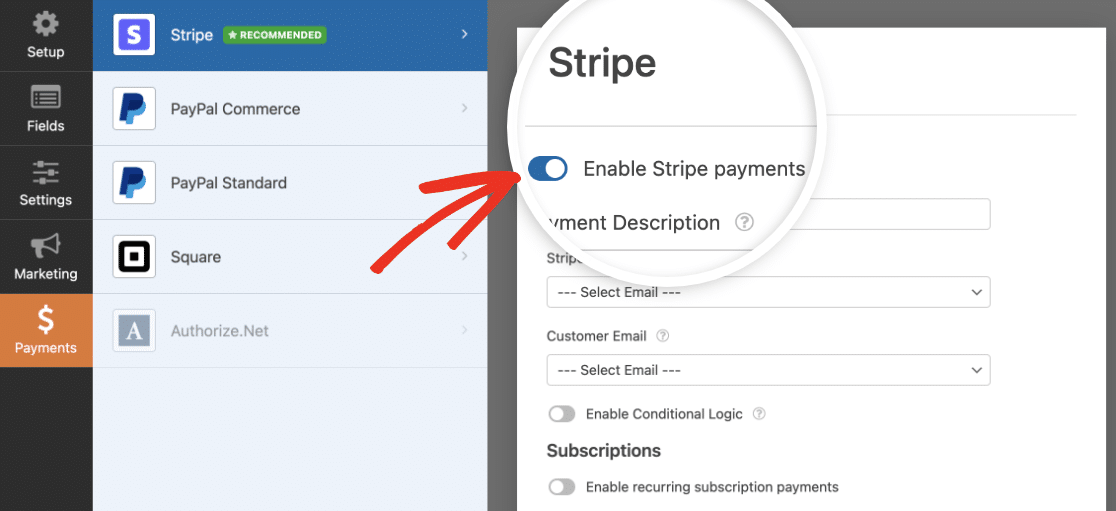
There are a few settings that you can customize here:
- Payment description: This is the description that will appear on your customer’s credit card statement. You should normally type your business name here.
- Stripe payment receipt: Select Email from the dropdown to send a receipt to the email address your visitor entered in the form.
- Enable conditional logic: You can use this to process the payment only if certain conditions are met. This is helpful if you want to check that important fields are filled out before payment is taken.
The rest of the settings are for recurring payments, so we don’t need to edit those right now.
All done? Click Save at the top of the form builder.
Just one more step to go!
Step 6: Publish Your File Upload Payment Form
Now, we’re ready to publish your form. This is the easiest part.
At the top of the form builder window, click Embed.

In this example, we’re going to Create New Page.

We’re going to name our page Pay Your Project Deposit. Type your preferred page name here and then click Let’s Go.

WPForms will now create a new page and add the form we created to it. But before you publish the page, how about adding some style to your form?
If you click on the area around the form, it will open the settings panel for the block on the right-hand pan. You can adjust your buttons, fields, and background styles here without any code.
In fact, you can also choose a ready-made theme to instantly apply unique visual styles to your form.
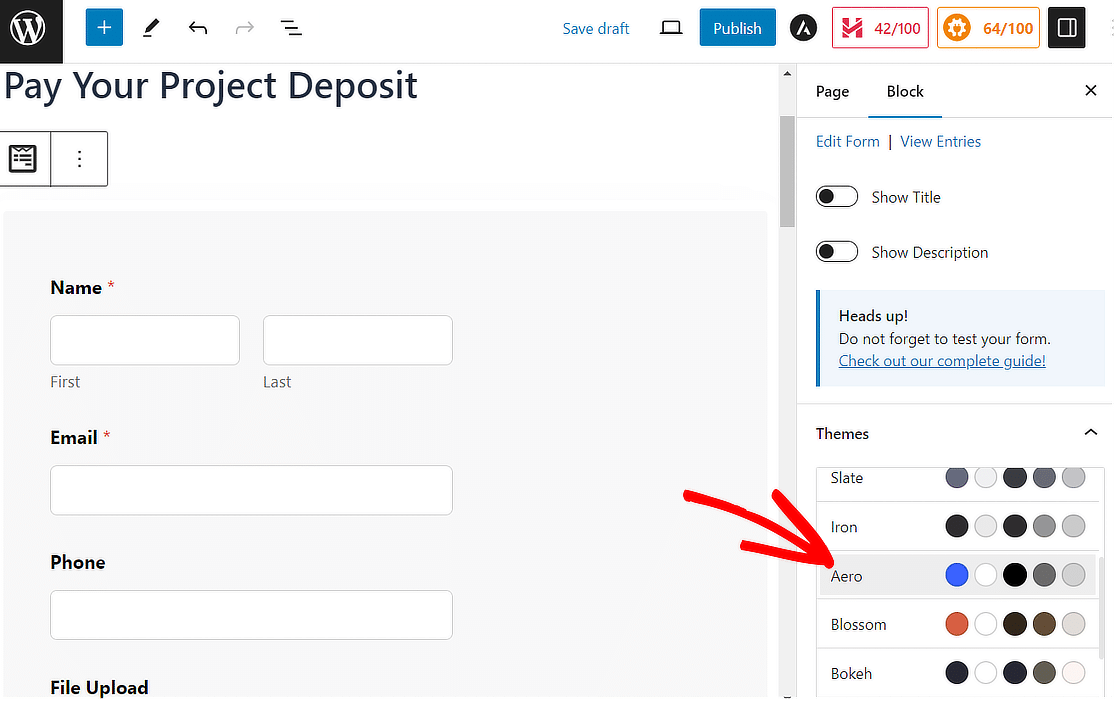
After customizing styles, all that’s left to do is click the Publish button in the top-right corner.

Now the form is live, you’re ready to take payments and file uploads with a single form!
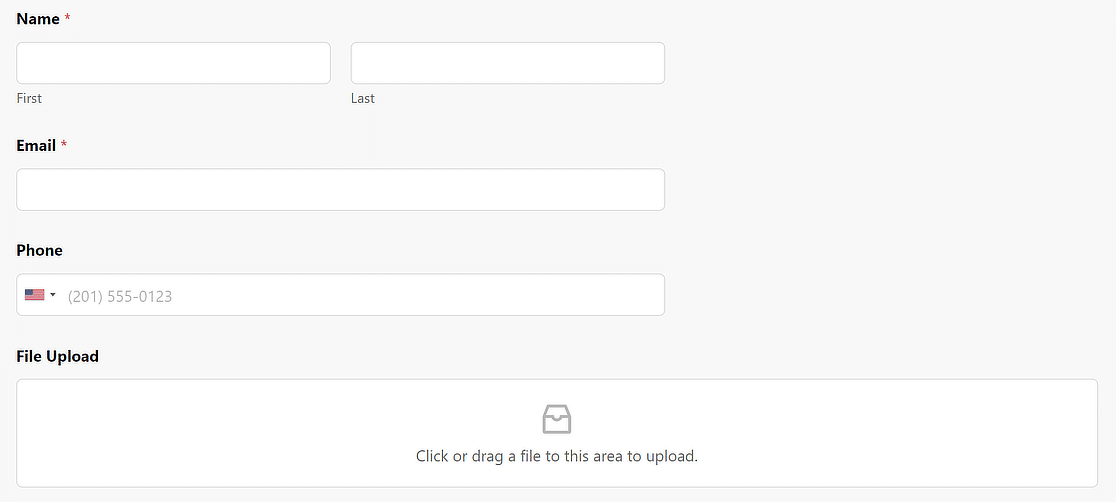
And that’s it! You can now take payments on your WordPress file upload form.
After customers start submitting your form, you can look entries up by their payment details if you ever need to track down a specific payment. Just go to WPForms » Entries and use the search field.
Create Your File Upload Payment Form Now
More Questions on File Upload Forms With Payments
If you’ve got more questions about requiring payments for file upload forms, the following commonly asked questions might help shine more light.
Can I use payment gateways other than Stripe?
Yes, WPForms supports PayPal, Authorize.Net, and Square as additional payment options. So you can enjoy the flexibility of having multiple payment gateways available depending on your preferences.
Is it possible to send an email notification with the uploaded file?
Yes, it’s easy to send the uploaded file as an email attachment after form submission. In WPForms, you’ll find this setting by going to Notifications, scrolling down to the Advanced section, and clicking on the Enable File Upload Attachments toggle button.
How can I ensure my form is secure from spam?
You can add multiple layers of spam protection in WPForms including Akismet, set a minimum time to submit, keyword filters, and captcha options like reCAPTCHA, hCaptcha, and Tursntile.
Next, Add Optional Payments to a Form
Do you want to take file uploads with optional payment? This could be a good way to take donations for a charity or nonprofit.
To find out how to make payment optional, check out this article on adding an optional payment field to a form. You might also be interested in how to use the Zapier addon to save file uploads to Dropbox or Google Drive.
Ready to build your form? Get started today with the easiest WordPress form builder plugin. WPForms Pro includes file upload form templates and offers a 14-day money-back guarantee.
If this article helped you out, please follow us on Facebook and Twitter for more free WordPress tutorials and guides.




is possible to select already uploaded file in checkout page ?
Hi balhadj, it isn’t possible as our plugin’s forms do not have an integration with any checkout pages. The process described in this article is for a process that is handled entirely within WPForms.
I hope this helps to clarify 🙂 If you have any further questions about this, please contact us if you have an active subscription. If you do not, don’t hesitate to drop us some questions in our support forums.
Is it possible to charge the customer according to audio/video length? If I charge $1 per minute and he uploads a 5 min audio file it charges him $5?
Hi Thomas! We don’t have any feature that would enable your forms to discern the media file length and calculate a total to be charged. It may be possible to with custom code, however I apologize as we aren’t able to provide support for this degree of customization.
In case you’d like to look into custom development options, we highly recommend using Codeable. Codeable screens all developers for you to make sure that they’re highly skilled and communicative, and then also helps guide the entire process of connecting and communicating with a best-fit developer.
Here’s our tutorial on using Codeable, which provides more details on how this process works.
Or if you’d like a team that you can continue coming back to (longer term) for custom development help, you might also consider checking out WPBuffs.
If you have any further questions about this, please contact us if you have an active subscription. If you do not, don’t hesitate to drop us some questions in our support forums.
Is it possible to ensure that the customer details entered in a form like are add to our mail chimp mailing list?
Are payments taken linked to accounting systems i.e. Xero or similar?
What happens to the uploaded file? is it emailed or stored in digital asset management software?
Hi Michael!
You can have customer details from your forms be added to your Mailchimp account’s database by utilizing our Mailchimp addon which is available with our Plus level (and higher) license. More details about this can be found here.
Regarding payments being linked to accounting systems, at this time we do not have any such integrations though it could be possible via our Zapier addon. For instance, it is possible to connect your WPForms to Quickbooks via Zapier as described here.
Uploaded files (along with any of your forms and their data) are stored on your site’s server directly, so you have control over all of your files and data. More details about this can be found in this article.
I hope this helps to clarify 🙂 If you have any further questions about this, please contact us if you have an active subscription. If you do not, don’t hesitate to drop us some questions in our support forums.
Hi, on the post above you have put a highlighted bar that says “WPForms is the best WordPress Form Builder plugin. Get it for free!” However the payment function you have described in this post is not available on the free version, but only the Pro version. I think that this post needs to state very clearly at the outset that this functionality of accepting payments is only available on the Pro version
Hi Tosin! The banner that you’re referring to is not a part of this article specifically but is rather filled dynamically for marketing content, so it isn’t attributed to this article. However I agree that we could certainly do a better job making it clear in this article that payment processing features are only available with our Pro level (or higher) license. I’ve forwarded your feedback to our writing team for further review 🙂
Thank you for taking the time to give us your feedback here!
IS IT POSSIBLE TO HAVE THE CUSTOMER UPLOAD MORE THAN ONE FILE AND HAVE THE PRICING CHANGE DEPENDENT ON THE AMOUNT OF UPLOADS?
Hi there,
I am sorry to inform you that we do not have a built-in feature that shows the change in Pricing based on the number of file uploads. I will upvote the request on our behalf.
Thanks you for your patience here 🙂