Accepting payments online is essential for any WordPress site, and alternative payment methods like Google Pay can make it easier for customers to complete their payments on your site.
A faster checkout process can also decrease cart abandonment and improve sales for your eCommerce store, but you might be wondering if it’s worth the effort or if the setup process is too complicated.
Fortunately, it’s fairly simple to set up Google Pay on your WordPress payment forms and start making transactions right away. In this post, we’ll show you how to set up Google Pay for WordPress sites.
Create Your Google Pay WordPress Form Now
How to Accept Google Pay in WordPress
Check out our video tutorial for steps on how to set up Google Pay in WordPress:
Or, if you’d rather follow a written tutorial, follow these simple steps:
Step 1: Install the WPForms Plugin
The very first thing you’ll need to do to set up Google Pay for your site is install the WPForms WordPress plugin. In order to use the Stripe addon to enable Google Pay, you need at least the Pro license level.

After you’ve completed your purchase, you can log in to your WPForms account to download and install the plugin. If you need more help with this step, check out our guide on how to install WPForms.
Step 2: Activate the Stripe Addon
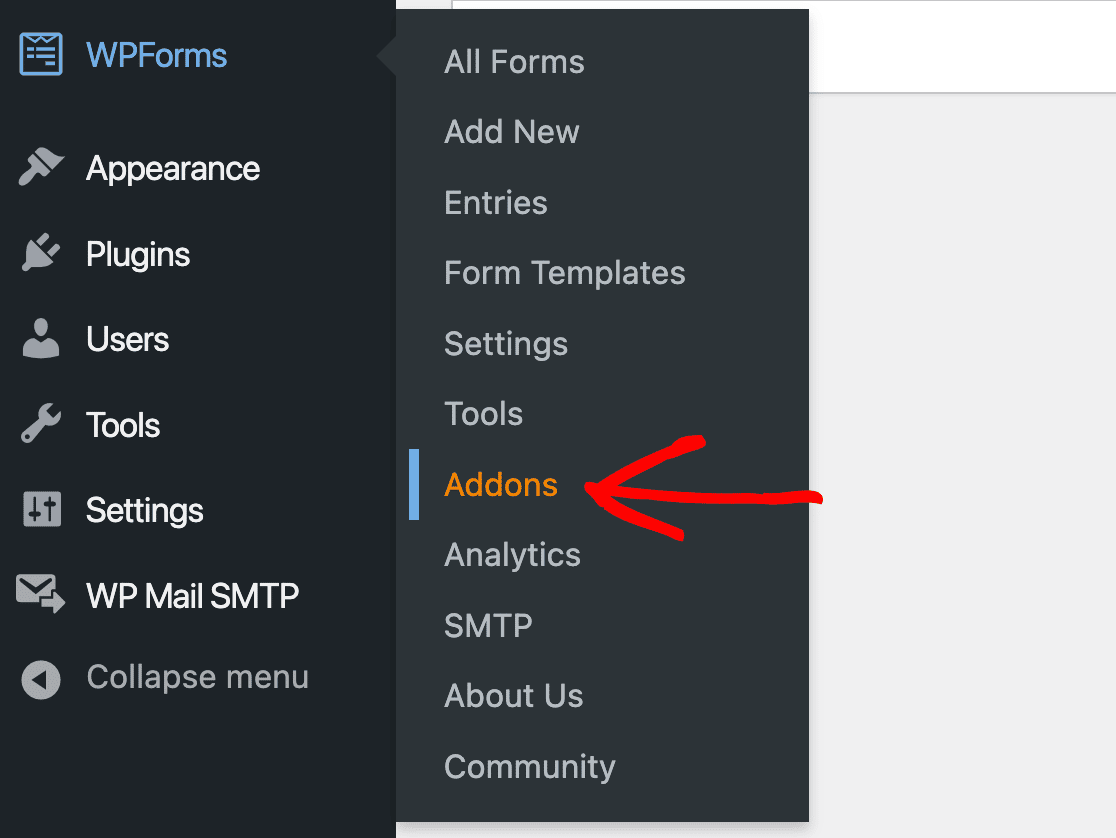
Now that WPForms is up and running, you can install the Stripe addon to add payment plugin functionality to your site. In your WordPress dashboard admin menu, go to WPForms » Addons.
Then look for the Stripe addon and click the Install Addon button.
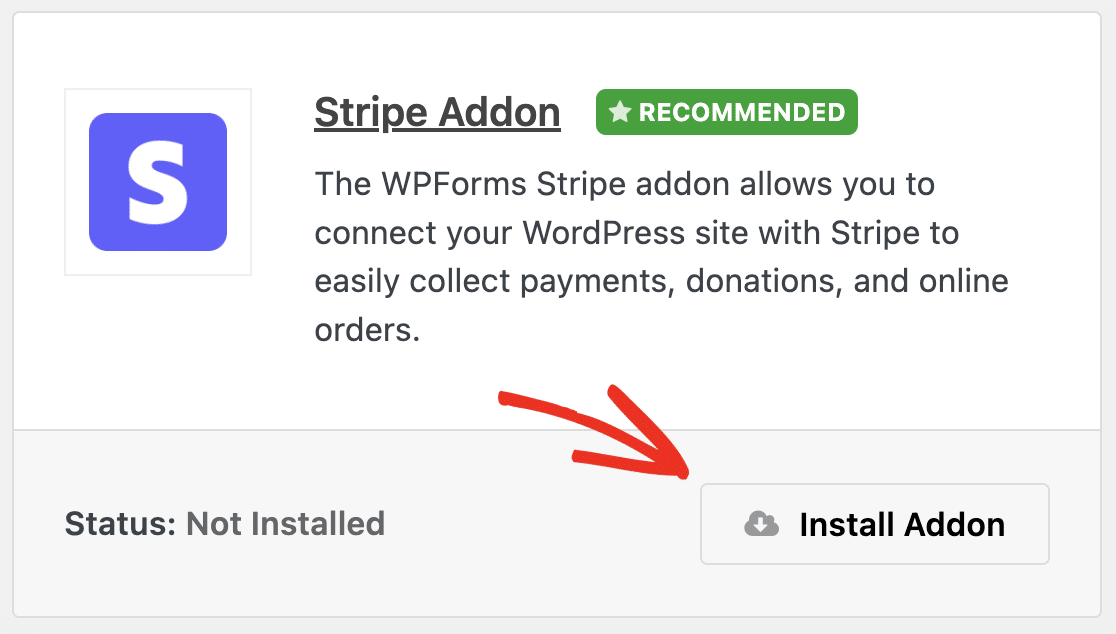
Once it’s installed, the addon should also automatically activate. Then you can begin connecting WPForms to Stripe.
We’ll explain the whole process, but if you feel like you need additional help, you can see our Stripe addon documentation for more details.
Step 3: Connect WPForms to Your Stripe Account
Next, head over to WPForms » Settings » Payments. Here you’ll see your general payment and Stripe addon settings.
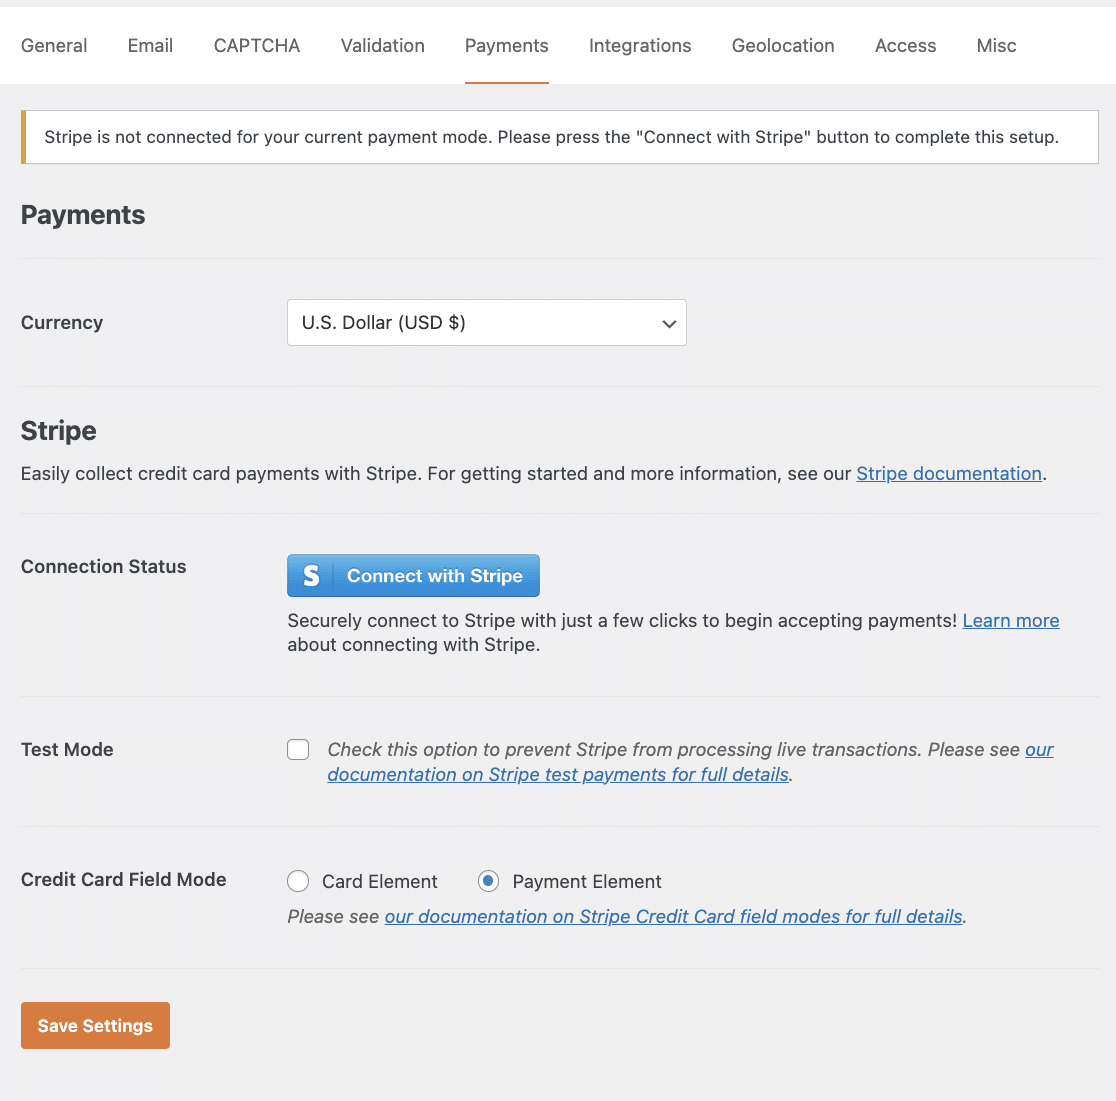
First, select from the currencies available. We’ll be using US dollars for our example.

Then click the Connect with Stripe button to start connecting WPForms to Stripe.

This will open a new page where you can enter your Stripe account credentials and other information to connect your site to Stripe.
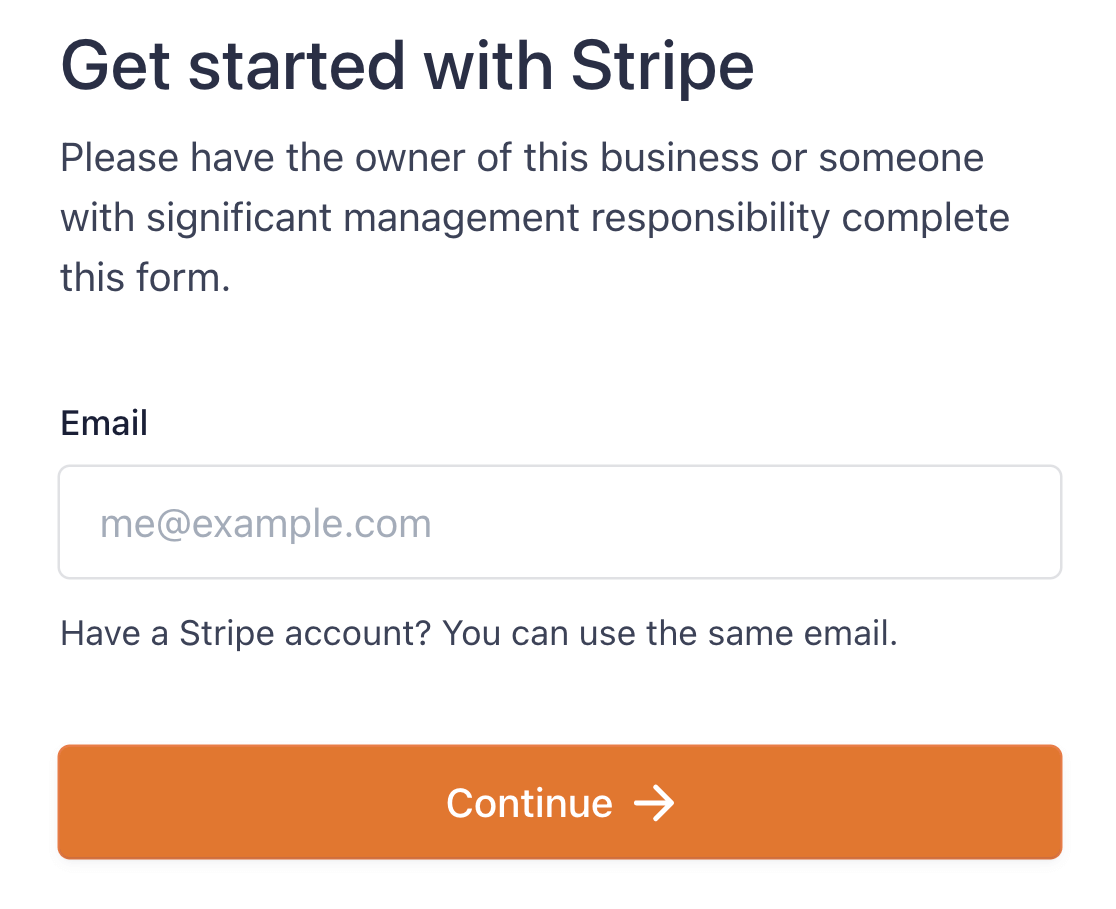
Once you’ve completed the Stripe Connect wizard, you’ll be returned to your WPForms payments settings page. You should see a checkmark indicating that your account is properly connected.

Note that you’ll also see a checkbox here to enable Test Mode. This is a useful option if you’re just setting up your eCommerce site and want to check that everything is working properly.
See our guide on testing Stripe payments for more details on how to use test mode.
Step 4: Enable Payment Element Mode
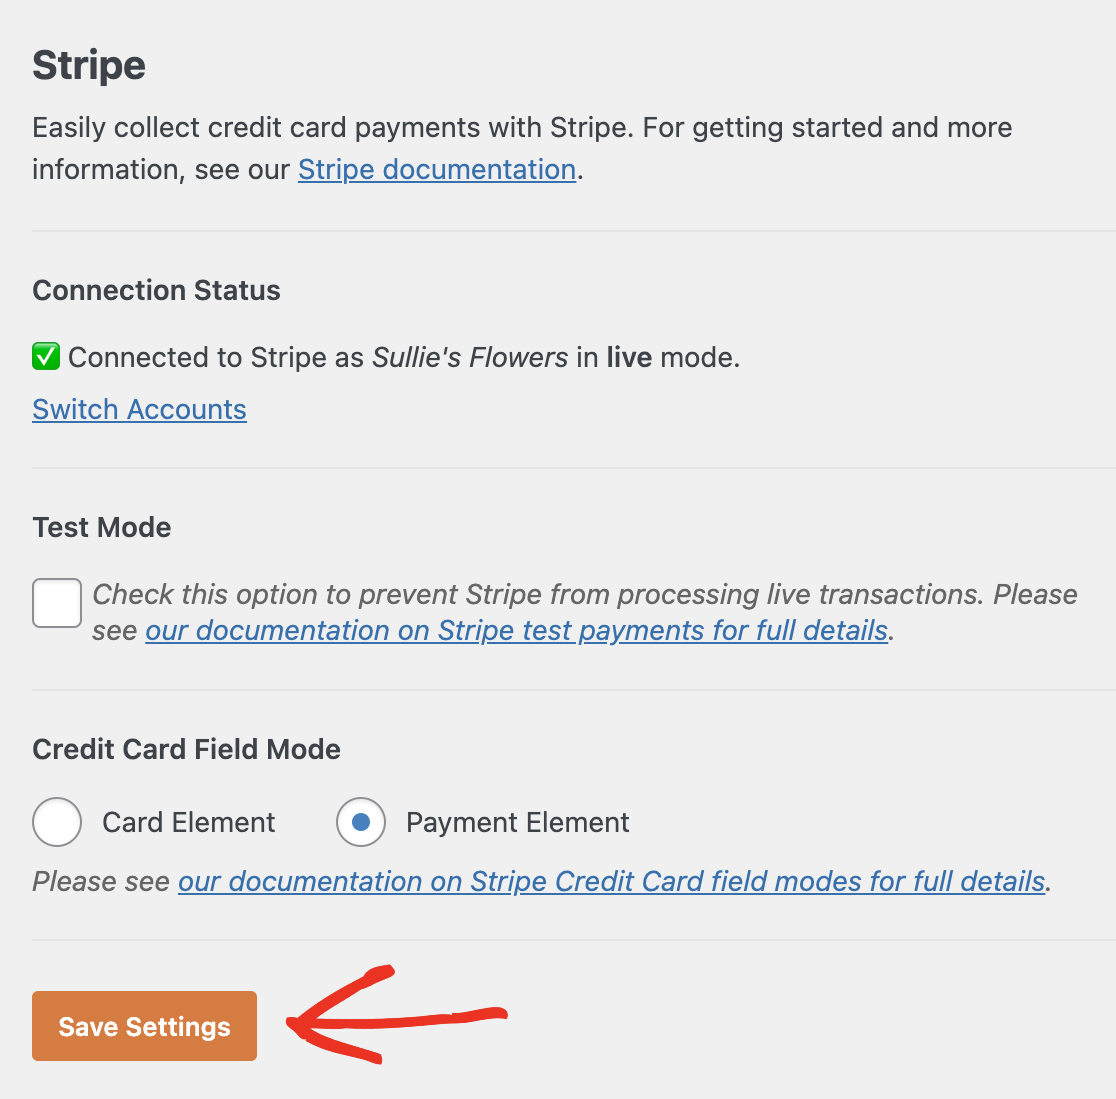
The next setting you need to configure is which mode you want to use the Stripe addon in. There are 2 options: Card Element and Payment Element.

Card Element mode will only accept payments from credit and debit cards. Payment Element mode accepts card payments as well as digital wallet payments with Google Pay and Apple Pay.
So, select Payment Element mode, then save changes to your payment settings by clicking the button at the bottom of the screen.
Step 5: Create Your Stripe Payment Form
Great! Now the Stripe addon is all set up and ready to use. Next, you’ll need a form where customers can make purchases on your WordPress site.
To begin making your Google Pay WordPress form, head over to WPForms » Add New.
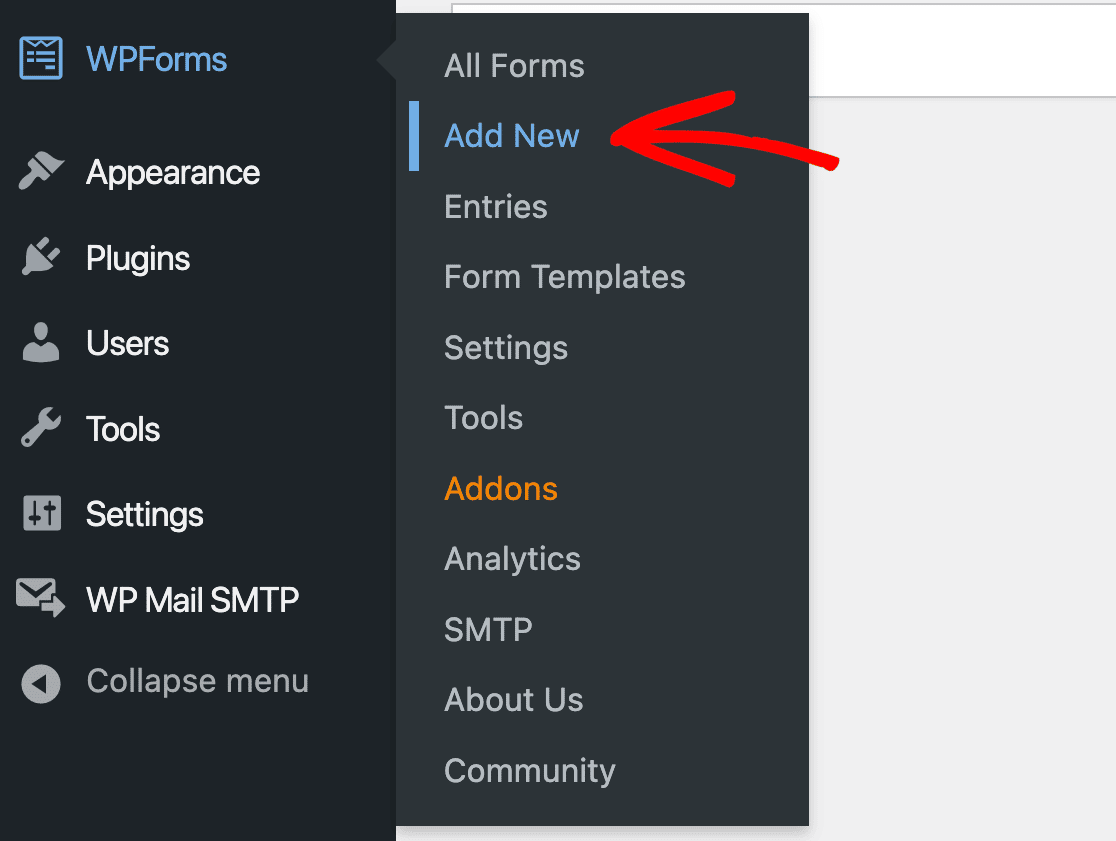
This will open the form builder to the first screen where you can name your form and select a template.
For our example, we’re going to use the Billing / Order Form template. However, you can use any template you like or build your form from scratch. Every template in WPForms is 100% customizable.
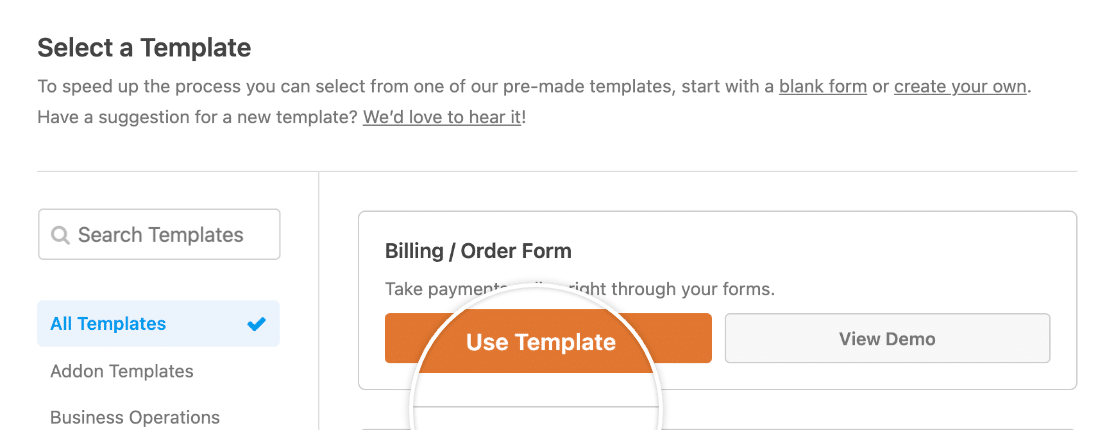
Once you’ve chosen your template, it will load in the drag-and-drop form builder.

Here, you can make any changes you want to your form. For more details on customizing your form, check out our tutorial on how to make a WordPress order form.
For now, all we’re going to do is add a Stripe Credit Card field.
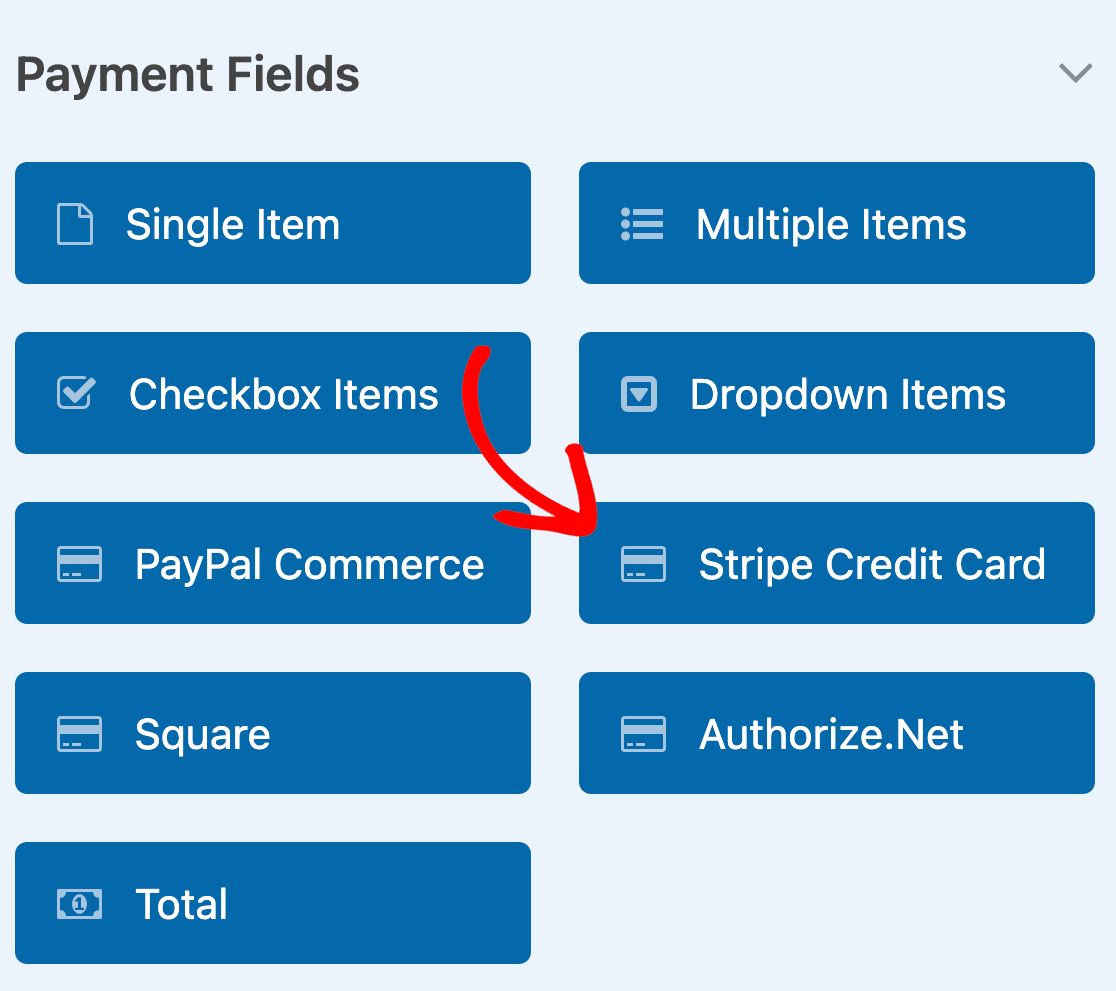
Drag and drop the Stripe field into the preview area to add it to your form.
Whenever you add a new field to your form, you can customize its field options by clicking on it in the form preview area. First, you can change the field label for the Stripe Credit Card field.
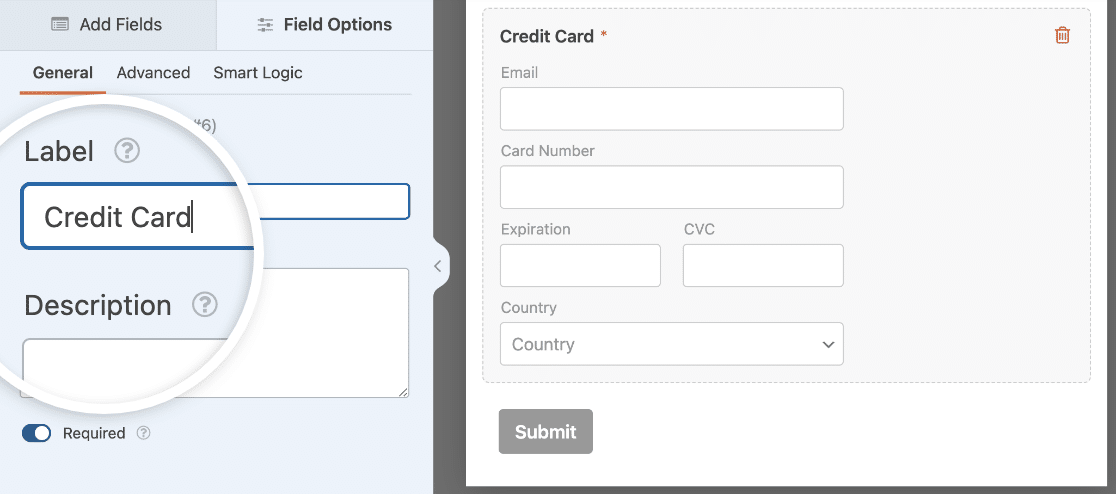
You can also add a description if you like. And, if customers have to make a payment to submit your form, make sure to toggle on the Required option.
Next, move over to the Advanced field options. Here, you can set up Link to provide returning customers with a faster payment process.
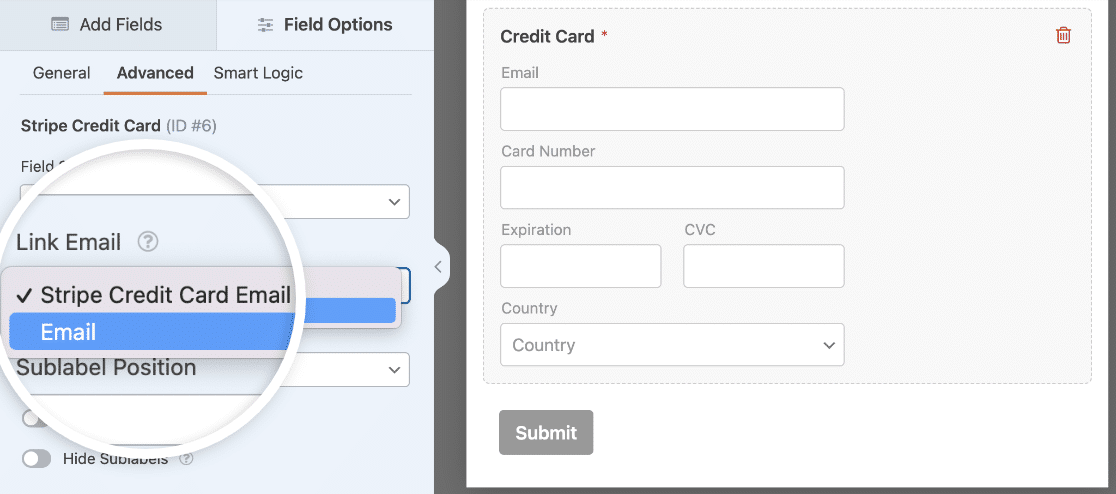
Link is a service that enables online shoppers to complete 1-click Stripe checkout when making purchases at online stores where they’ve shopped before. Select whether you want to use an Email field from your form or add an Email subfield to the Stripe Credit Card field to save customers’ information for future purchases.
Once your form is looking the way you want it to, there’s one more thing you have to do before you add it to your WordPress site.
Step 6: Configure Your Stripe Form Payment Settings
You’ve already connected WPForms to Stripe, but now you need to enable Stripe payments for this specific form.
In the form builder, click on the Payments tab on the left. Then select Stripe and toggle on the Enable Stripe payments setting.
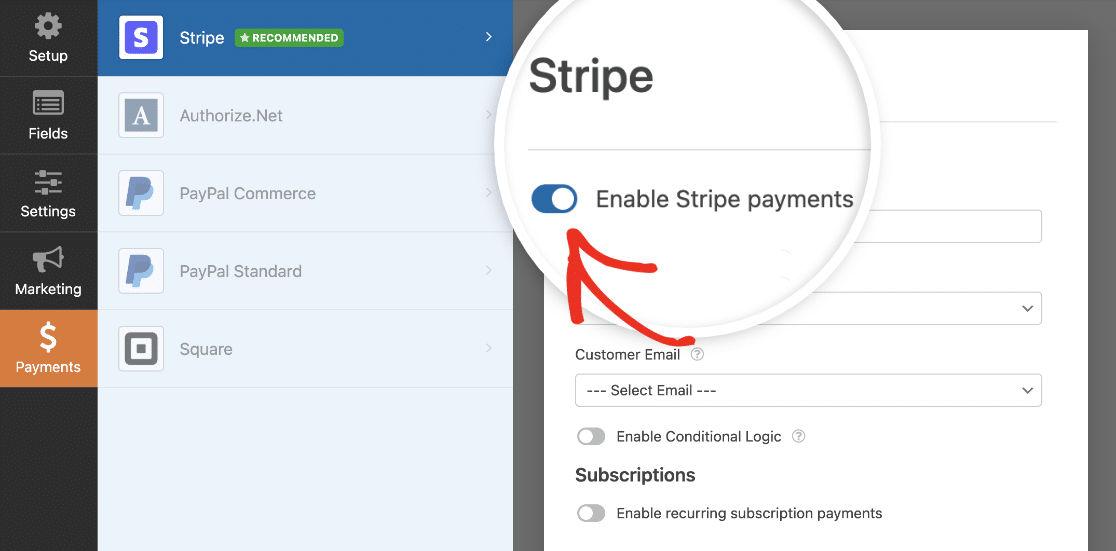
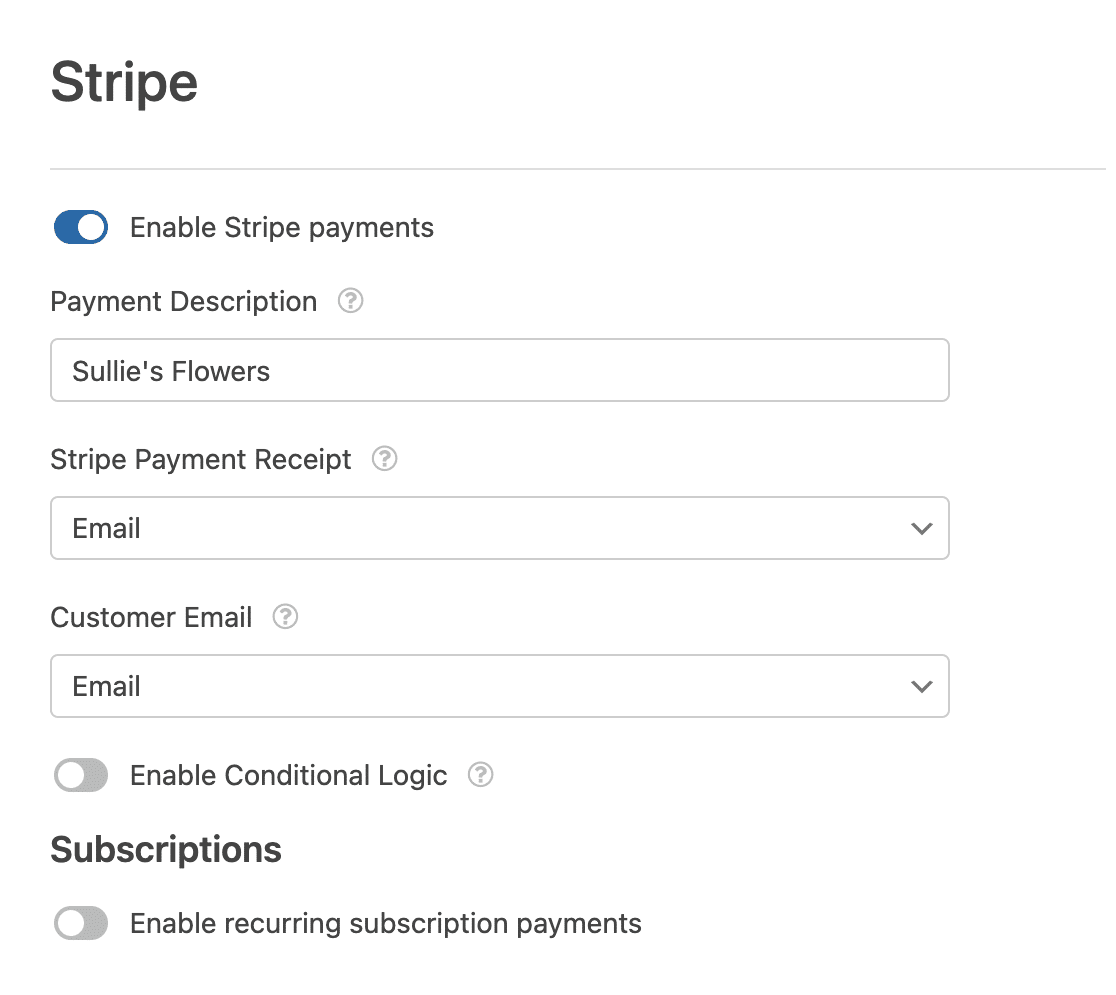
Next, fill in the rest of the settings for this payment form. The Payment Description is what will show on customers’ bank account statements for this purchase. Then you’ll need to select the Email field from your form to send the receipt to the customer after their payment is complete.
Pro tip:
For payment forms, it’s a good idea to send a notification to the customer only after their payment has gone through. If you’d like to send conditional notifications for completed payments, see our doc on conditional logic for Stripe.
If you’re selling a membership or subscription product, you can also check out how to enable recurring subscriptions with Stripe.
Once you’ve finished with the Stripe settings, your Google Pay form is done! Make sure to click the Save button at the top of the form builder.

Step 7: Publish Your Google Pay Form
All that’s left is to add your Google Pay form to your WordPress site so customers can make purchases. WPForms includes lots of different ways to embed forms on your site, but we’ll be using the embed tool to add our form to a new checkout page.
From the form builder, click on the Embed button at the top of the screen.

This will open a module where you can select if you want to add your form to an existing WordPress page or create a new page.
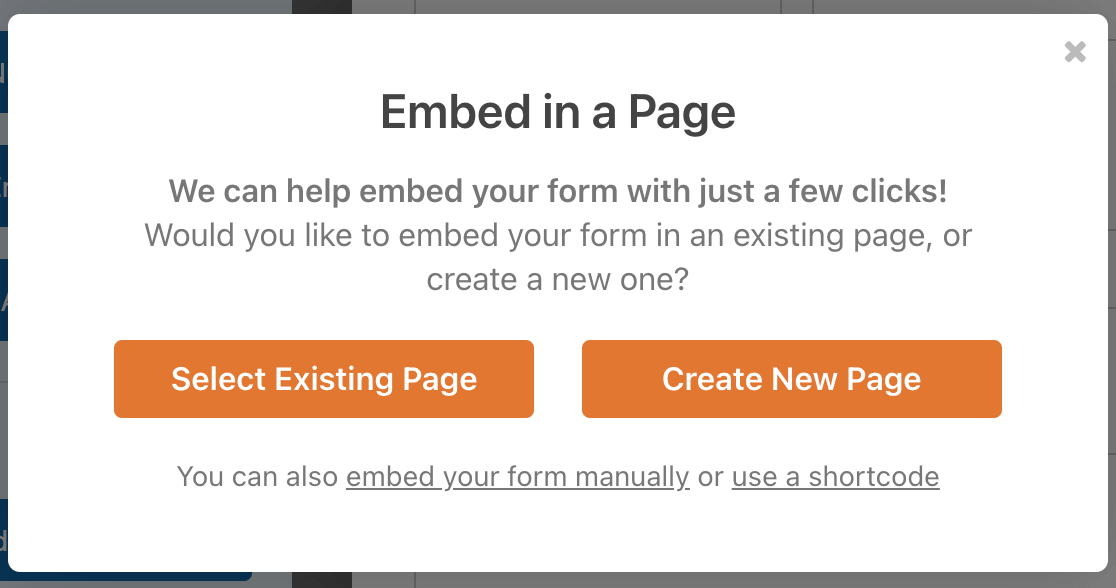
We’ll select Create New Page. Then enter a name for your page in the field provided and click Let’s Go!

WPForms will add your form to your new page automatically. Check that everything looks right, then go ahead and click Publish.
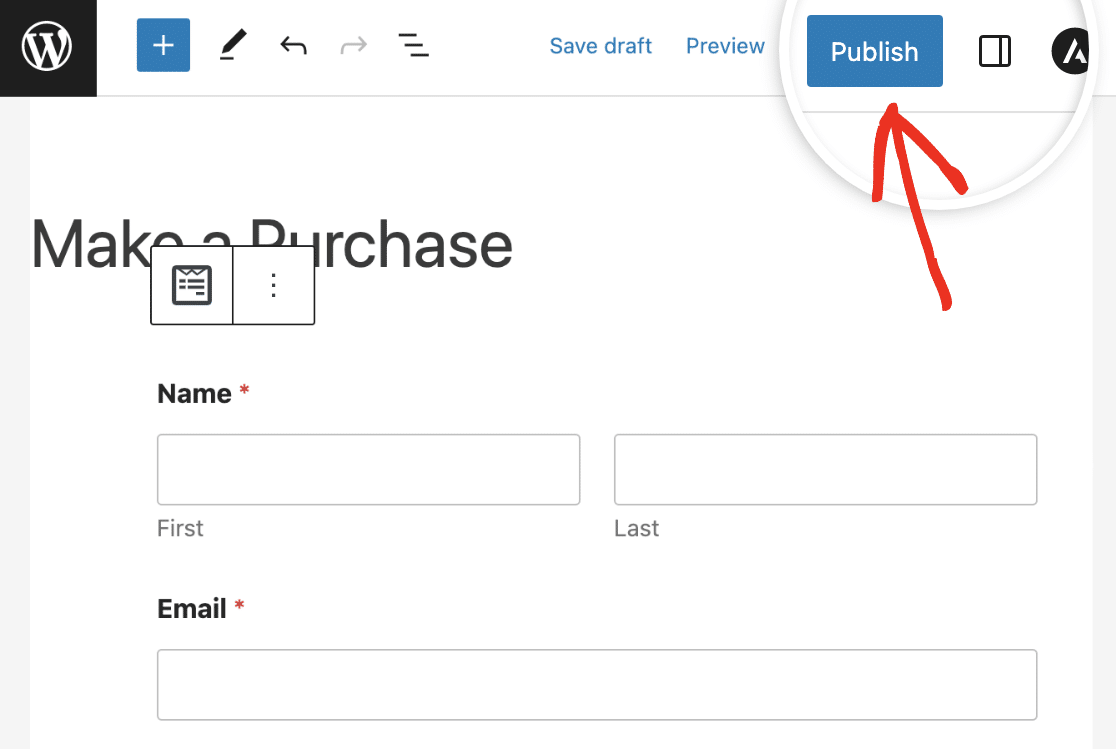
Now customers who have Google Pay enabled on their devices will see a Google Pay option on this form.
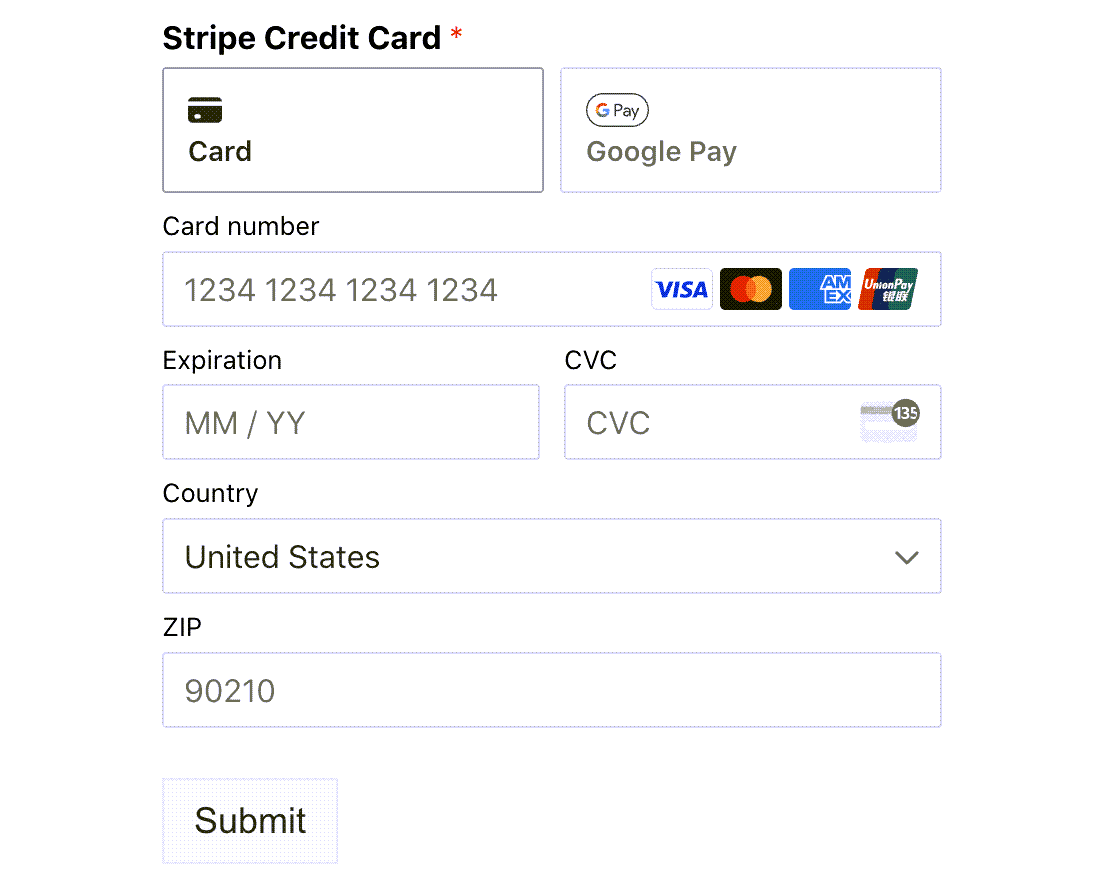
Note that you’ll only see the Google Pay button if you have Google Pay set up on your device. Anyone without Google Pay can still use your form to make an online payment using a credit card.
If you’d like to look at an alternative option, WP Simple Pay also supports Google Pay payments. Check out our WP Simple Pay review to learn more.
Create Your Google Pay WordPress Form Now
FAQs about How to Take Google Pay Payments in WordPress
Does WordPress Support Google Pay?
Yes, you can take payments with Google Pay on your WordPress website. This is an excellent digital wallet alternative to Apple Pay for Android users. However, you’ll need a plugin to add this payment option to your site.
WPForms is the best form builder for WordPress. It includes 2,000+ form templates, including payment form templates, to help you get started quickly.
Plus, the WPForms Stripe addon lets you set up a payment gateway on your site and includes payment elements such as Google Pay and Apple Pay. This makes it a great Stripe plugin and WooCommerce alternative.
How do I integrate Google Pay with WordPress?
To integrate Google Pay with WordPress, you can use WPForms Pro along with the Stripe integration. Once set up, you can easily add a payment form that supports Google Pay, making it simple for users to pay directly through your site.
How do I accept Google Pay in Woocommerce?
To accept Google Pay in WooCommerce, you’ll need to install the Stripe payment gateway plugin. Stripe supports Google Pay, so once it’s set up, your WooCommerce store can accept payments via Google Pay without any additional steps.
Can I accept Google Pay on my website?
Yes, you can accept Google Pay on your website by using WPForms Pro with the Stripe integration. This combination allows you to create payment forms that support Google Pay, offering your customers a convenient payment option.
How do I accept payments on my WordPress site?
To accept payments on your WordPress site, WPForms Pro with Stripe integration is a great solution. It allows you to create customized payment forms where users can pay using various methods, including Google Pay, credit cards, and more.
Can I set up time-sensitive payment options?
Yes, WPForms allows you to show payment fields based on specific dates, which is useful for seasonal pricing, early bird specials, or limited-time payment options.
Next, Create a Recurring Payment Form
Recurring payments are a great way to generate revenue from your site. The WPForms Stripe and PayPal Commerce addons both support recurring payments so you can easily create your own membership site with WordPress.
Create Your WordPress Form Now
Ready to build your form? Get started today with the easiest WordPress form builder plugin. WPForms Pro includes lots of free templates and offers a 14-day money-back guarantee.
If this article helped you out, please follow us on Facebook and Twitter for more free WordPress tutorials and guides.

