When I started exploring ways to sell on WordPress, I discovered that there are plenty of great options beyond the well-known choices like WooCommerce.
Depending on what you’re offering, there are tools like WPForms that can fit your needs perfectly, whether you’re selling digital products, physical items, or services.
In this guide, I’ll walk you through the steps to sell on WordPress without using WooCommerce. With a WPForms Pro license, you’ll easily be able to sell products and accept payment for them from right in your forms.
Sell on WordPress with WPForms Now! 🙂
How to Sell Products on WordPress Without WooCommerce
WooCommerce is a great solution for medium-large scale online stores, but for smaller businesses, or businesses that only sell a few products, it’s not always the best idea.
The main reason not to use WooCommerce for smaller sites is that the plugin comes with a lot of features and functions, which add some weight to your website and can make it load slower.
Besides, if your products are made-to-order and you have no inventory requirements, then using WooCommerce or other eCommerce platforms would be much too complicated for your needs.
For larger stores, the benefits may outweigh the slight inconvenience, but for small stores with fewer products, there are easier solutions out there. One of these is simply using WPForms Pro.
Step 1. Install and Activate WPForms Pro
You can easily sell products and collect payments right from your forms using WPForms. This is so convenient since you’ll need to have forms on your site anyway.
All you’ll need to do is add a few extra fields to your form to make them eCommerce-ready. So we’ll get started by installing WPForms Pro, which is a paid WPForms license.
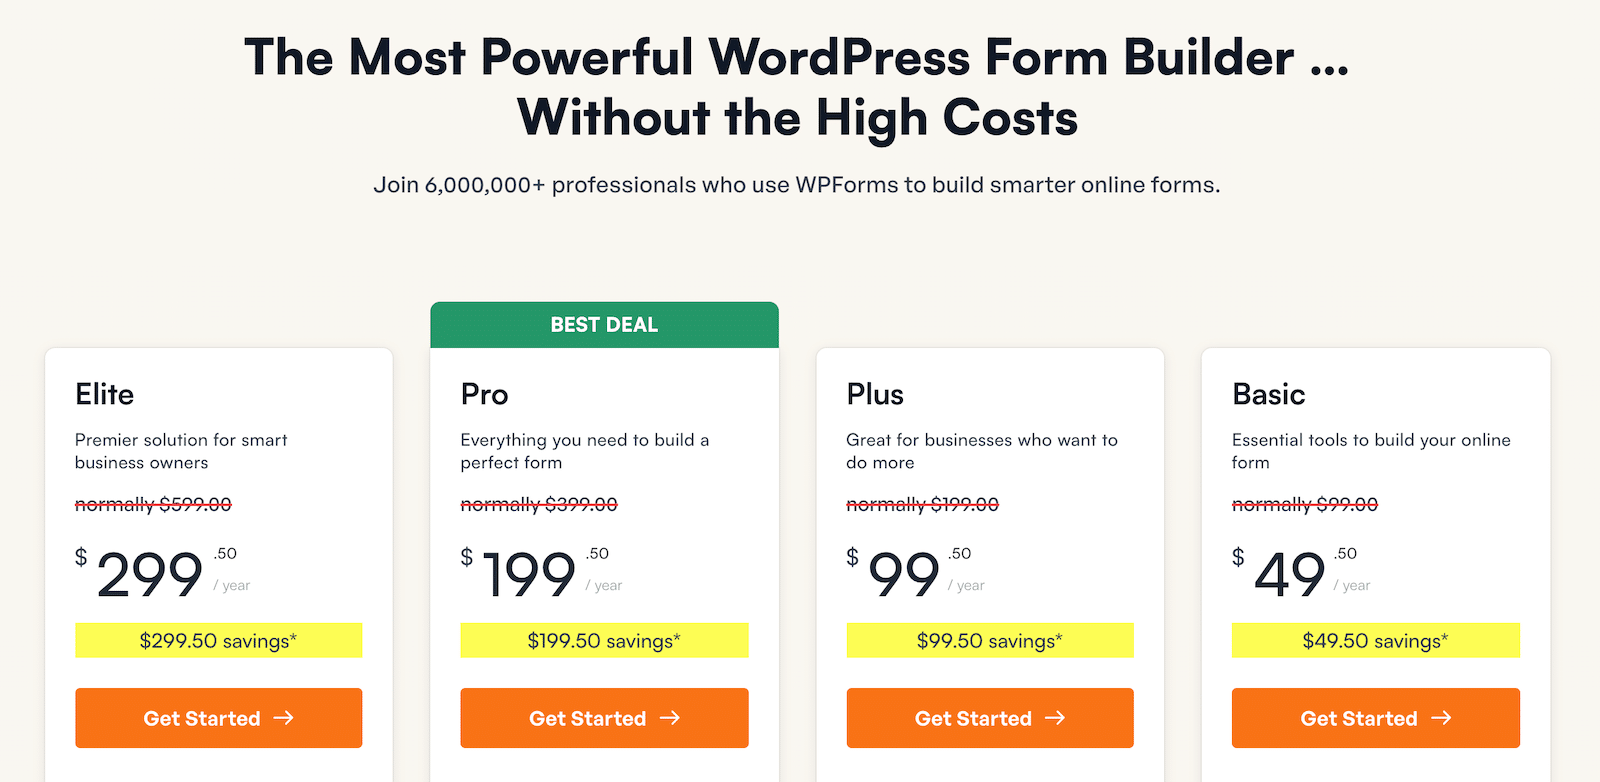
With WPForms Pro installed, you’ll have free access to the WPForms payment addons, which include popular payment gateways like Stripe, PayPal Commerce, Square, and Authorize.Net.
If you need a bit of help with installing WPForms Pro, check out this helpful guide to installing WordPress plugins for beginners.
Step 2. Install Payment Addons
With WPForms installed, the next step will be adding a WPForms payment addon. There are several to choose from, but for this guide, we’ll focus on the Stripe addon.
Another popular choice is the PayPal Commerce addon, and if you’re unsure which is best for you, our Stripe vs. PayPal comparison will help clear your mind. That said, you can activate multiple payment gateways so that your users can decide which they’d prefer.
Installing either addon is easy. First, let’s head into the WordPress admin area, where we’ll click through WPForms » Addons to get to the WPForms Addons page.
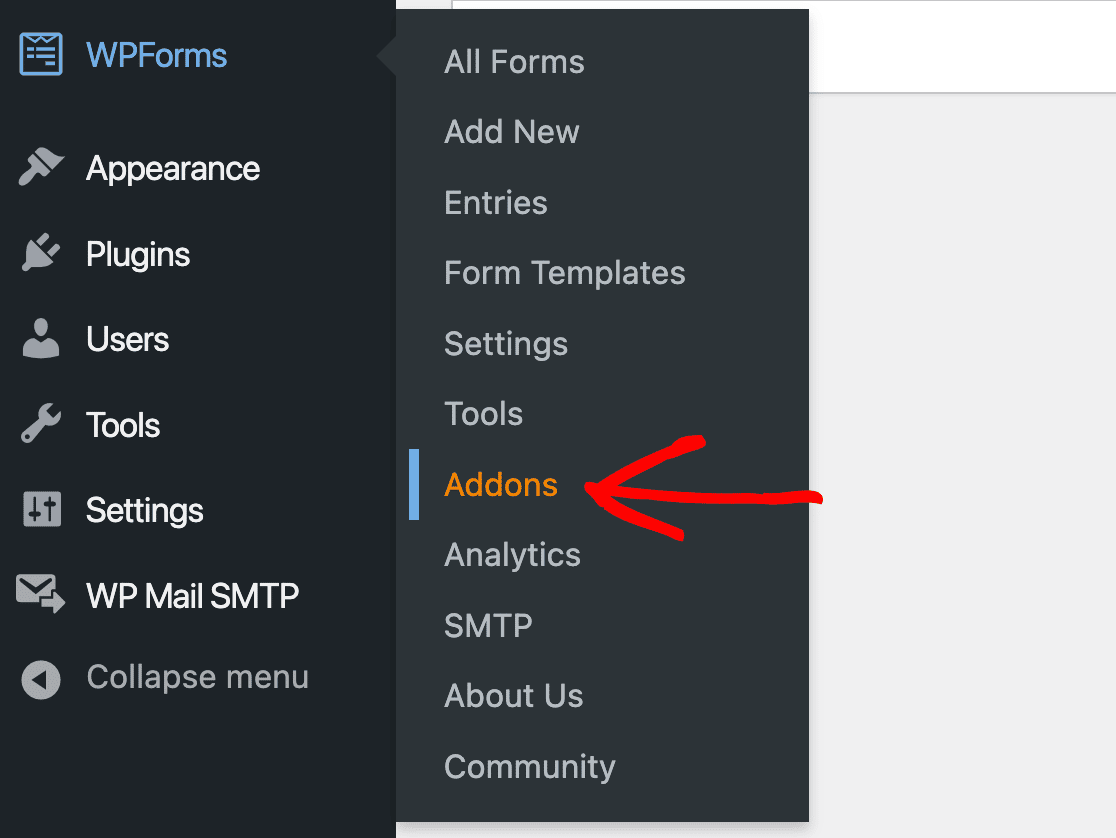
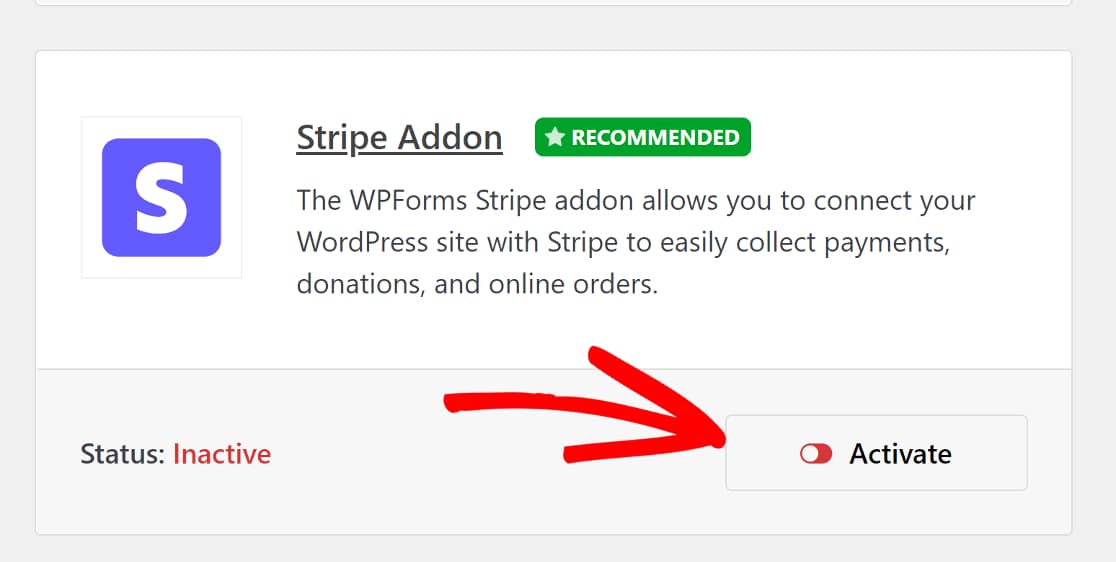
You can easily find the addons you need by scrolling through the page or simply using the search bar. Once you’ve found the addon you’d like to use, simply click Install Addon and then Activate to get started.
Next, head back to the WPForms tab on the sidebar of the WordPress admin area, and this time, click through WPForms » Settings » Payments.
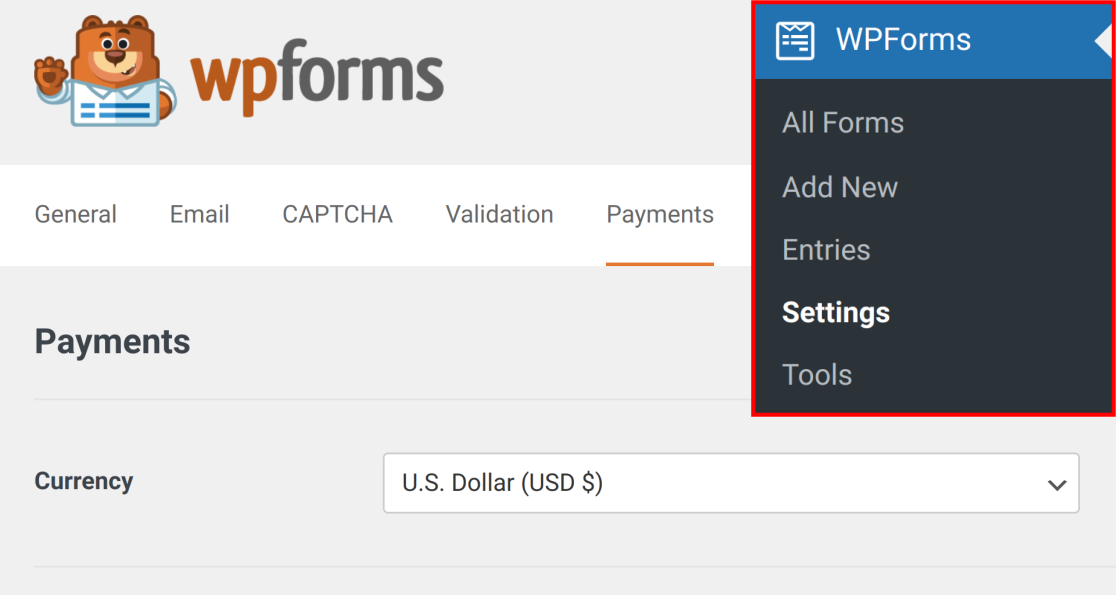
On this page, you’ll run through a quick integration process for the payment gateway you chose.
As mentioned, we’ll be using Stripe, but the steps are not significantly different for any other payment gateway.
On the Payments page, scroll down till you see the section labeled Stripe, then click Connect with Stripe.
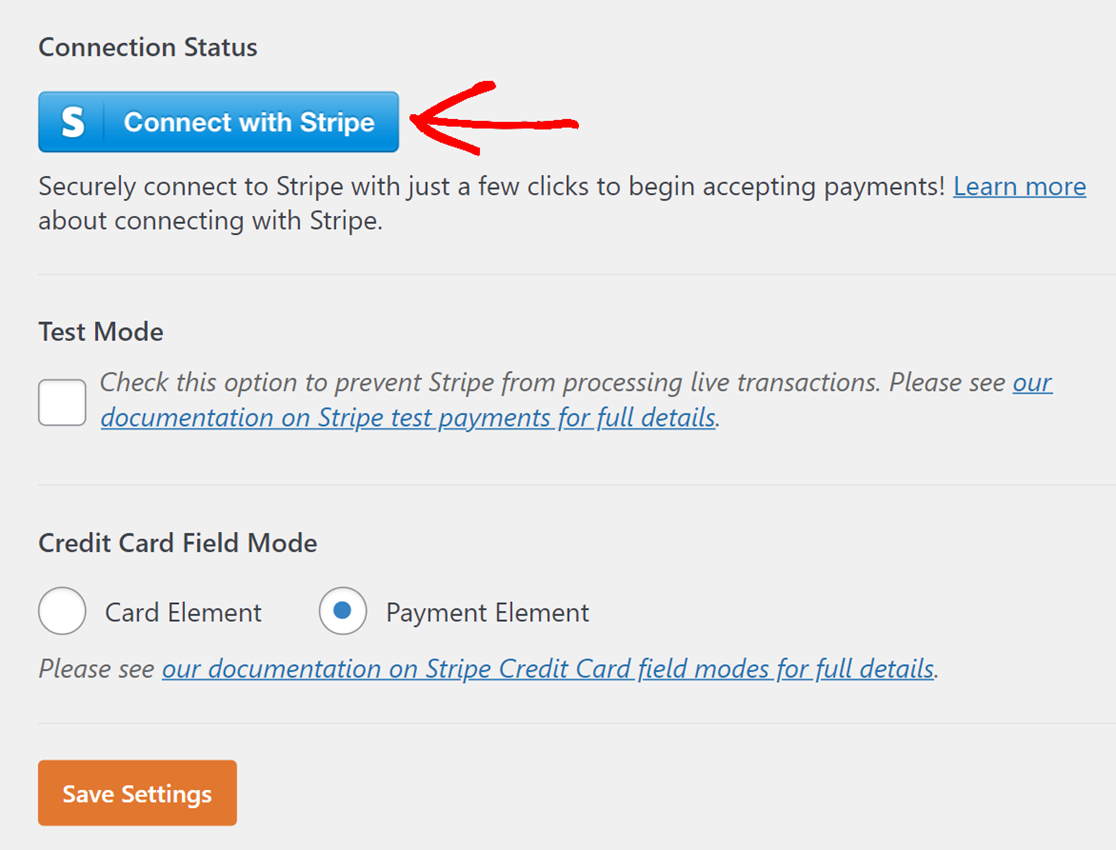
You’ll then be prompted to authorize the connection between your site and Stripe. If you already have a Stripe account, enter the email you used to set it up and click Continue.
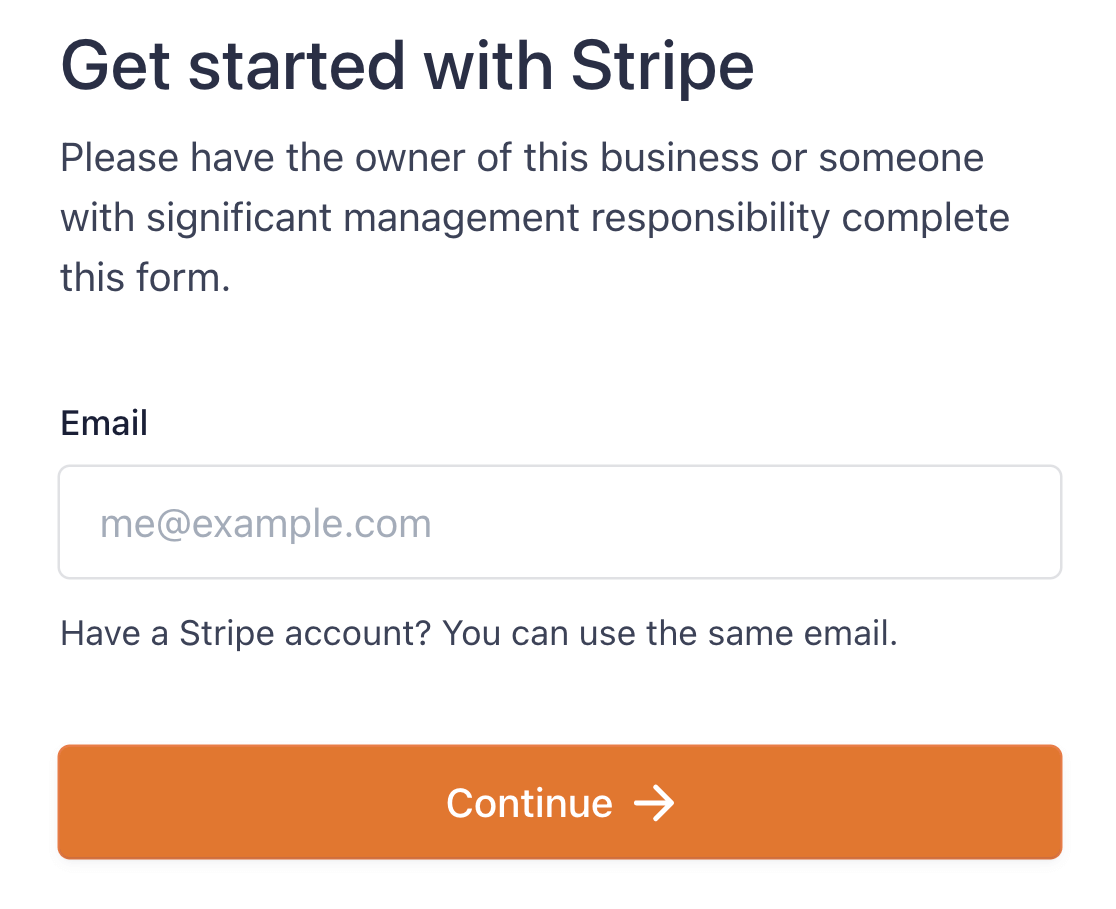
You’ll have a few more steps to complete in a Stripe window, and then you’ll be redirected back to the WPForms Payments page. You’ll see that your site is now connected to Stripe.

Don’t forget to save your settings! Now that we have a payment gateway enabled, we can get on with creating an eCommerce form using WPForms.
Step 3. Create an eCommerce Form
Creating forms with WPForms is a breeze. The WPForms form builder is a visual, drag-and-drop tool with a live preview area. And you don’t have to build your forms from scratch if you’re pressed for time!
WPForms comes with 2,000+ WordPress form templates that cover a broad range of business and nonprofit uses. For this tutorial, we want to build a form that allows us to sell products and collect payments.
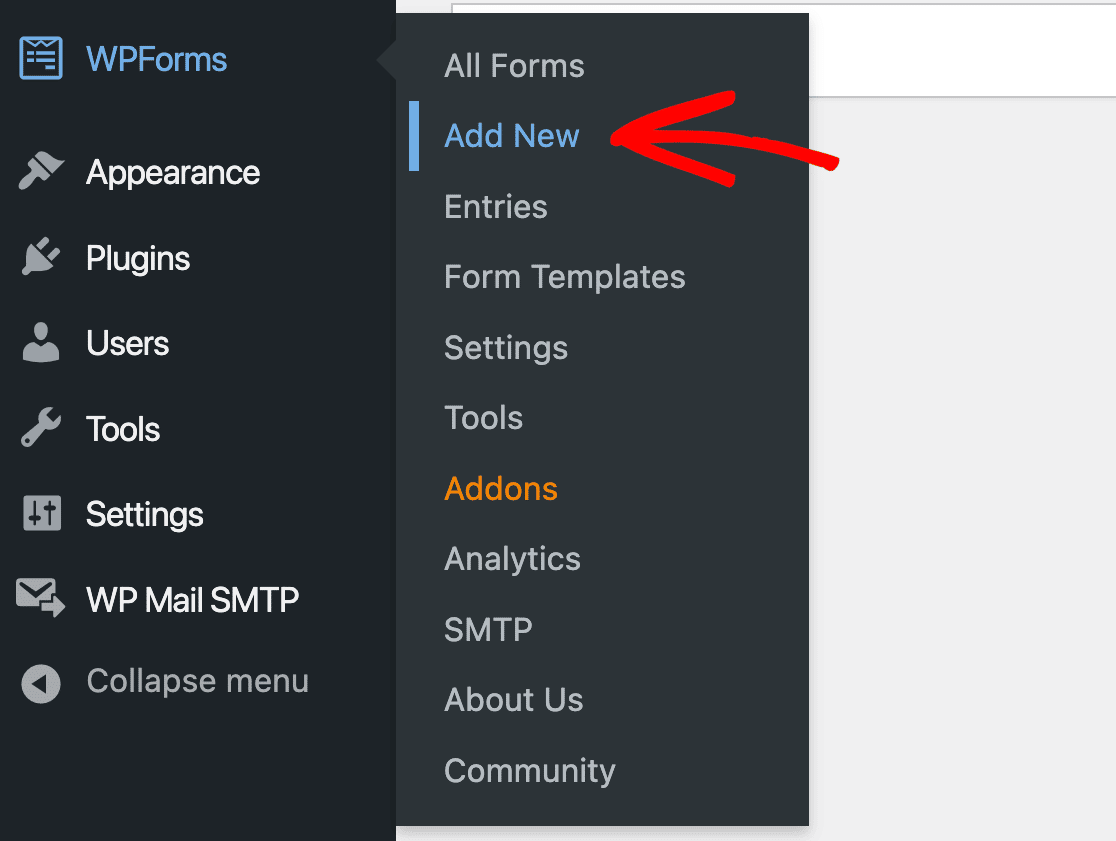
The WPForms Billing/Order Form template is perfect for this. To find it, we’ll head back to the WPForms tab on the WordPress admin area sidebar and click through WPForms » Add New.
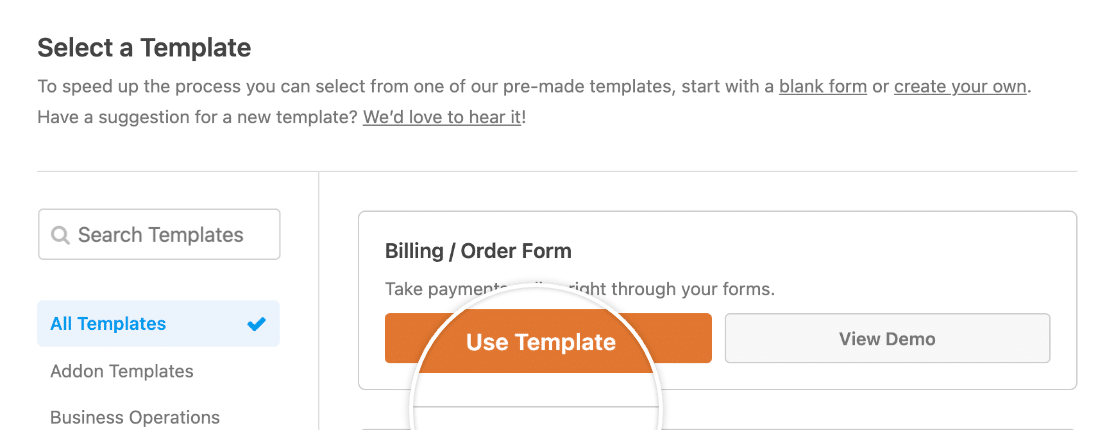
This will open up the WPForms template area. We can find the Billing/Order Form template by searching for it in the search bar on the top left corner of the page. Click Use Template to get started.
The Billing/Order form will open up in the WPForms form builder, where you’ll see the template on the right, with WPForms form fields on the left.
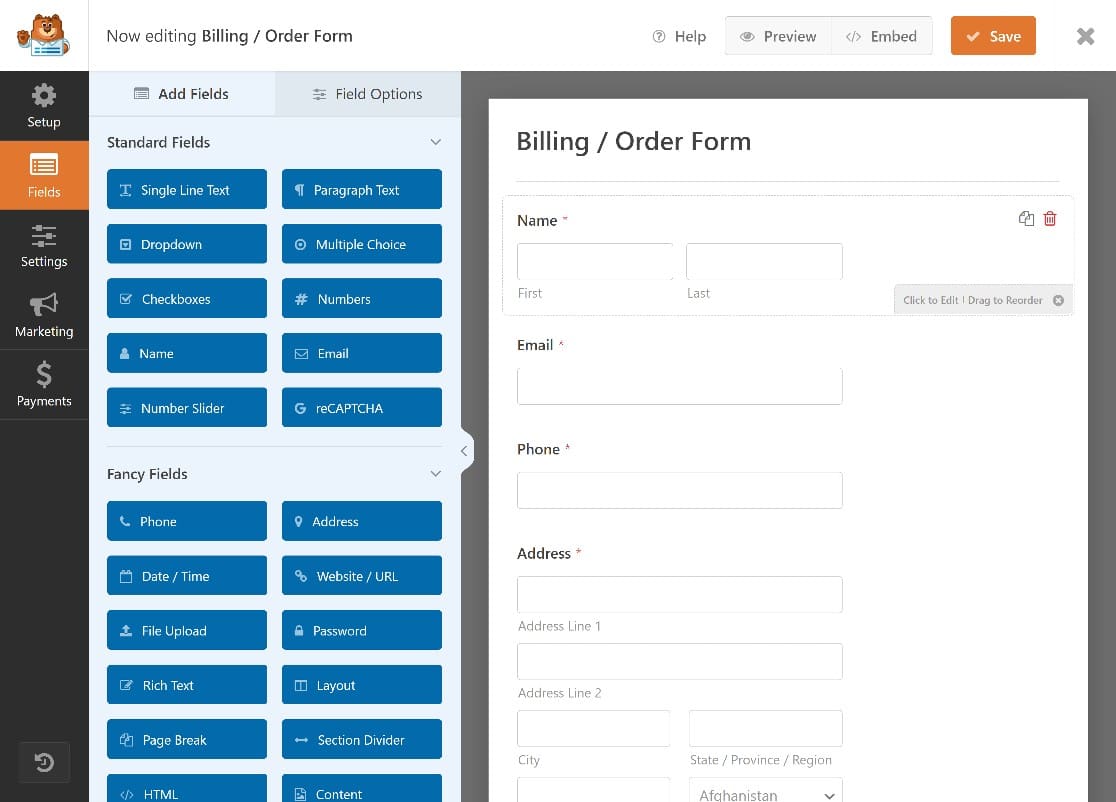
We’ll quickly edit some of the fields on the form to make it more suitable for our needs. For example, though the Billing/Order form template comes with some placeholder products, we’ll need to customize these.
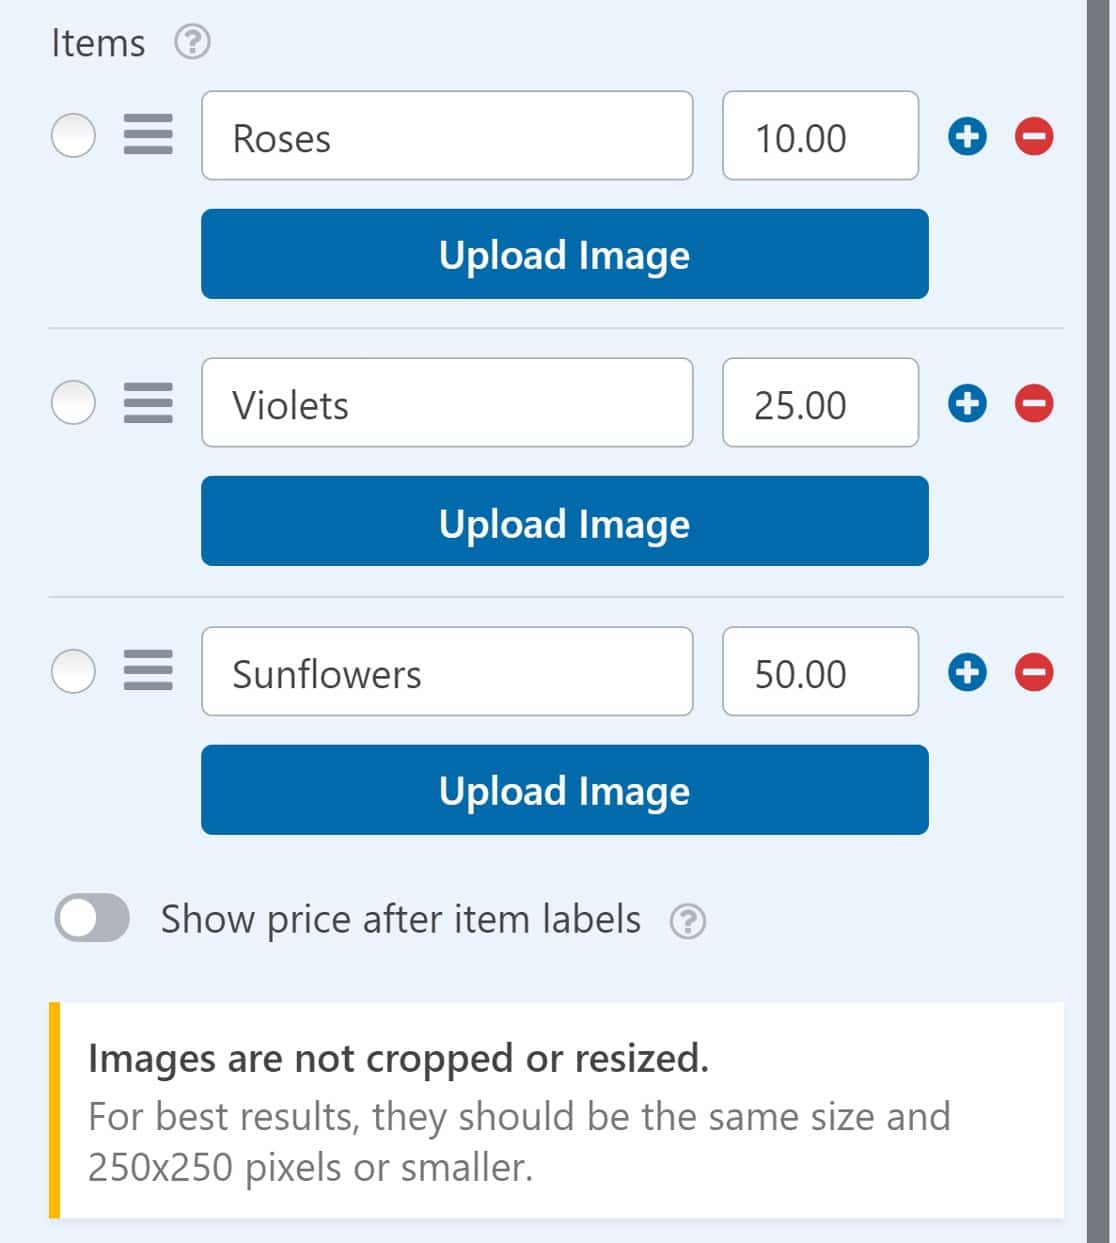
On the form template, you’ll see a WPForms Multiple Items field. Users can click these items to order those products.

We’ll edit this field to name them after products. To get started, simply click anywhere on the Multiple Items field to open the field options on the left of the screen.
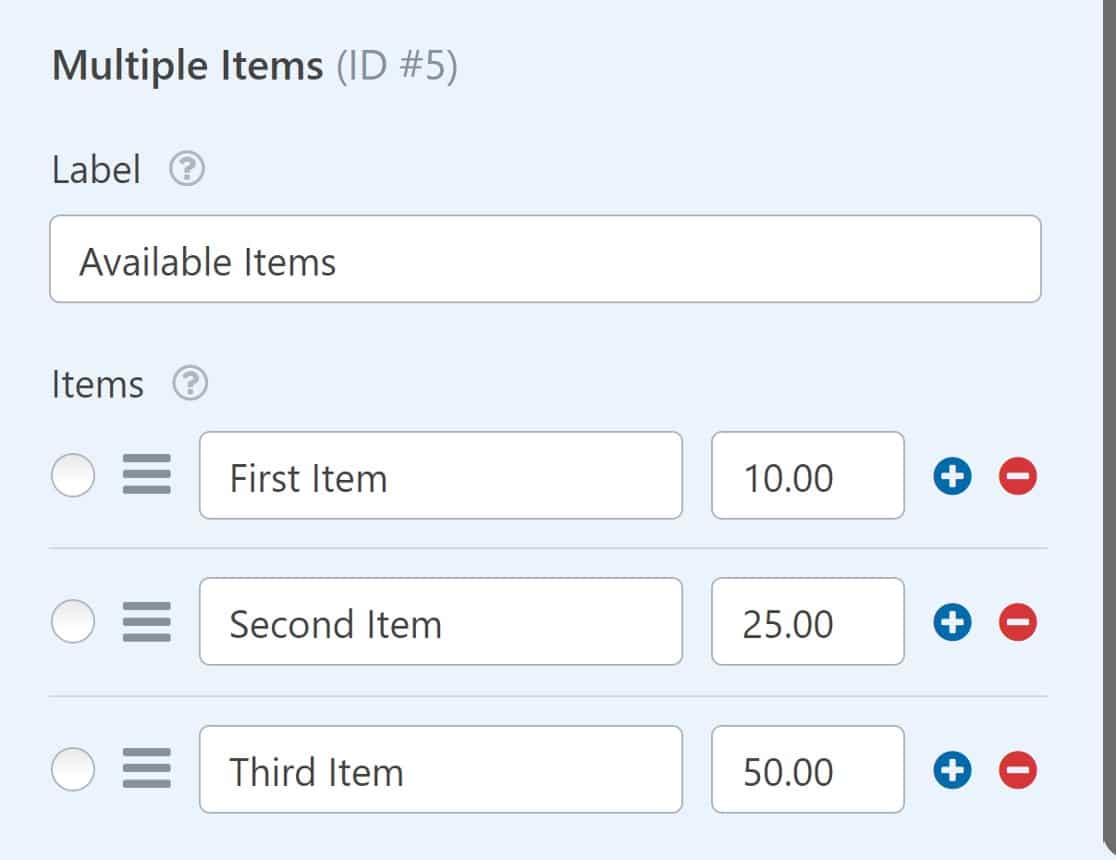
You can easily change the labels on these items to reflect your products.
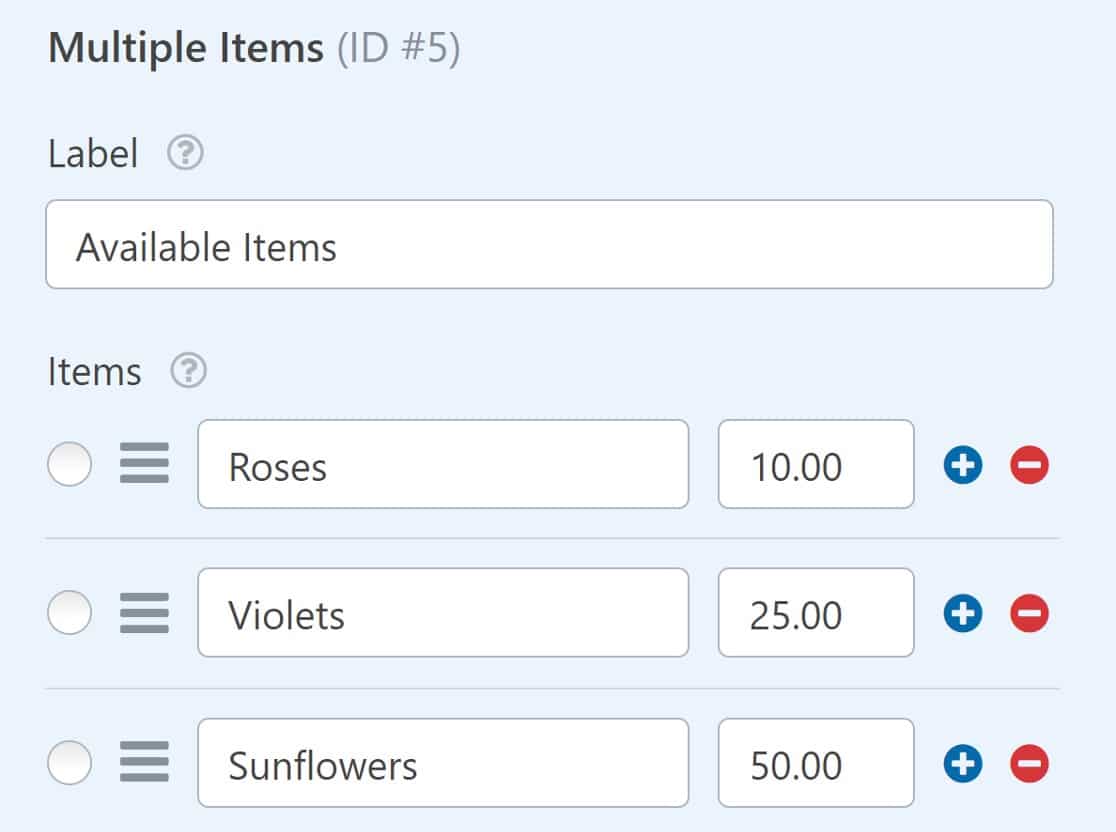
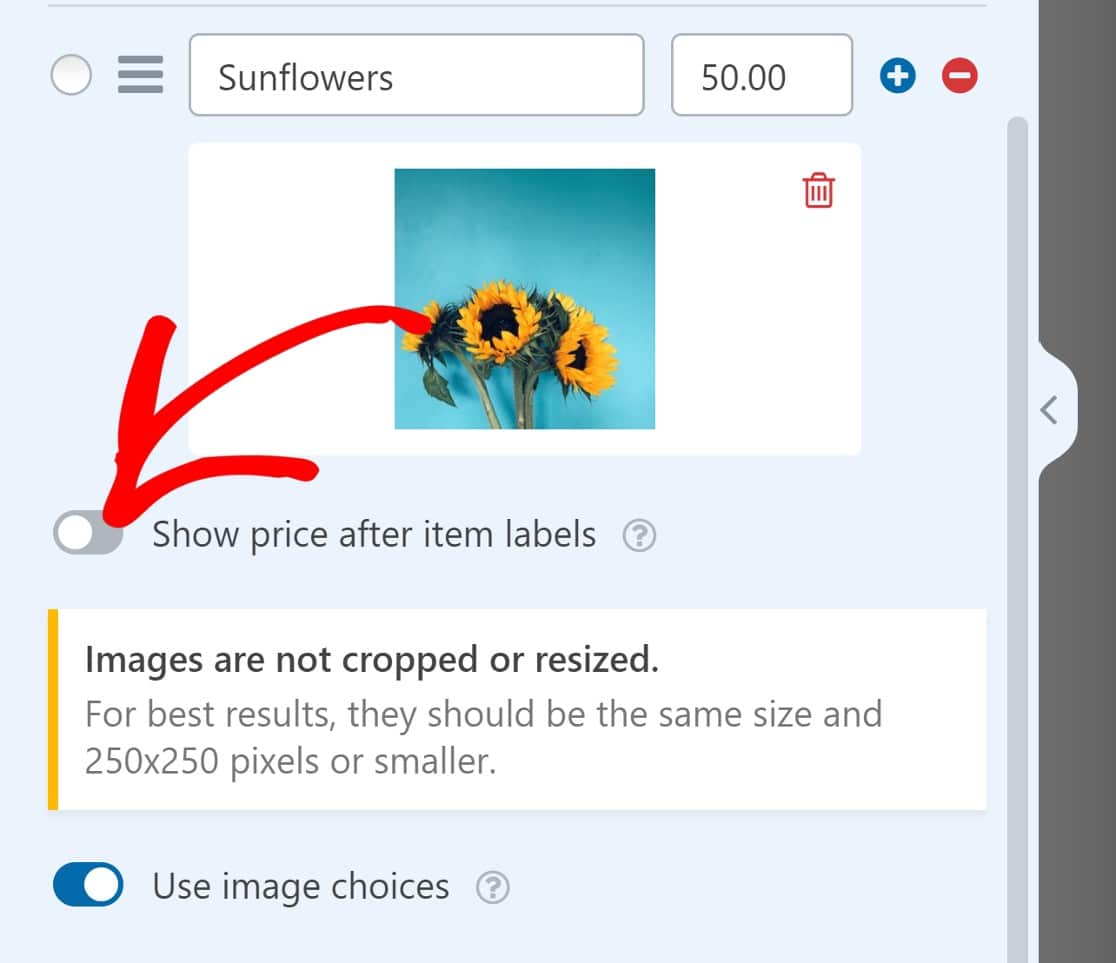
You can also add product images by toggling the image choices button.
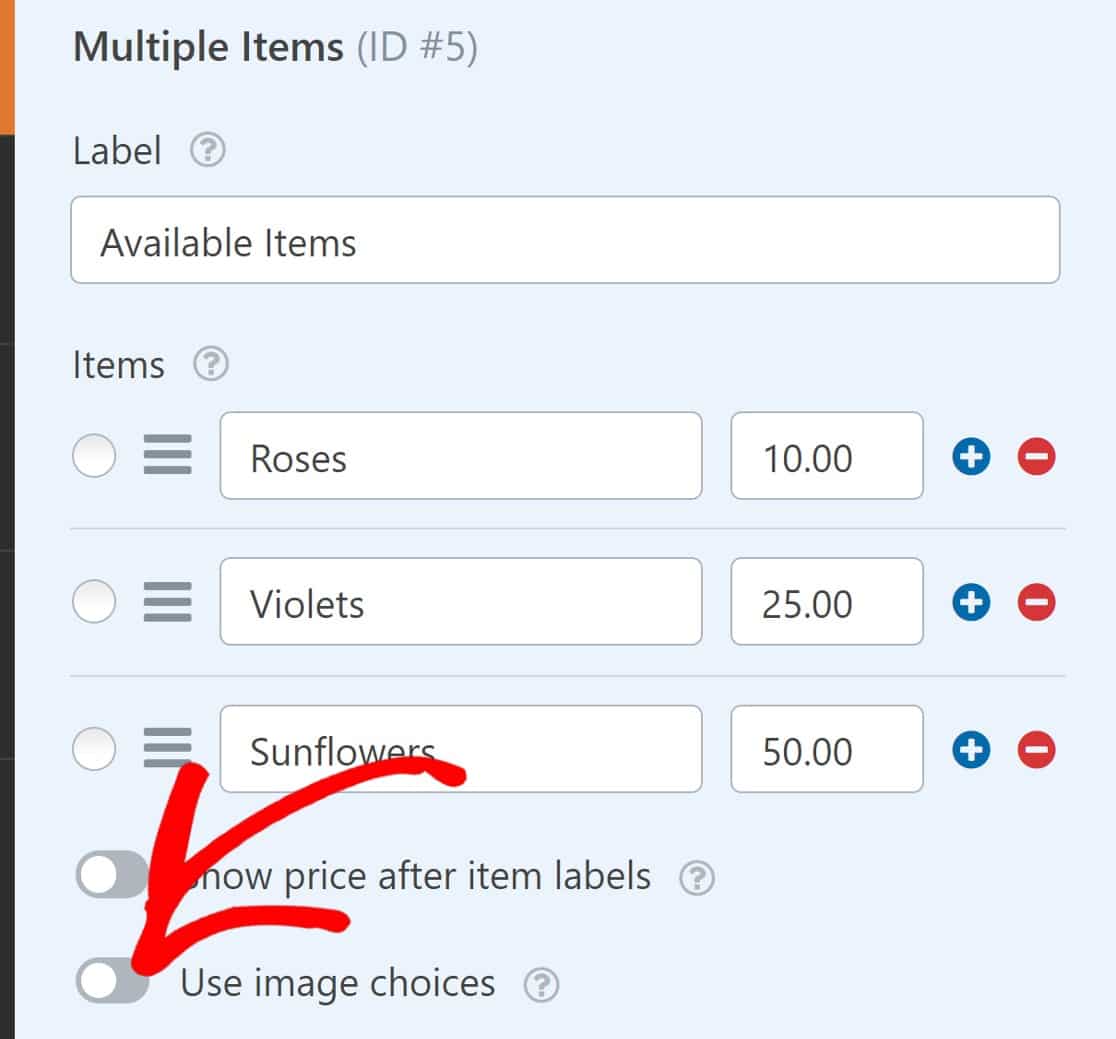
You’ll now be able to add images to each item on your multiple items lists.
Here’s what our Billing/Order form looks like now:

If you would like to display the price of each item alongside its product image, just toggle the Show price after item labels button.
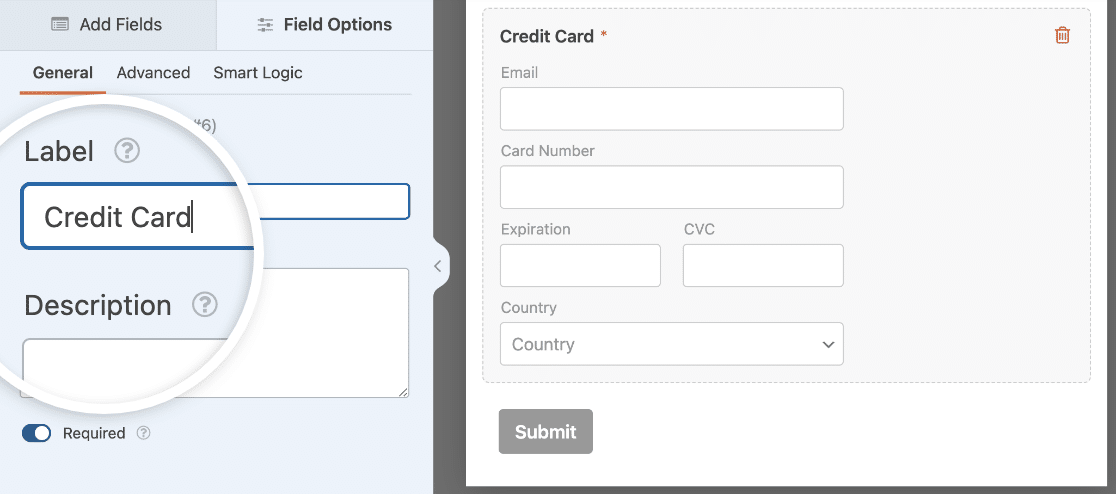
Once your items are set up, you can make changes to the Stripe Credit Card field. Click on it to change its label and description.
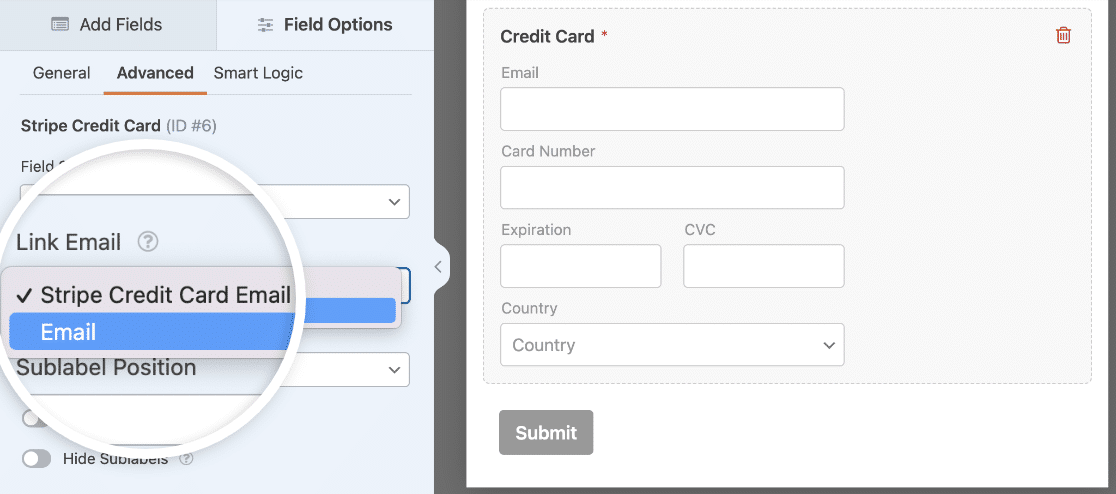
Then click on the Advanced tab. If you set up Stripe in Payment Element Mode, you’ll see an Email subfield. This lets users checkout faster using Stripe Link autofill.
You can choose to keep the Email subfield or use another Email field in your form here.
Now, we’ll just need to enable Stripe for this form, and add the Stripe payment field to make our form fully functional.
Step 4. Enable Payments For the Form
To enable Stripe payments for this form, we’ll navigate over to the menu on the left sidebar of the form builder interface, and click through Payments » Stripe » Enable Stripe payments.
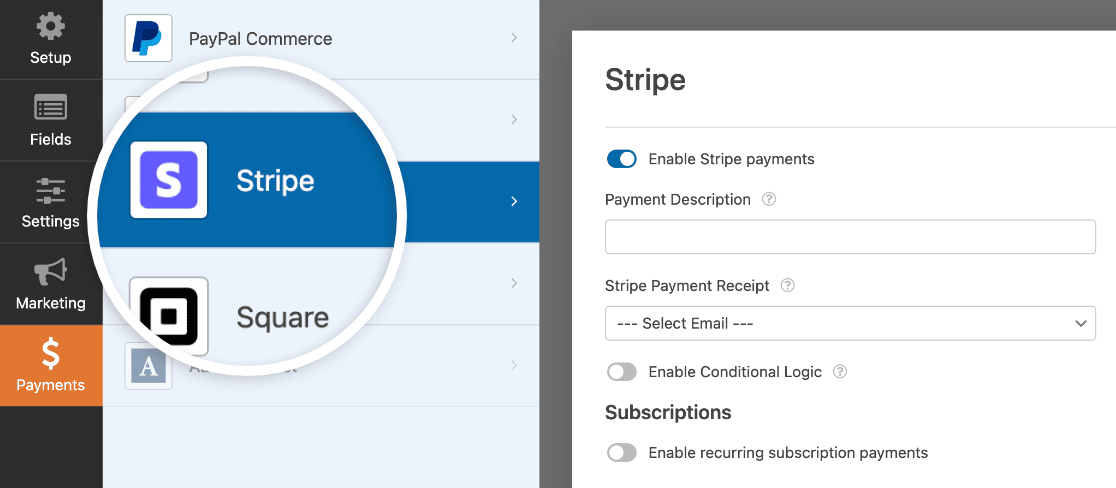
There are a few more optional settings you may want to take a look at:
Payment Description
Enter a basic description, such as your business name or the product type to help users identify transactions they’ve made on your site.

This description will show up when they view the transaction on their bank statements.
Stripe Payment Receipt
Enter the field of the form where the user’s email address should be pulled from. In this case, we have only one email field, so we’ll simply choose Email.

Users will now receive their receipts at whatever email address they’ve entered into the form.
Recurring Payments
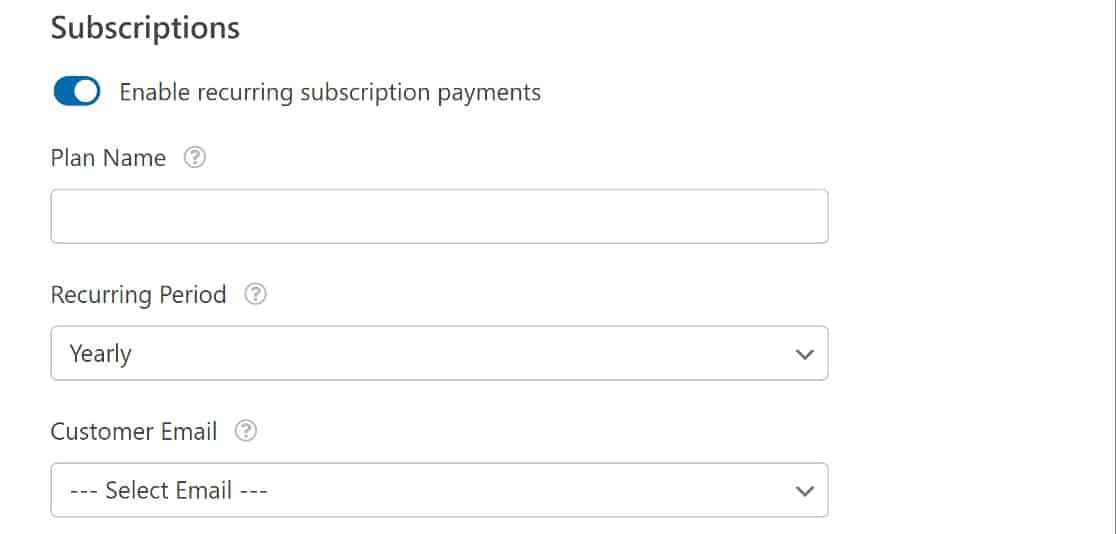
If you want to set up recurring payments, perhaps for a recurring subscription, you’ll need to activate the Enable recurring subscription payments button.
Enter a name for the subscription plan, set the subscription period, and again, set the Customer Email field to Email.
At this point, we’re all set up with a fully functional payment form. If you want, you can follow our tutorial on customizing your payment form to offer one-click checkout.
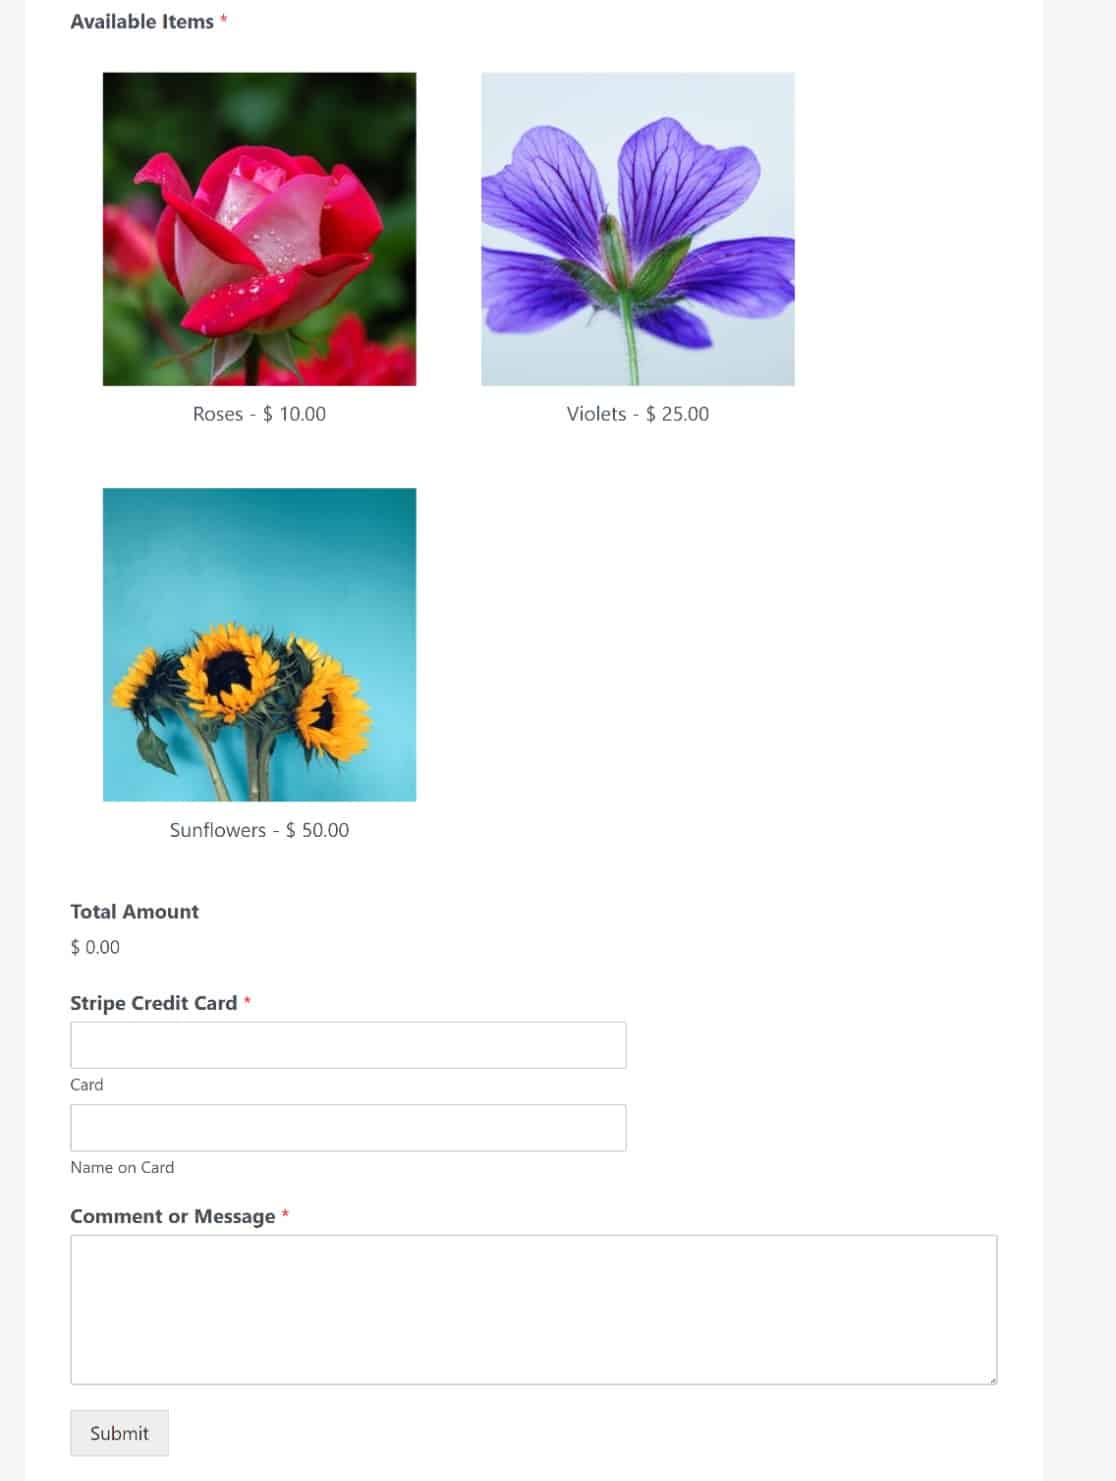
And that’s it! You now know how to sell on WordPress without using WooCommerce.
Step 5. Create Coupons Codes (Optional)
With the WPForms Coupons addon, you can offer sales and discounts on your merchandise. The best part is that it’s super easy to add a coupon code field to your forms.
To create a coupon code, go to your WordPress dashboard and navigate to WPForms » Payments in the left navigation sidebar.
From there, click on the Coupons tab.

On that screen, click the Add Coupon button and you’ll receive a prompt to fill in the information for your new coupon.
You can use a custom code that you create, or you can generate a random code using the Generate Code button.

After you create the coupon, you’ll need to select the forms where you want to enable that code. The code won’t work unless you map it to the forms where you want to use it. This is an easy process that involves flicking a toggle switch.
You can decide whether you want to enable the coupon on all of your forms, or just specific ones.
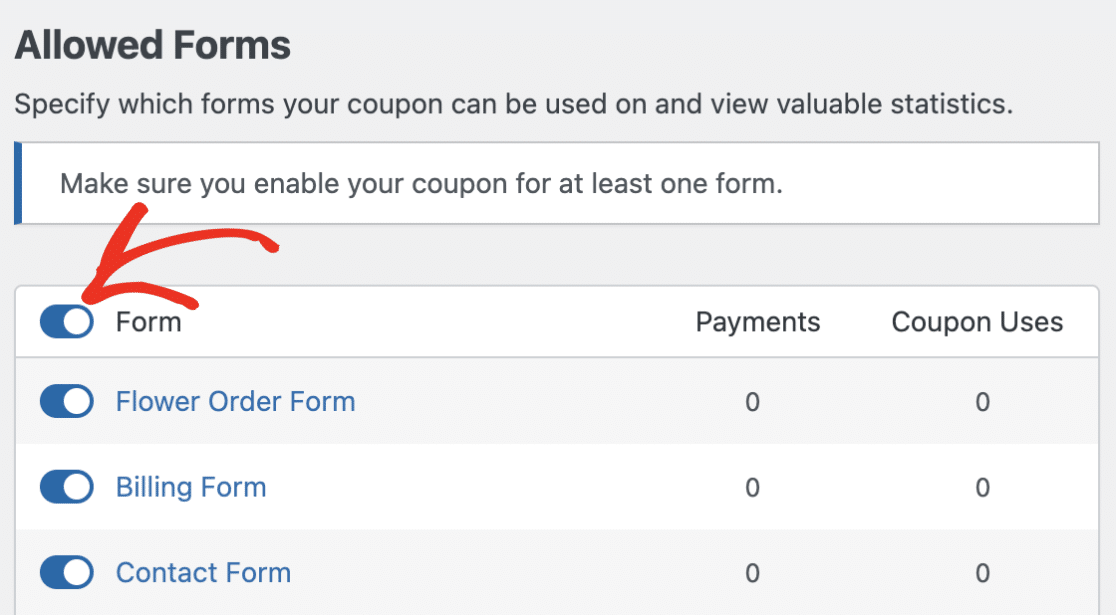
After that, you can go into your form and add a coupon field.
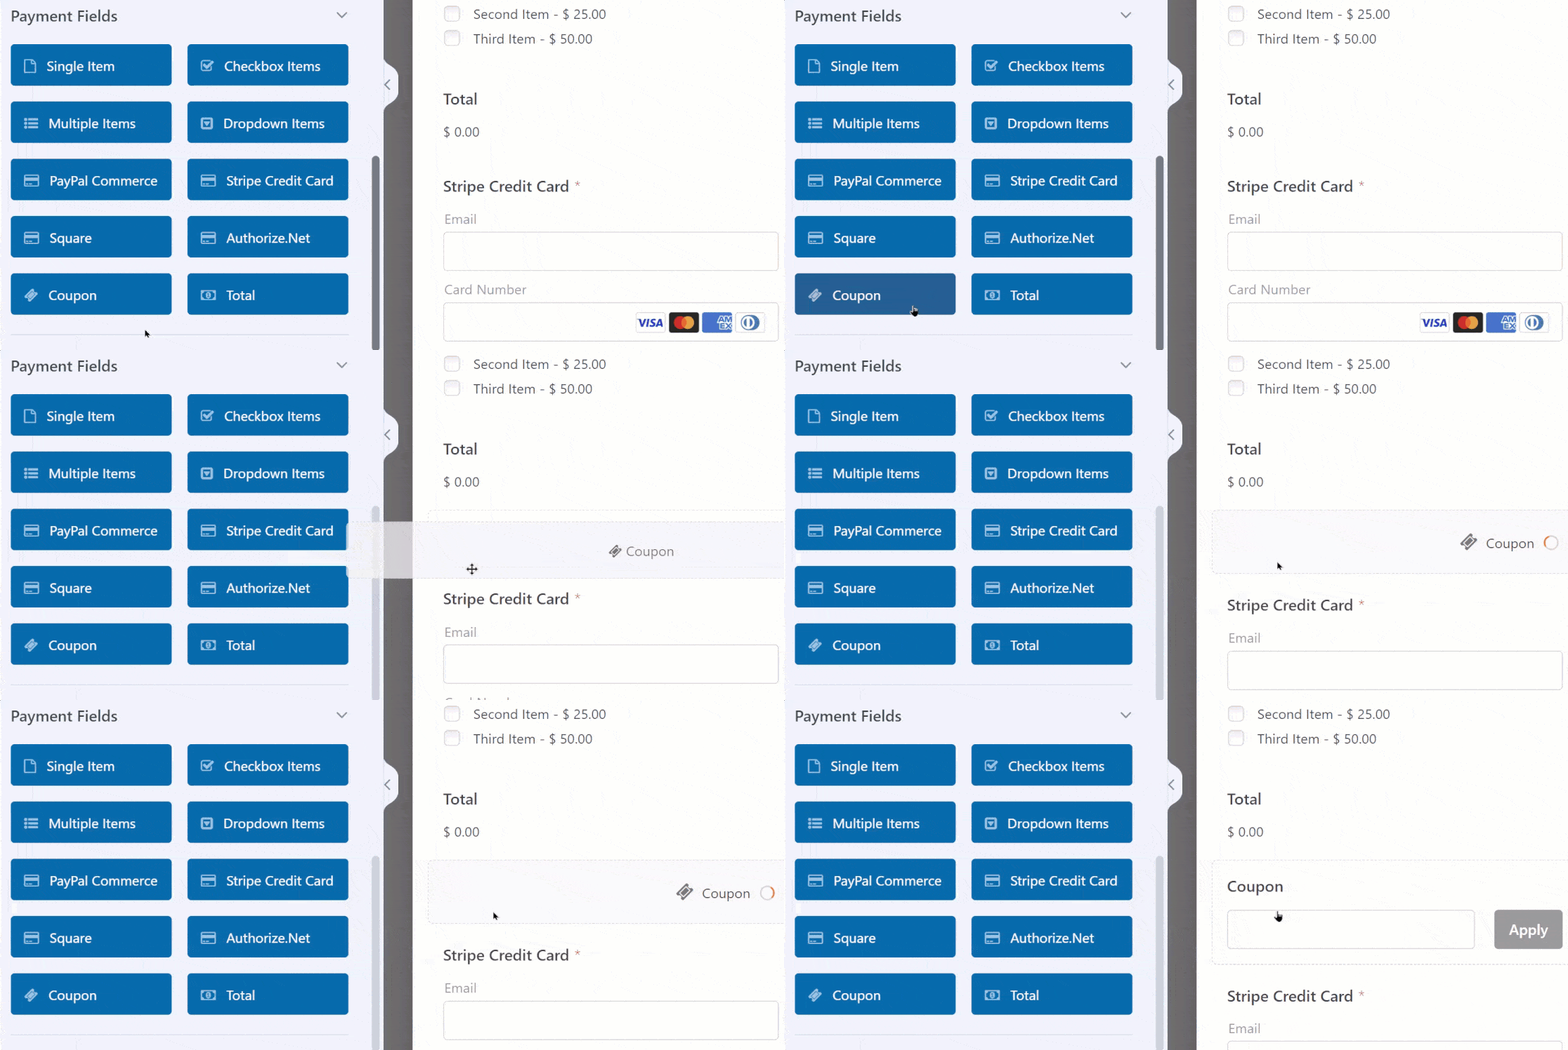
Now your form is equipped to accept your coupon code so that you can offer customers sales, deals, discounts, free shipping, and more.
For a more in-depth look at how to add and track coupons, check out our tutorial on how to add a coupon code field to your WordPress forms.
FAQs on How to Sell on WordPress without WooCommerce
Selling on WordPress without WooCommerce is a popular topic of interest among our readers. Here are answers to some common questions about it:
Is there an alternative to WooCommerce for WordPress?
Yes, there are alternatives to WooCommerce for WordPress. Plugins like WPForms Pro allow you to create forms that accept payments, making it easy to sell products or services directly from your site.
What is the cheapest way to sell on WordPress?
The most affordable way to sell on WordPress is by using free plugins that support payment processing. For example, WPForms Lite offers basic form creation with payment options, though advanced features may require a paid upgrade.
Does WordPress take a cut of sales?
No, WordPress does not take a percentage of your sales. However, payment processors like Stripe or PayPal may charge transaction fees. It’s important to review their terms to understand any costs involved.
Next, Check Out these Payment Related Guides
Now that you know how to sell on WordPress without WooCommerce, it’s also a good time to explore our related guides on adding quantities to your products and changing the total cost to include sales tax, shipping, and more.
Create Your Wordpress Form Now
Ready to build your form? Get started today with the easiest WordPress form builder plugin. WPForms Pro includes lots of free templates and offers a 14-day money-back guarantee.
If this article helped you out, please follow us on Facebook and Twitter for more free WordPress tutorials and guides.




Awesome! I think this is just what I need to do with my existing order form for my wooden signs order page. I’m currently using WPForms and Woocommerce, have been for years now. In future I hope to be able to just use WPForms and stop using Woo. It will also make it easier for my customers to customise and add or remove options for their custom made sign order.
Hi Andrew,
Yes, I agree with you on this one! We currently do not have an integrated feature with the Woocommerce. I have gone ahead and added your vote to consider this as a feature request for future enhancements.
Thanks,
How do you configure shipping matrices into your final total?
Hey Janie — would you mind reaching out to us with additional details of your requirements and we will be happy to suggest!
Thanks,
Is there a way to add a quantity for each item? For instance, if I want (in your example) to order 3 roses and 2 violets?
Also, is there a way to add a shipping cost to each item. Yes, this might be more of a Woocommerce direction, but I like WPForms for it’s simplicity.
Hello Jim – In this case, you can make use of our Calculations addon to achive what you are looking for! This addon is available under our Pro license level or higher.
Hope this helps.
Let me know if you have any other questions. Thanks 🙂