Would you like to perform basic and advanced calculations with your WordPress forms? The WPForms Calculations addon lets you extend your forms and build calculators to perform tasks such as calculating shipping costs.
This guide will cover how to install and use the Calculations addon in WPForms.
Requirements:
- You’ll need the Pro license level or higher to access the Calculations addon
- Ensure that you’ve installed the latest version of WPForms to meet the minimum required version for the Calculations addon
Installing the Calculations Addon
Before you get started, you’ll first need to ensure WPForms is installed and activated on your WordPress site and that you’ve verified your license.
After you’ve done that, you’ll be able to quickly install and activate the Calculations addon.
Using the Calculations Addon
After installing the Calculations addon, you’ll be able to enable calculations on supported fields in the form builder. To do so, create a new form or edit an existing one to access the form builder.
Once you’re in the form builder, go ahead and add the fields you’d like your form to have.
To enable calculation mode, you’ll need to add one of the supported fields to your form. Below, we’ve highlighted the compatible fields:
- Single Line Text
- Paragraph Text
- Number
- Hidden
- Single Item
Enabling Calculation Mode
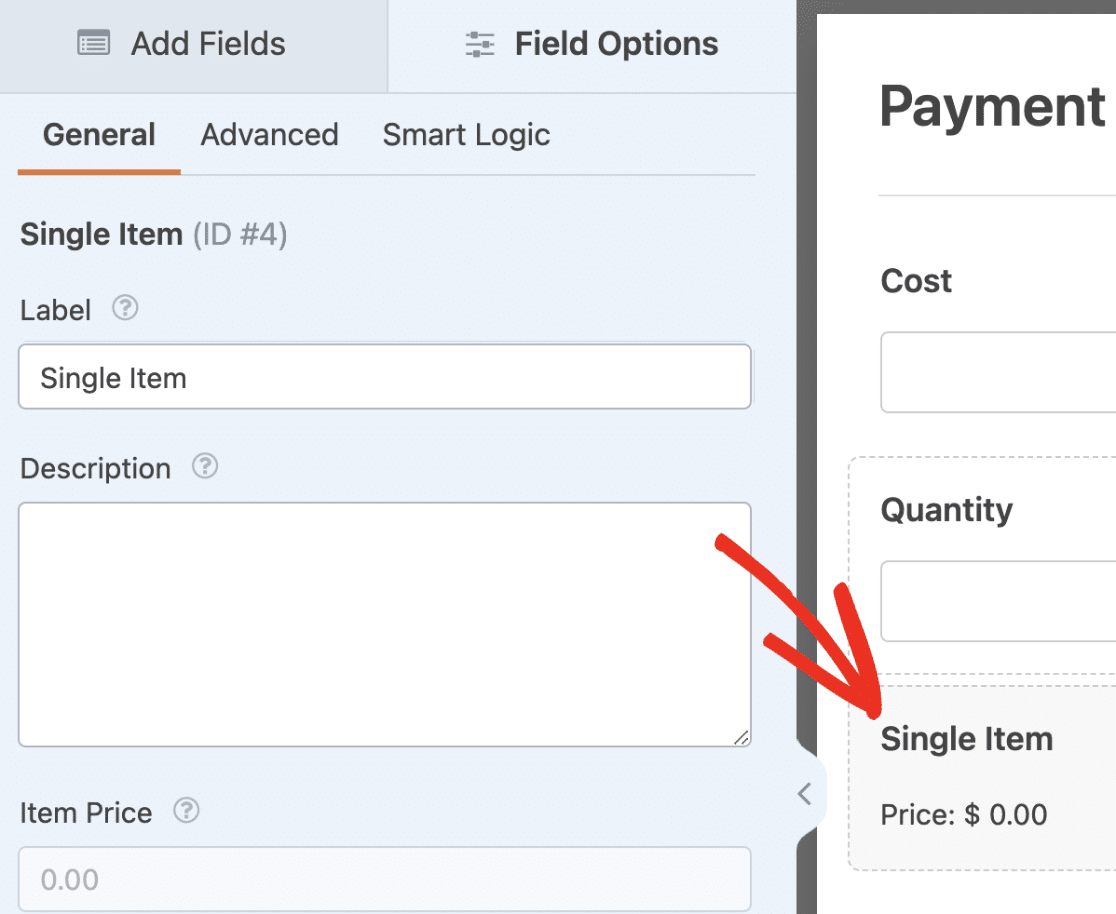
Once you’ve added any of the supported fields, select the field to access the Field Options panel.
Next, navigate to the Advanced tab and toggle the Enable Calculation option to the on position.
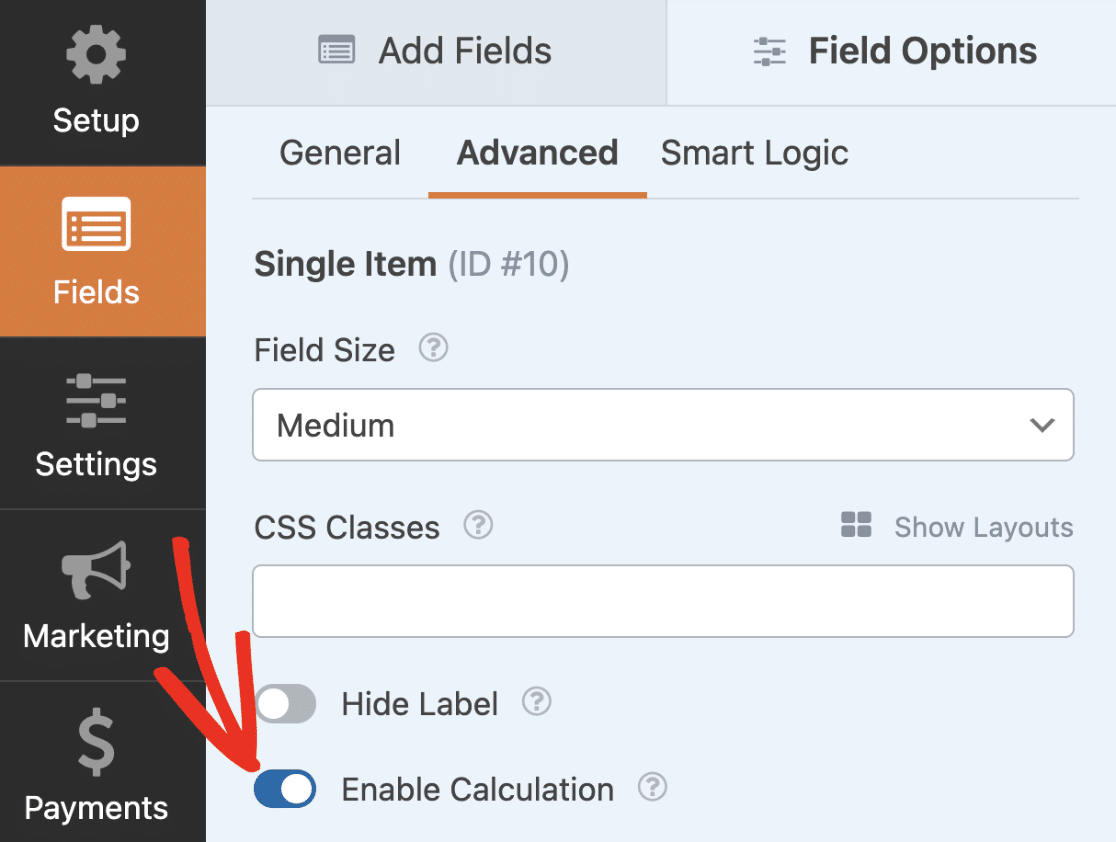
Note: Once you enable calculations for a field, the field’s value can only be set by the calculation result.
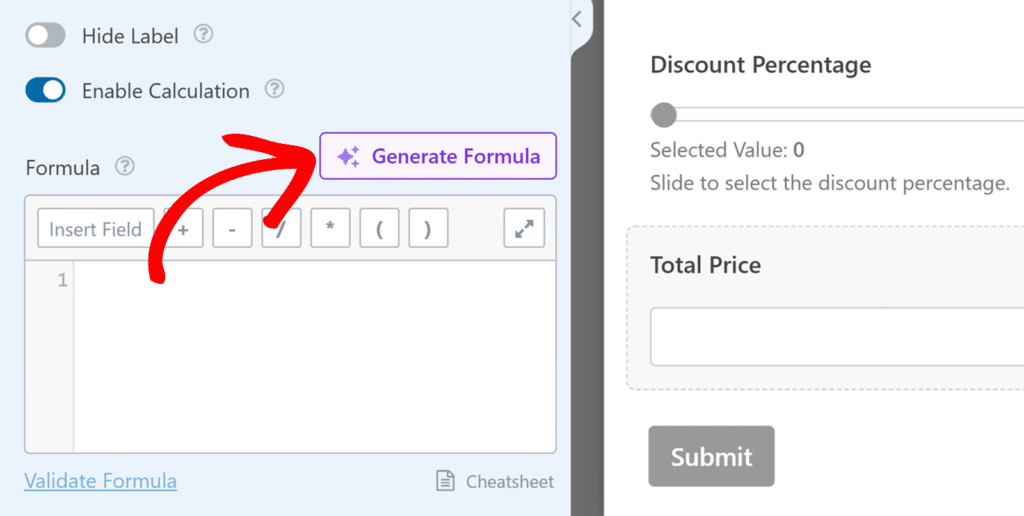
After enabling calculation mode for a form, you’ll see a text editor for building formulas below the toggle.
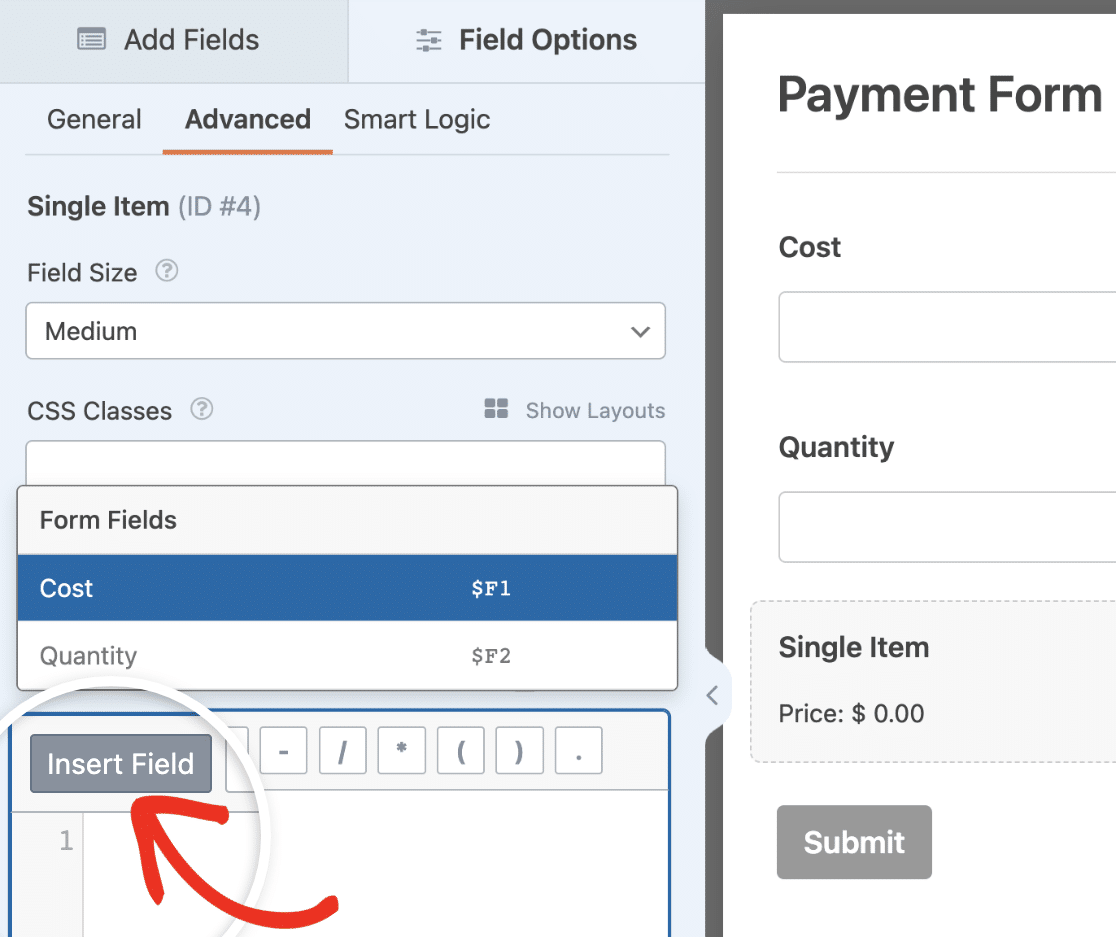
The Insert Field button allows you to choose a field from your form to use as a variable for your calculation formula.
Note: Not all form fields can be used as variables to build your calculation formula. See our FAQ section for a list of supported fields.
Next to the Insert Field button, you’ll see icons to quickly add arithmetic operators to the formula builder.
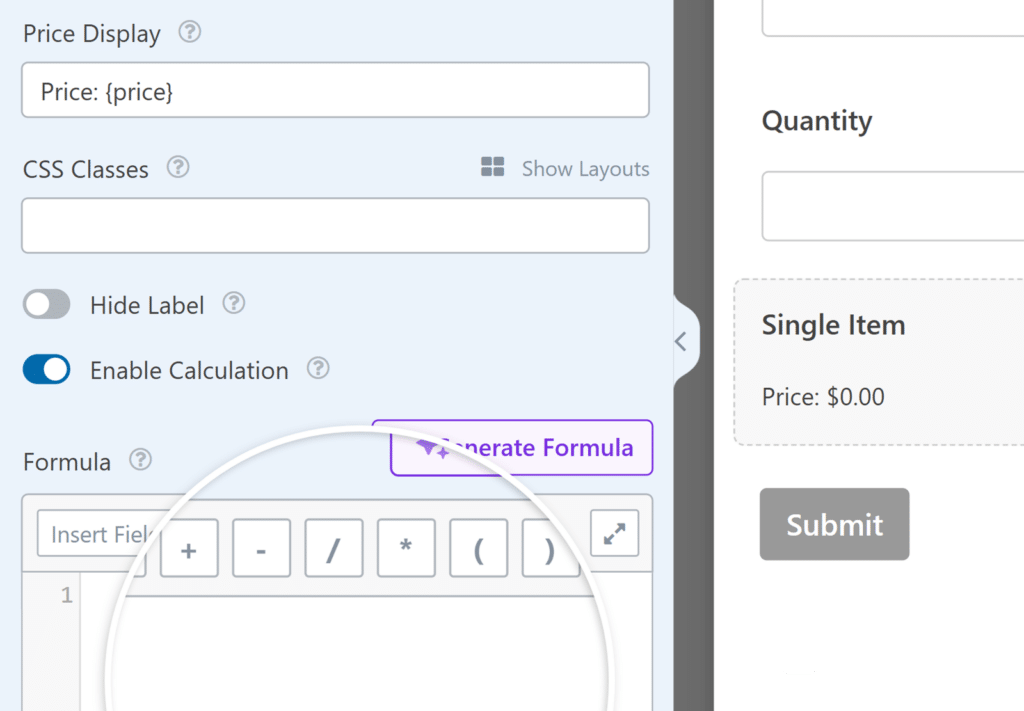
Supported arithmetic operators include:
- Addition (+)
- Subtraction (–)
- Division (/)
- Multiplication (*)
- Modulo (%)
The formula builder is where you’ll write the equation for your calculations. In addition to arithmetic operations, you can use logical and conditional statements such as if/else logic. Below are some of the logical operators you can use for your formulas.
Comparison operators:
- Equal to (==)
- Not equal to (!=)
- Greater than (>)
- Less than (<)
- Greater than or equal to (>=)
- Less than or equal to (<=)
Logical operators for creating multiple expressions:
- AND (&&)
- OR (||)
- NOT (!)
There is also an autocomplete feature that suggests fields, functions, and operators while you type on the formula builder.
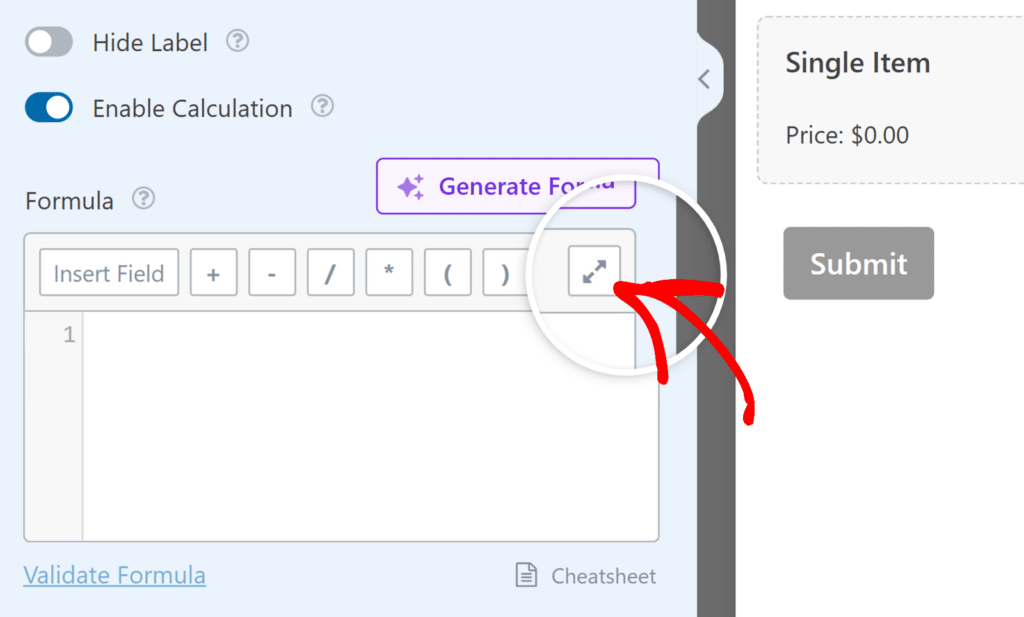
If you’d like to expand the formula builder, click the expand icon.
Accessing the Calculations Addon Cheatsheet
Before using the Calculations addon, we strongly suggest reviewing our cheatsheet documentation.
The cheatsheet guide details all the operations you can perform with the addon. It also explains the rules to follow to ensure your formulas work as intended.
For more details about the various rules, functions, and operators available with the Calculations addon, be sure to click the Cheatsheet link.
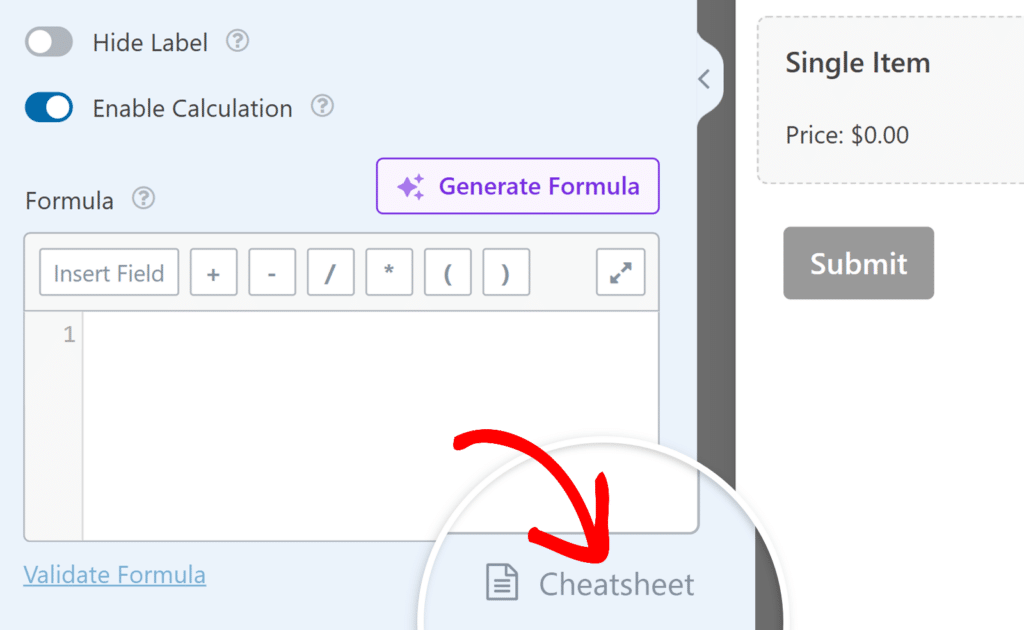
Alternatively, you can use this direct link to access the cheatsheet doc.
In the next section, we’ll cover basic examples of using the Calculations addon with WPForms.
Note: Want to explore some of our ready-to-use calculation form templates? Check out our gallery of calculator form templates to help you get started.
Creating a Basic Calculation Form
With the Calculations addon, you can perform basic arithmetic operations such as addition, subtraction, multiplication, and division.
For this example, we’ll build a form that calculates the price of a product when given the cost price and the quantity.
To start, add 2 Numbers fields and a Single Item field to the form builder. Then, change the field label for both Numbers fields to “Cost” and “Quantity.”
Now, select the Single Item field and update the field label to “Total.” After that, navigate to the Advanced tab and toggle on the Enable Calculation option.
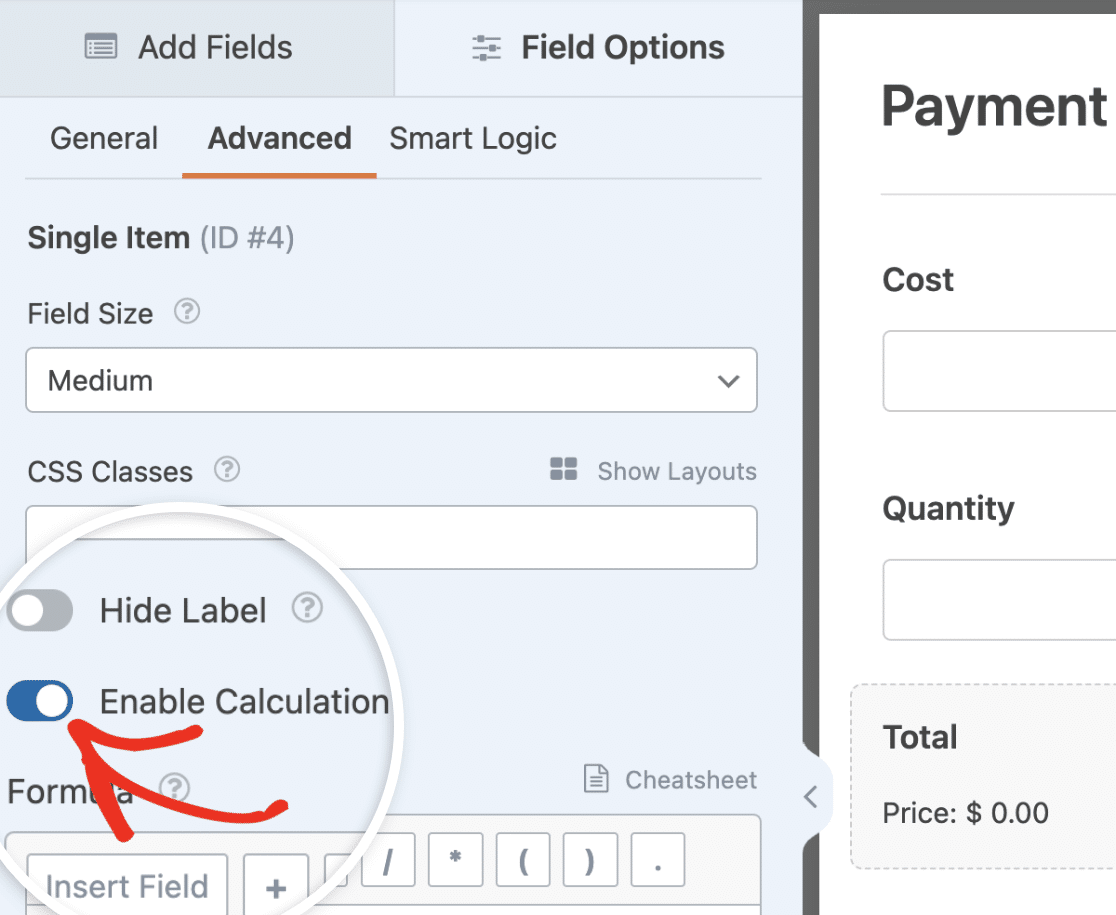
Once enabled, we’ll need to write a formula to multiply the cost and quantity to get the actual price.
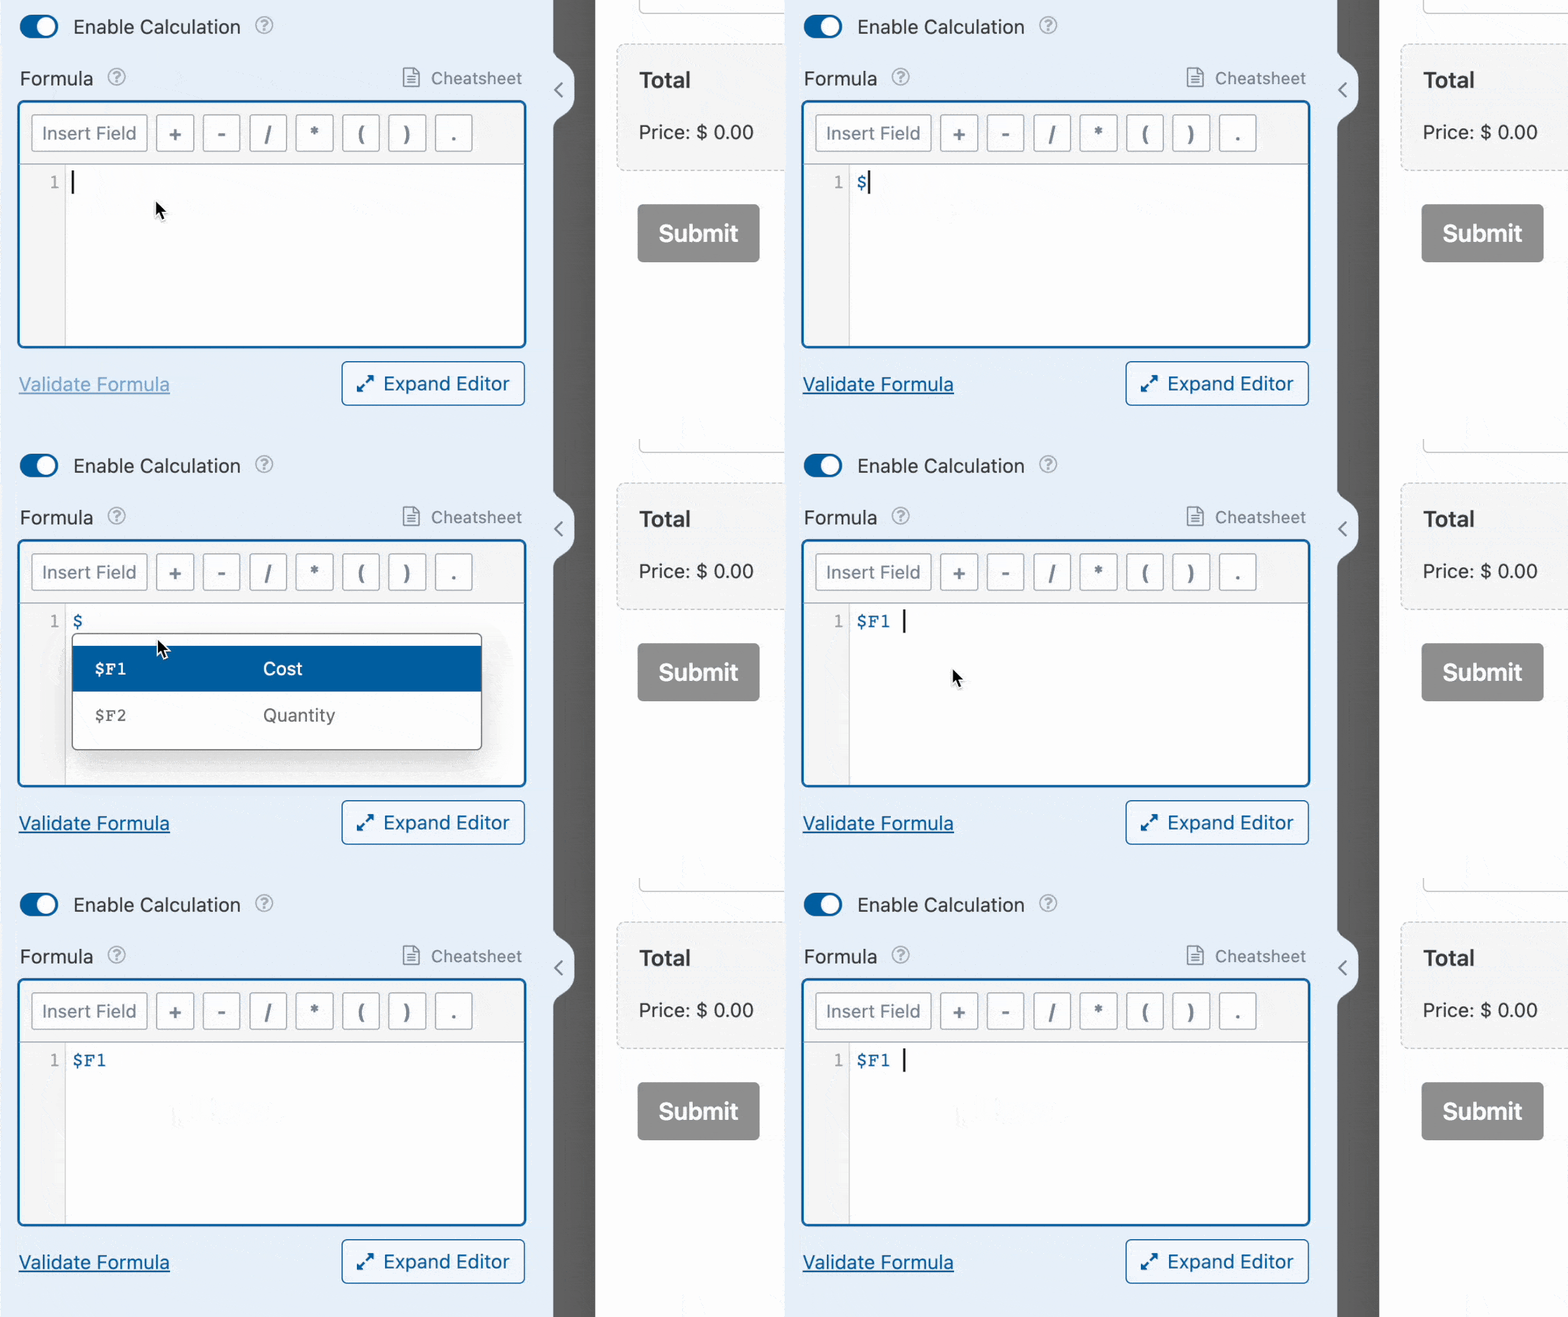
Firstly, use the Insert Field button in the formula builder to add the Cost field.
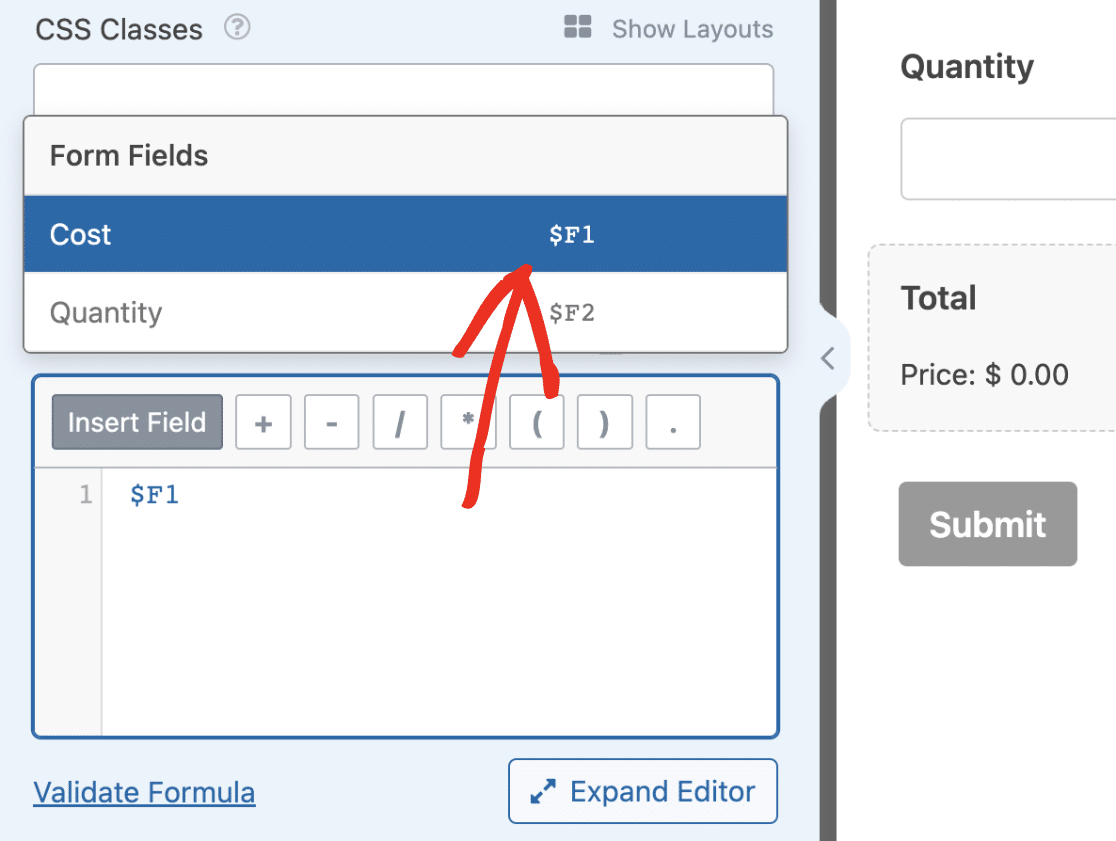
Note: If you’d like to easily add field variables, type the $ symbol in the formula builder. Once you type it, it’ll display all available fields from your form.
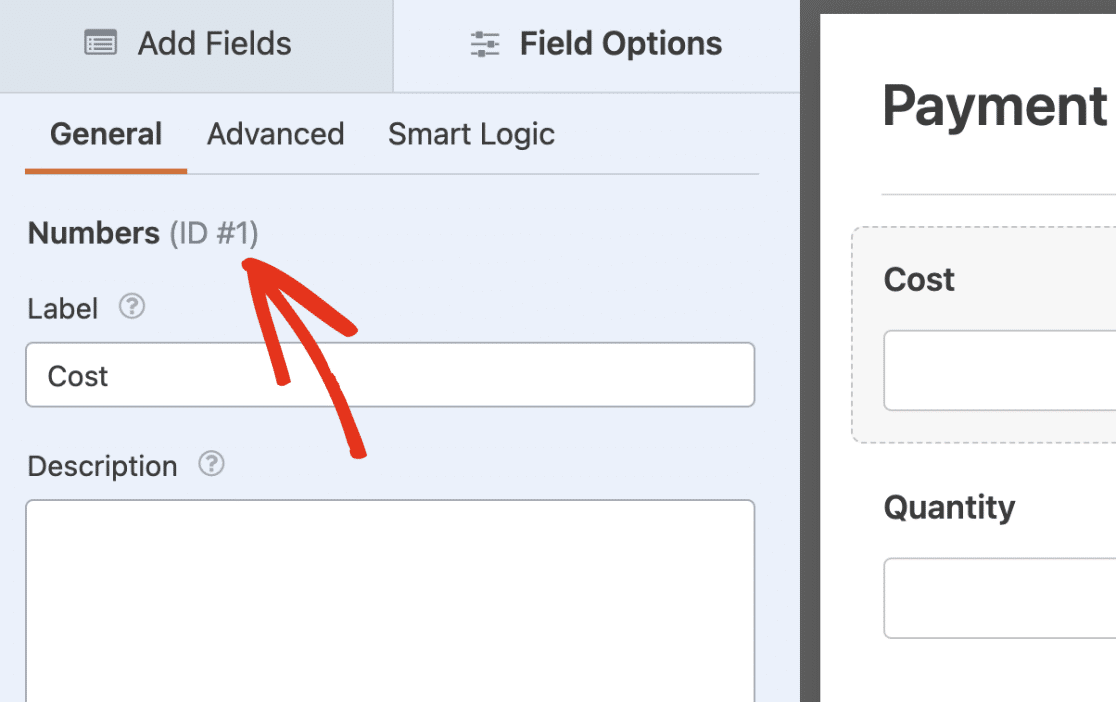
The number that follows the $F symbol in the variable name is the field’s ID. So, for our example, the Cost field has an ID of 1, which is reflected in the variable name.
Next, select the multiplication icon or type the asterisk symbol (*) into the formula builder. After that, click the Insert Field button and select the Quantity field from the dropdown.
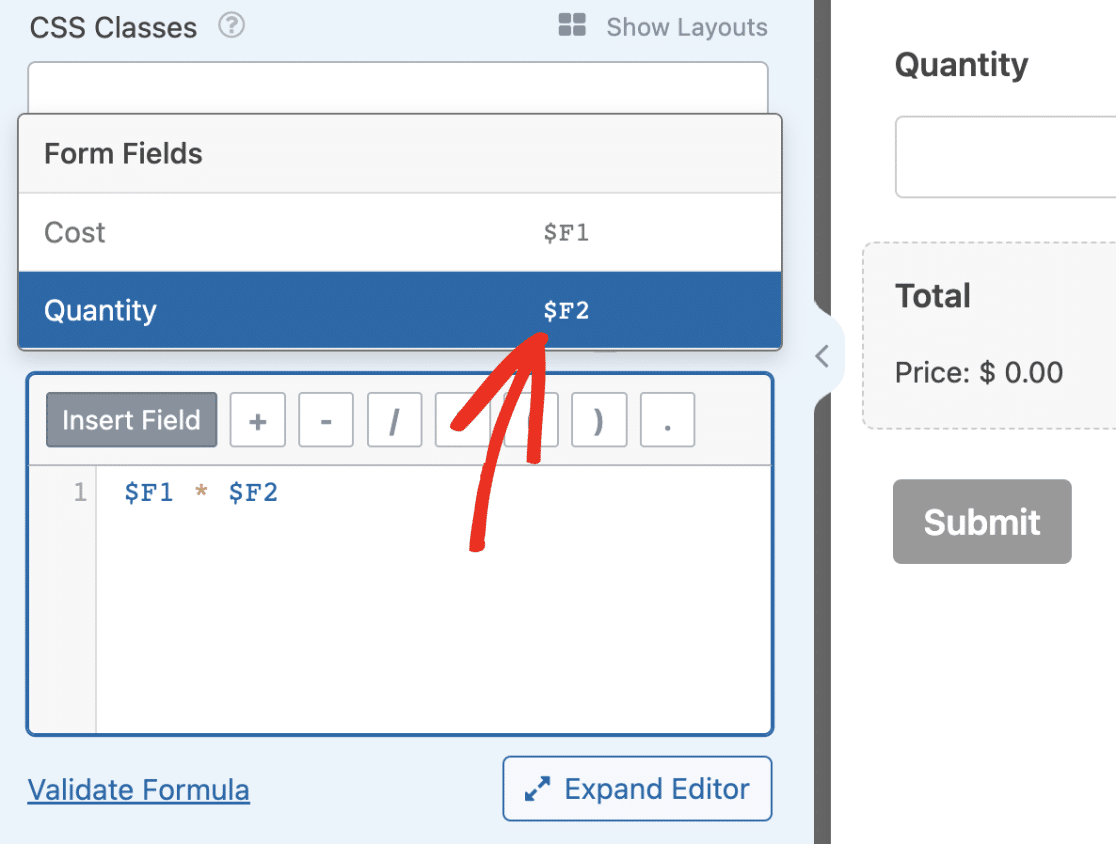
The formula should read Cost multiplied by Quantity (i.e., $F1 * $F2).
Note: To quickly identify a field in your formula builder, hover over the field variable. You’ll see the field label as a tooltip.
Validating Your Formula
After building your calculation formula, we recommend validating it to ensure the syntax and formulas are correct.
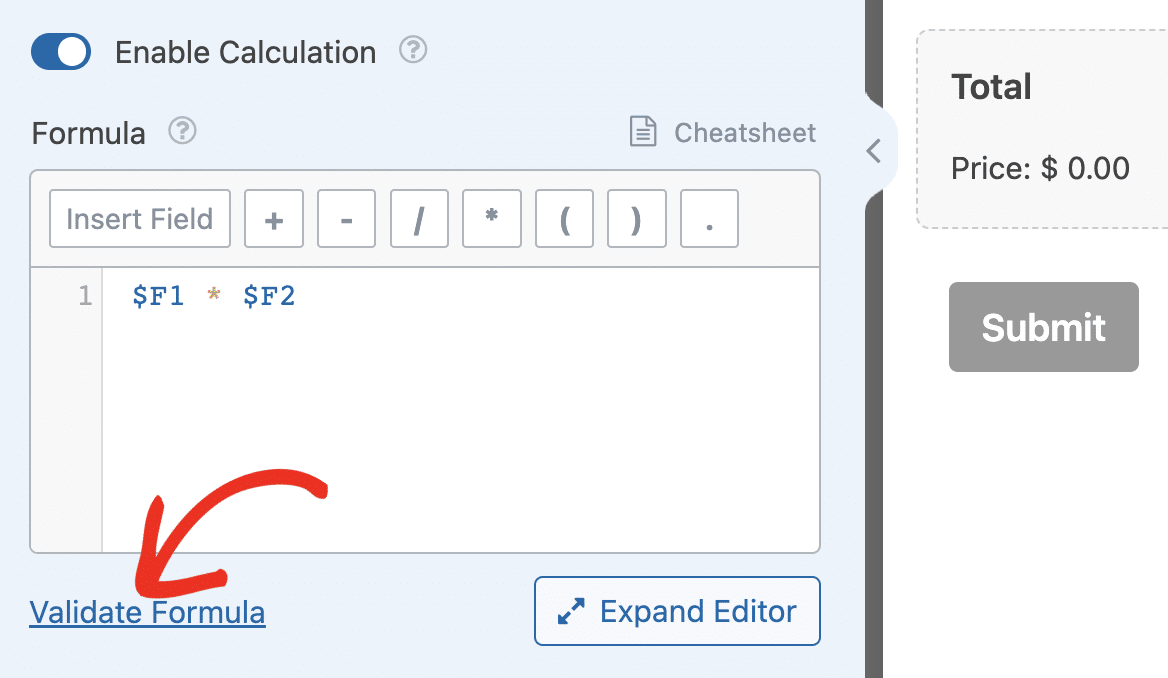
To validate your formula, click the Validate Formula link.
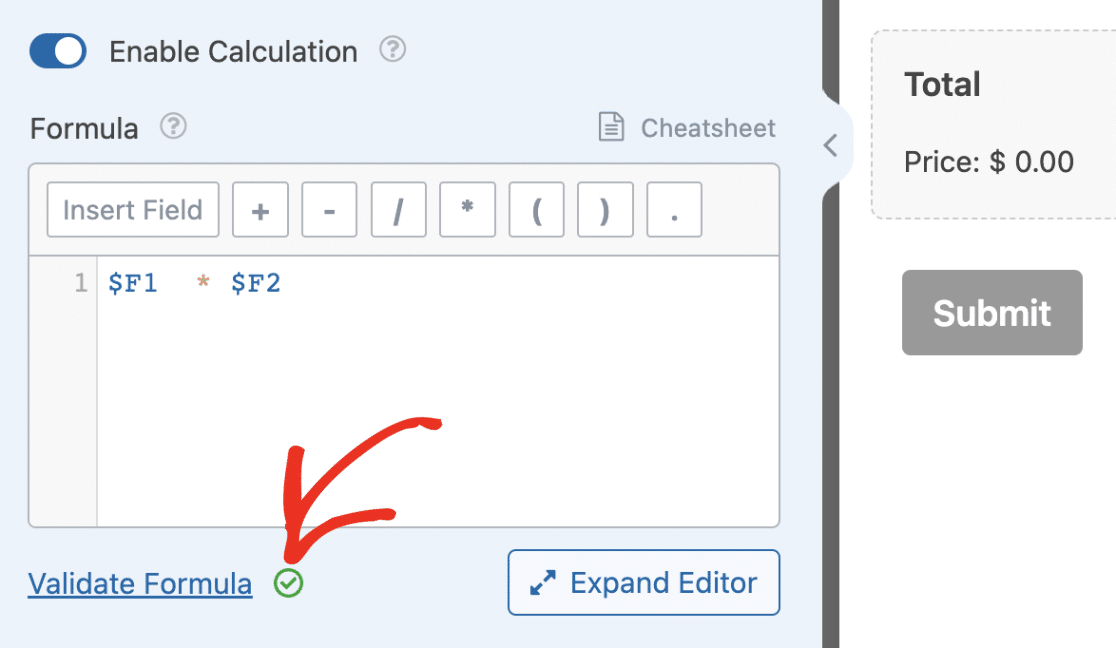
You should see a green check if all the syntax is correct.
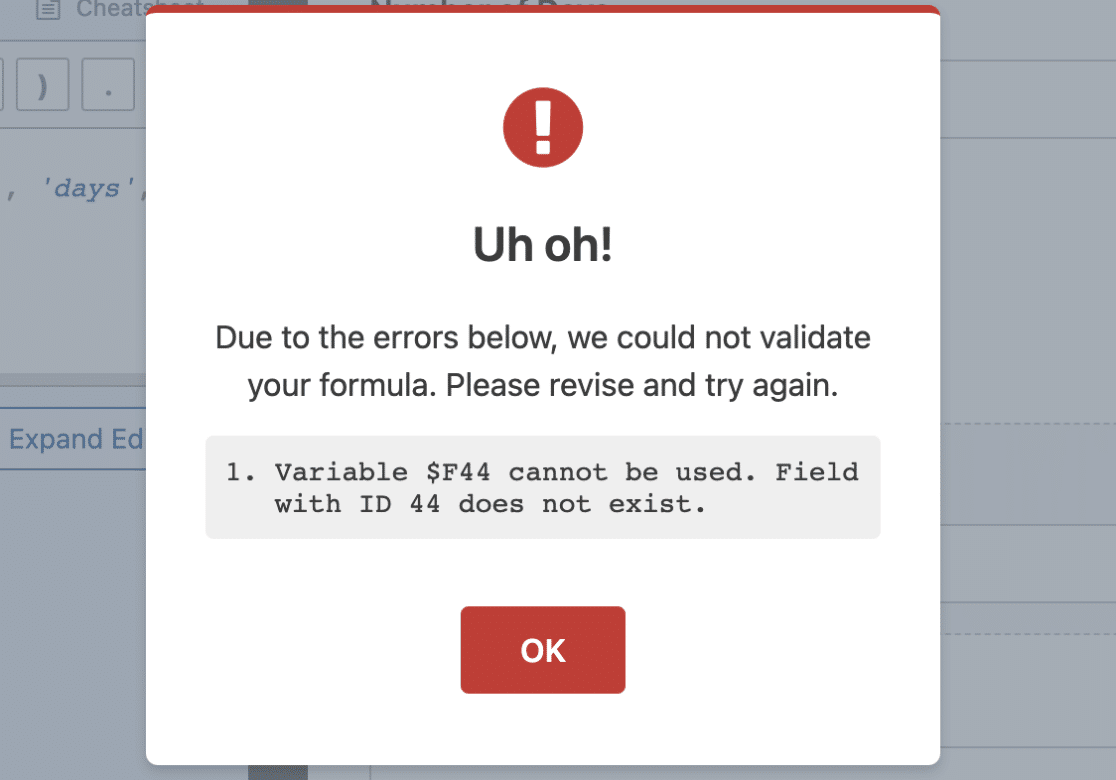
If there is an error with the formula, you’ll see an overlay with details about the specific line of the formula with the error.
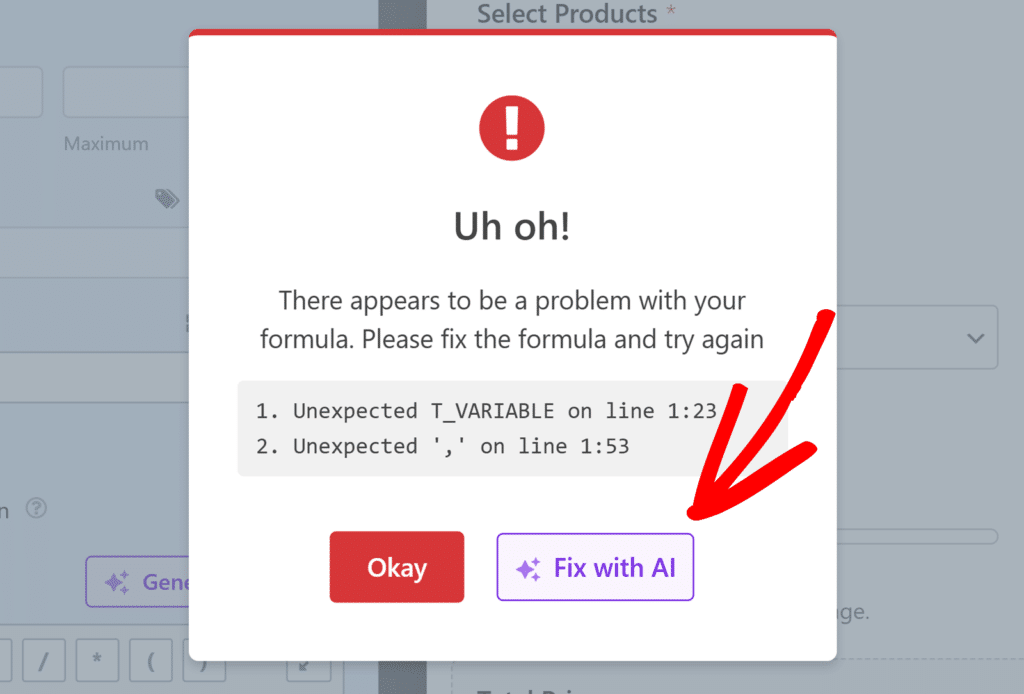
WPForms AI can also help fix formula errors automatically. If validation fails, click the Fix with AI button in the error popup to let AI resolve the issue. WPForms AI will provide a corrected formula along with an explanation of what was wrong.
Note: You can still save your form if the formula has validation error(s). However, the calculation for the field will be ignored in the background. The field will function like a regular field instead.
After adding the formula for your calculation, be sure to save your changes. You can preview the form to ensure the calculations work correctly.

Note: The currency corresponds to the one in your WPForms settings page. You can change it by going to WPForms » Settings and navigating to the Payments tab. Once there, click the Currency dropdown and choose the one you’d like to use.
Using WPForms AI To Generate Formulas
If you’d prefer to quickly generate calculation formulas instead of building them from scratch, you can use WPForms’ AI formula generator. By providing a simple description of what you want to calculate, WPForms AI can generate the appropriate formula for you.
To do so, click the Generate Formula button that appears next to the formula builder.

Then, in the chat dialog, describe the calculation you want, and WPForms AI will create the formula for you.
Building Advanced Calculations
The Calculations addon also lets you build complex calculations using conditional and logical operators.
For this example, we’ll implement a logic that automatically adds a shipping cost based on the amount the user is paying.
Start by adding the following fields to the form builder:
- Multiple Items
- Single Item
- Total
Once you’ve added these fields, set the prices you’d like to use for the Multiple Items field. We’ll use the default values in our example, but you can use any value you like.
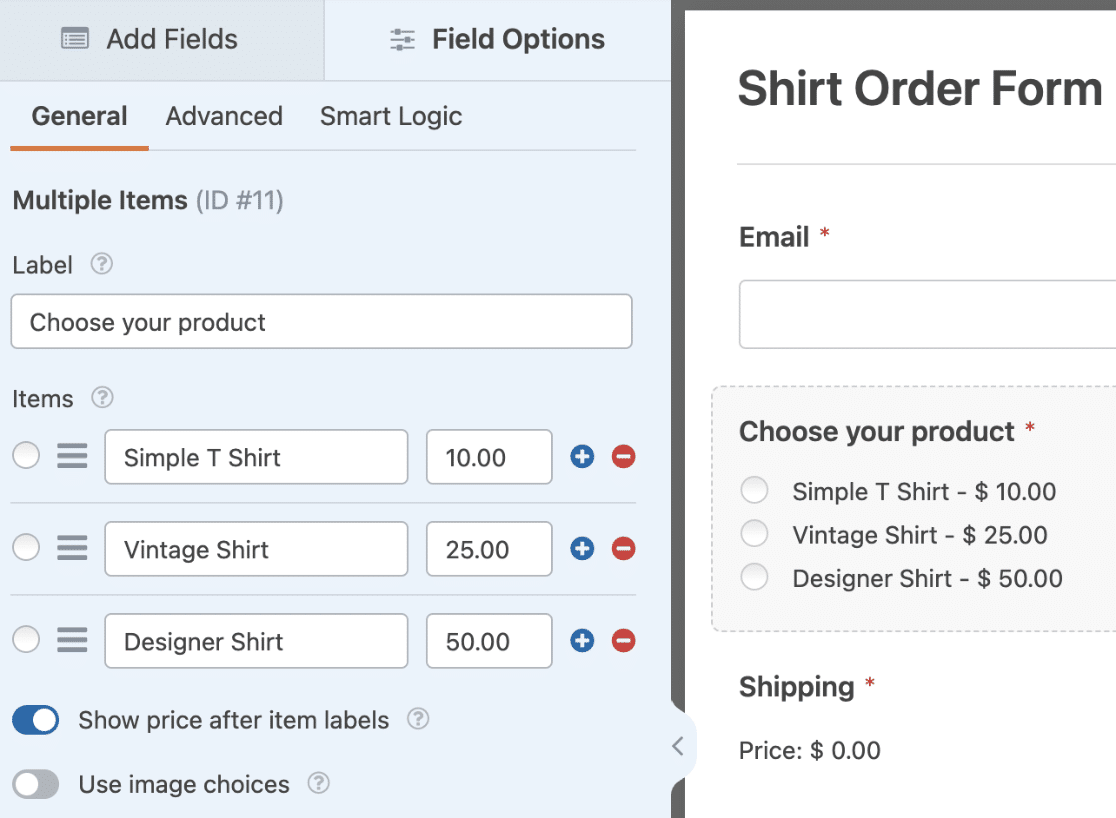
Note: You can use image or icon choices to improve the look and feel of the Multiple Items field. For more details, see our guide on using icon choices.
Now, select the Single Item field to open its Field Options panel. Under the General tab, change the Label to “Shipping.”
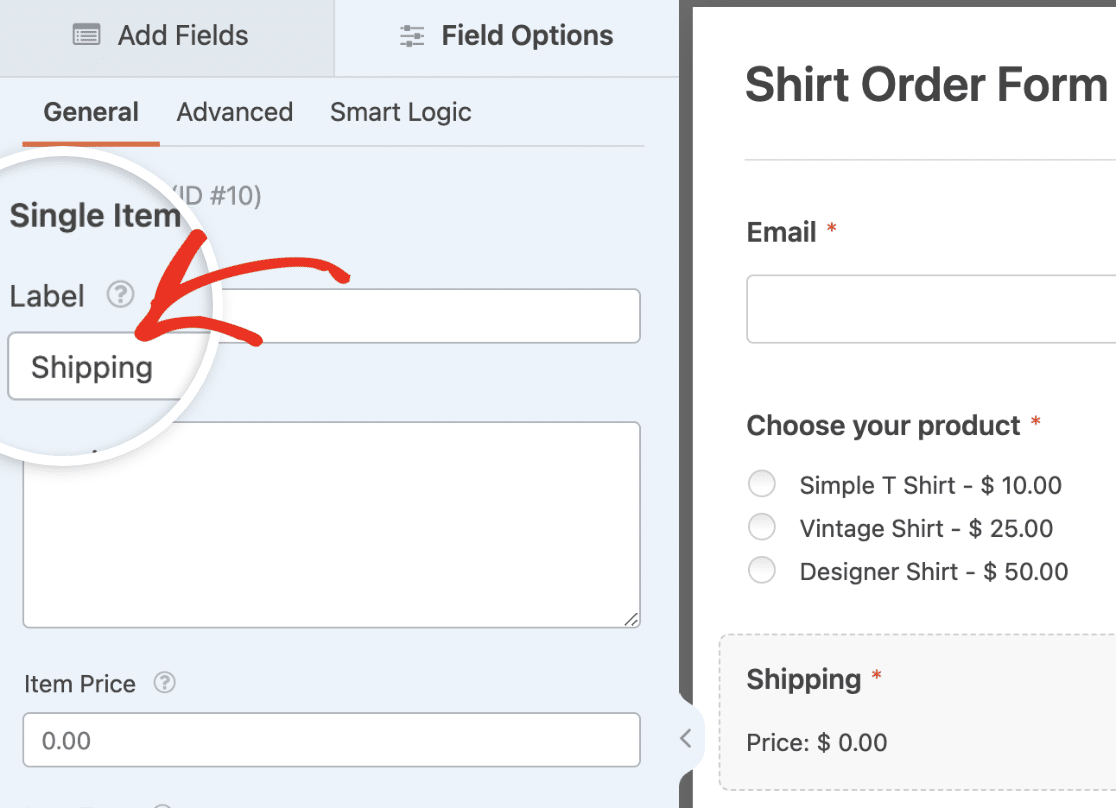
Next, navigate to the Advanced tab and toggle the Enable Calculation option to the on position.

In the formula builder, we’ll use conditional logic to set a shipping fee based on the user’s selected price.
For this, copy and paste the equation below to the formula builder.
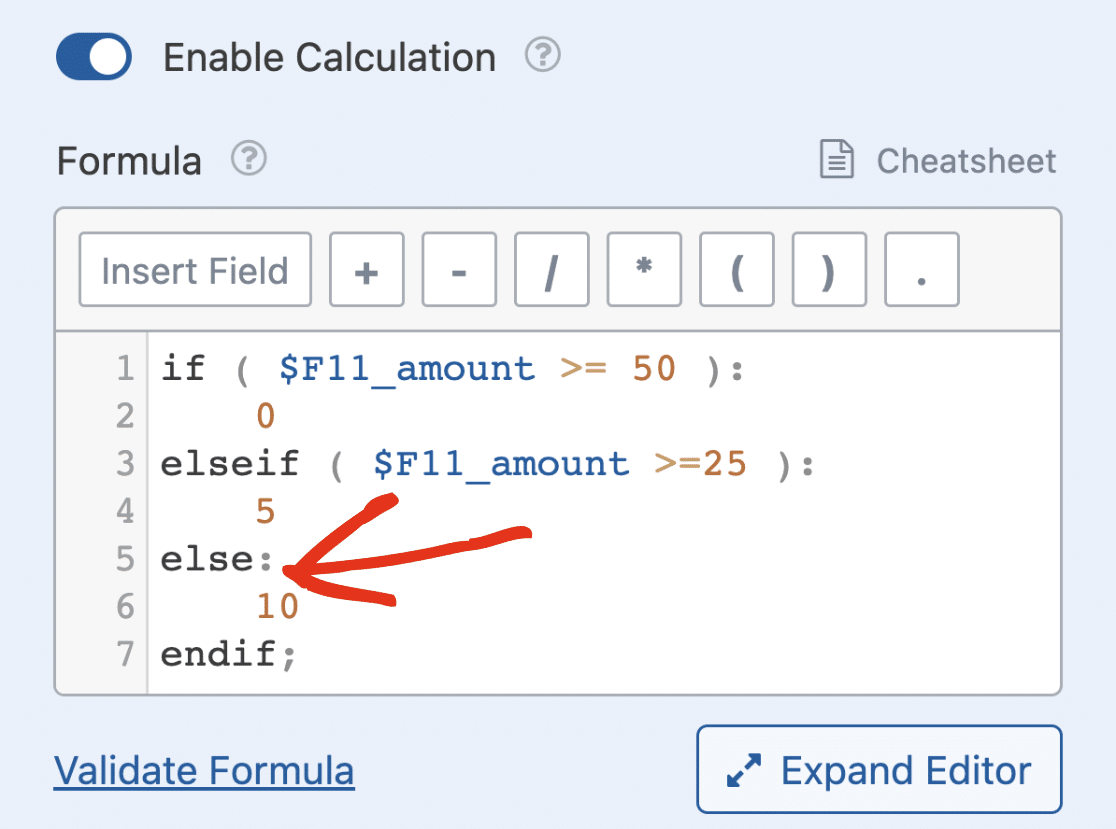
if ( $FX_amount >= 50 ):
    0
elseif ( $FX_amount >=25 ):
    5
else:
    10
endif;
Be sure to replace X in the equation above with your Multiple Items field’s ID. For our example, this value is 11.
Note: The colon (:) after the if/else statement is required for the logic to work. However, adding a semicolon (;) after each line in the formula builder is optional. For instance, you can optionally remove the semicolon after the endif line, and the formula would still work as expected.
In the equation above, we use an if statement to check whether the selected amount is greater than or equal to 50. If it’s true, then the shipping cost is $0.
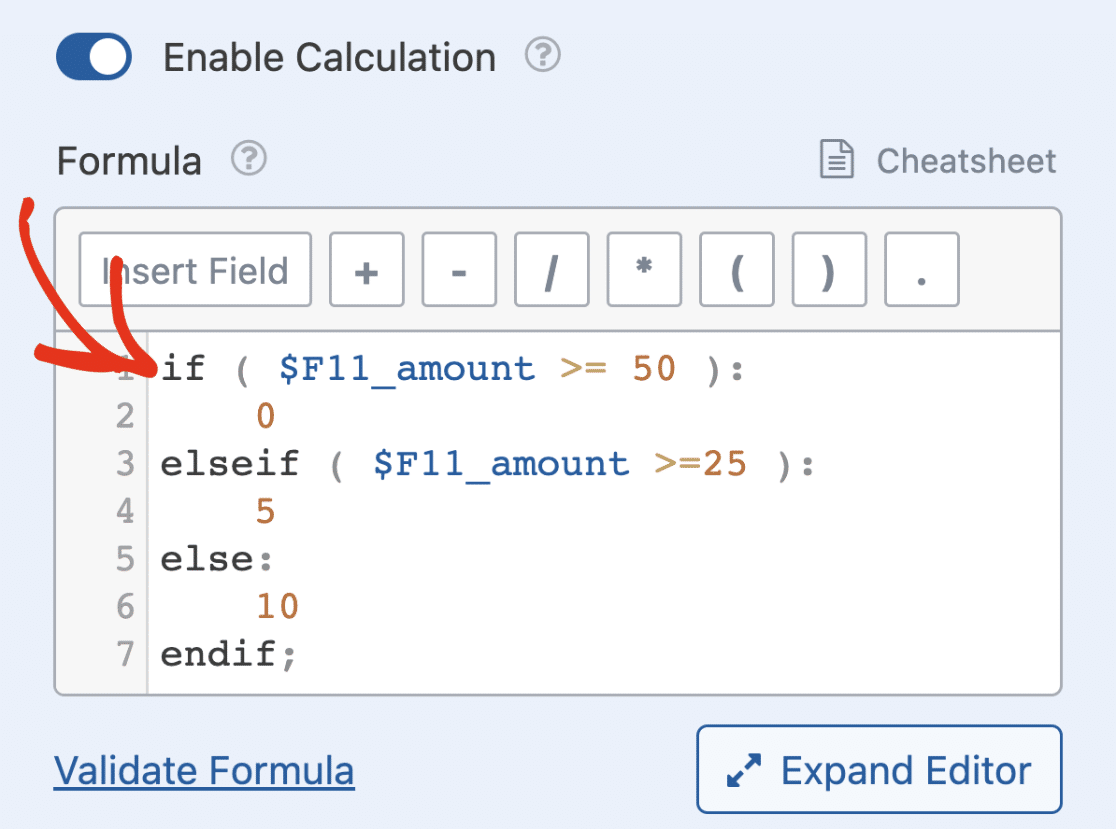
Note: The naming convention for subfields includes the field ID followed by an underscore and the subfield’s name. For payment fields, the value is represented as, $FX_amount in the formula builder, where X is the field ID.
Next, we add an elseif conditional that checks whether the price is greater than or equal to 25. If true, then the shipping cost is set to $5.
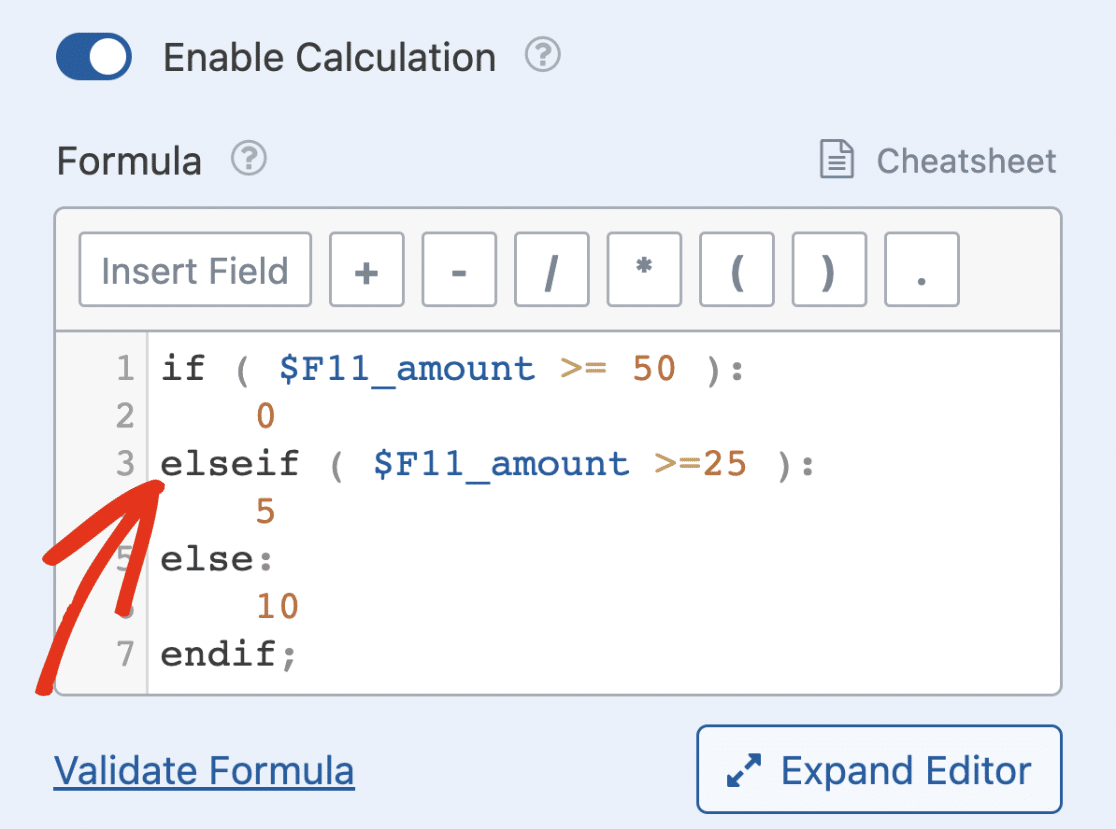
Note: The formula builder allows you to use unlimited elseif statements in your equation.
Lastly, we use an else block to set the shipping cost to $10 for prices below $25.
Note: As a reminder, always confirm that you’re using the correct field ID when you insert a field as a variable. For instance, if you add a Numbers field, delete it, and then add a new Numbers field, you’ll see a new field ID.
When you save and preview the form, you’ll see the shipping cost changing its value based on the amount your users select.

Note: To learn more about creating formulas, see our guide on building formulas with the Calculations addon.
Viewing More Examples
The Calculations addon has several use cases. You can use it to calculate fuel costs, shipping discount fees, transaction fees for payment forms, among other uses.
To learn more about other use cases for this addon, be sure to check our calculations formula examples documentation.
Frequently Asked Questions
These are answers to some top questions about using the Calculations addon with WPForms.
Which form fields can be used as variables when building calculation formulas?
Below, we’ve highlighted the supported fields that can be used as variables when building formulas:
- Single Line Text
- Paragraph Text
- Dropdown
- Dropdown Items
- Multiple Choice
- Multiple Items
- Checkboxes
- Checkbox Items
- Single Item
- Numbers
- Name
- Number Slider
- Phone
- Address
- Date/Time
- Website/URL
- Hidden Field
- Total
- Rating
Note: If you use dynamic choices for Multiple Choice, Checkboxes, and Dropdown fields, you won’t be able to use the field as a variable for your calculation.
Can I use a field with calculation enabled as a variable for another field?
Yes. If you enable calculations on multiple fields on your form, you can use one of them as a variable when building calculations for the other field. This essentially means the field’s value depends on the result from the first calculation.
Can I declare a regular variable that isn’t a form field in the formula builder?
The Calculations addon doesn’t allow using a variable that isn’t a form field in the formula builder. If you’d like to store the results from a calculation in a variable, we suggest using the Hidden field.
Once you’ve added the Hidden field to your form, enable calculation mode and enter the equation you’d like to perform.
You can then use the Hidden field containing the result from the first equation as a variable for the formula you intend to build.
How can I quickly switch fields inside a formula?
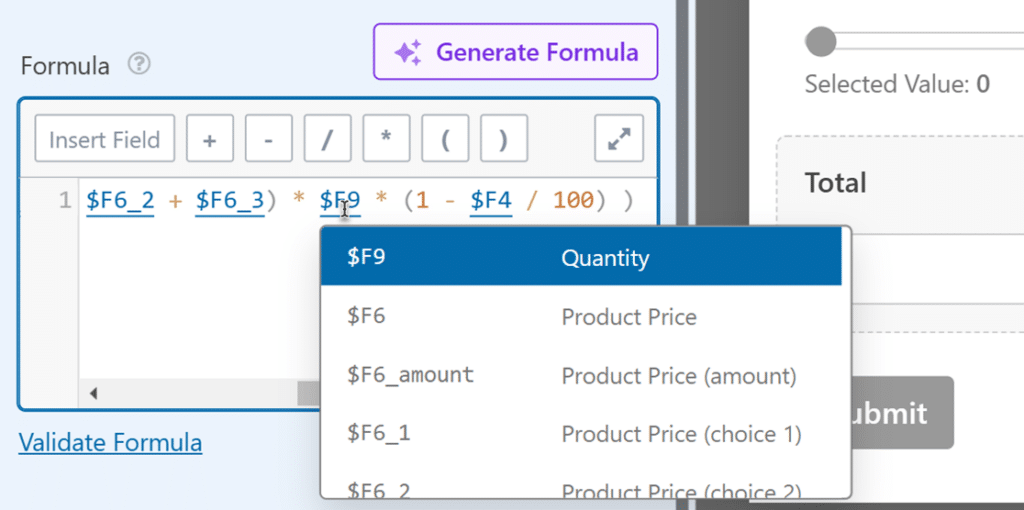
You can click on any field inside the formula builder to view a list of all available fields in your form. This makes it easy to replace or update fields without having to type them out.
How do I know which field I’m using in my formula?
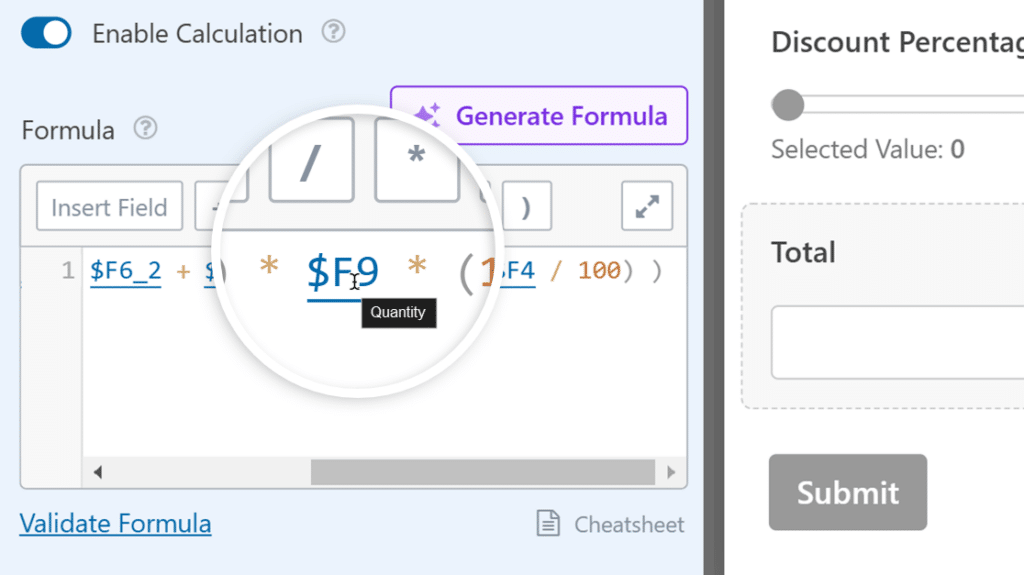
Hover mouse over any field inside the formula builder to see its label. This can help you confirm you’re using the correct fields in your calculation.
That’s it! You now know how to use the Calculations addon in WPForms.
Next, would you like to create a form capable of accepting user payments? See our guide on creating a payment form with WPForms for more details.

