Would you like to add a Number Slider to your WordPress forms? A Number Slider field allows your users to easily click and drag a selector to choose a value on a number line.
This tutorial will show you how to use the Number Slider field in WPForms.
Before you jump in, you’ll first need to make sure WPForms is installed and activated on your WordPress site and that you’ve verified your license. Then you can create a new form or edit an existing one to access the form builder.
Adding a Number Slider Field to Your Form
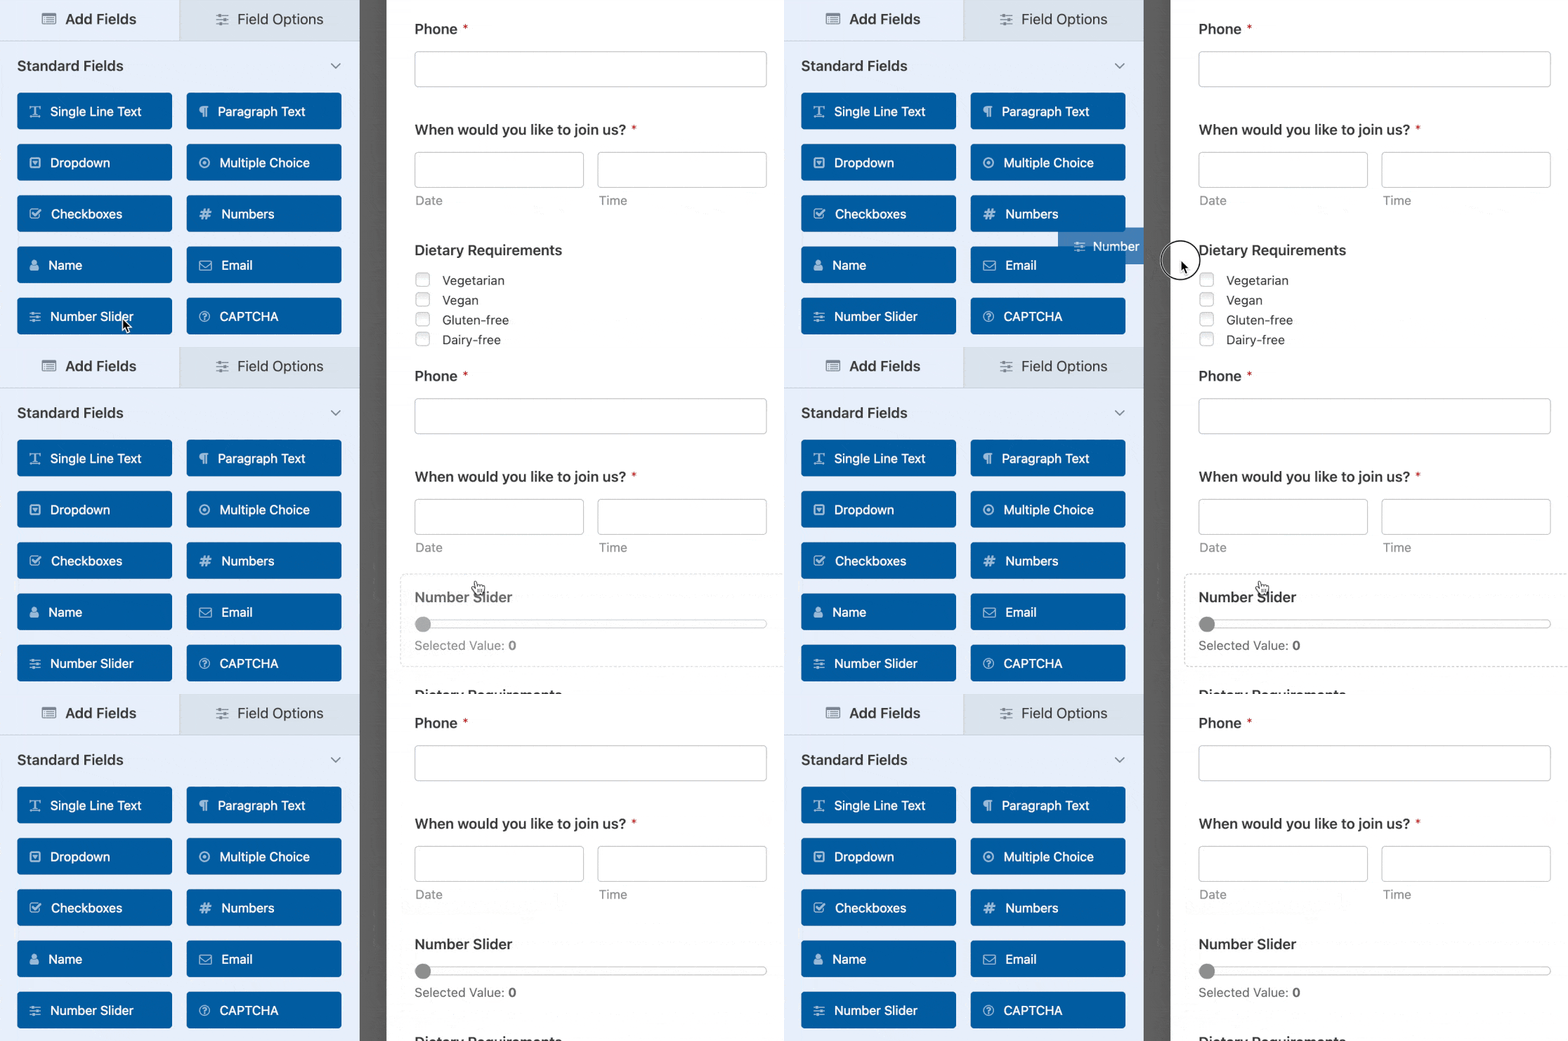
After opening the form builder, look under Standard Fields to find the Number Slider option. Simply click on it or drag and drop it into the preview area to add it to your form.
Configuring Number Slider Field Options
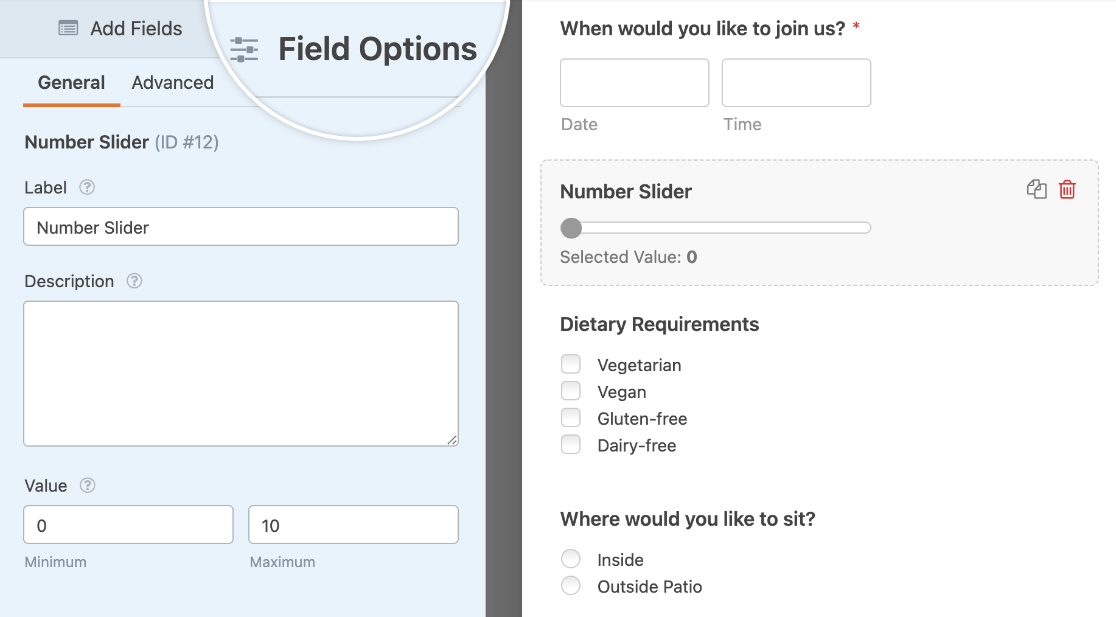
Once you’ve added the field to your form, click on it in the preview area to open its Field Options panel. Below, we’ll go through each setting that’s available here, using a restaurant reservation form as an example.
Label and Description
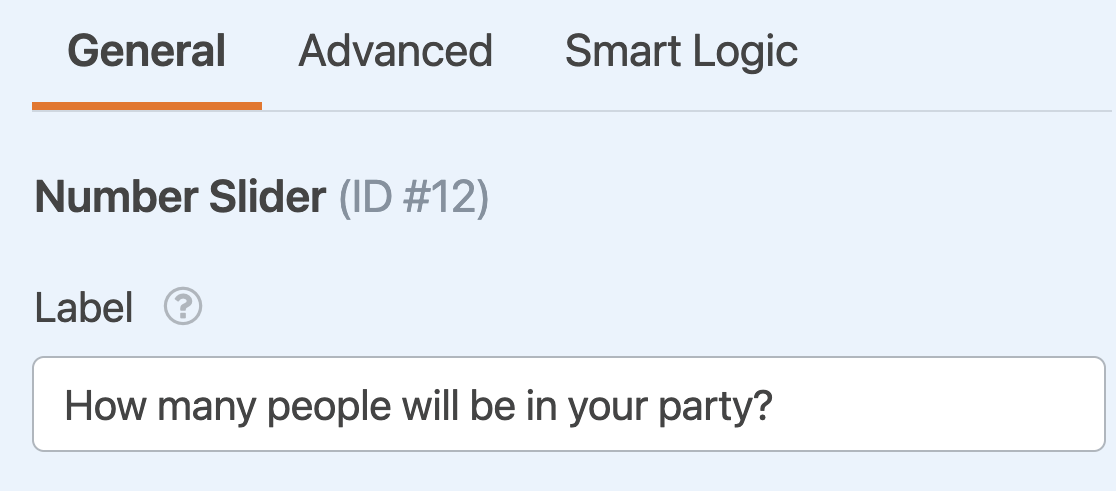
In the Number Slider field options, you can customize its label and description. The label will default to read “Number Slider,” but you can change this to whatever you’d like.
For our restaurant reservation example, we’ll change the label to, “How many people will be in your party?”
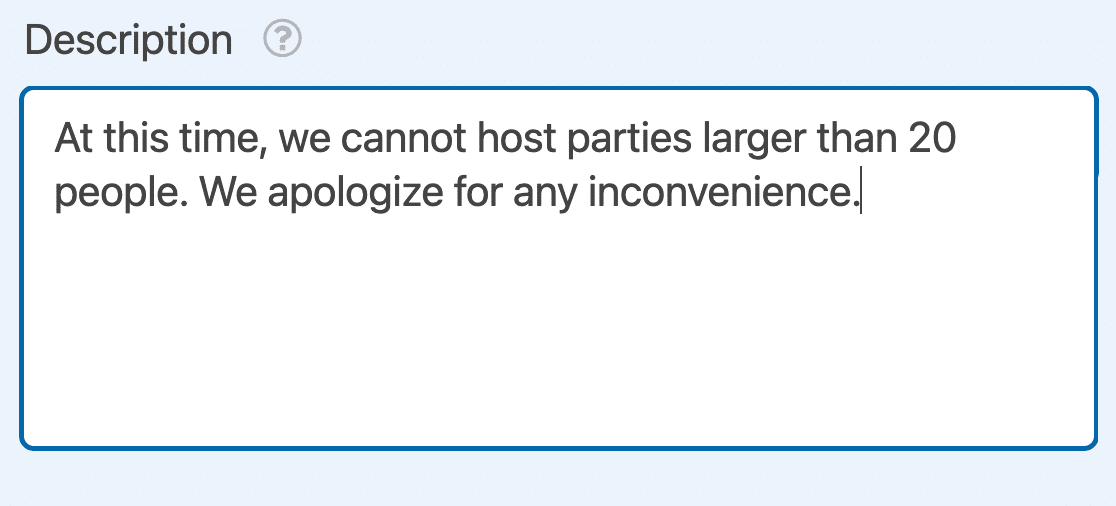
The field description gives you an opportunity to add extra text to your form, such as instructions on how to use the number slider. You can enter whatever text you like in the field provided.
Minimum and Maximum Values
You can also customize the minimum and maximum values that a user can select under the Value settings. The default values will be from 0 to 10, but you can replace these with whatever whole numbers you’d like.
For our example, we’ll set the minimum to 1 person and the maximum to 20 people.

Configuring Number Slider Advanced Options
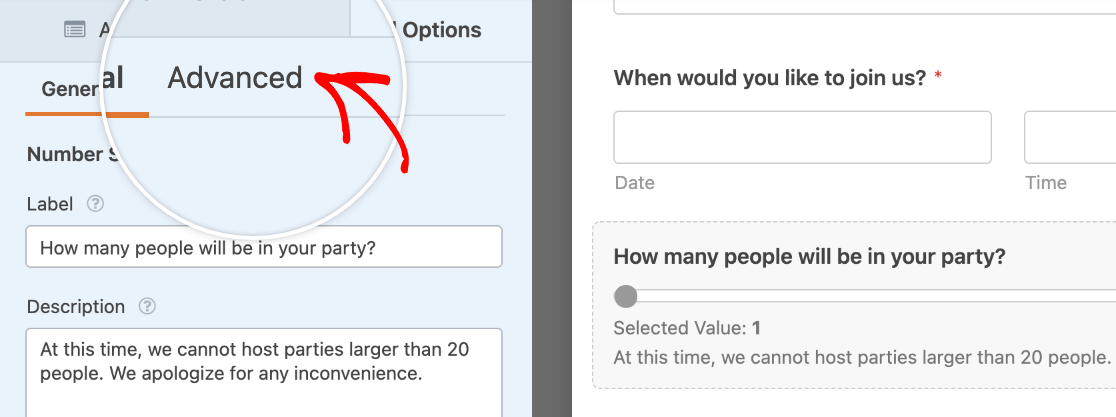
You can customize the field size, default value, and increment value in the Advanced tab of the field options panel. Click on it in the form builder to access these additional settings.
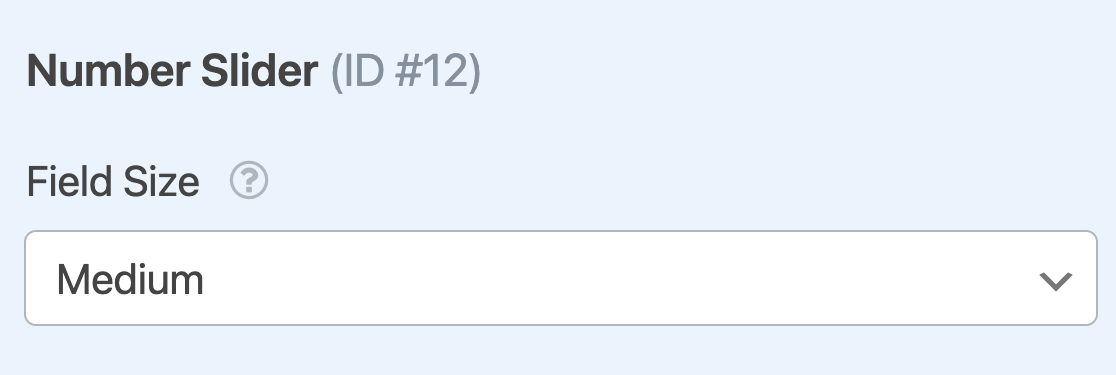
Field Size
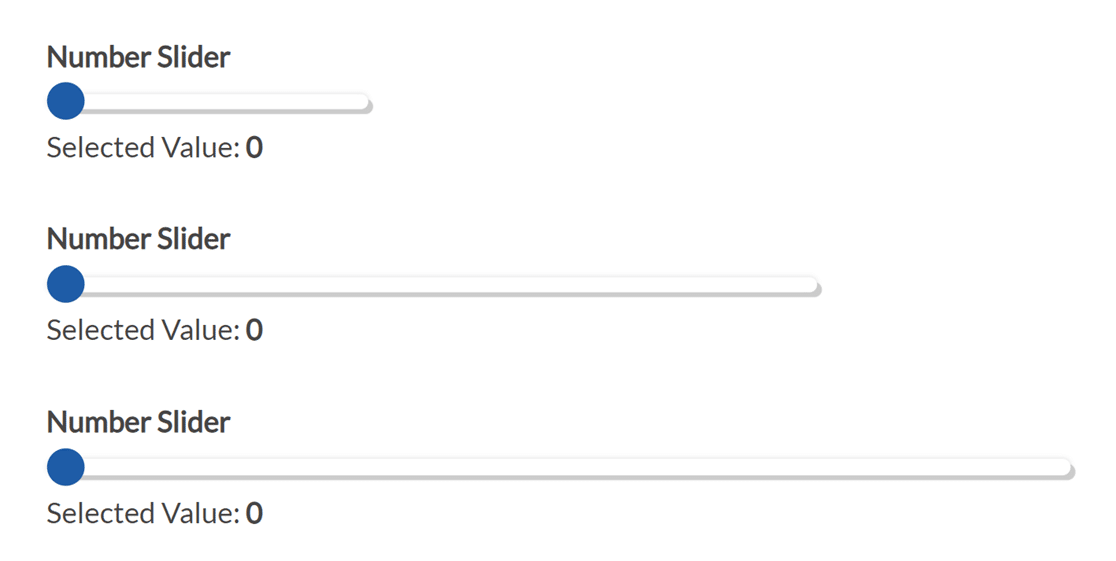
By default, the Field Size is set to Medium. However, you have the option to change your slider’s length to Small, Medium, or Large.
Below are examples of what each field size will look like on the frontend of your site:
Default Value
The Default Value determines where the slider will be set when users open your form. It will automatically be set to the minimum value you choose in the field options.
However, you can adjust it to any whole number within your number slider’s range by entering your desired value in the Default Value field.

Note: For more details on setting default values for your forms’ fields, check out our full tutorial on this option.
Value Display
By default, the label beneath your slider will read, “Selected Value: {value}.” The {value} tag pulls the number that is currently selected by the user so they can check that it’s correct.
You can change what the label reads under Value Display.

However, we recommend leaving the {value} tag in place so users can confirm their selection.
Note: Want to let users review all of the information they’ve entered in your form before they submit it? Check out our tutorial on showing entry previews in WPForms for all the details.
Increment
This setting determines the step size for each increase in the slider’s position. For example, if you had this setting set to 2, each increase would add 2 to the selected value (0, 2, 4, 6, etc.).
By default, the increment value will be set to 1. However, you can edit this to any whole number you’d like under the Increment setting.

Note: If you choose to increment your value by an even number, but your max value is odd (or vice versa), the number slider will stop at the number before your max value.
Configuring Conditional Logic
If you’d like, you can also show users who select a particular value a message using conditional logic.
For our restaurant reservation example, we’ll show a message to users who indicate their party will be greater than 10 people. In our message, we’ll let them know that an automatic 20% gratuity charge will be added to their bill.
To set this up, we’ll first add an HTML field to our form with the text “Note: A 20% gratuity will automatically be added to your bill for parties over 10.”

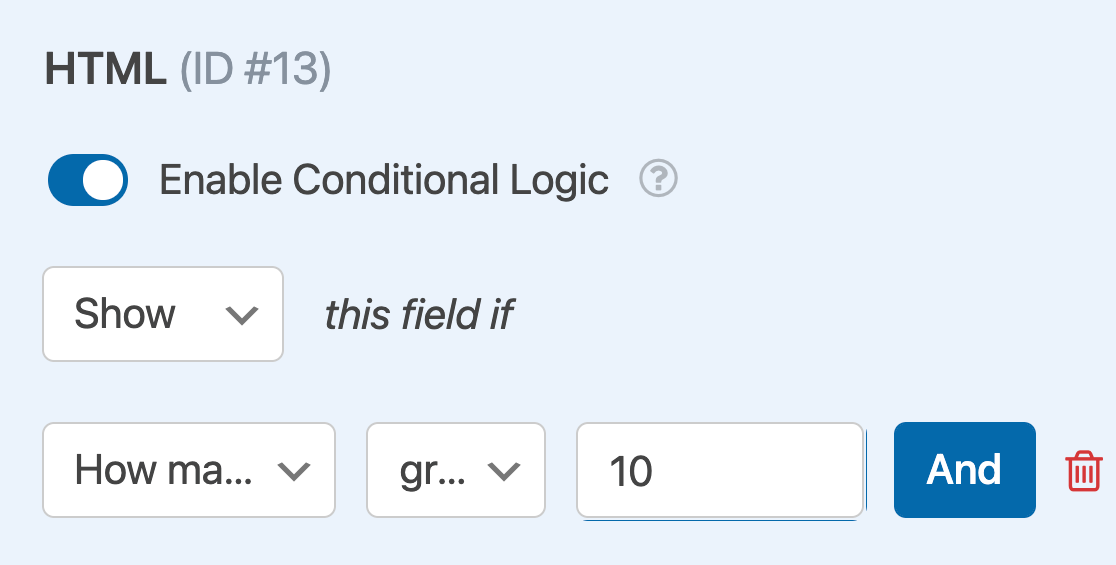
Next, we’ll set up conditional logic so that this HTML field only appears if a user chooses a number greater than 10 using the number slider. To do this, click the Smart Logic tab in the Field Options panel for the HTML field and toggle on the setting to Enable Conditional Logic.
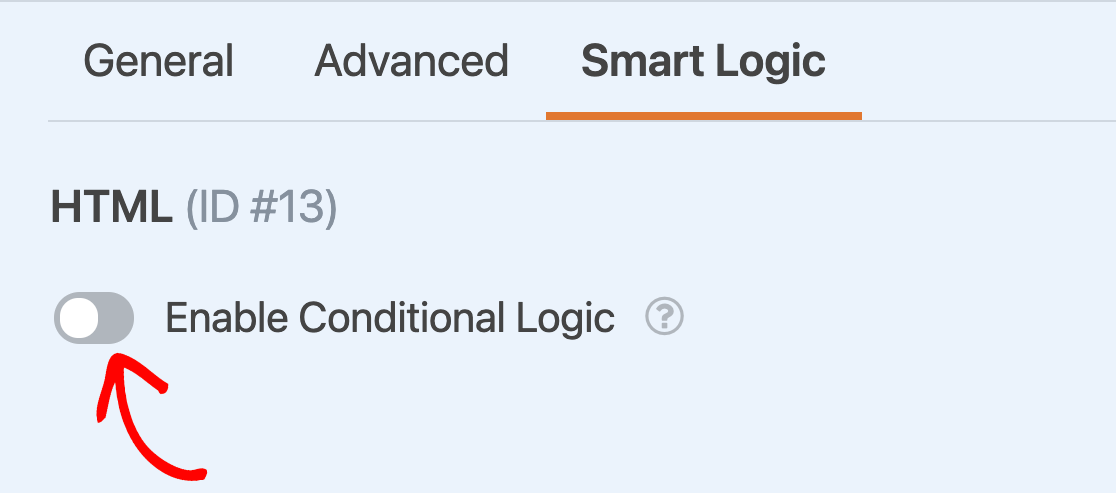
Then set the rule that determines when the field will appear. For this example, we’ll set the logic to read, “Show this field if How many people will be in your party? is greater than 10.“
Note: Need help setting up your conditional logic rule? Our beginner’s tutorial on using conditional logic in WPForms has all the details.
The HTML field will remain hidden unless the user selects a value greater than 10 in the Number Slider field.
That’s it! You can now add and customize a Number Slider field for any of your forms.
Next, would you like to learn how to analyze the data you’ve collected? Be sure to check out our tutorial on the Surveys and Polls addon for details on how to view entry statistics, generate reports, and more.
