AI Summary
Looking for ways to enhance your WPForms payment forms? Adding a Total field to your form can refine transaction accuracy, improve user experience, and provide versatile customization options for various payment scenarios.
This tutorial covers how to add a Total field to your form, how to make the field required, and how to display a summary of the payment before a user submits your form.
Before you dive into this tutorial, make sure WPForms is installed and activated on your WordPress site. Then create a new form or edit an existing one to access the form builder.
If you would like to accept payments with this form, you’ll also need to make sure you’ve installed and set up one of our payment addons. You can find complete tutorials on each of the available options below:
Adding a Total Field
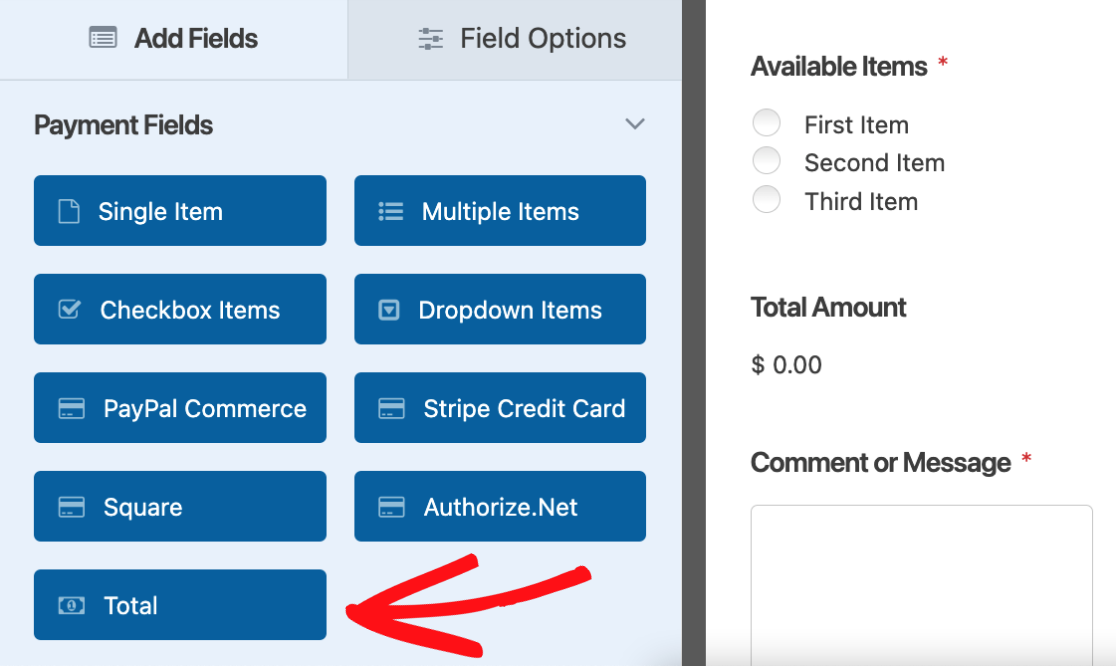
The Total field is located under the Payment Fields section in the form builder. To add this field to your form, click on it or drag and drop it into the preview area.
Requiring a Payment Total
Making a Total field required on your WPForms payment forms prevents the issue of $0 submissions, eliminating potential confusion and ensuring every transaction is intentional.
To make the field required, start by clicking on it in the preview area to open its field options. Under the General tab, toggle the Required option to the on position and save your changes.

Note: We recommend testing your form before you publish it to make sure it works as expected. See our complete form testing checklist for a step-by-step guide.
If a user tries to submit your form with $0 in the Total field, they will see a validation message that reads, “Payment is required.”

Note: Want to change the message users will see if they try to submit your form and the Total field amount is $0? Check out our tutorial on customizing validation messages.
Displaying an Order Summary
Displaying an order summary on your payment forms gives users a clear, itemized breakdown of their selected products, similar to a receipt. This is a great way to help prevent any misunderstandings about what’s included in the total cost.
Note: Displaying order summary requires WPForms version 1.8.7 or higher to work.
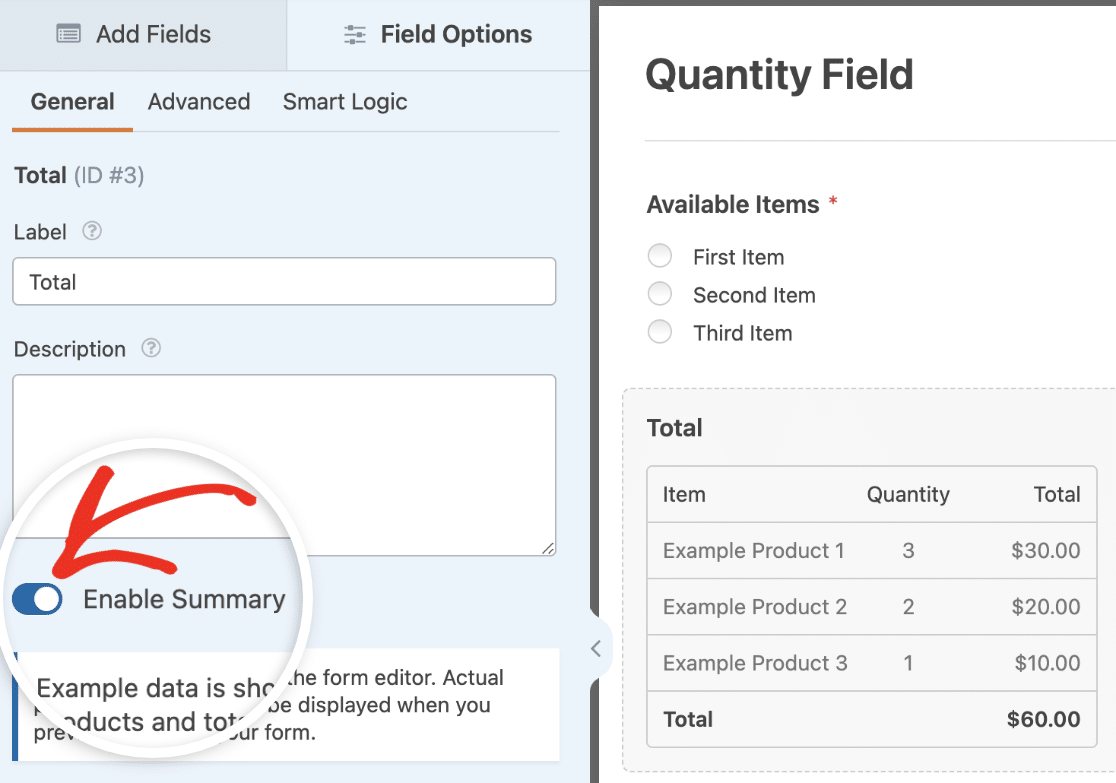
To display the summary, first open the field options panel by clicking on the Total field in the form preview area.
Under the General tab, go ahead and toggle on the Enable Summary option.
Note: If you’re using the Coupons addon, be sure to update it to the latest version. Otherwise, you won’t be able to use the order summary feature.
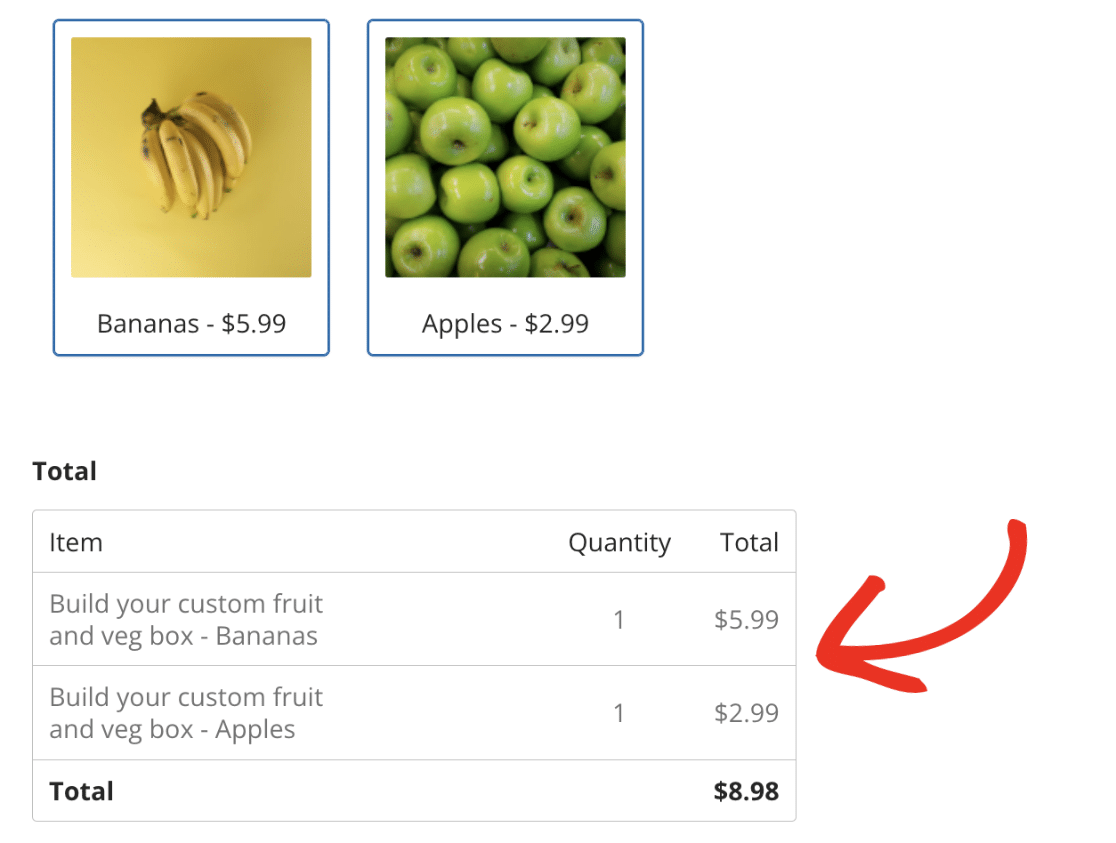
After enabling the order summary, users will now see a detailed breakdown of selected items and their prices directly on the form, providing a transparent overview of the purchase before submission.
Note: For a practical implementation, explore this Luxury Watch Order Form Template with a built-in order summary. It demonstrates how to effectively display itemized product details in a real-world scenario.
Adding an Order Summary to a Confirmation Message
Adding the order summary to the confirmation message gives users a clear recap of their purchase right after they submit the form. This is a great way to instantly show users what they’ve purchased, improving transparency and customer satisfaction.
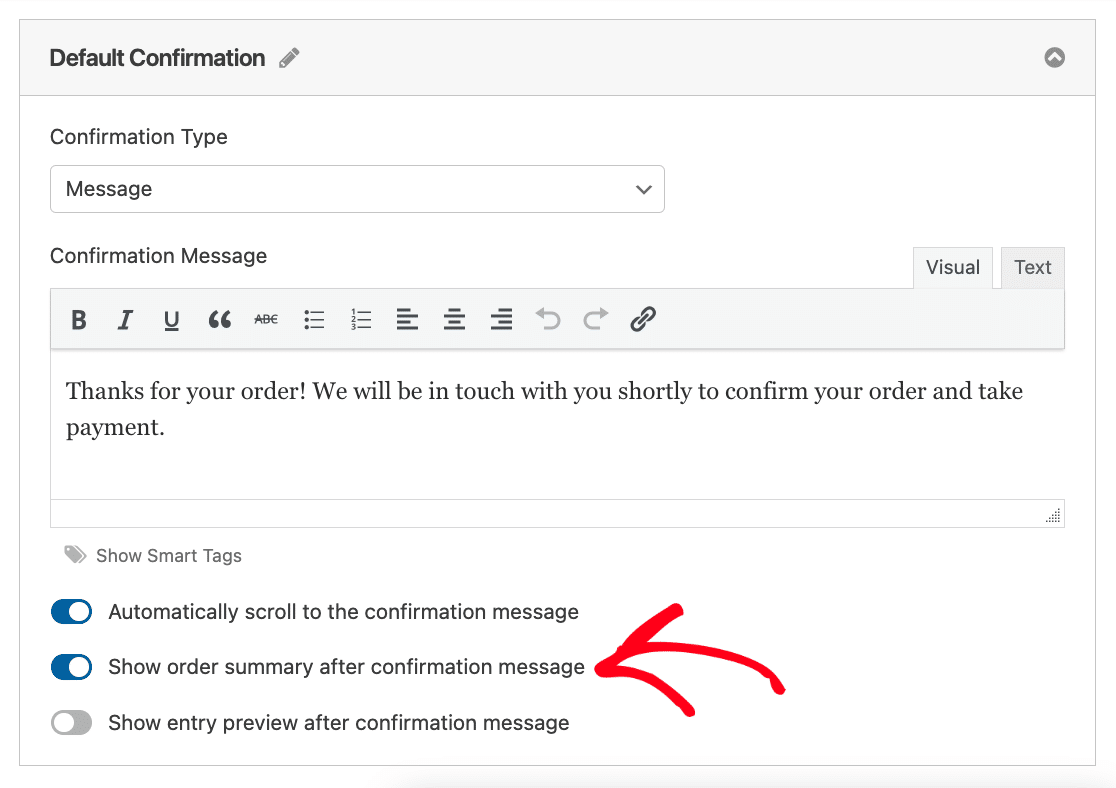
To include the order summary in the confirmation message, go to Settings » Confirmations.
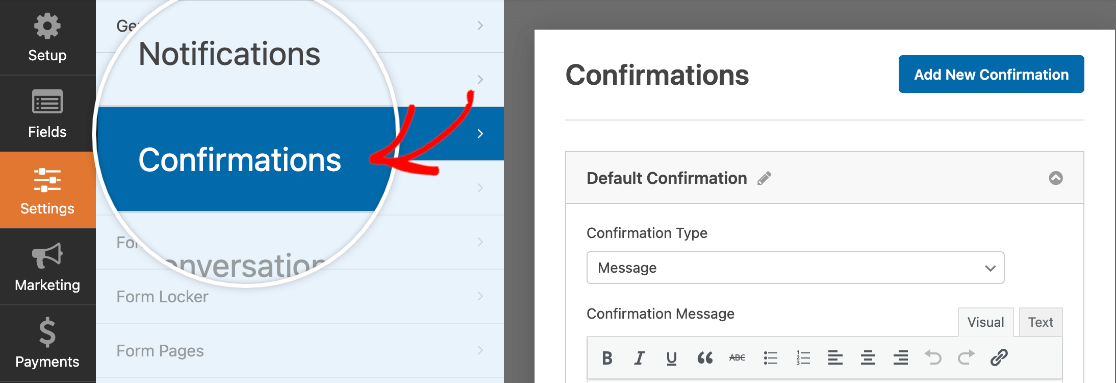
Next, toggle on the Show order summary after confirmation message option and save the form.
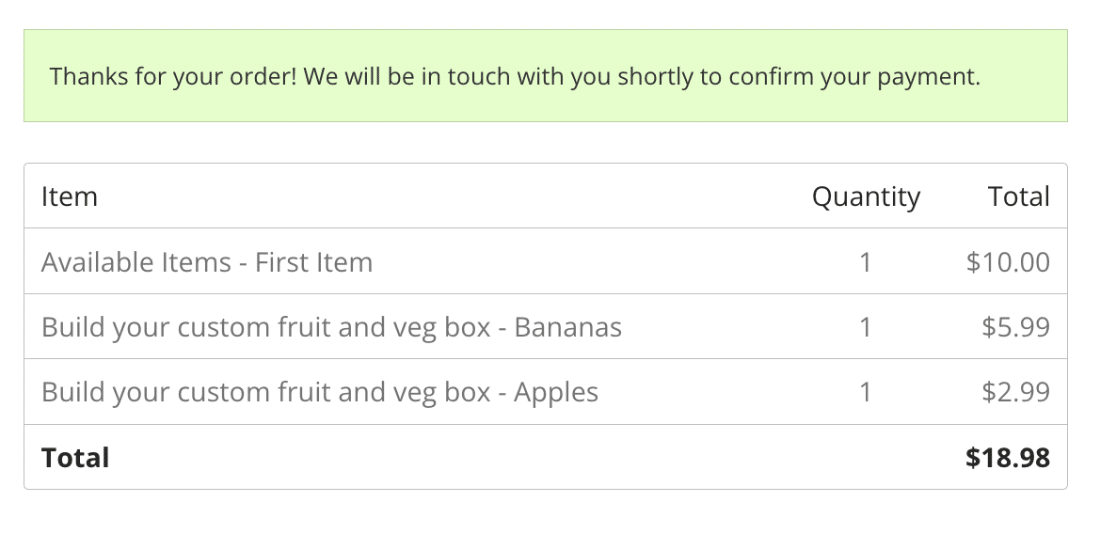
Now when a user submits your form, they’ll see the order summary displayed with the confirmation message.
Frequently Asked Questions
Can I show users a summary of all their form responses (not just payment items) before they submit?
The order summary feature covered in this tutorial only displays payment-related items and pricing. If you’d like to show users a full text summary of everything they’ve entered in the form — including non-payment fields like name, email, and text responses — you can use the Entry Preview field. This lets users review all their responses on the last page of a multi-page form before submitting. See our guide on how to show entry previews in WPForms for setup instructions.
That’s it! Now you know how to add a Total field to your form, make it a required entry, and display a payment summary before a user completes their submission.
Next, would you like to offer multiple payment methods in a single form? Follow our guide to let users choose their payment method.