Would you like to accept payments through your WordPress forms? With our Square Pro addon for WPForms, you can easily process credit card payments using your own custom payment forms.
This tutorial will show you how to set up the Square Pro addon and integrate it with your forms so you can start taking payments.
Requirements:
- You will need a Pro license level or higher to access the Square Pro addon
- Ensure that you’ve installed the latest version of WPForms to meet the minimum required version for the Square Pro addon
- Square requires your site to have SSL (HTTPS) enabled on the page where you’re adding a live payment form, as this allows you to securely send credit card data to Square. For more details, please see WPBeginner’s guide to adding SSL and HTTPS in WordPress
Before you dive into the tutorial below, make sure WPForms is installed and activated on your WordPress site and that you’ve verified your license.
Connecting Square to Your WordPress Site
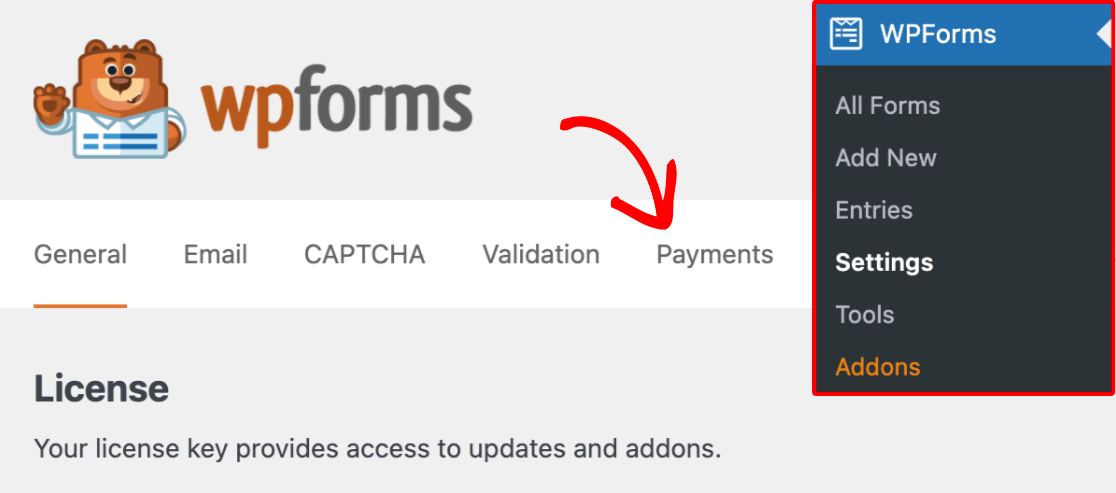
WPForms enables you to connect your site to Square in just a few clicks. First, go to WPForms » Settings in your WordPress admin area and click on the Payments tab.
Under the Payments section, make sure the Currency dropdown is set to the same currency your Square account uses.

If these settings do not match, Square won’t be able to process your payments and you’ll see an error message when you try to connect your Square account to WPForms.

Once you’ve set your currency, you can move down to the Square section and click on the Connect with Square button.
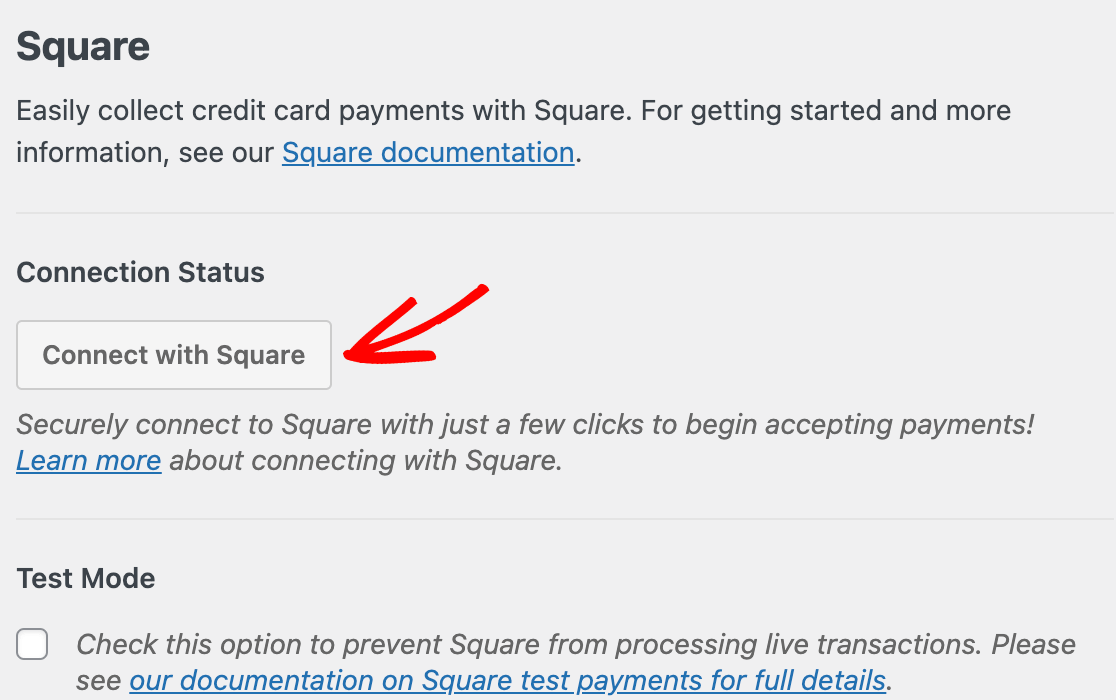
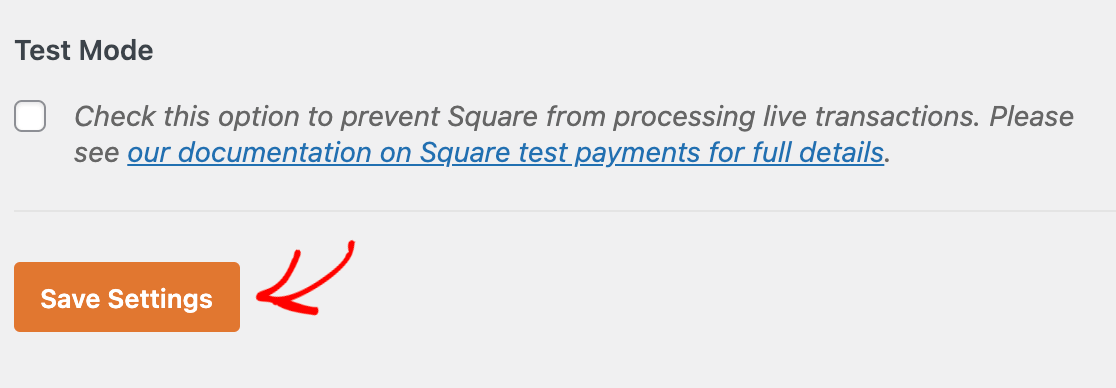
Note: For WPForms payment integrations, Test mode and Live mode are configured separately. Make sure the Test Mode option is left unchecked to ensure you can process transactions once your form is published.
If you would like to test your form’s Square integration before publishing your form, please see our tutorial on how to test Square payments.
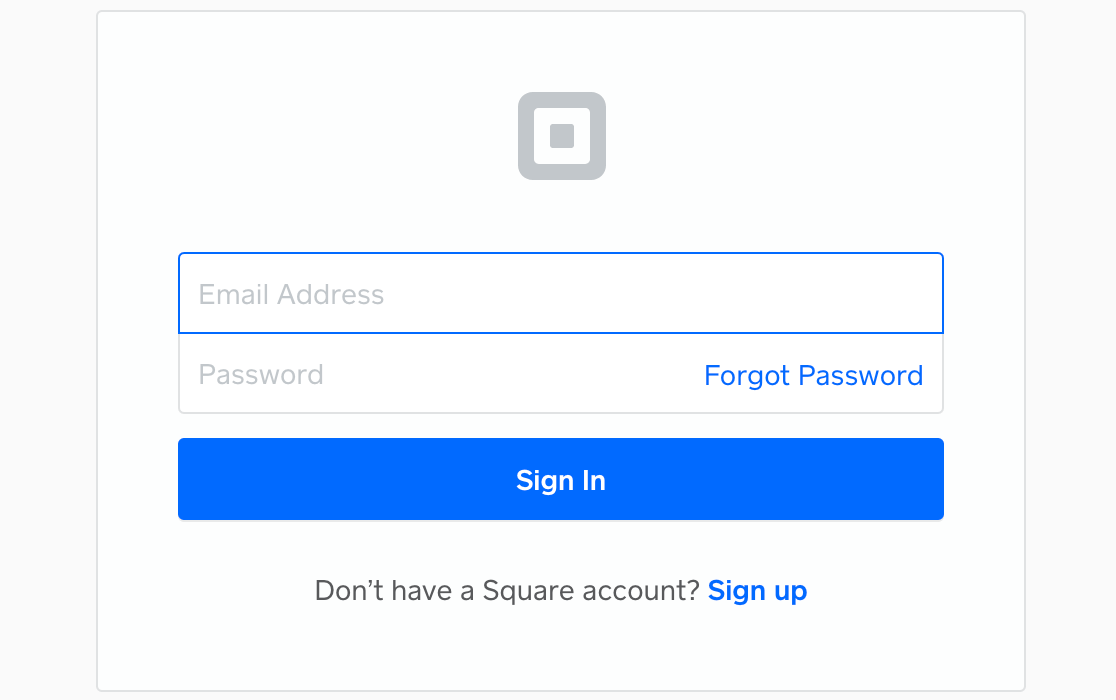
Next, you’ll be prompted to log in to your Square account. Enter your email address and password, then click on Sign In.
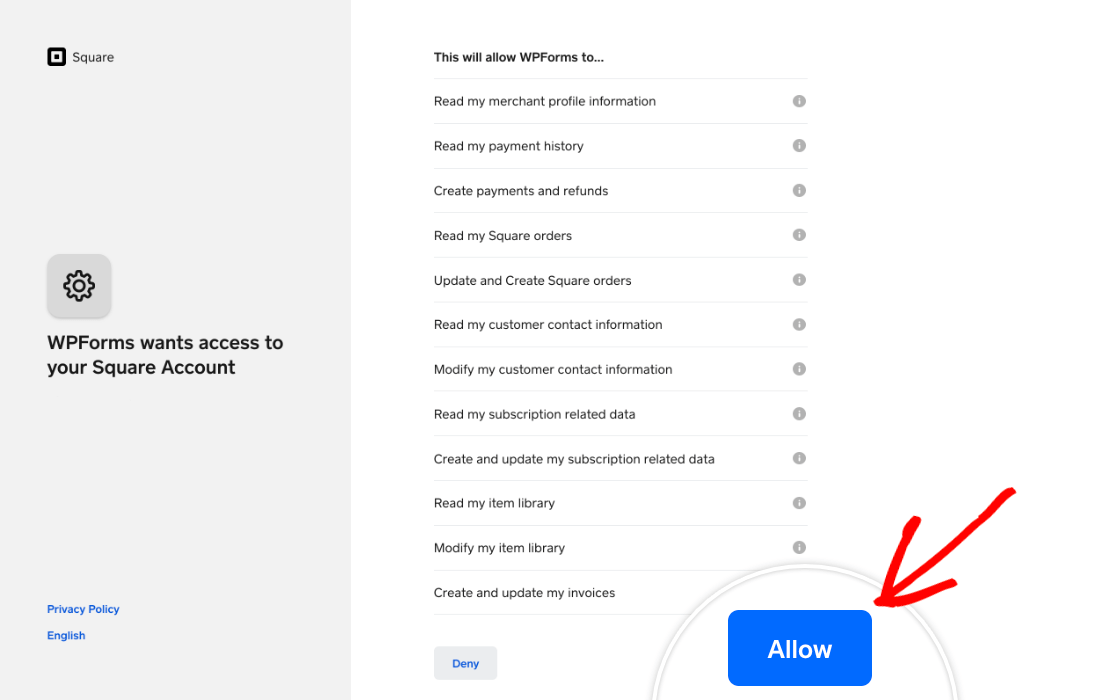
Square will then ask if you want to grant WPForms certain permissions related to your account. Click on Allow to proceed.
This will bring you back to your WPForms payments settings. If the connection was successful, you’ll see a green checkmark next to Connection Status.

The primary location for your business will also be imported into your WPForms payments settings from Square. If your business has multiple active locations, you can select which one you want to use from the Business Location dropdown.

Note: Locations are managed within your Square account. For help with adding, removing, or editing locations, please see Square’s documentation on this topic.
Lastly, make sure to save your settings before leaving this screen.
Setting Up Square Webhooks
Webhooks allow WPForms to receive real-time updates from Square when a payment is completed, refunded, or updated. With Square webhooks enabled, your forms stay in sync automatically, so you don’t have to manually track payment changes.
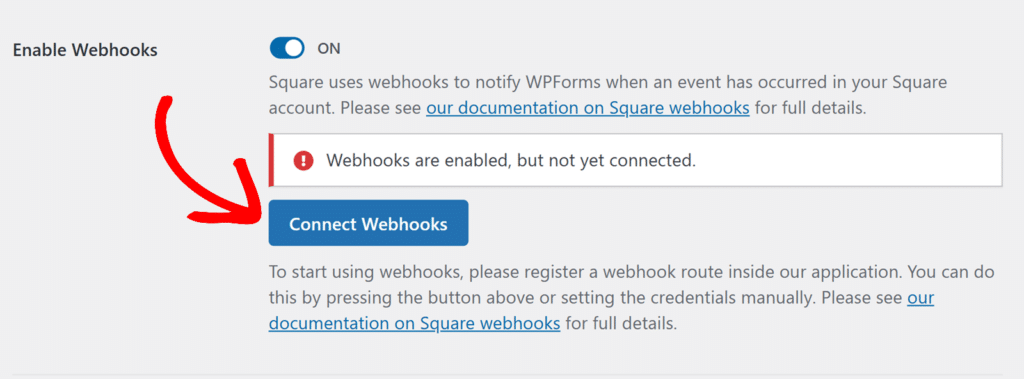
To learn how to connect Square webhooks to WPForms, follow our guide on setting up Square webhooks
Adding Square Integration to Your Forms
After you’ve connected your site to Square, you can enable payments for a specific form. To do so, create a new form or edit an existing one to open the form builder.
You can use a form template or start from scratch and customize your form however you’d like. However, make sure to add a Square field from the Payment Fields section of the form builder. You can click on it or drag and drop it into the preview area to do so.
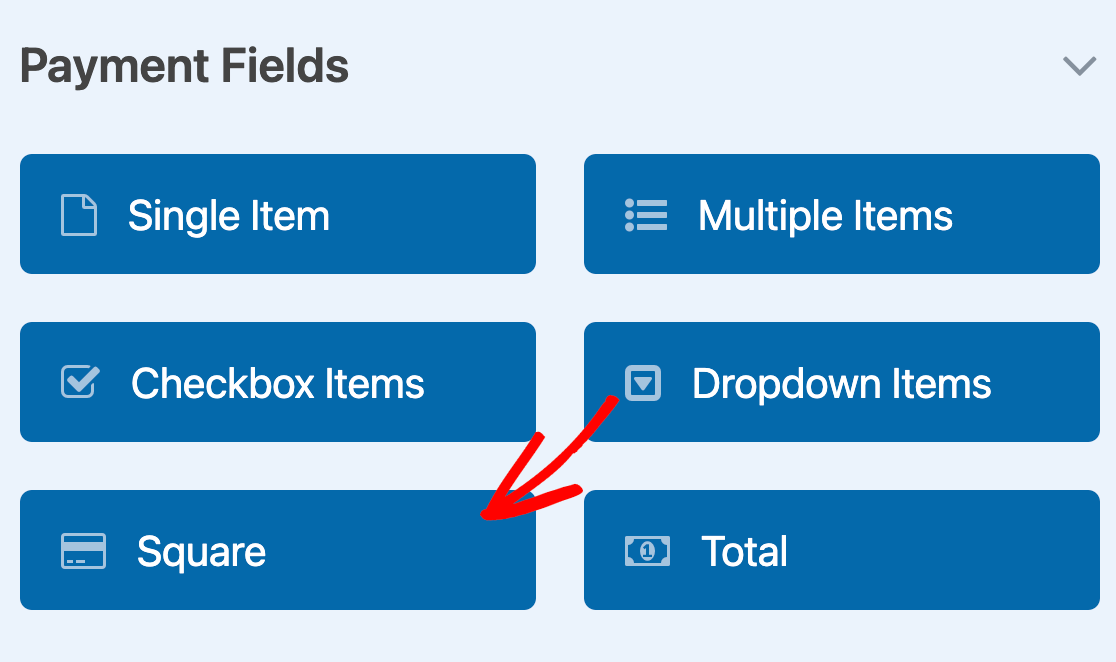
This will add the credit card fields necessary to process payments through Square.
Once you’re happy with your form’s fields, go to Payments » Square to access the Square settings page. Then toggle the Enable one-time payments option to the on position.
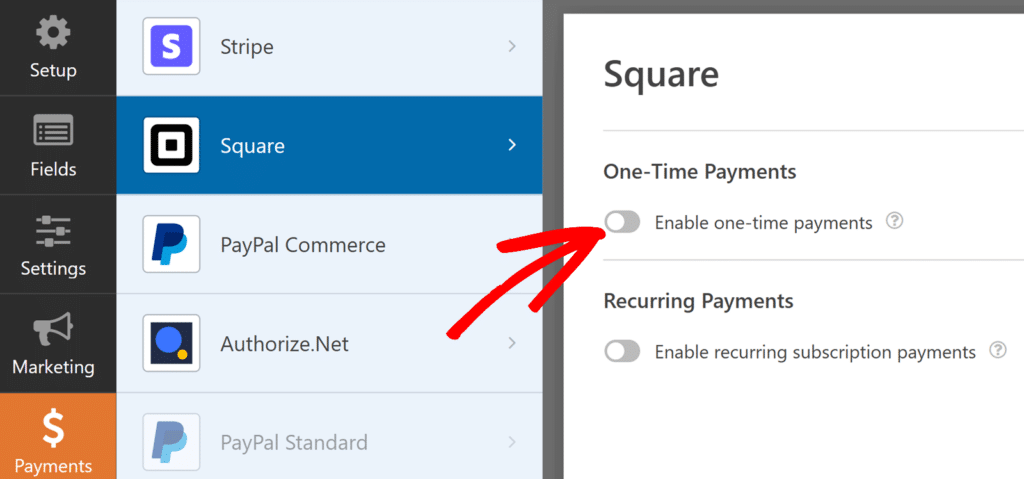
This will reveal some additional options for you to configure. First, enter a Payment Description, which will appear on users’ credit card statements to help them identify transactions made through this form.

Next, you can map a few fields from your form to your Square account if you would like to. Using the dropdowns, select your form’s Email, Name, and Address fields.
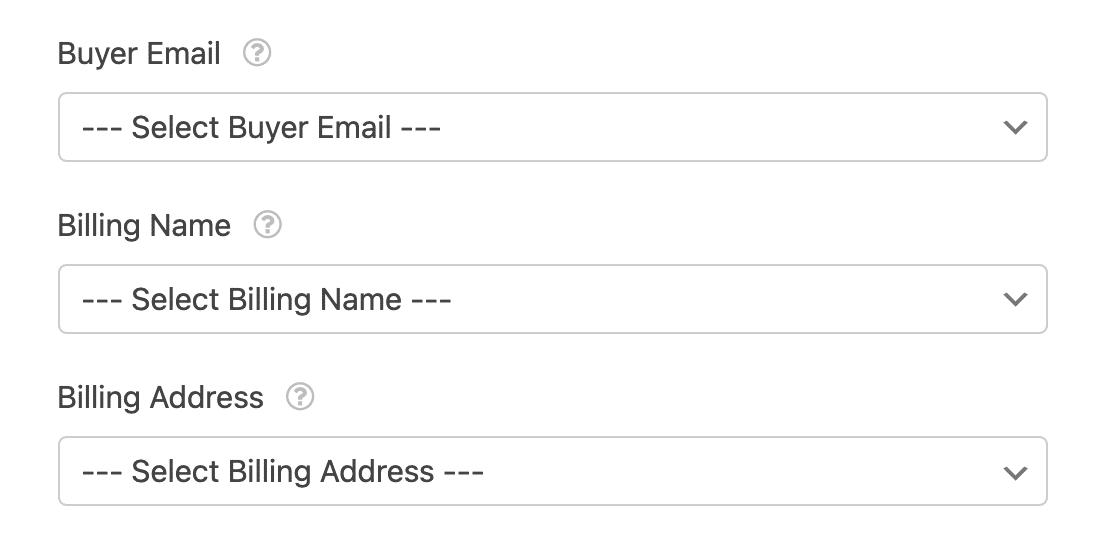
Note: This data will be saved, but will not be visible in the Square Dashboard. You can send the email address to Square using this workaround from our developer documentation.
If your form is for accepting one-time payments, you can save your changes and proceed to test your payment form. However, if you need to accept recurring payments, you’ll need to complete additional settings.
Enabling Recurring Payments
To charge users on a recurring basis, toggle on the Recurring Payments option.

Once you’ve enabled this option, you’ll need to complete the other fields in this section, which include:
- Plan Name: Enter a title for the subscription. This will appear in the transactions for this form in your Square account.
- Phase Cadence: Select how often the payment should occur. Options include Monthly, Yearly, and more.
- Customer Email: Select the Email field from your form so the customer can be contacted. This is required to create a subscription for a customer in Square
- Customer Name: Select the field that contains the customers name.
- Customer Address: Select the field that contains the customer’s address.
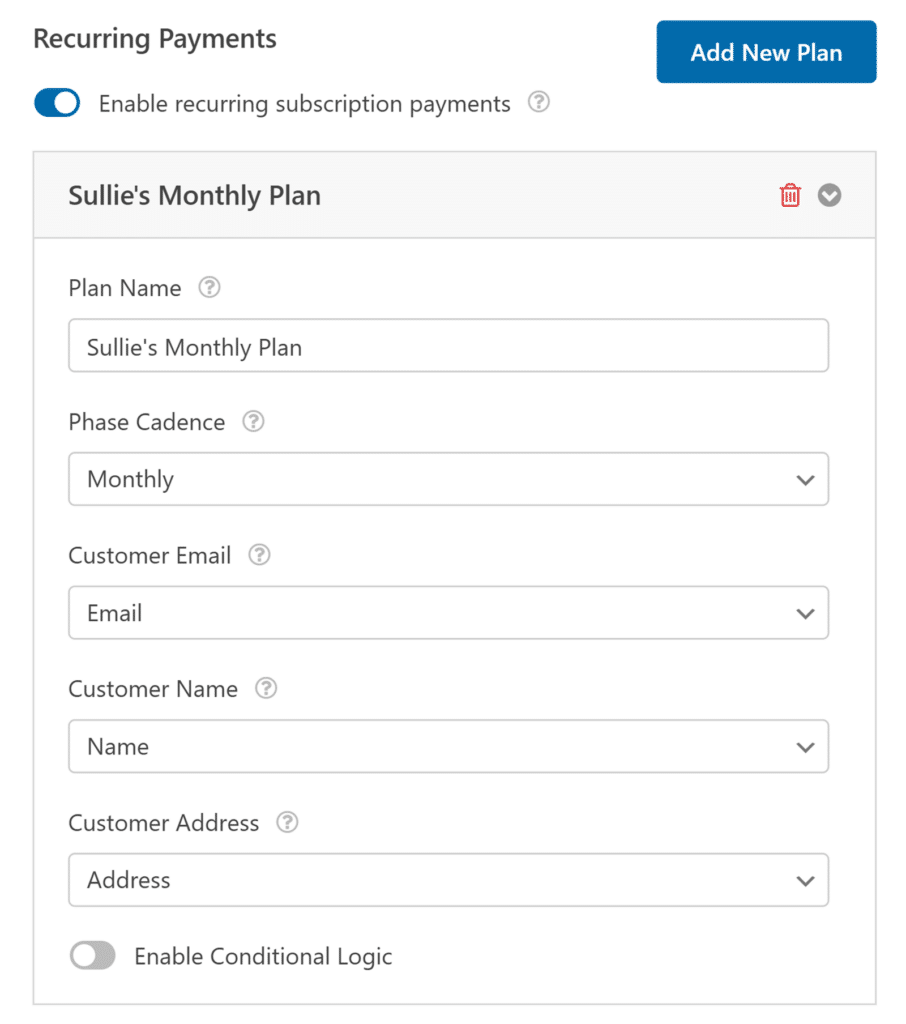
Once you’re done configuring your payment settings, be sure to save your form to update your settings.
Testing Square Payments
After setting up Square with WPForms, you’ll need to send a test payment before launching your form to ensure everything works as expected.
We recommend reviewing our guide to testing Square payments for a complete walkthrough.
Enabling Conditional Logic (Optional)
The next option we’ll cover in this tutorial is enabling conditional logic for Square payments. There are many ways you can use conditional logic with the Square Pro addon, including:
- Processing the payment only if certain conditions are met
- Showing or hiding the payment fields based on users’ selections or input
- Sending email notifications for completed payments
Below, we’ve covered a couple of examples.
Setting Up Conditional Logic for Payments
For this example, we’ll create a form that includes an option to make a donation. We’ll use conditional logic to process the payment depending on users’ selections.
First, we’ll create our form and customize its field options. For our example, we’ve built a feedback form. At the end there is a Multiple Choice field labeled, “Would you like to make a donation to support future Science Camps?” with the choices, “Yes, I’ll donate,” and “No, not today.”

Note: Want to learn more about using Multiple Choice fields in your forms? See our tutorial on customizing the Multiple Choice field for all the details.
We’ve also added a Single Item field where donors can enter the amount they wish to give, a Total field where they can see the amount they’ll be charged, and a Square field where they can enter their payment details.
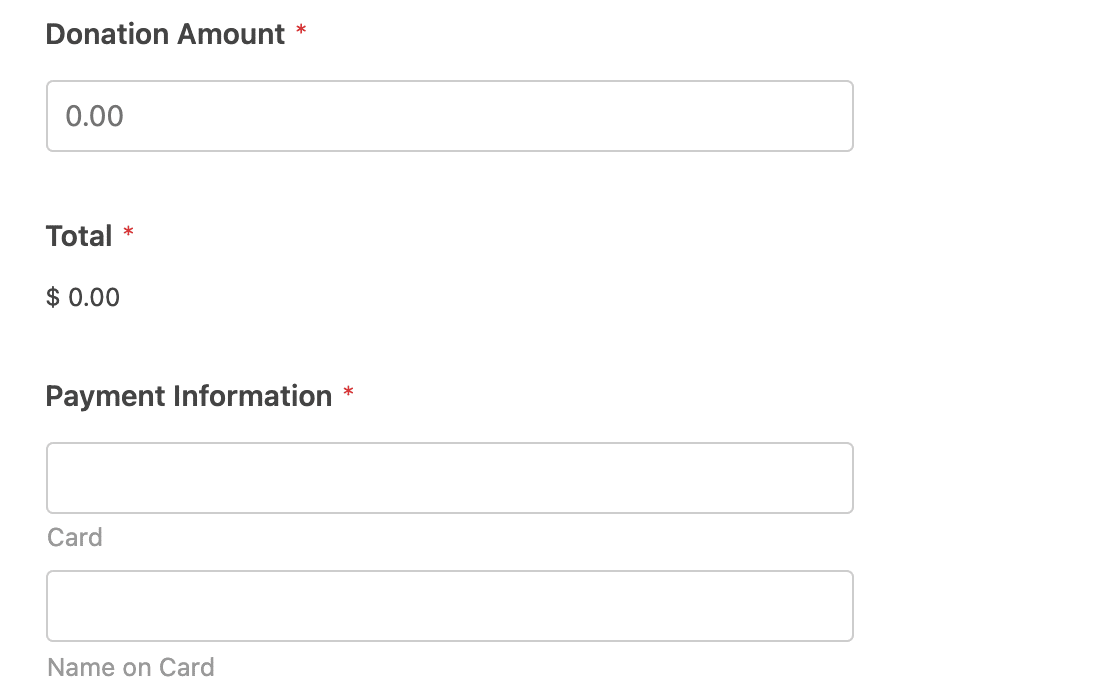
Note: Want to make sure users don’t accidentally submit a payment of $0? Check out our guide to requiring a payment total.
Once your form has all the fields you need, go to Payments » Square and toggle on the Enable Conditional Logic option at the bottom of the settings.
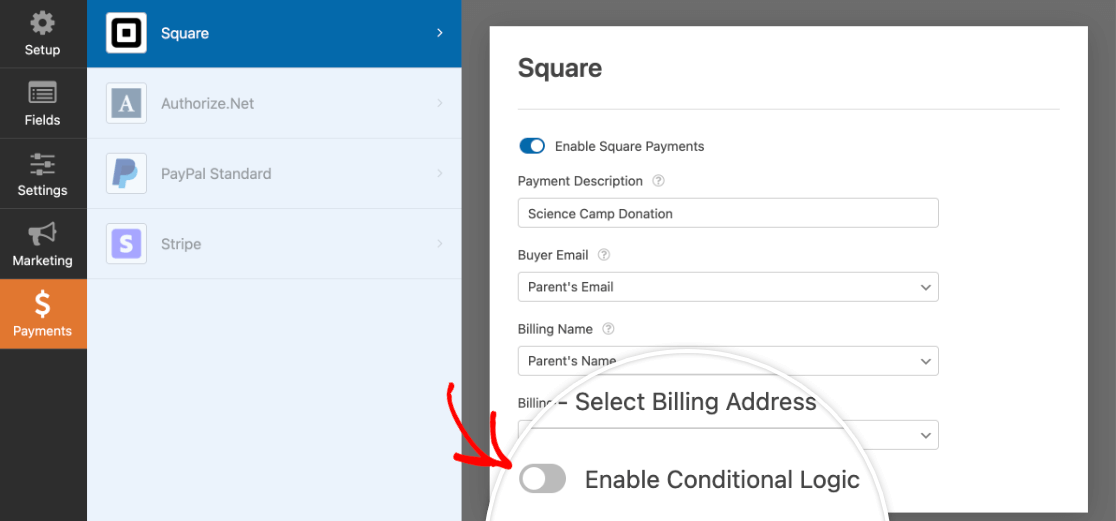
This will reveal a set of dropdowns you can use to create your conditional logic rule. For our example, we’ll make selections so the rule reads, Process this payment if Would you like to make a donation to support future Science Camps is Yes, I’ll donate.

Note: Need more help setting up your conditional logic rule? Our beginner’s tutorial on conditional logic includes step-by-step instructions.
In this case, users will only be charged if they choose to make a donation using the Multiple Choice field.
Don’t forget to always save your form before leaving the builder.
Setting Up Conditional Payment Notification Emails
Typically, form notification emails are sent when a user submits the form. However, if you have a payment integration enabled, you can prevent a notification email from sending until the payment has been successfully processed.
To do so, go to Settings » Notifications in the form builder. Then find the notification you would like to send for completed payments and toggle on the option labeled, Enable for Square completed payments.
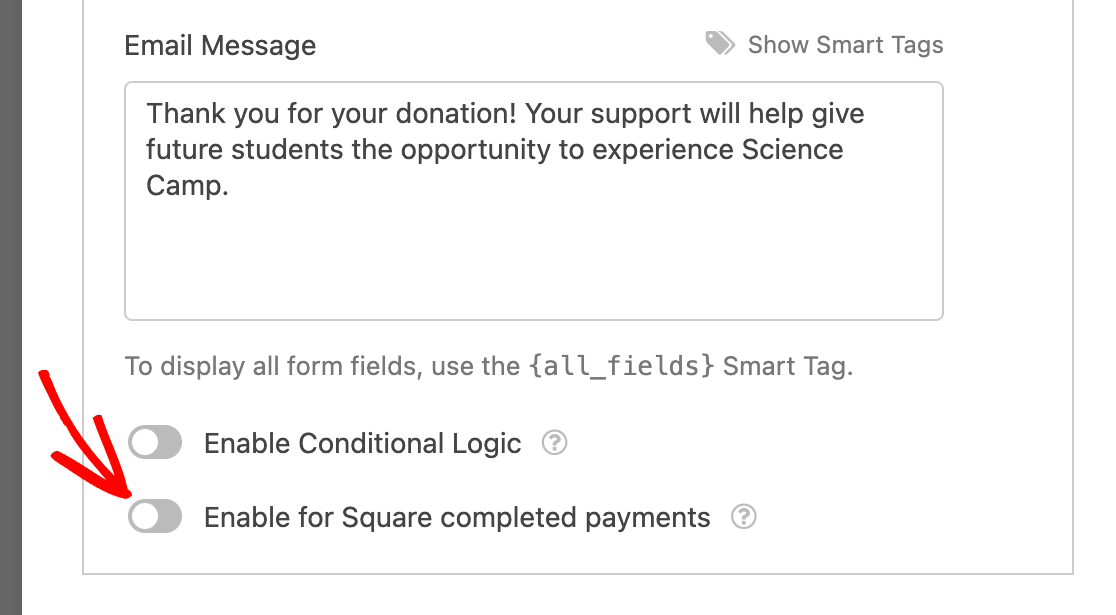
Note: Need more guidance to set up your form notification emails? Our tutorials on configuring notifications settings and creating conditional notifications can help.
You can enable this setting for as many notification emails as you like. Remember to save your changes before you leave the form builder.
Viewing and Managing Payments
Once you’ve received some payments through your forms, you’ll be able to view and manage them right from your site’s admin area.
To do this, go to WPForms » Payments and select the Overview tab to access the Payments page.
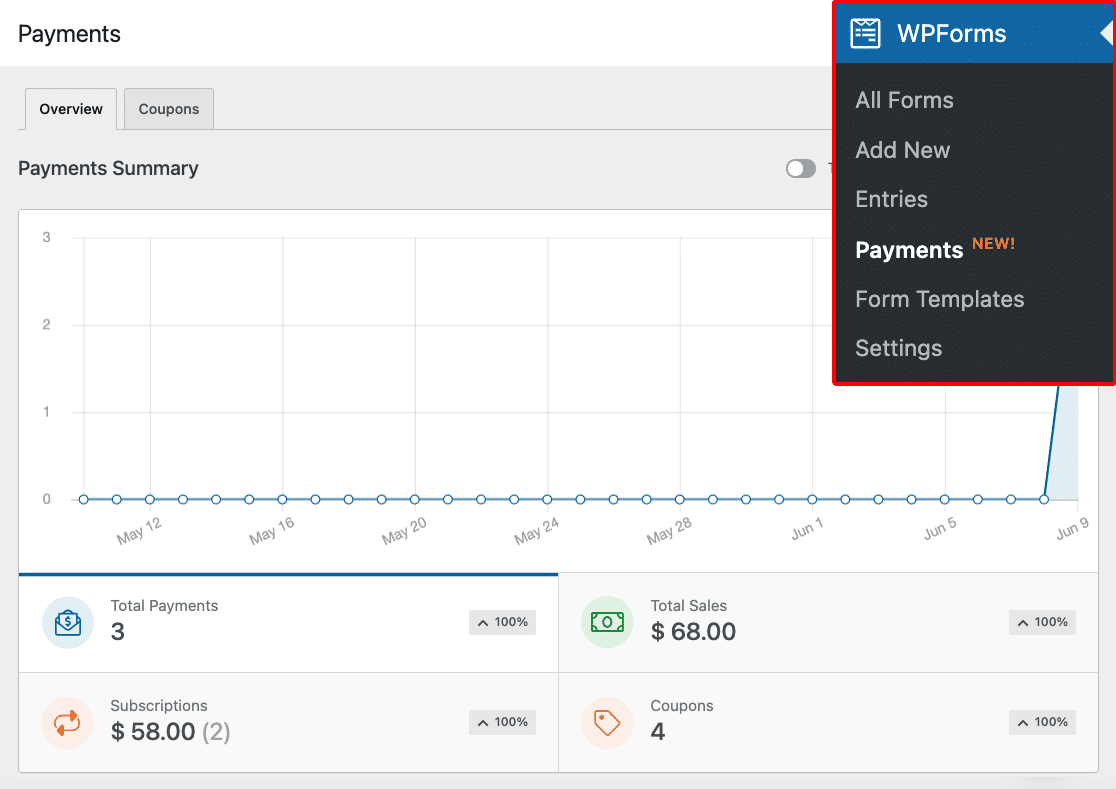
On the Payments overview page, you can view transaction details, track your sales, view revenue trends, measure the success of your payment forms, and much more.
Be sure to check out our guide to viewing and managing form payments for more information.
Note: If you’d like, you can create coupon codes and give users a discount when filling out your payment form. To learn more, check out our Coupons addon tutorial.
Frequently Asked Questions
These are some of the top questions about the Square Pro addon.
Will I be charged for using Square in my forms?
WPForms does not charge you to use Square in your forms. However, Square’s seller fees do apply to transactions made through your forms.
To see Square’s current seller fees for remote online transactions, check out its Pricing page.
Does WPForms have a partnership with Square?
Yes, we do! By partnering with directly Square, we can make sure your payments are processed reliably and securely, according to the platform’s best practices.
Does WPForms store users’ payment information?
No, we do not store your users’ payment information.
Instead, payment details are sent straight to Square to protect both you and your users from the risks that come with storing credit card details on your site.
That’s it! Now you can integrate your WordPress forms with Square to accept credit card payments.
Next, would you like to learn how to let users choose their payment method? Check out our tutorial on how to do so with conditional logic and our other payment integrations, PayPal, Stripe, and Authorize.Net.

