Wondering where to find and manage your payments in WPForms? Our Payments page is here to make that easy for you, gathering all user payment information from your site’s forms into one convenient location.
This tutorial walks you through how to effectively view and manage payments, ensuring you fully leverage the capabilities of WPForms to streamline your financial transactions.
Viewing Payments
You can access all the WPForms payments in your WordPress admin area. To do so, go to WPForms » Payments and select the Overview tab. Here, you’ll find a list of all the payments made on your site with their details and the specific form used to make them.
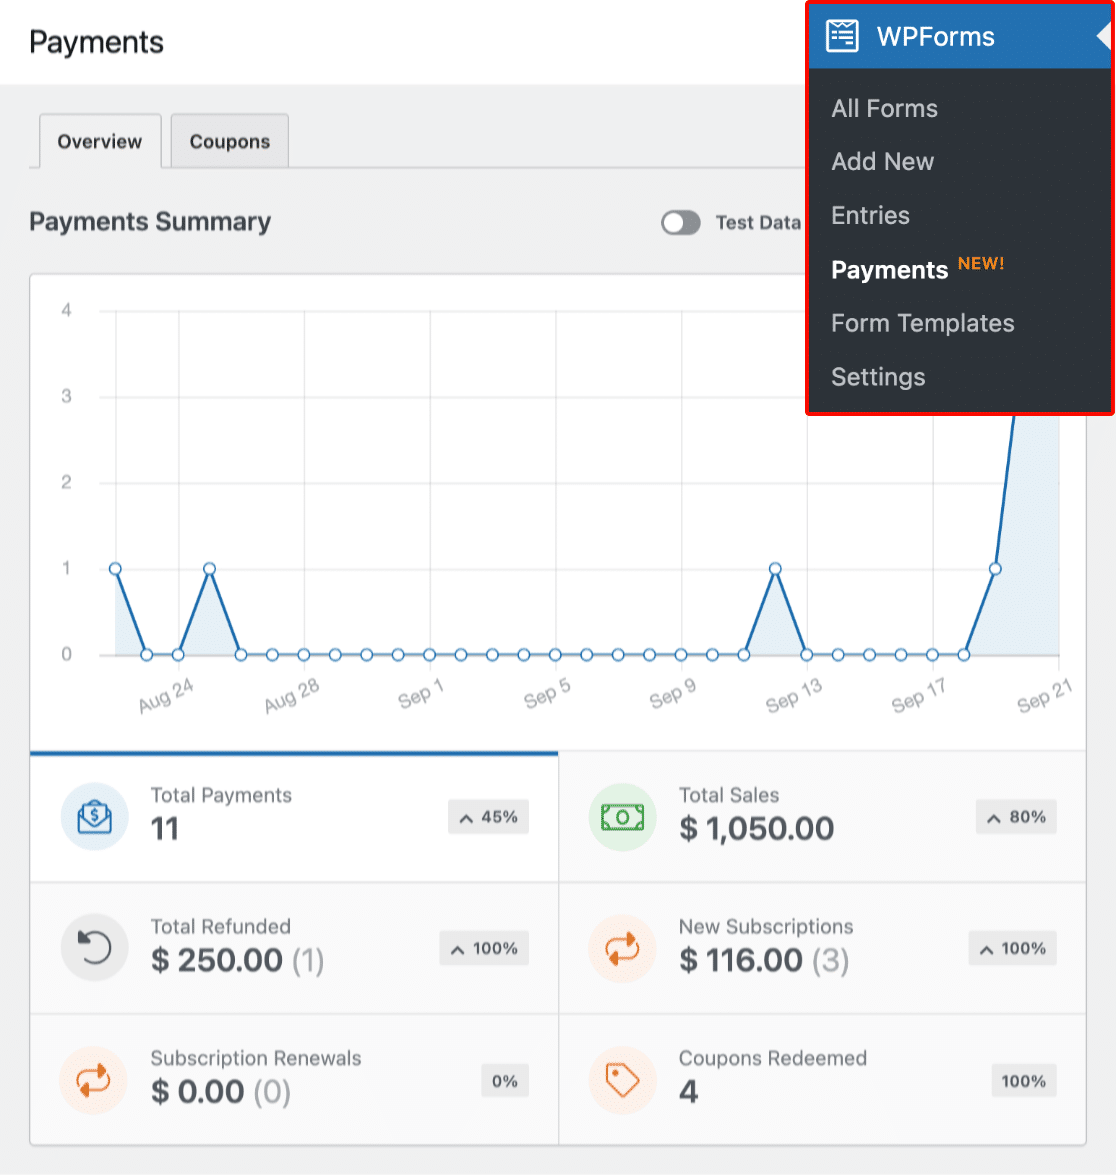
At the top of the Payments page, you’ll immediately see a visual representation of your payment information through a graph. This graph provides an overview of your payment data.
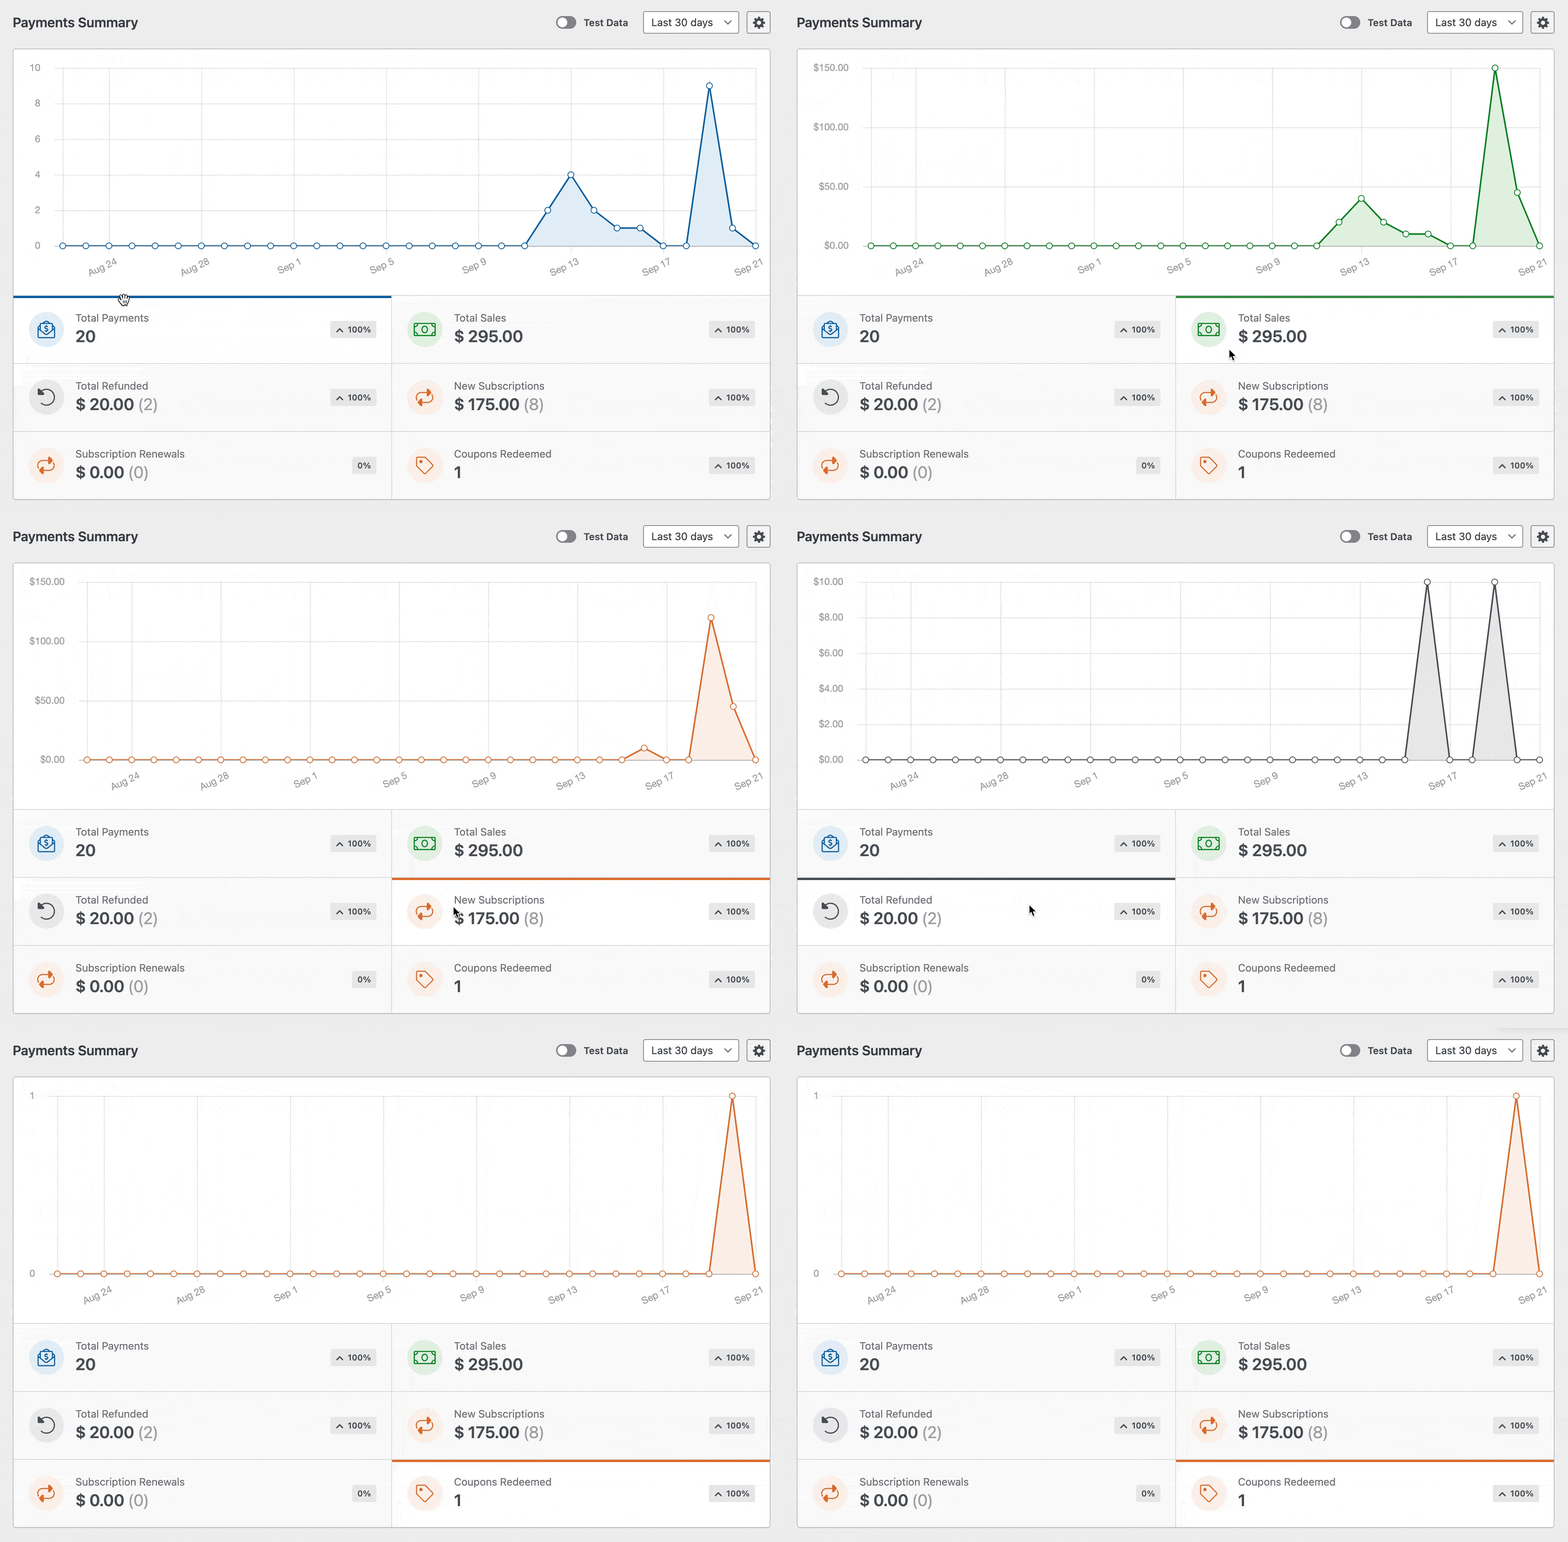
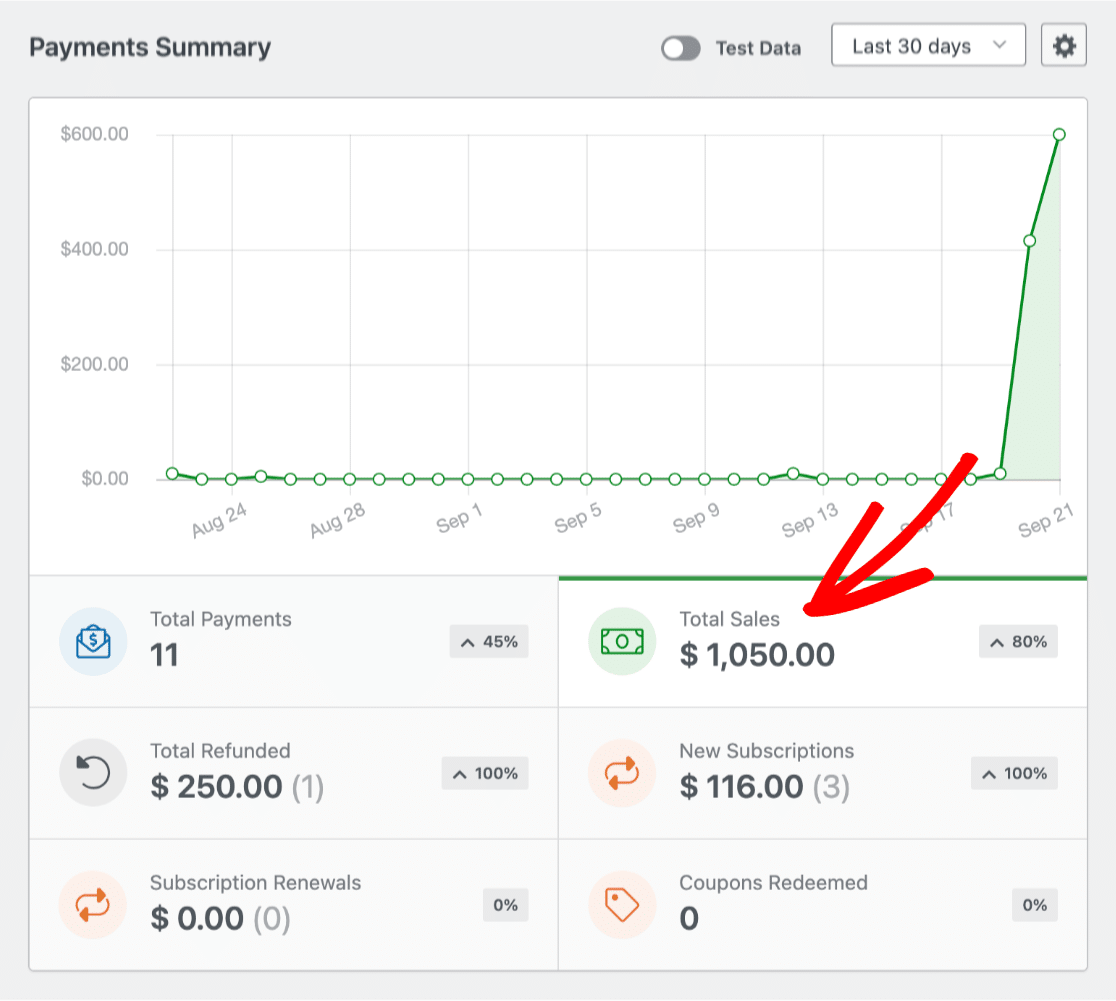
You can change what the graph shows by clicking on the options below the graph, such as Total Payments, Total Sales, Total Refunded, New Subscriptions, Subscription Renewals, and Coupons. This way, you can easily see the data you’re most interested in.
To customize the graph and show payments for a specific time period, use the date range dropdown in the top right corner.
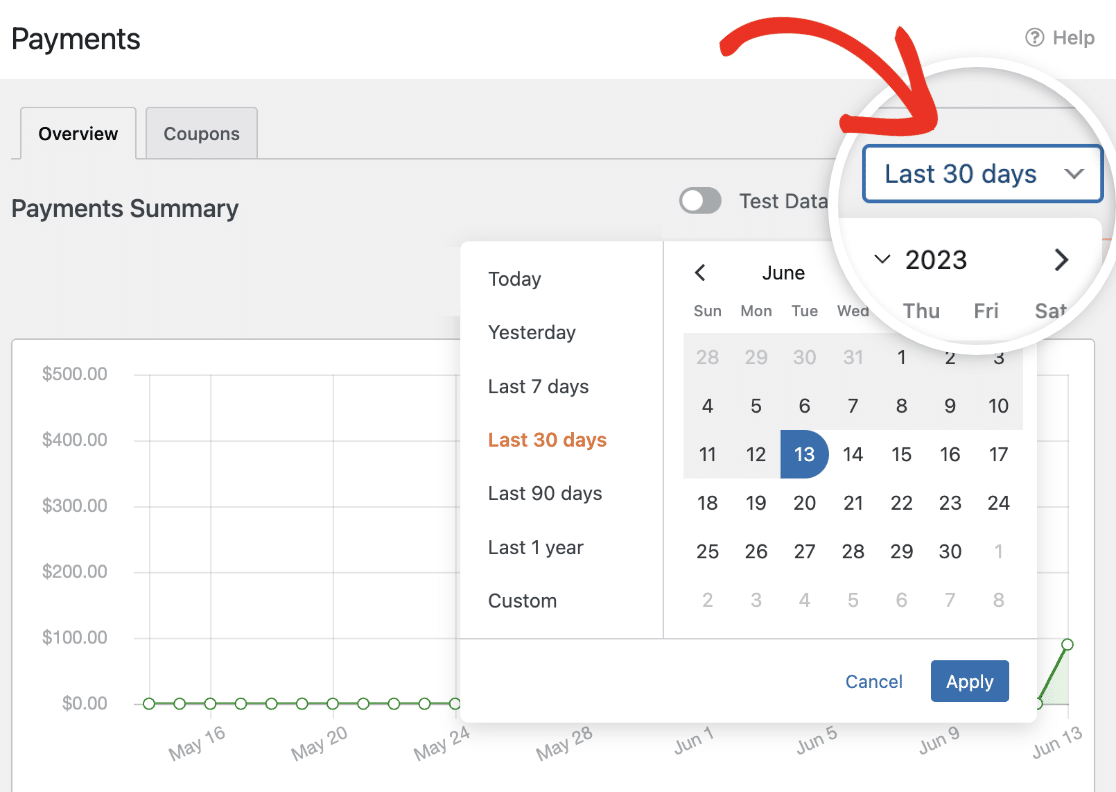
Note: Changes to the selected dates in the date range dropdown affect the graph, but they do not influence the data displayed in the payment table, which you’ll find below the graph.
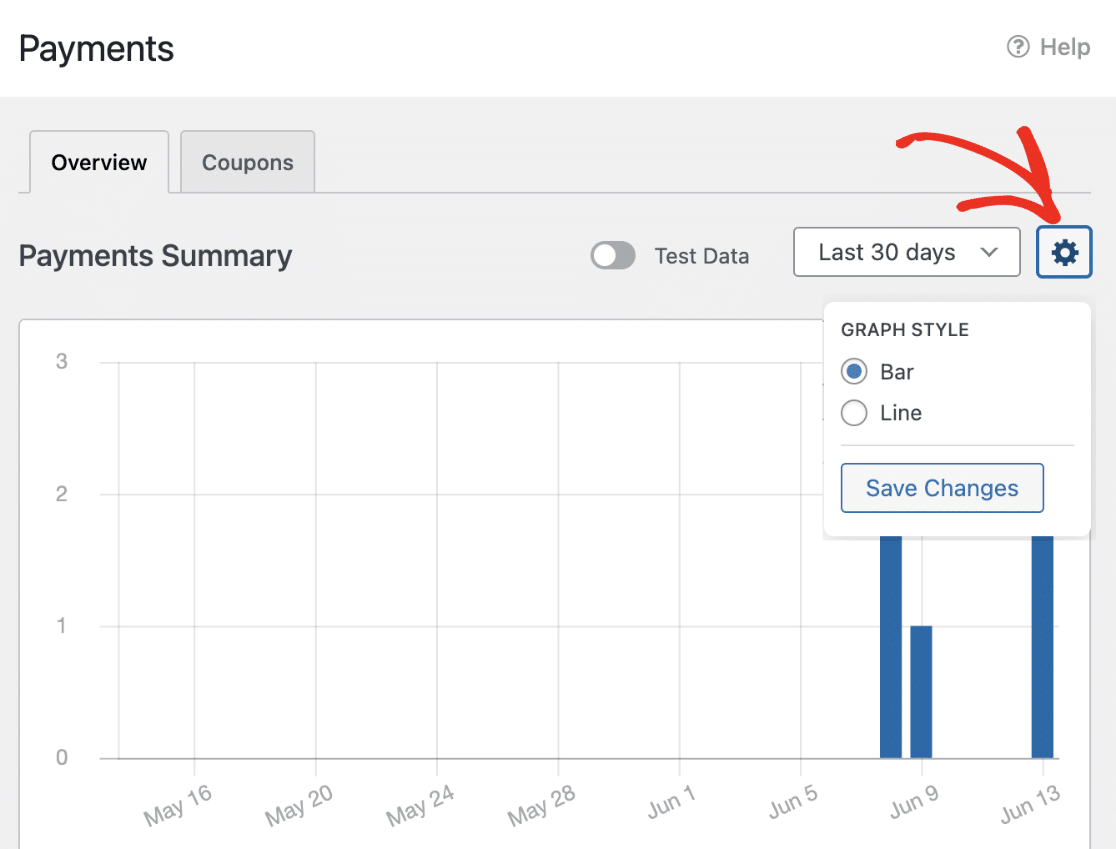
You can also switch up how the graph looks. If you’d like a line graph instead of the usual bar graph, click on the gear icon in the top right corner and pick the graph style you like best.
Below the graph, you’ll see a table that lists all the payments, providing essential details such as:
- Payment: The email address of the user who submitted the payment.
- Date: The date the payment was made.
- Gateway: The service used to process and authorize the payment transaction.
- Type: Indicates if it’s a single purchase or a subscription.
- Coupon: The coupon applied to the transaction if you’ve enabled any for your form.
- Total: The whole sum paid.
- Subscription: Details about the recurring payment terms and schedule.
- Form: The specific online form that started the payment.
- Status: The current state of the payment.
Note: Payments received before installing WPForms 1.8.2 are marked with an ‘N/A’ placeholder in the Payment column. However, any new payments received after installing WPForms 1.8.2 will display the customer’s email or name if available.

Understanding Transaction Comparisons and Percentages
The percentages seen on the Payments page in WPForms provide a simple method for comparing transactions over time. They’re worked out by looking at a certain period and comparing it with the same amount of time just before it.
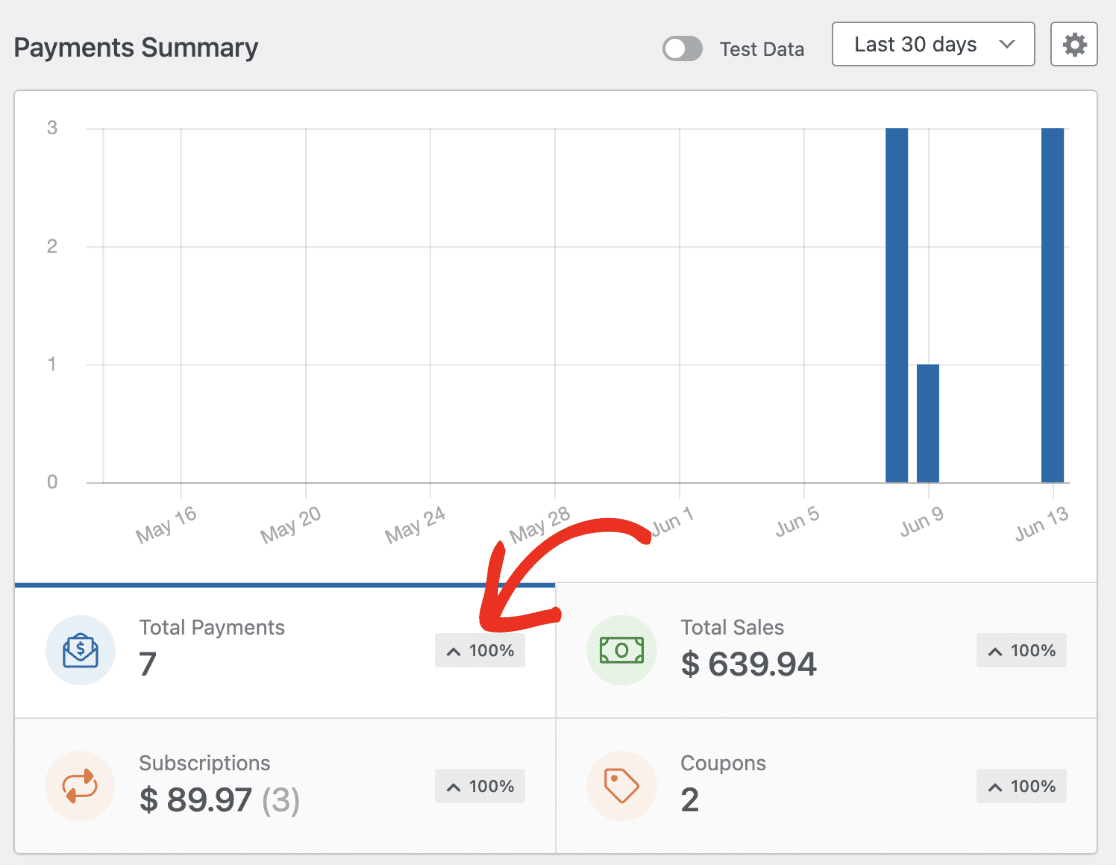
For example, if you select a single date, like April 29th, the percentage shows how the number of payments on April 29th compares to the number on April 28th.
If you select a range of dates, like the Last 7 days, the percentage shows you how the number of payments in those 7 days compares to the 7 days immediately before that.
Next to the percentages, you’ll see a caret (^). It can point up or down, showing the trend of your transactions. An upward-facing caret means more transactions in the chosen period compared to the last one. A downward-facing caret means fewer.
For example, choose Last 7 days from the date range dropdown. If there’s an upward caret next to Total Payments, you had more payments this week than the previous week.
Considering Currency Changes
When viewing and managing payments in WPForms, it’s important to understand the impact of your chosen currency settings on the displayed payments, for both live transactions and those made in test mode.
Your Payments page will only display payments processed in the currently selected currency. For instance, if your currency setting is USD, you’ll only see payments made in USD. However, if you change the currency setting to EUR and there are no payments made in EUR, the Payments page won’t display any payments.
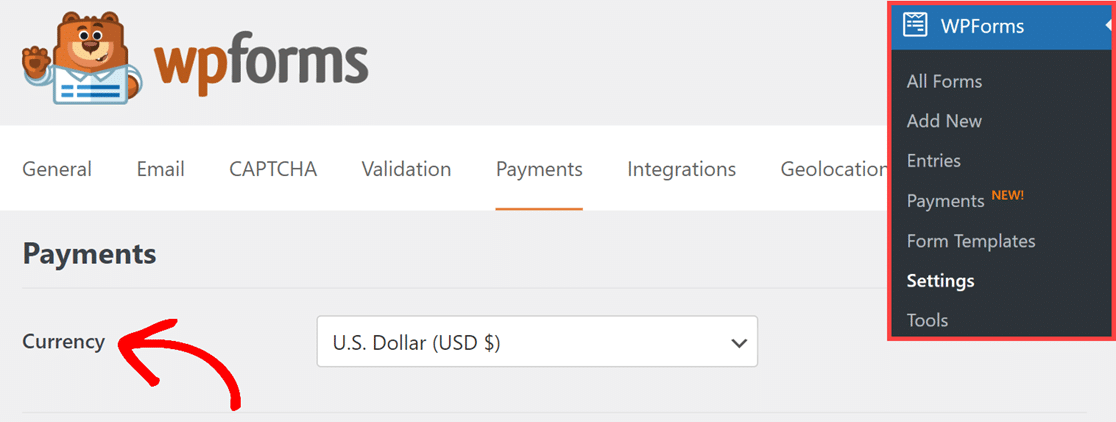
To adjust the currency settings, go to WPForms » Settings. Then, click the Payments tab and select your preferred currency from the Currency dropdown.
Note: Need a custom currency symbol in WPForms? Check out our developer documentation to learn how to create and add a new currency symbol to your forms.
Viewing Individual Payments
If you need more information about a specific payment, simply click on the payer’s email located under the Payment column in the table to open the individual payment page.

You’ll then see all the details you need about that payment on its individual payment page.
To navigate between payments on this page, you can use the pagination field. It allows you to effortlessly jump to the next or previous payments.
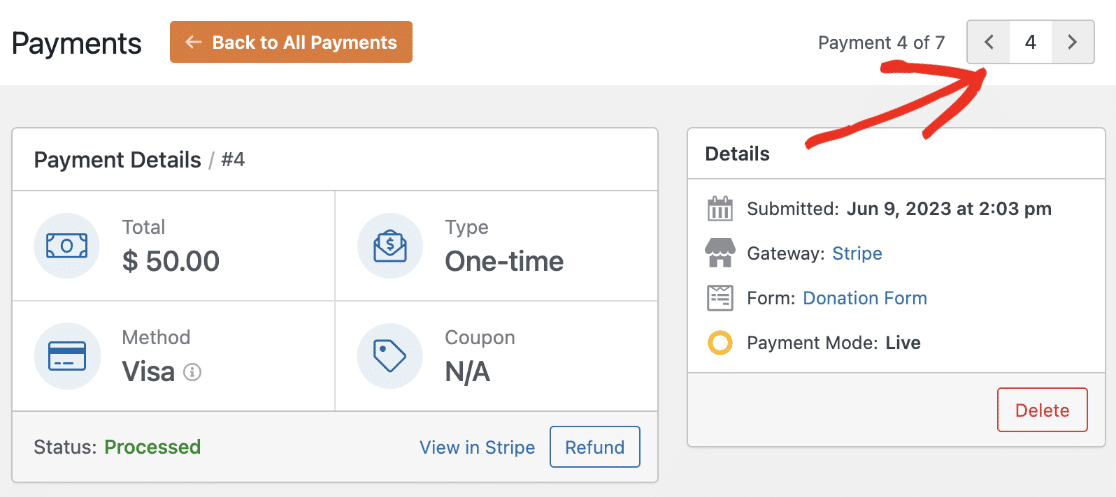
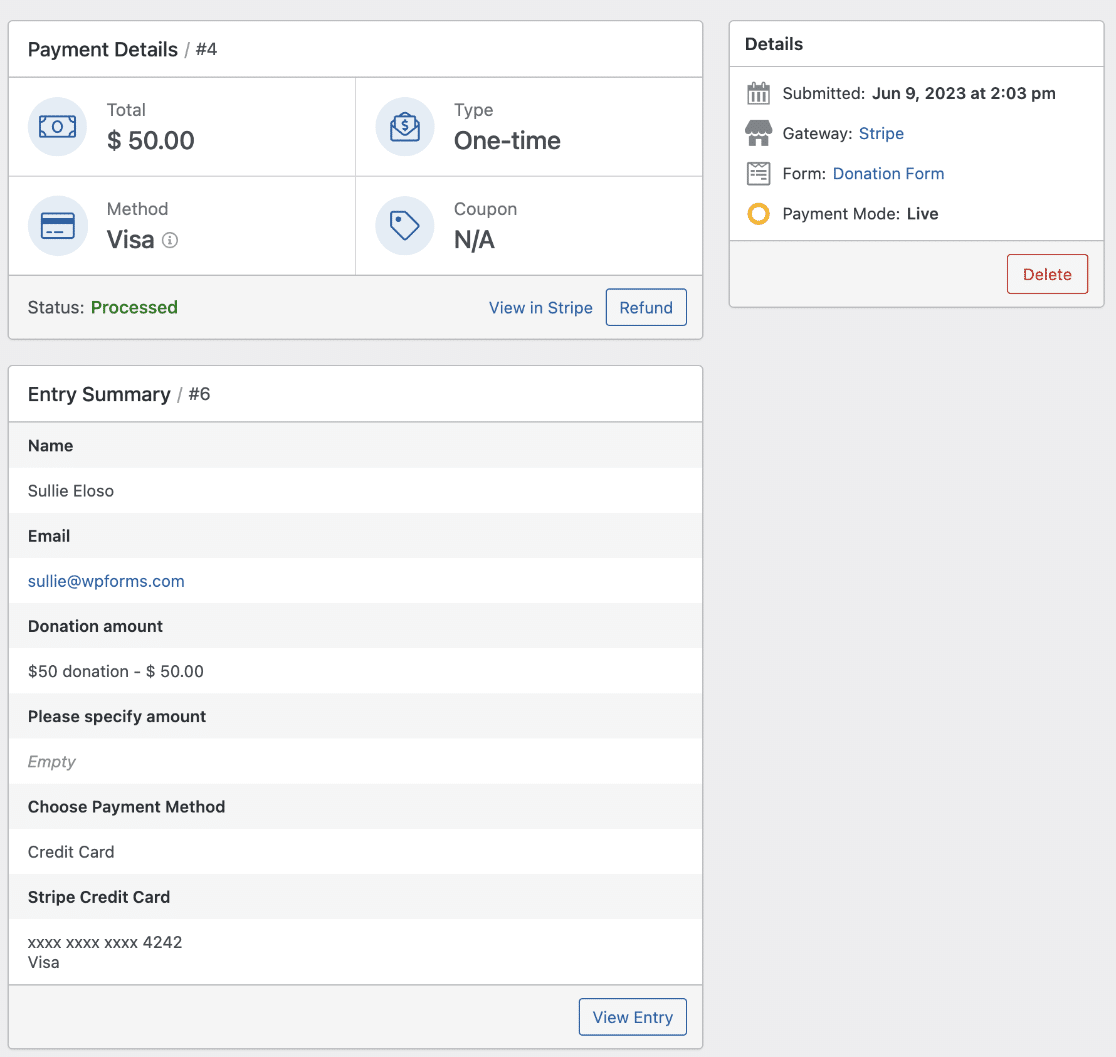
At the top of the page, you’ll find the Payment Details section, providing key information about the payment. This includes information about the total payment amount, payment type, and the method used for the payment.

In the bottom right corner of the Payment Details section, you’ll find two options that offer additional functionality.
The first option, labeled View in Stripe (or the appropriate payment gateway), allows you to access the payment details directly within the respective payment gateway platform.

The second option, labeled Refund, enables you to initiate a refund through the payment gateway for the respective payment.

Note: In the View in Stripe option, the text “Stripe” will change to the name of the payment gateway you have enabled and the user has made the payment from.
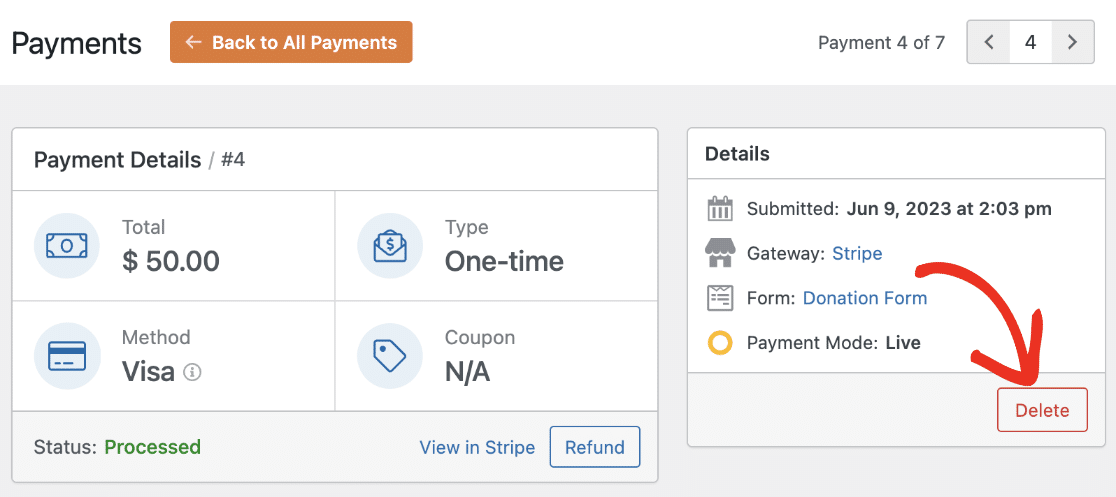
You can also permanently delete a payment from this page. To do so, simply click on the Delete button located in the Details section on the right side of the page.
Next, you’ll come across the Entry Summary section.
In this section, you can explore the form entry details associated with the payment. It showcases all the fields of the form and the corresponding data the user enters.
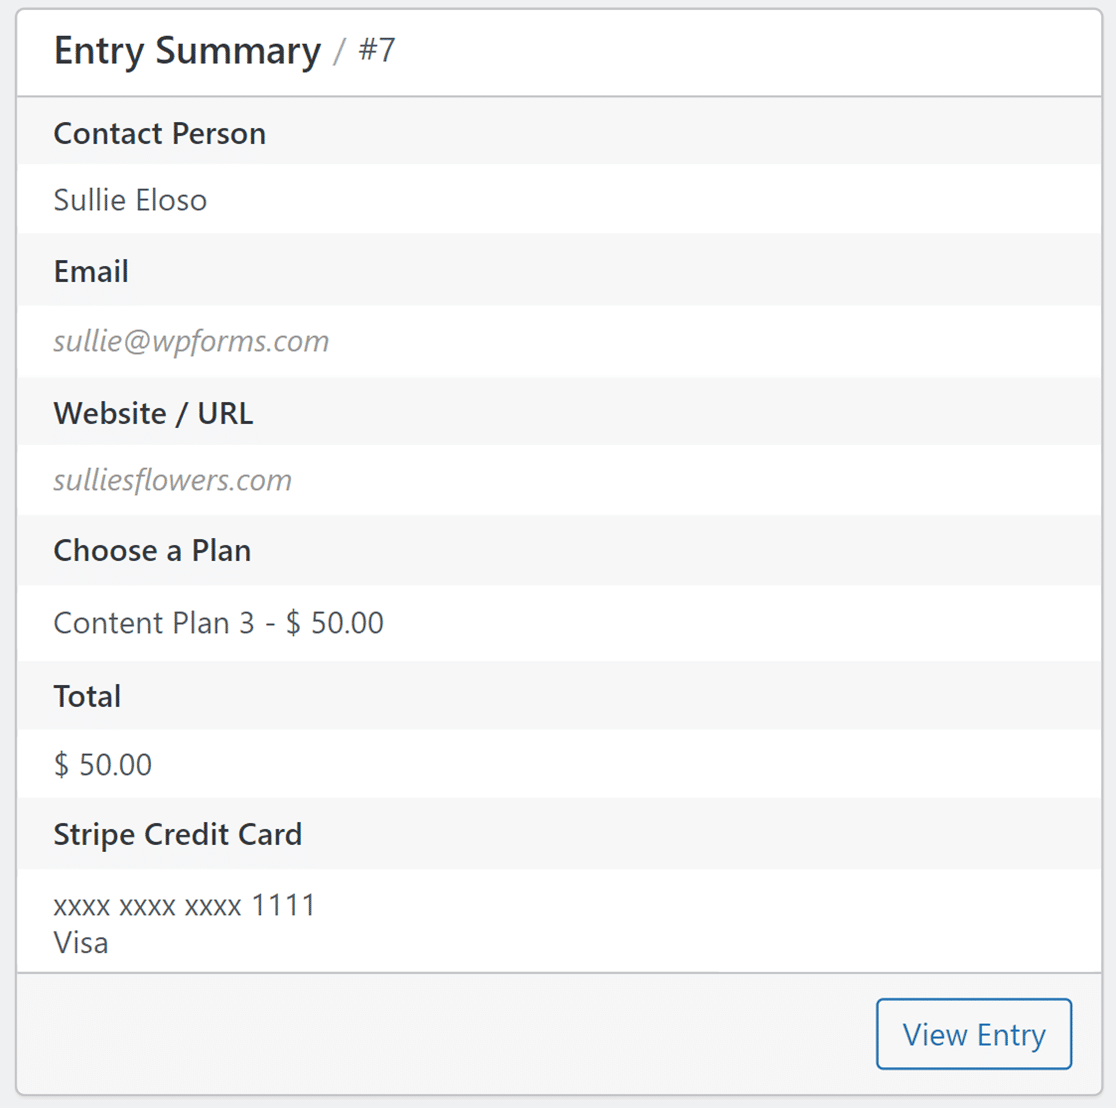
To view this entry in more detail, click the View Entry button in the bottom right corner of this section. This will redirect you to the individual entry page for that specific form entry.
Note: The Entry Summary section is accessible to all users. However, the View Entry button, which takes you to a detailed view of the entry, is available only with a Basic license level or higher.
For more information on navigating and viewing the details of the individual entry page, refer to our guide on Form Entries.
Understanding Payment Statuses
WPForms currently support 3 payment statuses: Completed, Processed, and Pending.
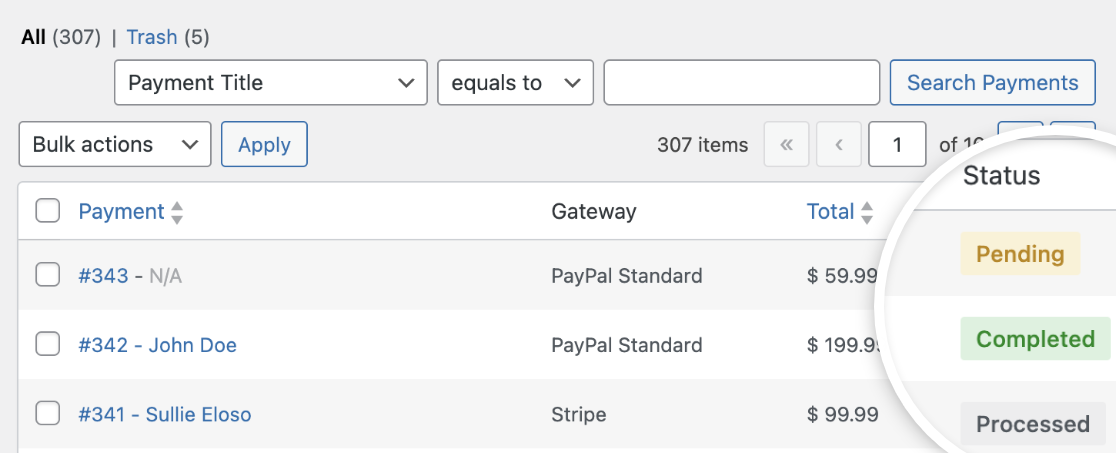
Below we’ll explain what each status means:
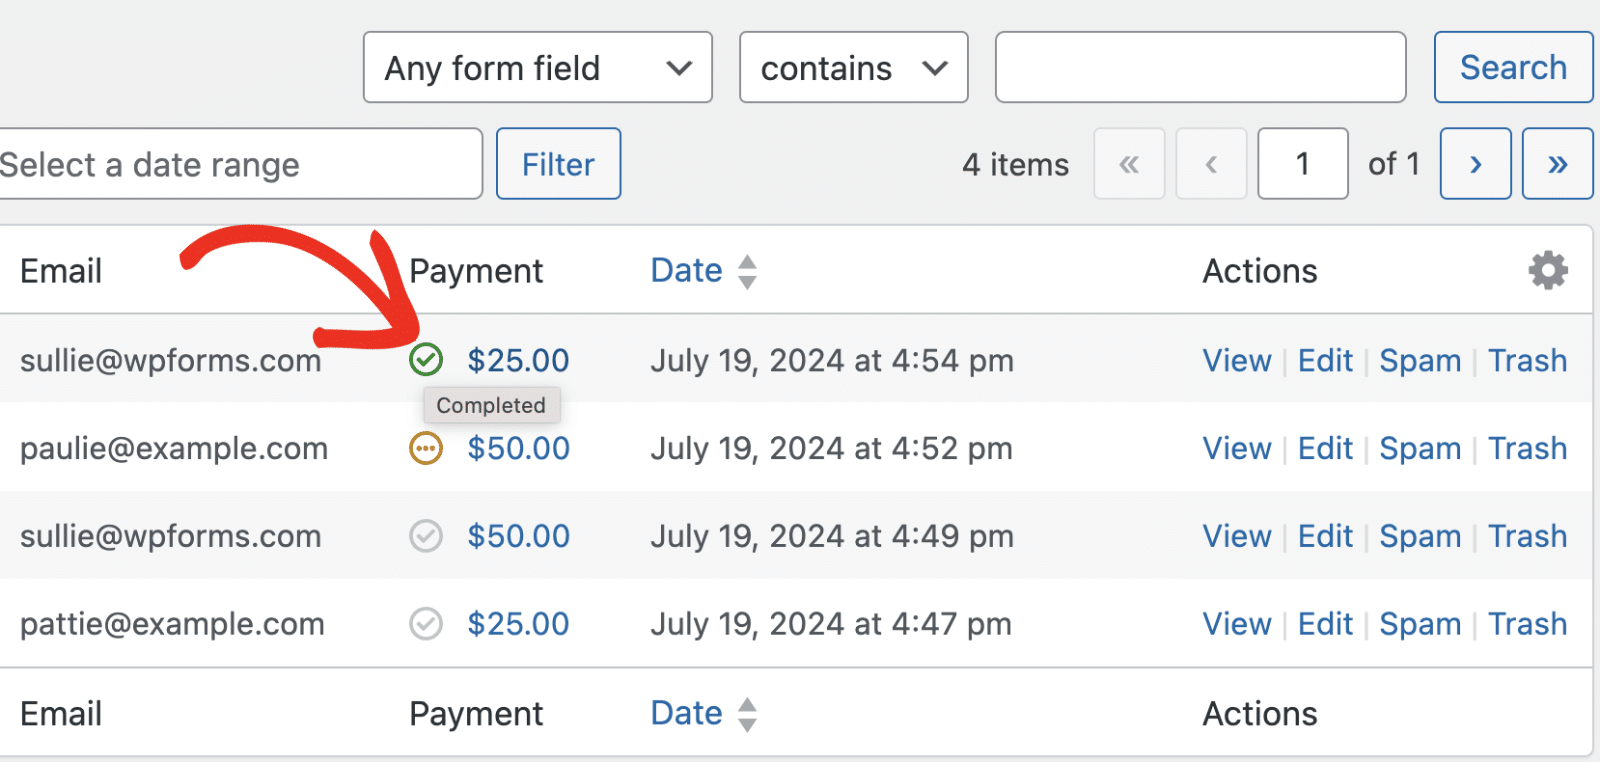
Completed
This status indicates the payment was successful. Payments through the PayPal Standard and Stripe (with Webhooks enabled) gateways use this status.
The Entries overview page shows a green check next to payments with the Completed status.
Processed
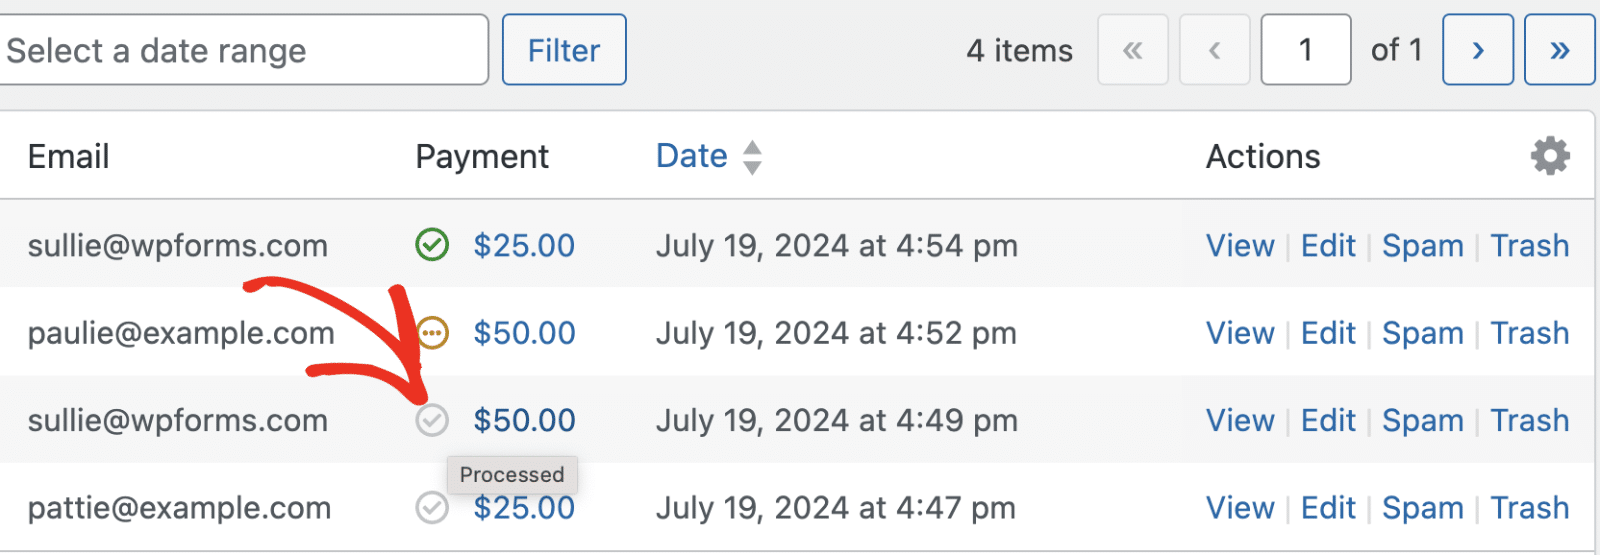
Payments through the Stripe, Square, Authorize.Net, or PayPal Commerce gateway use Processed to denote successful payments. It’s similar to the Completed status.
In the Entries overview page, you’ll see a grey check in the Payment column.
Pending
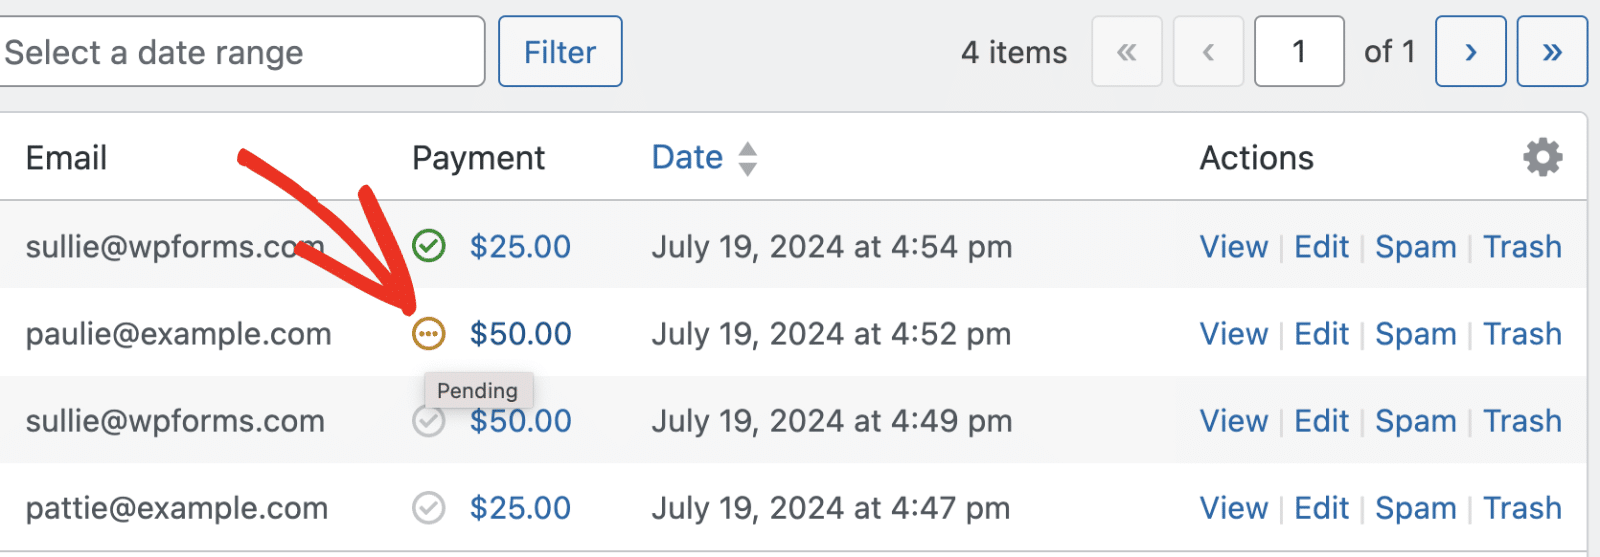
If a user submits the form without completing the transaction, the payment will have the Pending status. Denoting that payment hasn’t been made for the specific payment entry.
You’ll see a yellow 3-dot icon in the Payment column when viewing the payment on the Entries overview page.
Exploring Additional Information
To access additional information about a payment, you can click on the Screen Options tab located on the individual payment page.

Once you open the tab, you’ll find two options that you can enable by checking the respective boxes.

Here’s what each option does:
- Advanced details: When enabled, you’ll gain access to comprehensive information about the payment. This includes details like the transaction ID, the customer’s IP address, and the payment method used.
- Log: Enabling this option displays a chronological record of payment-related events. It includes key milestones such as payment intent creation and payment charge completion.

Viewing Test Payments
Testing payments is essential to ensure smooth and error-free transactions. When connected in test mode, you can view and manage test payments separately on the Payments page by activating the Test Data option. This allows you to safely simulate transactions without affecting real payments.
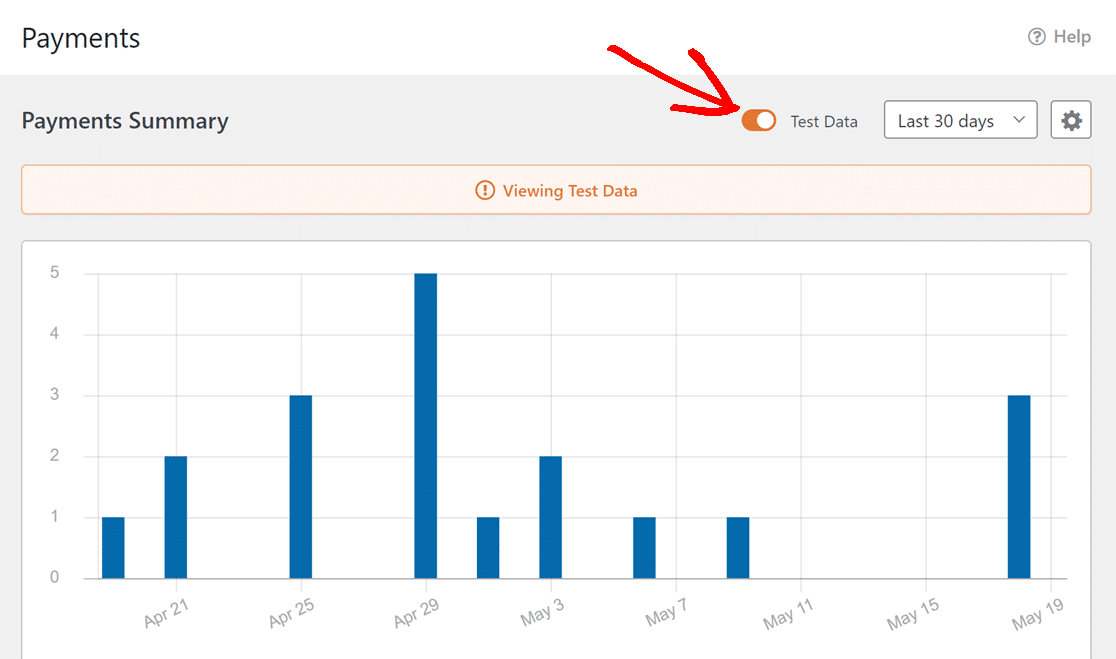
Note: When you’re done testing, remember to disconnect Test Mode before allowing users to submit payments in your form. You can do this by going to WPForms » Settings » Payments.
To learn more about testing payments with specific payment gateways, refer to the following guides:
- Testing Stripe Payments
- Testing PayPal Commerce Payments
- Testing PayPal Standard Payments
- Testing Square Payments
- Testing Authorize.net Payments
These comprehensive guides explain how you can conduct trial purchases on your website using test credit card numbers.
Customizing the Payments Page View
You have the option to personalize your view on the Payments page. This includes choosing which columns appear in the table and adjusting the number of payments shown per page.
To do so, click the Screen Options tab in the top right corner.

In the dropdown tab, simply check or uncheck the column names under the Columns field to show or hide specific columns. If you want to change how many payments are shown per page, modify the number in the Pagination field.
Once you’ve made these changes, hit the Apply button to keep them.

You can also sort all of the table data in either an ascending or descending order based on three columns: Payment, Date, and Total.
To do this, simply click on the respective column’s name. The table will then automatically rearrange itself based on the chosen column’s order.

Frequently Asked Questions
Below are some of the most common questions asked about viewing and managing payments in WPForms.
What happens when I delete a subscription payment in my WPForms Stripe integration?
When you attempt to delete a Stripe subscription payment in WPForms, be aware that it operates within a hierarchical system: every subscription begins with a “parent” payment entry, followed by “child” entries for each subsequent recurring payment.
Deleting a parent subscription may cause associated child payment entries to no longer be listed in your results page, potentially disrupt future renewals, and impact your ability to manage payments through filtering or reporting. The warning you encounter varies based on the deletion context, be it a single payment view or a bulk action from the payments overview.
That’s it! Now you know how to effectively view and manage WPForms payments on your WordPress website.
Next, would you like to learn how to quickly find specific transactions in your payment records? Be sure to check out our guide to searching and filtering payments for all the details.
