Would you like to test PayPal Standard transactions before accepting real payments on your site? By testing the process, you can see the steps your visitors will take while ensuring that the payment process functions as it should.
This tutorial will show you how to set up and create test PayPal Standard transactions for your forms.
Note: You will need a Pro license level or higher to access the PayPal Standard Addon.
This guide covers how to test payments with the PayPal Standard addon. If you’re looking to test payments with the PayPal Commerce addon instead, please see our tutorial on testing PayPal Commerce payments.
Setting Up a Sandbox Account With PayPal
To begin testing, you’ll need a PayPal account. If you don’t have one already, you can sign up for a new one.
Next, you’ll need to go to the PayPal Developer site and use your existing PayPal account to log in.
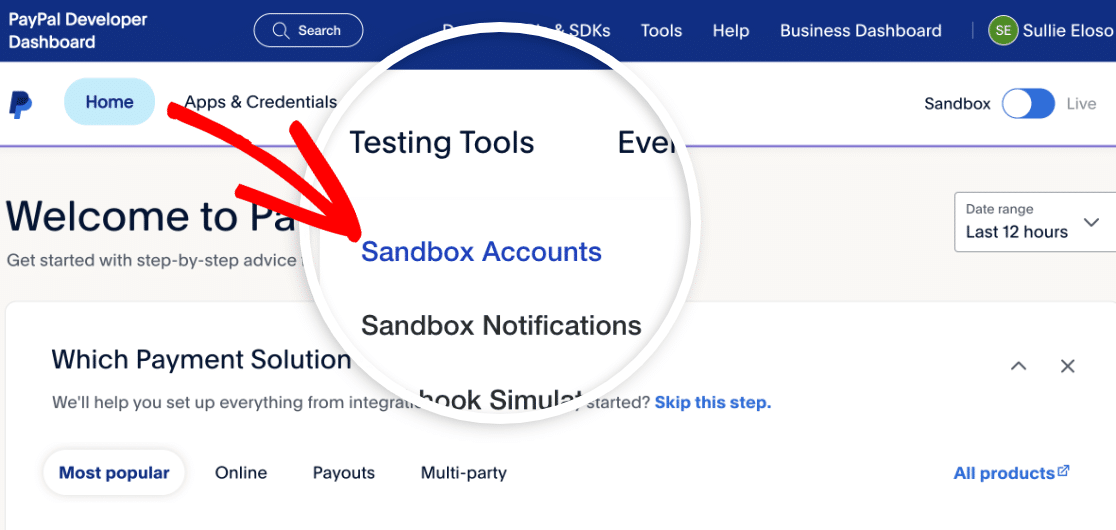
Once you’re logged in, click on the Testing Tools dropdown. Then select Sandbox Accounts from the dropdown menu.
PayPal will have already created two test accounts for you: one for a Business account and one for a Personal account.

Note: If you’d like to learn how to create more test accounts, be sure to check out PayPal’s documentation on creating and managing sandbox accounts.
Next, you’ll need to set up a password for your Personal test account. This is so that you can log in with this account later to make a test payment.
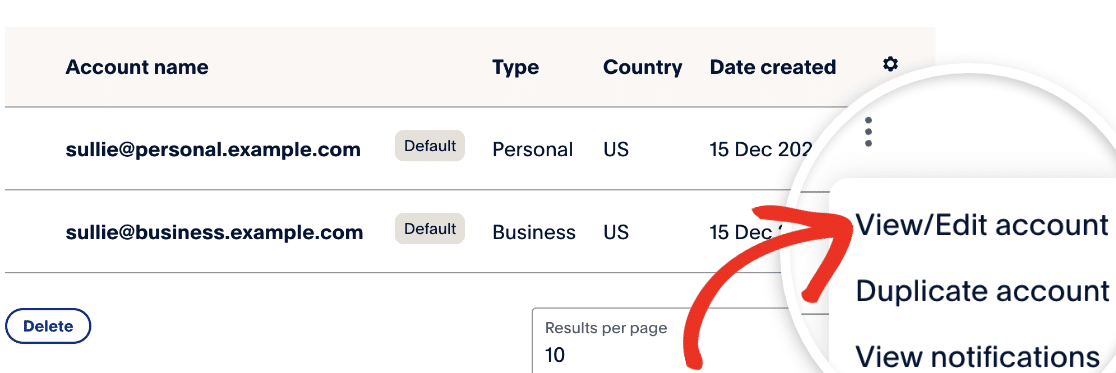
To create your password, click on the three dots under the settings icon column for the Personal test email. Then click on View/Edit account.
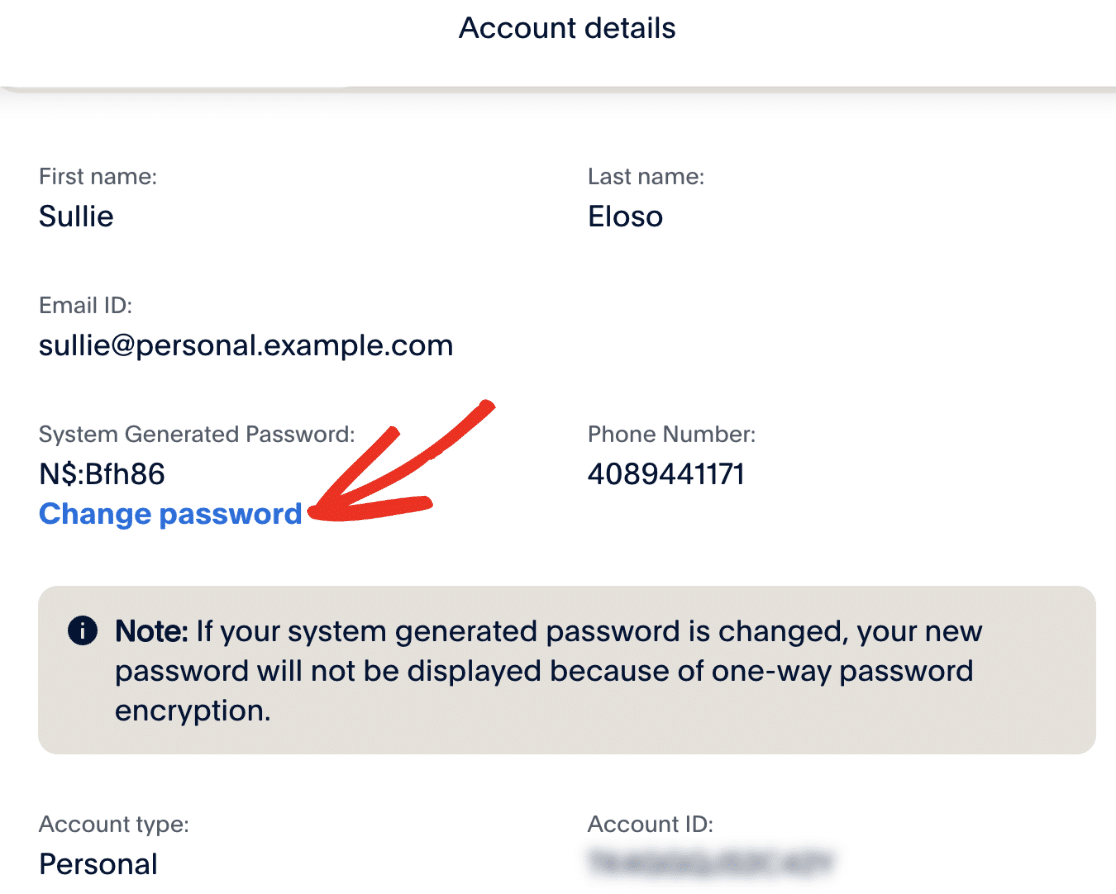
In the popup window that appears, you’ll see the details for the Personal test profile that was automatically created for you. Next, click Change password and enter a password you’ll be able to remember later.
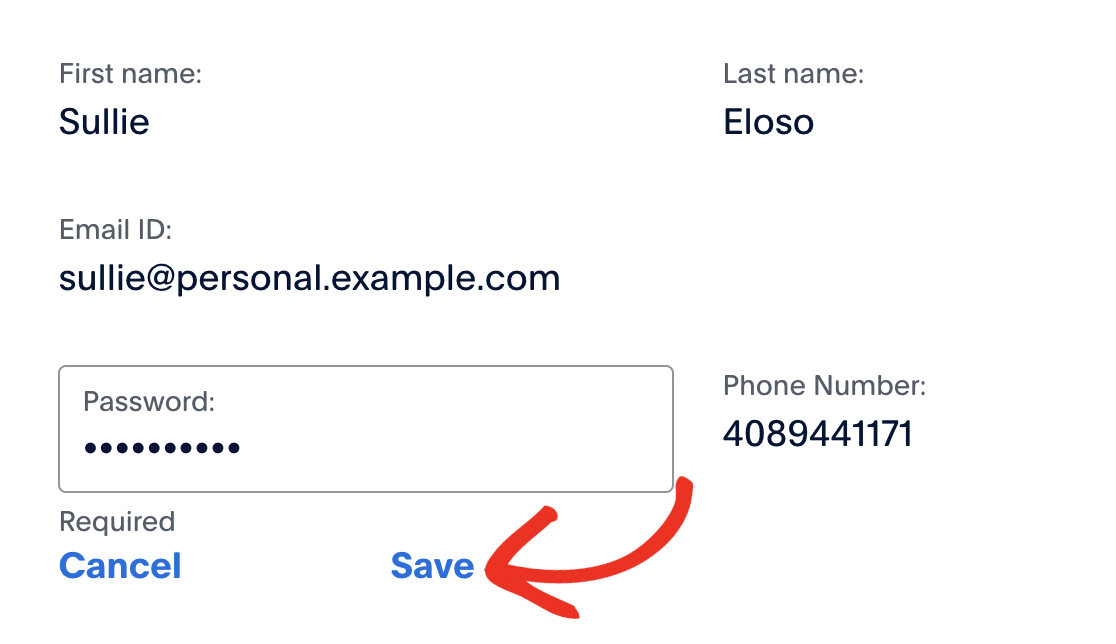
Save your password and close the popup.
However, keep the Sandbox Test Accounts page open in a separate browser tab or window, as you’ll need to refer to it later.
Creating a Form to Test PayPal Standard Payments
Before you continue, be sure you’ve installed and activated WPForms on your WordPress site. Once you’ve done so and your license is verified, you’ll be able to install and activate the PayPal Standard Addon.
After you’ve got everything set up, you’ll need to create a new form or edit an existing one.
If you are creating a new form, you may want to consider using our Billing/Order Form template to speed up the process.
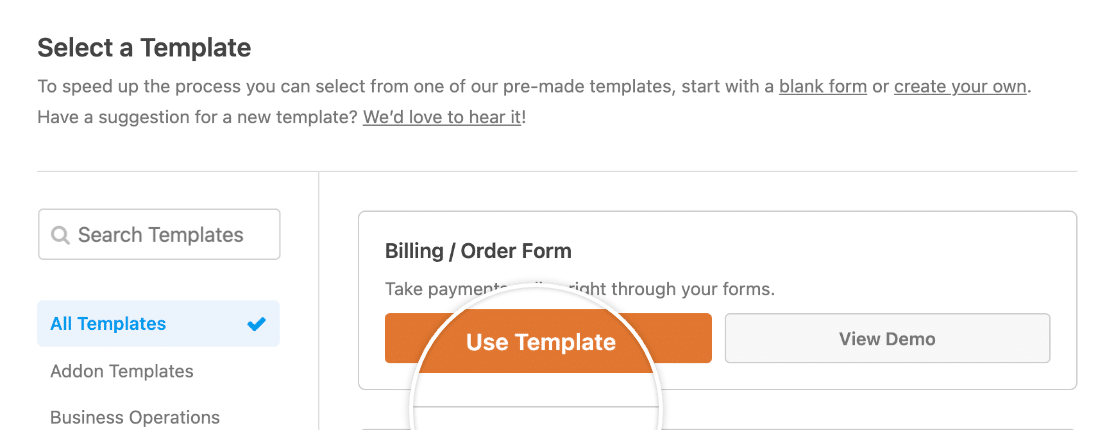
Note: Want to learn more about the Billing/Order Form template? See our tutorial on using templates in WPForms for all the details.
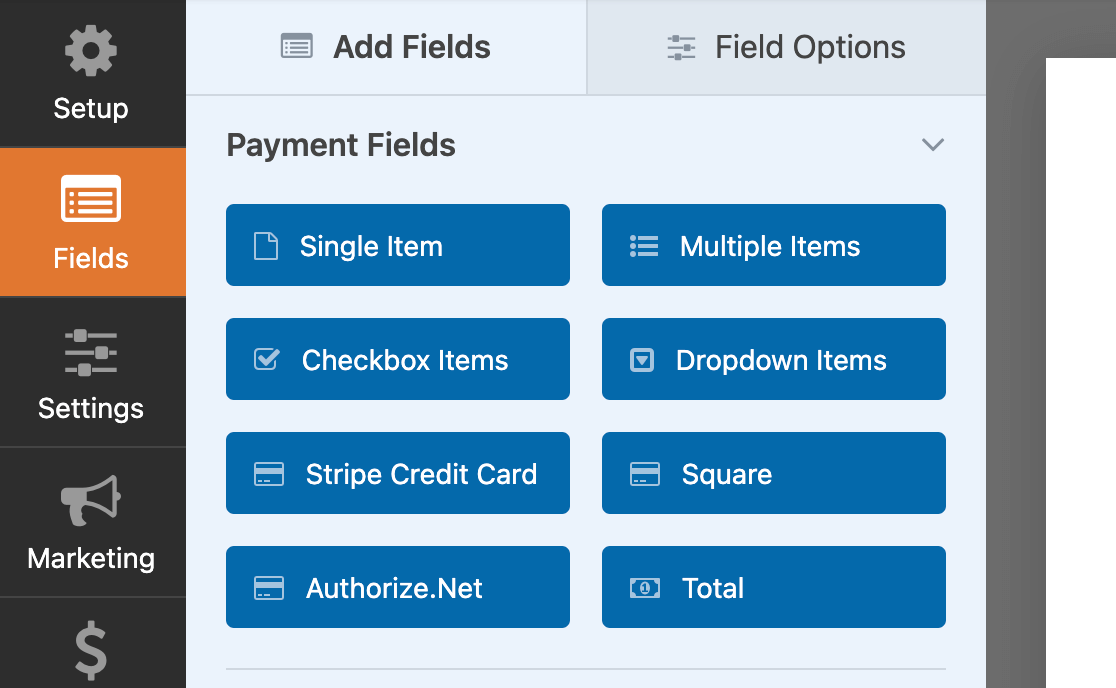
Regardless of whether you use a template or build your own form, make sure to include one of the following payment fields:
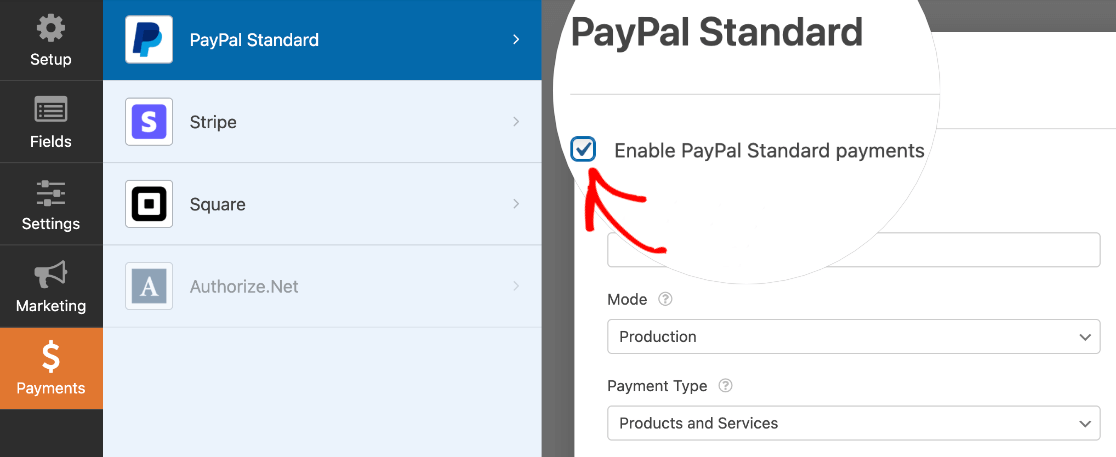
Then, navigate to Payments » PayPal Standard and check the box labeled Enable PayPal Standard payments to activate PayPal’s settings.
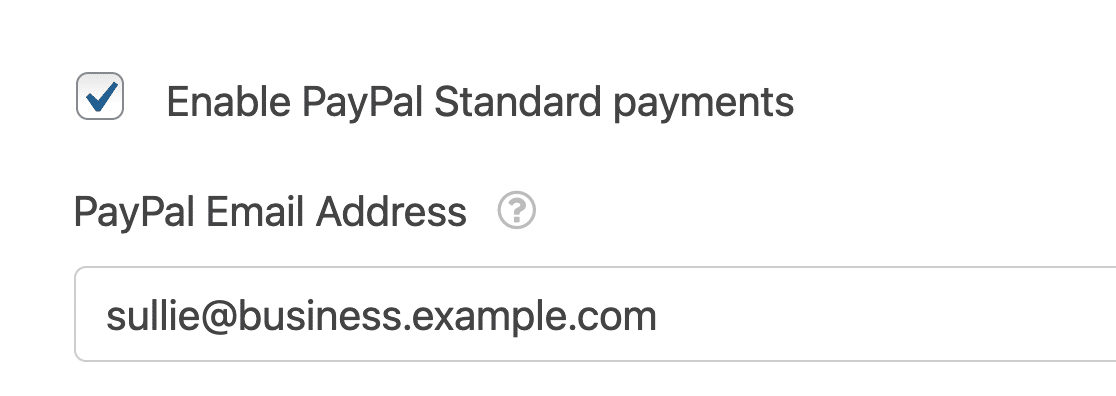
Under PayPal Email Address, you should then enter the test Business email listed on your PayPal Sandbox page.
Then set the Mode to Test/Sandbox.
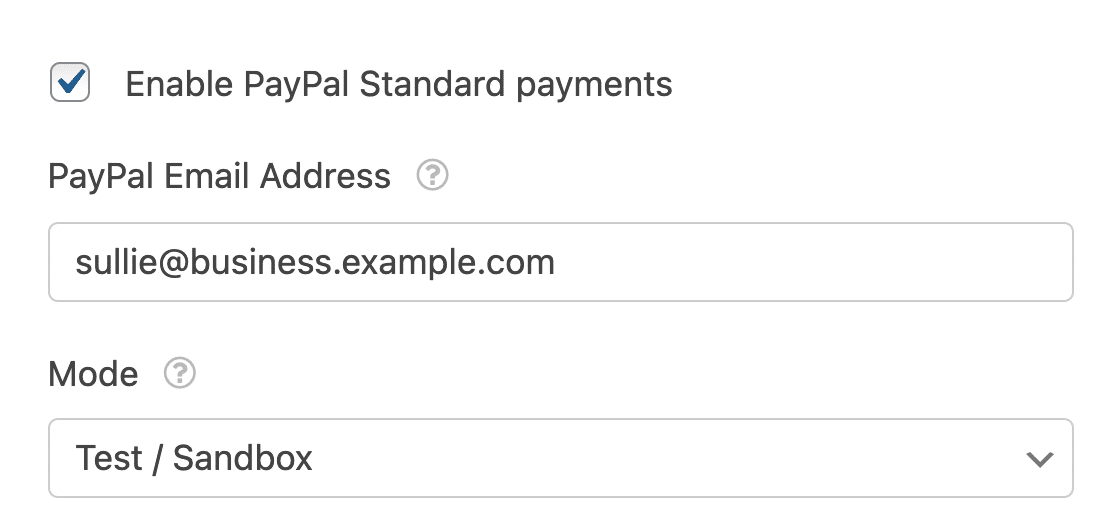
The rest of the settings on this screen are optional when using the PayPal Standard Addon for testing purposes. Feel free to fill them out or leave them empty for now.
Be sure to save your form before leaving the form builder.
Publishing Your Form and Performing the Test
Once your form is set up, you can use it to test payments on the frontend of your site. To do so without publishing your form to a live page, you can use the form preview option in WPForms, or you can add your form to a private page or post.
To begin your test payment, fill out the form with the Personal test email listed in your PayPal Developer account.
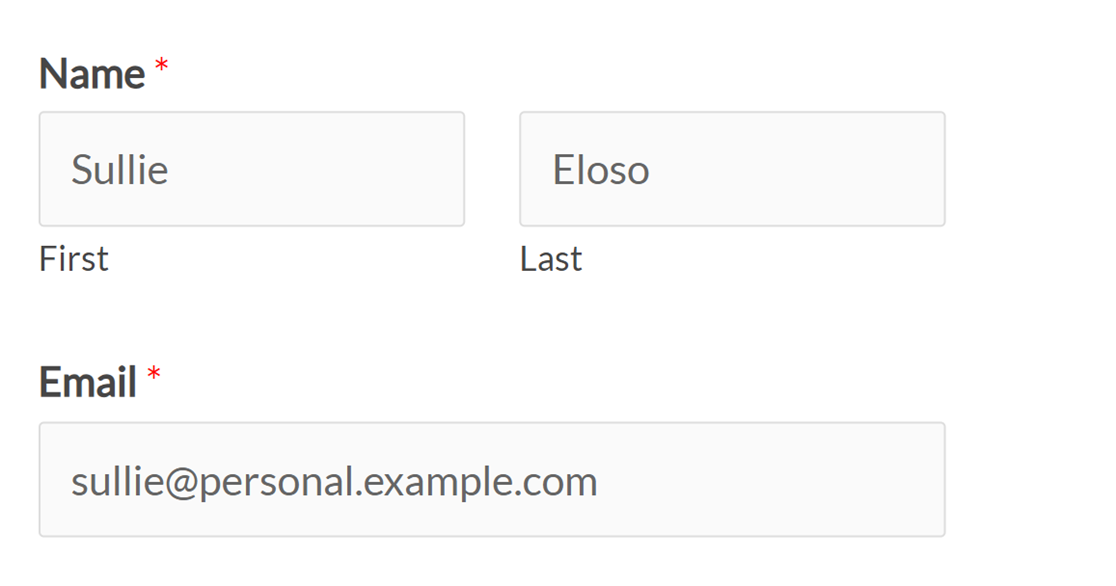
After you submit the form, you’ll be redirected to PayPal’s site. Here, you’ll need to log in using the same Personal test email you entered in the form as well as the password you created for it earlier.
To avoid entering login details again in a couple of steps, check the Stay logged in for faster purchases option. Then click the Log In button.
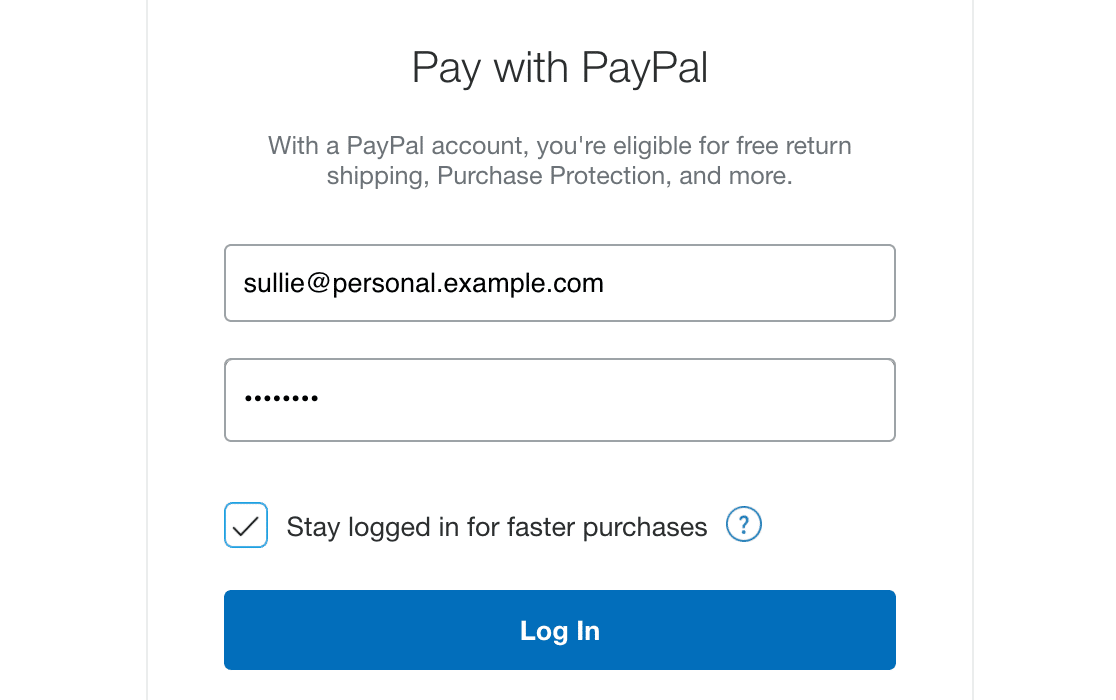
Note: PayPal may ask you to agree to its Electronic Communications Delivery Policy before continuing.
Once you’re logged in, you’ll be taken to the Order Summary page. Here, check that the total matches what was listed in your form, then click the Pay Now button.
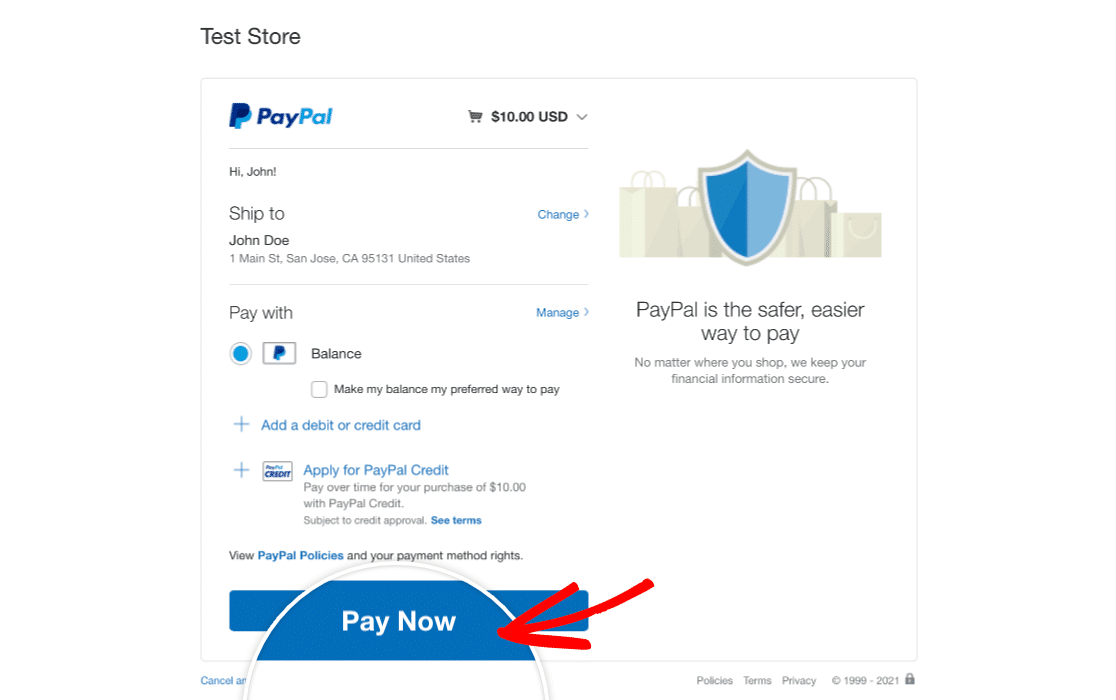
You’ll then see a page confirming your order.

Viewing Test Payments in WPForms
To view and manage all test transactions and their details, simply go to WPForms » Payments and turn on the Test Data option.
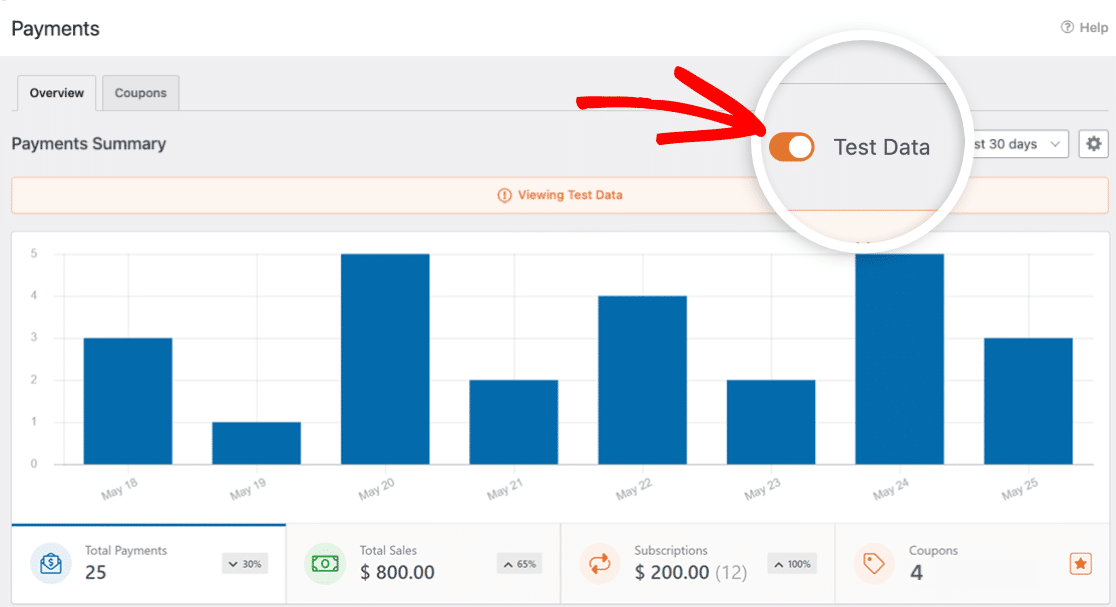
For full details on viewing test and live payment information, understanding transaction trends, adjusting for different currencies, and more, check out our guide to viewing and managing payments.
Note: Looking to offer discounts to your customers through coupon codes? Check out our Coupons addon tutorial for all the details.
Viewing Test Payments in PayPal
Finally, you’ll want to check that the completed order appears in your Personal test account in PayPal. To do this, return to your Sandbox Test Accounts page on PayPal’s Developer site.
Next, click on the three dots under Manage Accounts for the Personal test email. Then, click on View notifications. This will open a list of any recent actions taken under this account.
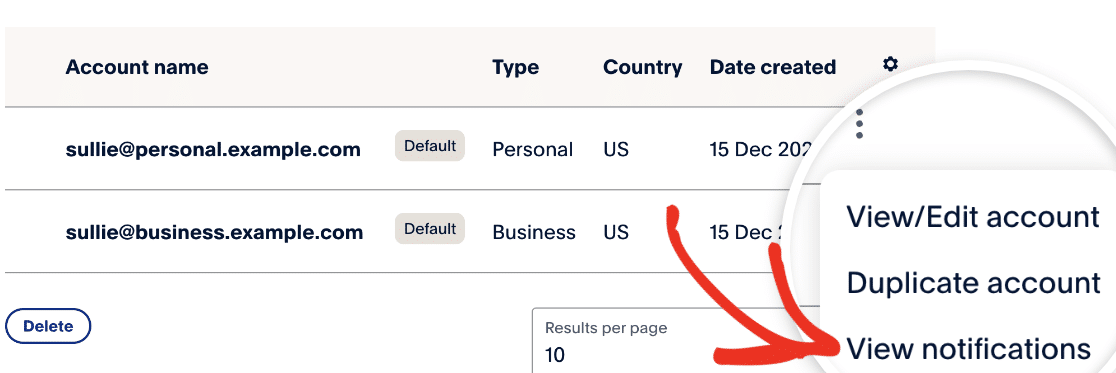
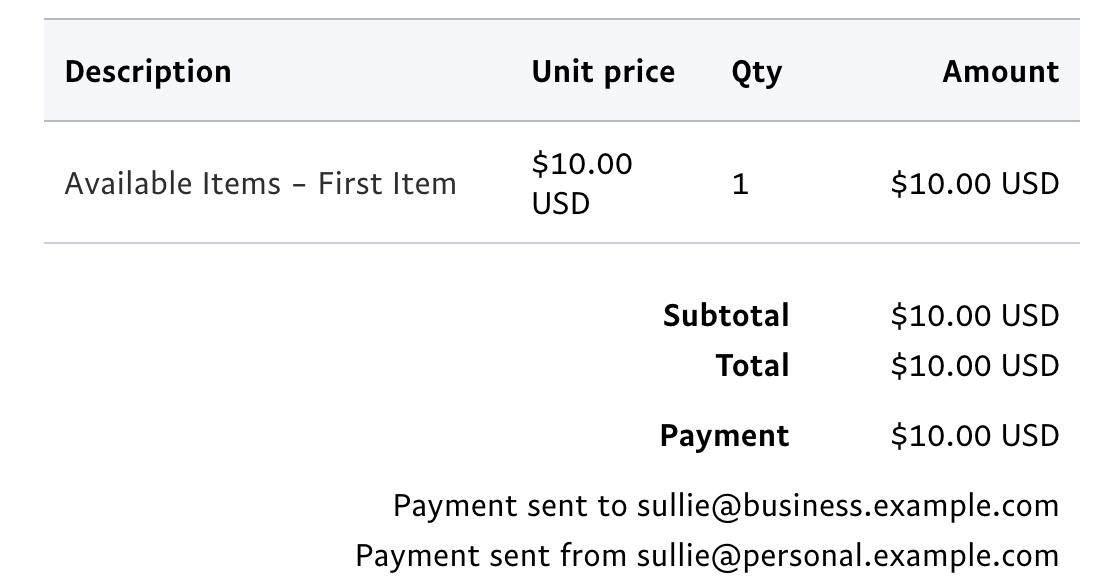
This list will include the receipt from your test transaction.

You can click on the email address for the receipt to open more details and check that they match your test order.
Switching to Live Payments
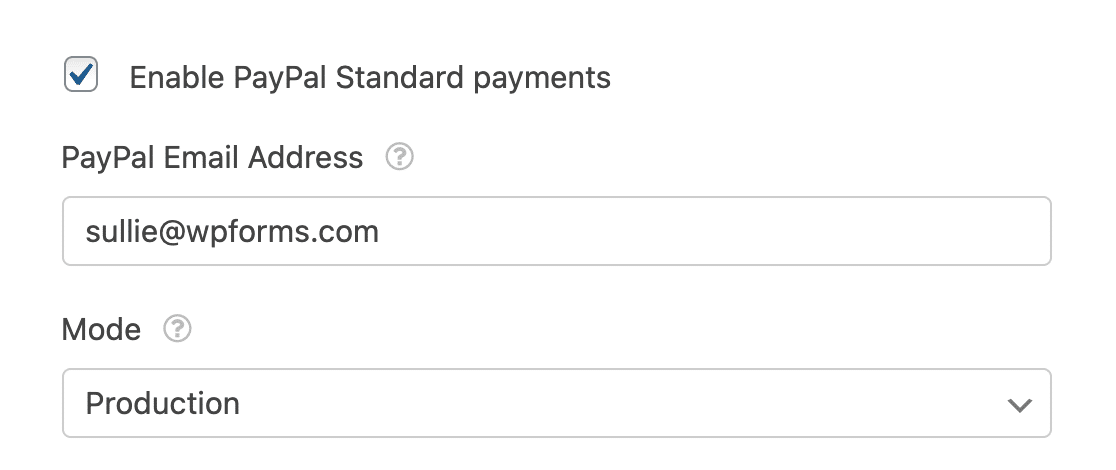
Before you publish your form, you’ll need to switch its PayPal Standard settings to process live transactions.
To do this, open your form in the form builder and go back to Payments » PayPal Standard. Select Production from the Mode dropdown. Then add the email address associated with your PayPal Business account in the PayPal Email Address field.
Note: For more details on how to customize PayPal Standard settings in your form, check out our tutorial on how to set up the PayPal Standard Addon in WPForms.
Remember to save your form again before you exit the builder.
That’s it! Now you know how to test PayPal Standard payments in WPForms.
Next, would you like to let customers choose whether to complete their purchases using PayPal or a credit card? See our tutorial on how to allow users to select a payment method in your forms.
