AI Summary
Do you want to allow users to choose between multiple payment methods in your form? With WPForms, you can use conditional logic to let users select whether they’d like to make their payments with PayPal or with a credit card provider.
This tutorial will show you how to allow your users to choose a payment method in your forms.

Requirements: You’ll need a Pro license level or higher to use the PayPal Standard, Stripe Pro, and Square addons. To access the Authorize.Net addon, you’ll need an Elite license.
Before getting started, make sure you’ve installed and activated WPForms and verified your license key.
Then you can install the PayPal Standard addon. You’ll also need to install either the Stripe Pro addon, Square addon, or Authorize.Net addon (depending on which credit card payment processor you’d like to use in your forms).
Note: Stripe applies a 3% transaction fee to each payment processed through their platform if your WPForms license is inactive.
Adding a Payment Method Selection Field to Your Form
For this tutorial, we’ll use conditional logic to show or hide certain fields and process payments through a certain provider, depending on users’ selections in your form.
Note: We recommend using the PayPal Commerce addon if you have a Business PayPal account. This addon allows you to accept both PayPal and credit card payments without using conditional logic. See our FAQ for more details.
Once all your addons are installed and activated, you’ll need to either create a new form or edit an existing one.
If you haven’t already, go ahead and add a Multiple Choice field to your form, as well as one of the following payment fields:
- Stripe Credit Card
- Square
- Authorize.Net
You can click on a field in the left panel of the builder or drag and drop it into the preview area to add it to your form.
Next, you’ll need to add options to your Multiple Choice field for each available payment method in your form.

Note: For more details on how to add items to your Multiple Choice field, as well as other options available for this field type, see our tutorial on customizing the Multiple Choice field.
For our example, we’ll change the Multiple Choice field label to Payment Method and label the choices to PayPal and Credit Card.

We recommend you use similar labels, but you can customize this text to suit your form.
To be sure that users select a payment method before they submit your form, toggle on the Required setting in the field options for your Multiple Choice field.

Enabling Conditional Logic for the Credit Card Field
Next, you’ll need to apply conditional logic to your form’s payment field to hide it unless a user selects it as their payment method.
In our example, we’re using the Stripe Credit Card field. However, the steps are essentially the same if you choose to use the Square or Authorize.Net field instead.
Note: If you’re using Stripe with WPForms Lite, you won’t have access to conditional logic in your Stripe Credit Card field options.
To enable conditional logic for your credit card field, open its field options by clicking on it in the preview area. Then click on the Smart Logic tab.

From here, toggle on the Enable Conditional Logic option.

Then, create a rule to show the credit card field if a user selects the corresponding option from your Multiple Choice field.
Our example rule reads, Show this field if Payment Method is Credit Card.

Note: Need help setting up your conditional logic rule? Our beginner’s tutorial on using conditional logic in WPForms has all the details.
Configuring Payment Settings for Your Form
Finally, you will need to configure the settings for the payment methods you offer in your form. Notably, you’ll need to use conditional logic to process users’ payments through their chosen method.
We’ve covered the options for all the available methods below.
PayPal Standard Settings
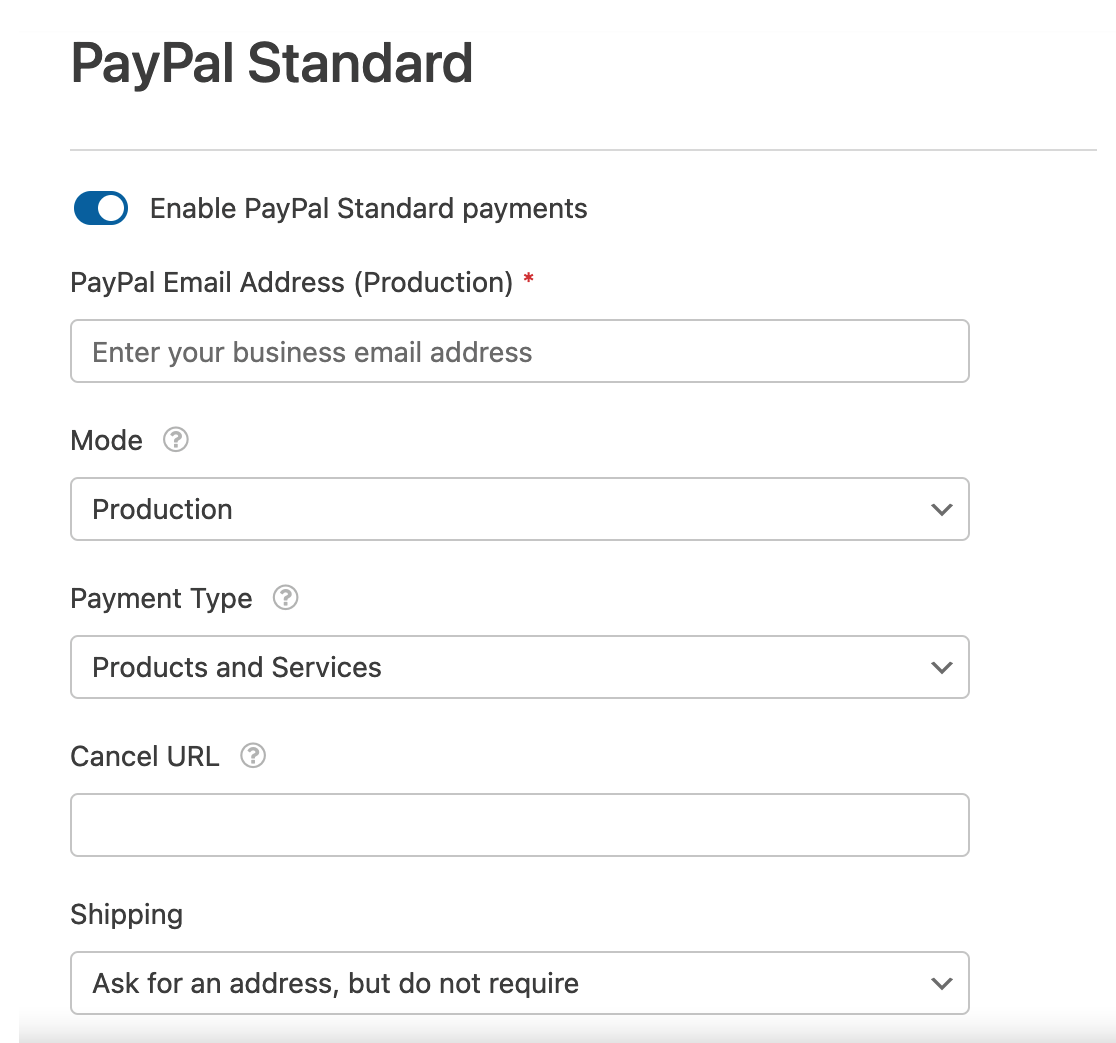
In order to configure your PayPal Standard settings, navigate to Payments » PayPal Standard in the form builder. Then, toggle on the Enable PayPal Standard payments option in the right panel.
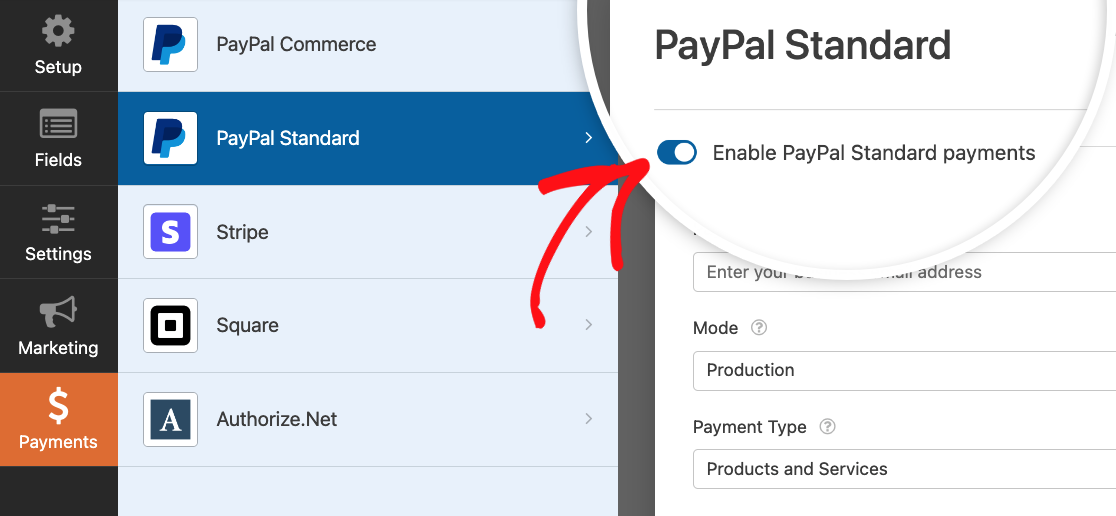
There are a handful of options you need to configure next, including adding your PayPal email, putting your account in production mode, and determining whether users must provide a shipping address.
Note: For the complete steps to set up PayPal Standard, check out our full PayPal Standard addon tutorial.
Then scroll down to the Enable Conditional Logic option and toggle it on to reveal more settings.

Set the conditional logic rule to read Process this charge if Payment Method is PayPal.

Stripe Settings
To configure your Stripe settings, first navigate to the Payments tab in the form builder and click on Stripe. Then, toggle the Enable Stripe payments option to the on position.
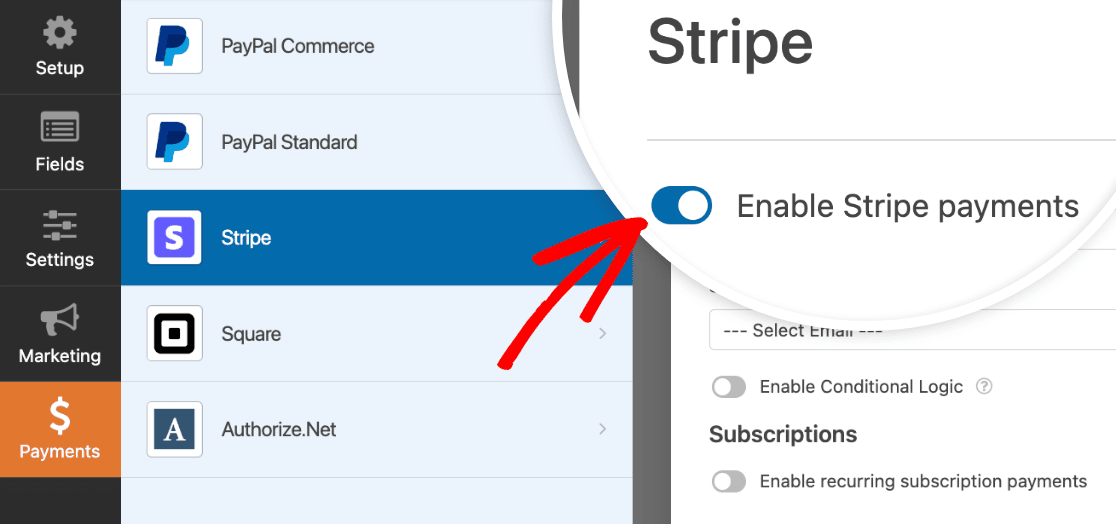
Add a payment description and map your form’s email field to the Stripe Payment Receipt option if you wish. Then scroll down and toggle on the Enable Conditional Logic setting.

Note: For complete setup instructions for Stripe, be sure to check out our Stripe Pro addon tutorial.
Configure the rule to read Process this charge if Payment Method is Credit Card.

Square Settings
To configure your Square settings, go to Payments » Square in the form builder and toggle on the Enable Square payments option.
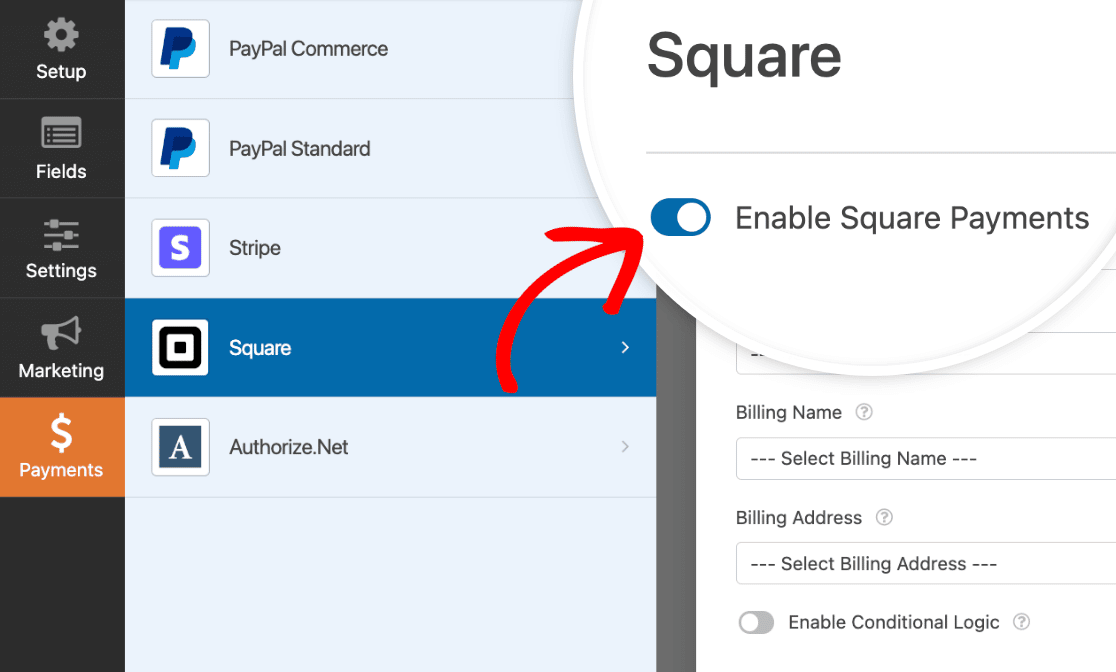
This will reveal several settings. Enter a payment description, map any fields you’d like to collect information from, then toggle on the Enable Conditional Logic option.

Note: For more details on how to set up Square payments for a form, see our complete guide to the Square addon.
Using the dropdowns that appear, set your rule to read, Process this charge if Payment Method is Credit Card.

Authorize.Net Settings
To configure your Authorize.Net settings, go to the Payments tab in the form builder and click Authorize.Net. From here, select the Enable Authorize.Net payments option.

Next, add a payment description and map any relevant fields from your form to your Authorize.Net account. Then toggle on the Enable Conditional Logic option at the bottom of the settings.

Note: For complete details on how to set up the Authorize.Net addon, be sure to check out our Authorize.Net tutorial.
Then, you can configure your conditional logic rule to read Process this charge if Payment Method is Credit Card.

Frequently Asked Questions
These are answers to some top questions about allowing users to choose a payment method.
Do I need to use conditional logic if I have the PayPal Commerce addon?
The PayPal Commerce addon supports credit card and PayPal checkout options by default. After configuring the addon, you won’t need to use conditional logic to enable this functionality on your form. However, you’ll need to have a PayPal Business account to configure the addon.
To confirm that both payment method is enabled, click the PayPal Commerce field to open its Field Options. Then look under the Supported Payment Methods section and ensure PayPal Checkout and Credit Card are enabled for your form.

To learn more about using PayPal Commerce, see our guide on how to set up and use the PayPal Commerce addon.
That’s it! Now you can enable your users to choose between paying with PayPal or one of our supported credit card payment methods when filling out your forms.
Next, would you like to ensure that your form and all payments are working as expected before you publish it? Check out our tutorial on how to properly test your forms for more details.