Want to send out different notification emails depending on users’ selections in your forms? With our smart conditional logic, you can set up your form to send unique email notifications based on users’ input.
This guide will show you how to create conditional email notifications in WPForms.
Before you dive in, make sure you have WPForms installed and activated on your site. Then you’ll need to create a new form or edit an existing one.
Setting Up Conditional Logic for Notifications
You can add conditional notifications based on users’ selections or input for the following fields:
- Single Line Text
- Paragraph Text
- Dropdown
- Multiple Choice
- Checkboxes
- Numbers
- Number Slider
- Website / URL (Basic license or above)
- Hidden Field (Basic license or above)
- Rating (Basic license or above)
- Net Promoter Score (Pro license or above)
- Multiple Items (Pro license or above)
- Checkbox Items (Pro license or above)
- Dropdown Items (Pro license or above)
Add at least one of the fields above to your form and configure its field options as needed.
For our example, we’ll be using a contact form with a Dropdown field labeled “Reason for Contact” and the options “Sales Question,” “Support Request,” “Media Inquiry,” and “Other.”
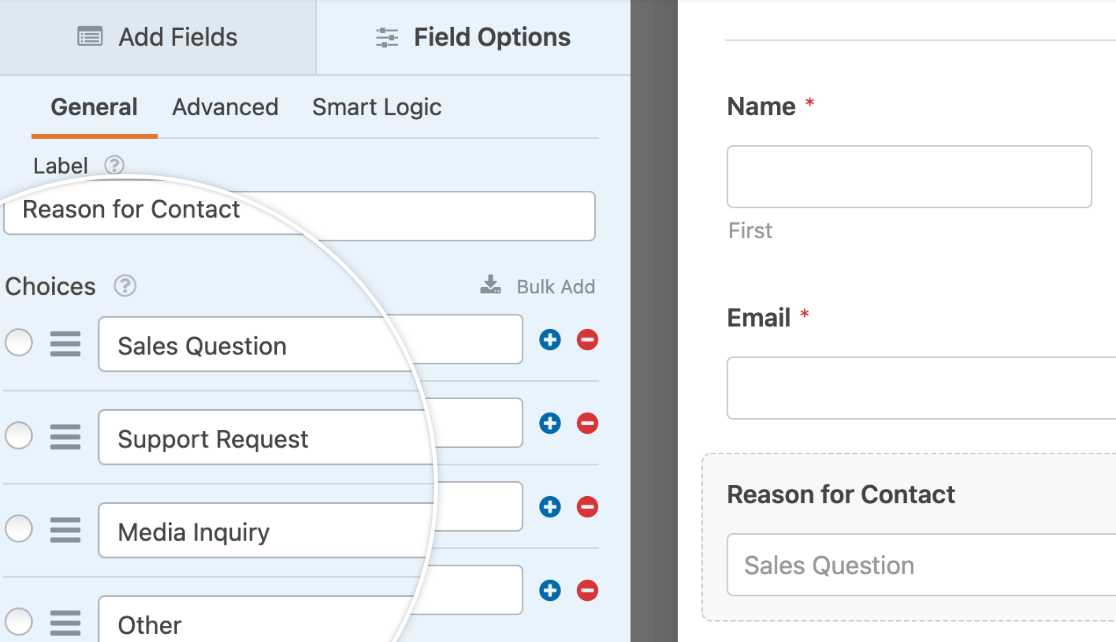
Note: We recommend basing your notifications’ conditional logic on a required field so that users must fill it out in order to submit your form.
We’ll send an email notification to a different recipient based on which option the user selects.
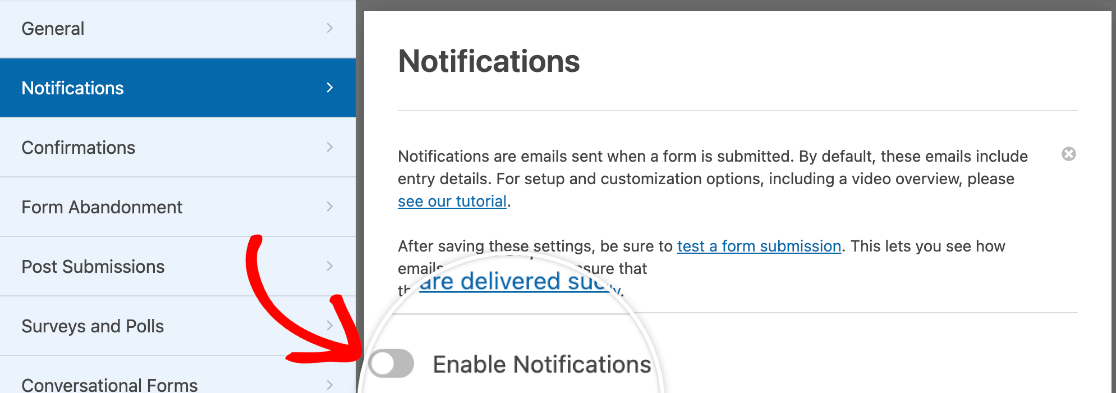
Once you’re happy with the field you’ll be using, go to Settings » Notifications. Here, toggle on the Enable Notifications option if it’s not activated already.
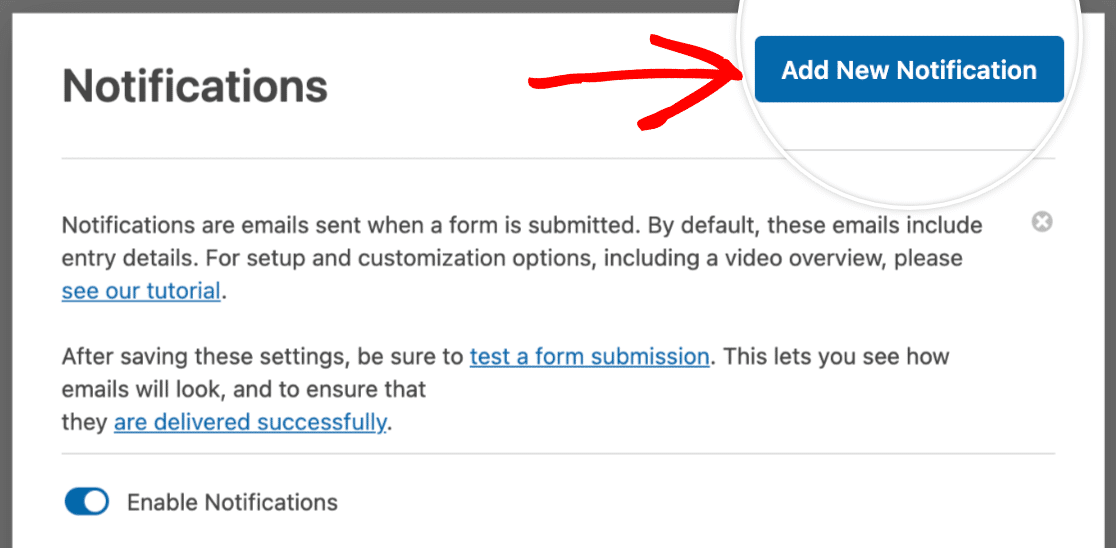
Next, customize the default notification if you wish. Then click on the Add New Notification button to add your first conditional email notification.
This will open a popup window in which you can name this notification.
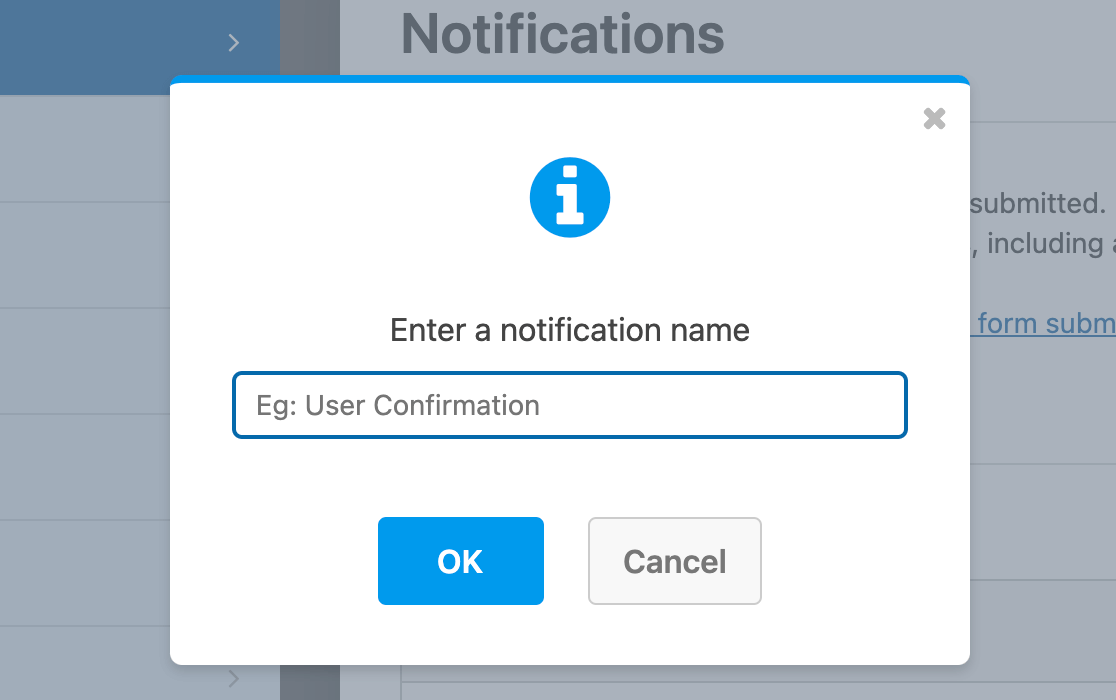
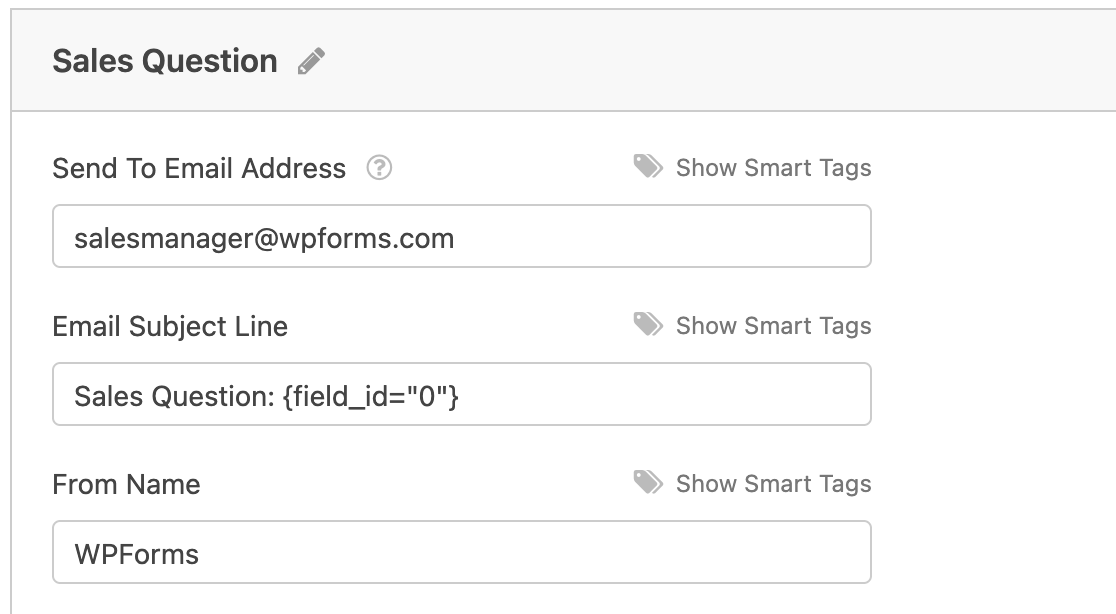
For our example, we’ll make this the email notification for users who select “Sales Question” from our “Reason for Contact” dropdown.
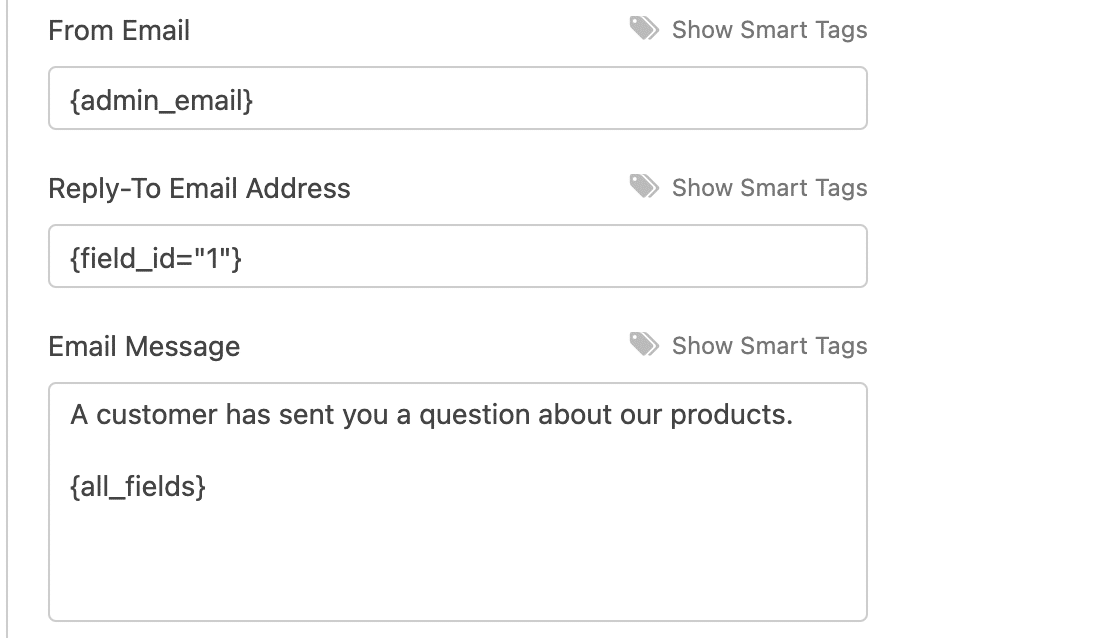
We’ll add the sales manager’s email address as the Send To Email Address and customize the Email Subject Line and Email Message accordingly.
We’ll also use a Smart Tag to set the Reply-To Email Address to the customer’s email.
Note: Want to pull data such as users’ names and email addresses from your form entries into your notifications? Check out our tutorial on how to use Smart Tags.
When you’re done customizing your email notification, scroll to the bottom and toggle on the Enable Conditional Logic option.
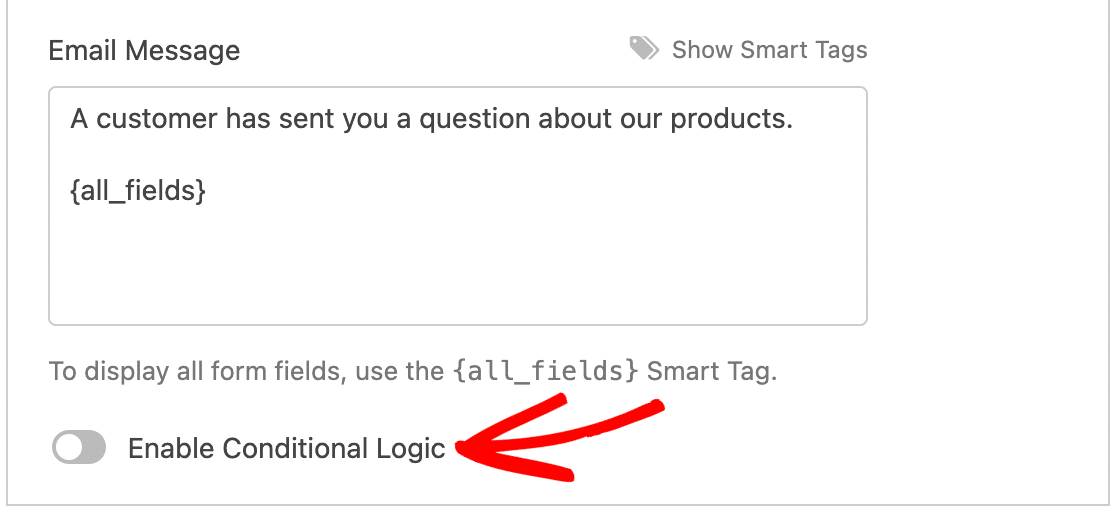
This will reveal the settings you can use to create your conditional email notification rule. For our example, we’ll configure the dropdowns so our rule reads, Send this notification if Reason for Contact is Sales Question.

Note: Need help creating your conditional logic rule? See our tutorial on conditional logic basics for more details.
Once you’re done setting up the conditional logic for your first notification, click on Add New Notification and repeat the steps above for each of your other email notifications.
In our case, we would set up the following additional notifications:
- Send an email to the support team if Reason for Contact is Support Request
- Send an email to the marketing manager if Reason for Contact is Media Inquiry
- Send an email to the site administrator if Reason for Contact is Other
Remember to save your changes before exiting the form builder, and to test your form before you publish it.
Note: To dynamically set email recipients based on user input, see our developer documentation for setting up conditional email recipients.
Frequently Asked Questions
Here are some of the top questions users have about creating conditional email notifications with WPForms.
Can I send conditional email notifications based on which page the user submits the form from?
Absolutely!
We often see users who want to use one form on several pages and change the notification’s recipient based on which page the form is submitted from.
To do so, you will need to use a Hidden Field and the {page_url}, {page_title}, or {page_id} Smart Tag.
First, add a Hidden Field to your form and set the default value to your preferred Smart Tag.
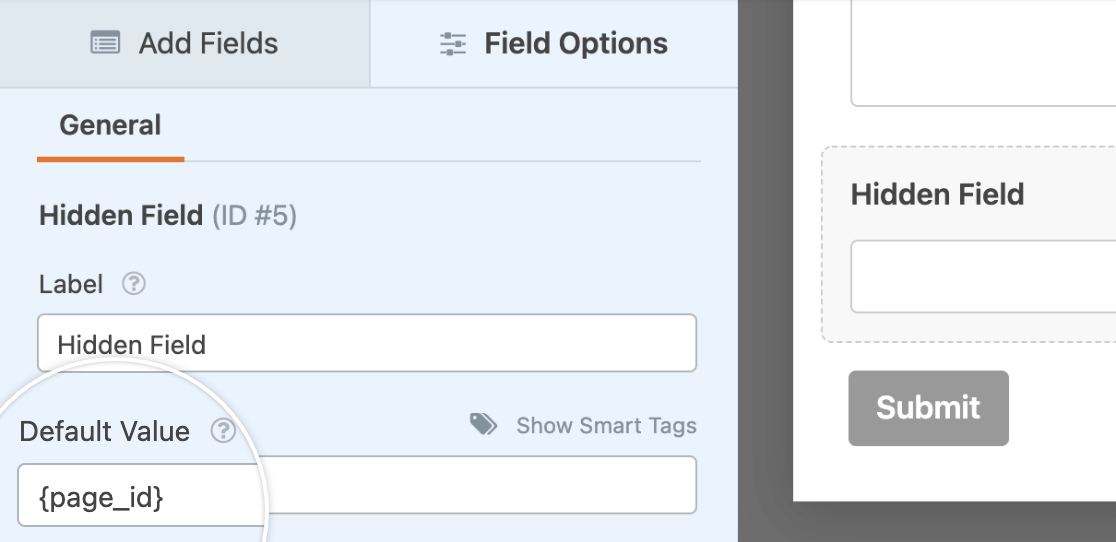
Then, create a conditional notification using a rule that reads Send this notification if Hidden Field is X, where X is the page ID from which the form is being submitted.

Just substitute the page’s URL for X if you’re using the {page_url} Smart Tag, or substitute the page’s title for X if you’re using the {page_title} Smart Tag.
You will need to repeat this process for each page you’ve embedded your form on.
That’s it! You can now create conditional form notifications with WPForms.
Next, want to show different confirmation messages depending on how users fill out your form? Check out our tutorial on creating conditional form confirmations.
