
AI Summary
Do you want to make your WordPress forms more organized and easier to manage?
As the number of forms grows on your WordPress website, form management can become a bit of a hassle.
But there’s a simple solution to better form organization — using form tags.
In this post, we’ll show you how to use form tags to improve your WordPress form management.
Create Your WordPress Form Now
What Are Form Tags?
Form tagging is a method of labeling your forms so similar forms can be organized and grouped together by type. It’s similar to the built-in WordPress tags you can use to organize your blog posts.
The same concept applies to online forms. Using tags, it gets a whole lot easier to locate specific types of forms on your WordPress site, especially if you’ve got tons of forms. When your forms are tagged, it doesn’t matter how many there are on your site because you can always easily filter your forms to find the one you need.
Different form builders use different taxonomies to help you organize your forms. One of the advantages of tags over systems that use categories or groups is that you can add any number of tags to your forms. This means you can have multiple layers of organization for your WordPress forms.
First, we’ll show you how to assign tags to your forms. Then we’ll show you how to filter your forms quickly once they’ve been tagged.
How to Organize WordPress Forms With Tags
Adding tags to your WordPress forms is incredibly easy. You can follow the video guide below to learn all you need to organize forms with form tags.
If you prefer written instructions instead, continue reading below:
In This Article
Let’s jump into it.
1. Installing WPForms
WPForms is the top-rated forms plugin for WordPress. One of its many features is form tags, which is designed to make form management easier for you.
To get started, you need to install WPForms on your site (if you don’t already have it).

After WPForms is installed and active on your site, you can start building forms and assign tags to them.
2. Creating and Assigning Tags to Your WordPress Forms
WPForms makes it very easy to create tags and organize your WordPress forms. There are two ways you can assign a tag to a form.
We’ll show you both methods.
Assigning Tags From the Form Builder
In the first method, you can assign tags to a form while you’re building it in the WPForms form builder interface.
To do this, open your WordPress admin area and navigate to WPForms » Add New.

This will open the WPForms form builder interface. Start by giving your new form a name and selecting a template.

When the template has loaded, click on Settings on the left of the WPForms interface, then select the General tab.

Under the General settings, you should see a Tags option. To assign tags to the form you’re creating, just type in a name you want to give your tag.

If you would like to add multiple tags here, just separate them with commas.
You can also select previously created form tags from this field. Just click on the Tags field and it will expand to show a list of your existing tags to choose from.

When you’re done adding the tags you want for your form, press the Save button in the top right corner of the form builder.
Assigning Tags From the Forms Overview Screen
The Forms Overview screen lists all your existing forms in a table. The Tag column allows you to quickly edit tags for any form without having to open the form builder.
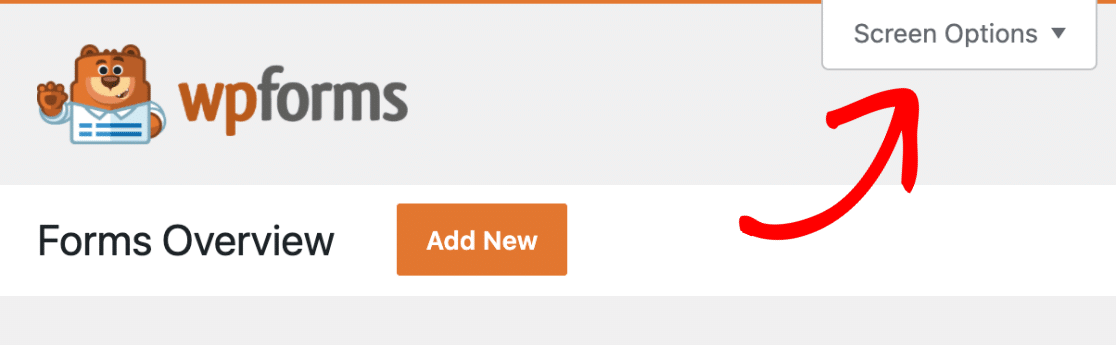
In order to see form tags on the Forms Overview screen, first click on the Screen Options dropdown menu in the top right corner of the screen.
After that, select the Tags checkbox and click on Apply.

You should now see a Tags column in the table where all your forms are listed.

To assign a tag, hover your mouse over the form you want to organize and click on Edit under its Tags column.

WPForms will now allow you to create a new tag for the form or choose from previously created tags.
To create a new tag, just type it in and press enter. Repeat the process if you want to add multiple tags.
Or if you want to assign a tag you’ve previously created, just click on the tag you want in the list.
When you’re done editing the tags for your form, click the green checkmark button to save your changes.

Great! Now that you know how to create and assign tags to your forms, let’s look at how you can filter forms by tags to locate them later.
3. Filtering Forms By Tags
What makes form tagging such a powerful form management tool is the simple fact that tagged forms are easy to find. Every tag reveals something useful about your online forms.
For instance, WordPress login, registration, and password reset forms all fall under the same category of User Management, so you can assign them the same tag. You can then locate these forms really fast from your WordPress dashboard by using that tag.
Depending on what kind of site you have, you might also want to add tags for contact forms, order forms, lead generation forms, event signup forms, and more.
To use the WPForms’ filter tool, go to the Forms Overview page and click on the All Tags dropdown button.

The dropdown will expand to display all the tags you’ve created so far. Select the tags you want to filter your forms by and then press the Filter button.

Right after you press the Filter button, WPForms will filter your forms by your selected tags. This way you can instantly locate the forms you need without having to search manually.
Let’s now look at some additional tag management features that enable you to keep your forms well-organized at all times.
4. Removing, Deleting, & Bulk Editing Form Tags
If you need to remove a tag from a form, WPForms makes this super easy too.
All you need is to go to the Forms Overview screen and then press the Edit button under the tag(s) you want to remove from a form.

Press the cross (x) button on the form tag you wish to remove, then press the green checkmark button to save your changes.

And if you need to completely delete tags that you no longer use, just click the Manage Tags button.

This will open a modal showing all the form tags you’ve created so far and the number of times you’ve used each of them. To delete a tag completely, just select the tag and then press the Delete Tags button.

You’ll notice a message confirming that the tags are now deleted. Click on the Refresh button to update the tags in the forms list.

Finally, WPForms also lets you bulk edit tags. This is super convenient when you want to edit the tags for multiple forms at the same time.
Click on the Bulk Actions dropdown and select Edit Tags.

After that, simply select the forms you want to edit the tags for and then press Apply.

The view on your screen will now change with the selected forms on the left side and the tag edit field on the right. Under the Tags section on the right, you can create new tags, assign tags from your existing list, or remove tags all at once for the forms you selected.

When you’ve made the changes you need, press the blue Update button to save your changes.
And that’s all there is to it! You’re now all set to use form tags to better organize your WordPress forms.
Next, Bulk Email WordPress Users
Want to send email to your WordPress users right from your dashboard? Check out our guide explaining how to email all registered users in WordPress.
Also if you’re looking for DocuSign alternatives, check out our recommended digital signature WordPress plugins (hint: WPForms fully supports electronic signatures).
Improve Form Organization With Tags
Ready to build your form? Get started today with the easiest WordPress form builder plugin. WPForms Pro includes lots of free templates and offers a 14-day money-back guarantee.
If this article helped you out, please follow us on Facebook and Twitter for more free WordPress tutorials and guides.

