
AI Summary
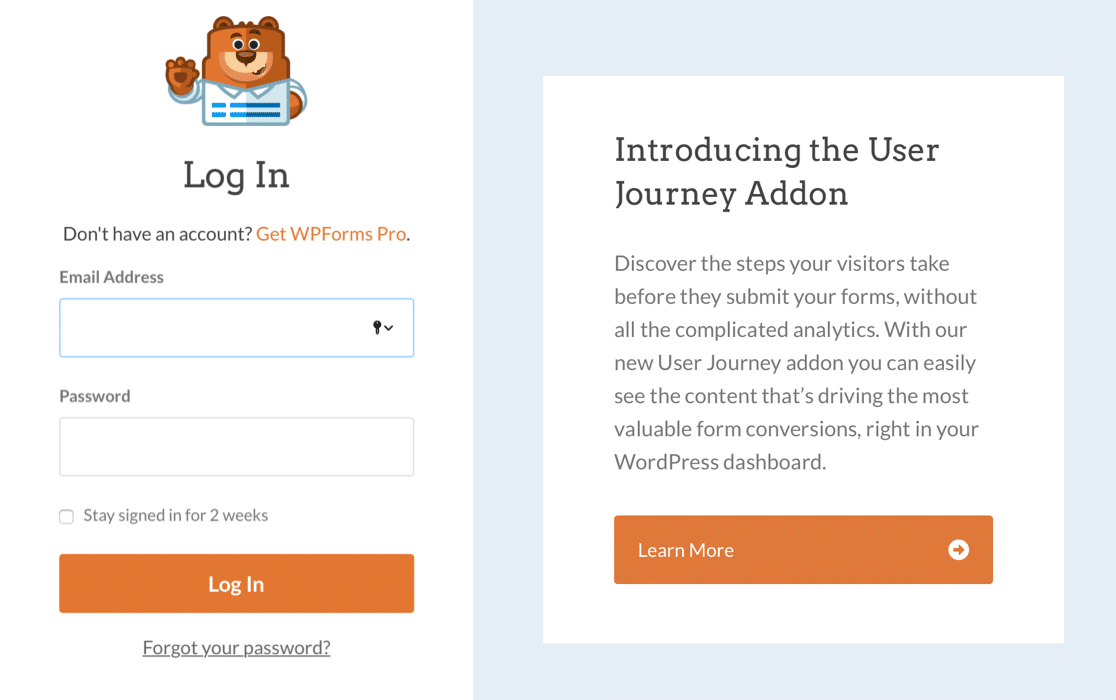
Do you want to create a custom login page for your WordPress site? I’ve set up custom login pages for multiple WordPress sites, and it’s one of those changes that looks small but makes a real difference. The default WordPress login screen is bland, generic, and even links away from your site.
The good news? You can replace it with a fully branded, styled login page using just one plugin. In this guide, I’ll walk you through creating a custom login page with WPForms. That includes building the form, customizing the design, publishing the page, and redirecting the default login URL.
Create Your Custom Login Page Now! 🙂
Why Create a Custom Login Page in WordPress?
Every WordPress site ships with the same default login screen. It has the WordPress logo, a plain white background, and nothing that tells visitors which site they’re actually signing into. Here’s why that’s worth changing:

- Branding. A custom login page puts your logo, colors, and messaging front and center. At WPForms, we use our custom login page to highlight new features and updates for our users.
- Security. When you create a custom login page, you can redirect the default
wp-login.phpURL. This reduces brute force attacks and login spam because bots can’t find your real login form. Pair this with strong WordPress security plugins for even better protection. - Professional appearance. If your site accepts member registrations, client logins, or student accounts, a branded login page builds trust. Visitors know they’re in the right place the moment they see your logo.
And here’s the best part: you don’t need a separate login customizer plugin, a page builder, AND a form plugin to pull this off. WPForms handles the login form, the visual styling, and the page creation all in one tool.
How to Create a Custom Login Page in WordPress
I’m going to show you how to build a complete custom login page using WPForms and its User Registration addon. This covers everything: building the form, adding your branding, styling the appearance, publishing the page, and redirecting the default WordPress login URL so bots can’t find it.
- Step 1: Install WPForms and Set Up the User Registration Addon
- Step 2: Create a Custom Login Form
- Step 3: Add Branding and Customize the Design
- Step 4: Configure Your Login Settings
- Step 5: Publish Your Custom Login Page
- Step 6: Add the Login Page to Your Navigation Menu
- Step 7: Redirect the Default WordPress Login URL
- Bonus: Create a Custom Password Reset Form
Step 1: Install WPForms and Set Up the User Registration Addon
First, you’ll need WPForms Pro installed on your site. The User Registration addon is what gives you login, registration, and password reset form templates, and it’s available at the Pro tier and above.

If you don’t have WPForms yet, grab it from the pricing page and install it on your WordPress site. Then head to WPForms » Addons in your dashboard.
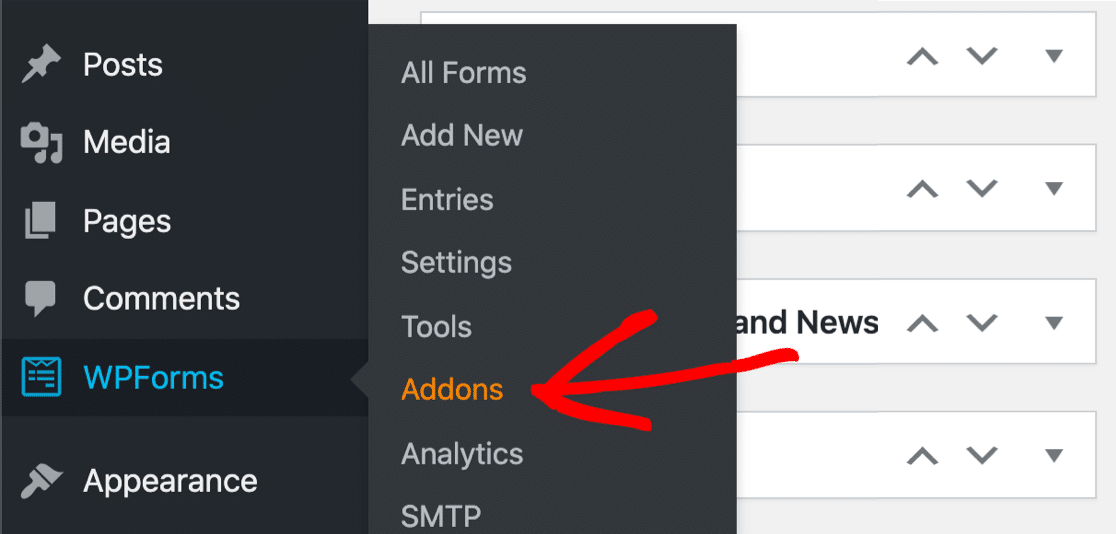
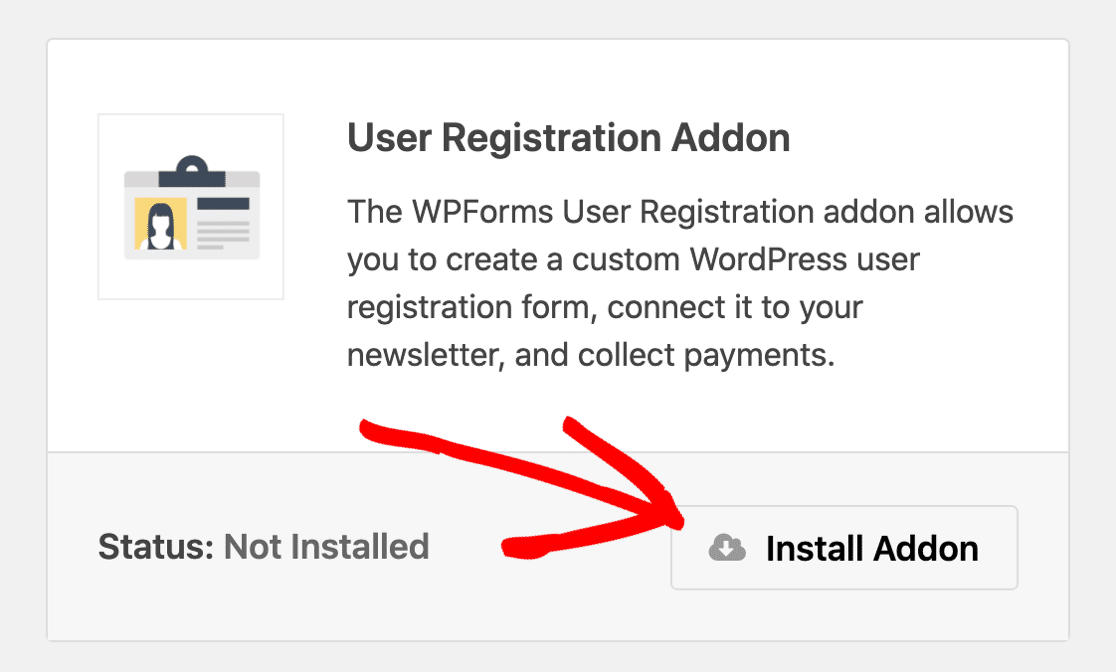
Find the User Registration Addon and click the button to install it. That’s it for setup. With one plugin and one addon, you now have everything you need to create a custom login page, registration form, and password reset form.
Step 2: Create a Custom Login Form
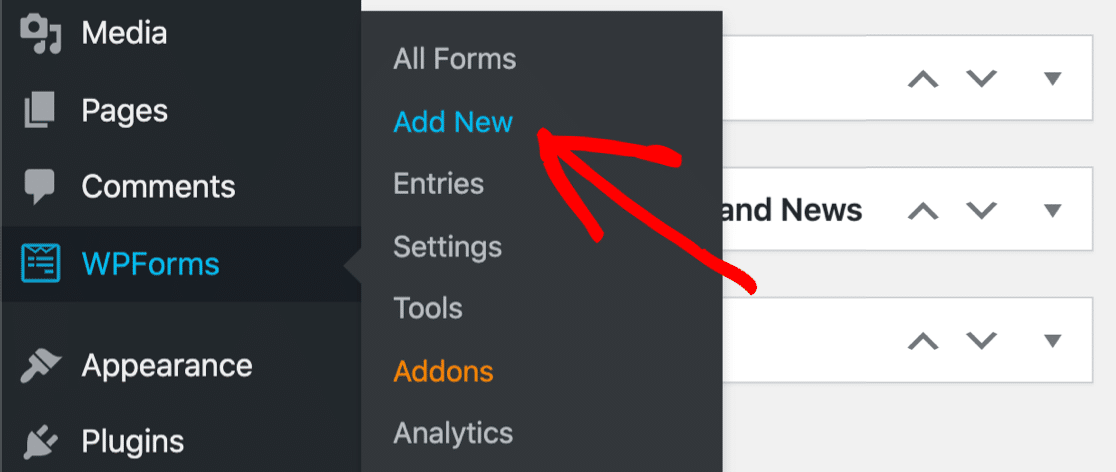
Go ahead and click WPForms » Add New to create your login form.
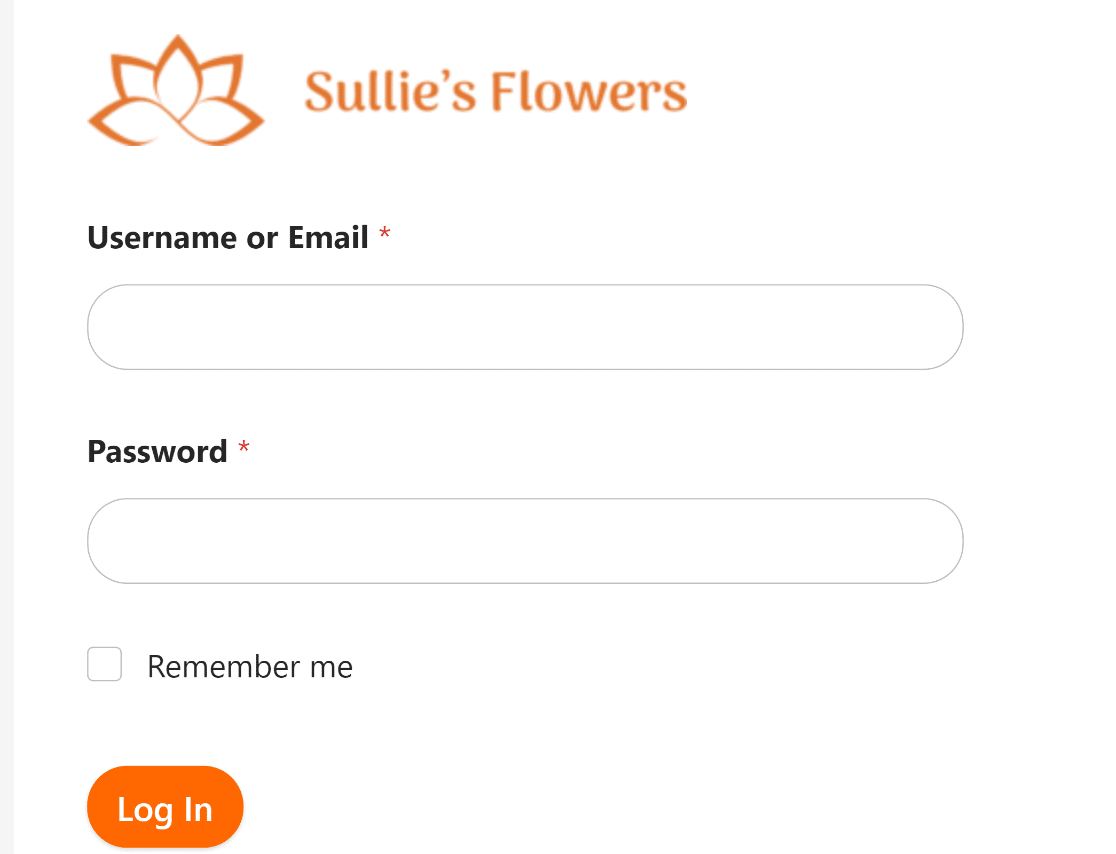
Give your form a name (something like “Custom Login Form”), then select the User Login Form template. This template is built specifically for login functionality, and you won’t see it without the User Registration addon activated.

The template loads with three fields already in place: Username, Password, and Remember Me.
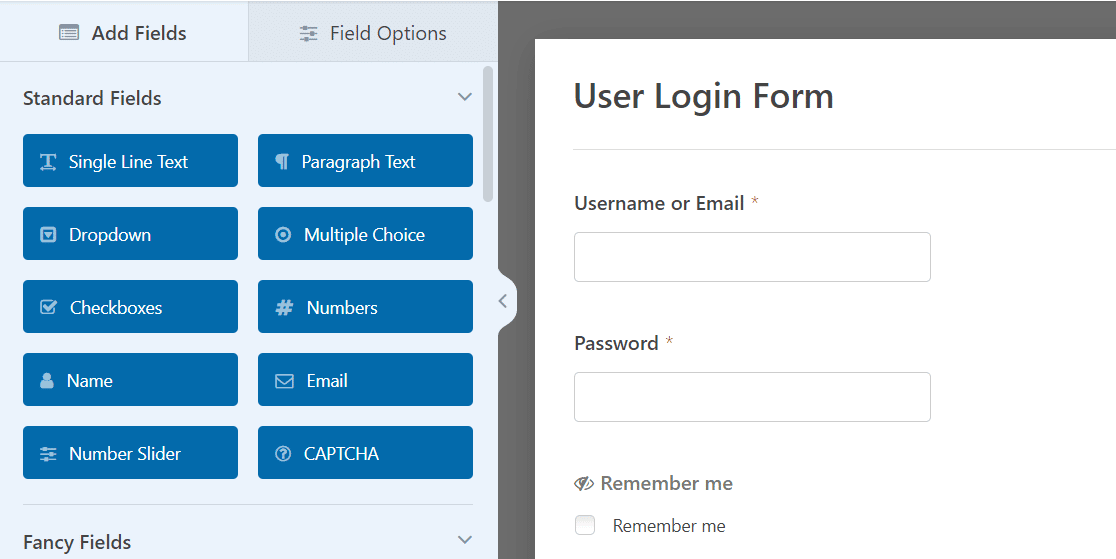
The Remember Me checkbox lets visitors stay logged in between visits. It’s a small touch, but it saves returning users from typing their credentials every single time. For more technical details, check out the login form documentation.
You can use this template exactly as-is, or customize it further. I’d recommend adding your branding at minimum, which is what we’ll do next.
Step 3: Add Branding and Customize the Design
You can add your logo, change colors, adjust fonts, and style buttons without installing a separate login page customizer plugin. Everything happens right inside WPForms and the WordPress block editor.
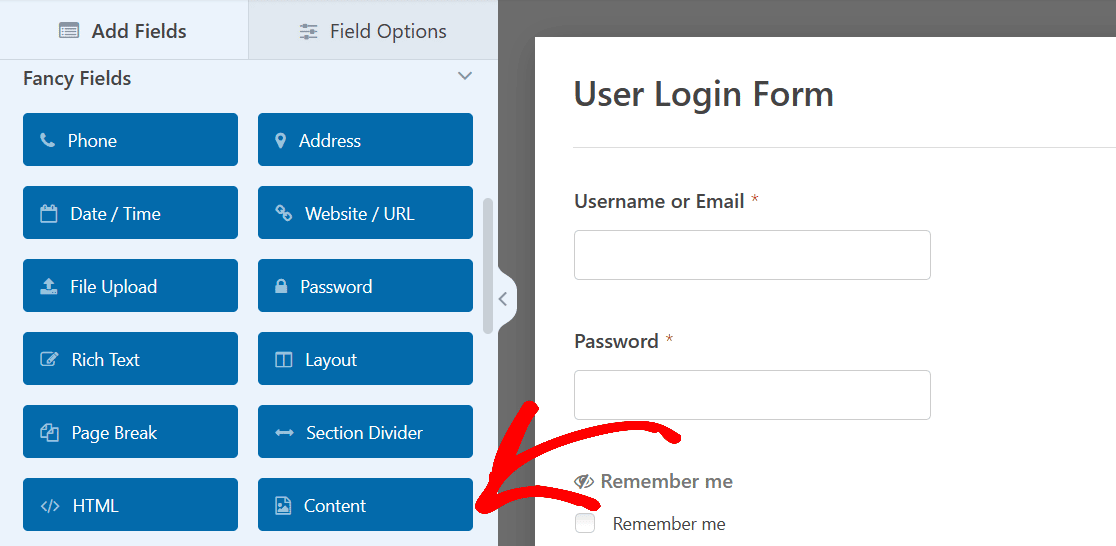
Add Your Logo or Branding Image
Start by dragging the Content field to the top of your form, right below the title.
Click on the Content field to open its Field Options panel on the left.
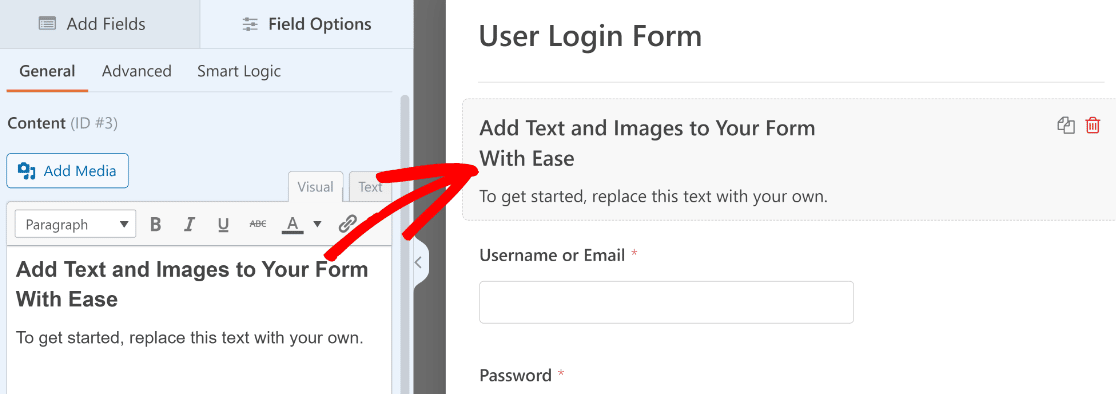
You’ll see a text editor where you can add anything you want. To insert your logo, click the Add Media button and upload your brand image.
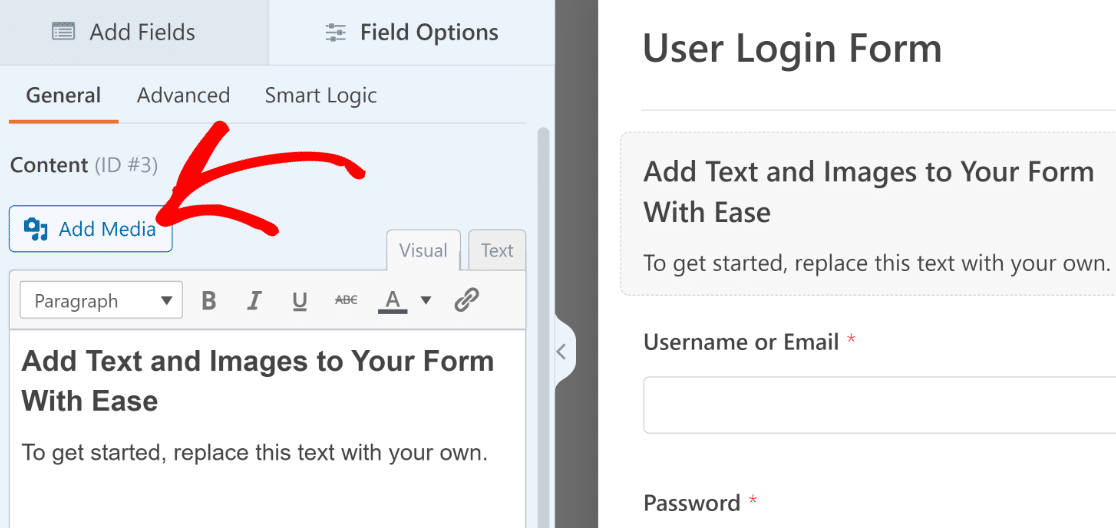
Upload your logo through the WordPress Media Gallery just like you would for any other image on your site.
Once your branding looks good, click Save. Need more design inspiration? Check out these login page examples for ideas.
Style Your Login Form in the Block Editor
Here’s something most other login page guides won’t mention: you don’t need a dedicated styling plugin for your login form. WPForms has built-in form styling right in the WordPress block editor.
When you embed your form on a page (we’ll do that in Step 5), you’ll see styling options in the WPForms block sidebar. From there, you can customize:
- Field styles like background colors, border colors, and border radius
- Label styles including fonts, sizes, and colors
- Button styles such as background color, text color, border radius, and width
- Overall form styling for spacing, alignment, and container backgrounds
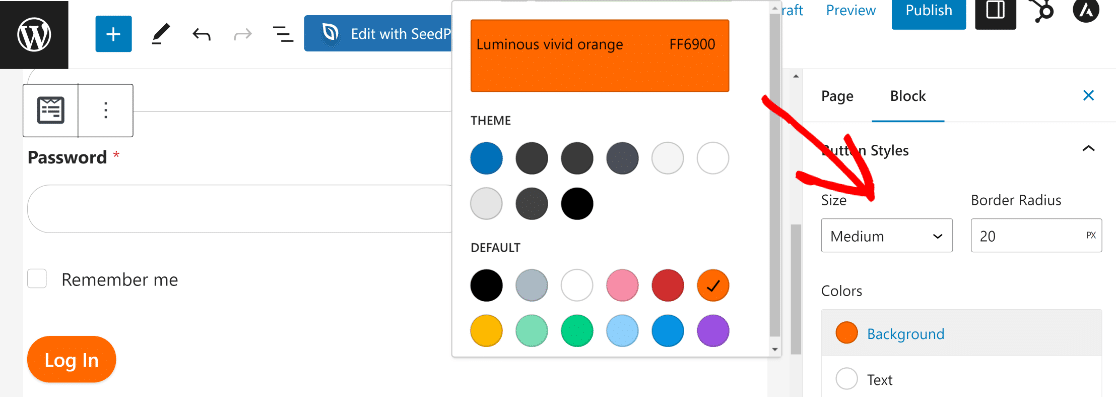
This is a huge time-saver. Instead of juggling a login customizer plugin for the colors and a form plugin for the actual login functionality, you do it all in WPForms.
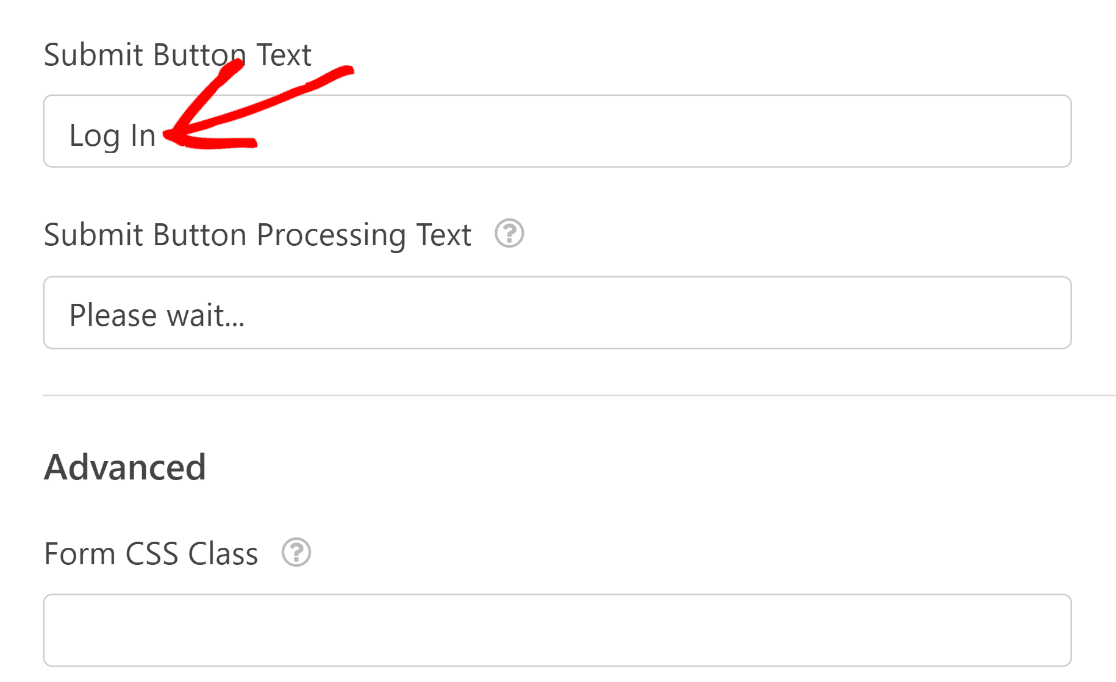
For a full walkthrough of every styling option, see the guide on how to style your forms in the block editor. While you’re at it, let’s also customize the submit button text.
Go to Settings » General inside the form builder and change the Submit Button Text to something like “Log In.”
Step 4: Configure Your Login Settings
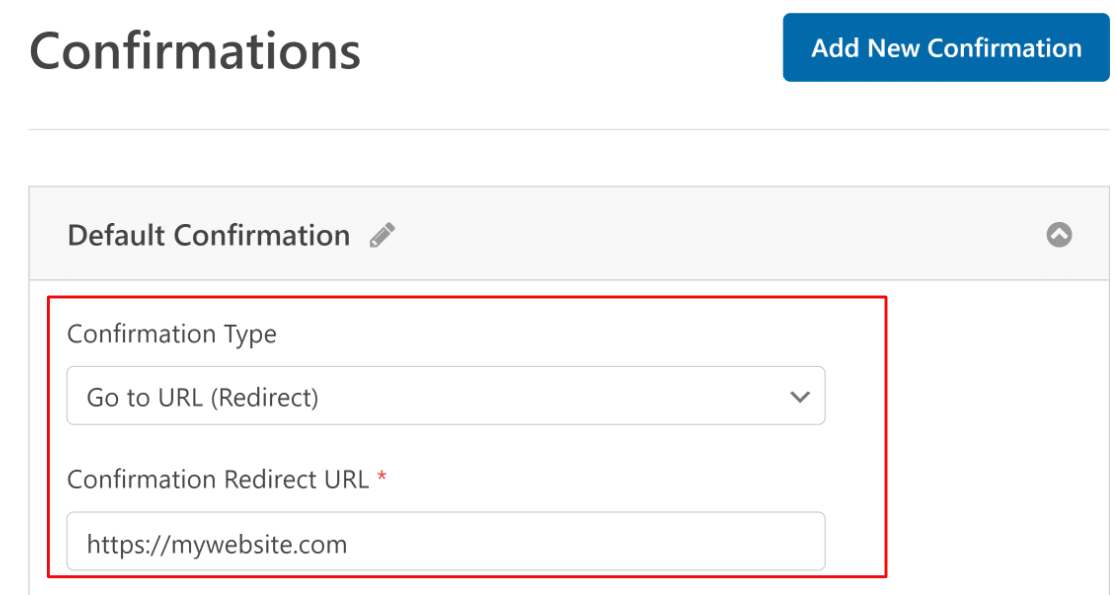
Still in the form builder, click Settings on the left-hand panel. Now click on Confirmations to decide what happens after a successful login.
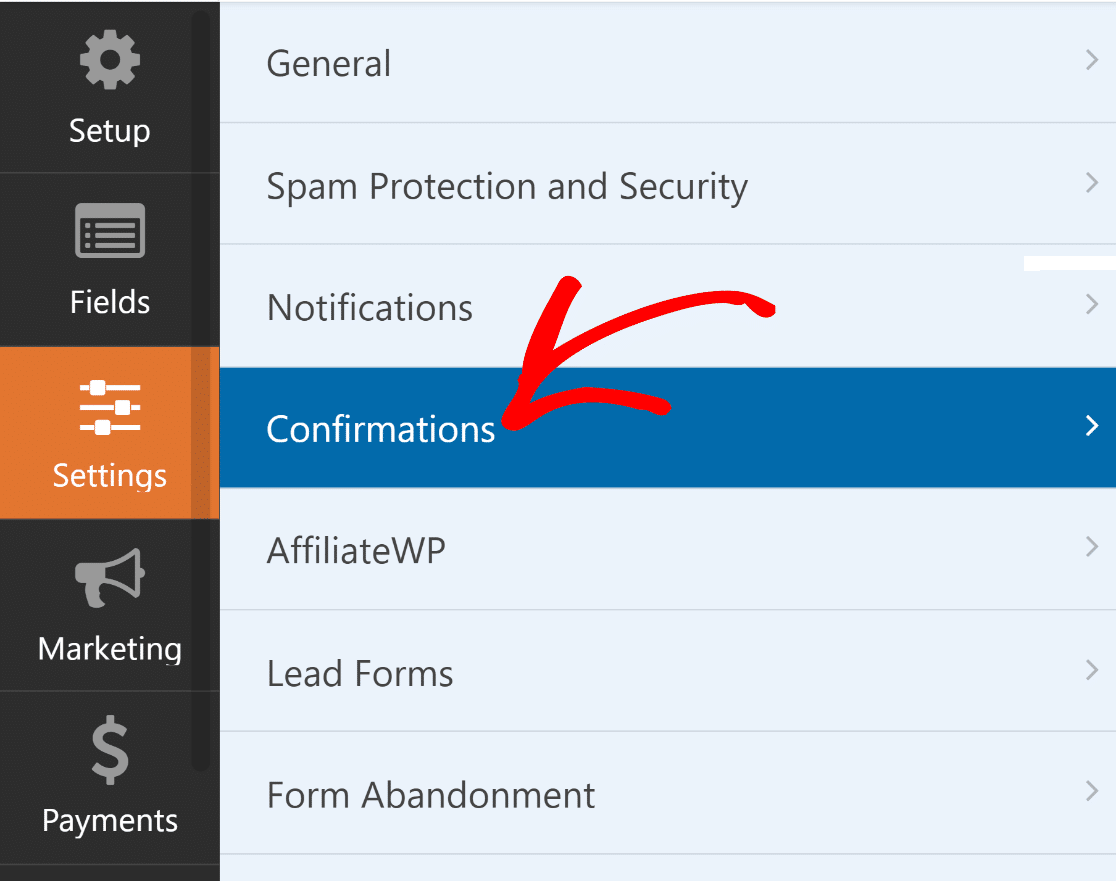
For most sites, you’ll want to redirect users somewhere after they log in. You can send them to your homepage, their account dashboard, or any other page. Set the Confirmation Type to Go to URL (Redirect) and enter your target URL.
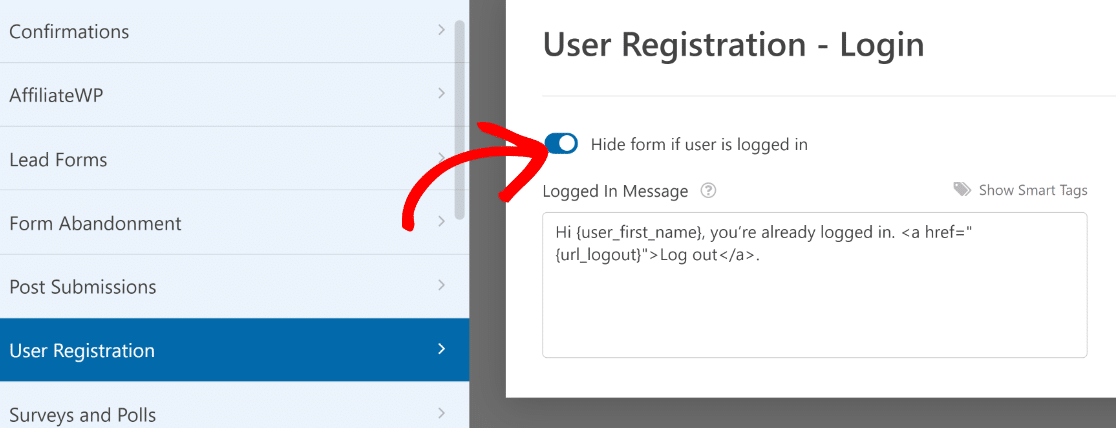
There’s one more setting worth checking. Scroll down and click User Registration to expand those options.
Toggle on the option to hide the form from logged-in users. This way, people who are already signed in won’t see the login form. You can customize the message they see instead.
Click Save when you’re done with the settings.
Step 5: Publish Your Custom Login Page
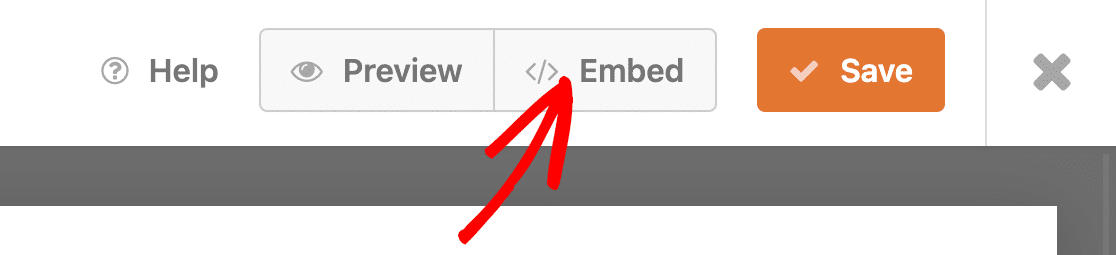
Your login form is built, branded, and configured. Now let’s put it on a page. Click the Embed button at the top of the form builder.
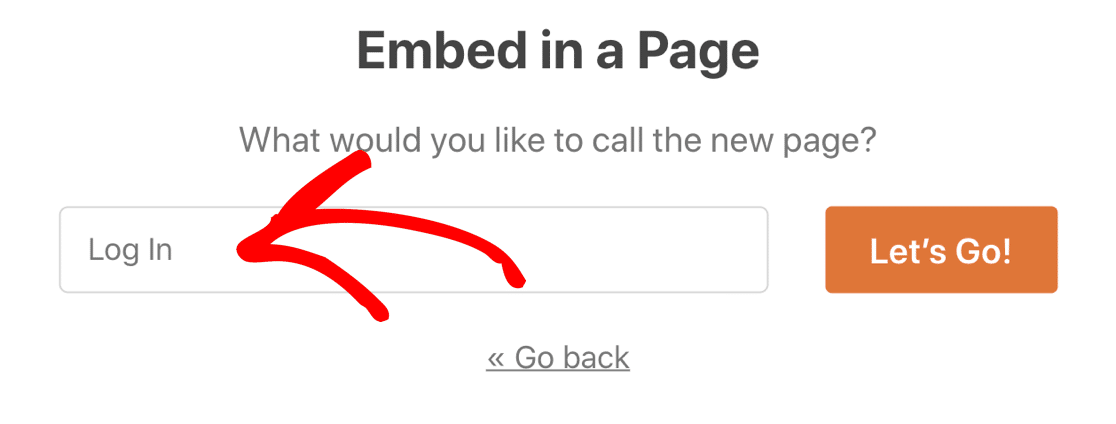
A popup will ask where you want to embed the form. Click Create New Page.

Give your page a name (something like “Login”) and click Let’s Go.
WordPress opens the block editor with your login form already embedded. This is also where you’ll see the block styling options from Step 3, so you can fine-tune colors and fonts right here before publishing.
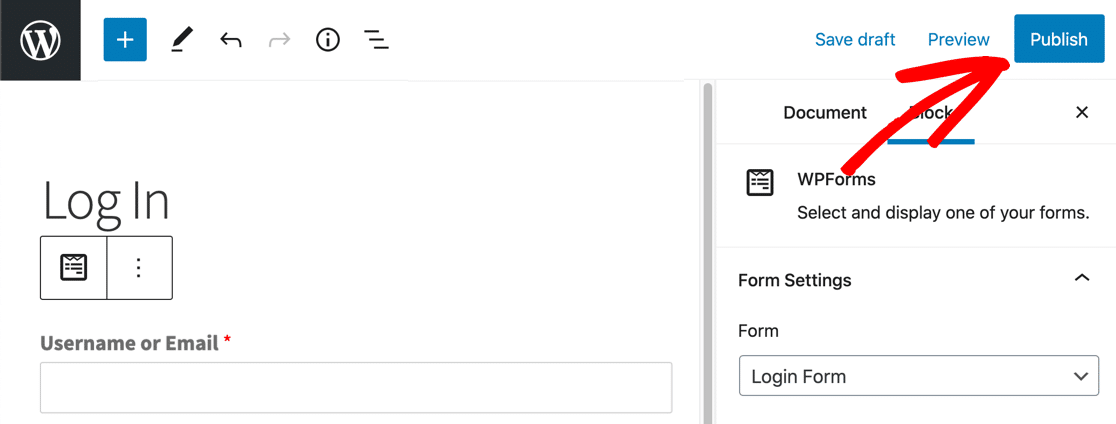
When everything looks the way you want, click Publish. Your custom login page is live and ready to accept registered users in a matter of minutes!
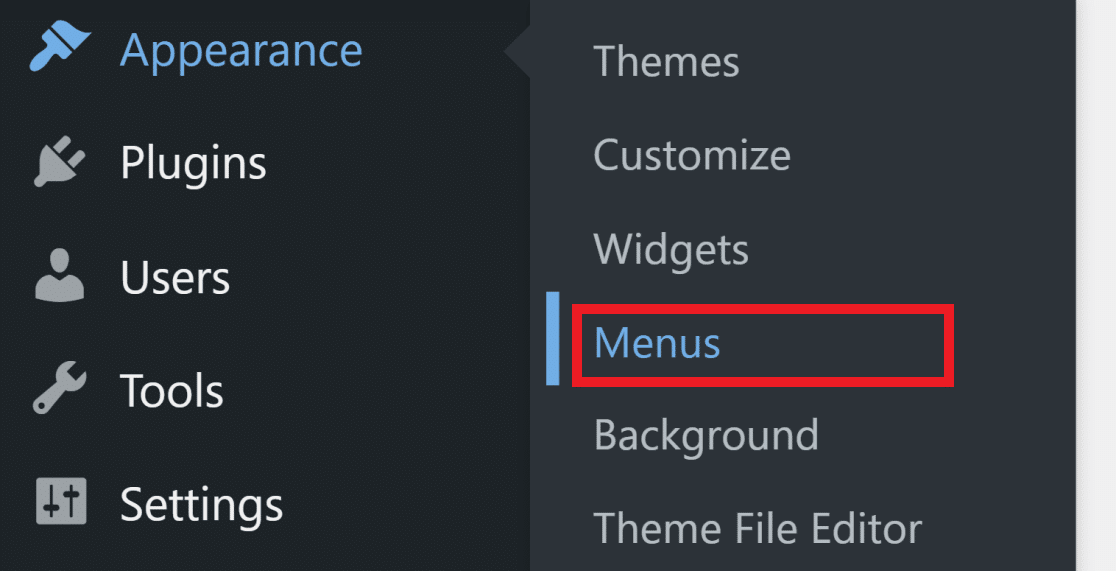
Step 6: Add the Login Page to Your Navigation Menu
Your login page exists, but visitors need a way to find it. The most natural place is your site’s navigation menu. Go to Appearance » Menus in your WordPress dashboard.
If you already have a menu set up, find your login page in the Pages panel on the left and click Add to Menu.
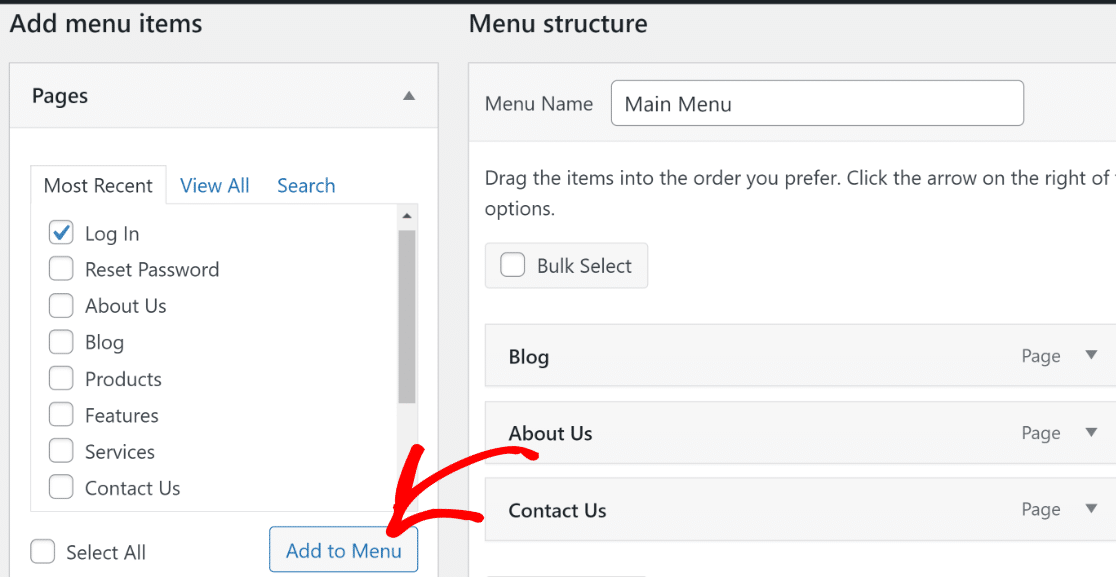
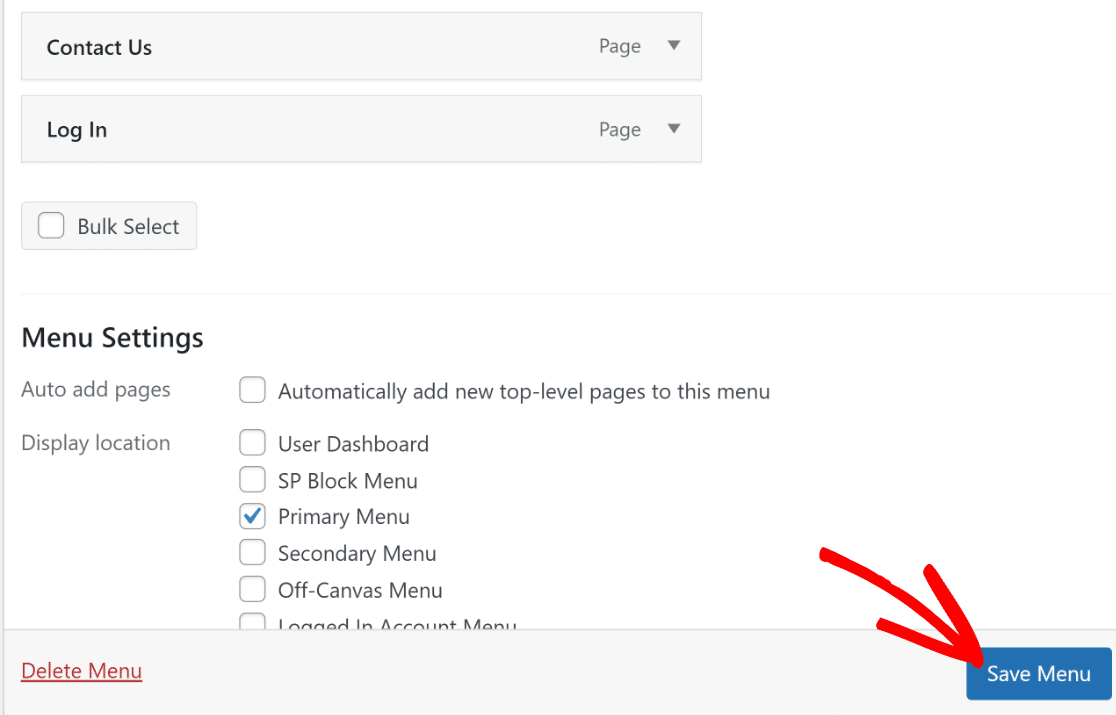
Drag the login page to wherever you want it in the menu order. Most sites put it on the far right of the navigation bar. Choose your menu’s display location (usually Primary Menu for the header) and click Save Menu.
If your site doesn’t have a menu yet, you’ll need to create one first. Enter a name for your menu under the Menu Structure section.
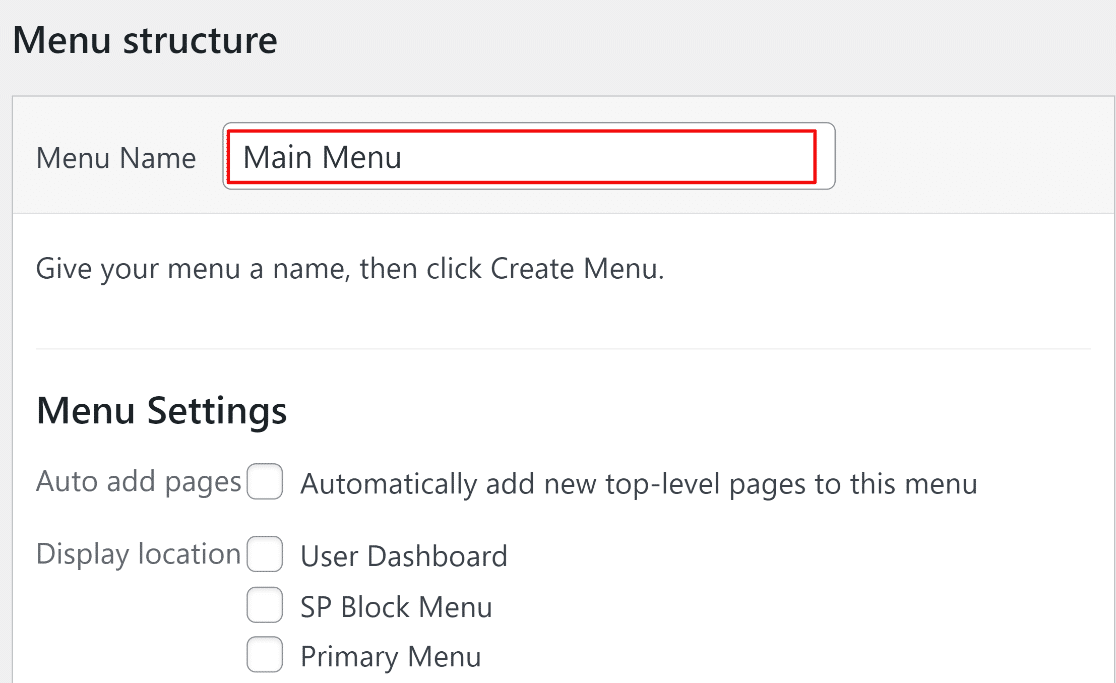
Click Create Menu to set it up. Then add your login page to it using the same steps I just described. Visit your homepage after saving to make sure the login link shows up where you expect it.
Step 7: Redirect the Default WordPress Login URL
This step is optional, but I strongly recommend it. By default, anyone can still visit yoursite.com/wp-login.php and see the generic WordPress login screen.
Redirecting that URL to your custom login page keeps the experience consistent and makes your site harder for bots to target.
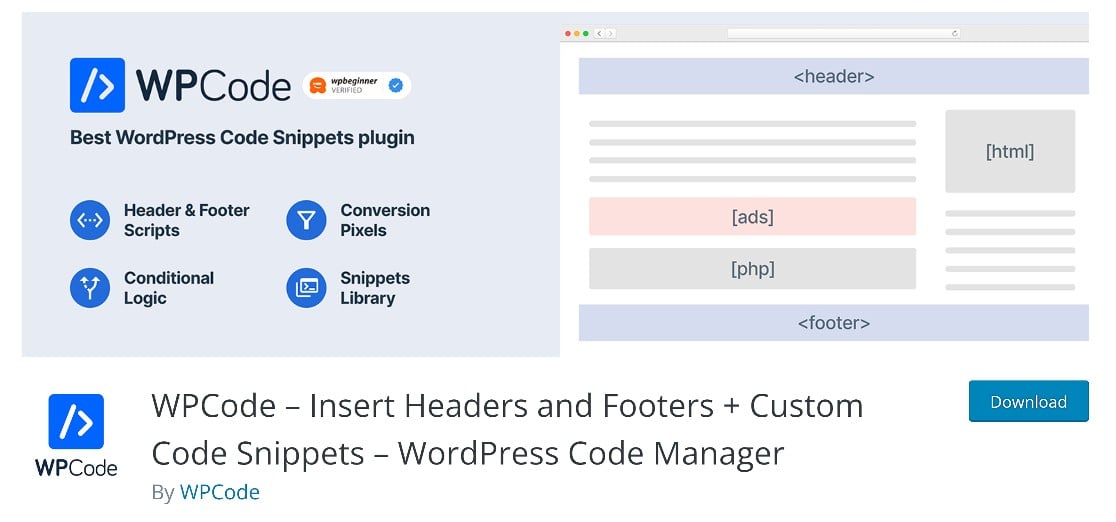
We’ll use WPCode for this. It’s a free plugin that lets you add code snippets to WordPress without editing theme files.
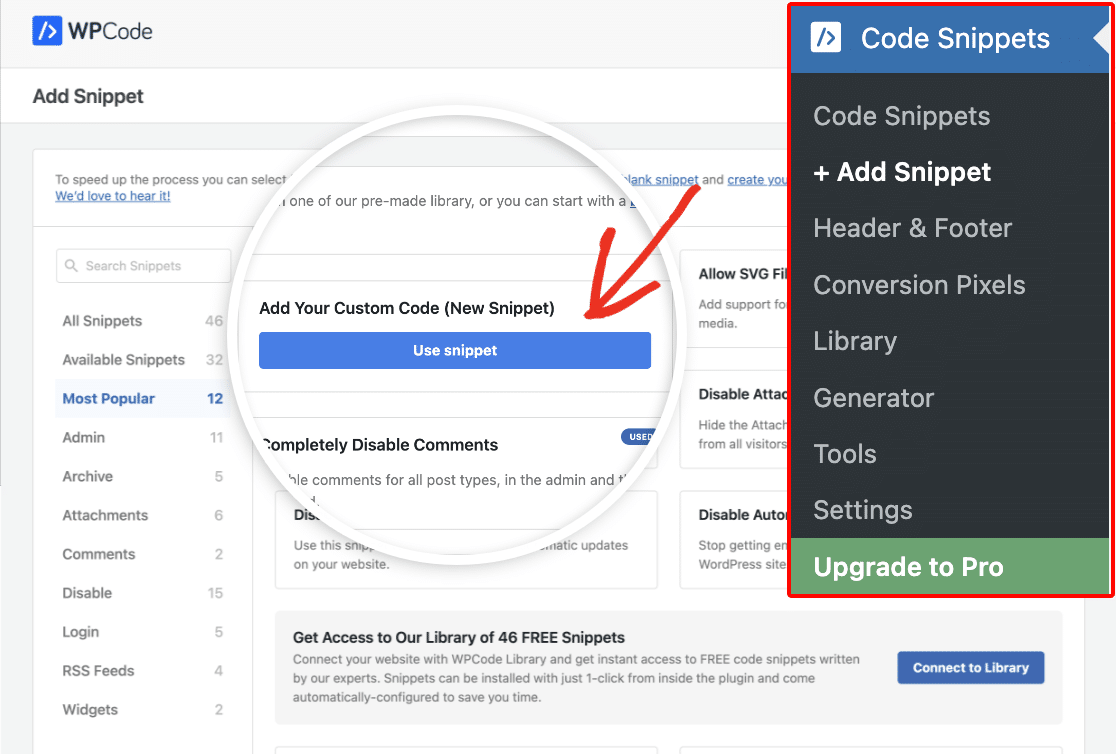
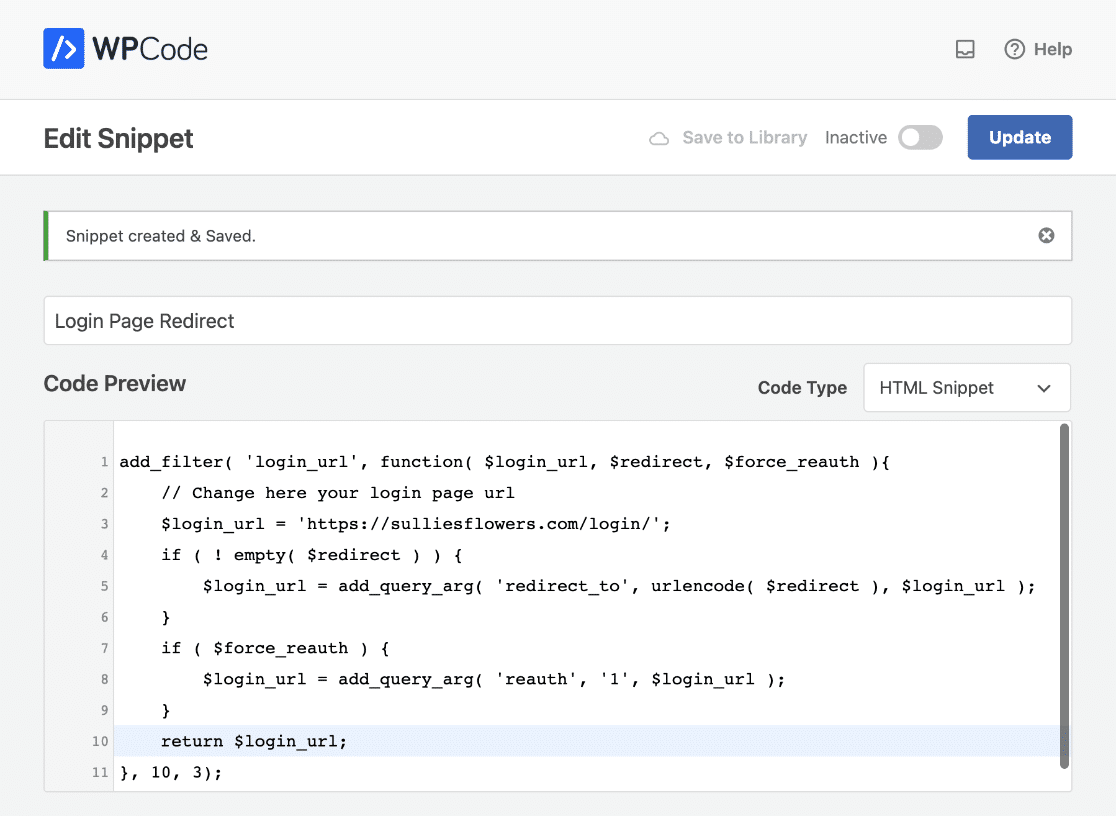
Install and activate WPCode, then go to Code Snippets » + Add Snippet. Choose Add Your Custom Code (New Snippet).
Name your snippet something like “Login Page Redirect” and paste in the redirect code. Make sure to update the URL in the code to match your custom login page’s URL. Click Save Snippet.
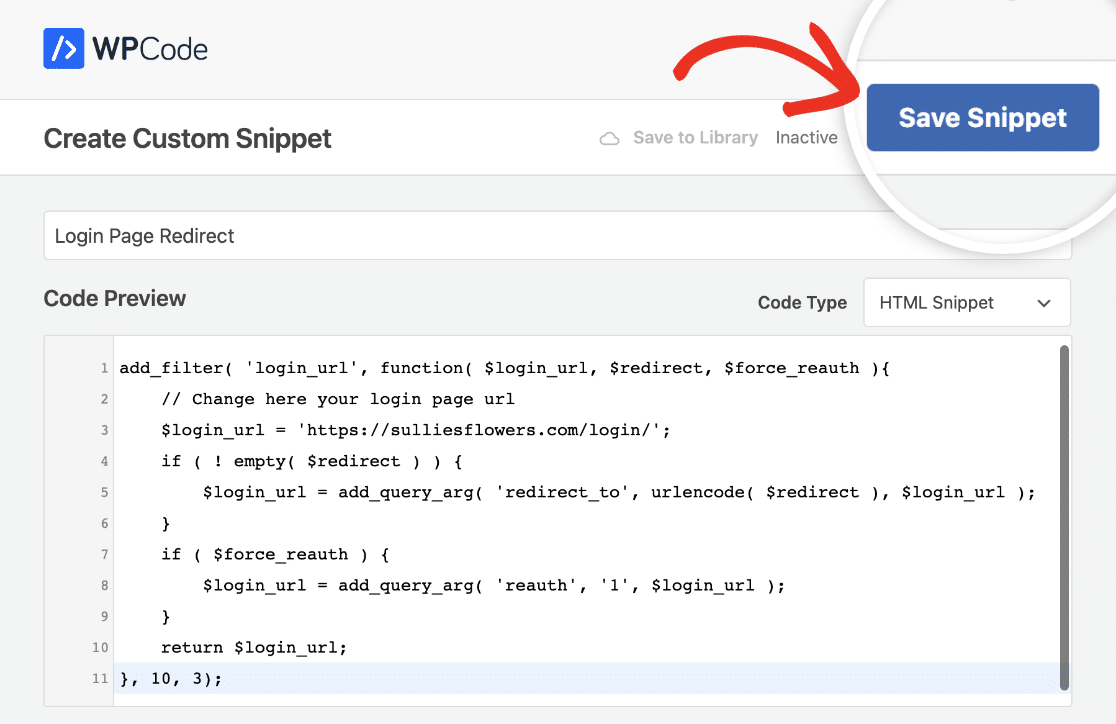
You’ll see a confirmation once it’s saved successfully.
Finally, toggle the snippet to Active at the top of the page.
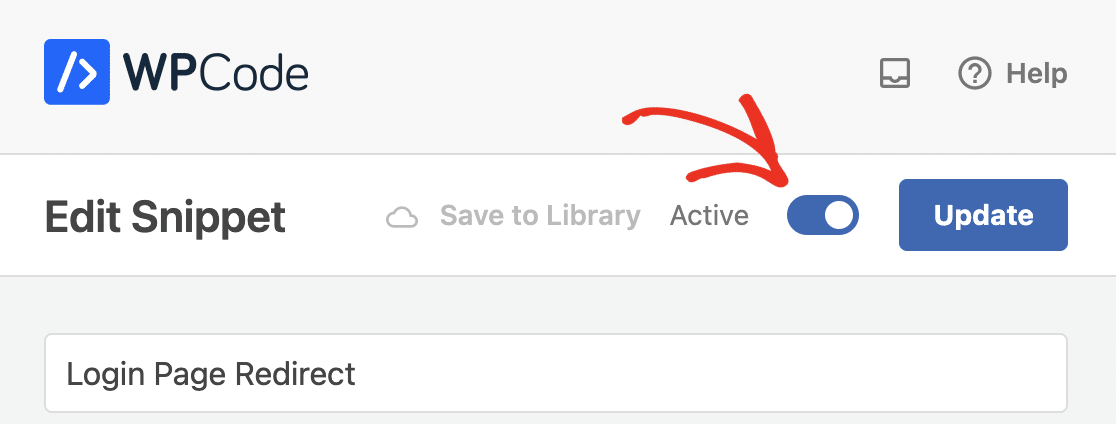
Now anyone who tries to visit wp-login.php gets automatically sent to your branded custom login page instead.
Bonus: Create a Custom Password Reset Form
If your site allows user registrations, you’ll want a custom password reset form too. Without one, users who forget their password get dropped into the default WordPress reset screen, which breaks the branded experience you just built.
The User Registration addon includes a User Password Reset Form template. Go to WPForms » Add New and select it.
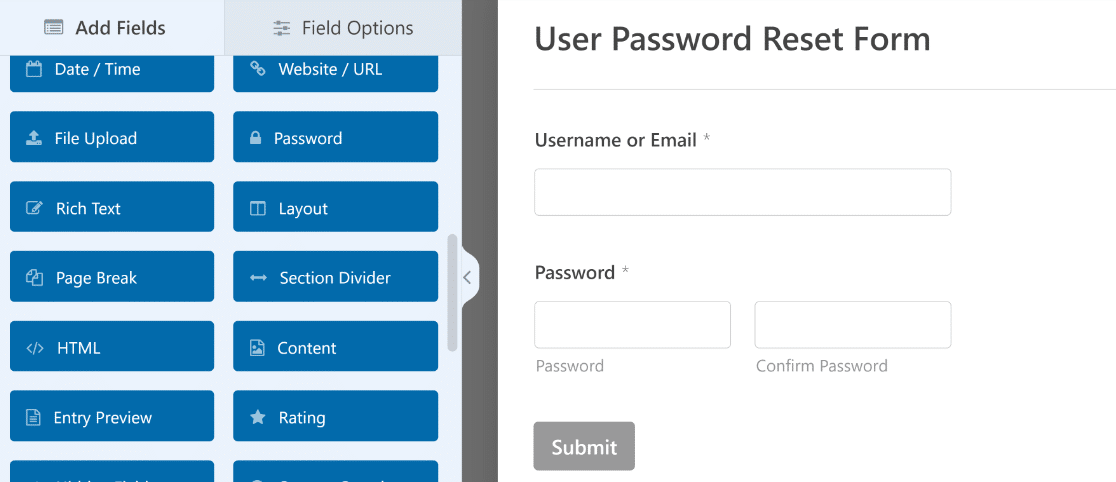
You can customize this form the same way you customized the login form: add your branding with the Content field, style it in the block editor, and publish it on its own page. For a detailed walkthrough, see our guide on customizing the password reset form in WordPress.
FAQs About Custom WordPress Login Pages
If you want to create a custom login page for WordPress, customize the existing WordPress login screen, or add a login form to any page on your site, these answers cover the most common questions.
Can I customize the WordPress login page without coding?
Yes. WPForms lets you build and style a custom login form entirely through its drag-and-drop builder and the WordPress block editor. You can change colors, fonts, button styles, and add your own branding without writing a single line of CSS or PHP.
What’s the best plugin for a custom WordPress login page?
I’d recommend WPForms Pro with the User Registration addon. While some guides suggest using separate plugins for the form, the styling, and the page layout, WPForms handles all three.
You get login forms, registration forms, password reset forms, and visual styling tools in a single package. For a broader look at the options available, check out our roundup of the best WordPress login page plugins.
How do I add a login form to any page in WordPress?
WPForms makes this simple. You can embed your login form using the WPForms block in the block editor, a shortcode, or a widget.
That means you can place a login form on any page, in your sidebar, or in your footer. For the full walkthrough, see our guide on how to display login and registration forms on any page.
Is it safe to redirect the default WordPress login URL?
Yes, and it’s actually a smart security practice. Redirecting wp-login.php to your custom login page means bots and automated scripts targeting the default URL won’t reach your actual login form.
Just make sure the redirect code only applies to GET requests so that the login form’s POST submission still works correctly.
Next, Build a Complete Registration Experience
You now have a fully branded custom login page for your WordPress site. Paired with a password reset form, your users get a professional, polished experience from start to finish.
To round things out, check out how to create a user registration form with WPForms. And if security is a priority, learn how to prevent unauthorized password resets in WordPress to lock things down further.
Create Your Custom Login Page Now
Ready to build your form? Get started today with the easiest WordPress form builder plugin. WPForms Pro includes lots of free templates and offers a 14-day money-back guarantee.
If this article helped you out, please follow us on Facebook and Twitter for more free WordPress tutorials and guides.


For some reason the password reset fields are not showing up with my form, I inspected the page and they are not being rendered at all. What might be the cause?
Hey Matthew – We’d be happy to help! When you get a chance, please drop us a line in support so we can assist.
If you have a WPForms license, you have access to our email support, so please submit a support ticket.
Otherwise, we provide limited complimentary support in the WPForms Lite WordPress.org support forum.
Thanks 🙂