Do you want to add a WordPress contact form widget in your sidebar? Adding a contact form to the page’s sidebar makes it easy for your visitors to read out from any page on your site.
In this article, we’ll show you the easy way to add a contact form in a sidebar widget without writing any code.
Create Your WordPress Form Now
In This Article
Video Tutorial
If you prefer to follow written instructions, keep reading.
How to Add a Contact Form in a WordPress Sidebar Widget
We’re going to start by getting our plugin set up.
1. Install the WPForms Plugin
Start by installing and activating the WPForms plugin. For more details, see this step by step guide on how to install a plugin in WordPress.
Next, go to WPForms » Add New to create a new form.
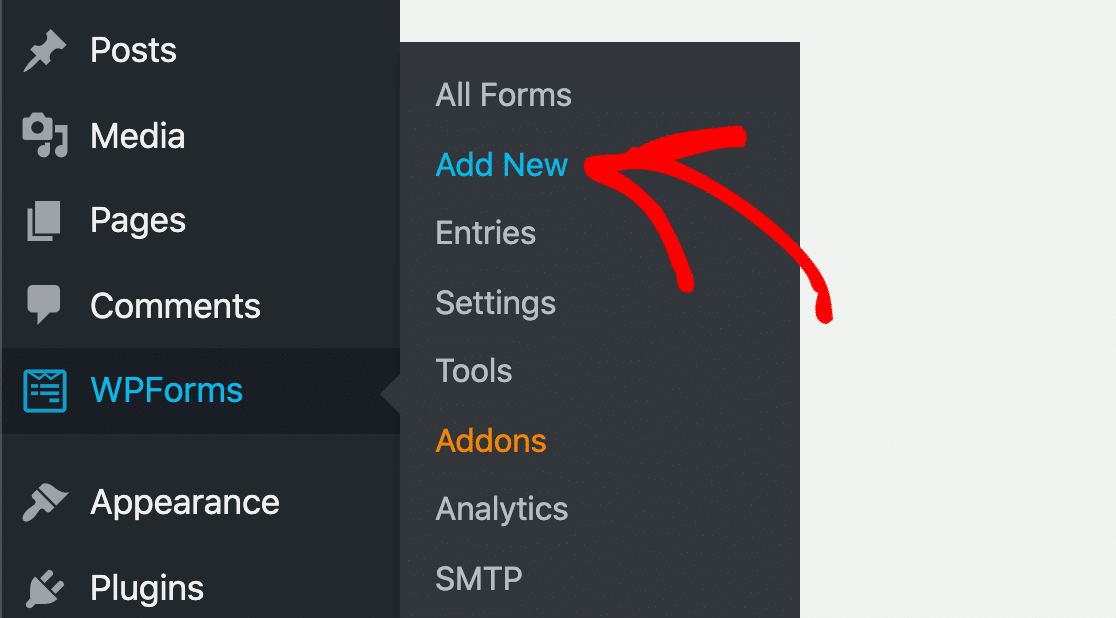
You’ll see the WPForms window open up in your browser. Let’s add a contact form to your website next.
2. Add a Contact Form
On the WPForms Setup screen, select the Simple Contact Form template.
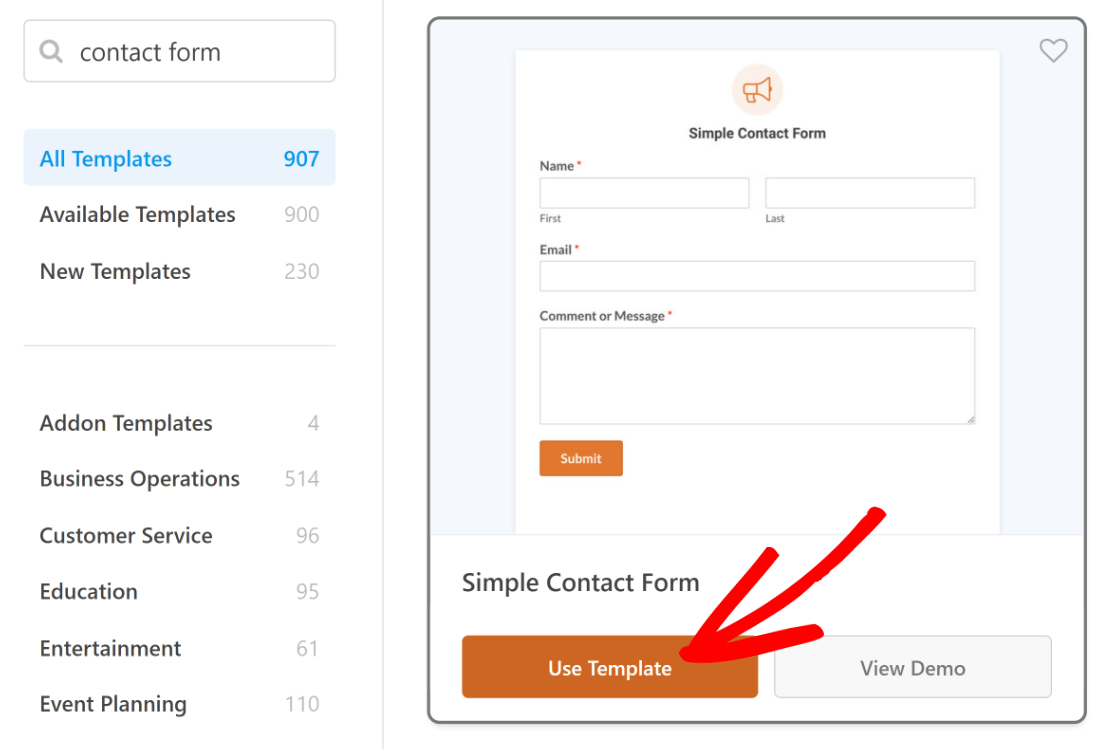
The Simple Contact Form template already has 3 fields:
- Name
- Message
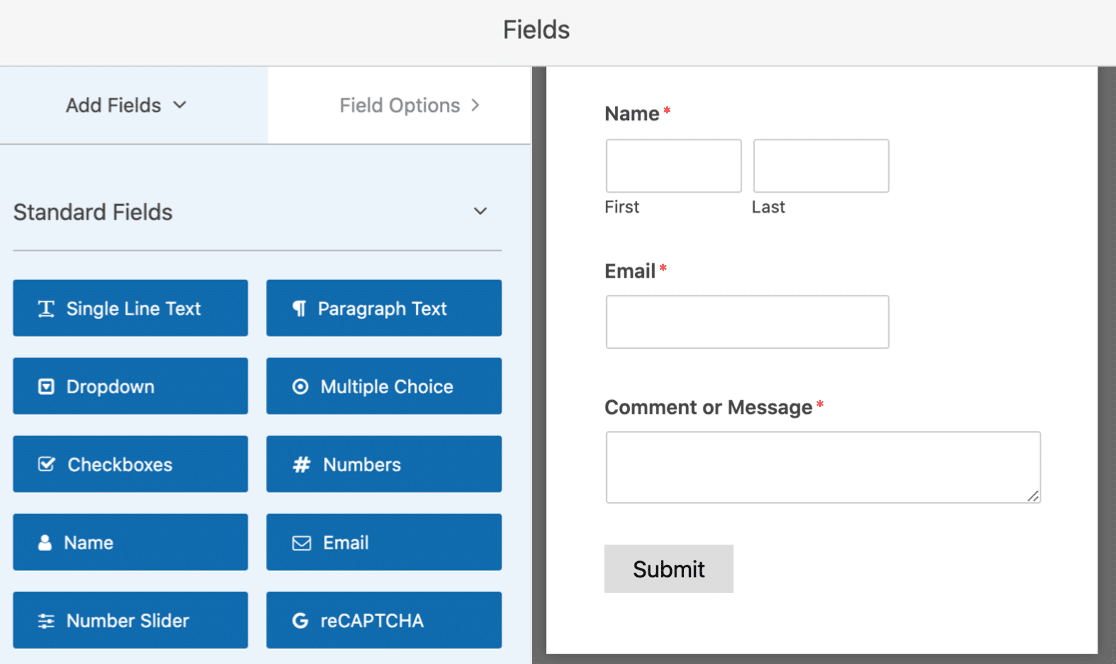
You can add additional fields by dragging them from the left hand panel to the right hand panel. Then, click on the field to make any changes.
By default, WPForms will show a confirmation message when your form is submitted. But because the sidebar is a small space, the confirmation might look a little cramped.
Instead, you might prefer to redirect the visitor to another page. Here are a couple of guides to help with that:
- Learn how to make a thank you page
- Find out how to redirect users to another page when they submit your form.
Be sure to save your changes before closing the form builder window.
3. Add a Contact Form Sidebar Widget
Now that your form is ready, you can add it to your site’s sidebar widget area.
To add a sidebar widget in WordPress, you’ll want to navigate to Appearance » Widgets in the WordPress sidebar.
Are you missing the Widget menu in WordPress? Read this guide on how to add a widget-ready sidebar in WordPress.

On the list, you can see the available widgets on your WordPress site. You can go ahead and drag any widget onto the sidebar area on the right to use it.
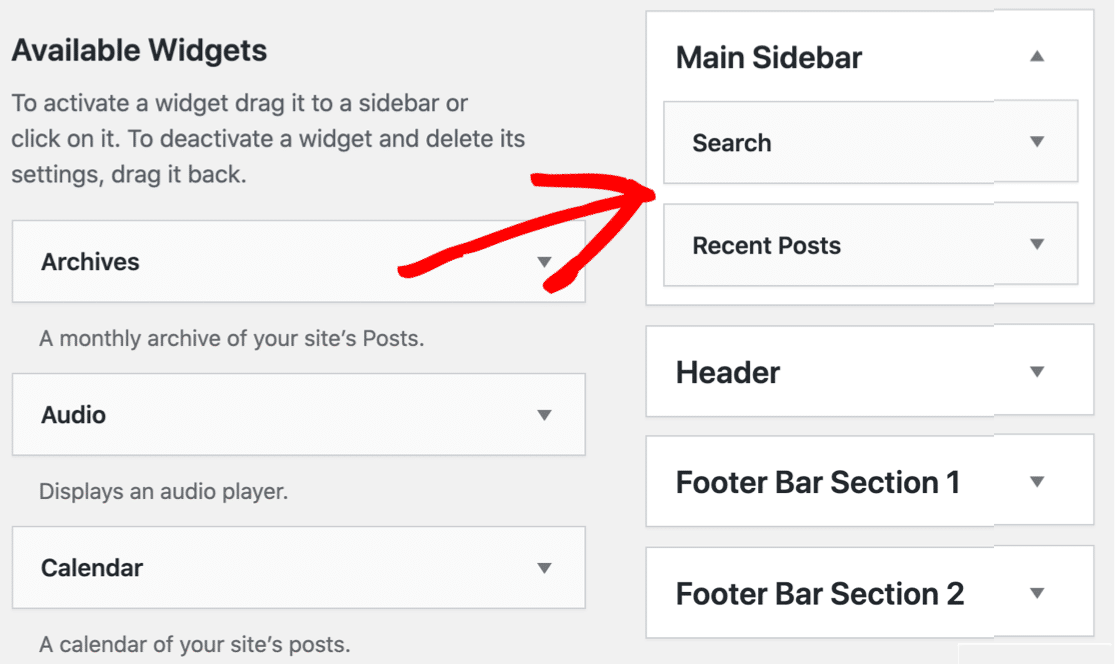
Scroll down until you find the WPForms widget. When you click it, you’ll see all of the available widget areas in your theme.
We selected Main Sidebar to add the contact form widget to our WordPress sidebar. Depending on the way your theme is set up, your sidebar might have a different name.
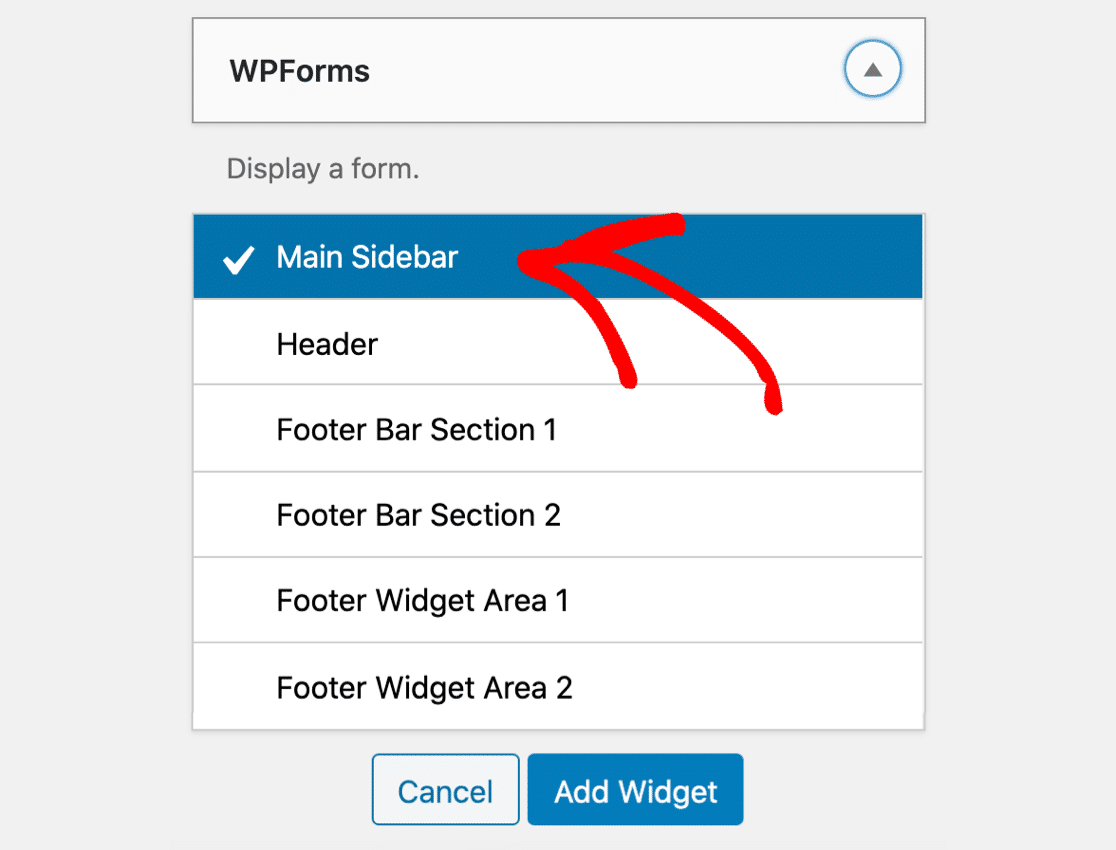
Now go ahead and click Add Widget to add the contact form to your sidebar.
Let’s select the form we want to display. To do that, scroll up and look to the right hand side. You’ll see all of the widgets that you’re currently using.
Click on the WPForms widget to expand it. Here, you can select your contact form from the dropdown.
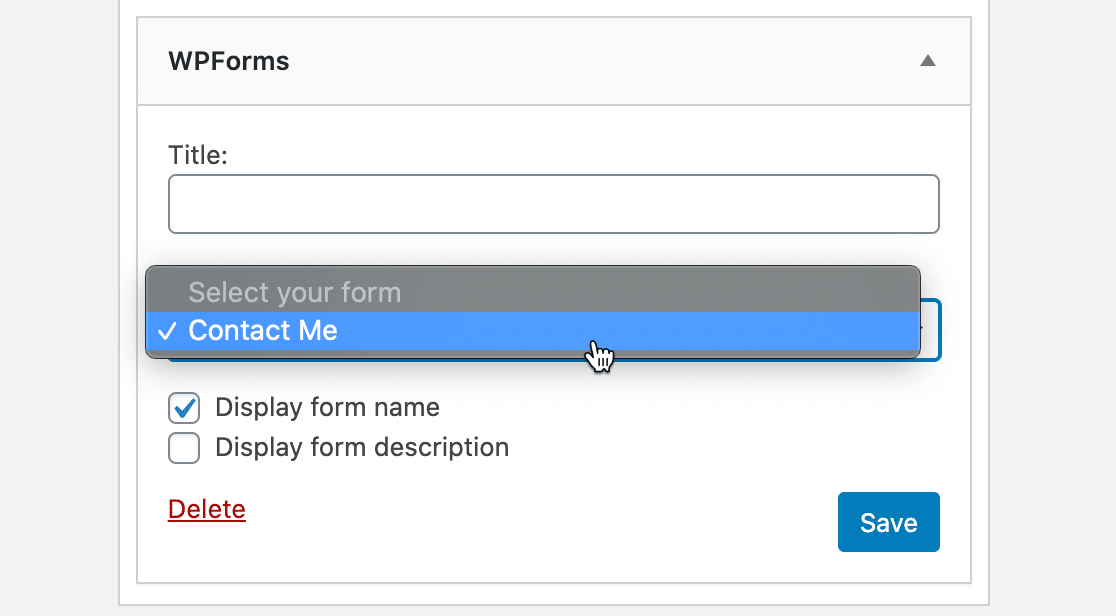
When you click Save, your contact form sidebar widget will be live on your website and ready for your visitors to fill out.
Here’s what our finished sidebar contact form looks like:
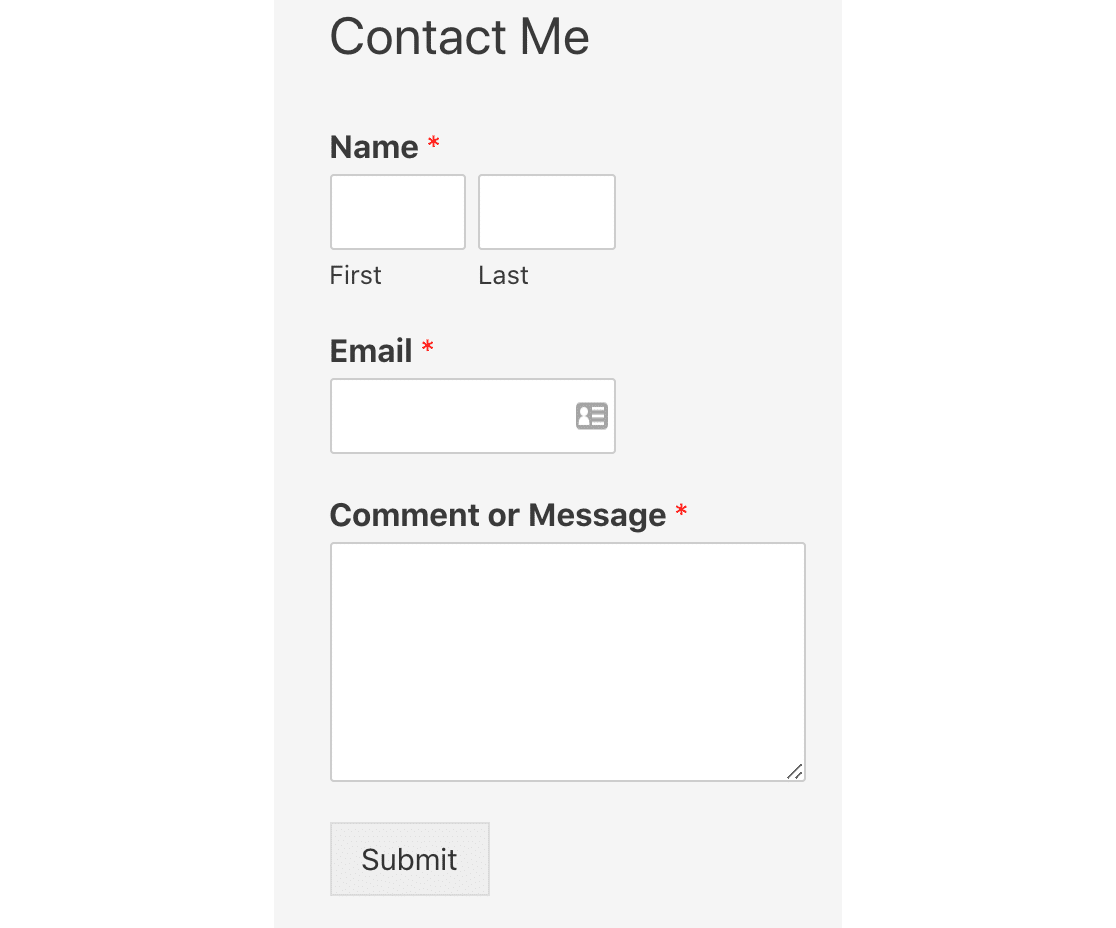
And that’s it! You successfully added a contact form to your WordPress sidebar.
Create Your WordPress Form Now
Next, Make a File Upload Form
You’ve got your contact form in your sidebar widget. Next, would you like to make a file upload form for WordPress?
Accepting file uploads is a great way to take orders let your clients upload documents.
- To learn how to add a file upload field to your form, check out this guide to creating a file upload form in WordPress.
- Check out these contact page examples to see more creative ways to use your forms.
Ready to build your form? Get started today with the easiest WordPress form builder plugin. WPForms Pro includes lots of free templates and offers a 14-day money-back guarantee.
If this article helped you out, please follow us on Facebook and Twitter for more free WordPress tutorials and guides.

