Do you want to learn how to make a Thank You Page in WordPress?
In this tutorial, we’ve made a step-by-step guide on exactly how to create one.
What Is a Thank You Page?
A Thank You Page can be a great place to send people after they complete your forms, so you can keep them engaged with your website.

This seemingly simple page can nurture leads and encourage them to become customers. It can also help cross-promote to current customers. You could:
- Offer a coupon code
- Redirect someone to your purchase funnel
- Collect email addresses in exchange for a free lead magnet (which you deliver on the Thank You Page).
How to Make a Thank You Page in WordPress
In This Article
- Step 1: Install and Activate SeedProd
- Step 2: Create a New Thank You Page
- Step 3: Customize Your Thank You Page Template
- Step 4: Add Content to Your Thank You Page
- Step 5: Connect Your Email List
- Step 6: Configure Your Thank You Page Settings
- Step 7: Publish Your Thank You Page
- BONUS: Automatically Send People to Your Thank You Page
Step 1: Install and Activate SeedProd
You’ll want your Thank You Page to look like a professional web designer built it (but you might not want to pay one).
The best and easiest solution is to use the landing page builder SeedProd. This incredibly powerful plugin offers some amazing features including:
- Coming Soon Pages: Put people into your sales funnel before you even launch.
- WordPress Landing Pages With Social Media Sharing Buttons: Get people to share your landing page so it can reach more like-minded leads on other platforms.
- Webinar Registration Pages: Build a beautiful and inviting page that encourages people to attend your registration.
- Video Landing Pages: Create a distraction-free page where people actually focus on and watch your video.
- Sales Landing Pages: Build a special sales page on WordPress where your sales copy shines and people convert.
- Customizable 404 Pages: Turn potential lost traffic into leads by collecting emails, invite people to other landing pages, and more.
- Custom Login Pages: Customize your user’s login page to match your website and brand
- Email Marketing Integrations: Connect to the most popular services to seamlessly connect your website to your email list.
…and a LOT more.
First, download and install SeedProd.
There’s a free version of SeedProd with everything you need to build simple landing pages. However, in this tutorial, we’ll be using a paid version of the plugin, SeedProd Pro, because it’s the best landing page builder around and gives you great options when building your thank you page in WordPress.

You’ll be emailed your license key which you can go ahead and copy. On the page asking for your license key, enter it and click on Verify key.

Next, scroll down and click on the button that says Create Your First Page.

Up next, you’ll be taken to the SeedProd dashboard. This is where you’ll start making your awesome Thank You Page.
Step 2: Create a New Thank You Page
On the SeedProd Pages page, scroll down to the Landing Pages section and click on the orange Add New Landing Page button.

On the next page, you’ll see tons of templates that SeedProd Pro offers. Click on the Thank You filter if you’d like to see templates specific to making a Thank You Page.
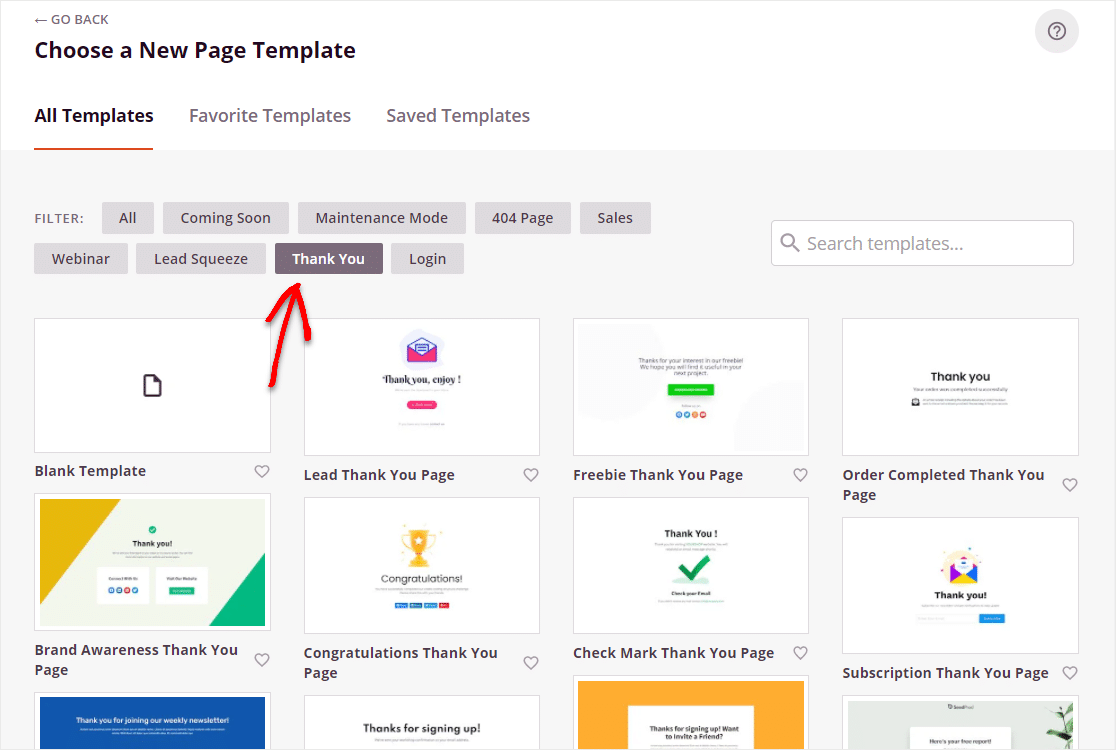
Once you’ve found a template that you like, go ahead and click on it to open it.

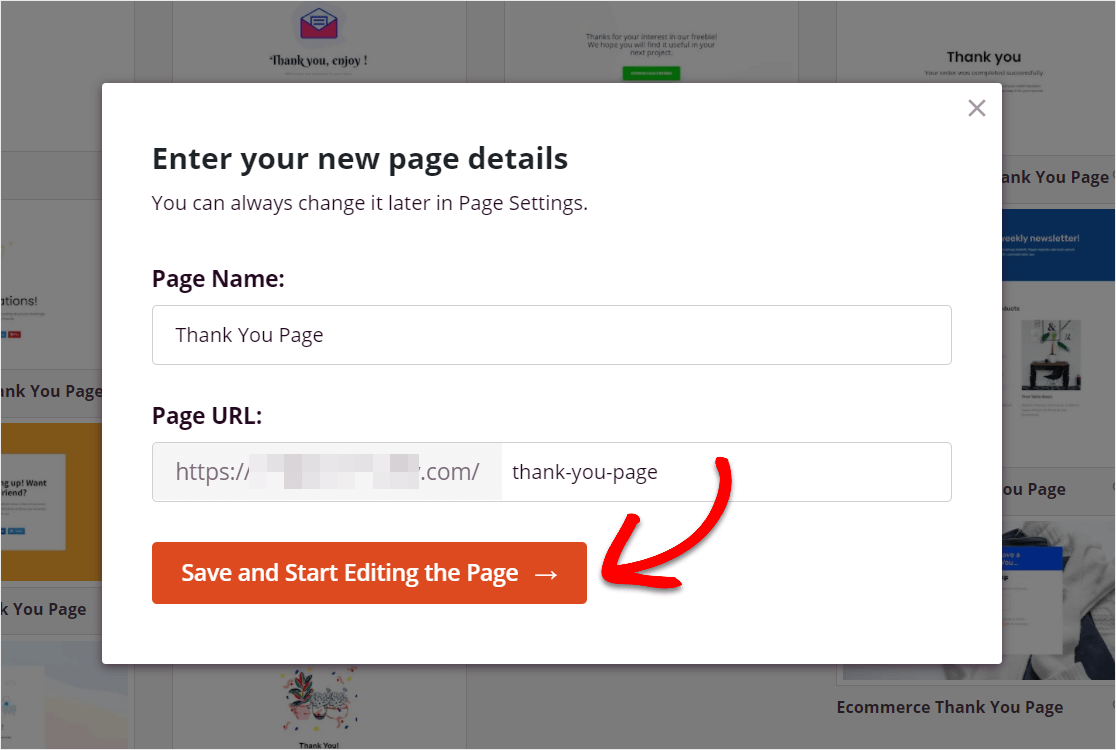
Great job! Now on the next page, you’ll see two blank fields you’ll want to fill out. Don’t worry, you can always change these later before you publish your WordPress Thank You Page (inside the page settings):
- Page Name: Name your page something like Thank You Page.
- Page URL: Customize the Page URL to match your title or SEO needs.
And once you’re ready, go ahead and hit the Save and Start Editing the Page button.
Now, you’ll be taken to SeedProd’s amazing visual editor, where you can easily make the template you selected your own.
Step 3: Customize Your Thank You Page Template
The next step is to start customizing your WordPress Thank You Page so it matches your brand.
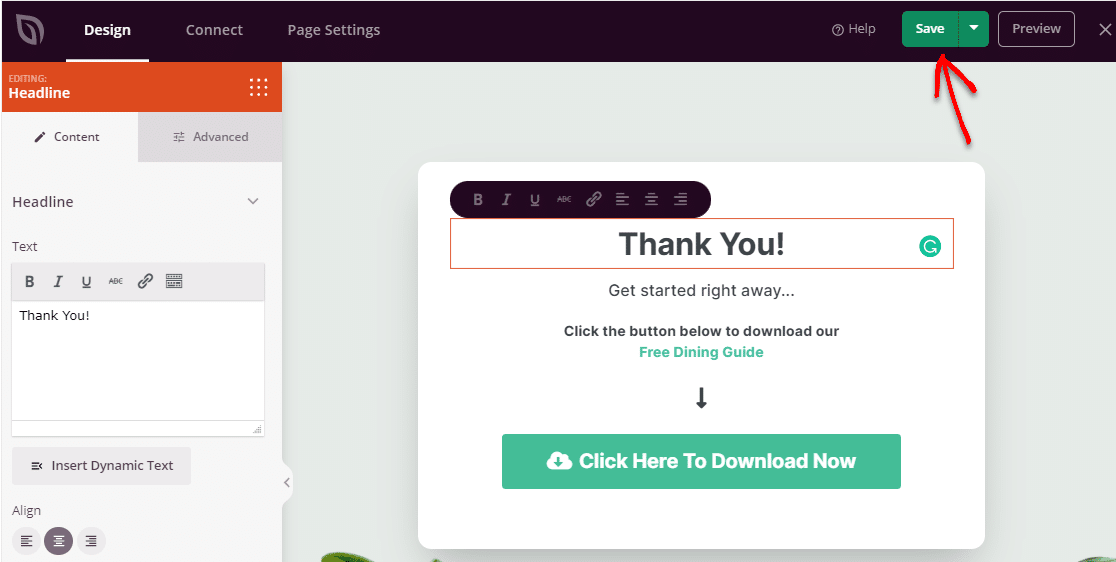
Inside SeedProd’s easy-to-use builder, you’ll see drag and drop fields on the left. Drag them over to your Thank You Page on the right.
Start by changing the logo to your own logo (if you have one) and then editing the Call To Action button to direct to one of your own links.
Don’t forget to click on the Save button to keep all your changes.
Step 4: Add Content to Your Thank You Page
Feel free to explore the fields available to you in SeedProd to see what you’d like to add to your WordPress Thank You Page. You can keep your Thank You landing page simple or go all out.
You can find these fields on the left side of the builder.
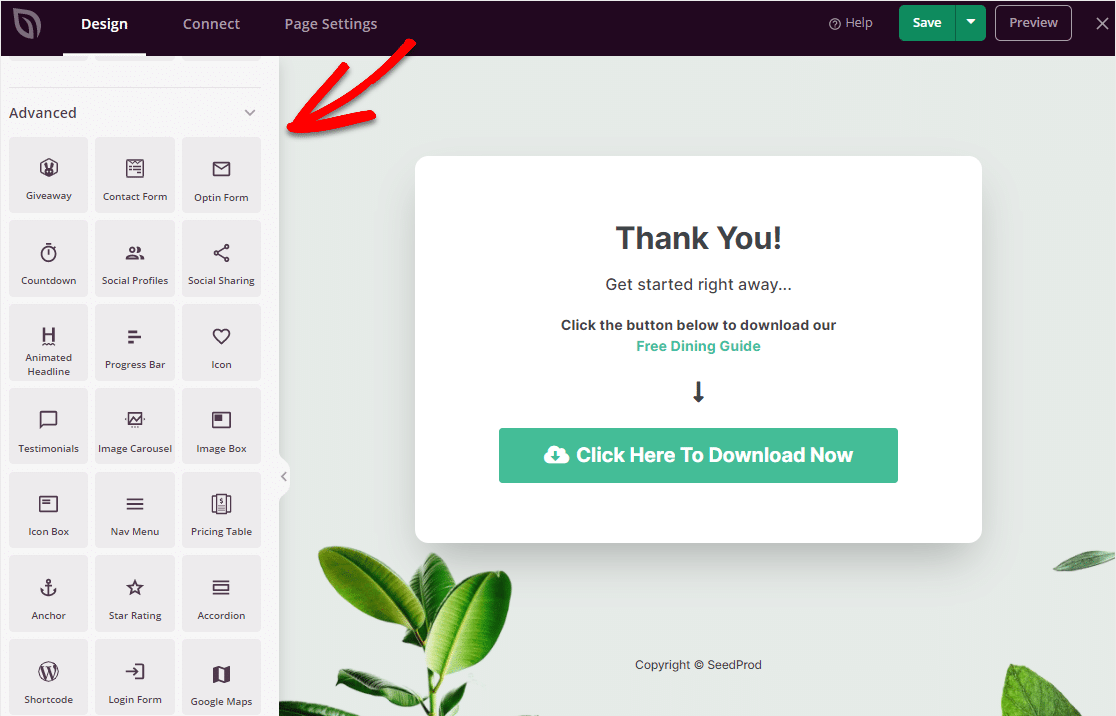
Here’s just an idea of some of the blocks you can use with SeedProd:
- Standard
- Headline
- Text
- List
- Button
- image
- Video
- Divider
- Spacer
- Columns
- Advanced
- Giveaways
- Contact Form
- Countdown Timer
- Social Sharing
- Animated Headline
- Progress Bar
- Testimonials
- Image Carousel
- Pricing Table
- Google Maps
- WooCommerce
- Add To Cart
- Checkout
- Featured Products
- Best Selling Products
…and there are a ton more useful blocks available in SeedProd.
You can also head to the Global Settings on the bottom left hand side of the builder to change fonts, colors, background, and CSS.
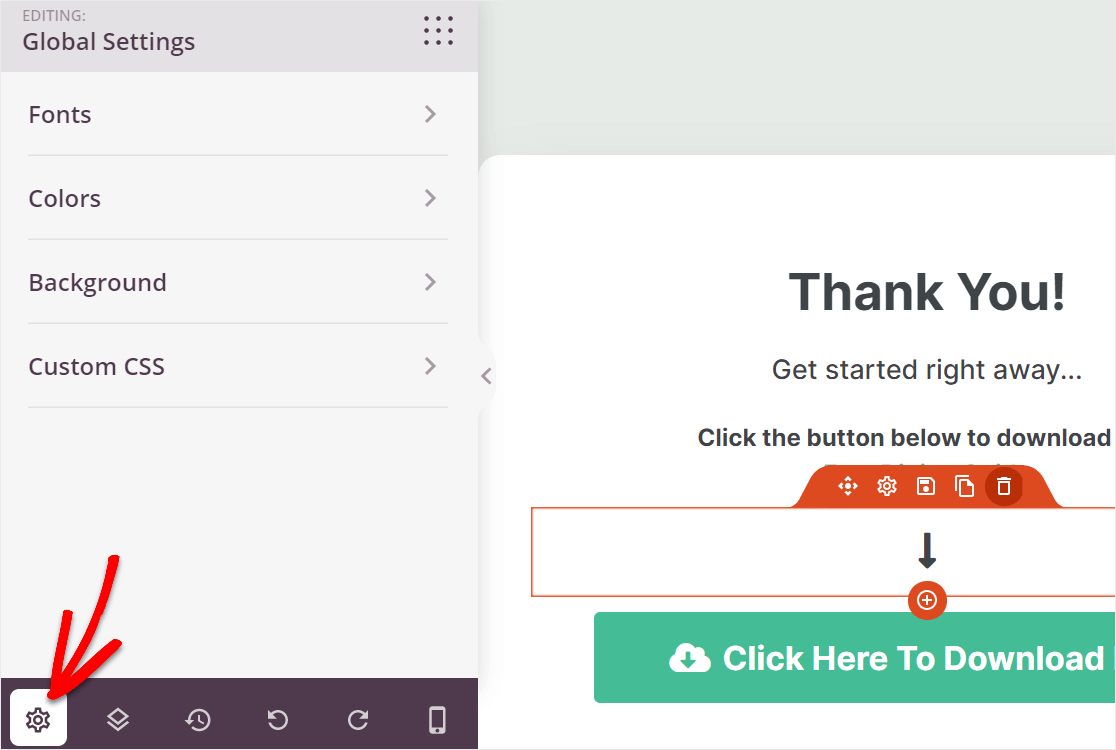
Make sure to save your changes if you make any here.
Step 5: Connect Your Email List
One of the best things about SeedProd is how easily it connects to your email marketing service provider. There are tons of integrations with the most popular email services out there so you can collect a visitor’s email address easily.
When you’re ready to connect and grow your email list with SeedProd, head to the Connect tab.
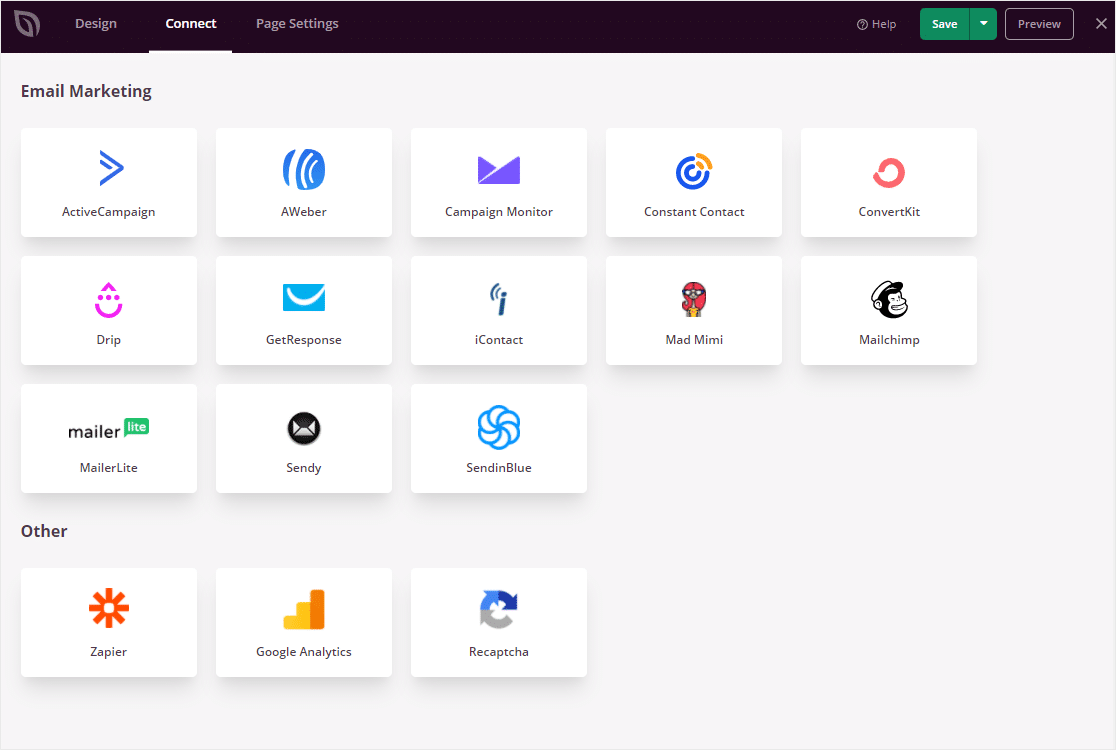
After you sync your email service here, simply click Save.
SeedProd also integrates Zapier, Google Analytics, and Google reCAPTCHA. Feel free to connect your SeedProd account with these to your heart’s content! The more valuable insight and automation you can get on your small business WordPress website the more time you’ll have to focus on growing.
Step 6: Configure Your Thank You Page Settings
One of the last steps before you publish your Thank You Page in WordPress is to customize the settings.
Head to the Page Settings tab. Under General, you’ll find the:
- Page Title: An editable field where you can update your Thank You Page’s title.
- Page URL: You can change the page URL here.
- Page Status: Publish the page or set it back to draft status here.
- SeedProd Link: Enter your custom affiliate link if you’ve joined the SeedProd partner program.
- Isolation Mode: An advanced setting for developers to make sure no other plugins run on the page.
- Facebook App ID: To connect and use the Facebook Page Block.
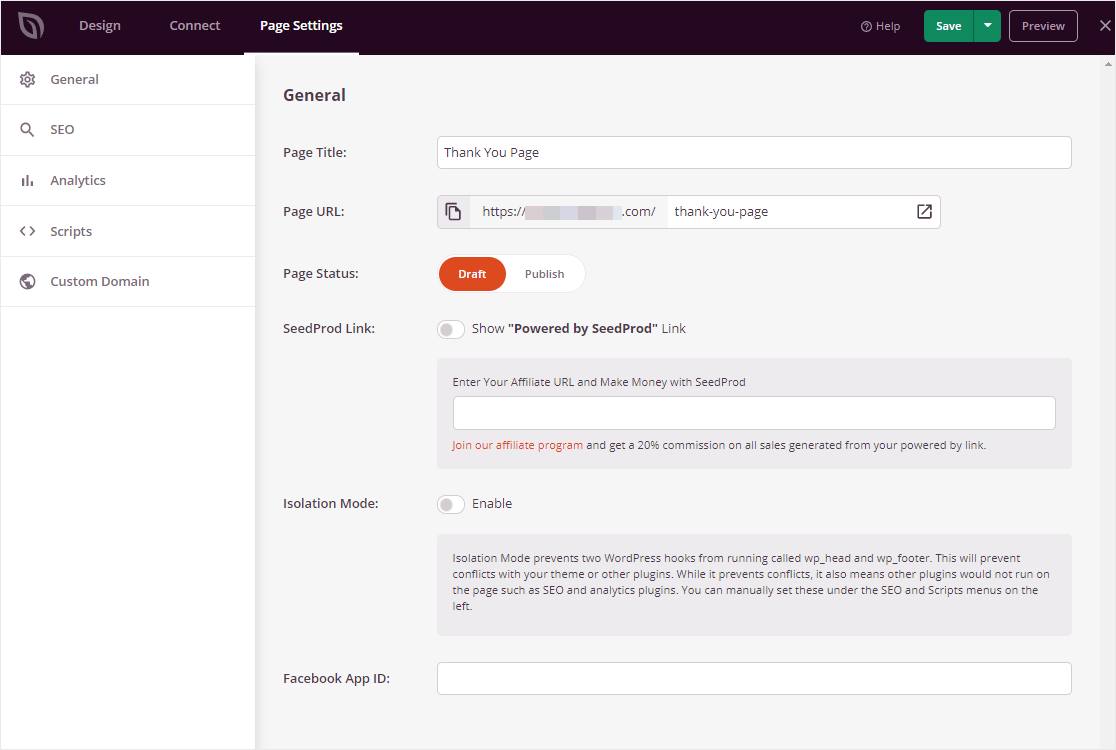
Don’t forget to check out the other tabs too. You can use the SEO tab to connect to a great SEO plugin like All in One SEO. And, you can use the Analytics tab to sync with a Google Analytics WordPress plugin like MonsterInsights.
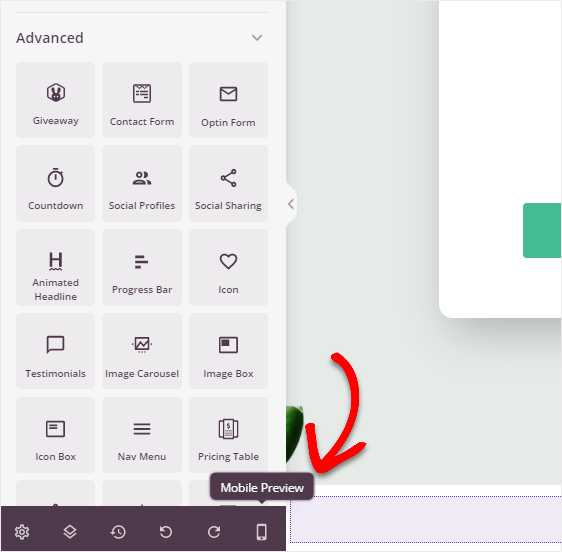
One last thing. Click on the Mobile Preview tab to make sure your Thank You Page will look good to your visitors visiting on phones or tablets.
After you’re all done customizing your Thank You Page settings, click Save. Congrats, you’re now ready to publish your Thank You Page on WordPress!
Step 7: Publish Your Thank You Page
It’s time to publish your Thank You Page on the web.
To do it, simply click on the dropdown arrow on the Save button then select Publish.
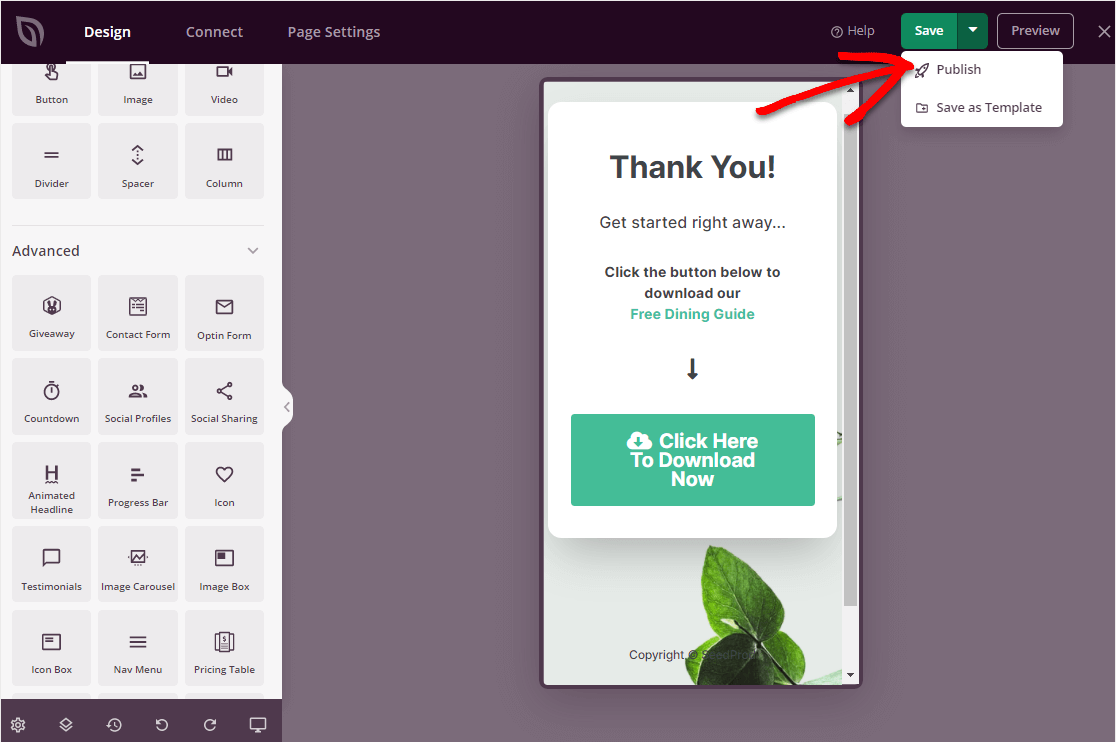
Your fantastic Thank You Page in WordPress is now live on the web. Yep, it really is that easy.

And that’s it, you’ve done it. Now, you’ll want to get people headed to this page you worked so hard on. So, if you want people to automatically end up on this page after they fill out a form on your website, keep reading.
BONUS: Automatically Send People to Your Thank You Page
Using WPForms as your contact form creator, you can extend the possibilities of your SeedProd plugin.

With WPForms, you can create forms that automatically redirect people to your thank you page right after they hit submit.
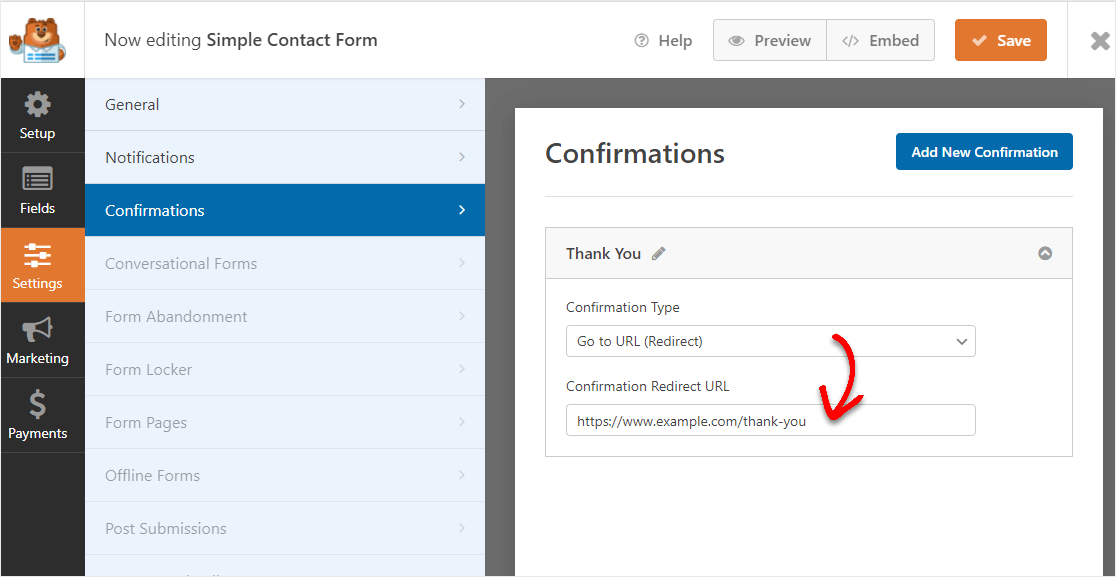
It’s a very cool feature that’s wildly easy to set up. Just check out our tutorial on how to redirect users after a WordPress form submission.
There are tons of smart website owners out there taking advantage of the powerful combo of owning both SeedProd and WPForms, two very popular WordPress plugins for a reason.
Next, Create a Coming Soon Page
And that’s it. We hope this tutorial helped you learn how to create a Thank You Page in WordPress, easily. SeedProd has a lot of amazing features we think you’ll love.
So what are you waiting for? Get started with SeedPro Pro today and start making the website (and Thank You Pages) of your dreams.
And now that you’ve got SeedProd up and running, you should check out our post with the best coming soon page examples out there so you can get yours built quickly.
If this article helped you out, please follow us on Facebook and Twitter.

