
AI Summary
When collecting files through WordPress forms, storage space can quickly become a headache. I’ve seen plenty of websites run into issues when file uploads pile up on their hosting server.
That’s why I always recommend connecting your forms directly to Google Drive. Instead of keeping those uploaded files on your WordPress server, they’ll go straight to your Google Drive account.
So, if you’re tired of juggling file storage and need a smooth solution, you’re in the right place. It’s easy to connect your WordPress and Google Drive with WPForms!
Create Your WordPress File Upload Form Now! 🙂
How to Create a WordPress Google Drive Upload Form
Let’s dive into creating a WordPress Google Drive integration so you can back up files automatically from your WordPress forms.
Step 1: Install and Activate WPForms
When it comes to handling file uploads in WordPress forms, you need a solution that’s both reliable and flexible. That said, WPForms is the best WordPress plugin to upload files to Google Drive.
You can create a form within minutes and accept multiple file types, set specific upload limits, and have everything automatically sync to your Google Drive folders.
If you haven’t installed WPForms yet, you’ll need the Pro version to access the Google Drive Addon. This will allow you to automatically send files to specific Drive folders and even set custom permissions.

And if you’re not sure how to install a plugin in WordPress, you can see our documentation on installing the WPForms plugin for help. It only takes a few minutes to get started!
Step 2: Create a File Upload Form
There are a few ways to set up a form that accepts file uploads, and I’ll show you my favorite approach that works every time.
You can either start from scratch or use one of WPForms’ templates. Open your WordPress admin area and click on WPForms » Add New.

This will open the WPForms form builder. Here, start by giving your form a suitable name. Next, take advantage of WPForms’ extensive library of form templates.

To make your job easier, I recommend you use the File Upload Form template. Scroll down and type in File Upload Form in the search field under the Select a Template section.

When the template opens, you’ll find some common fields within including a file upload field. You can customize this template any way you like or leave it as it is.

For a more detailed guide on file upload forms, see our tutorial on how to create a file upload form in WordPress. When you’re ready, make sure to Save the form.
Step 3: Connect to Google Drive
Before we can start sending files to Google Drive, we need to activate the Google Drive Addon. From your WordPress dashboard, head to WPForms » Addons.

Search for “Google Drive” by typing its name into the Search Addons field. Then, click on the Install Addon button followed by the Activate button.
After that, head to WPForms » Settings in your WordPress dashboard, then click on the Integrations tab. You’ll see Google Drive listed among the available integrations.

Next, click on the Google Drive integration to expand its settings and click the Continue with Google button to connect WPForms to your Google account.

When you click the connect button, Google will ask you to sign in and grant WPForms access to your Drive. It will then request the permissions it needs to store your form uploads.

After authorizing WPForms, you’ll be taken back to WPForms » Settings » Integrations. Look for the little green “Connected” badge next to Google Drive. That’s how you know everything’s connected and ready to go.

Step 4: Add the Integration to Your Form
Back in your form builder, let’s set up exactly how files should flow into Google Drive. Click on Settings » Google Drive, and hit the Add New Connection button.

You’ll see a popup asking for a nickname for this connection. Don’t worry too much about this, as it’s just for your reference. Type in your nickname and hit OK.

Next, pick your connected Google Drive account from the dropdown menu. If you’ve got multiple Google accounts connected, make sure you choose the right one, as that’s where all your form uploads will land.

After picking your account, you’ll see new options pop up that let you control where your uploaded files will live in Google Drive. Under the Folder setting, you’ll see two options:
- Create New: This will create a fresh folder in your Drive (this is what I usually do for new projects). WPForms will suggest using your form name as the folder name, but you can change it to whatever makes sense.
- Select Existing: Use an existing folder if you’ve already got a specific spot in mind for these uploads. Just click on the Select Folder button to browse your Drive.

Once you’ve made your selection, you need to tell WPForms which upload fields should sync with Drive. You can either pick specific fields or choose “All File Upload Fields” to send everything over.

After saving your form settings, a View Folder on Drive button will appear in the Folder section of your Google Drive connection settings.

Clicking this button will open the selected folder in your Google Drive account. This allows you to quickly access and manage uploaded files.
Step 5: Publish Your Google Drive Form
Now that your form is connected to Google Drive, it’s time to get it on your site. You can place your upload form on any page, post, or even in your sidebar.
Let’s add it to a page since that’s what I usually do for file upload forms. Click the Embed button at the top of your form builder to get started.

You’ll see two options: add to an existing page or create a new one. I typically create a dedicated page for file uploads to keep things organized. Choose what works best for your site.

Give your page a name (something like “Upload Documents” or “Submit Files”), then click Let’s Go. The WordPress editor will open with your form already placed and ready to go.

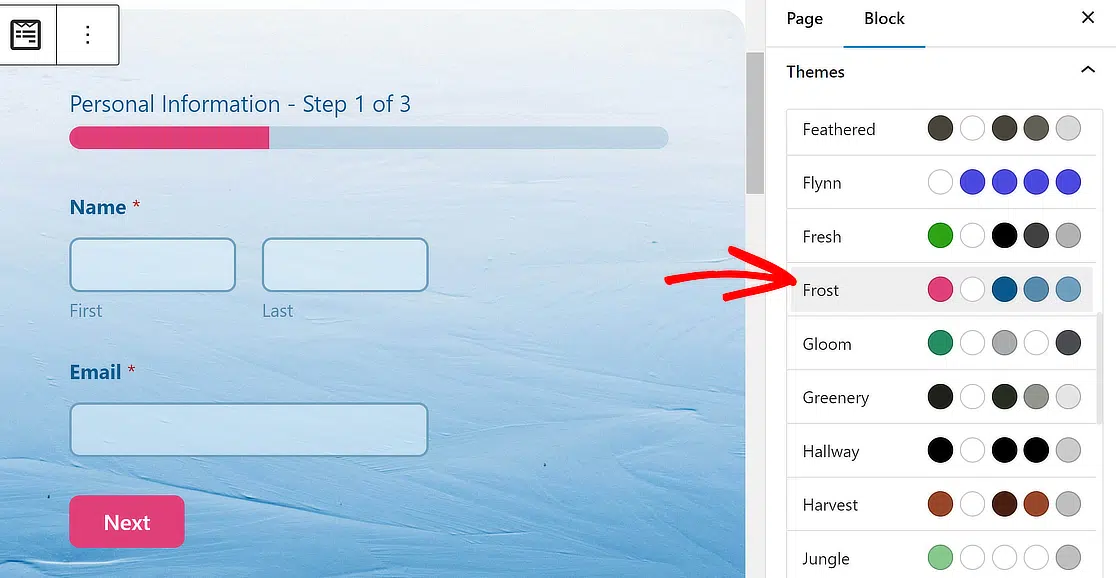
Before hitting publish, let’s make your form look professional. Click around the form block to open the styling options panel. This is where you can really make your upload form stand out.
To make quick work of styling your form, you can select a ready-made theme under the Form Theme section. In this example, I’m using the Frost theme (which is one of my favorites).
Feel free to try other themes; you’ve got lots of options. If you like experimenting directly, you can also manually customize different elements of the form more precisely.
Once you’re happy with how everything looks, hit Publish. Your Google Drive-connected upload form is now live! When users submit files, they’ll go straight to your designated Drive folder without touching your WordPress storage.
FAQs on How to Create a WordPress Google Drive Upload Form
Creating a WordPress Google Drive upload form is a popular topic of interest among our readers. Here are answers to some common queries about it:
Why create a Google Drive upload form?
A Google Drive upload form gives you the reliability of having your uploads from forms safely stored at all times. Normally, form uploads are stored on your website’s servers. However, your website can quickly run out of space if all of your uploads are stored within it.
When you connect Google Drive with your contact form, it will also send a copy of those uploaded files to your Google Drive. That way, you will have copies of those uploaded files on both your server and Google Drive.
How do I create a form that allows uploads to Google Drive?
To create a form that lets users upload files directly to Google Drive, you can use WPForms along with Google Drive Addon.
First, build a file upload form in WPForms, then connect WPForms with Google Drive. This will allow the form submissions to send files straight to your Google Drive automatically.
How to create an upload form in WordPress?
To create an upload form in WordPress, install and activate the WPForms plugin. Use the drag-and-drop form builder to add a file upload field, customize the form, and set it to accept files.
You can further integrate it with services like Google Drive using the dedicated addon. Similarly, you can send entries to Google Sheets.
Next, Automate WordPress Tasks
If you think the idea of doing all this stuff with your forms automatically is cool, you’ll definitely want to check out this post on the best WordPress automation tools.
And, if you’re a nonprofit looking for ways to track donations effectively, here’s our guide to creating an automated donation tracker using the WPForms’ Google Sheets integration.
For some other ways to use Google Workspace apps on a WordPress site, check out our guide to the top Google Workspace plugins for WordPress.
You may also enjoy reading our guide to changing the max file upload size in WordPress. This may come in handy when you’re working with file upload forms.
Create Your WordPress Form Now
Ready to build your form? Get started today with the easiest WordPress form builder plugin. WPForms Pro includes lots of free templates and offers a 14-day money-back guarantee.
If this article helped you out, please follow us on Facebook and Twitter for more free WordPress tutorials and guides.


Is this entire process end-to-end encrypted? Where are the files stored temporarily before they are transferred to Google Drive? It seems to store them on a server called i0.wp.com. What is this server? Is it secure? Who owns/controls it?
Hey Ryan.
In order to make sure we answer your question as thoroughly as possible, we will be responding via email support in your current active ticket on the same.
I hope this helps!
My form recently stopped sending the file to Google drive. When I run the Zap by itself, it executes fine, placing the last file uploaded in WPFORMS into Google drive. However, if I trigger it via the WPFORMS, I receive the following error “Required field “file” (file) is missing.” I talked to multi-level ZAP support. ZAP indicated this is a known issue with WPFORMS and asked me to contact WPFORMS. Can someone tell me if this is a known issue and if someone is working on it?
Hey Erik, we are sorry for any trouble. In order to make sure we answer your question as thoroughly as possible and avoid any confusion.
Would you mind reach out to us with additional details so that we can help you further on this case?
Thanks.
How to user want see that file from user side
Hey Arjunan we are sorry for any trouble. In order to make sure we answer your question as thoroughly as possible and avoid any confusion.
Would you mind reaching out to us with additional details so that we can help you further on this case?
Thanks.
I like this solution, but it’s missing something I need.
I’d like to be able to create a pulldown in the upload form that allows the user to select which folder in the google drive to upload to.
For example if my user is uploading a PDF for a presentation on Friday, I’d like them to be able to select the Friday folder from the pulldown. Does Zapier allow for this?
Hi MJ,
Unfortunately, I am sorry to let you know that we do not have an inbuilt feature to select the specific folders as you have mentioned via dropdown. I agree it would be super helpful! I have gone ahead and added this feature to be considered as a future enhancement.
Thanks,
Is there any way to set this up to bypass storing the file on the server (and size upload limit), and instead save files directly to Google Drive?
Hi Cody,
Yes, you can configure your form to send uploaded files directly to Google Drive, bypassing local server storage and its size limits. Just enable the “Delete Local Files After Upload” option in the addon settings from the form builder. This ensures files are only stored in your connected Google Drive account. You can find more details about this in our documentation: Google Drive Addon.