
AI Summary
If you’ve ever tried to upload an image, a video, or a PDF to WordPress and hit a wall, you’ve probably seen a message like “file exceeds the maximum upload size for this site.”
It’s one of the most common roadblocks in WordPress, and the good news is that it’s usually quick to fix. WordPress doesn’t set this limit on its own. Your hosting company decides it, and the size you get depends on your plan.
In this guide, I’ll walk you through seven ways to increase it, starting with the easiest no-code option and working up to the more hands-on methods.
What Is the Max File Upload Size in WordPress?
Your maximum upload size is the largest single file WordPress will let you add through the media library or a form. It’s set by your web host, so it varies from one site to the next. Most hosts land somewhere between 2 MB and 500 MB by default.
Hosts cap the size to keep servers running smoothly and to limit the strain that very large uploads put on memory and bandwidth. That’s reasonable on a shared server, but it gets frustrating when you need to add a high-resolution photo or a longer video.
Before you change anything, it helps to know what you’re working with. From your WordPress dashboard, go to Media » Add New, and you’ll see your current limit listed under the upload box.

Knowing the precise upload file size allowed for your site will help you decide how much to increase it by.
How to Increase Max File Upload Size in WordPress
Increasing the max file size can help users upload higher-resolution images, videos, or other media. You can increase the max file upload size in a few ways, including by using a code snippet or directly editing the functions.php file.
Method #1: Adjust Max File Size With a Plugin (No Code)
The easiest way to increase the maximum file size limits in WordPress is by using a very handy plugin known as Big File Uploads.
To get started, download and install the plugin on your website. If you need some help with this step, here’s a quick guide to installing WordPress plugins.
When the plugin is installed, open your WordPress dashboard and navigate to Settings » Big File Uploads.

This will take you to the plugin’s settings page where you can simply specify the maximum upload file size using the adjustment settings on the right and then press Save.

This method requires no technical knowledge on your part and we highly recommend trying this if you’re looking for a quick and easy way to change your file size limits in WordPress.
Method #2: Add a Code Snippet Using WPCode (Easy)
Another fairly easy way to increase the max file size limit in WordPress is by using a plugin called WPCode. Although you’ll be working with some very simple lines of code with this method, it’s still super easy to do.
WPCode is an awesome solution for inserting custom code into your functions.php file. Among its many benefits, it’s extremely easy to use and includes advanced code validation that safeguards you from making coding mistakes that may accidentally break your theme or site.

To install WPCode, you can follow the same steps you followed for installing the plugin in the previous method above. After you’ve installed WPCode, head into the WordPress admin area and navigate to Code Snippets » + Add New.

Next, you can choose an existing snippet from WPCode’s pre-built library or create your own custom snippet. For this tutorial, we need to create a custom one.

Now, start by adding a title for your snippet and then paste in your code. Just make sure you select the right code type first. Since we’re working with PHP, use the Code Type dropdown to select PHP Snippet.

At this point, you can simply copy and paste this code inside the code editor:
In the code above, the first line defines the max file upload size, which is 256M i.e. 256 MB, in this case. You may notice that the second line has an identical figure. This line defines the maximum size of posts.
We’re focused on increasing the max file upload size, but the max post size is important too. Here’s why: media files will usually be used in posts. Naturally, you’ll need your posts to have enough space to accommodate your largest files.
So you’ll have to set the max post size to a value equal to or greater than the max file upload size. Now that you know how this works, go ahead and enter the code, changing the figures to whatever values you’d like.
Once you’ve done this, you can go ahead and check the insertion settings for the code. In this instance, you won’t have to change anything and simply use the default insertion options set to Auto Insert as the insert method and Run Everywhere as the location.

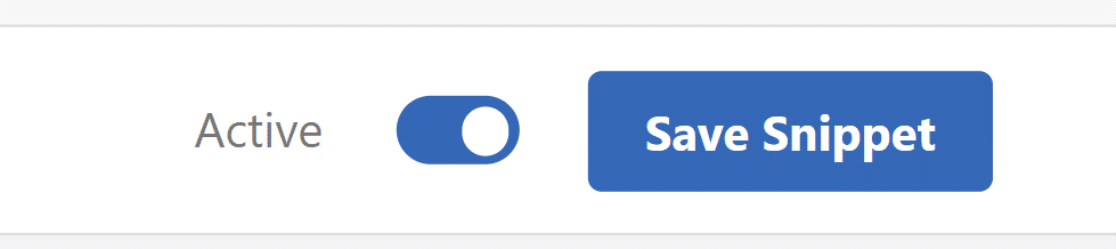
Then scroll back up and click Save Snippet. Right next to the save button, you’ll also find a button that should currently read “inactive”. When you’re ready to activate the code, click on the toggle button and it should now immediately read “Active”.
And that’s it! You can go and check your maximum file size settings. As long as your web host doesn’t restrict the file size, this code snippet will work perfectly to increase your maximum file limit.
Method #3: Directly Edit the functions.php File (Advanced)
The functions.php file can be accessed from within the WordPress backend, making it easy to use.
If you’re comfortable working with live code, this method might be for you. However, we don’t recommend this method for beginners, as there’s a risk of causing serious errors that might break your site.
If you do decide to use this method, the best practice would be to create a backup of your website first before you begin.
Once your site is safely backed up, you can find the functions.php file by navigating to Appearance » Theme File Editor.

A modal will pop up warning that you’re about to edit your website’s core files. As we mentioned, you’ll need to be careful while working with the functions.php file.
But if you’ve created a backup of your website, feel free to proceed by clicking I Understand.

Next, look for the functions.php file from the list of files on the panel on the right of your screen.

Scroll to the bottom of the page and paste in the same code as before:
Remember that the values in the first two lines define the max file upload size and post size. In this code, the max file and post size is set to 256M, which means you can upload file sizes as large as 256 MB.
If you’d like to change the max limit to a different value, just change the numbers at the end of the first two lines of code to whatever value you’d like (remember that ‘M’ stands for MBs here).
Now, go ahead and paste this code at the bottom of the functions.php file.

Remember to save these changes before you exit.
Now that you know how to adjust the file upload limits for WordPress, did you know that you can also change the max file size limit for your WordPress forms separately?
If you have forms on your site that accept file uploads from visitors, it might be a good idea to set an appropriate file upload size limit specifically for these forms.
Method #4: Adjust File Upload Size for WordPress Forms
As mentioned, this method is all about adjusting the max file upload size just for your WordPress forms.
Thankfully, this is straightforward and doesn’t require any code whatsoever.
Here’s what to do:
Install WPForms
You’ll need a form builder that allows you to create file upload forms and change max file size limits.
Not many WordPress form builders have these features. Fortunately, WPForms does!
WPForms Pro is the best form plugin for WordPress with tons of easy-to-use features and settings, including the ability to adjust the max file upload size for form attachments.

After purchasing WPForms Pro, you can go ahead and install WPForms on your site. WPForms allows you to create pretty much any type of form, using its powerful drag-and-drop form builder.
You can also choose from 2,100+ form templates to simplify the form creation process as we’ll show in the next step.
Create a New Form
From the WordPress dashboard, click on WPForms » Add New.

This will open up the template library where we’ll choose the Simple Contact Form template. Click on Use Template to open up the form builder.

This will load the Simple Contact Form form template.

Like all WPForms templates, this template can be fully customized. In the next step, we’ll add a File Upload field to this form and set a max upload size limit for it.
Add a File Upload Field to Your Form
In the form builder, you’ll see the available form fields in the panel on the left. Look for the File Upload field in the Fancy Fields section.
Drag and drop the File Upload field, placing it where you’d like to include it in your form on the right.

After adding the File Upload field, click on it to open the Field Options on the left hand panel.

Scroll down to Max File Size and enter the figure you want. Remember that you can’t set a max file upload size higher than what your WordPress site allows. However, you can set a lower size limit specifically for WPFroms if you’d like.

Changing this setting will also change the max file attachment size for file upload attachments to your form’s email notifications.

For more details on file upload attachments, see our email notification file upload attachments documentation. When you’re done, go ahead and Save your form.
Publish the Form on Your Site
To publish your new form, click on Save at the top right corner of the form builder.

Next, click on Embed to add your form to a page.

This will open up a modal asking if you want to publish the form on an existing page or if you want to create a new page. In this example, let’s embed the form in a new page.
Select the Create New Page button to continue.

Enter a title for your new page and press Let’s Go.

You’ll now be redirected to your WordPress page edit screen with your form already embedded in it.
This is a good chance to take a look at your page, edit or add any other elements if needed, and publish the page when you’re ready.

After the form is live, you can go ahead and check it out. Here’s what the form we built in this tutorial looks like from the frontend:

As you can see, we have a form with a file upload field that allows users to upload a file from their computer. If a user uploads a file that is larger than the limit we defined, WPForms will refuse to upload and give an error:

On the other hand, visitors will have no problems uploading supported file types that are under the specified size limit:

That’s pretty much it! Now you know how to increase the max file upload size in WordPress!
FAQs About the Max File Upload Size in WordPress
Changing the maximum upload size in WordPress tends to bring up a few of the same questions. Here are quick answers to the ones I hear most often.
What is the default maximum file upload size in WordPress?
WordPress doesn’t set the limit itself. Your web host does, and it usually falls between 2 MB and 500 MB. You can see your own limit by going to Media » Add New and looking under the upload box.
Why does WordPress limit the file upload size?
The cap protects server performance. Large uploads use more memory and bandwidth, so hosts set a sensible default to keep sites stable, especially on shared plans where many sites share the same resources.
Why didn’t my upload limit change after editing functions.php?
Some hosts don’t allow PHP values like upload_max_filesize to be changed while the site is running, which is exactly what the functions.php and WPCode snippets rely on. If your limit stayed the same, that’s almost always the reason. Editing .htaccess, creating a php.ini file, or asking your host to raise the limit will work where the snippet can’t.
What is the difference between upload_max_filesize and post_max_size?
The upload_max_filesize value is the largest single file you can upload. The post_max_size value is the total size of all data sent in one request, including any files. Since your uploads travel inside that request, post_max_size should always be equal to or larger than upload_max_filesize.
How do I set a different upload limit just for my forms?
Add a File Upload field to your form in WPForms, click it, and set the Max File Size in the field options. You can keep it lower than your site’s limit if you want a tighter cap on what visitors send, though it can’t go higher than your site’s overall limit. It’s also smart to keep file uploads secure whenever you accept files from the public.
Next, Build a File Upload Form Your Visitors Can Actually Use
Now that your upload limits are set the way you want, you can put them to work. If you collect files from visitors, the best WordPress file upload plugins guide is a good next read, and you can also let people send more than one file at once on a single form.
Create Your File Upload Form Now
Ready to build your form? Get started today with the easiest WordPress form builder plugin. WPForms Pro includes lots of free templates and offers a 14-day money-back guarantee.
If this article helped you out, please follow us on Facebook and Twitter for more free WordPress tutorials and guides.


Method 1 does not work because unless you pay for the “pro” version of WPCode – the free version is now crippled to the point of being useless.
Method 2 does not work at all.
What works is to add these 4 lines to your .htaccess file:
php_value upload_max_filesize 256M
php_value post_max_size 256M
php_value max_execution_time 300
php_value max_input_time 300
Hey Manfred – I did some tests and it should work just fine unless there could be some restrictions from your host provider when modifying the PHP variables. For that, we recommend getting in touch with your host support.
If it persists, we are happy to test this on your site, and in order to do so, in order to make sure we answer your question as thoroughly as possible and avoid any confusion, could you please contact our team by submitting a support ticket here.
Thanks.
manfred is right. your method(s) do not work. just waste of my time.
Hey Adrian – It should work just fine unless there are some restrictions from your host provider when modifying the PHP variables.
If you are still facing this after checking with your host, we are happy to test this on your site, and in order to do so, and avoid any confusion, could you please contact our team by submitting a support ticket here.
Thanks.