Are you seeing a ‘file type is not permitted’ error when uploading files in WordPress?
I’ve run into this WordPress error on multiple sites, but it easy to fix. I’ll show you how.
This method is completely “no-code” — you don’t need to edit any files in WordPress. It works on regular WordPress sites and WordPress multisite too.
Best of all, the plugin we’ll use is free.
In This Article
- What Does “Sorry, This File Type Is Not Permitted for Security Reasons” Mean?
- How to Fix “File Type Is Not Permitted”
- FAQs about File Types and MIME Types
- How Do I Upload Files to WordPress?
- What Does MIME Mean?
- What Does “This File Was Not Uploaded. File Type Not Allowed” Mean?
- Can I Allow Any File Extension Using the File Upload Types Plugin?
- Are There Security Risks Involved in Adding File Types?
- Can I Allow Specific File Types on Specific Forms?
- Can I Allow Unsupported File Types Without a Plugin?
What Does “Sorry, This File Type Is Not Permitted for Security Reasons” Mean?
The error Sorry, this file type is not permitted for security reasons appears when you try to upload a file that WordPress doesn’t allow ‘out of the box’.
For security reasons, WordPress only allows the following file types by default:
| Category | Extensions |
|---|---|
| Images | .jpg .jpeg .png .gif .ico |
| Audio files | .mp3 .wav .ogg .m4a |
| Documents | .pdf .doc .docx .ppt .pptx .pps .ppsx.odt .xls .xlsx .psd |
| Video files | .mp4 .m4v .mov .wmv .avi .mpg .ogv .3gp .3g2 |
That doesn’t mean other file types, like CSV, are a security risk. WordPress has simply locked down file uploads to the bare minimum that most people need.
These settings can be relaxed to allow legitimate files to be uploaded.
How to Fix “File Type Is Not Permitted”
We’re going to use a free WordPress plugin called File Upload Types to fix this error.
It lets you add more ‘allowed’ file types to WordPress without writing any code or editing important WordPress files, so it’s ideal for beginners.
You don’t need to use an FTP client — we’ll be working entirely in the WordPress admin area, so this is an easy process too.
1. Install File Upload Types Plugin
The first thing we need to do is install the File Upload Types plugin.
The plugin is 100% free, and you can trust it: it was created by the same team that created WPForms!
To start, open up your WordPress dashboard and head to Plugins » Add New.

Search for the File Upload Types plugin in the search box at the top.
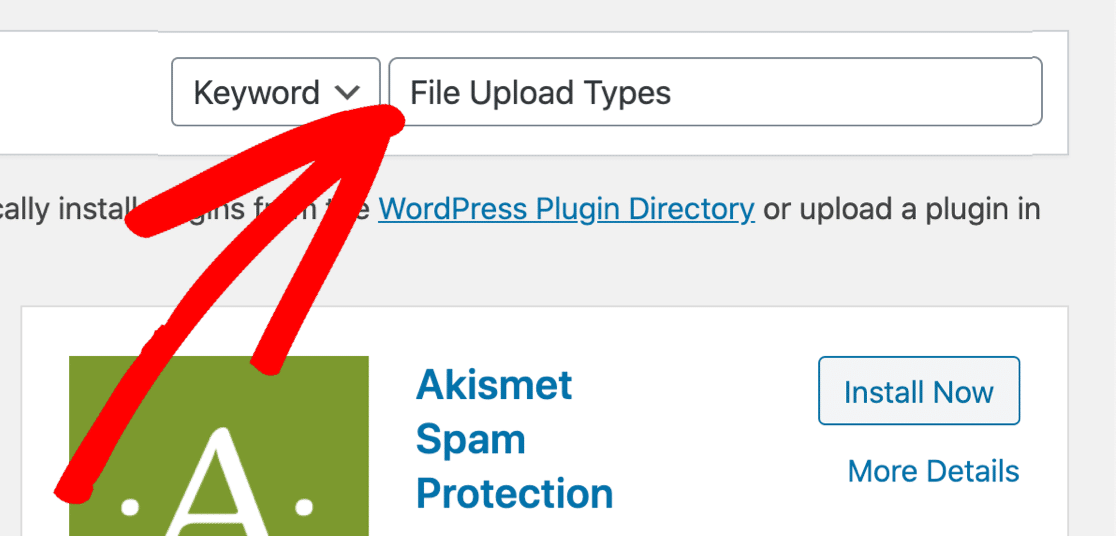
Click Install Now, and then click Activate.
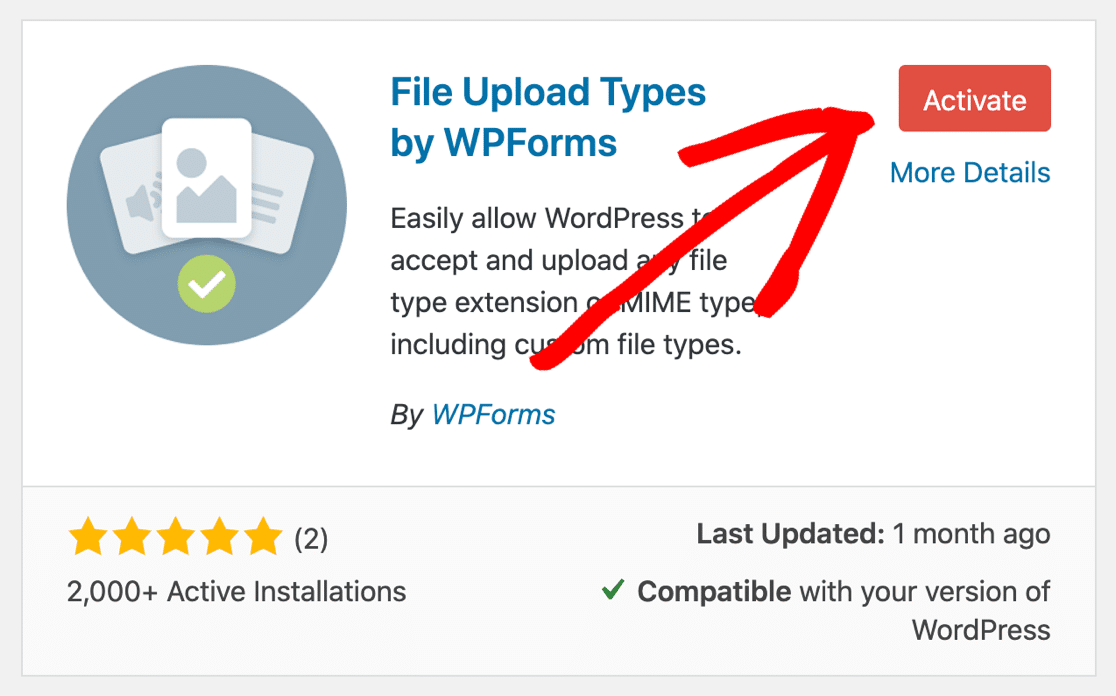
Great! Now let’s add the file types you need.
2. Enable New File Type in WordPress
In the WordPress dashboard, click Settings » File Upload Types.
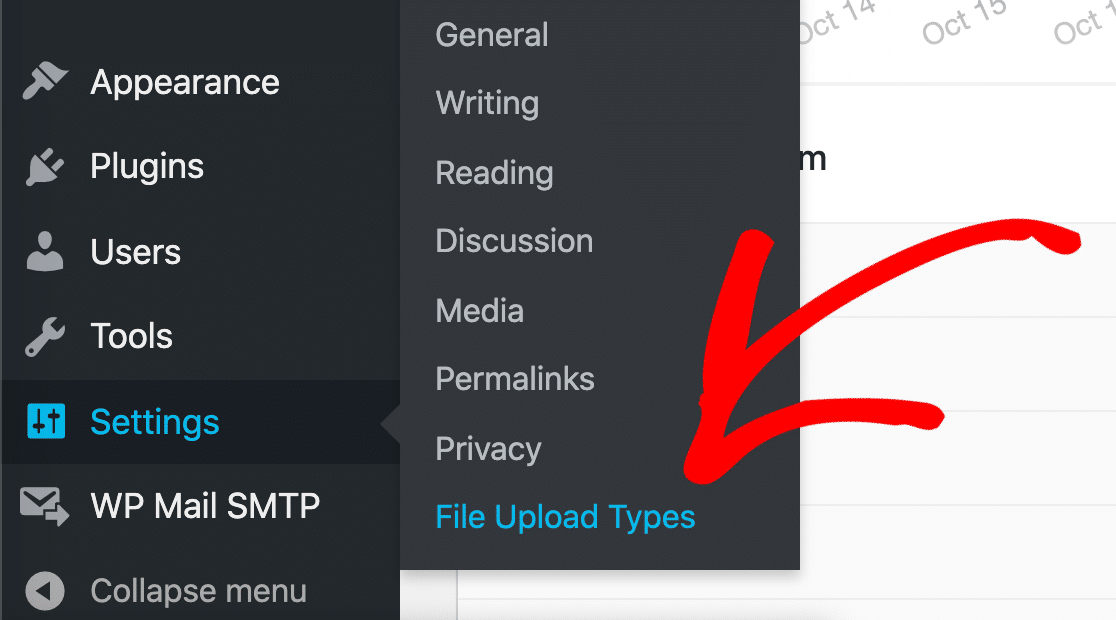
The settings for the File Upload Types plugin will open in your browser.
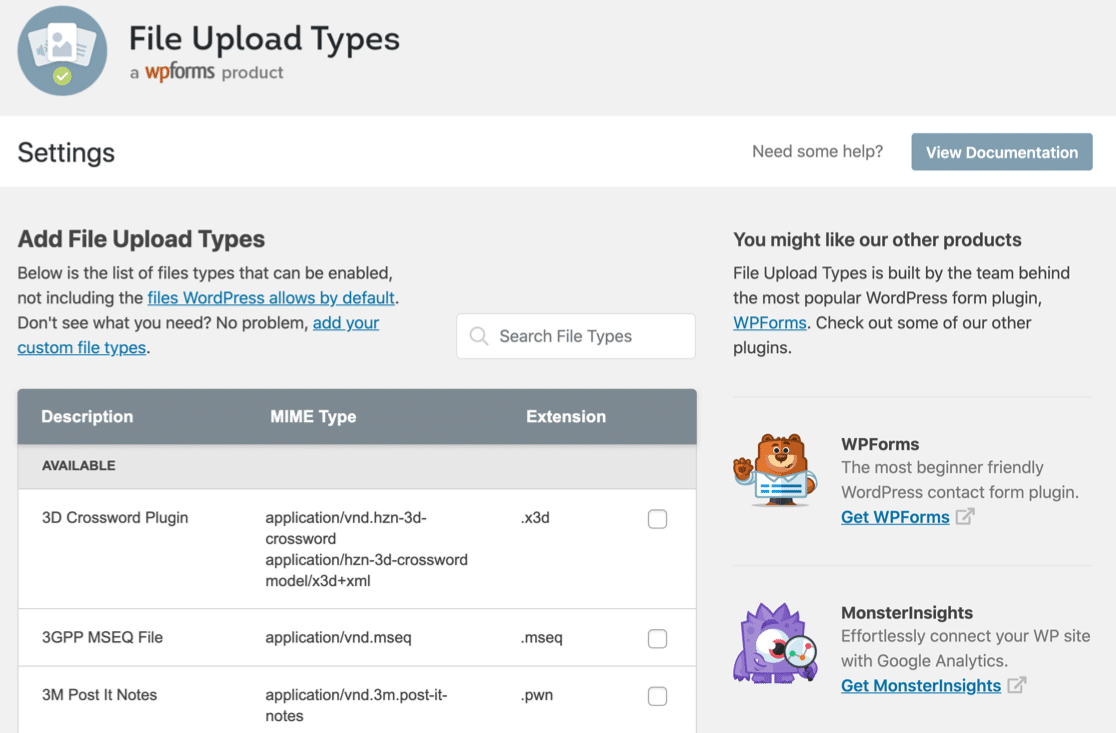
Many people need to allow common files types like .csv, .heic, and .svg in WordPress, so File Upload Types has some presets ready to go. I’ll explain those first.
Adding a Preset File Type
To find out if the preset for your file exists, search for the file type in the Search File Types box.
In this example, we’re going to search for AutoCad .cad file types.
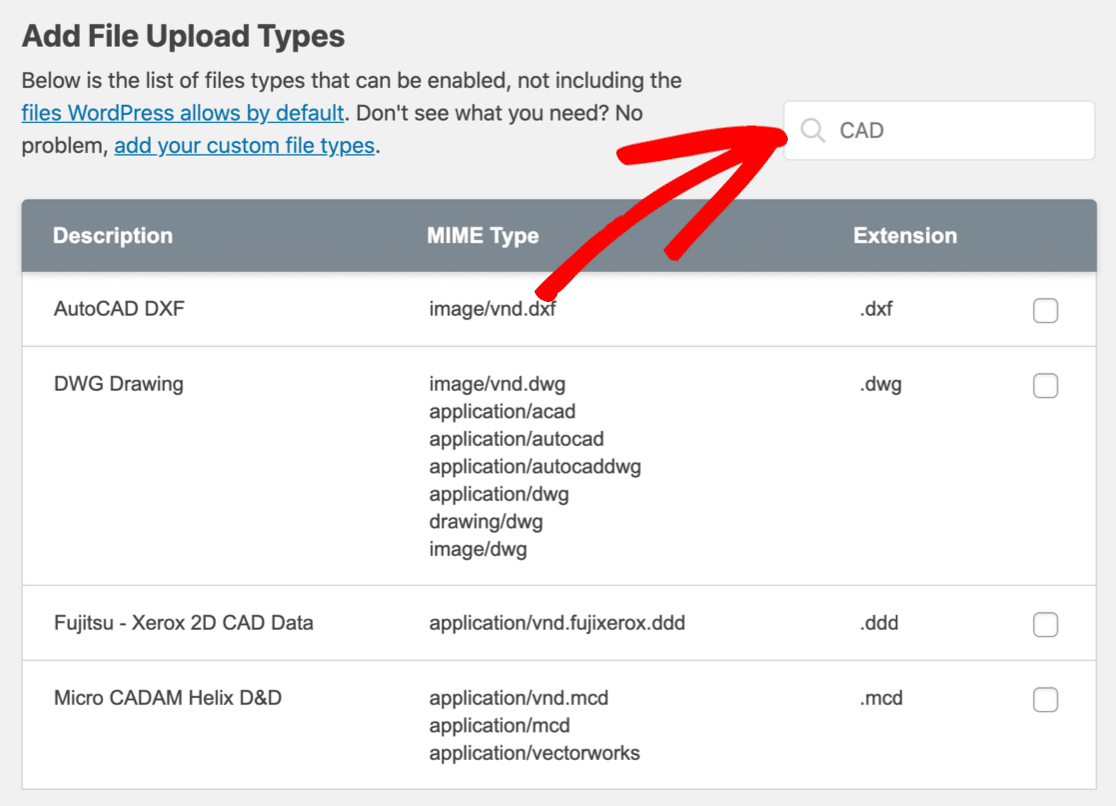
Notice how multiple files appear along with different extensions and MIME types. You’ll want to select the one that matches the extension and the MIME type.
What Is a MIME Type?
MIME types are sometimes called internet file types.
The MIME type describes the file’s actual contents so that your computer or server can interpret it correctly.
When using File Upload Types, you’ll want to be 100% sure that the MIME type is the same as the preset says.
Luckily, we can easily find the MIME type of any file using this free MIME file type checker. Just upload a file similar to the one you want to accept and the tool will tell you the MIME type.

That’s it! Now you can compare the MIME type with the preset to find out if the preset matches.
Check the box next to each file type you want to enable, then scroll down and click the orange Save Settings button.
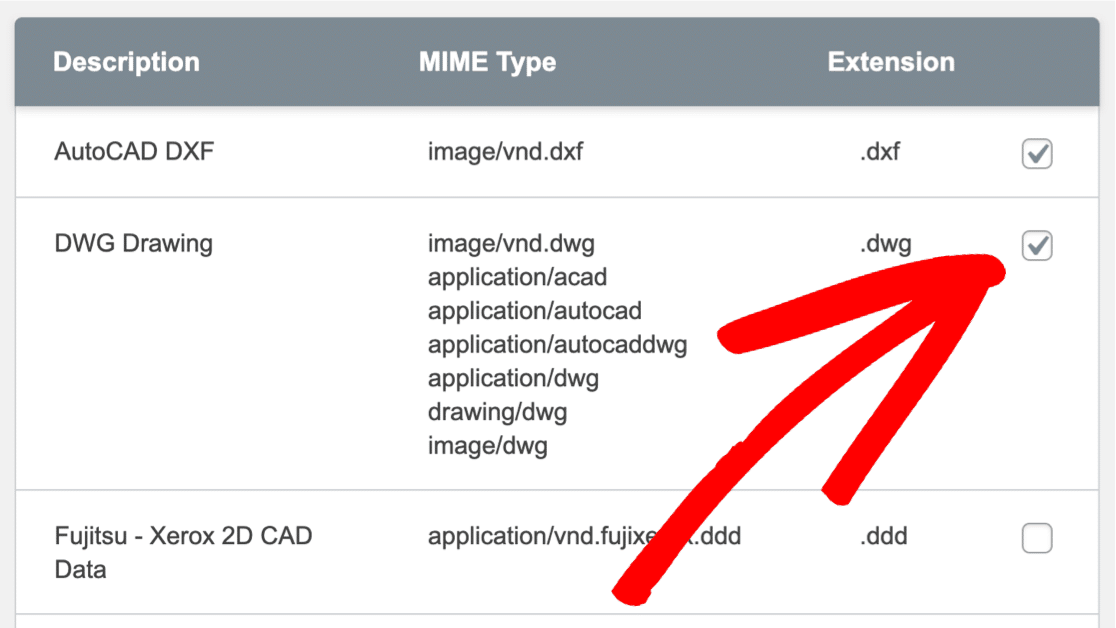
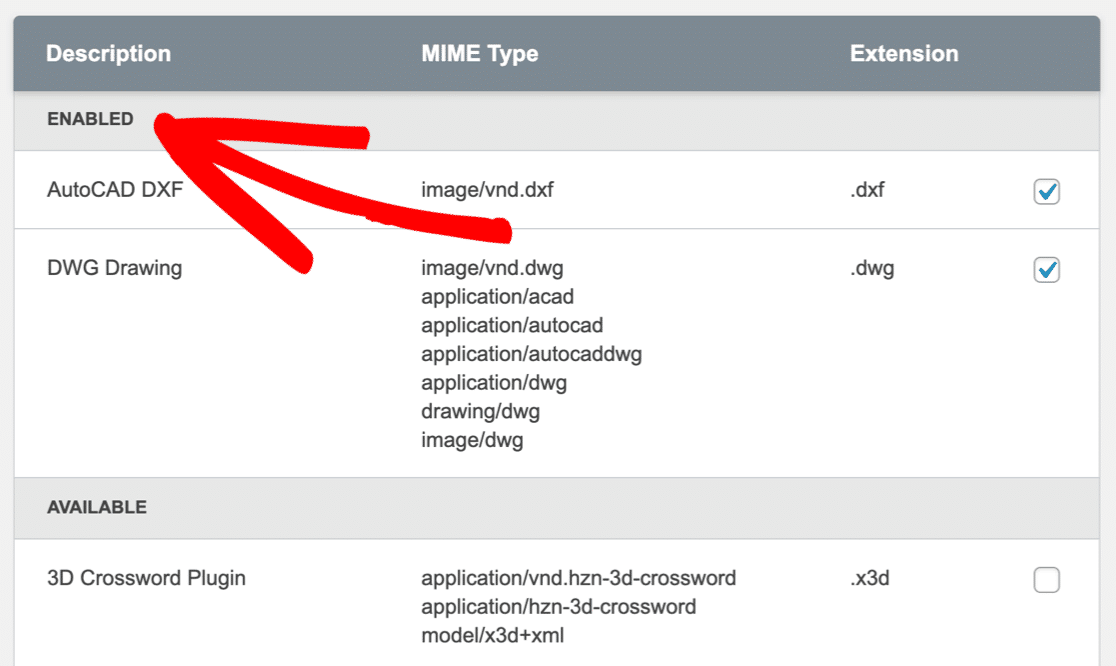
When the page reloads, you’ll notice that the file types you selected are now listed in a new section titled Enabled.
These will no longer trigger the ‘Sorry, this file type is not permitted for security reasons’ warning.
If you need to run through this again, we have a guide on how to accept Adobe Illustrator (AI) file uploads in WordPress that goes into a little more detail.
Next up, let’s look at creating custom file types for files that aren’t on the preset list.
Adding a Custom File Type
If the file type you want to upload isn’t listed in the File Upload Types plugin, you can add it as a custom entry.
You should also use a custom entry if you see the error, This file was not uploaded. File type not allowed. ‘File type not allowed’ typically means that your MIME type doesn’t match the MIME type that WordPress is expecting to see.
To fix this, you’ll need to know the correct MIME type for the custom file type you want to add. Again, check an example with the free MIME file type checker before you continue.
In this example, we’ll add the .heif file format so users can upload smartphone images to your WordPress site.
(I already verified the MIME type of my test file: image/heif.)
In the File Upload Types plugin, click the Add your custom file types link.
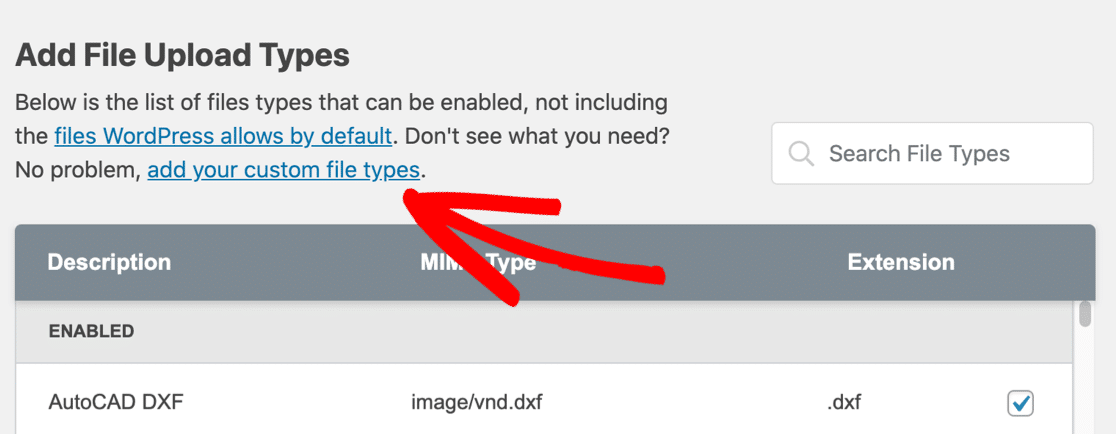
For this file type, we’re going to type in:
- A description for the custom file type – you can type anything you want here
- The MIME type (if you need to add more than 1, separate them with a comma)
- The file extension, including the leading period
.
In this example, we’re adding .heif files with the MIME type image/heif.

Once that’s done, click Save Settings.
Your custom file type will be listed in the Enabled section in the plugin.
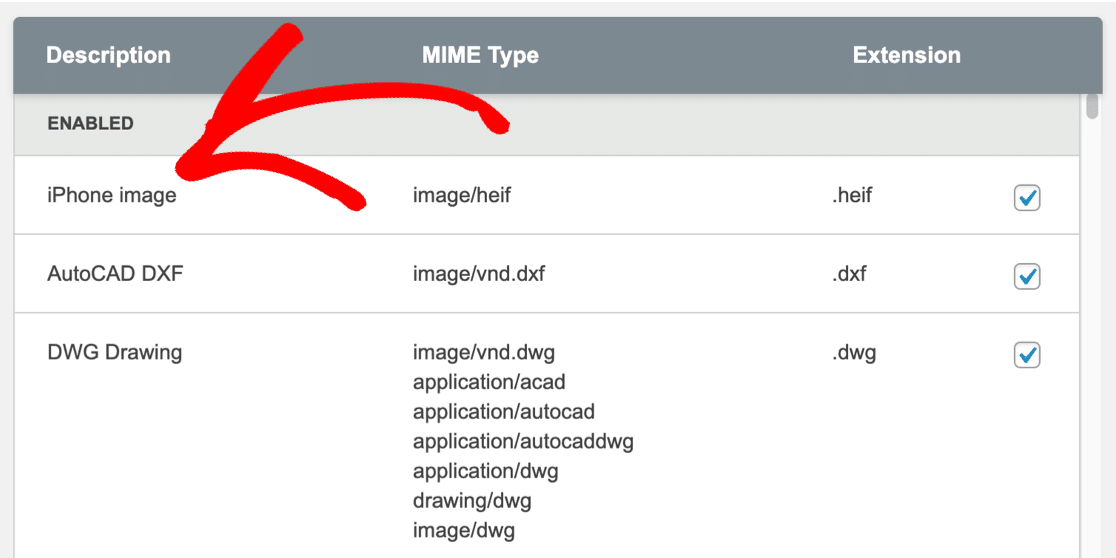
Now we can go ahead and upload these image files without getting the ‘sorry, this file type is not permitted for security reasons’ error in WordPress.
And that’s it! Now you know how to enable unsupported file types in WordPress.
FAQs about File Types and MIME Types
In this section, we’ll look at some additional questions on file upload types in WordPress.
How Do I Upload Files to WordPress?
To create a file upload form, you need WPForms. It’s the best file upload plugin for WordPress and it comes with a ready-made file upload form template.
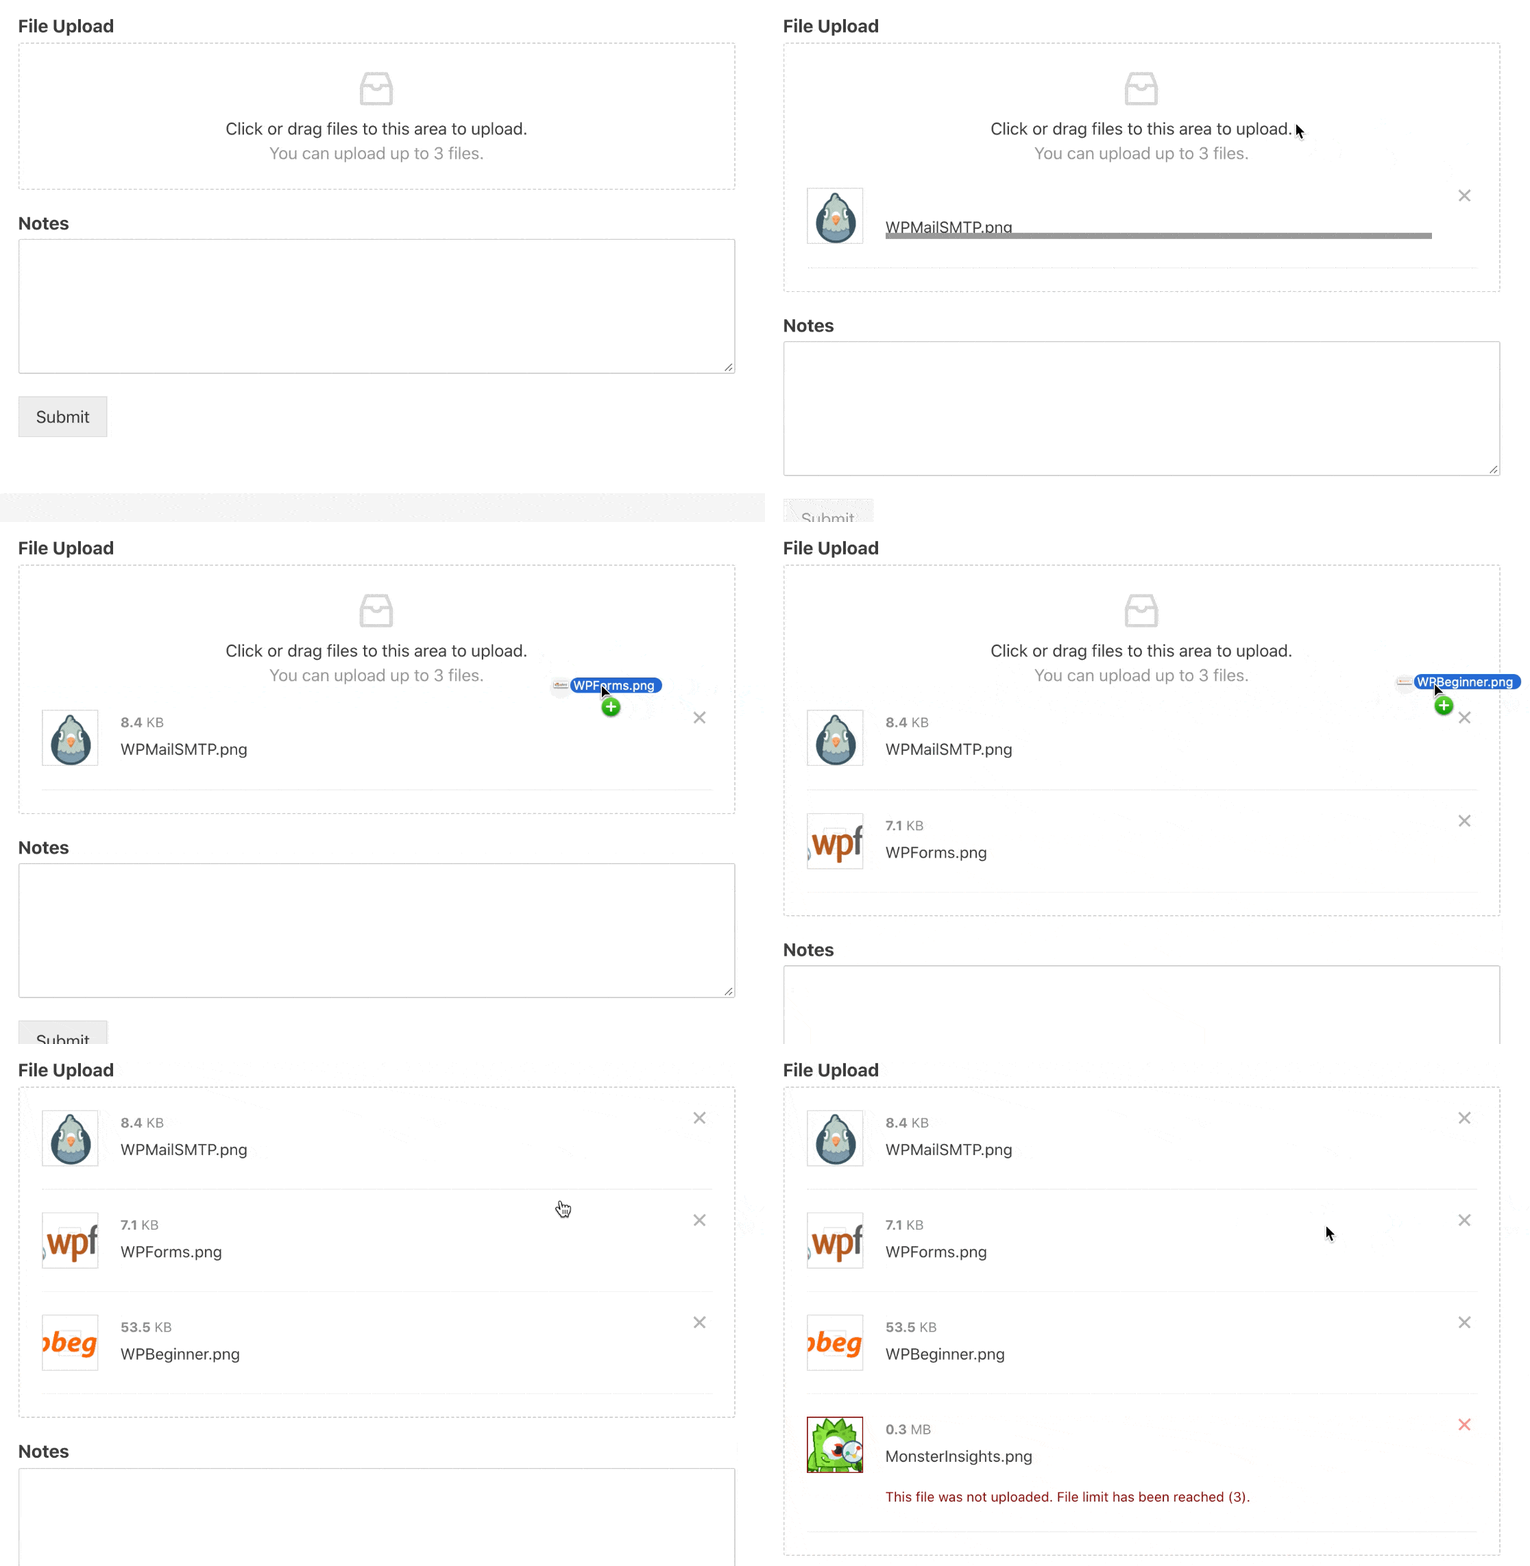
WPForms has a bunch of features to make uploading files easy and intuitive. For example, the ‘Modern’ style file upload field lets visitors drag and drop files onto your forms.
What Does MIME Mean?
MIME stands for ‘multipurpose internet mail extensions’. It was originally developed to allow media files to be sent via email.
The MIME header in a file tells the computer how to process or display the contents of the file.
What Does “This File Was Not Uploaded. File Type Not Allowed” Mean?
You might see this error in WordPress after adding unsupported file types. It usually means that the MIME type doesn’t match the file you’ve tried to upload.
(Sometimes, you’ll also see this on your computer: Windows also doesn’t like unrecognized MIME types, and it will display, “it looks like we don’t support this file format” if you have a mismatch.)
To fix this, check that you have the correct MIME type associated with your custom file type. You can use the MIME type checker (see above) to do this.
Can I Allow Any File Extension Using the File Upload Types Plugin?
Yes, the File Upload Types plugin allows you to enable any file type or MIME type you want. However, keep in mind that other plugins, or your hosting company, may override it for security reasons. For example:
- Your form builder plugin may still block files that are commonly used by hackers. For example, WPForms will always block executable files like
.exe.msiand.html, ignoring the settings in the File Upload Types plugin. - Sometimes, your web hosting provider won’t let users upload file types on its own blocklists. These blocks help to prevent hackers from taking advantage of plugin vulnerabilities.
Are There Security Risks Involved in Adding File Types?
If you’re careful, there won’t be any security risks. But it’s important to note that File Upload Types is a powerful plugin. It will allow any file type you add – even executable files.
We never recommend allowing executable files to be uploaded to WordPress. It gives hackers an easy way to infect your site with malware.
If you’re using WPForms, it won’t allow executable files to be uploaded, even if you’ve added them to your allowlist.
Can I Allow Specific File Types on Specific Forms?
Yes, in WPForms you can specify which file types you want to allow on a specific form.
To do that, click on the File Upload field to edit the settings. Type in the extensions you want to allow in the Allowed File Extensions box.
Be sure to use the correct format for the upload settings. Start each extension with a period . and separate multiple extensions with a comma ,
Those will be the permitted file types for that specific form.
You can also specify a maximum file size for each file upload if you want to. By default, WPForms will use the maximum file size allowed on your server. If you’re not sure what this is, you can hover your mouse over the tooltip next to the field.
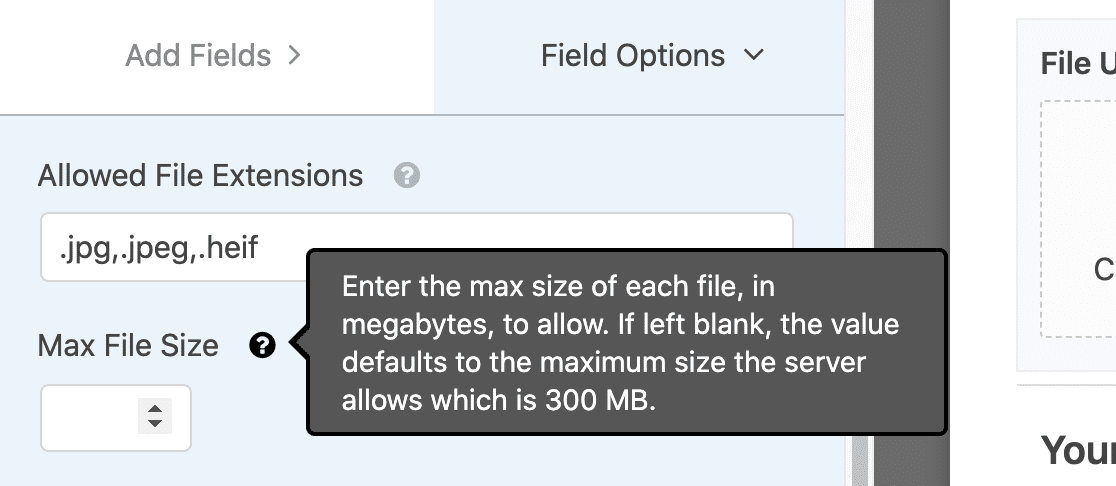
If the maximum file size setting is too low, you’ll want to increase it on your server. We recommend that you reach out to your web hosting provider for assistance.
Can I Allow Unsupported File Types Without a Plugin?
Yes. We don’t recommend this method.
You can allow any files to be uploaded by editing your site’s wp-config.php or the WordPress theme’s functions.php file in File Manager.
In the wp-config.php file, adding the following code will allow all uploads without any filtering at all:
define('ALLOW_UNFILTERED_UPLOADS', true);
Keep in mind that this code allows hackers to upload any type of file to your website, so it’s not recommended unless your site is locally hosted and you’re just testing things out.
Pro tip: If you need to edit any files in WordPress, or add any code snippets to your site, we strongly recommend that you use the WPCode plugin. It’s much safer than editing core files directly.
Create Your WordPress File Upload Form Now
Next Step: Add a Dropbox File Upload Form
Would you like to automatically send file uploads to a cloud storage service? Check out this article on how to add a Dropbox file upload form in WordPress.
This can help you to store uploaded files in the cloud if you don’t want to keep them on your web server, or in the Media Library.
Ready to build your form? Get started today with the easiest WordPress form builder plugin. WPForms Pro includes a file upload form template and offers a 14-day money-back guarantee.
If this article helped you out, please follow us on Facebook and Twitter for more free WordPress tutorials and guides.



This is truly ridiculous. Your plugin is written in PHP. That means there is a way to enable file uploads of specific types in PHP without a plugin. Yet everybody is dead set on making me install yet another single-use plugin. And then when my site grinds to a halt, everybody will say, “Of course your site is broken. Look how many plugins you’re using.”
Hi Mala,
This feature is currently not available with the core plugin. But we understand the importance of keeping a lean plugin list for site owners. We built this light-weight solution so everyone (including beginners) can allow additional file upload types with relative ease.