Do you want to connect your WordPress forms to Google Sheets?
Saving form entries in a spreadsheet allows you to sort and manipulate your data with great flexibility.
If you prefer doing all of your business using spreadsheets, it’s a good idea to send entries from important forms to one of your Google Sheets.
The good news: WPForms makes it really easy to link a form to a Google Sheet automatically.
In this article, we’ll show you how to save form entries from WordPress forms to Google Sheets.
Create Your Wordpress Form Now
How to Save Entries From WordPress Forms to Google Sheets
Here’s a video tutorial that provides all the instructions you need to follow to save entries from WPForms to Google Sheets.
However, if you prefer written instructions, follow these steps to link your WordPress forms to a Google spreadsheet.
Step 1: Install WPForms
To start, make sure you have a WPForms Pro license because this comes with the Google Sheets addon that we’ll need to create this integration.
WPForms is one of the best WordPress plugins for Google Workspace thanks to its native integration with Google Sheets.
After getting WPForms Pro, go ahead and install the WPForms plugin on your site. If you’ve installed WordPress plugins before, this will be a breeze!
Step 2: Activate the Google Sheets Addon
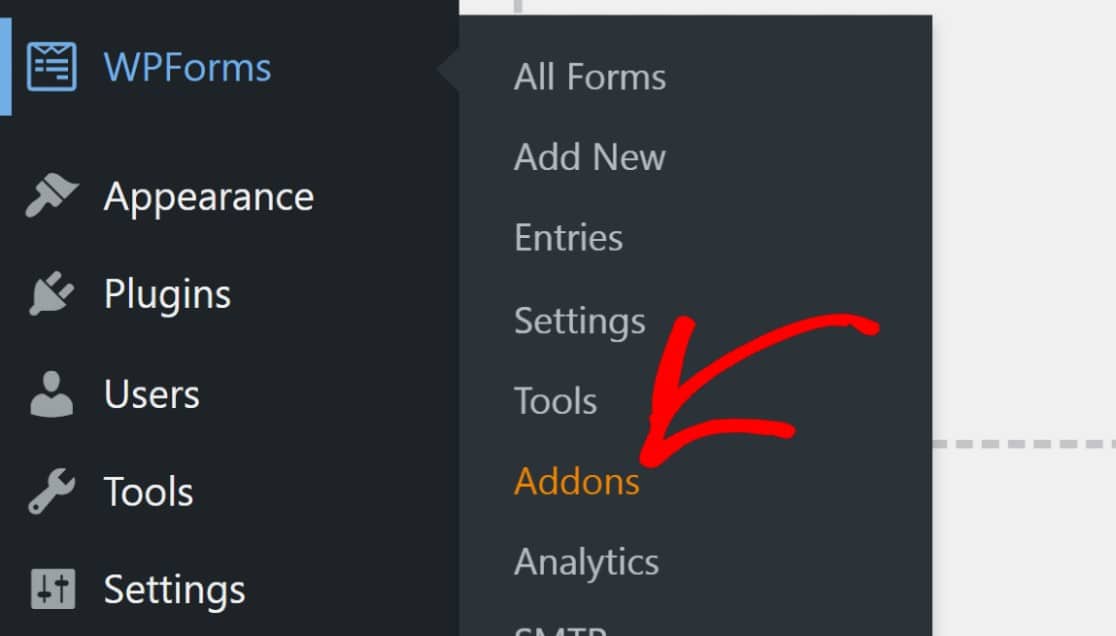
With WPForms Pro now ready on your site, open your WordPress dashboard and go to WPForms » Addons.
On this addons page, look for the Google Sheets addon and click Install Addon under it, followed by the Activate button.
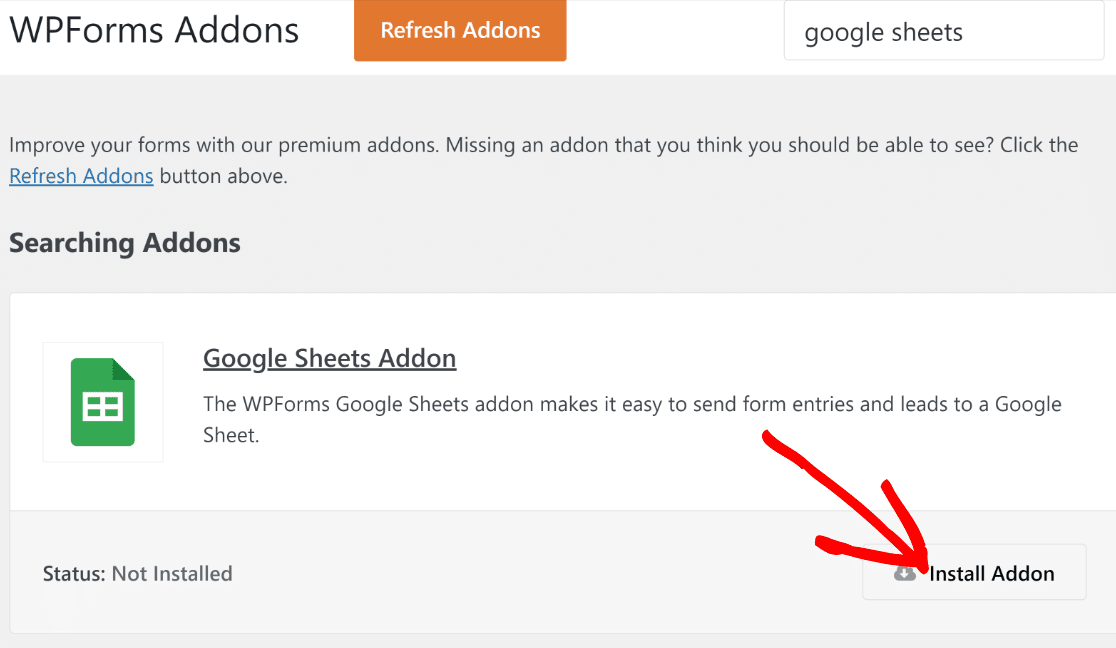
The status will read Active once the addon has finished installing. The Google Sheets addon is now ready.

It’s now time to connect your Google account with WPForms, which we will show you how to do in the next step.
Step 3: Connect Google Account With WPForms
After activating the Google Sheets Addon, go to WPForms » Settings. On the Settings page that opens, click on Integrations on the navigation bar.
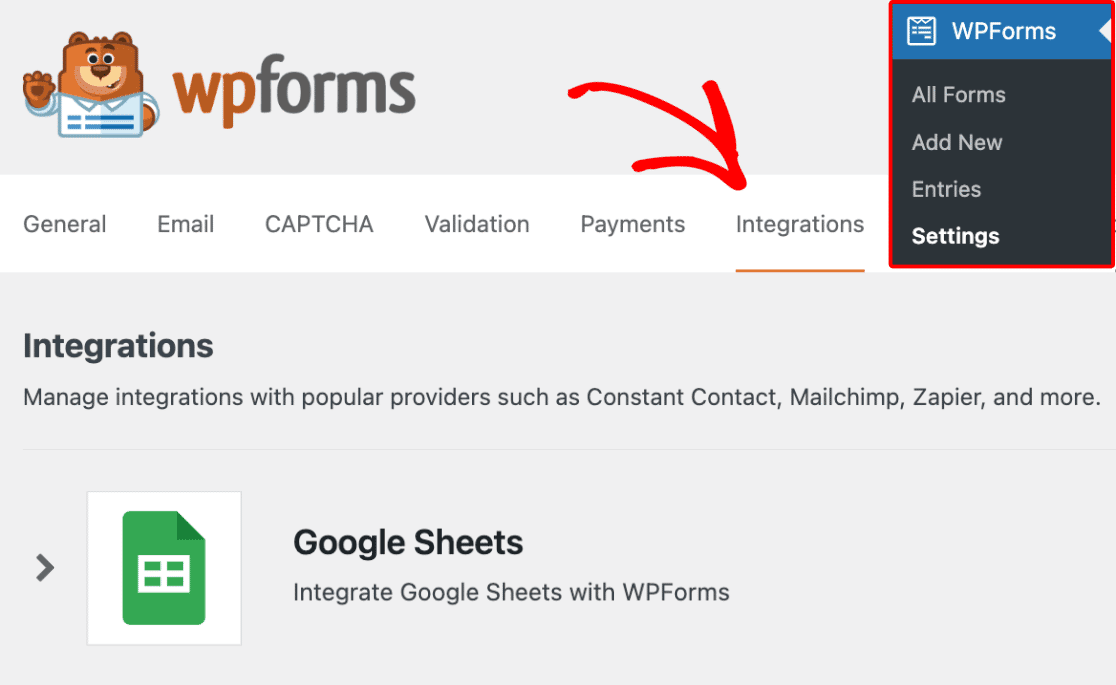
Scroll down to find the Google Sheets addon and click on the Add New Account button to proceed with the setup process.
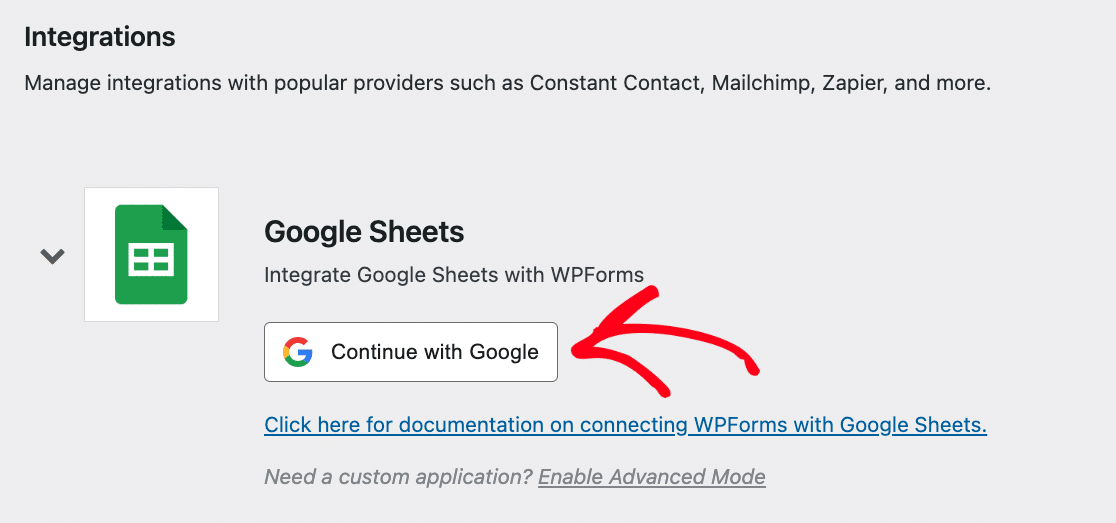
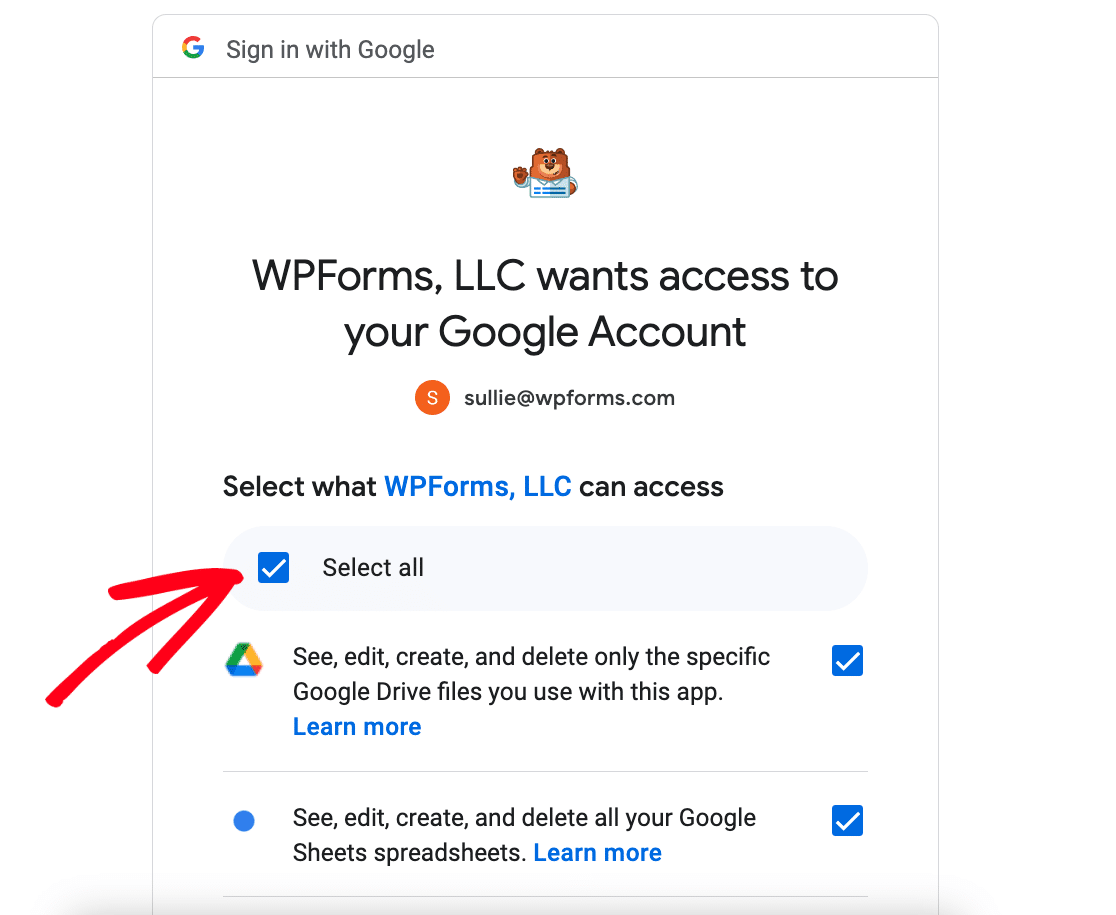
Sign in with your Google account and click Select all to allow WPForms to access your Google account.
Next, you’ll then be redirected to the Integrations page. Note that the Google Sheets integration will read Connected now.

Now that your account is connected, you can begin creating new forms that automatically send form data from WordPress to Google Sheets.
Step 4: Create a WordPress Form
Creating a Google Sheets form with WPForms is a walk in the park. From your WordPress admin area, navigate to WPForms » Add New.

You should see the form builder interface open. Here, start by naming your form, and then select a template. WPForms comes with 2,000+ WordPress form templates
For this tutorial, we’ll use the Simple Contact Form template. It’s easy to customize in the drag-and-drop form builder.
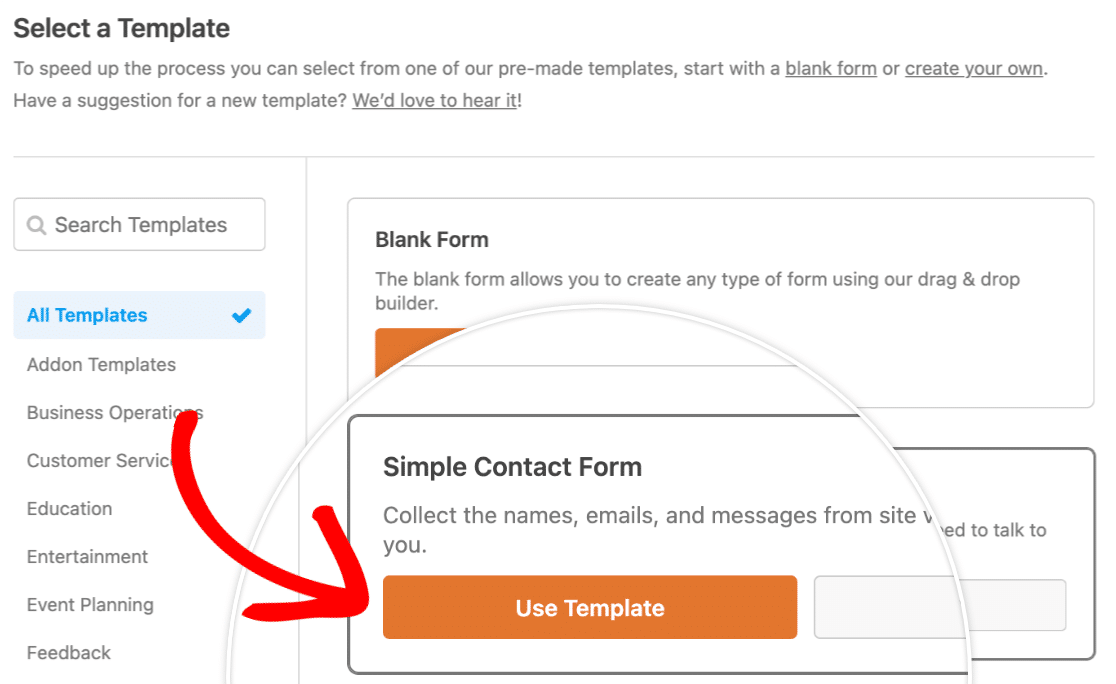
Here’s what the template looks like when it’s loaded. As you can see, it comes equipped with Name, Email, and Message fields.
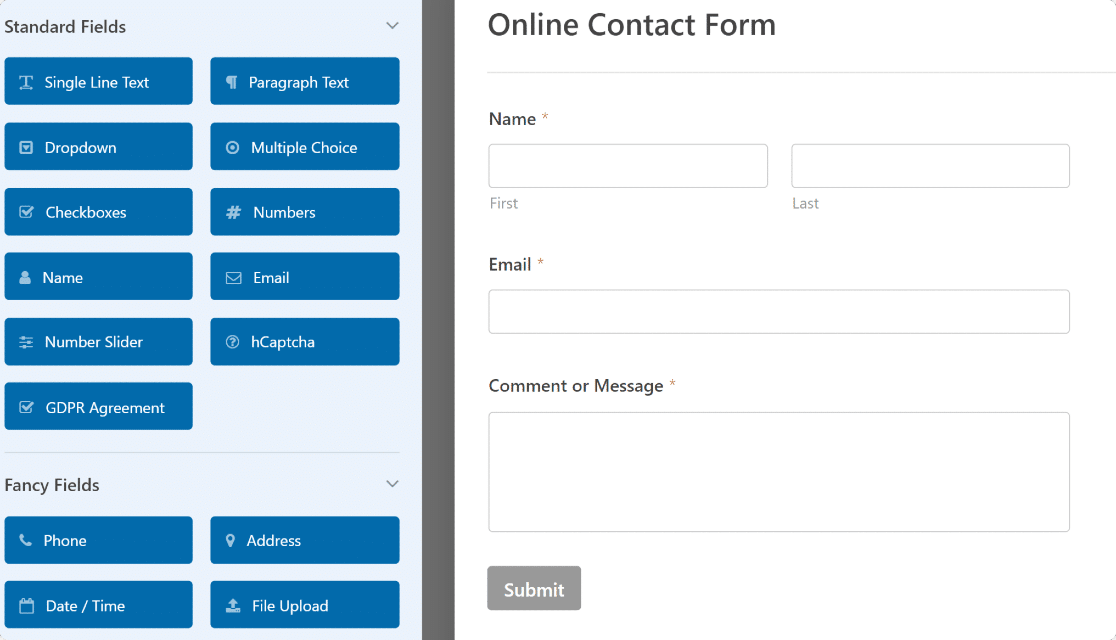
If you want, you can add more fields to your form by dragging them from the left-hand side to the right-hand side of the form builder.
Step 5: Configure Google Sheets Addon Settings
Once you’re done with the form customizations, click on Settings on the form builder sidebar and select Google Sheets from the list.

On the top-right, press the blue Add New Connection button to connect your Google account to the form you’ve created.

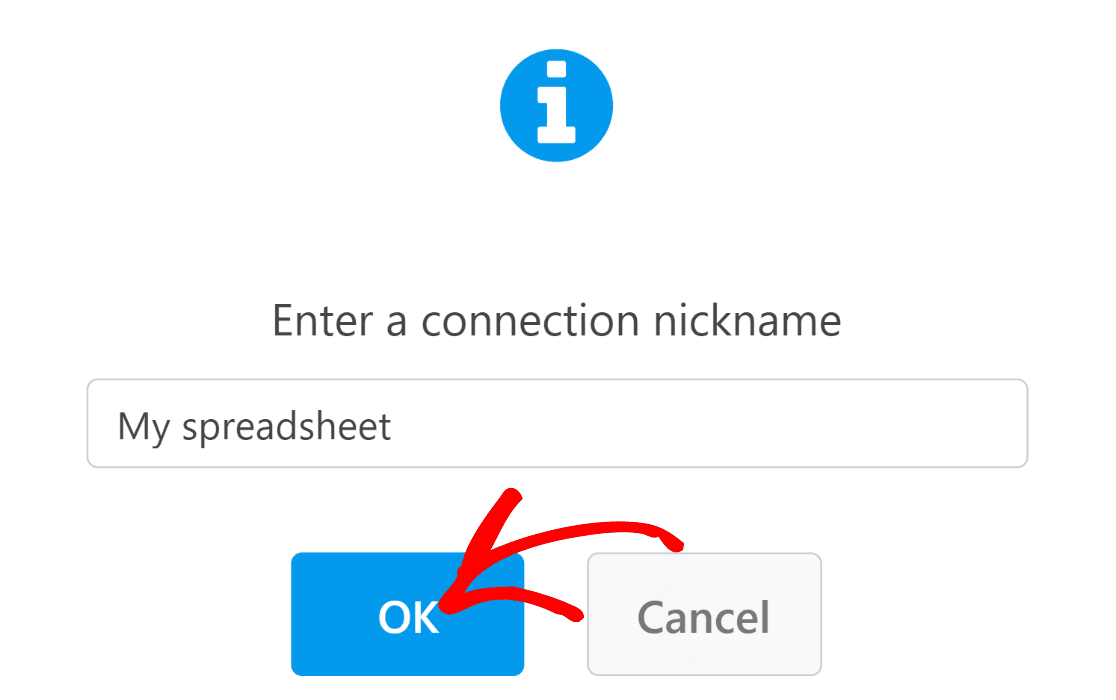
Enter a nickname for your connection and press the OK button. Make sure to set a nickname that’s easy for you to identify.
WPForms will now ask you to select whether you want to select an existing spreadsheet or create a new one.
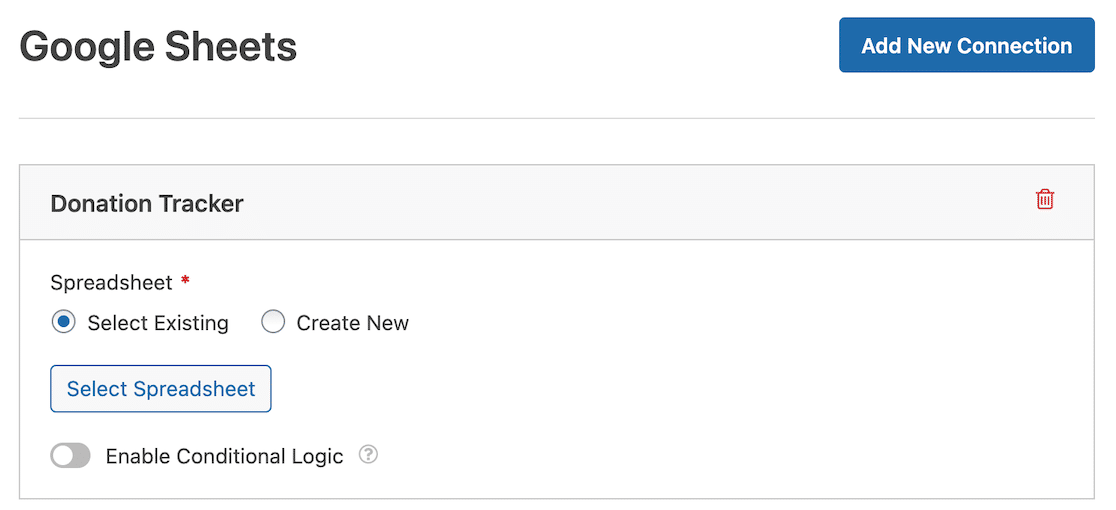
We already created a spreadsheet called WPForms Contact Form Data which is set up to include 3 columns: Name, Email, and Comment – these columns correspond to our form fields.
So we’ll choose Select Existing, followed by the Select Spreadsheet button. Then we’ll choose our WPForms Contact Form Data spreadsheet from the form builder settings.
Note that if you do want to create a new form, you can select the Create New option instead, then follow the prompts through to set it up.
After selecting or creating your form, scroll down further to see the Field Mapping settings. Use these settings to define which columns should correspond to which field values.
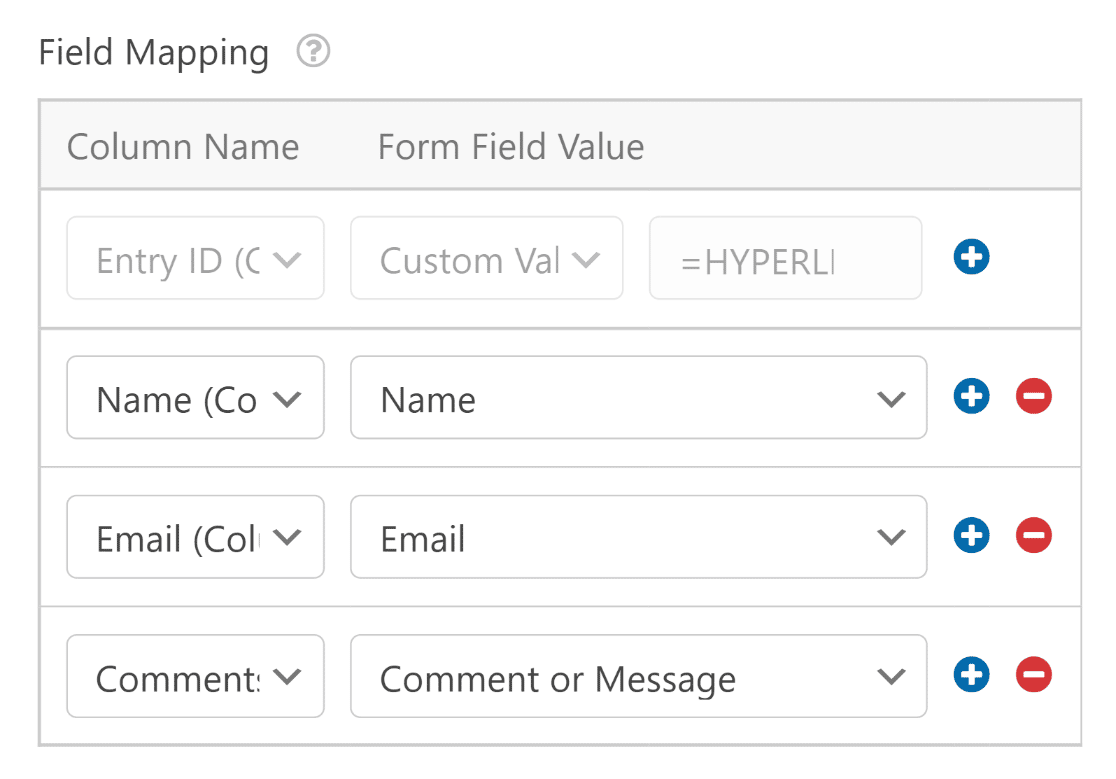
You can also use map columns to custom values. This is great if you want to pull additional hidden data or metadata from each entry like the date, IP address, and other details, or simply append some text.

By default, WPForms reserves Column A for Entry ID. This is fixed and cannot be changed. We recommend naming columns in your spreadsheet from Column B and leaving Column A empty for the Entry ID.
Using the steps above, you can also set up a donation tracker in Google Sheets if you’re managing a fundraiser.
Step 6: Publish the Form
Your form is almost ready to accept entries and automatically send these to your spreadsheet in real time.
We just need to embed the form on a page now. To do that, click on the Embed button next to Save.

You’ll see a new modal window open, giving you a choice between embedding on an existing page or creating a fresh new page for the form.
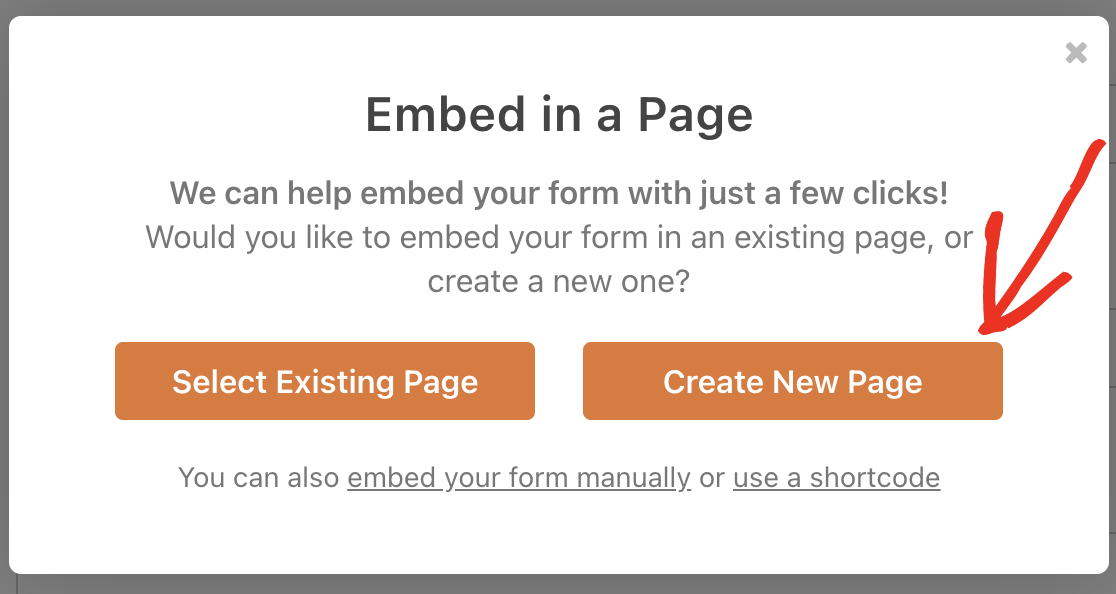
For this tutorial, we’ll select the Create New Page option. WPForms will prompt you to name your new page. Enter a name and press Let’s Go.

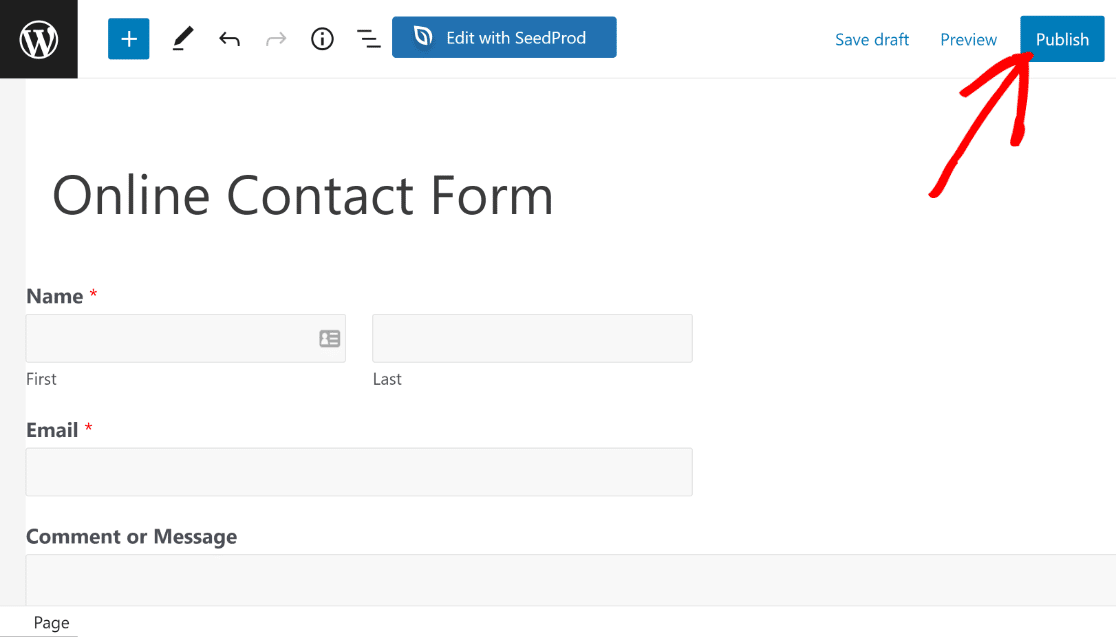
WPForms will take you to your WordPress page editor screen, where you’ll find the form block already embedded.
If you want to add any content to this page or make any other changes, this is a good time to do so.
When you’re happy with everything, you can press Publish to take your form live and start accepting submissions.
You can try submitting a test entry (you can also do this from the Preview before publishing your form) to check if the data is sending properly.
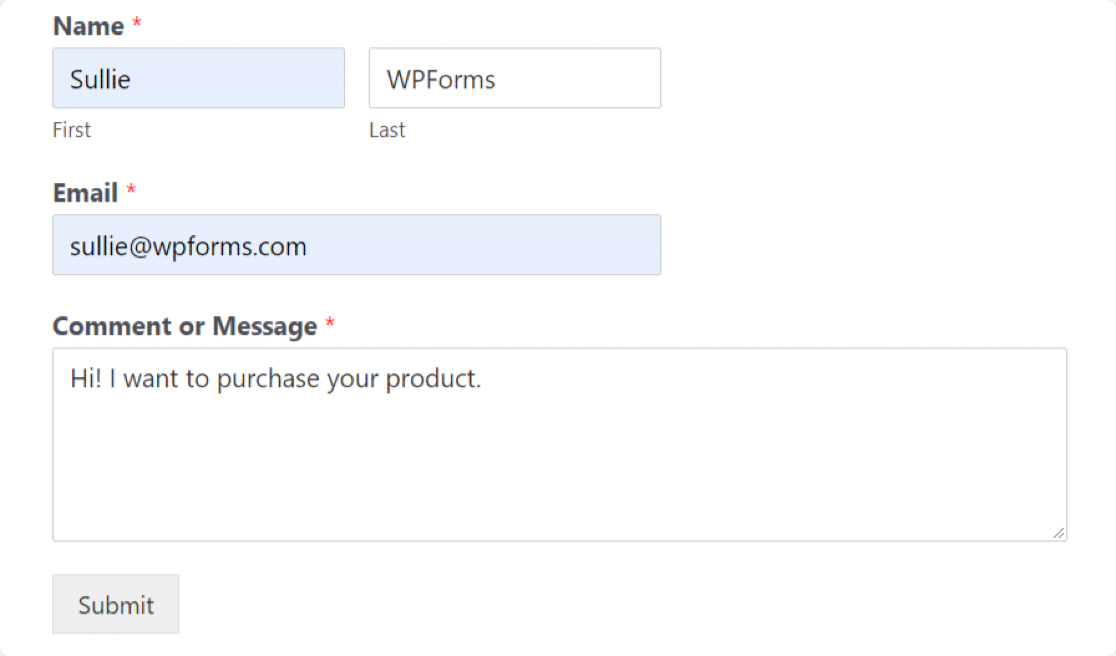
As you press Submit, wait a few seconds for the entry to appear in your spreadsheet, as you can see below.

And that’s it! You’ve just connected your WordPress form with Google Sheets. All entries will be added to the specified spreadsheet in Google Sheets in real time!
If you’re looking to export form entries to a sheet instead of updating it in real time, see how to export WordPress form entries to CSV.
FAQs About Connecting WPForms to Google Sheets
Connecting WPForms to Google Sheets is a popular topic of interest among our readers. Here are answers to some common questions about it:
Why Connect WordPress Forms to Google Sheets?
- Manageable and easy sorting: Google Sheets provides easy options to manage and sort your form data.
- Easy team collaboration: Your team members can easily monitor form entries. You don’t need to provide login credentials to your WordPress dashboard.
- Quick data analysis: Generate personalized reports based on the data your visitors submit and make informed decisions quickly and easily. For example, if you’re creating a poll, you can easily interpret the user inputs by connecting them with Google Sheets.
- Save entries automatically: You don’t need to enter the form entries manually. Simply connect your form with Google Sheets to automate the process.
- Go paperless: Using online forms is an excellent way of turning your office into a paperless space. Connecting your forms with Google Sheets only improves your efficiency in a paperless setting.
How do I integrate WPForms with Google Sheets?
To integrate WPForms with Google Sheets, you can use the Google Sheets Addon available with WPForms Pro.
This addon allows you to automatically send form data from your WordPress site directly to Google Sheets.
Just install WPForms Pro, activate the Google Sheets Addon, and configure it to link your forms with a specific Google Sheets document.
How do I send WordPress form data to Google Sheets?
Sending WordPress form data to Google Sheets is straightforward with the Google Sheets Addon in WPForms Pro.
Once you have WPForms Pro and the Google Sheets Addon installed, set up a new connection in your form settings to your desired Google Sheets.
Can I connect WordPress to Google Sheets?
Yes, you can connect WordPress to Google Sheets using WPForms Pro and the Google Sheets Addon.
This combination allows you to automate data transfer from your WordPress forms directly into a Google Sheets spreadsheet, making data management and analysis easier.
Next, Track Email Opens In a Google Sheet
The combination of Google Sheets and WPForms is powerful and versatile. But Google Sheets also integrates with other plugins like WP Mail SMTP and can work as an email tracker. Check out our guide on tracking email opens in Google Sheets.
Also, do you want to encourage form submissions on your WordPress site? Check out how to create a popup feedback form in WordPress to accept feedback and view them in visual graphs and charts.
Create Your Wordpress Form Now
What are you waiting for? Get started with the most powerful WordPress forms plugin today. WPForms offers tons of beautiful pre-built form templates and exciting features to create powerful online forms.
If you like this article, then please follow us on Facebook and Twitter for more free WordPress tutorials.




How do we get access to more columns? Our form has a number of more fields than columns the Add-on seems to allow
Hey there, You will need to create the additional columns in the Google Sheets as outlined here which will be available for mapping in the WPForms Google Sheet settings. Here is a screencast on the same.
I hope this helps.
This was working on our previous form, but is not currently working as of today. I’m not sure how to fix it now.
Hey Kasting – Sorry to hear about the trouble. For licensed users, we offer email support and so please submit a support ticket for further assistance.
Thanks 🙂
Hello we’re noticing sometimes it takes a few minutes to 45 minutes for new lines to load. It would be helpful to get any feedback about what may be causing this.
Hi Angelia,
Sorry to hear about the trouble you are facing here! When you get the chance, please reach out to us via our support with more details and we will be happy to help!
Thanks,
Can this be done by using WPForms Lite (FREE version) ?
Hey Doni, I apologize for any confusion, however, this is not possible with the WPForms Lite. You will need a WPForms Pro or higher license because this comes with the Google Sheets addon that we’ll need to create this integration. I hope this clarifies.
If you have changed the response collums in WPForms and want to resync with google, can that be done?
Hey Marc, in order to make sure we answer your question as thoroughly as possible and avoid any confusion, could you please contact our team by submitting a support ticket here.
Thanks.
Is there a method to have it update a row instead of insert?
Hey Scottie – Thanks for reaching out!
Unfortunately, at the moment, we don’t have the ability to update individual rows in the Google Sheets addon. The addon only allows mapping columns. I totally understand that having the option to update rows would be really useful, and I’ll definitely add your suggestion to our feature request tracker.
With the Google Sheets add-on, can the Google Sheets owner also manually add data to the sheet? Or will incoming form data overwrite any manually added rows?
Hey Chrissy – Yeah, the owner can manually add data without any issue! Google Sheets always add a new line after the last available line on the sheet and that won’t change the spreadsheet columns/rows. Thanks 🙂
I want to pass Checkbox value to google sheet column, I know I can send the query string of the field, {field_id=”3″} but how can I send individual checkboxes to individual columns?
Hey Jacob – Currently we don’t have the feature to send individual choices and record them into unique column in Google Sheet. I do agree this would be great, and I’ll add this into our feature request tracker so that it’s on the radar of our developers.
The google Sheet is blank in my google docs. How can I find the wpforms created google sheet in my google docs?
Hey Mike – As you’re seeing blank Google Sheets, when you get a chance, please drop us a line in support so we can assist.
If you have a WPForms license, you have access to our email support, so please submit a support ticket.
Thanks 🙂
If I created and connected a WP Form to a Google Sheet after the WP Form already received submission, how do I get the pre-Google Sheet submission to populate in the Google Sheet?
Hey Kevin – Currently we don’t have the feature to send old entries in Google Sheets. I do agree this would be great, and I’ll add this to our feature request tracker so that it’s on the radar of our developers.
Thanks 🙂
Hello, is this already available as of the moment? I’m also looking to add old entries to spreadsheet that we have. The wpform and sheet has been linked but we already have old entries.
Hey there!
This feature request is already in our development tracker and under discussion! I’ll add your vote to the feature request to help show more interest in this functionality. For now though, only new form submissions will be sent to your connected spreadsheet.
I have a form with lots of data collected and would need more than column Z to get it all on one sheet. Is there a way to utilize column AA, BB, CC…etc?
Hi Toby. Yes, just add more columns to the Google Sheet and WPForms will find them automatically.
Hello, is it possible to take a form that has already been created and add the Google Sheets connectivity after?
Hi Judah!
Yes, you can definitely add Google Sheets connectivity to an existing form! For details on how to set this up, check out our detailed guide on setting up the Google Sheets addon to get started.
Can WordPress Form Entries be received from to Google sheet? I am trying to create a poll where options are taken automatically from my google sheet then the response is sent to the same google sheet in a new column. is that possible ? thank you
Hi Polina!
Thanks for your interesting question about creating a two-way connection between Google Sheets and WPForms! While WPForms can definitely send form submissions to Google Sheets, pulling options from Google Sheets to populate form fields isn’t possible yet.
I’ve added this as a feature request to our development tracker since I agree it would be really useful for creating dynamic polls and surveys. We’ll keep this functionality in mind as we plan future updates.
If you’d like personalized advice for your specific use case, I’d encourage you to submit a support ticket if you have a WPForms license. Our Trusted Advisors would be happy to help explore solutions that could work for your needs.