AI Summary
Would you like to automatically send form entry data to Google Sheets? The Google Sheets addon for WPForms provides a simple method for sending your form entries directly to a Google spreadsheet.
This tutorial will show you how to install and use the Google Sheets addon in WPForms.
Requirements:
- Ensure that you’ve installed the latest version of WPForms to meet the minimum required version for the Google Sheets addon
- You will need a Pro license level or higher to access the Google Sheets addon
Before getting started, you’ll first need to make sure WPForms is installed and activated on your WordPress site and that you’ve verified your license. You will also need to sign up for a Google account if you don’t already have one.
Accessing Google Sheets Integration Settings
Once you’ve installed WPForms and your license is verified, go ahead and install and activate the Google Sheets addon.
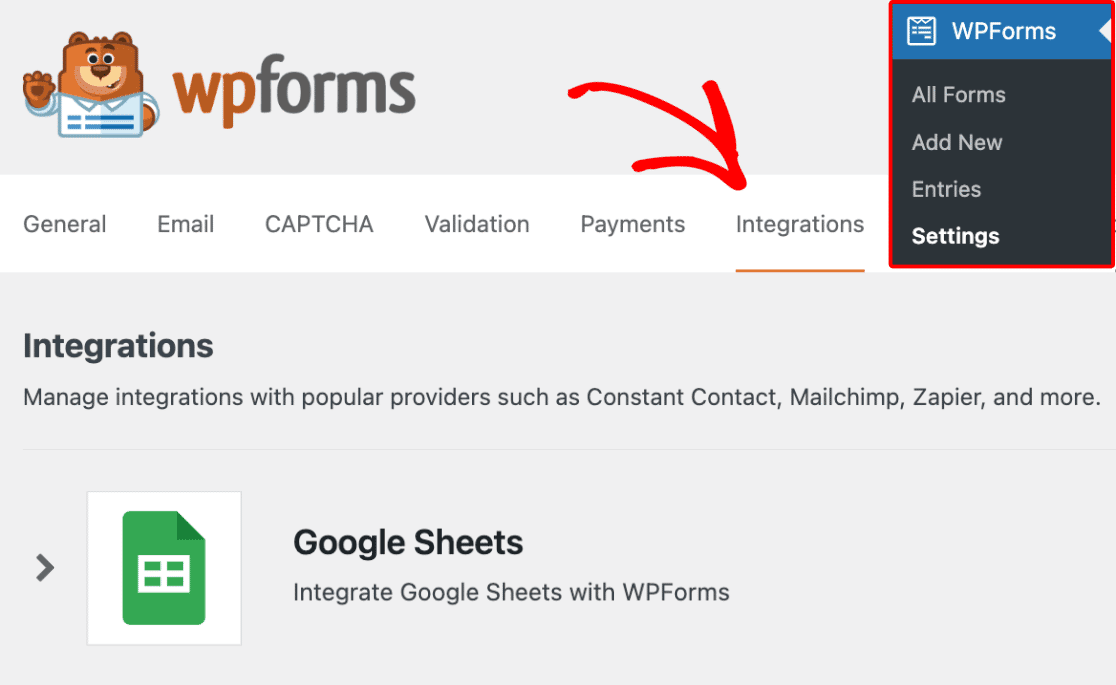
After installing the Google Sheets addon, you’ll need to access the Google Sheets integration settings. To do this from the WordPress dashboard, go to WPForms » Settings and click on the Integrations tab.
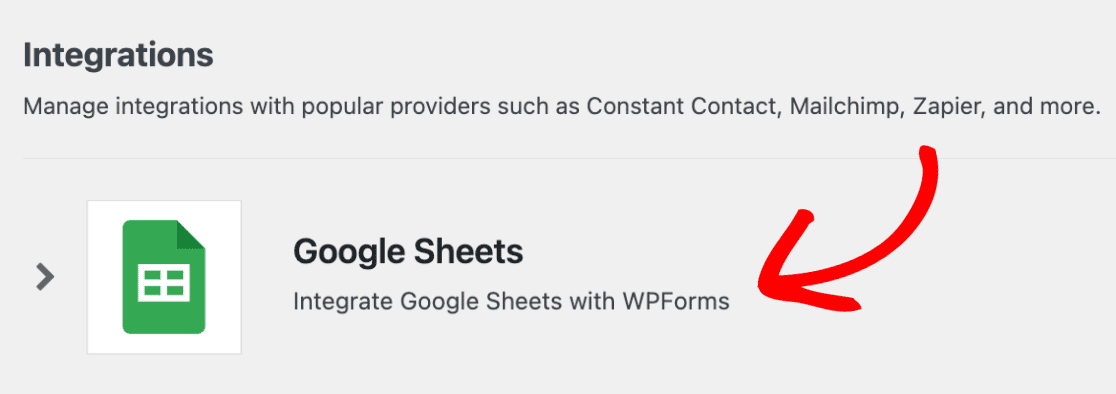
Next, click on the Google Sheets integration to expand its settings.
Connecting WPForms to Google Sheets
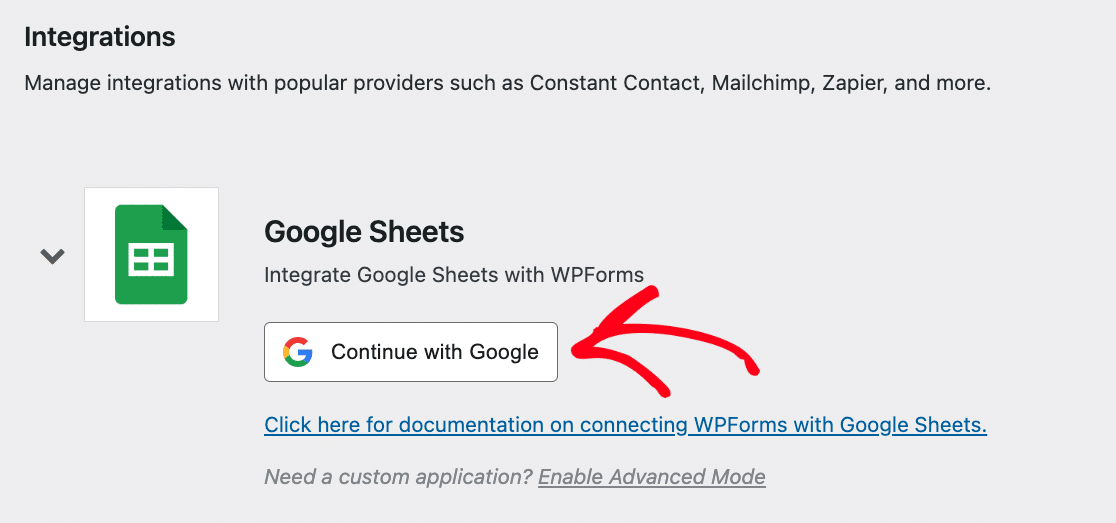
To connect WPForms to your Google account, go ahead and click the Continue with Google button.
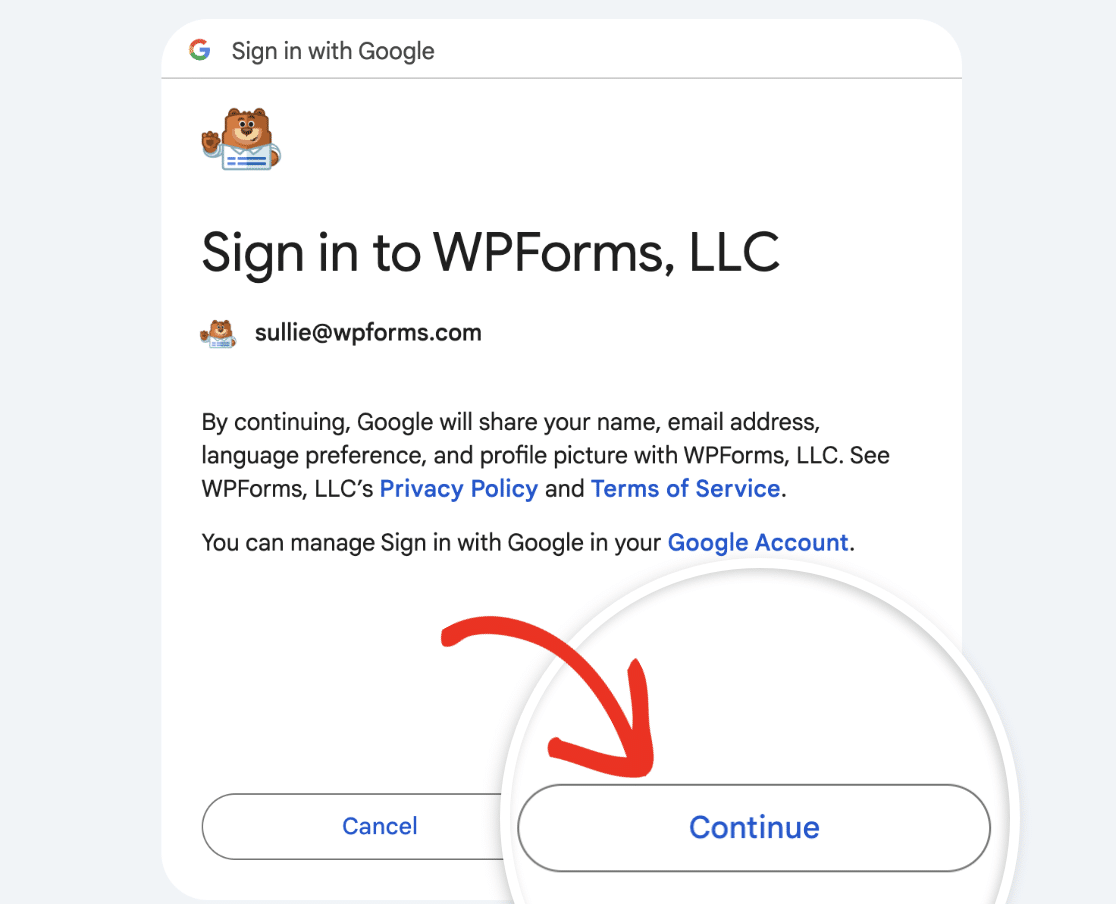
You’ll then be redirected to a Google authentication page where you’ll need to select a Google account to use with WPForms.

Once you’ve selected a Google account, click the Continue button to sign in and connect your account.
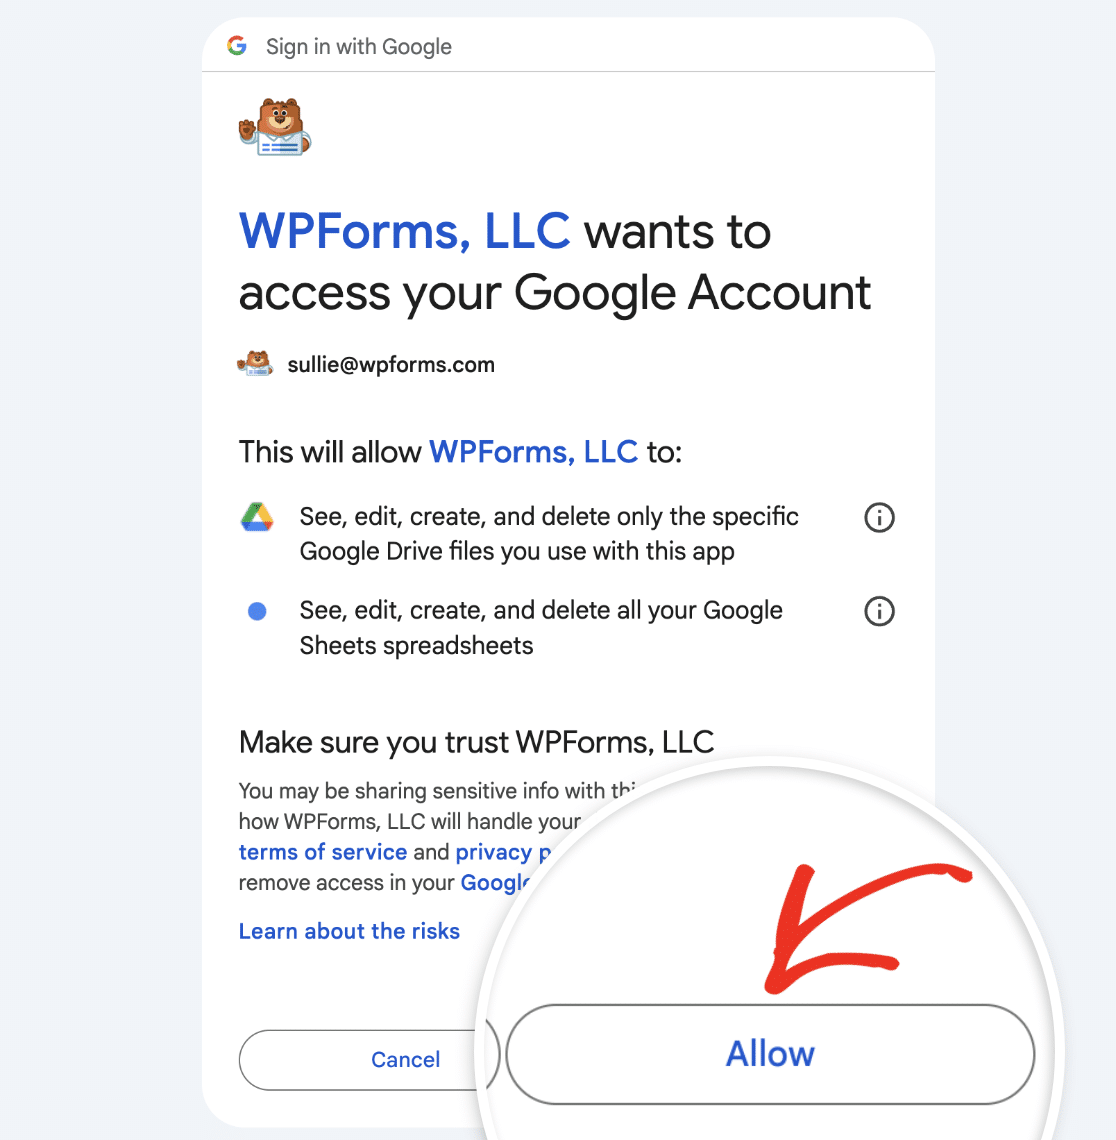
Next, click Allow to grant WPForms access to your Google account.
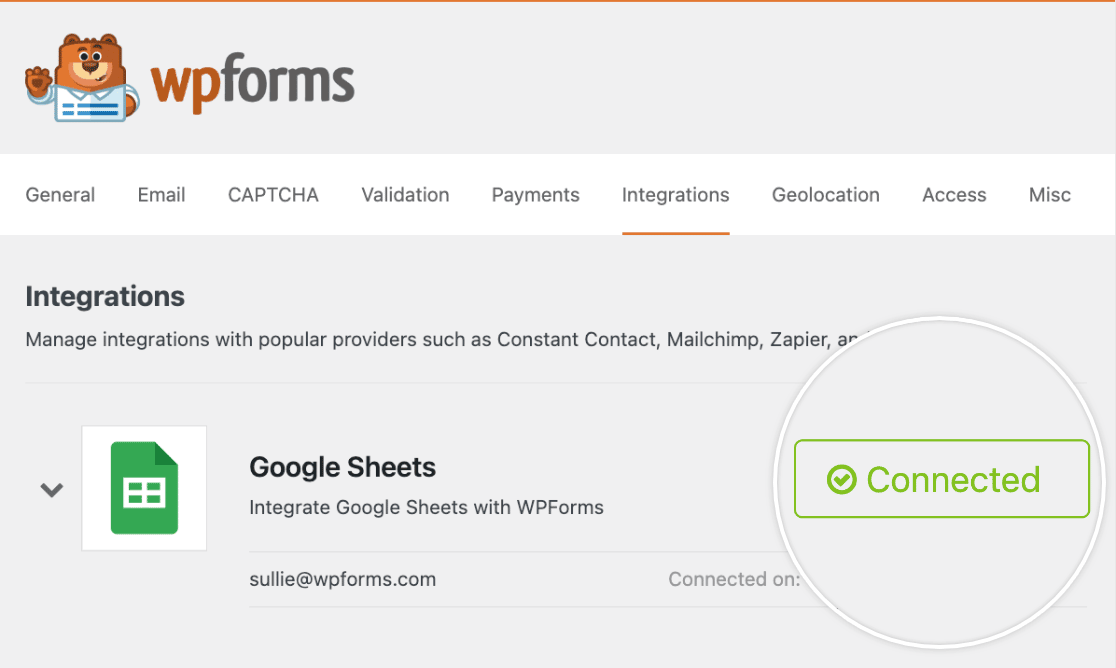
Now when you return to WPForms » Settings » Integrations, you should see the green Connected status along with your connection details.
Adding a Google Sheets Integration to Your Form
Now that you’ve successfully connected WPForms to your Google account, it’s time to add a Google Sheets integration to your form. To do this, you’ll need to create a new form or edit an existing one to open the form builder.
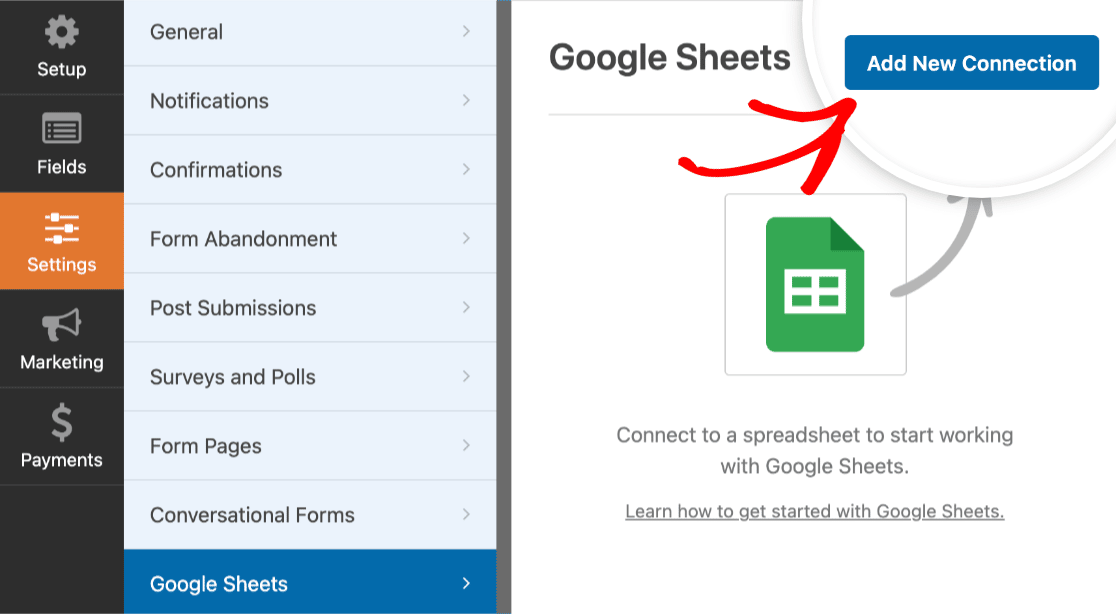
Once you’ve accessed the form builder, go to Settings » Google Sheets and click the Add New Connection button.
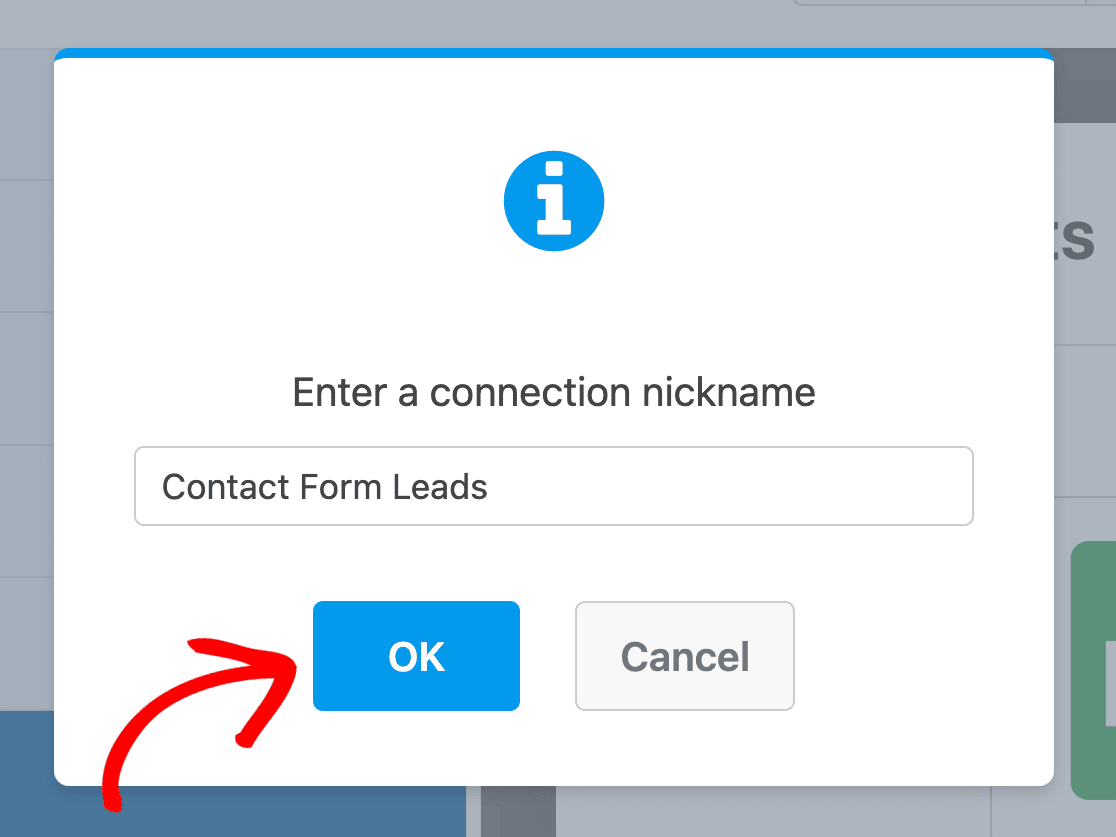
Next, an overlay will appear where you can enter a connection nickname. Feel free to use any nickname you’d like, as this won’t be visible to your users. Once you’ve added a nickname, click the OK button.
Configuring Connection Settings
After you add a connection nickname, additional settings will appear. Here you’ll see options to create a new spreadsheet or select an existing spreadsheet that you already have in your Google account.
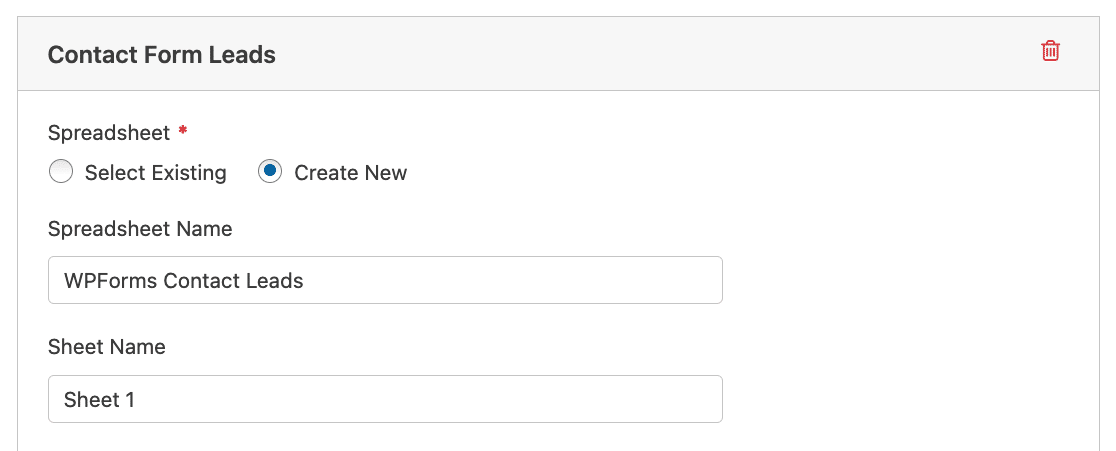
For this example, we’ll create a new spreadsheet by selecting the Create New option.
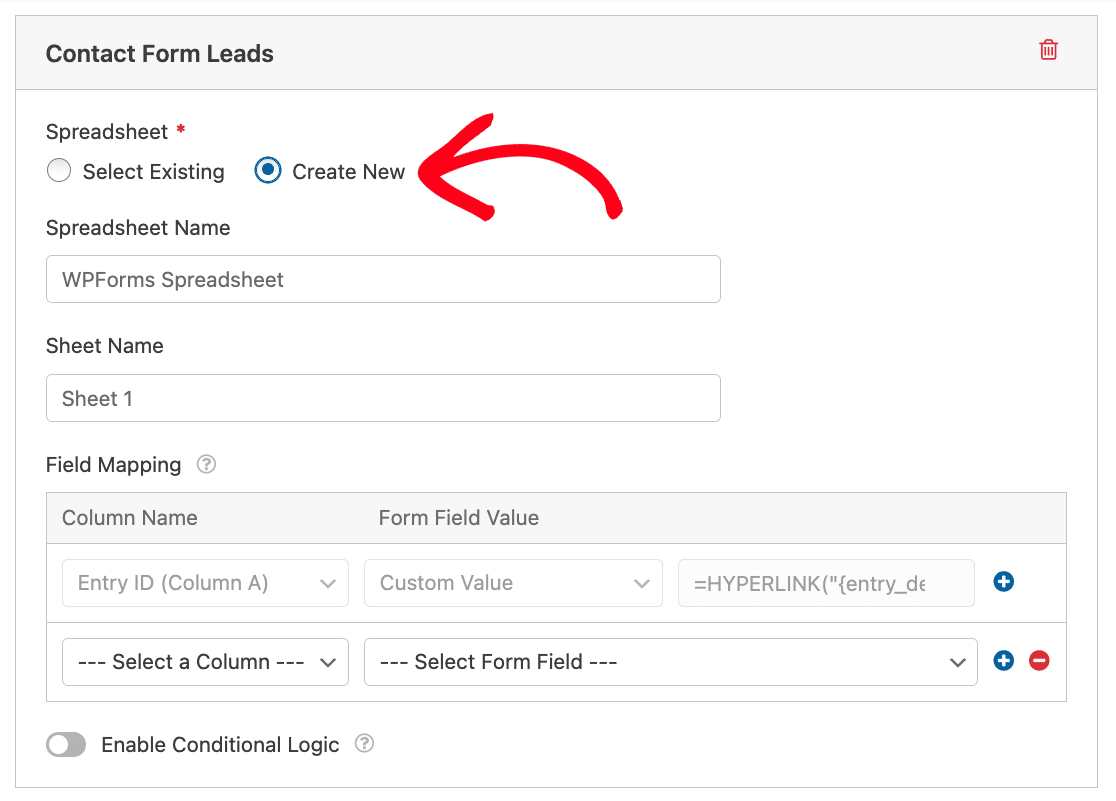
Although it’s optional, we recommend adding a name to the Spreadsheet Name and Sheet Name fields to help you keep track of your spreadsheet.
Accessing Your Spreadsheet From the Form Builder
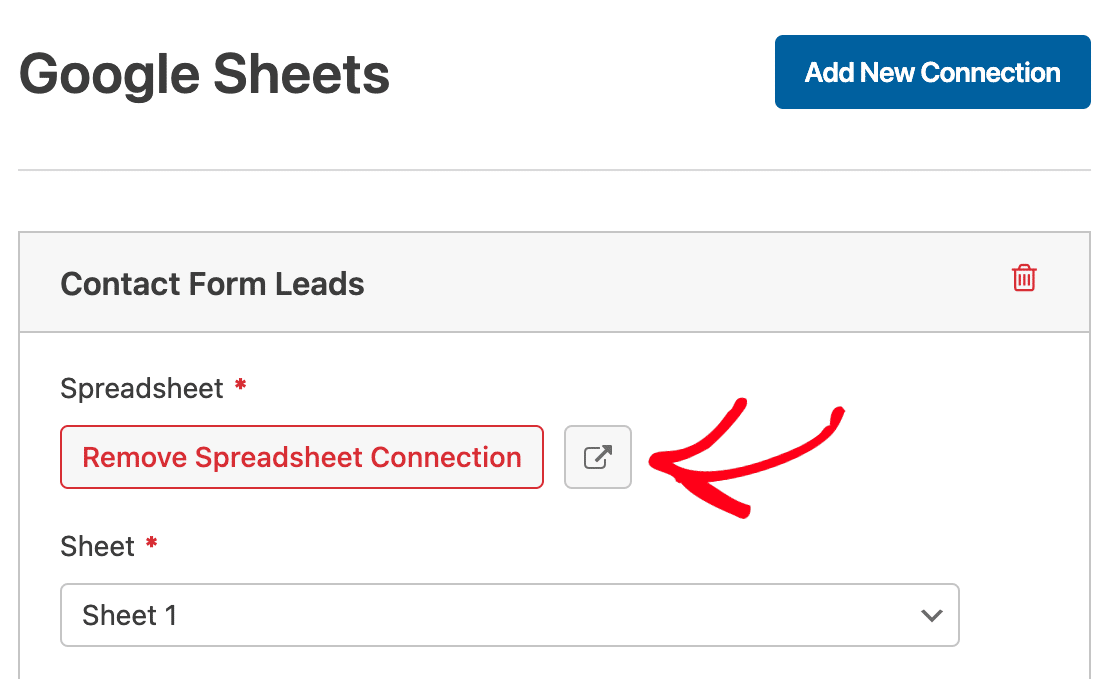
Once you’ve connected your form to a Google spreadsheet, a link icon will appear under the Spreadsheet section of your connection settings.
Go ahead and click the link icon to open your Google spreadsheet in a new browser tab.
Mapping Form Fields to Google Sheets
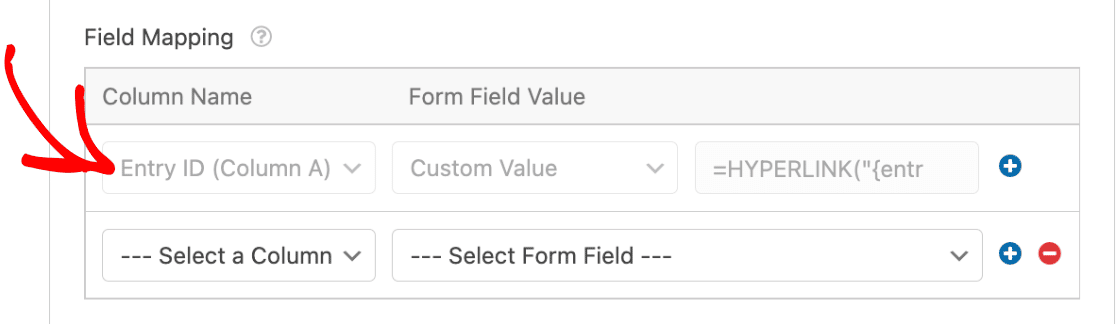
Under the Field Mapping option, you’ll see two columns for mapping your form fields to your spreadsheet: Column Name and Form Field Value.
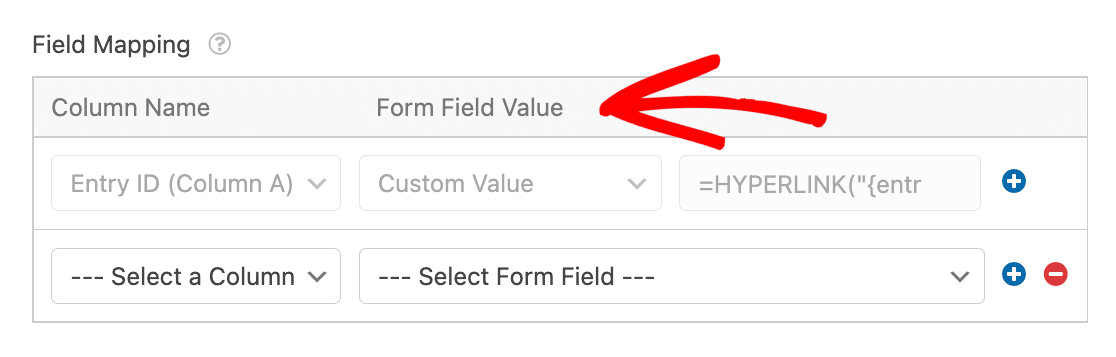
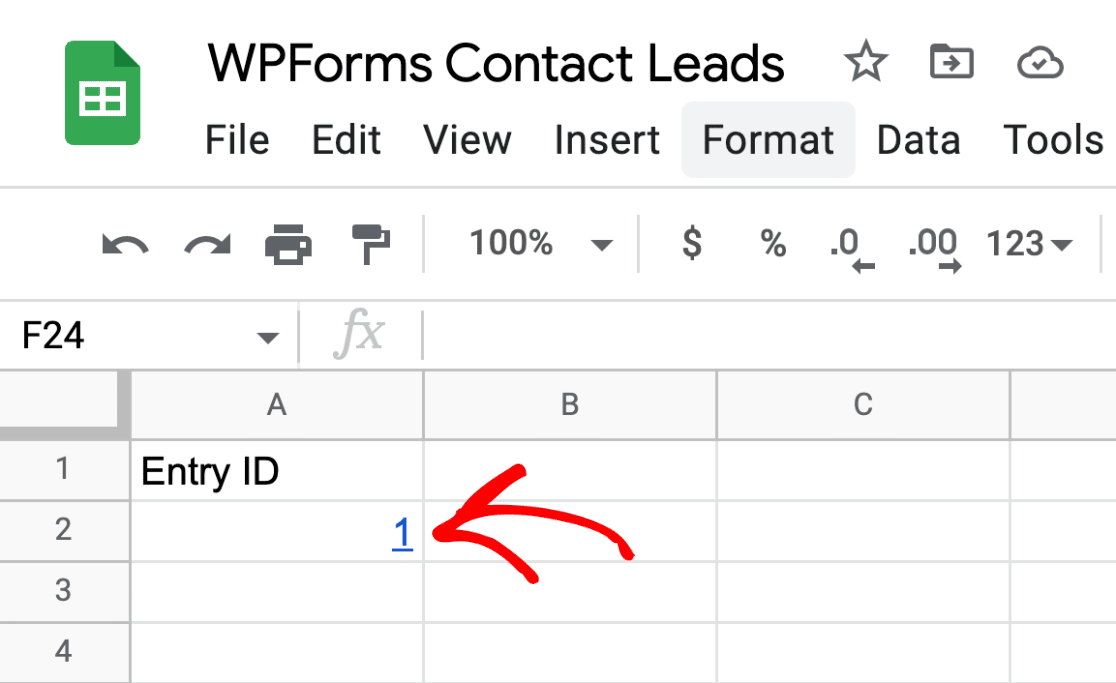
By default, WPForms maps the Entry ID to Column A of your spreadsheet.
When the form submission is added to your spreadsheet, the Entry ID will appear as a link in Column A. Clicking the Entry ID link will take you to the individual entry page for that particular form submission.
If you’d like to map form data to a new column, simply click the Column Name dropdown and select your desired column.
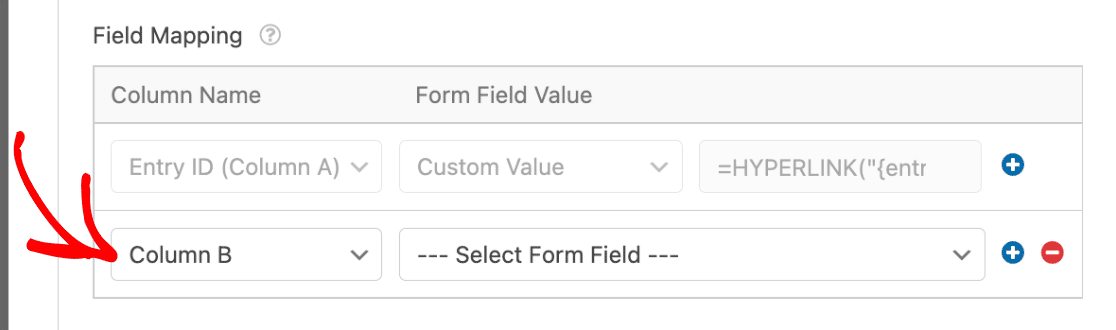
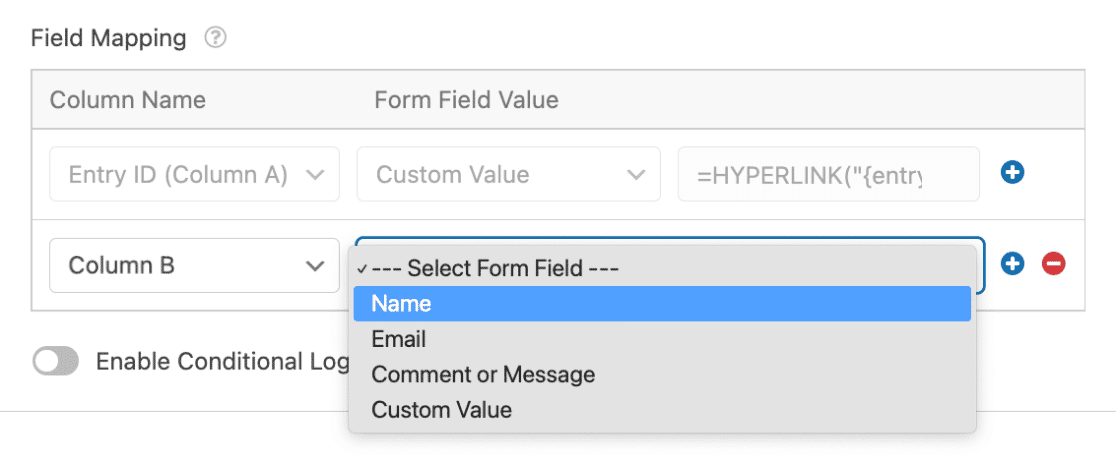
Then, you’ll need to select a form field you’d like to map to the column in your Google spreadsheet. To select a form field, click the Form Field Value dropdown and click on the form field you’d like to use.
For our example, we’ll select the Name field.
In our Google spreadsheet, we’ll now have a column where we can see the names of users who submit our form.

Adding a Custom Value
Instead of selecting a field from your form to map to your spreadsheet, you can use a Custom Value, such as a Smart Tag or Google Sheets formula.
To add a custom value, click the Form Field Value dropdown and select Custom Value.
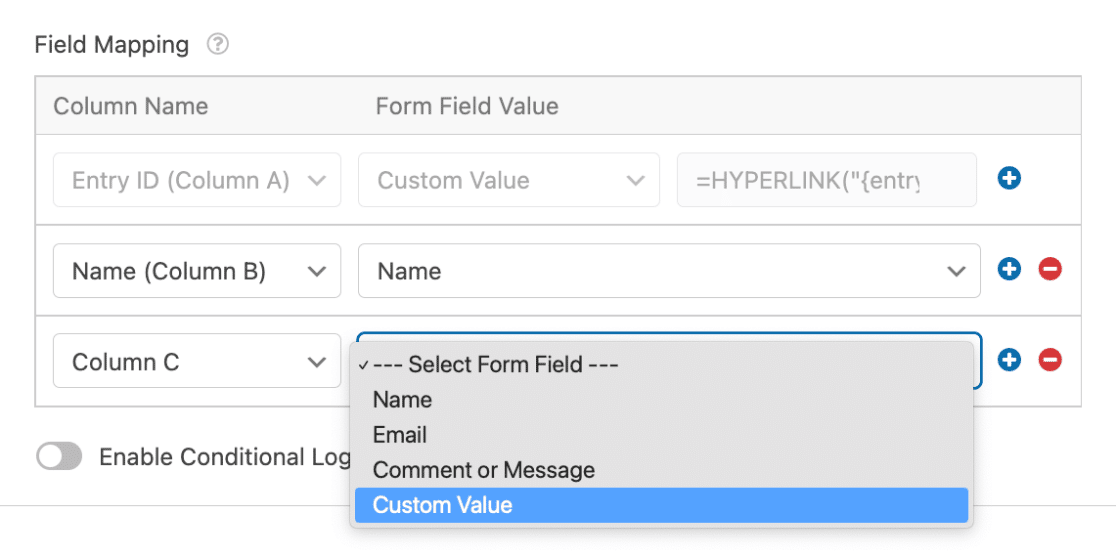
Then, a new field will appear where you can insert your custom value.
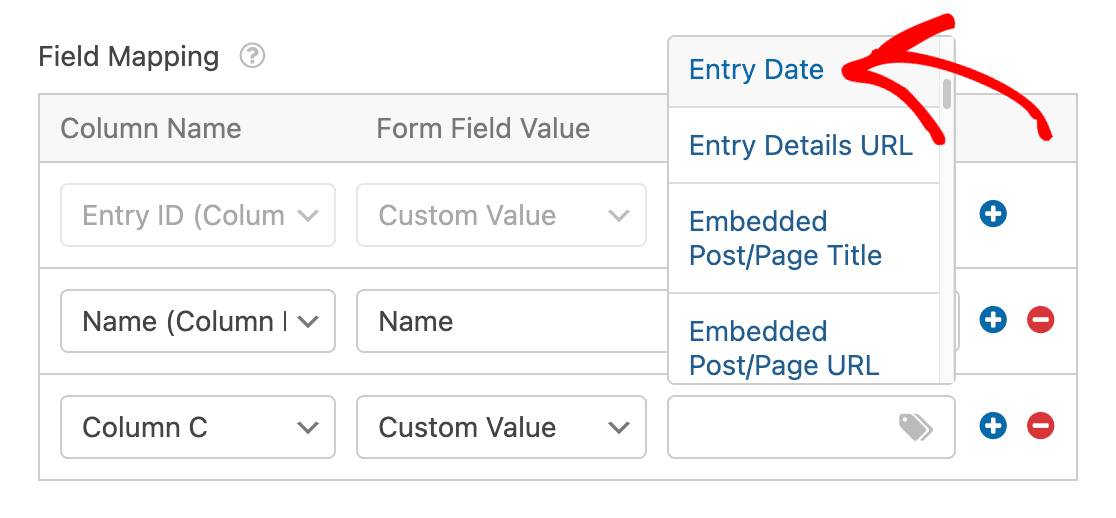
If you’d like to use a Smart Tag for the custom value, go ahead and click the Smart Tag.
You’ll then see a list of available Smart Tags. For our example, we’ll select the Entry Date Smart Tag so we can quickly see the date of the form submission in our spreadsheet.
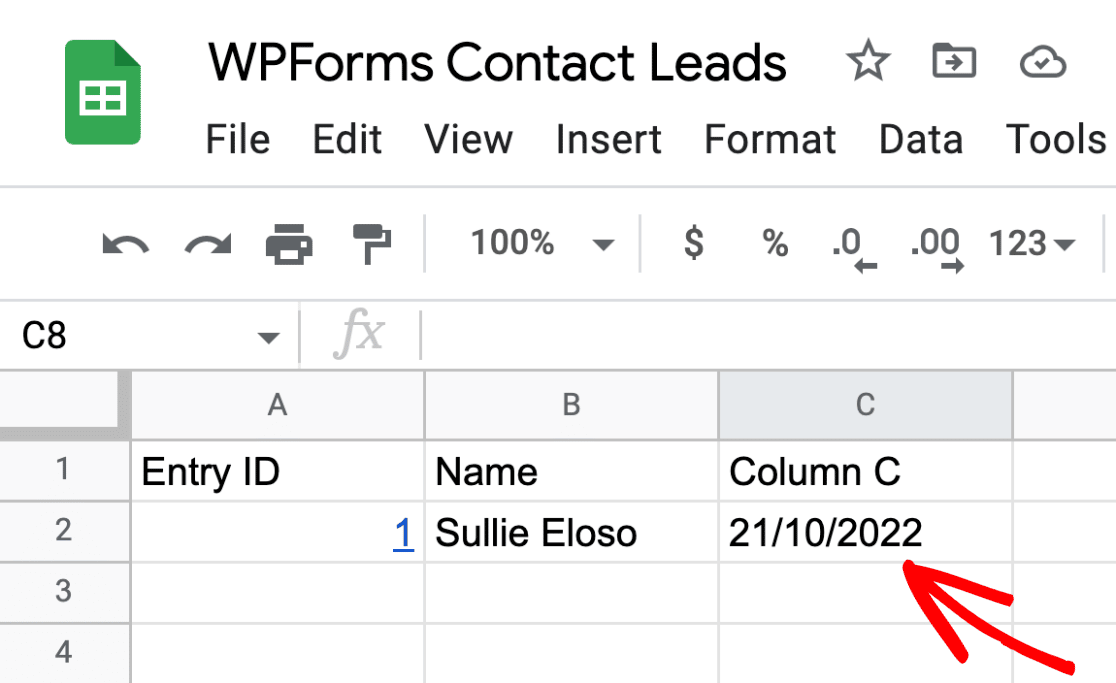
Now when a user submits our form, we’ll see the date of the form submission will appear in our Google spreadsheet.
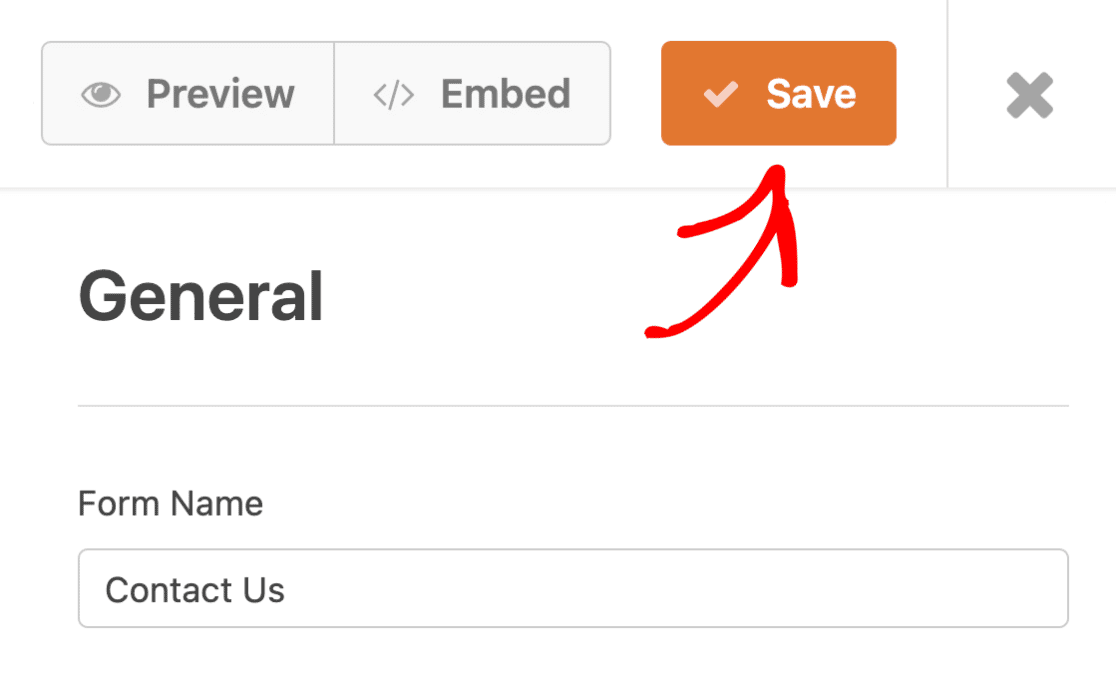
Once you’re finished configuring your connection settings, be sure to save your form by clicking the Save button.
Frequently Asked Questions
Below are some of the most common questions we receive about using the Google Sheets addon with WPForms.
I have a lot of spreadsheets in my Google account. Why don’t I see all of my spreadsheets when I try to select one to use with WPForms?
Please double-check your access permissions for the specific Google spreadsheet you’d like to use. Only Google spreadsheets you have permission to edit will appear in the list of available spreadsheets to select. To learn how to request Editor access, check out Google’s documentation on sharing files from Google Drive.
Once you have Editor access, the list of available spreadsheets may take a few minutes to update in your WPForms settings.
Can I disconnect the Google Sheets addon in WPForms?
Yes, WPForms provides the option to disconnect your Google Sheets connection for a single form or from your site entirely. To learn more, see our tutorial on disconnecting Google Sheets connection in WPForms.
I have more than 26 fields in my form. How do I add extra columns in Google Sheets?
By default, Google Sheets has 26 columns representing the 26 letters of the alphabet (A-Z). If you require more than 26 columns when setting up Google Sheets on your form, you’ll need to create the new columns from the Google Sheets doc.
For more details, be sure to check our tutorial on adding an extra column in Google Sheets.
Why can’t I see a shared corporate spreadsheet in the available options for form connection?
If you can’t see a corporate spreadsheet shared via email groups, it’s likely due to the connected Google Sheets addon account not having direct Editor access. To fix this, ensure the connected account email has Editor access to the spreadsheet, even if you already have group access.
Keep in mind that the list of available spreadsheets is cached and updated every 10 minutes. You may need to wait or clear your cache to see the updated list.
For more details on sharing files and managing access permissions in Google Drive, check out Google’s documentation for sharing files from Google Drive
Why do deleted column names still appear when I reconnect my Google Sheet to WPForms?
This occurs due to a 15-minute caching of column names in WPForms. To resolve this, either wait 15 minutes for the cache to update or manually clear the WordPress transient cache. For more info on clearing cache, follow WPBeginner’s guide to managing and deleting transients in WordPress.
I’m not seeing the option to update WPForms. How do I update the plugin?
Google Sheets addon requires having the latest version of WPForms installed on your website. Sometimes, the option to update the plugin won’t show in your WordPress admin area.
To resolve this, you’ll need to force your WordPress site to check for plugin updates. For more details, see WPBeginner’s guide to forcing plugin updates in WordPress.
Why are blank rows appearing in my Google Sheet when formulas are used?
This issue may occur due to how Google Sheets handles formulas in combination with newly appended rows. If your sheet includes formulas (especially in extra rows or a separate “Calculations” sheet), Google Sheets might automatically expand or shift these formulas when a new row is added by WPForms. This can lead to blank rows being appended unexpectedly.
Workarounds you can try:
- Use the ARRAYFORMULA function: Instead of copying formulas manually down the rows, wrap them in an
ARRAYFORMULAto handle new entries dynamically. - Use relative reference formulas: Use formulas like
=INDIRECT("R[0]C[-1]", FALSE)which don’t rely on specific row numbers and instead calculate based on relative cell position. - Use Smart Tags for inline calculations: If you’re doing simple math with form fields, consider using Smart Tags in WPForms to calculate values before sending them to the sheet.
Can I send PDF links to Google Sheets?
Yes. If you’re using the PDF addon, you can add generated PDF link(s) to your spreadsheet by mapping the PDF Links Smart Tag as a custom value in your Google Sheets connection.
To set this up, go to Settings » Google Sheets in the form builder and open your connection. Next, under Field Mapping, choose the column you want to use, then select Custom Value and click the Smart Tag icon to choose PDF Links.

That’s it! Now you know how to set up and use the Google Sheets addon for WPForms.
Next, would you like to learn more about what you can do with user-submitted information in WPForms? Be sure to check out our complete guide to form entries to learn more.