AI Summary
Want to use our Google Sheets addon with a custom Google application instead of the WPForms Google app? Connecting to Google Sheets via custom application is sometimes the best option for developers and advanced users.
In this tutorial, we’ll show you how to use the WPForms Google Sheets addon with your own custom Google app.
In This Article
Requirements:
- You will need a Pro license level or higher to access the Google Sheets addon
- Ensure that you’ve installed the latest version of WPForms to meet the minimum required version for the Google Sheets addon
Before getting started, you’ll first need to make sure WPForms is installed and activated on your WordPress site and that you’ve verified your license. You will also need to sign up for a Google account if you don’t already have one and install and activate the Google Sheets addon.
Note: Connecting WPForms to a custom Google application is only recommended for developers or advanced users. If you don’t need a custom application, please see our guide to using the Google Sheets addon.
Enabling Advanced Mode
To get started, open your WordPress dashboard and go to WPForms » Settings. Then click on the Integrations tab.
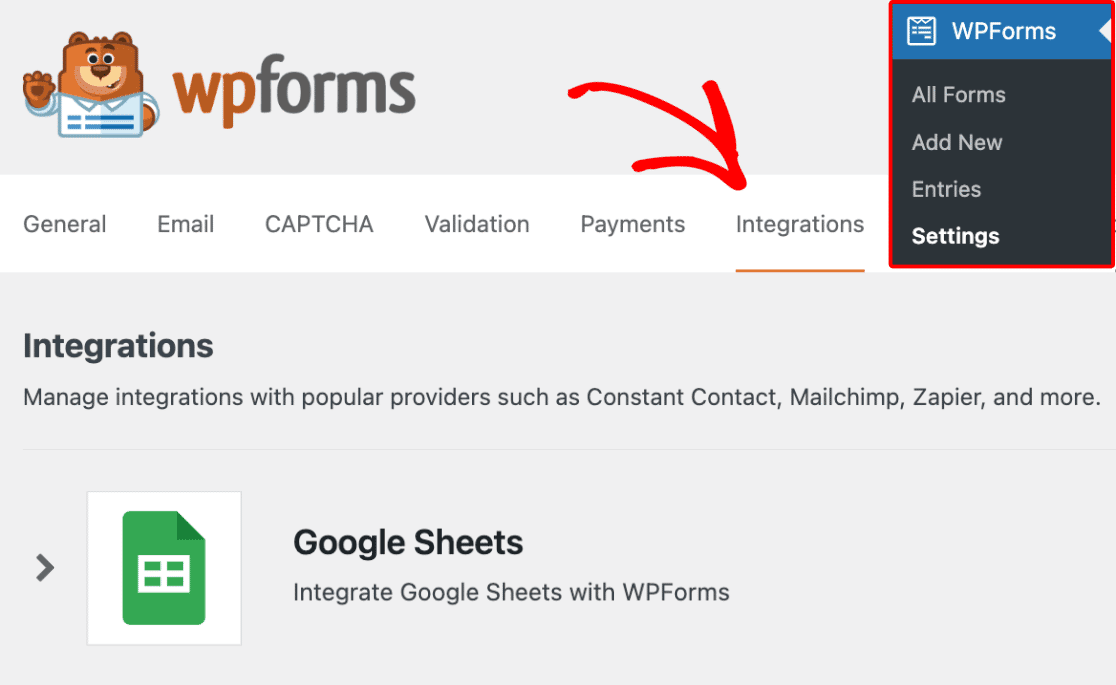
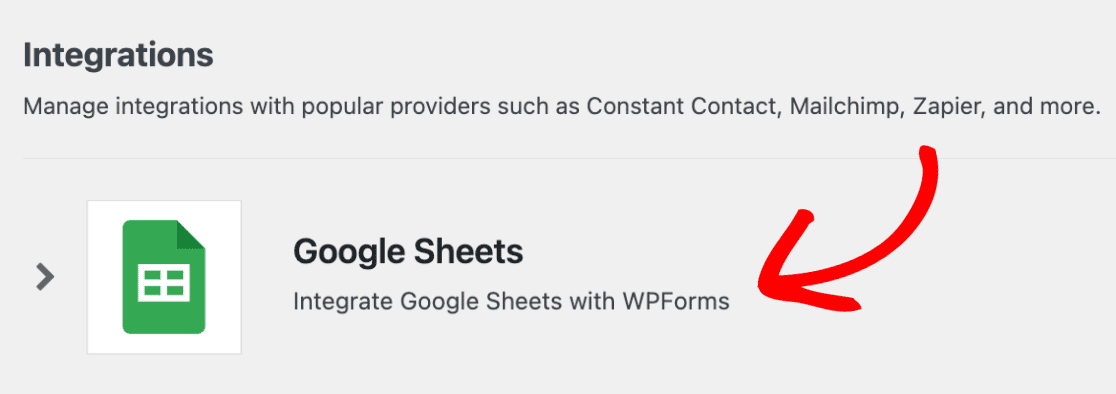
Next, click on the Google Sheets integration to expand its settings.
To get started with your Google application connection, click Enable Advanced Mode.
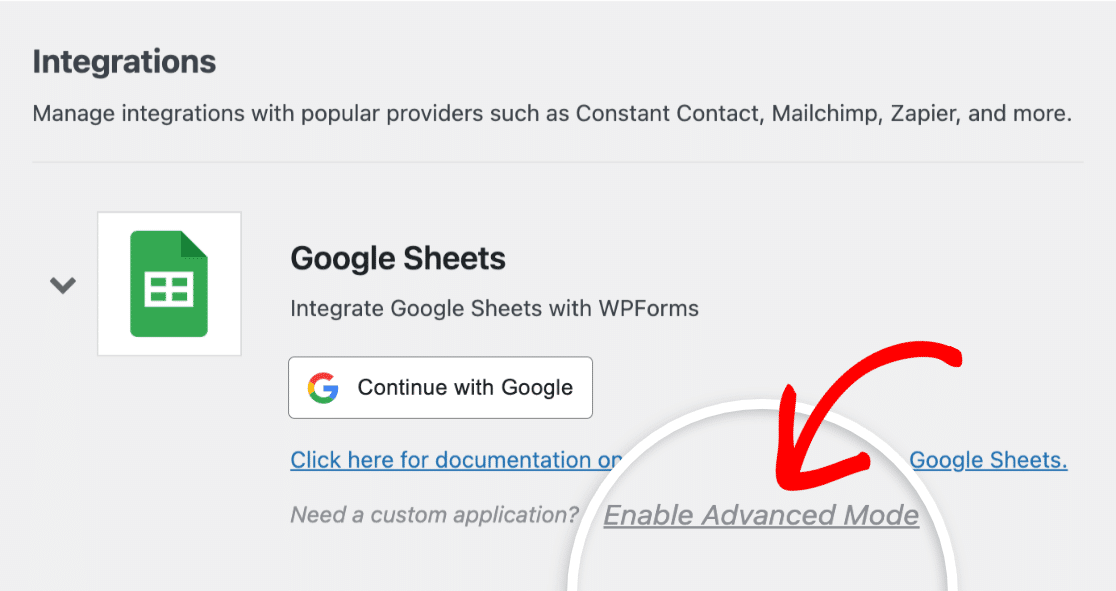
You’ll now see additional settings where you’ll need to enter information from the Google Cloud Platform.
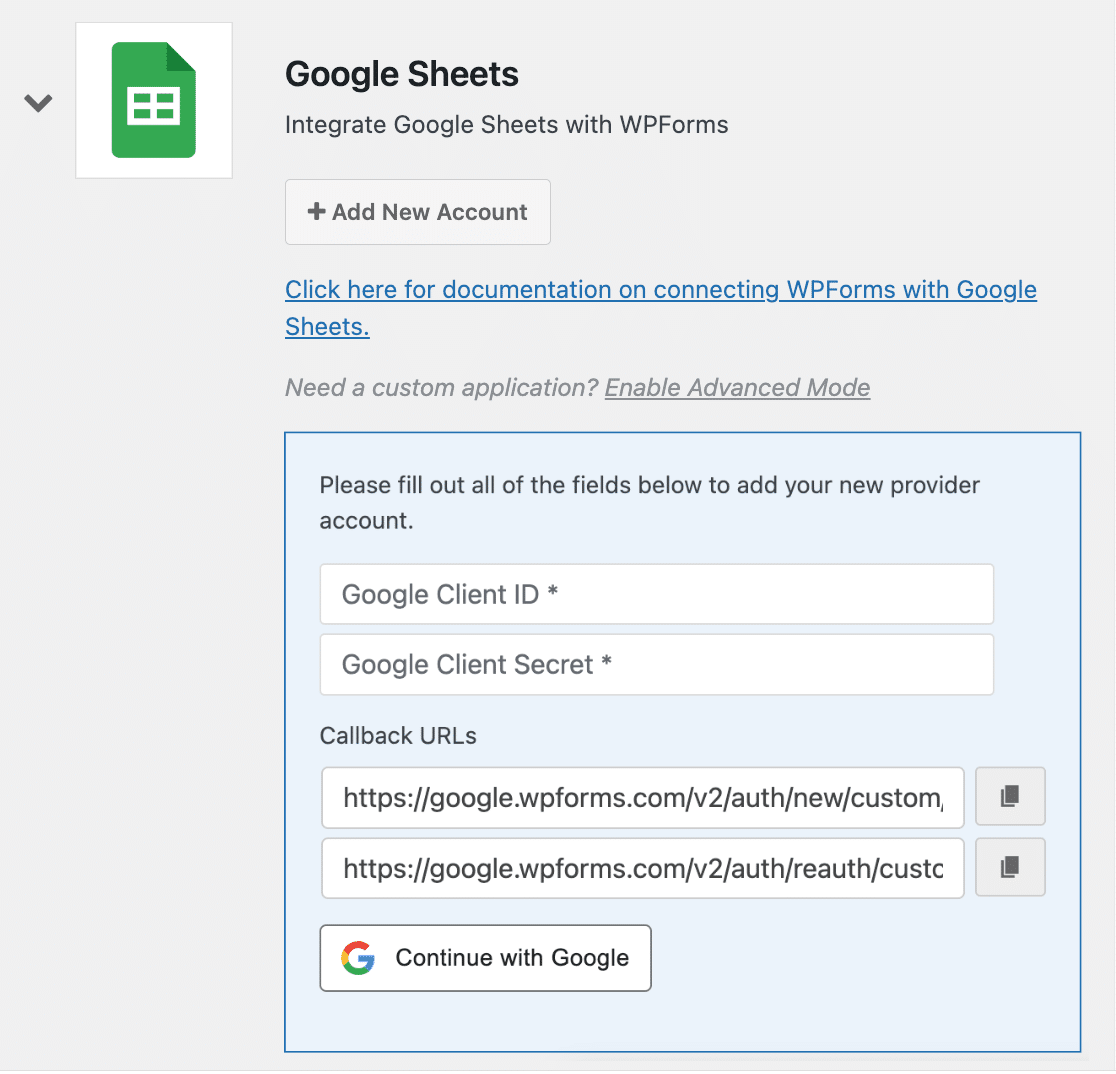
To find this information, you’ll first need to log in to the Google Cloud Platform and create a custom application. However, we recommend leaving your WPForms settings open in a separate browser tab while you create your application, as you’ll need to access them later.
Adding a New Project
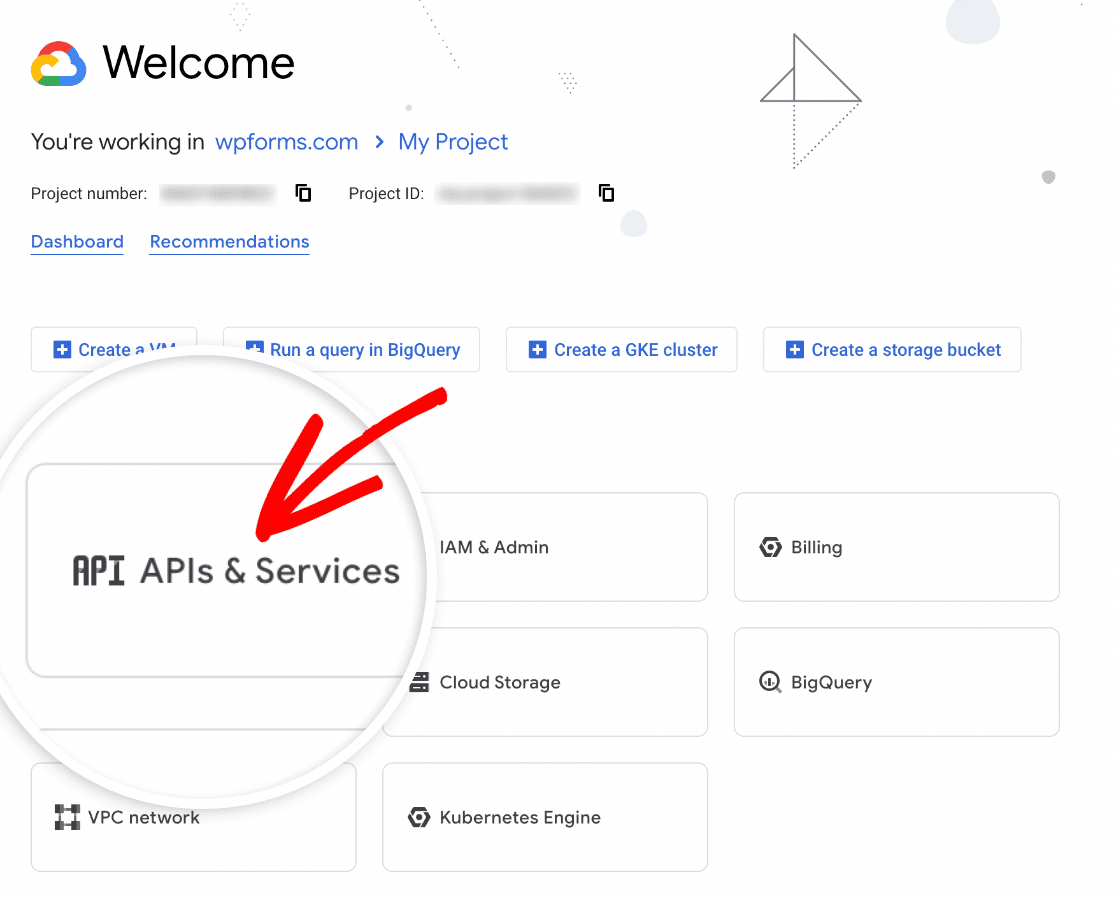
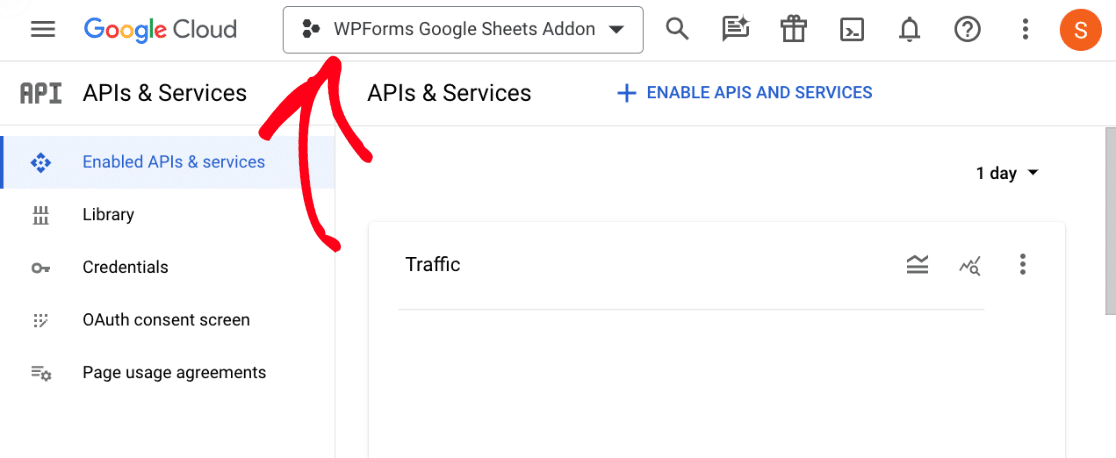
Once you’ve logged in to the Google Cloud Platform, click APIs & Services.
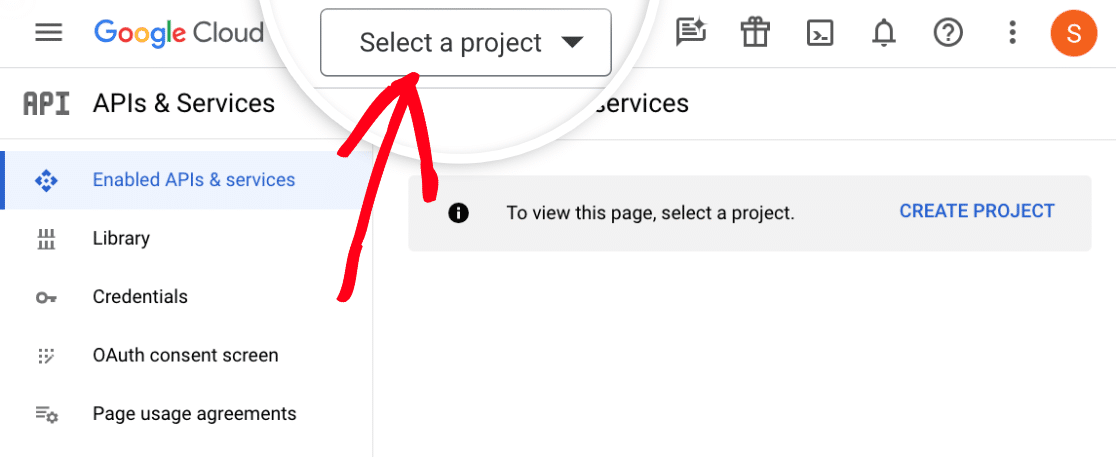
On the next screen, click the projects dropdown menu.
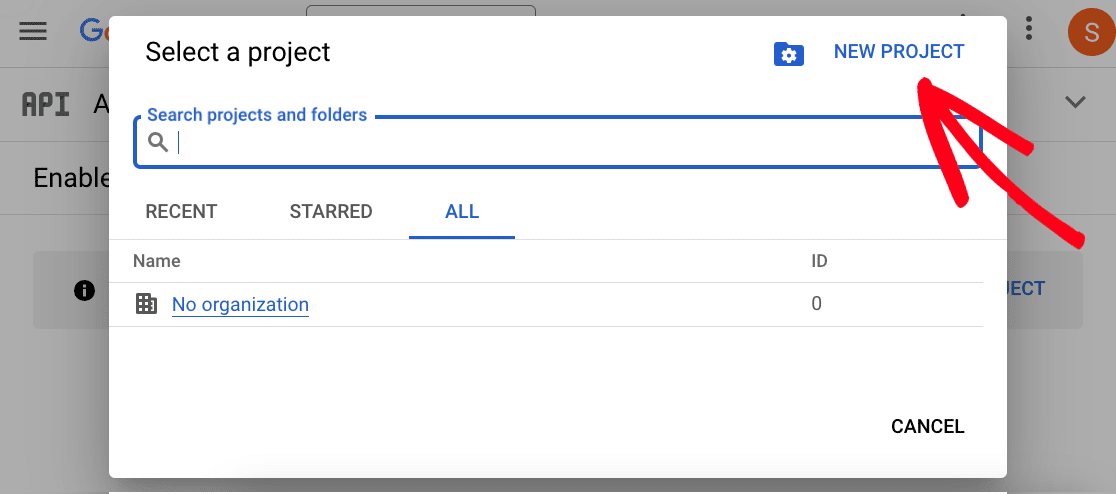
After that, an overlay will appear that shows your projects. Go ahead and click NEW PROJECT.
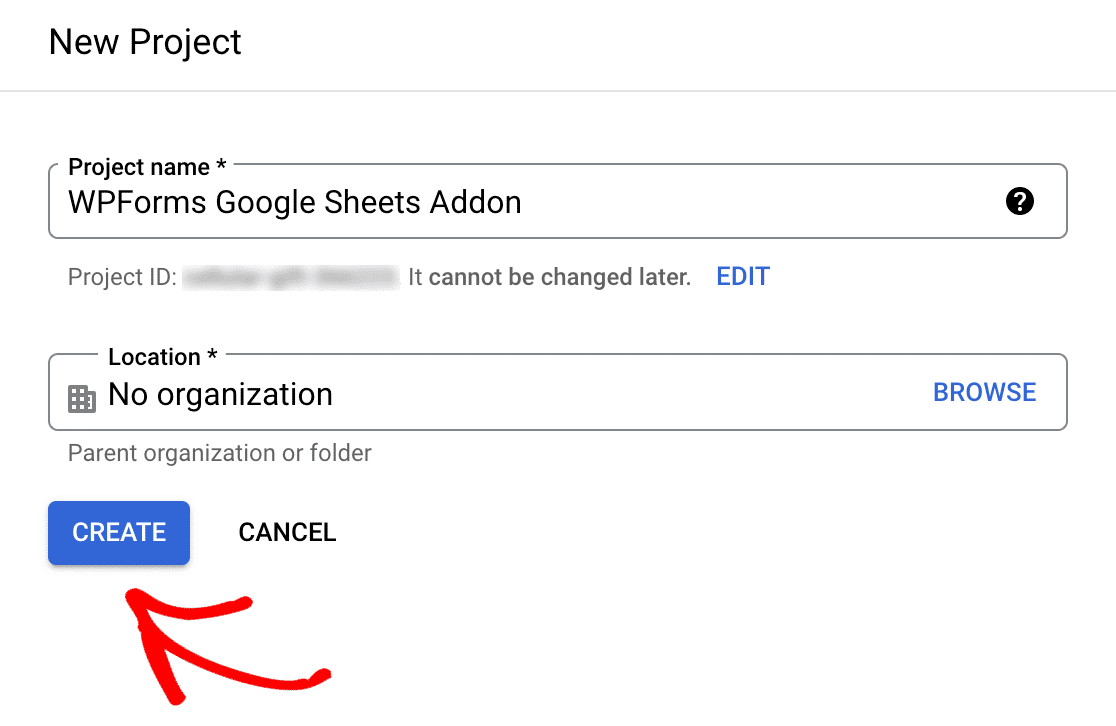
Next, you’ll need to add a name to the Project name field. We recommend using a name that will help you remember what you’re using the project for. However, you can use whatever name you’d like.
After adding a name, click the CREATE button.
Once you’ve created your project, click the project dropdown again and select your newly created project if it isn’t already selected by default.
Enabling Google APIs
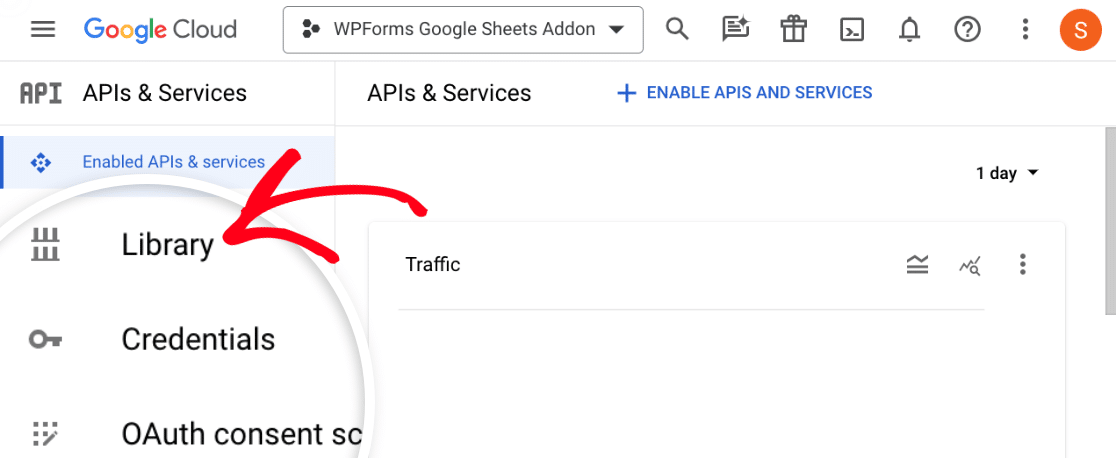
Now that your project is created, it’s time to enable some Google APIs. To start, click Library in the left-side menu.
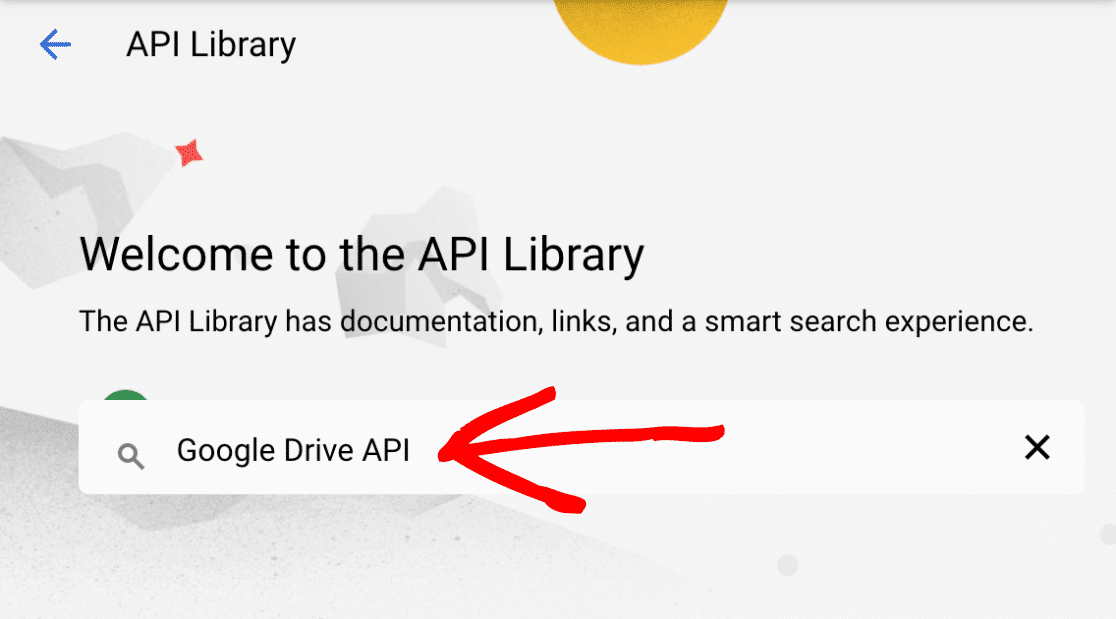
This will take you to the API Library where you’ll need to locate and enable 3 different APIs: Google Drive API, Google Sheets API, and Google Picker API.
Type “Google Drive API” in the search bar to locate the Google Drive API.
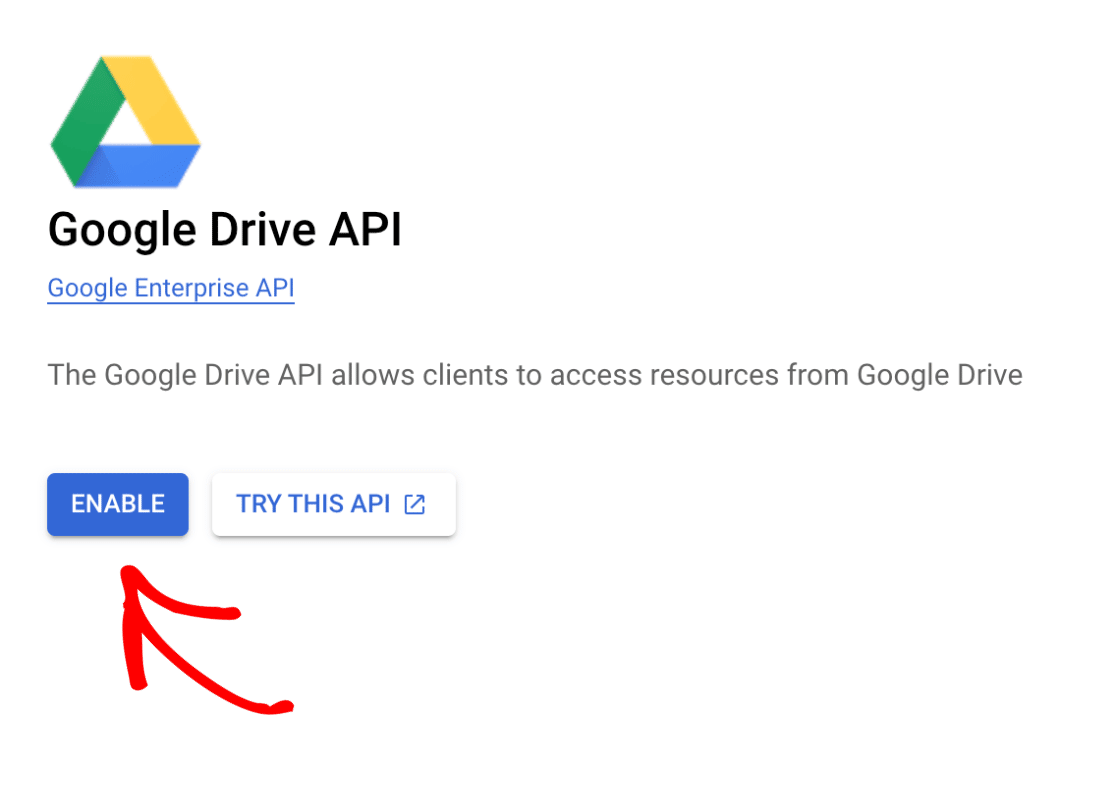
Once you’ve located the Google Drive API, click the ENABLE button.
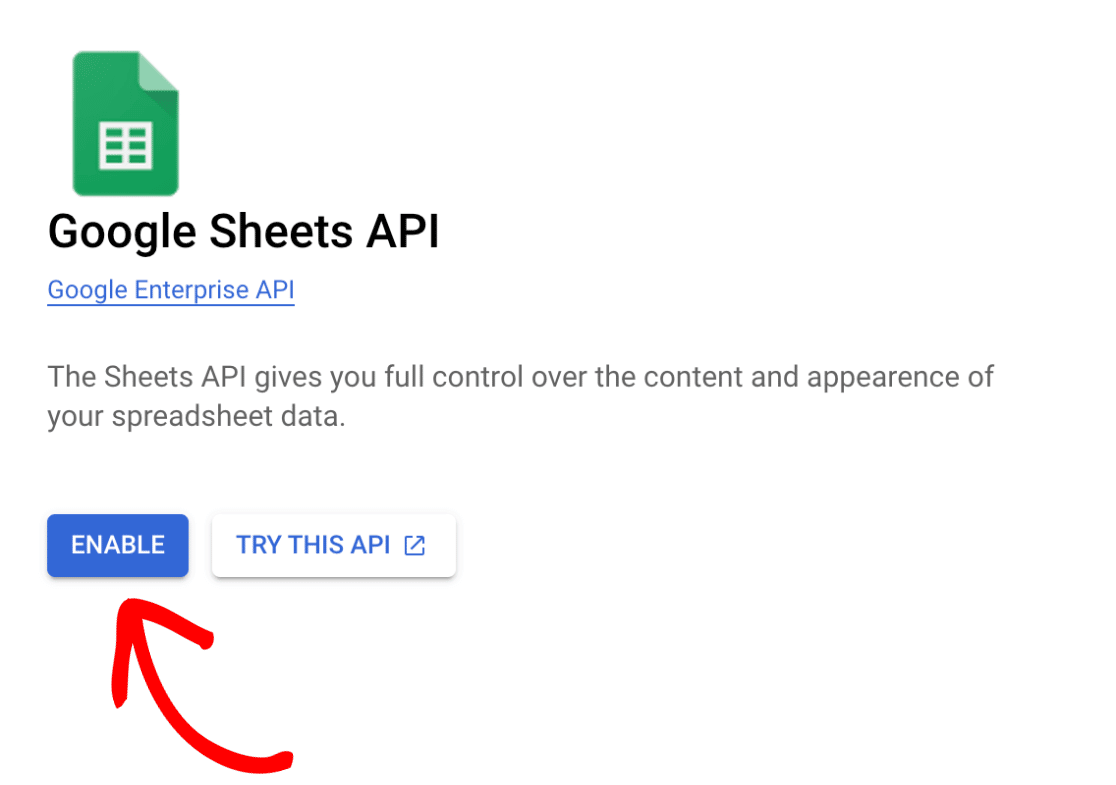
Next, head back to Google’s API library and type “Google Sheets API” in the search bar.
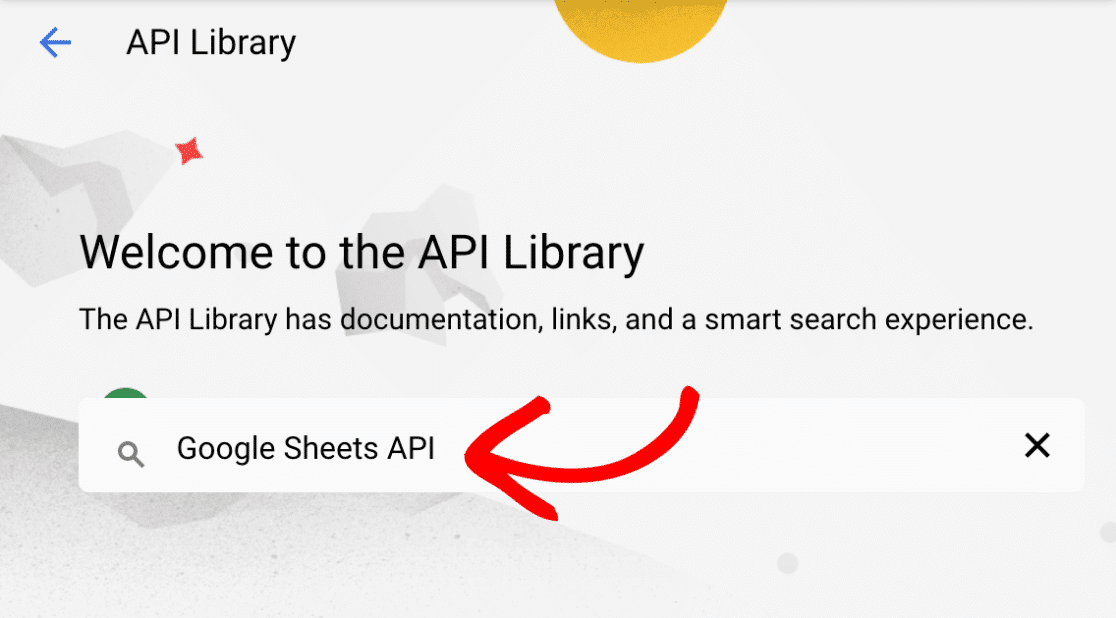
After locating the Google Sheets API, click the ENABLE button.
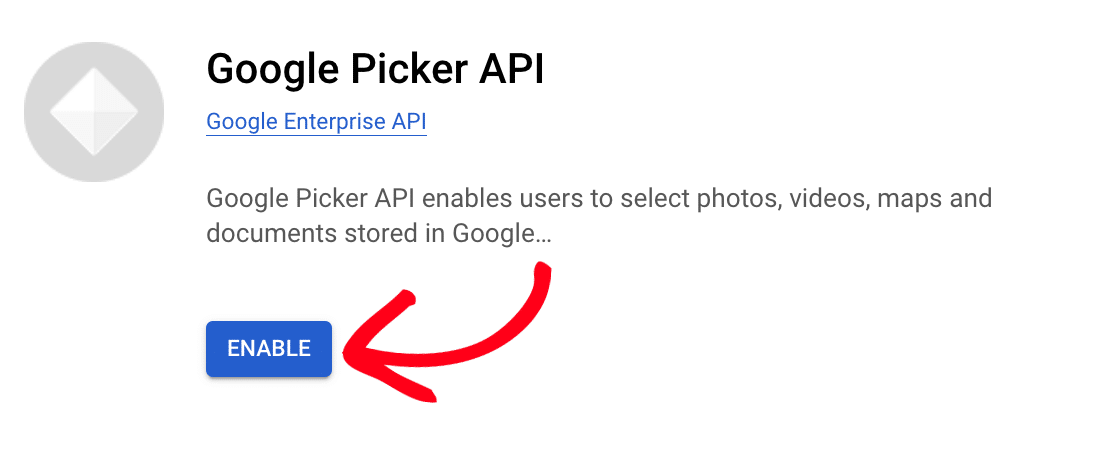
Finally, return to Google’s API library and type “Google Picker API” in the search bar.

Once you’ve located the Google Picker API, click the ENABLE button.
Selecting a User Type
Now that you’ve enabled the required APIs, click OAuth consent screen in the left-side menu.
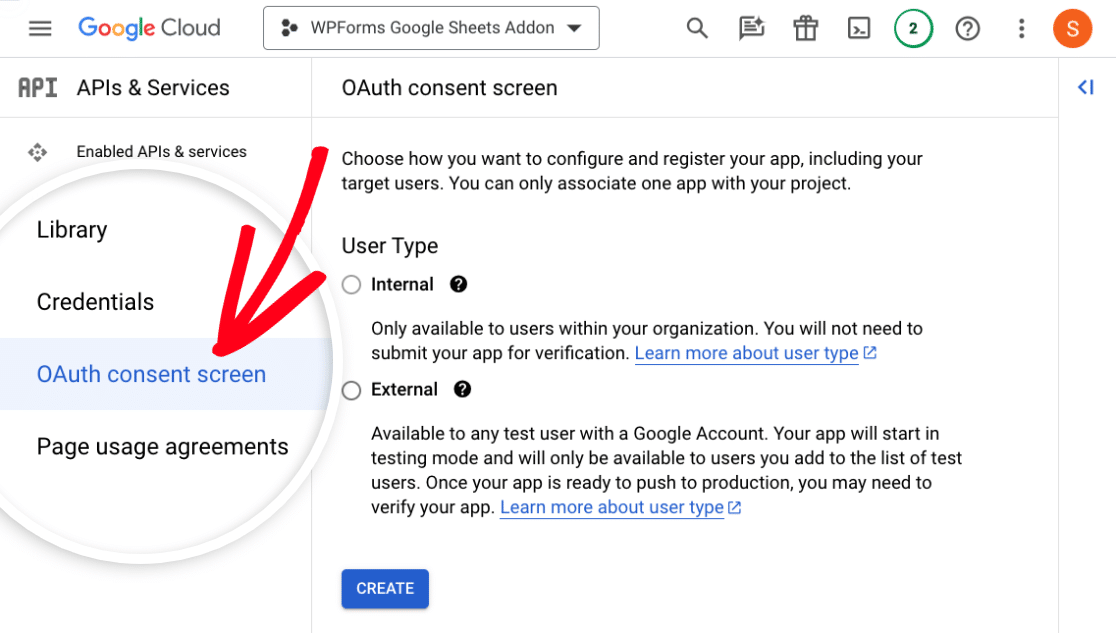
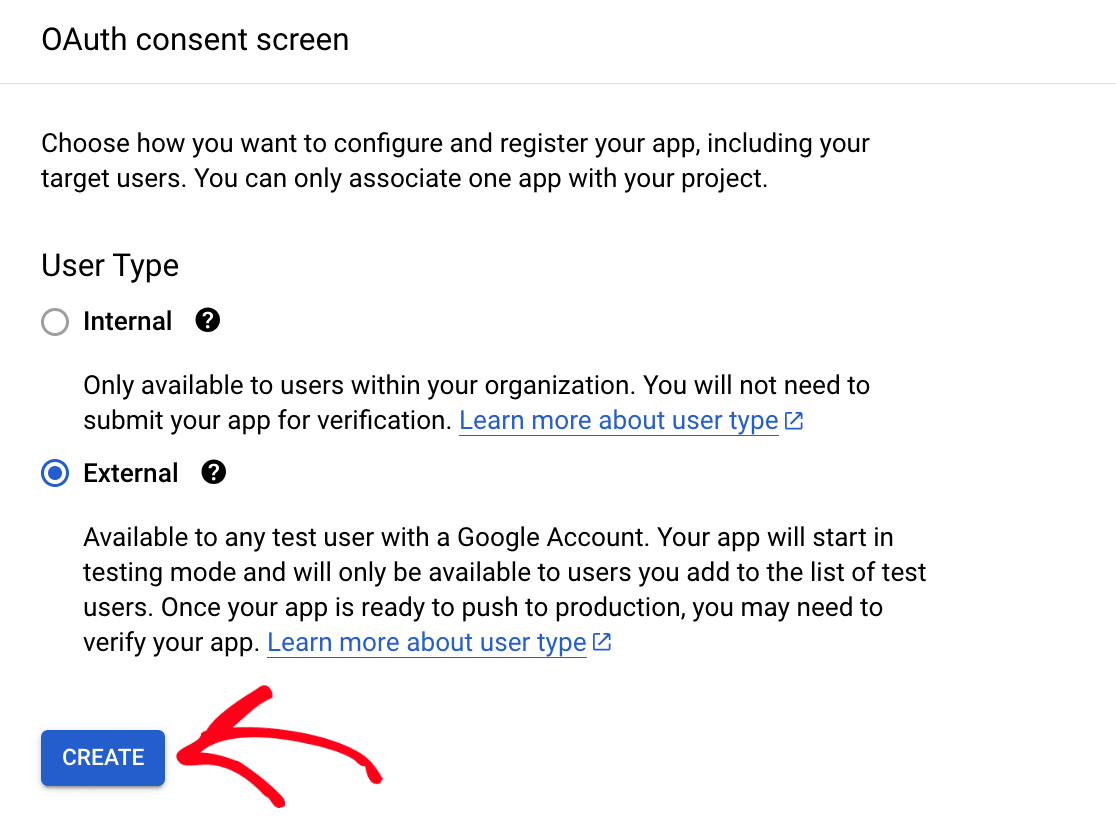
On the next screen, you’ll need to select a User Type for your application. You can select either Internal or External, depending on who you’d like to share your app with.
For our example, we’ll select External. Once you’ve made your selection, click the CREATE button to proceed.
Note: Be sure to check out Google’s documentation on user types to learn more about External and Internal users.
Registering Your App
After you’ve selected a User Type for your app, you’ll be redirected to a page to complete your app registration. You’ll need to complete a series of steps to register your app, which we’ll cover in the following sections.
Adding App Information
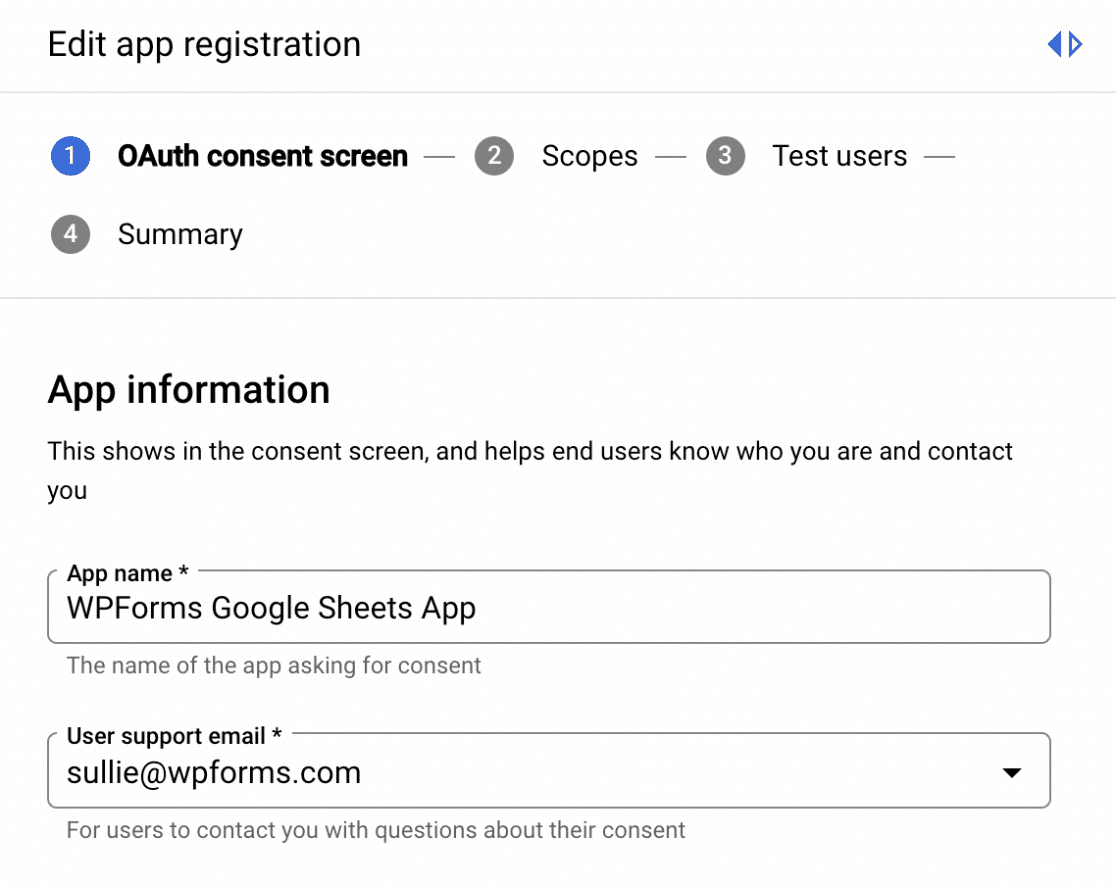
Adding information about your app is required and allows users to know who you are and how to contact you.
In the required fields, be sure to add an App name and User support email.
Adding an App Domain
Scroll down to the App domain section and locate the Authorized domains section. From here, click the ADD DOMAIN button.
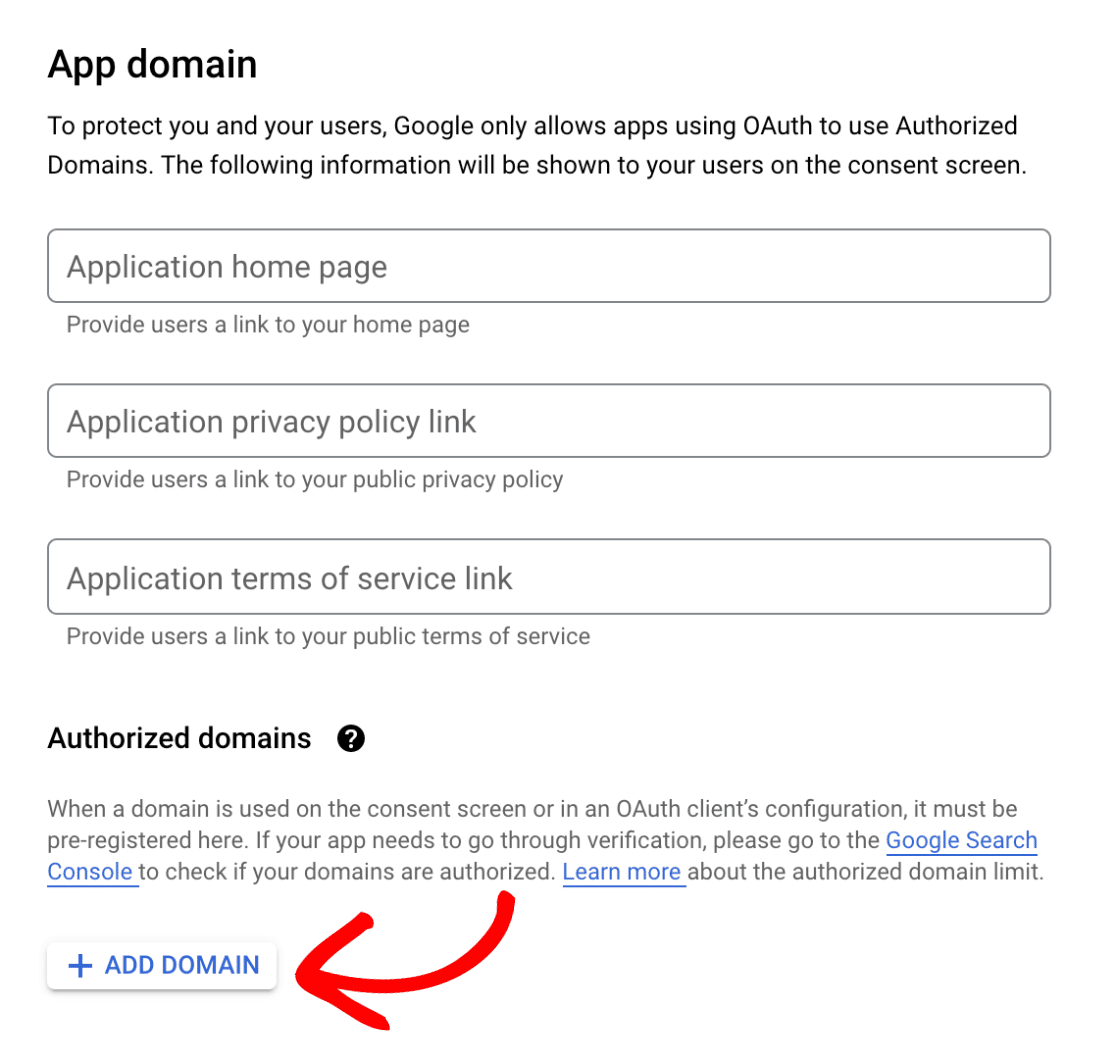
In the Authorized domain 1 field, you’ll need to add wpforms.com as your domain.

Note: You must add wpforms.com as your authorized domain, or your app will fail to connect to WPForms.
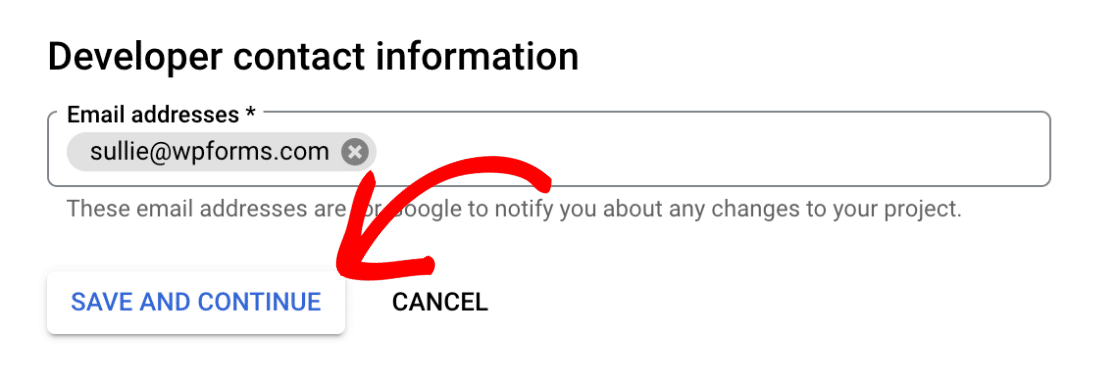
Adding Developer Contact Information
Next, add your preferred email address in the Developer contact information section. Google will contact you at this email address if there are any changes to your project.
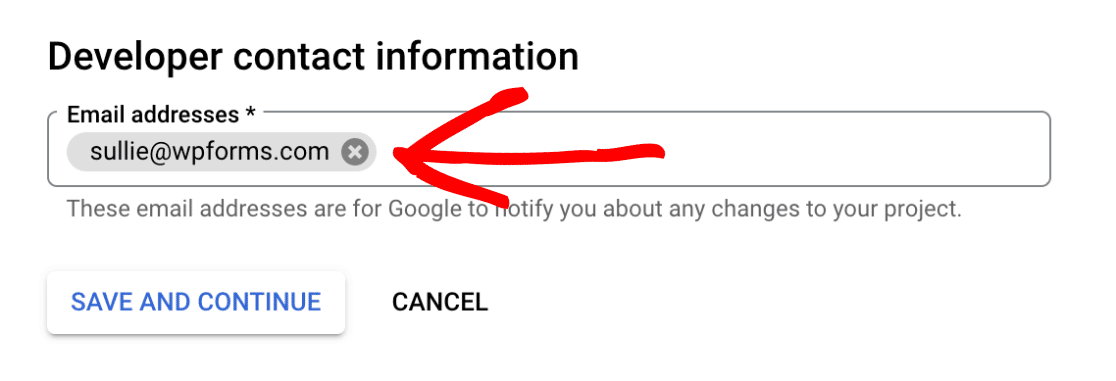
Finally, click the SAVE AND CONTINUE button to proceed to the next step.
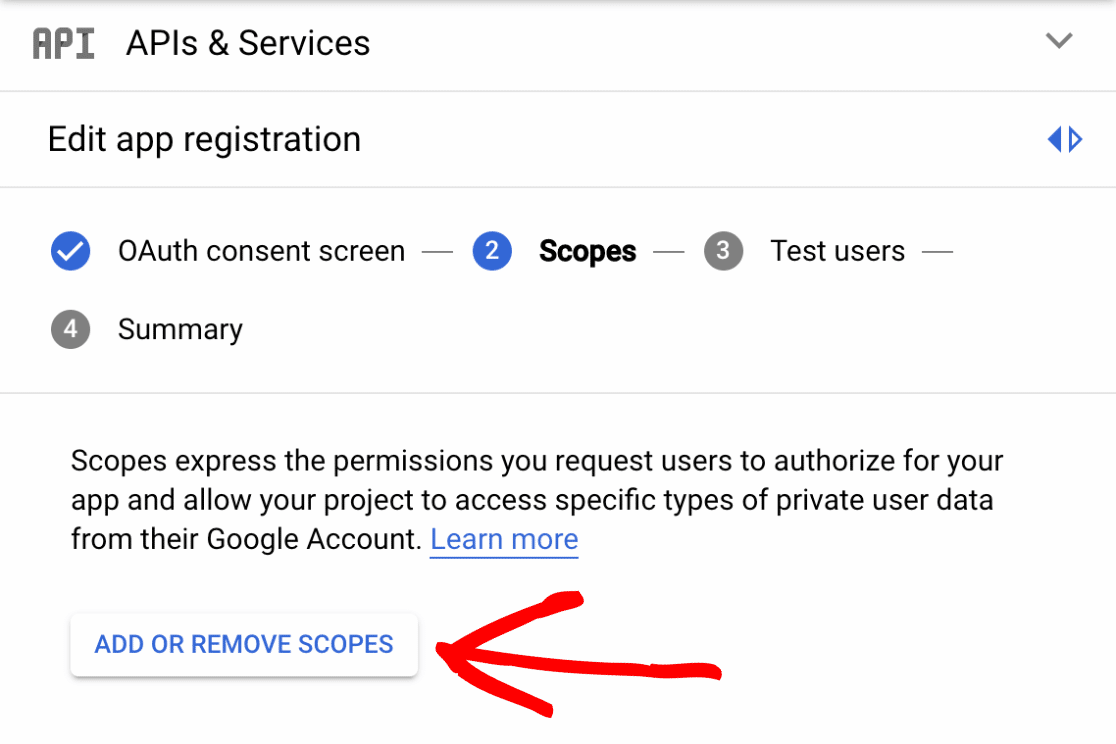
Adding Scopes
On the next screen, click the ADD OR REMOVE SCOPES button.
In the side modal that appears, click on the search bar labeled Enter property name or value.
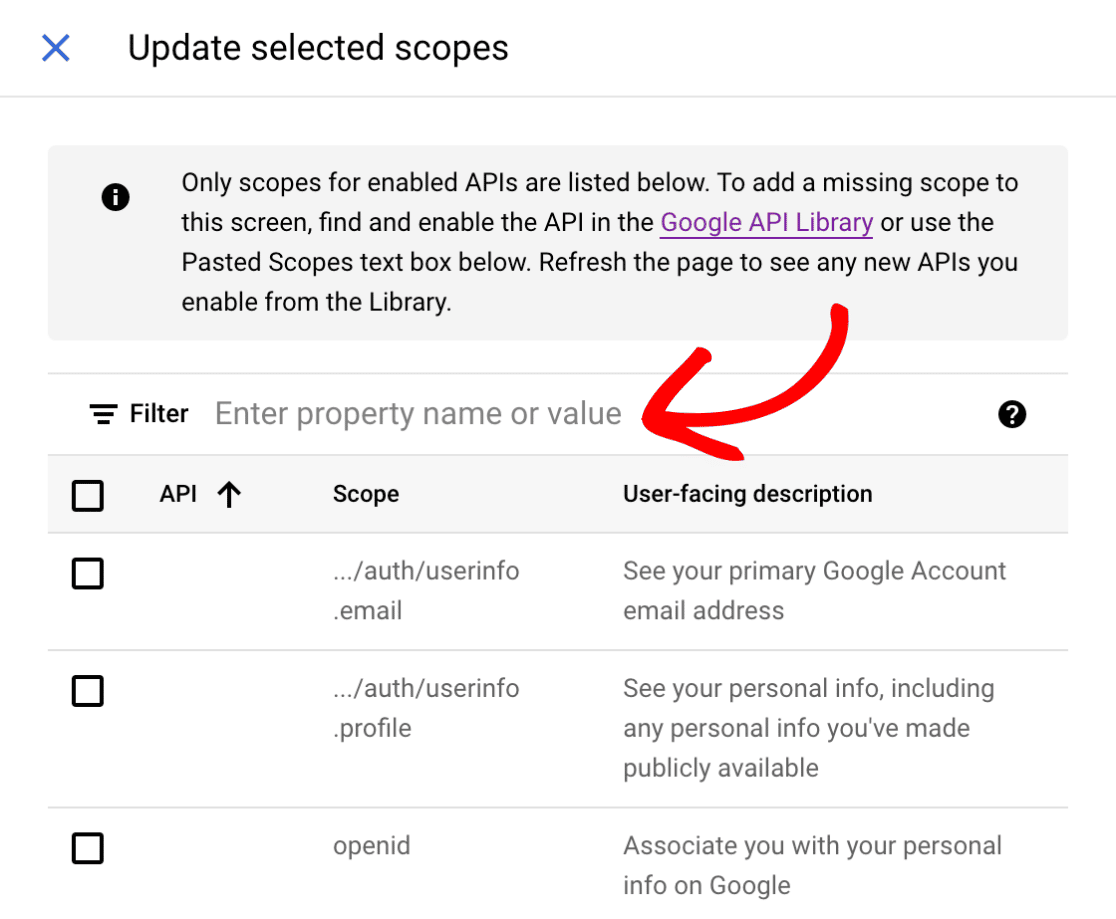
Then, go ahead and search for each of the following scopes:
https://www.googleapis.com/auth/userinfo.emailhttps://www.googleapis.com/auth/userinfo.profilehttps://www.googleapis.com/auth/drive.filehttps://www.googleapis.com/auth/spreadsheets
You’ll need to enable each of the above scopes by clicking the checkbox on the left side.
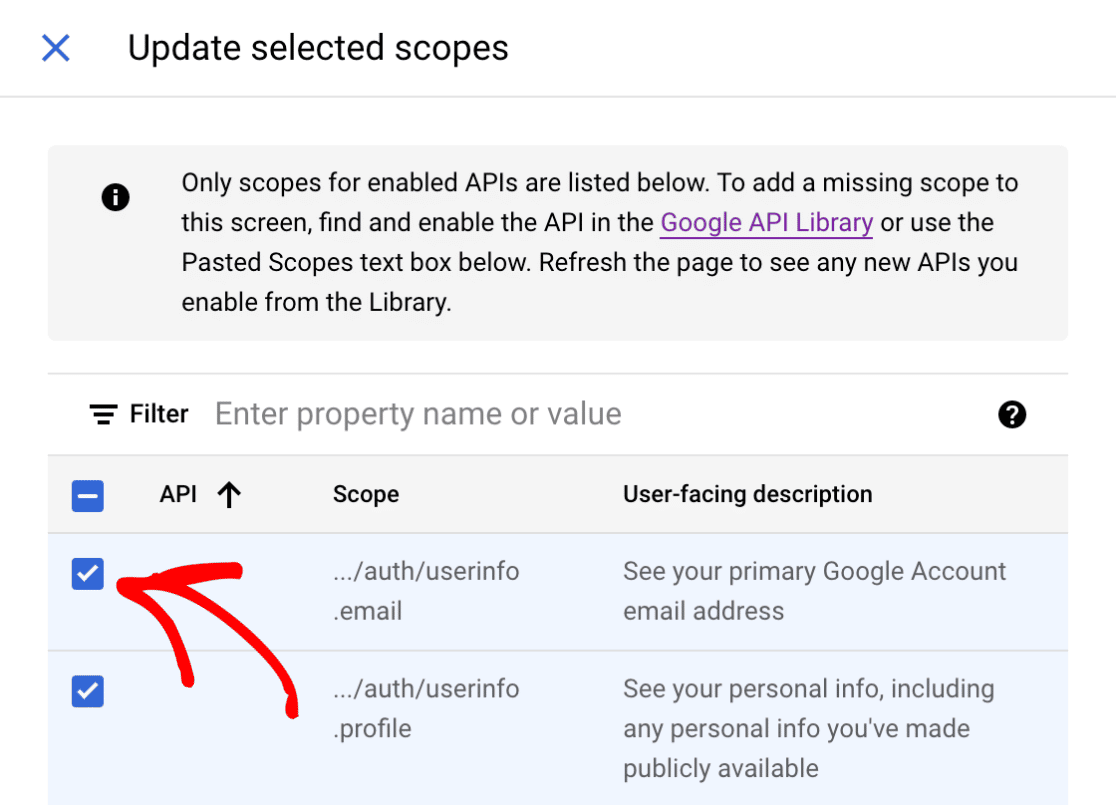
Once you’ve enabled the required scopes, click the UPDATE button located at the bottom of the screen.
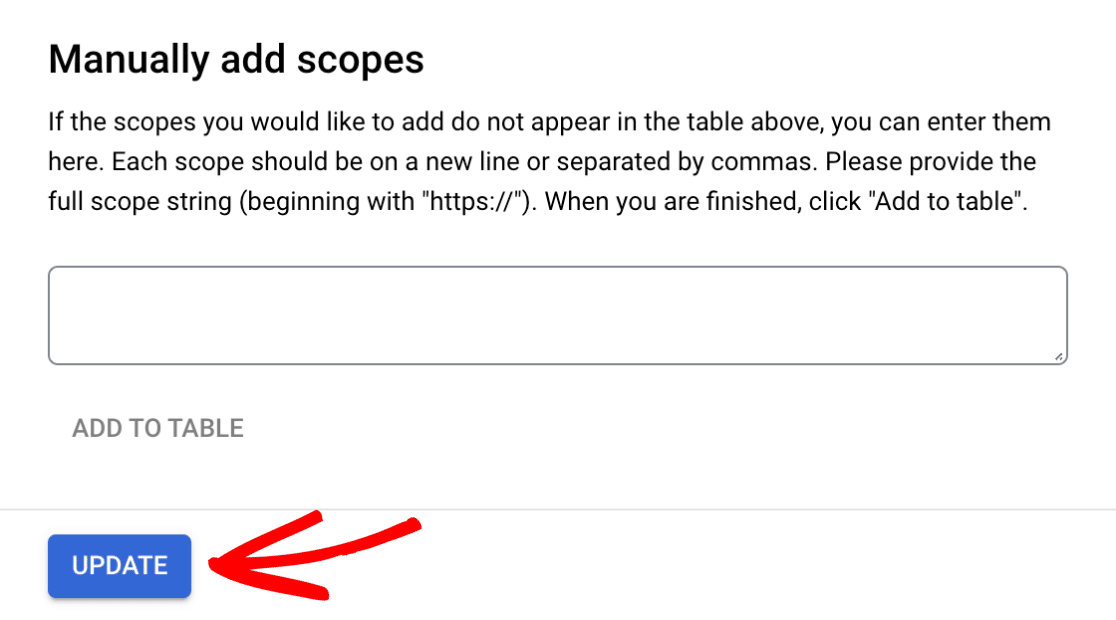
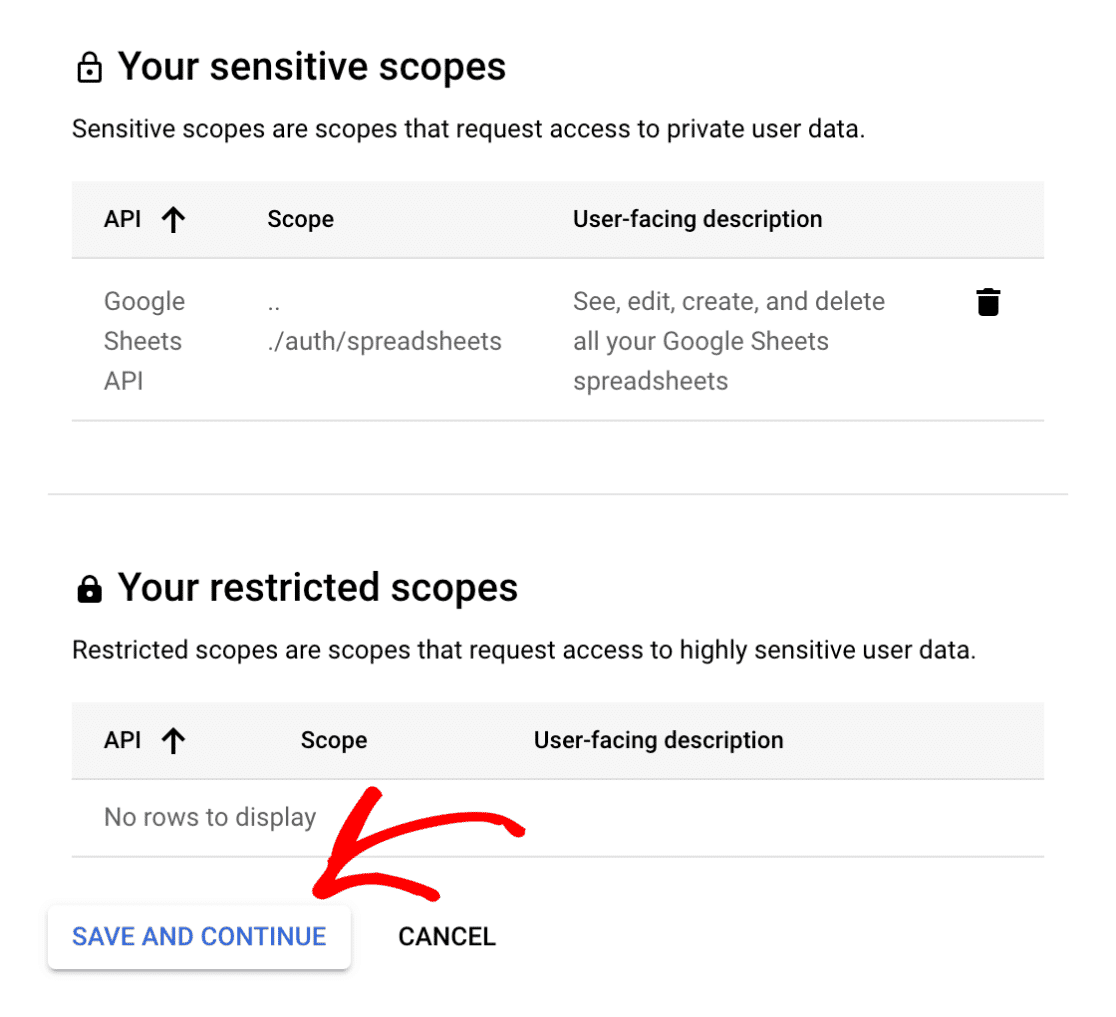
You’ll then return to the Scopes screen where you can view and manage your enabled scopes. From here, go ahead and click the SAVE AND CONTINUE button to save your changes.
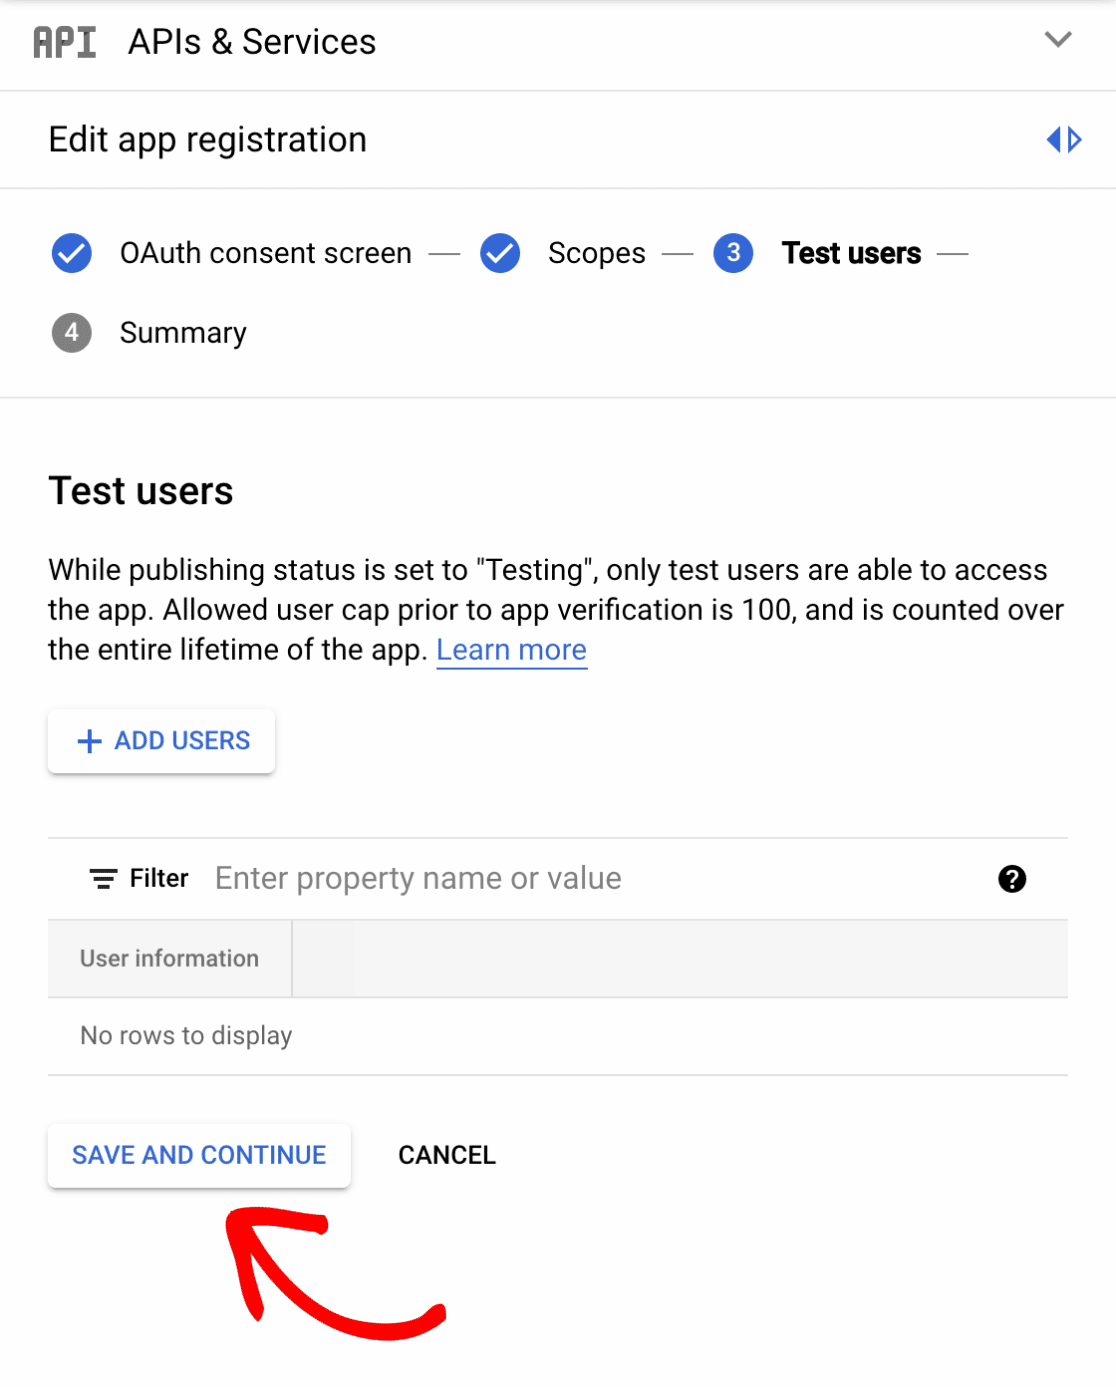
Adding Test Users
Google will need to complete the verification process before users can interact with your app. However, you can allow specific users to test your app before it’s verified. This step isn’t required for our setup, so we’ll go ahead and move to the next step by clicking the SAVE AND CONTINUE button.
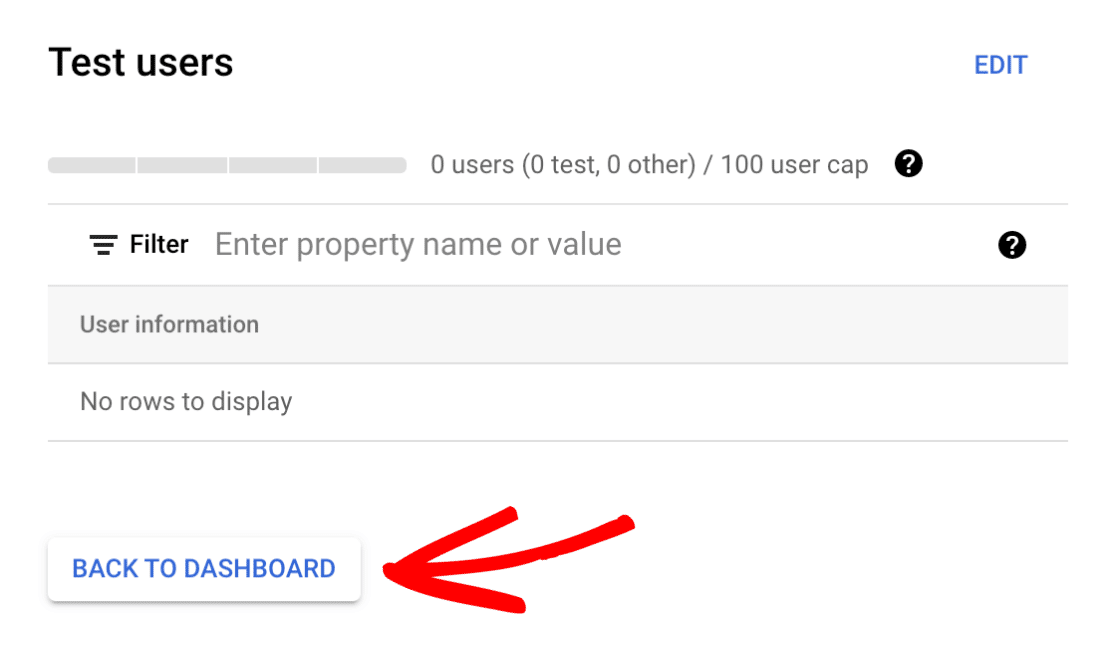
Reviewing Your App Registration
The last step of the app registration is to review your configuration on the Summary screen. If everything looks correct and corresponds with the steps in this tutorial, click the BACK TO DASHBOARD button at the bottom of the screen.
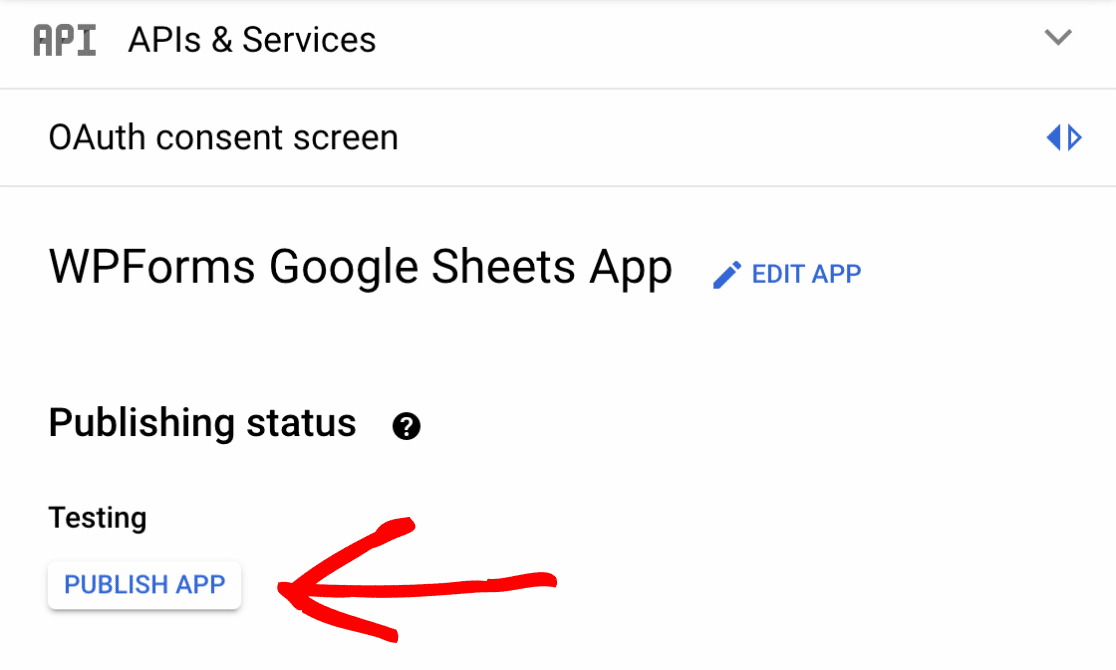
Publishing Your App
Now that you’ve completed the app registration, you’ll need to publish your app. You can do this directly from the Oauth consent screen by clicking on the PUBLISH APP button.
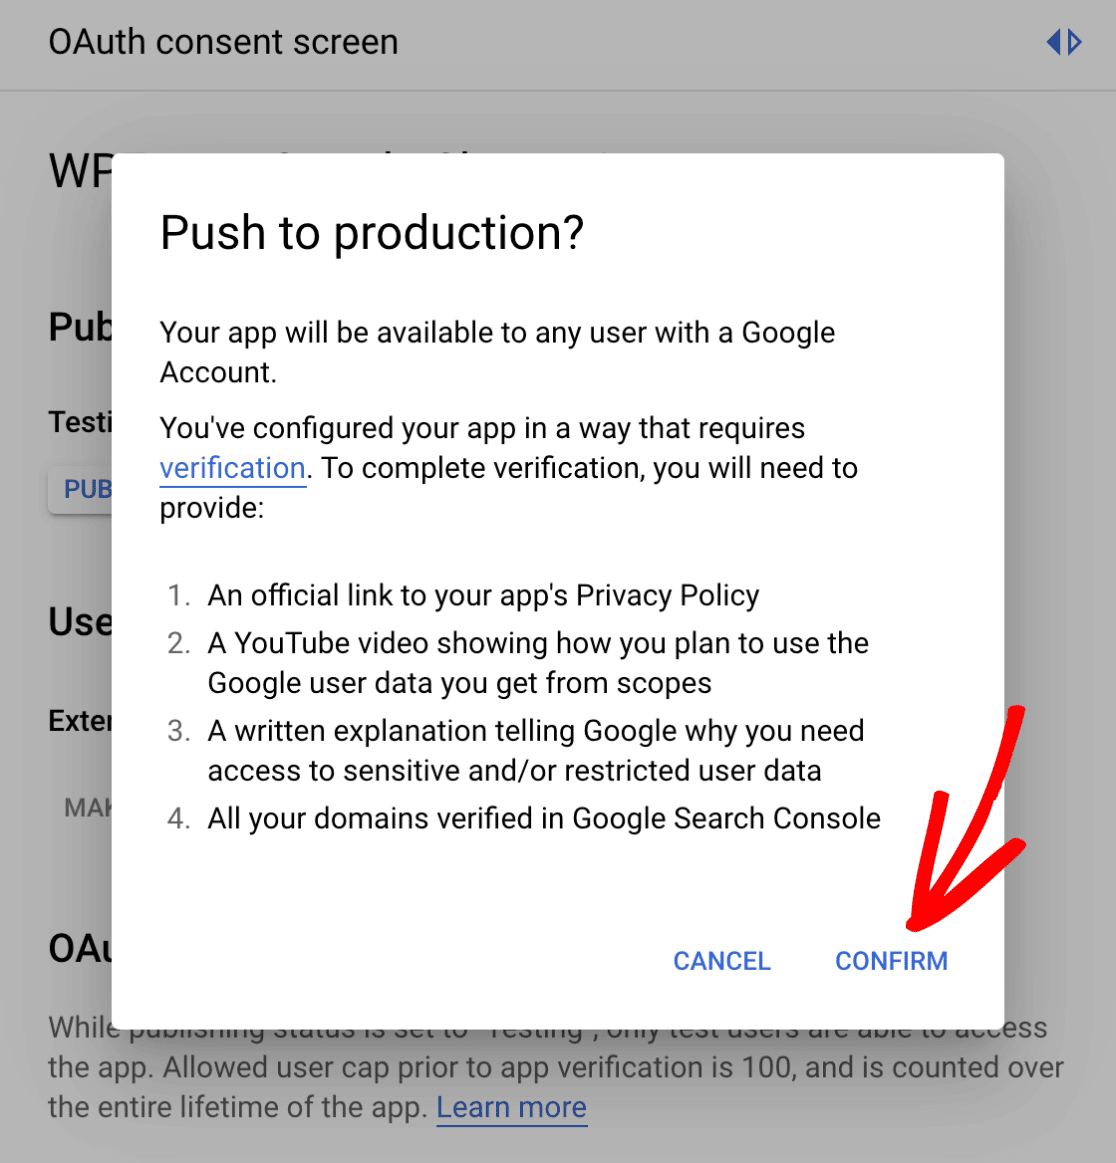
After clicking the button, a modal will appear with some further steps for completing Google’s app verification process. To confirm, click CONFIRM.
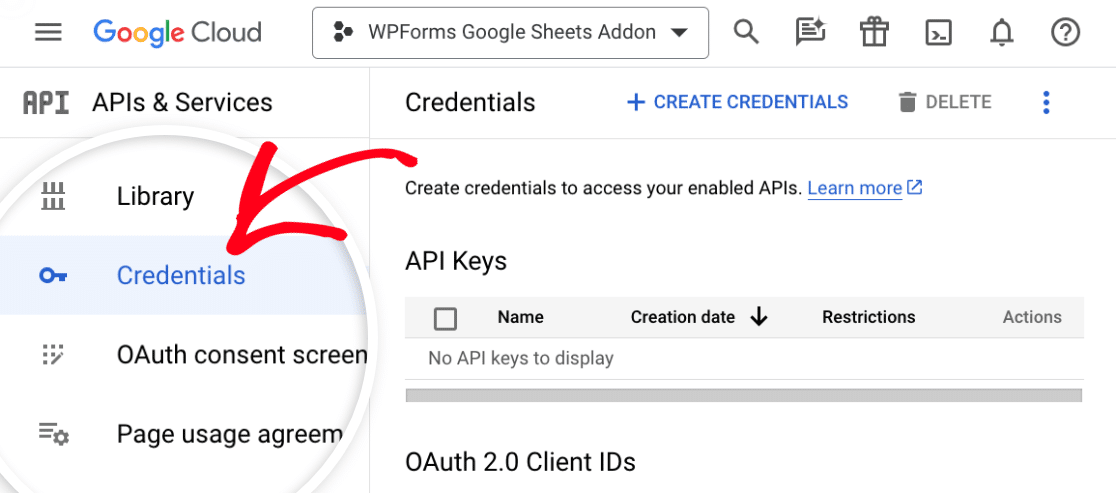
Creating Credentials for Your Application
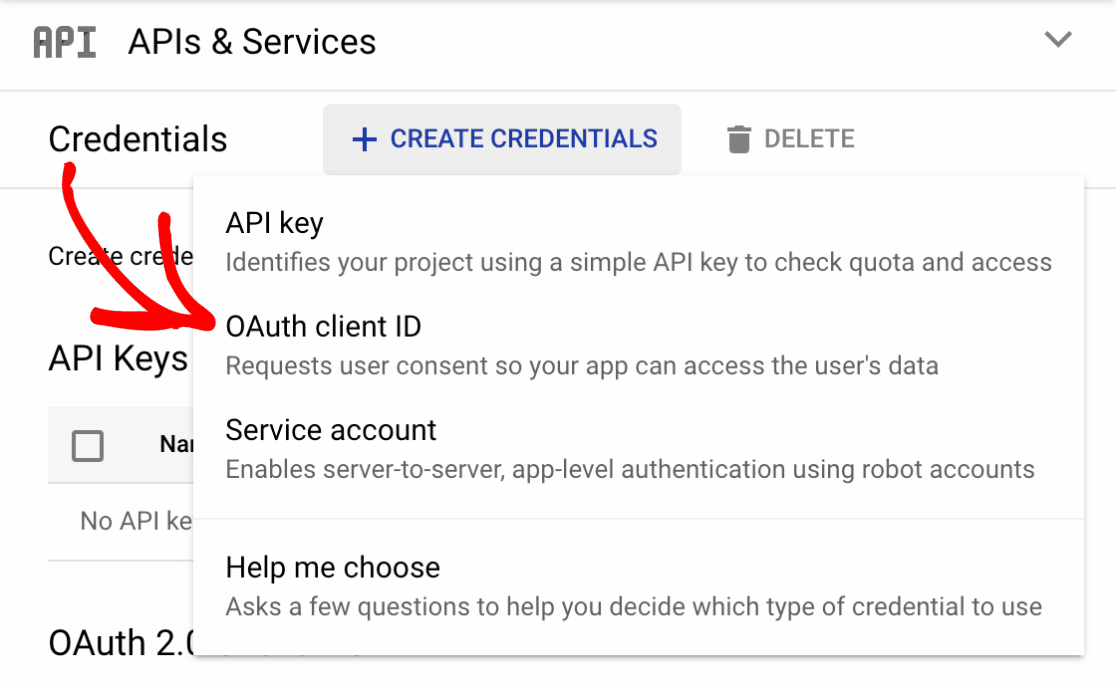
The next step is to create credentials for your application. To get started, click Credentials in the left-side menu.
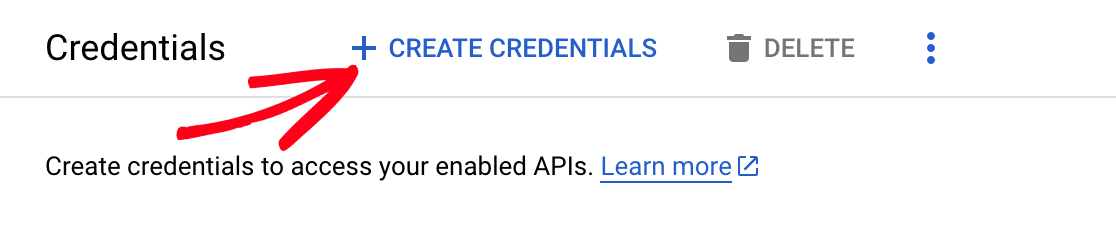
Then, click CREATE CREDENTIALS at the top of the Credentials screen.
After that, click OAuth client ID.
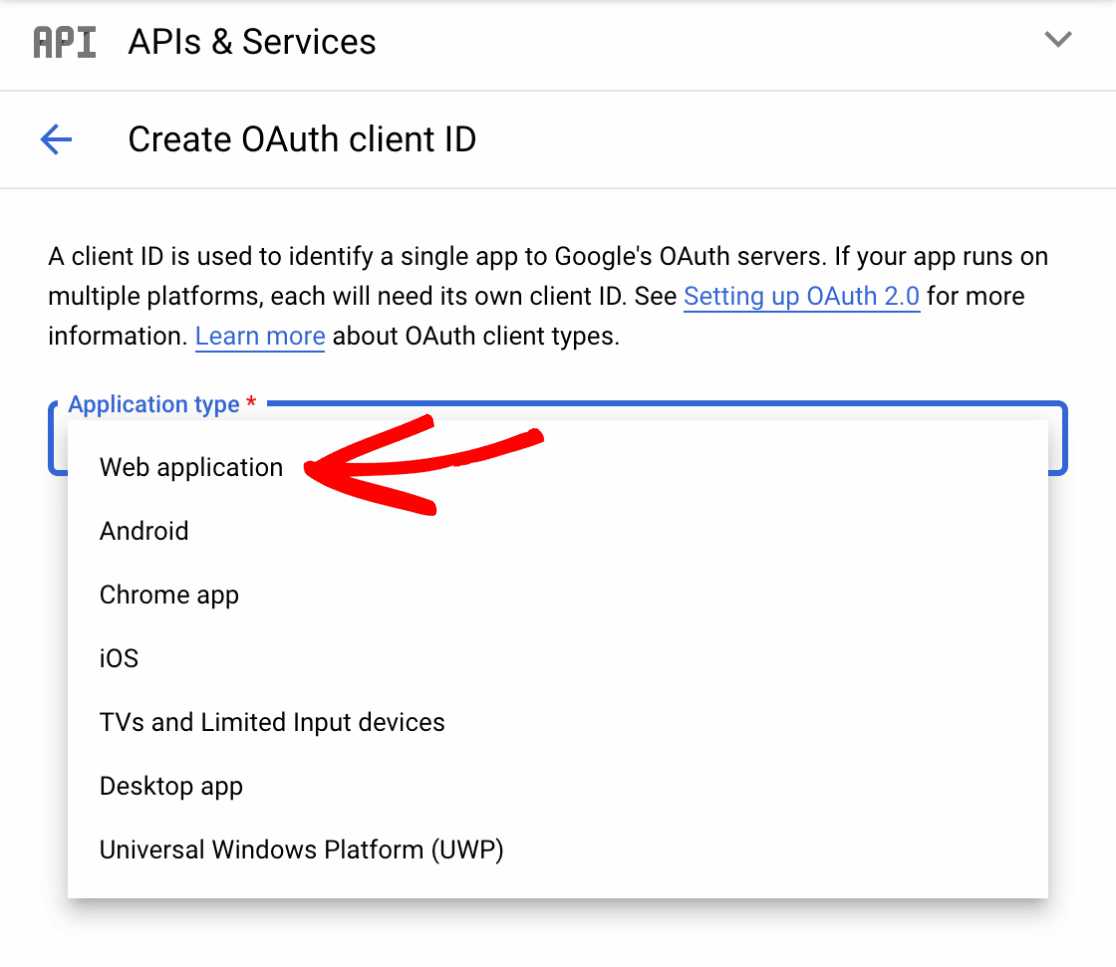
Next, click the Application type dropdown and select Web application.
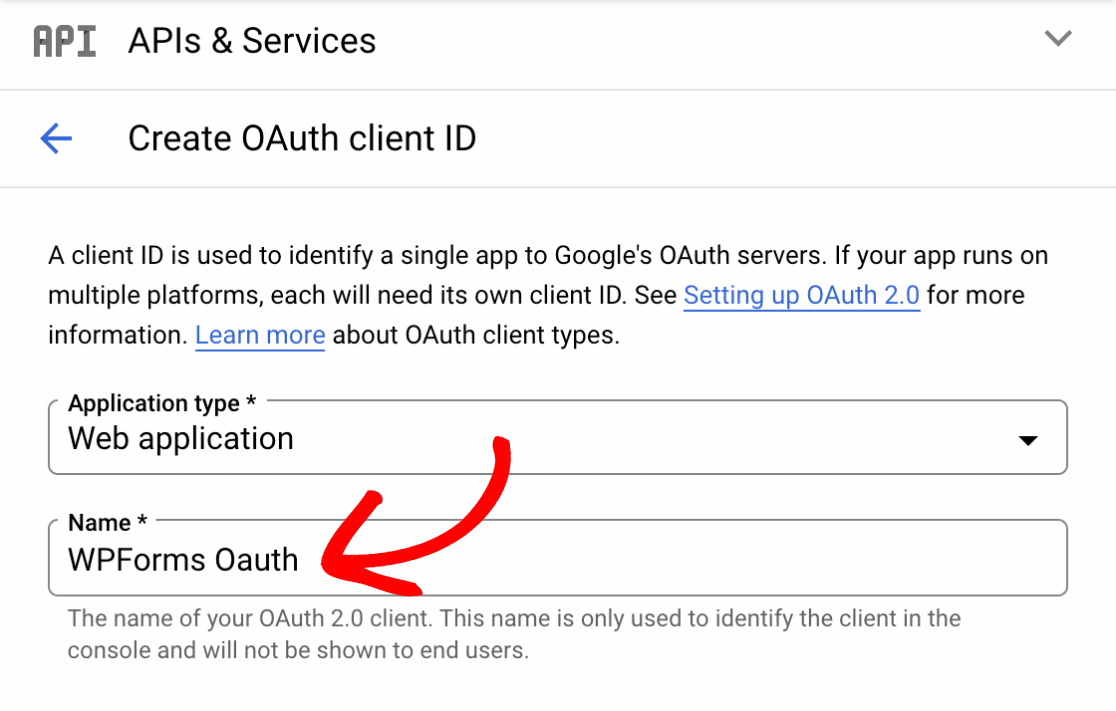
After that, be sure to enter a name for your Oauth 2.0 client in the Name field. This won’t be visible to end users, so feel free to name it whatever you’d like.
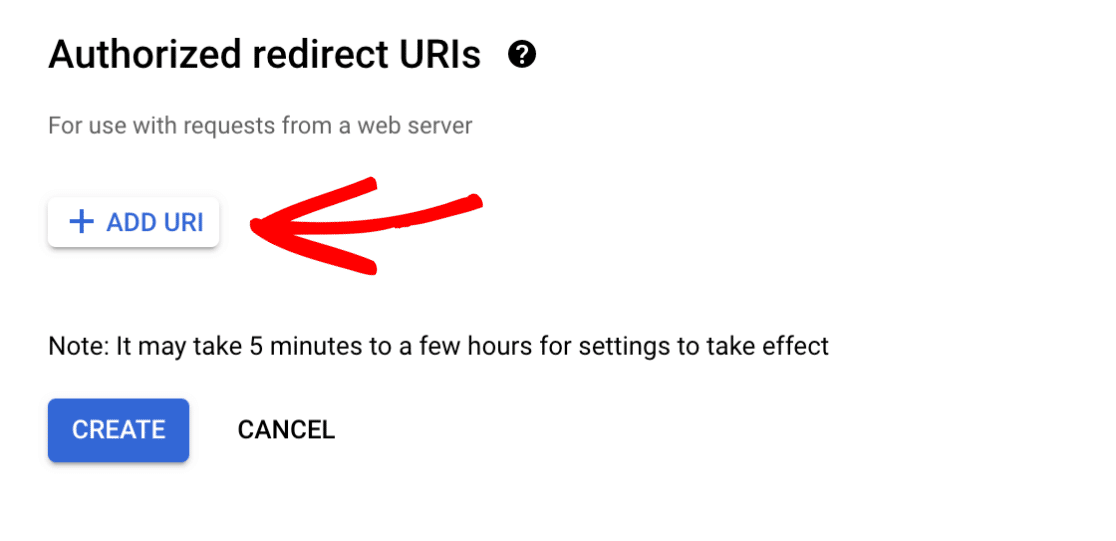
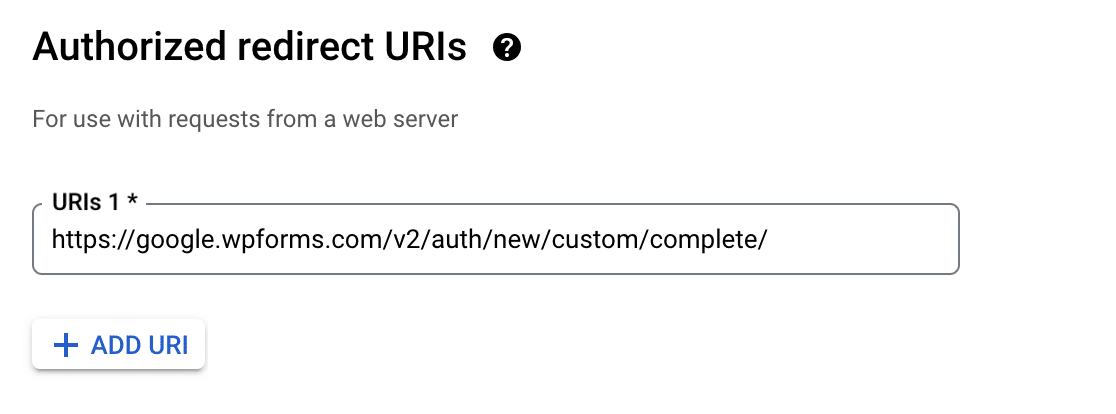
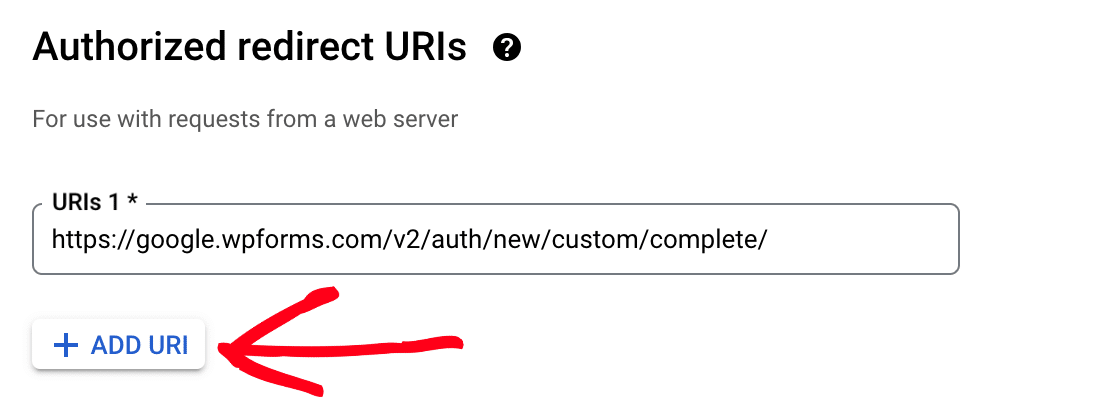
Next, scroll to the Authorized redirect URIs section and click ADD URI.
Now you’ll need to head back to your WPForms integration settings and copy the first Callback URL by clicking the copy icon.
![]()
Then, switch back to your Google application settings and paste the Callback URL into the URIs 1 field.
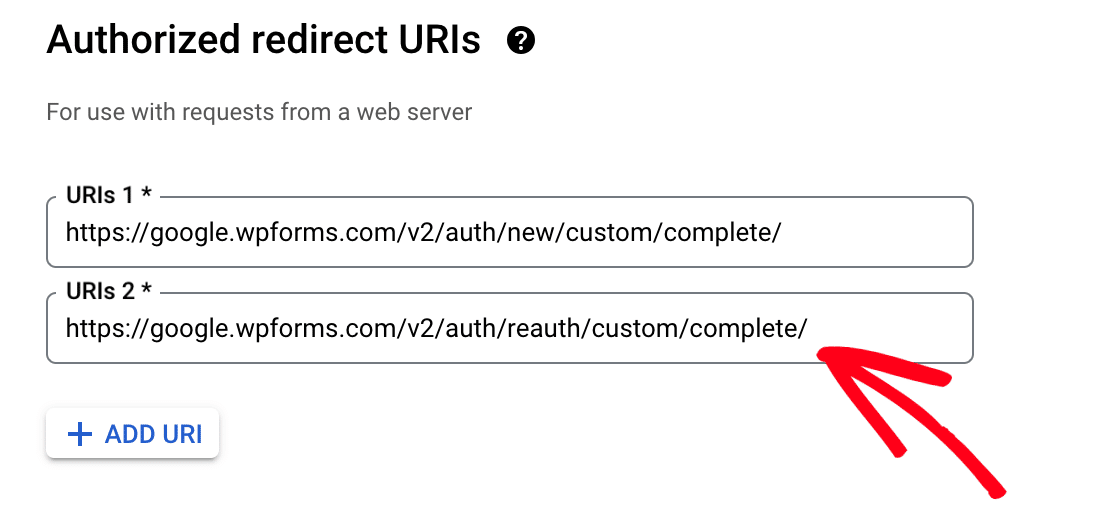
After that, click the ADD URI button again so you can add your 2nd URI.
Switch back to your WPForms settings and click the copy icon next to the 2nd Callback URL.
![]()
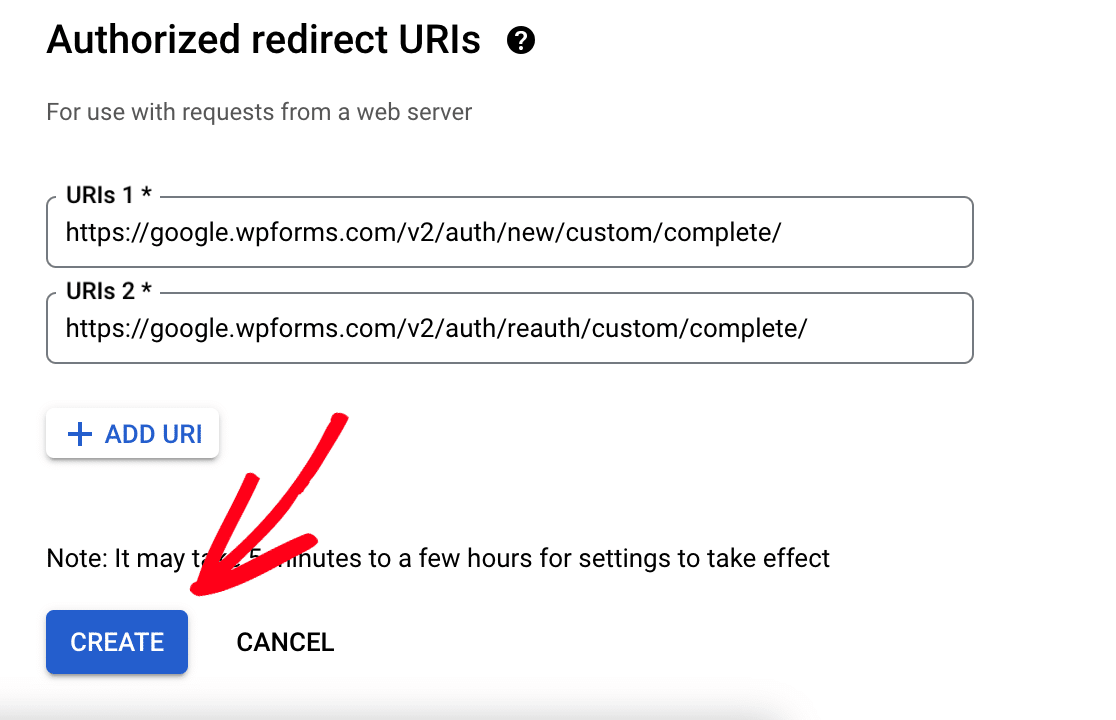
Now you can navigate back to your Google settings and paste the 2nd Callback URL into the URIs 2 field.
Next, click the CREATE button.
A modal window will then appear with your OAuth client credentials. From here, copy the Client ID by clicking the copy icon.
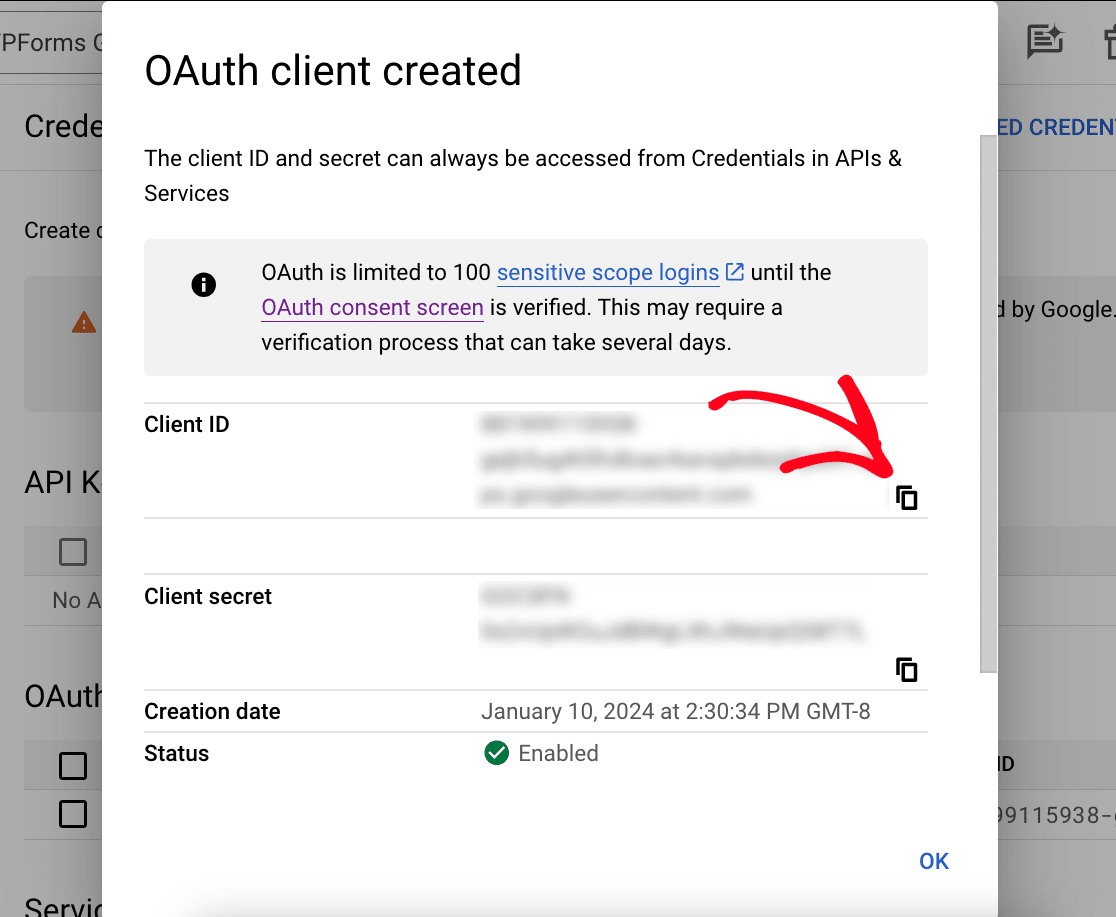
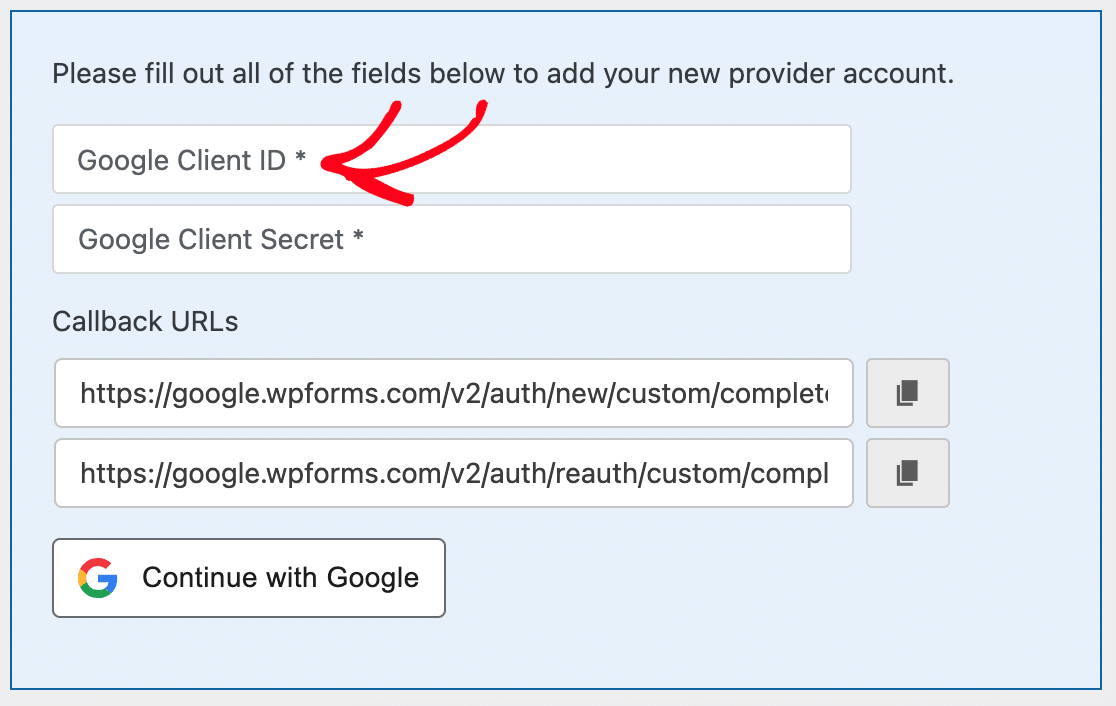
Then, switch over to your WPForms integration settings and paste the Client ID into the Google Client ID field.
Next, navigate back to your Google application settings and copy the Client secret.
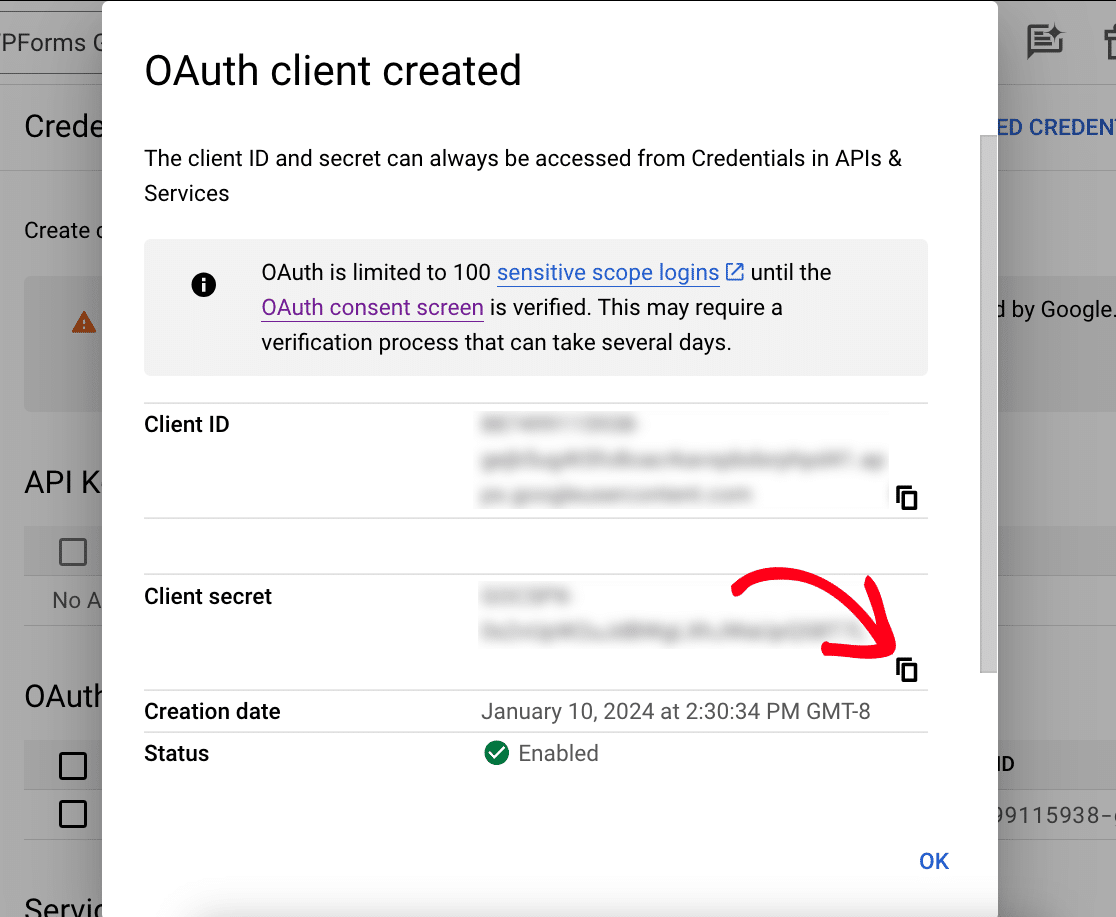
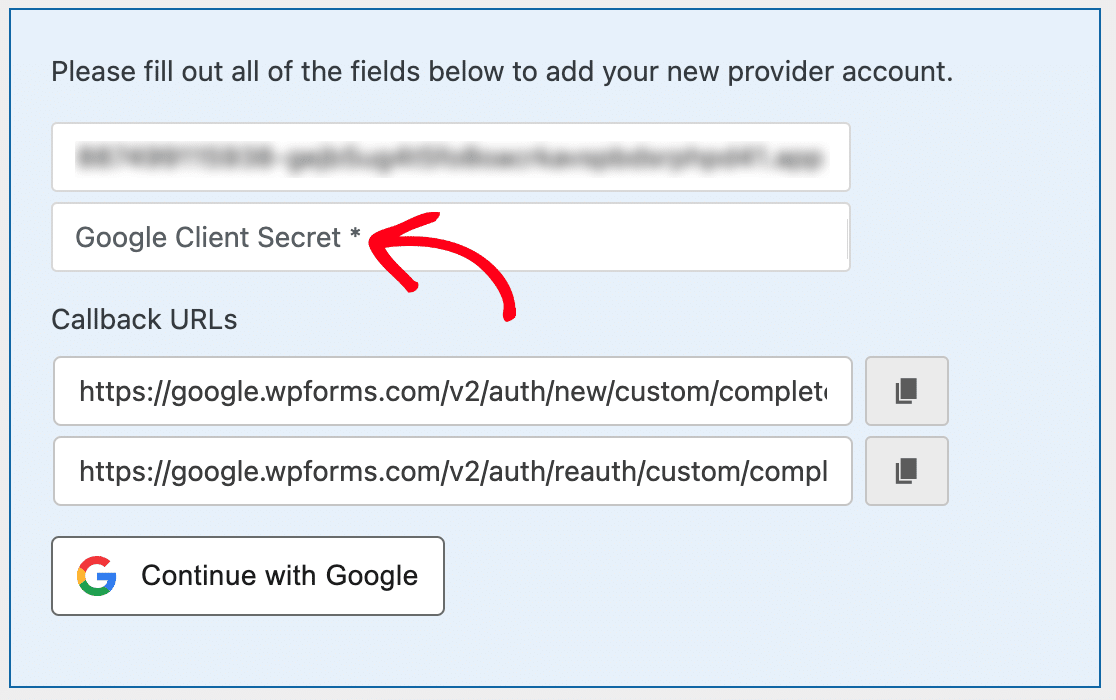
Switch over to your WPForms integration settings once more and paste the Client Secret into the Google Client Secret field.
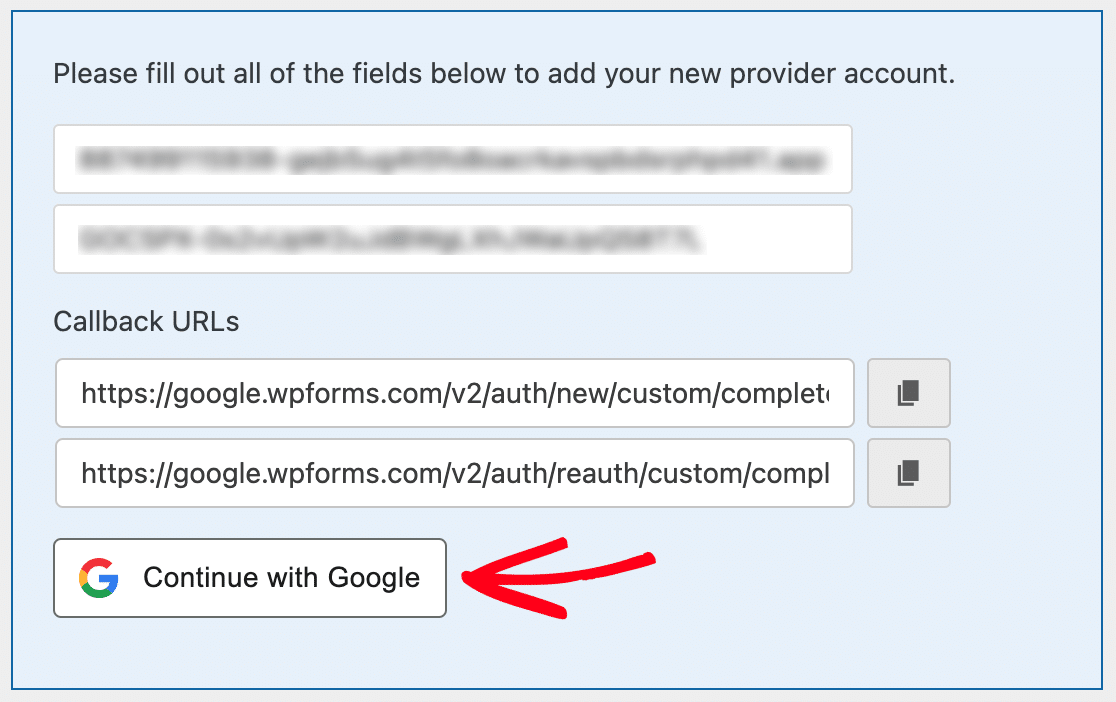
Completing the Connection
Now that you have your Client ID and Client Secret in place, it’s time to complete the connection. To do this, click the Connect with Google button.
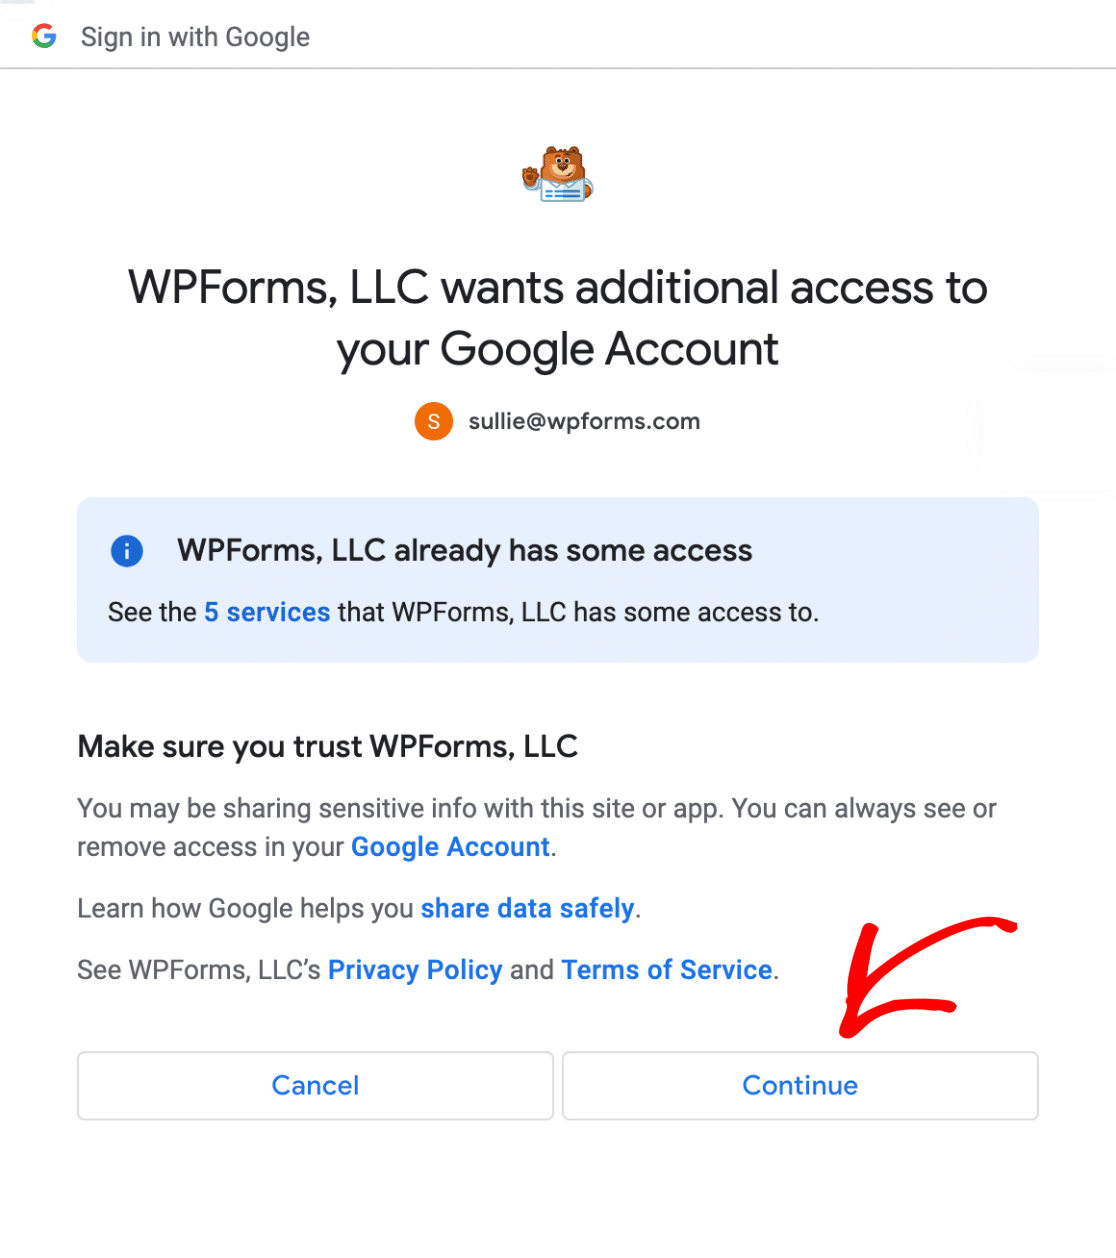
Next, you’ll be redirected to a Google authentication page. Here you’ll need to grant WPForms access to your Google account.
Once you’ve selected a Google account, click the Continue button to grant WPForms access to your account.
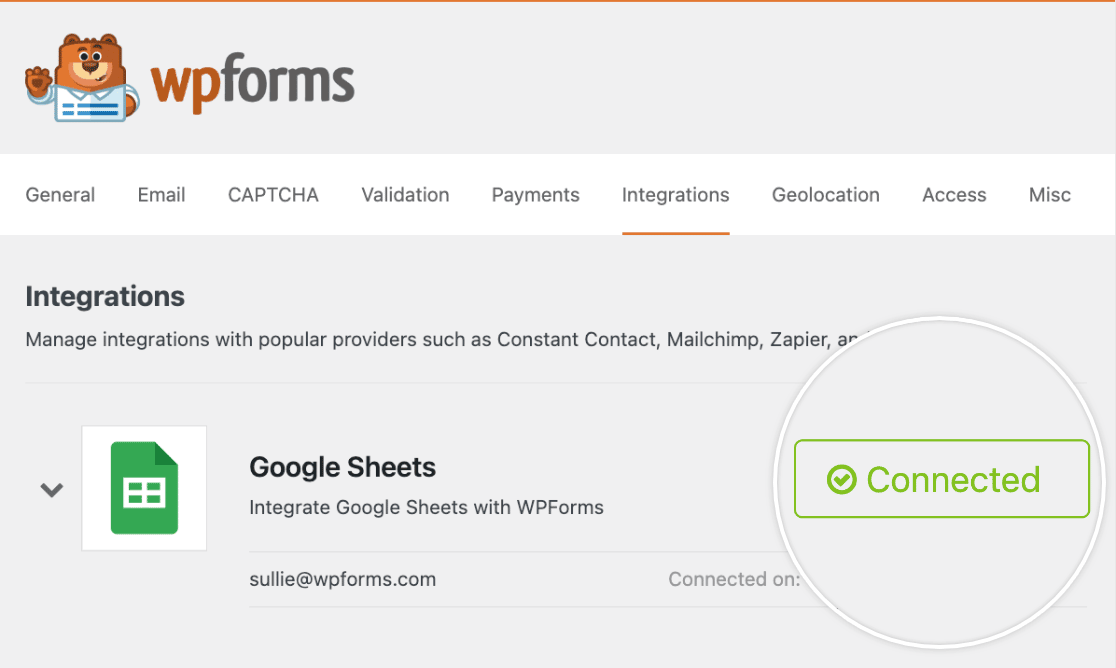
Now when you return to WPForms » Settings » Integrations, you should see the green Connected status along with your connection details.
You can now proceed to add a Google Sheets integration to any form on your site.
That’s it! Now you know how to set up a custom Google app to use with the WPForms Google Sheets addon.
Next, would you like to learn more about what you can do with user-submitted information in WPForms? See our complete guide to form entries to learn more.