


AI Summary
Are you looking for a WordPress restaurant ordering system or just an easy, simple way to let people order from your restaurant online?
Your website can easily start making your business more money if you let customers order take-out or delivery online. Customers pick their dishes, set quantities, and pay before they ever hit send.
So in this post, I’ve put together a step-by-step, beginner-friendly tutorial on how to create a restaurant online order form with WordPress.
Click Here to Make Your Restaurant Online Order Form Now
- How to Create a Restaurant Order Form in WordPress
- Step 1: Install the WPForms Pro Plugin
- Step 2: Generate a Takeout Order Form
- Step 4: Show an Itemized Order Summary
- Step 5: Set Up Pickup, Delivery, and Order Limits
- Step 6: Configure Your Form Settings
- Step 7: Send Order Alerts to Your Kitchen
- Step 8: Customize Your Order Confirmation
- Step 9: Configure the Payment Settings
- Step 7: Publish Your Restaurant Online Order Form
How to Create a Restaurant Order Form in WordPress
If you want to turn your site into a WordPress restaurant ordering system, it’s actually quite easy. You can do it by simply creating an online order form with WordPress. Here are the steps to build your restaurant online order form:
Step 1: Install the WPForms Pro Plugin
WPForms is a beginner-friendly, drag-and-drop form builder for WordPress with 2,100+ form templates built in, including several for food ordering.
What I like most about WPForms for restaurant work is that the payment maths is already wired up. Add a price to a menu item and the running total updates itself, so you’re not maintaining a spreadsheet of dish prices in two places.
To follow along, you’ll need the WPForms Pro license, which comes equipped with the Calculations, Coupons, and Form Locker addons that are required for this tutorial.
To get started, buy the Pro license. Then, install WPForms on your website. If you need help, follow these instructions on how to add a plugin to WordPress.
Step 2: Generate a Takeout Order Form
Next, you’ll need to go to WPForms » Add New to name your form and choose a template. WPForms Pro includes 2,100+ form templates right out of the box to help you create your WordPress restaurant order form quickly.
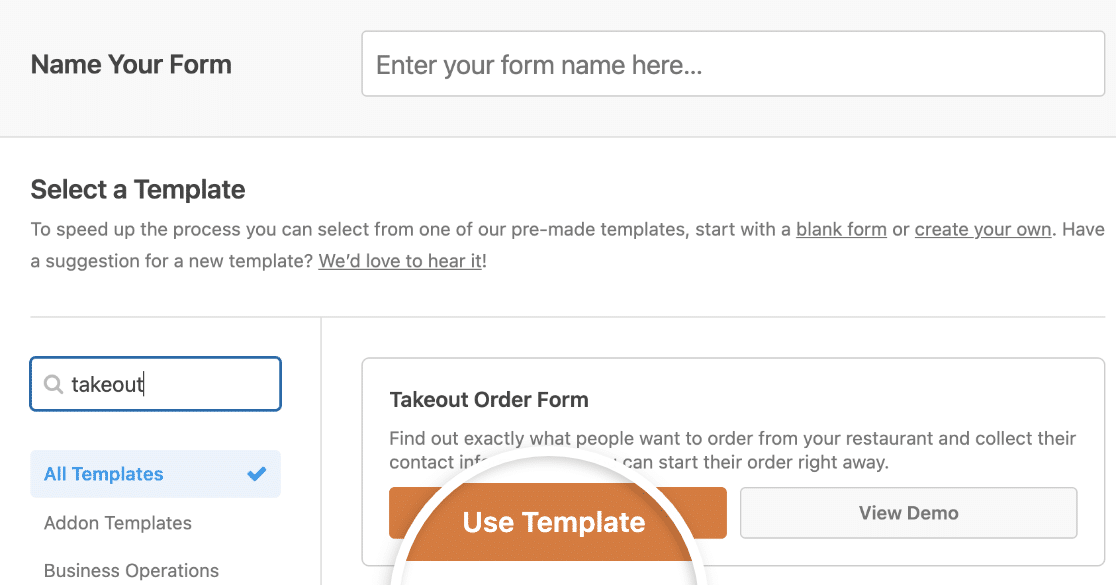
Use the search bar to find the Takeout Order form and then click Use Template to load it in the form builder. There’s no payment field in it by default, but you can easily add that in.
WPForms supports a number of different payment options including Stripe, Square, PayPal, and Authorize.net (Elite), which you can simply drop inside your form.
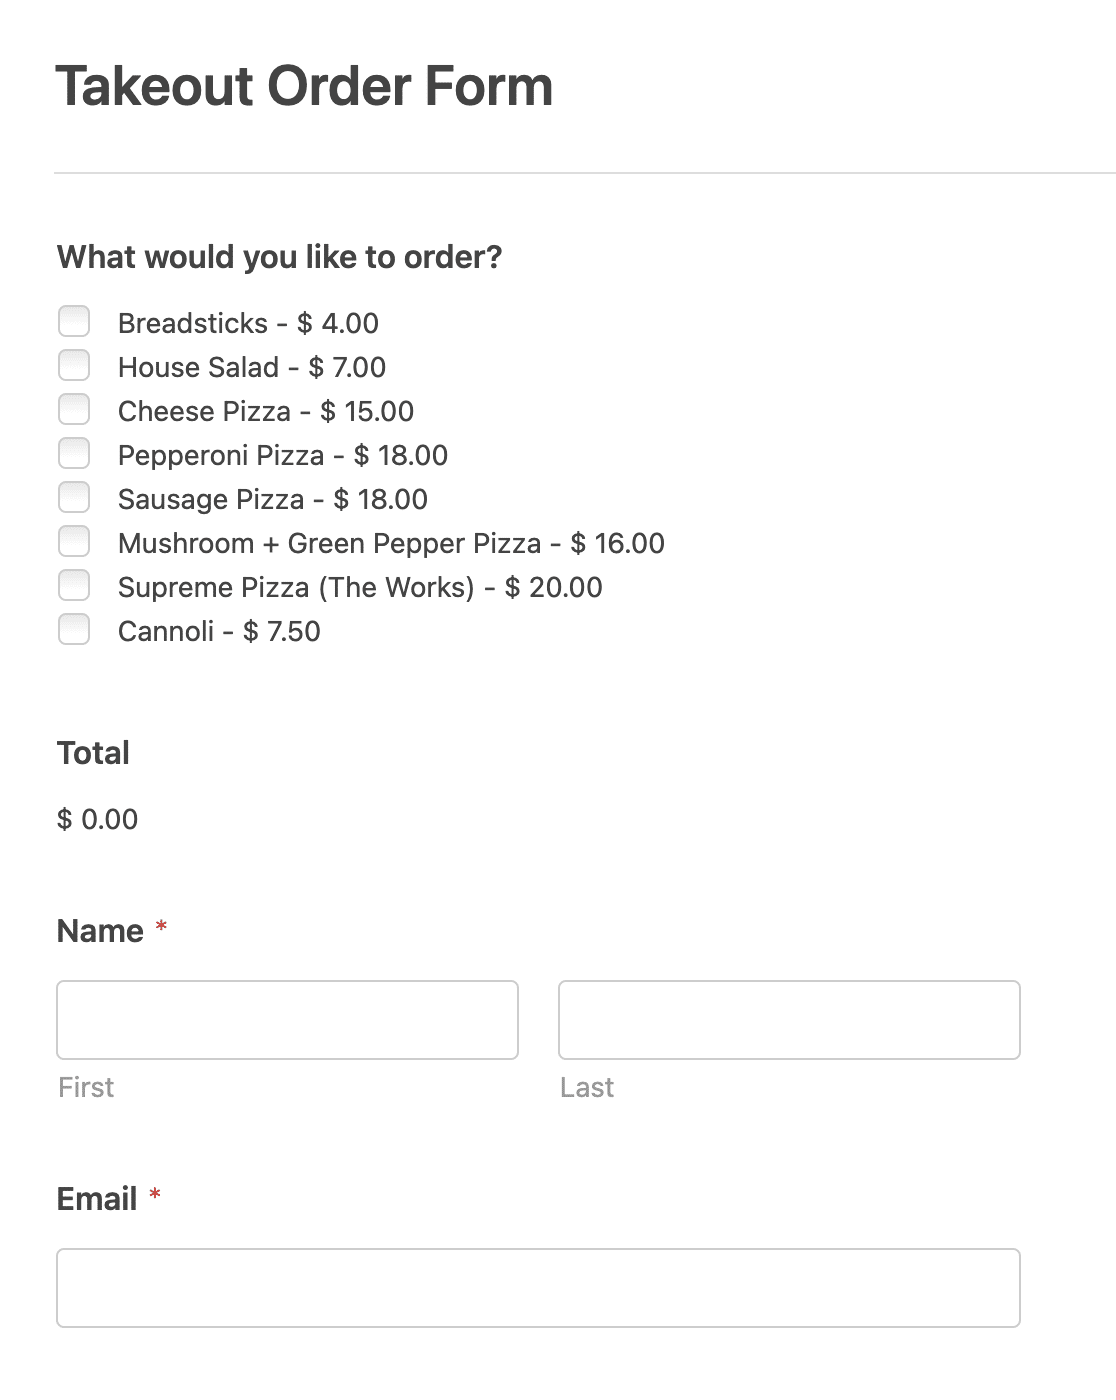
Pretty awesome, right? Let’s go ahead and customize this form.
Step 4: Show an Itemized Order Summary
WPForms makes customizing forms easy to do. The Takeout Order Form template comes with the following fields in this order:
- Checkbox Items
- Total
- Name (First and Last)
- Phone
- Address
- Paragraph Text
Unless you’re running a pizza place, you’ll probably need to customize your template a bit to match your particular menu.
It’s easy to do this. First, go ahead and click on the Checkbox Items field. This will open its options on the left-hand side of the form builder. Then you can change the item names and prices.
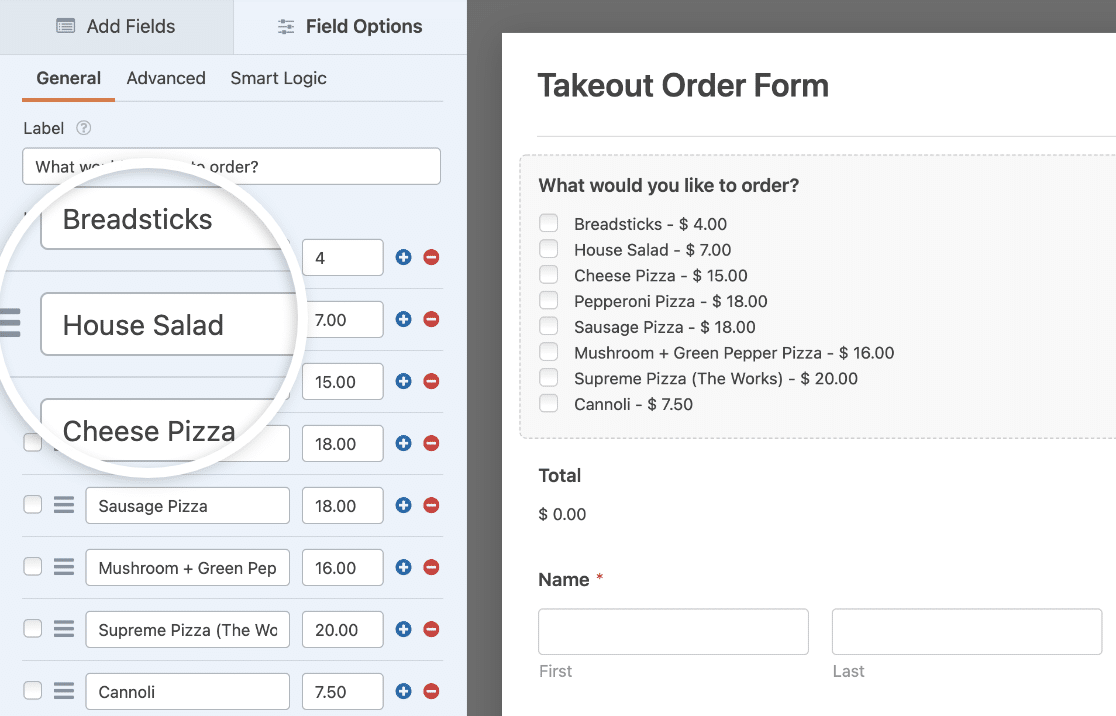
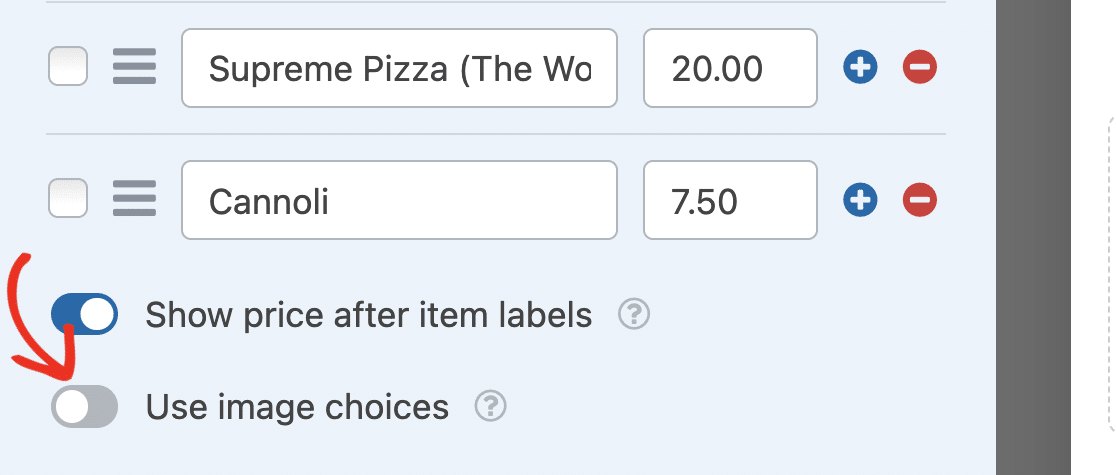
One of the coolest things you can do is add image choices to your online restaurant menu, too. Just turn on the Use image choices option to add them.
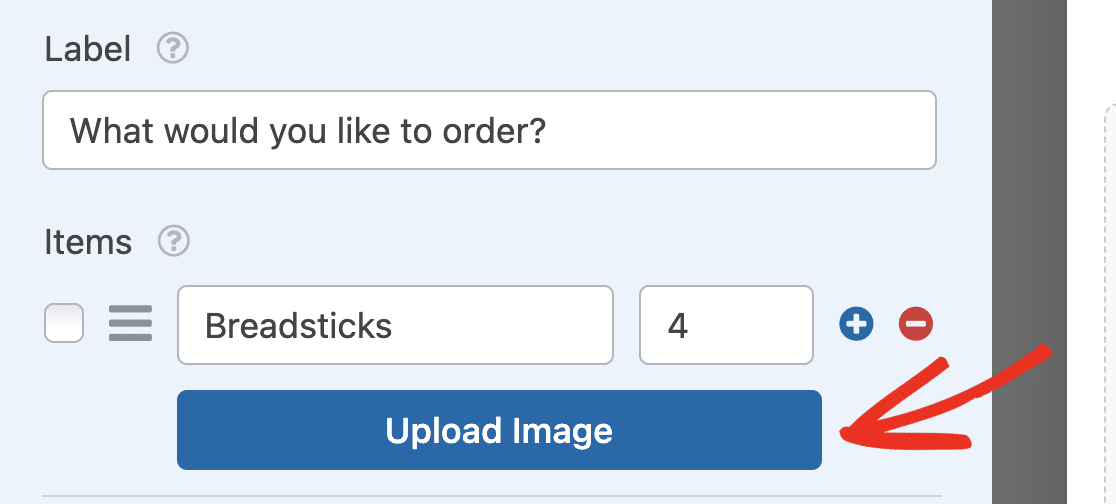
Now, click on the Upload Image button under each item to choose an image for each menu item.
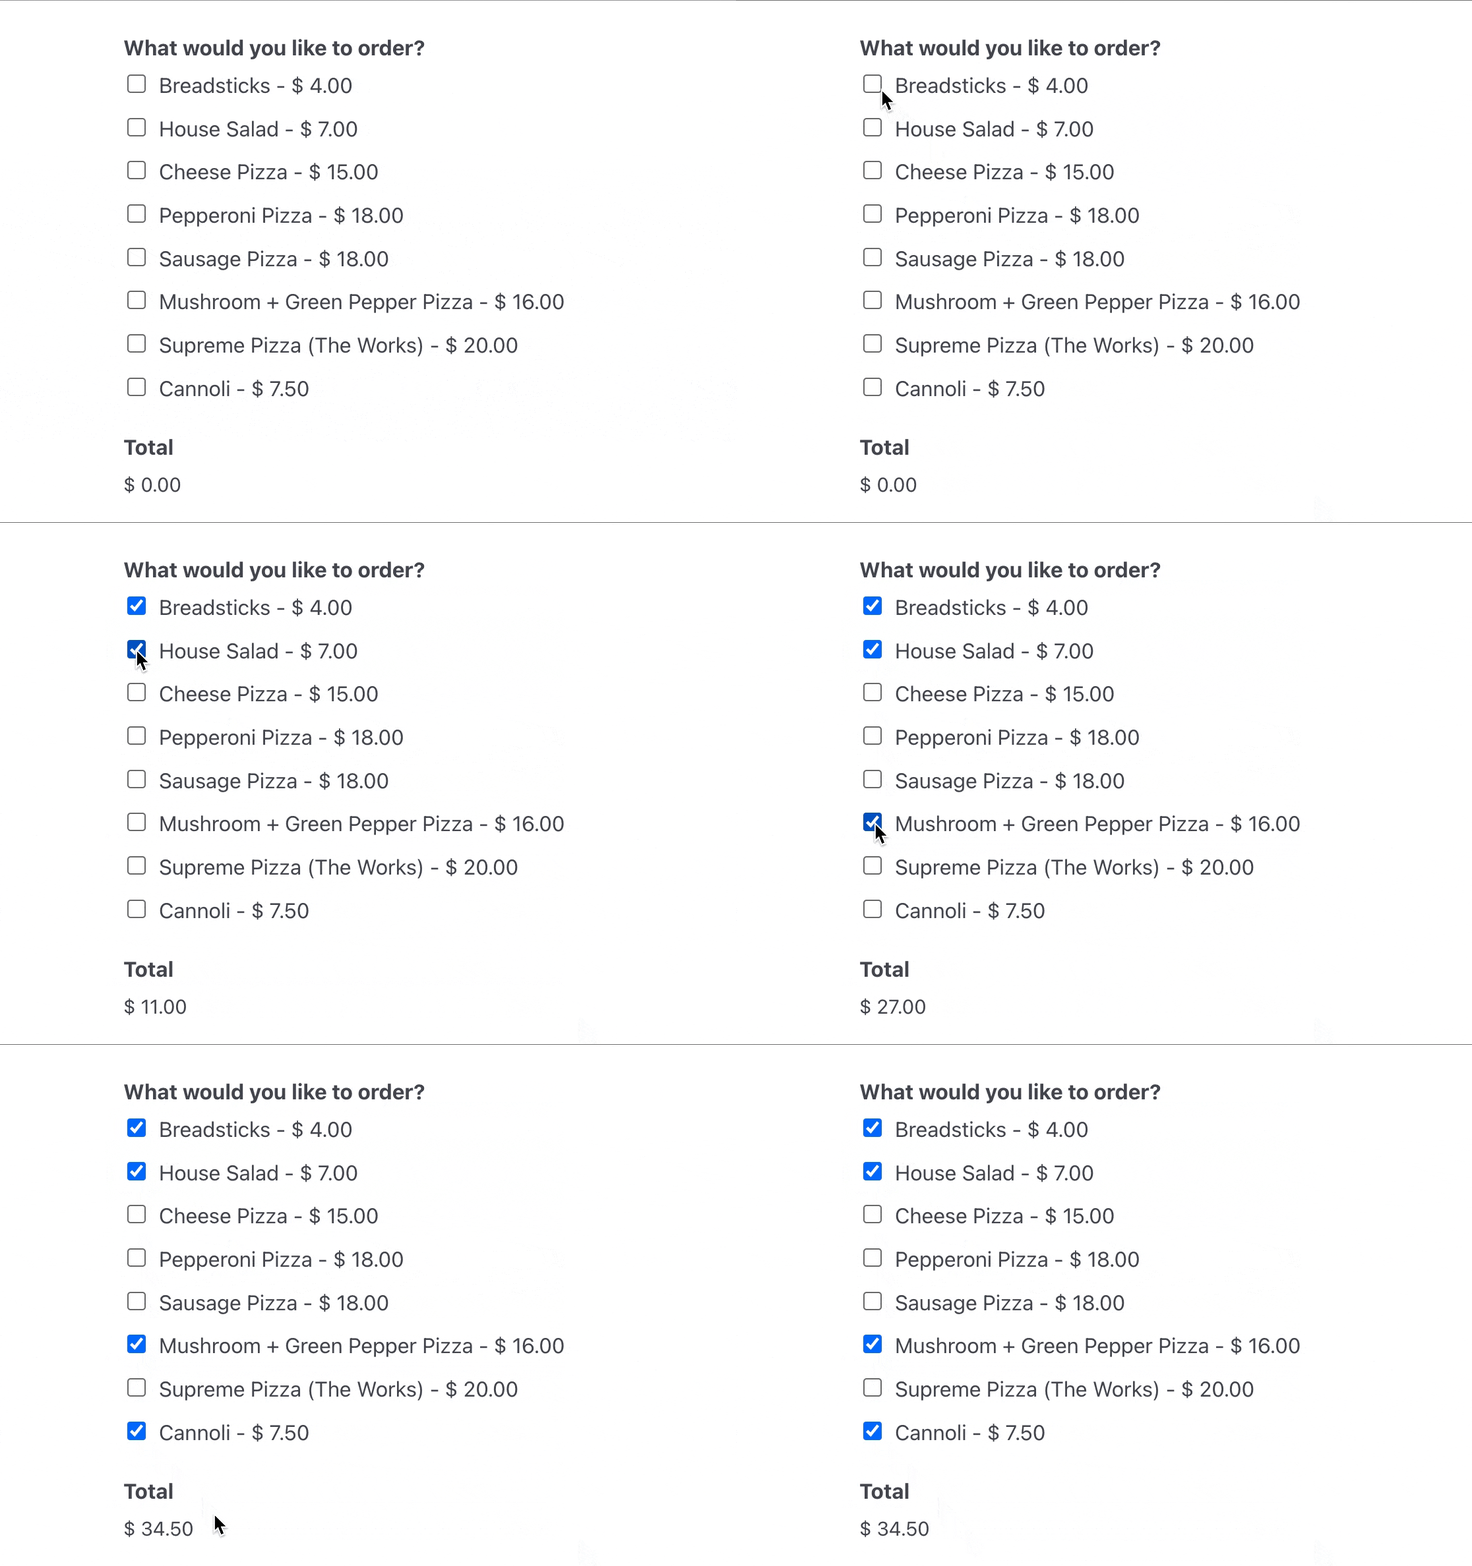
The Total field will show customers how much they own based on the items they select from the checkboxes.
The other fields are to collect customers’ information so you know who the order belongs to. Want to invite your customer to choose a delivery time? Check out this guide to adding a date/ time picker to your WordPress form.
When you’re done customizing your restaurant’s online ordering system form, click Save in the top right corner of the form builder.
Step 5: Set Up Pickup, Delivery, and Order Limits
A menu and a total will take an order. Running a real service needs a few more decisions, and this is where a form starts to behave like an ordering system.
Let Customers Choose Pickup or Delivery
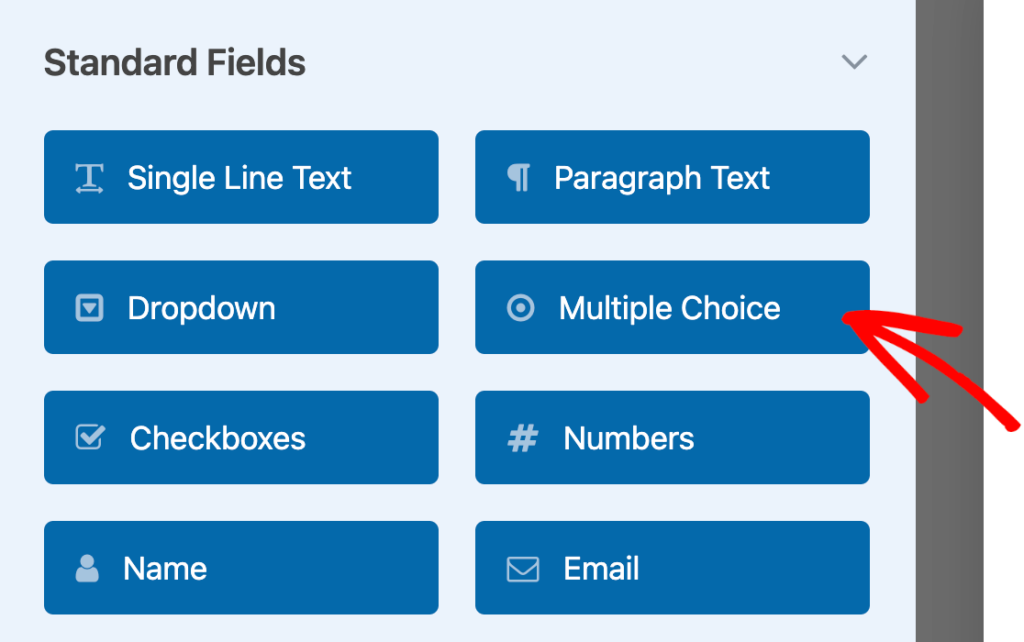
Add a Multiple Choice field with Pickup and Delivery as the options, then use conditional logic so the Address field only appears when someone chooses Delivery.
If you want a version that also handles multiple branches, the guide on adding a store pickup selector walks through letting customers pick which location they’re collecting from.
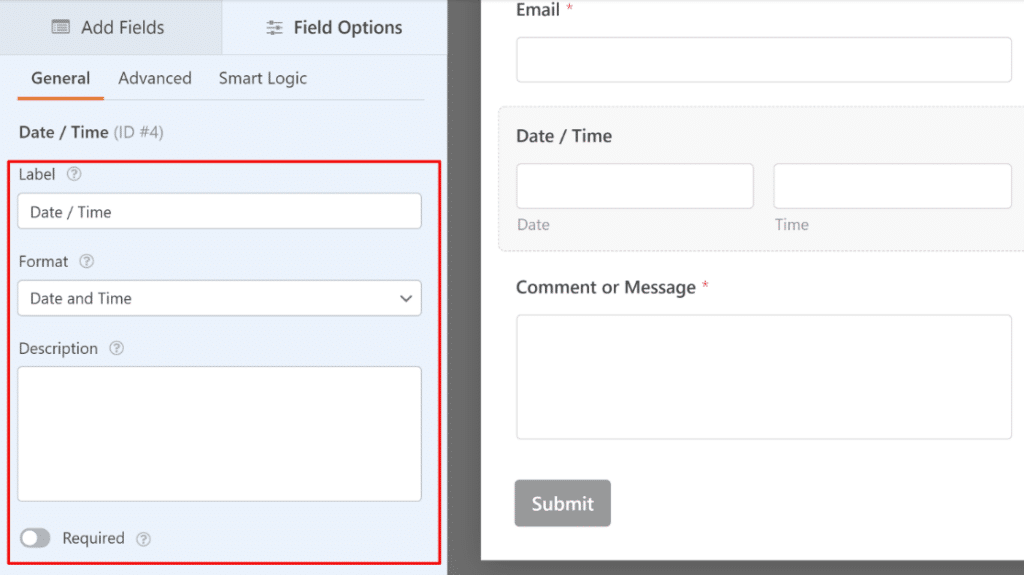
While you’re here, add a Date/Time field so people can say when they want the order. The walkthrough on adding a date/ time picker to your WordPress form covers limiting it to your service hours so nobody books a 3am collection.
Add Delivery Fees, Tax, and Tips
The Calculations addon lets you write a formula against your form fields, so you can add a delivery charge only when Delivery is selected, apply your local tax rate, or offer tip buttons at 10, 15, and 20 percent.
If you’d prefer to quickly generate calculation formulas instead of building them from scratch, you can use WPForms’ AI formula generator.

Formulas reference fields by ID, so a delivery fee is as simple as adding a fixed amount to the order subtotal when the delivery option is chosen. Tips work the same way as a percentage of the subtotal.
Cap Orders on Daily Specials
If you prep twenty portions of a Friday special, you don’t want order twenty five. ‘
Form Locker lets you cap the number of entries a form accepts, and the limit can reset per day, per week, or per month, so a daily cap genuinely resets each morning.
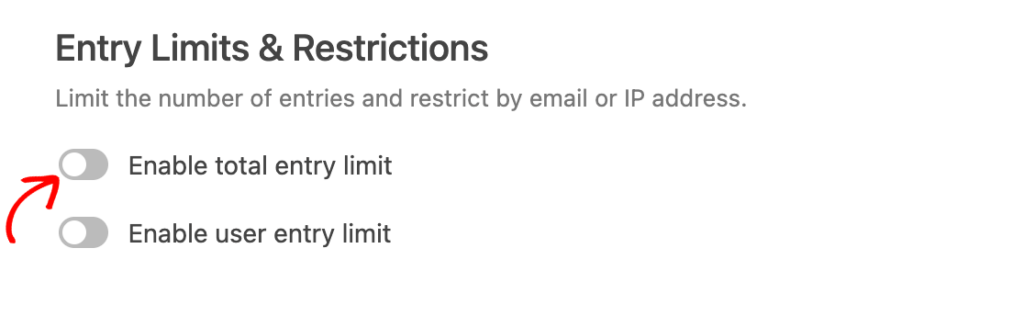
Form Locker also schedules a form to open and close at set dates and times, which suits a holiday pre order menu or a catering deadline.
Worth knowing upfront that this is a single open and close window rather than recurring weekly opening hours, so it won’t mirror your trading days on its own.
The guide on setting an automatic deadline on your forms shows how the scheduling works in practice.
Step 6: Configure Your Form Settings
With the ordering logic in place, open Settings » General to name the form, write a short description, and set the submit button text. “Place My Order” beats “Submit” on a food form.
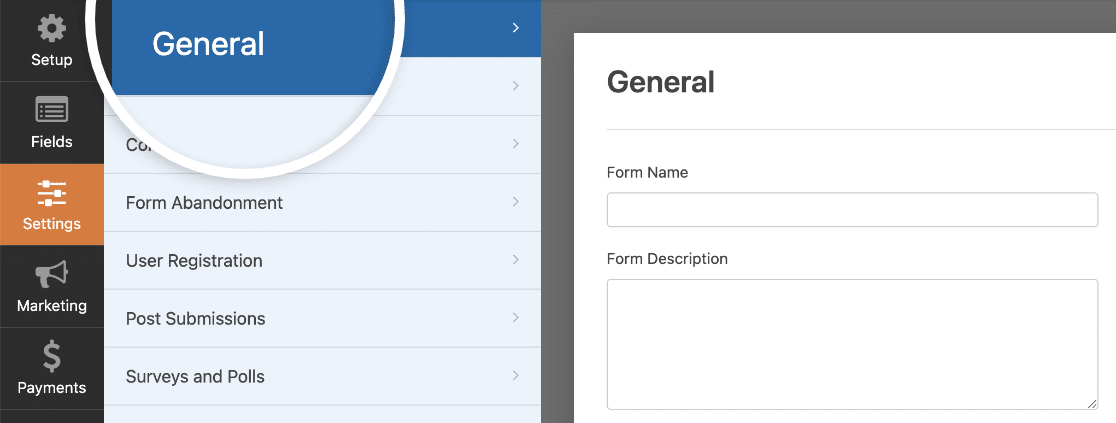
Here you can configure the following:
- Form Name — Change the name of your form here if you’d like.
- Form Description — Give your form a description.
- Tags — Apply tags to organize your site’s forms.
- Submit Button Text — Customize the copy on the submit button.
- Submit Button Processing Text — Change the text that will show while your form is submitting.
There are also more advanced settings in the expandable section at the bottom of the screen:
- CSS Classes — Add CSS classes to your form or submit button.
- Enable Prefill by URL — Automatically fill in some fields based on a custom URL.
- Enable AJAX form submissions — Enable AJAX settings with no page reload.
- Disable storing of entry information in WordPress — You can disable the storing of entry information and user details, such as IP addresses and user agents, in an effort to comply with GDPR requirements. Check out our step-by-step instructions on how to add a GDPR agreement field to your simple contact form.
Once you’re done here, you can switch to the Spam Protection and Security settings.
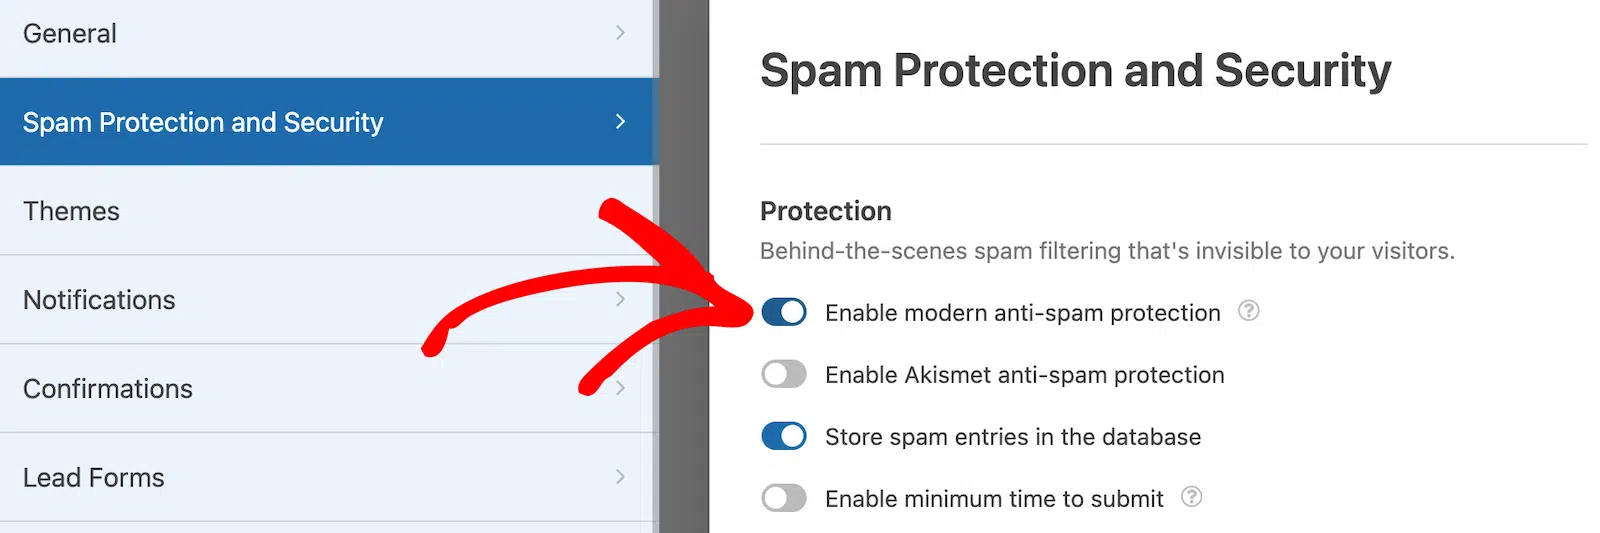
The options here include:
- Enable modern anti-spam protection — Stop contact form spam with the WPForms modern anti-spam protection. It runs in the background and provides a built-in layer of protection against spam that works great when paired with other options, such as a CAPTCHA.
- Enable Akismet anti-spam protection — You can connect your form to the Akismet plugin to prevent spam entries.
- Enable country filter — Block submissions for certain countries.
- Enable keyword filter — Prevent entries that include certain words or phrases.
When you’re done, click Save.
Step 7: Send Order Alerts to Your Kitchen
When you receive an order from your restaurant website, it’s important your team is notified right away. Notifications are a great way to send an email whenever a restaurant online form is submitted on your website.
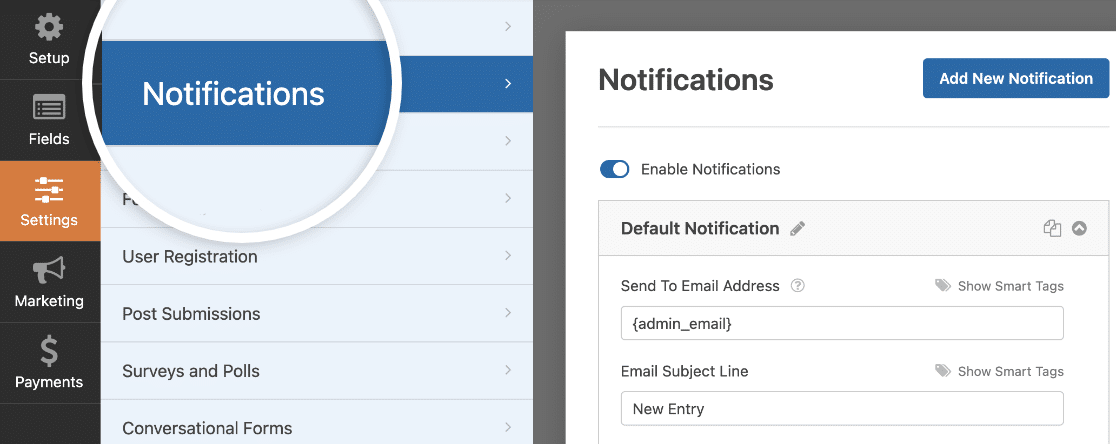
If you use Smart Tags, you can also send a notification to the user when they fill your form out, letting them know you received their order and that someone will begin working on it shortly.
This assures people their request has gone through. For help with this step, check out our documentation on how to set up form notifications in WordPress.
And if you want to keep branding across your emails consistent, you can check out this guide on adding a custom header to your email template.
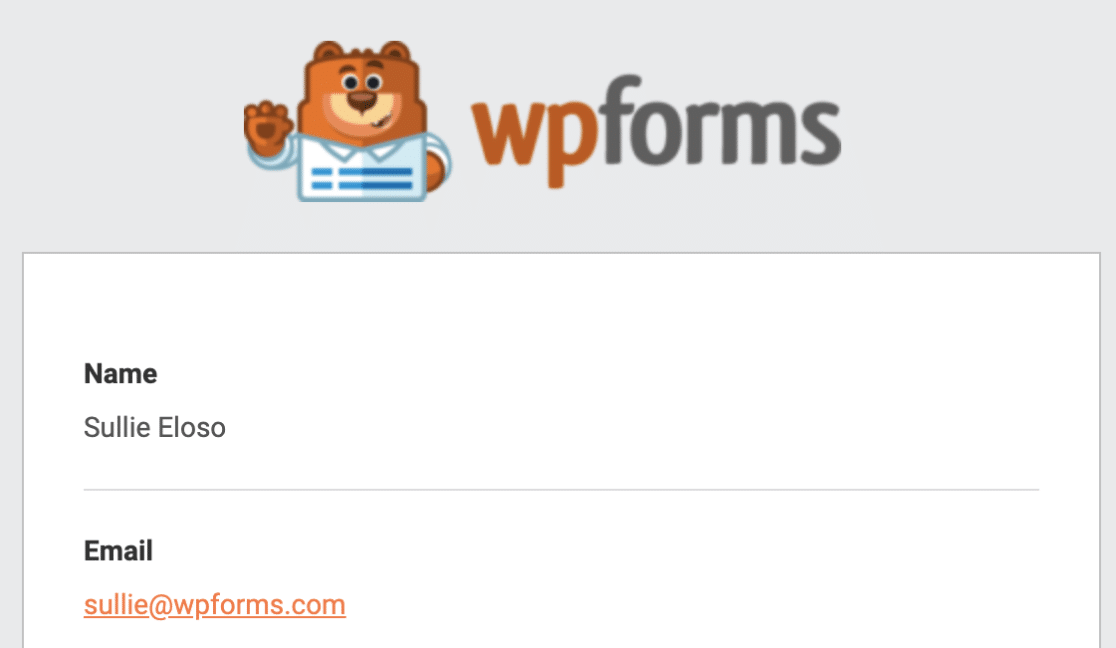
Now the part that matters a lot during service, which is that bobody in a busy kitchen is refreshing an inbox, so email alone will let orders sit.
The Twilio addon sends an SMS or WhatsApp message the moment an order lands, which is far harder to miss than an email. It’s available from the Plus license up.
Step 8: Customize Your Order Confirmation
Form confirmations are messages that display to site visitors once they submit a food order on your website. They let people know that their request has gone through and offer you the chance to let them know what the next steps are.
WPForms has 3 confirmation types to choose from:
- Message — This is the default confirmation type in WPForms. When a site visitor submits a request, a simple message confirmation will appear letting them know their order was processed. Check out some great success messages to help boost user happiness.
- Show Page — This confirmation type will take site visitors to a specific web page on your site, thanking them for ordering. For help doing this, check out our tutorial on redirecting customers to a thank you page. In addition, be sure to read our article on creating effective Thank You pages.
- Go to URL (Redirect) — This option is for when you want to send site visitors to a different website.
Let’s see how to set up a simple form confirmation in WPForms so you can customize the message site visitors will see when they fill out your form.
To start, click on the Confirmation tab in the Form Editor under Settings. Next, select the type of confirmation you’d like to create. For this example, we’ll select Message.
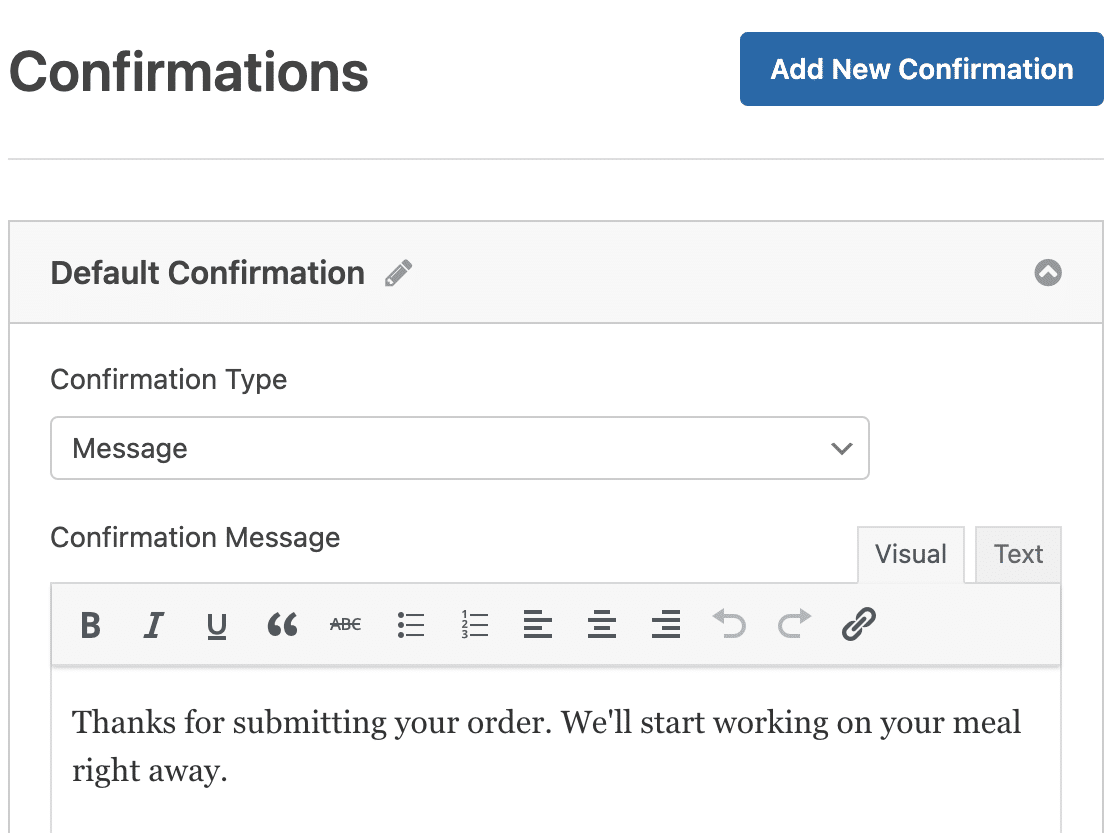
Then, customize the confirmation message to your liking and click Save. For help with other confirmation types, see our documentation on setting up form confirmations.
Step 9: Configure the Payment Settings
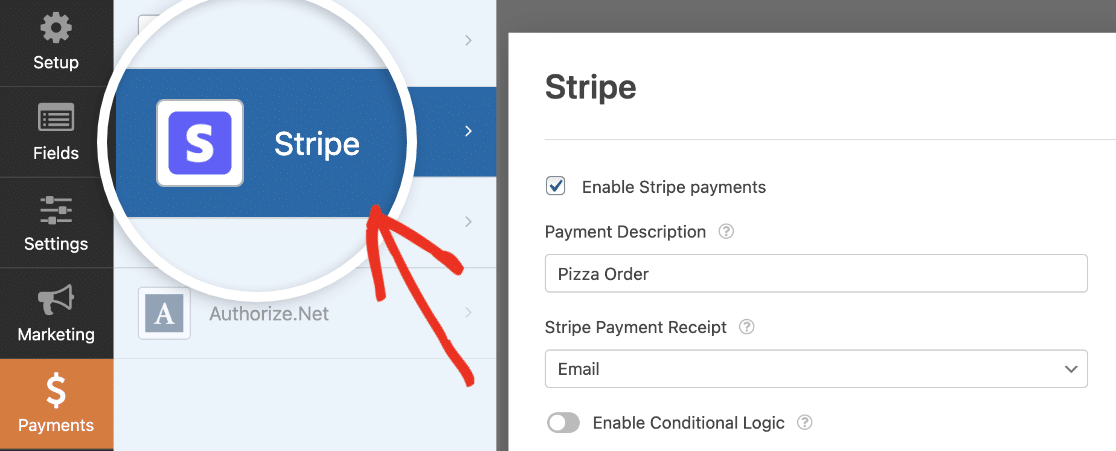
In order for customers to pay for their restaurant orders online, you’ll need to have at least one payment platform on your website. You can choose between Stripe, Square, Authorize.Net, Paypal, or multiple payment methods.
For this example, we’ll use Stripe. Once you’ve completed the setup of Stripe via the tutorial above, simply drag the Stripe Credit Card field from Payment Fields onto the form.
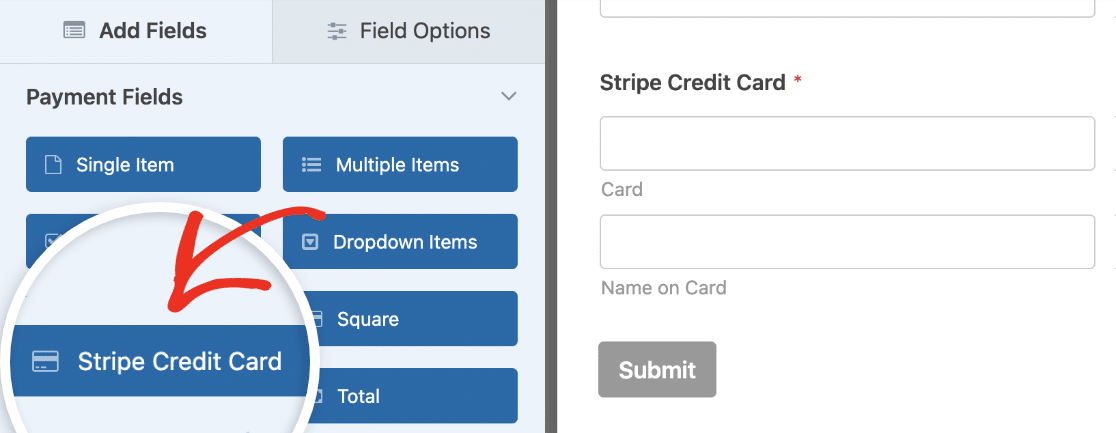
Then go to the Payments tab in the form builder and fill out the settings for your payment integration.
Running a promotion? The Coupons addon adds a discount code box to your form and handles fixed amounts or percentages, so a “20 percent off first order” campaign needs no manual maths.
Step 10: Publish Your Restaurant Order Form
After you’ve created your form, you need to add it to your WordPress website. WPForms allows you to add your forms to many locations on your website, including your blog posts, pages, and even sidebar widgets.
Let’s take a look at the most common placement option: page or post embedding. To begin, create a new page or post in WordPress, or go to the update settings on an existing one.
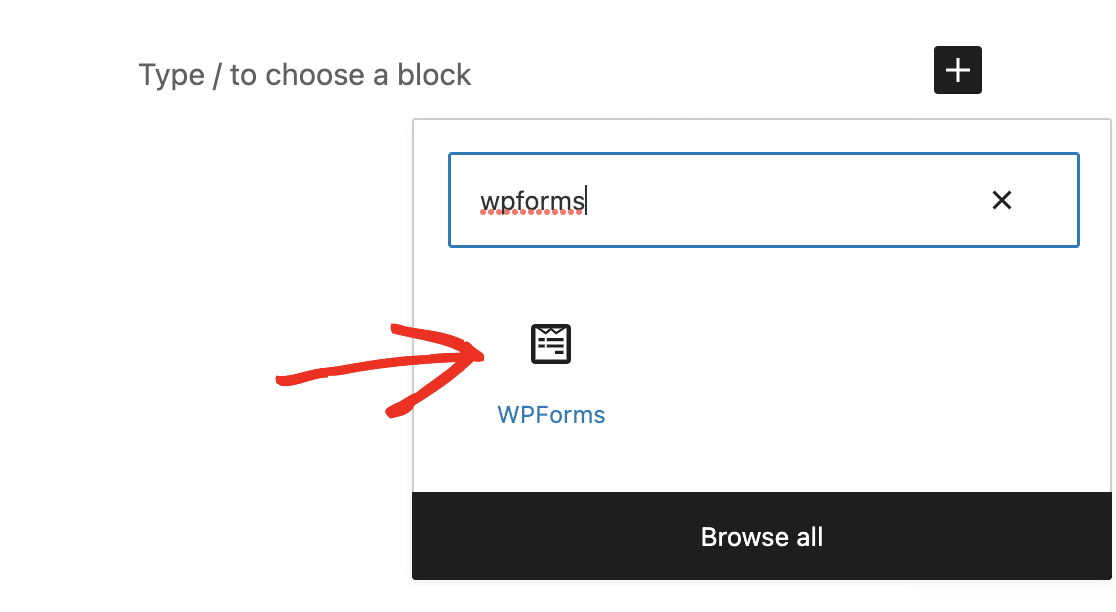
After that, click inside the first block (the blank area below your page title) and click on the WPForms block. The handy WPForms widget will appear inside of your block.
Click on the WPForms dropdown and pick which one of the forms you’ve already created that you want to insert into your page. Select your Takeout Order Form.
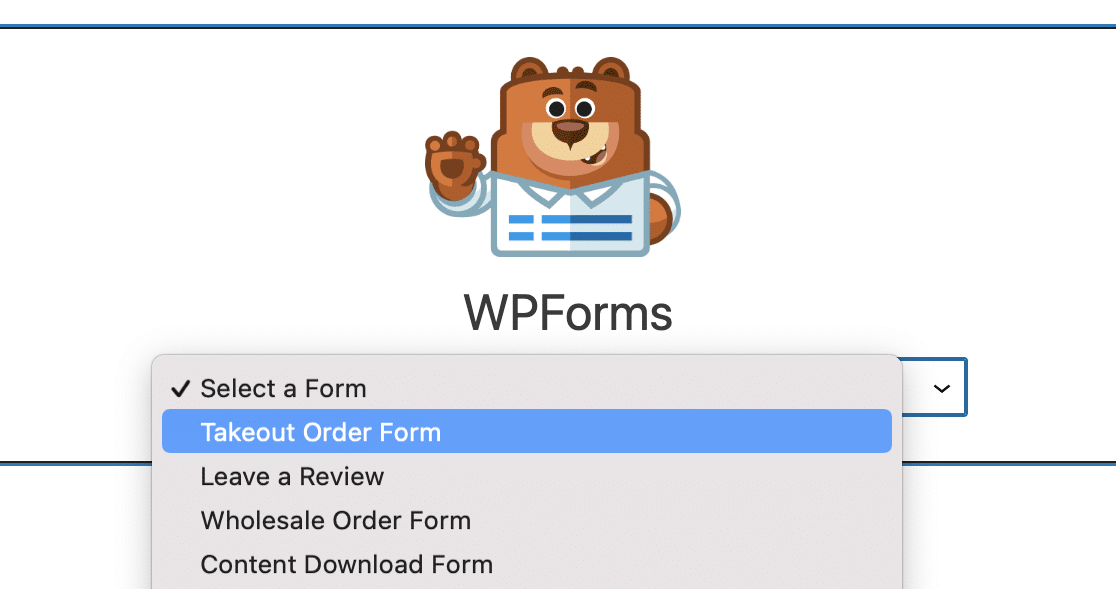
Then, publish or update your post or page so your restaurant order form will appear on your website. To view form entries after they’ve been submitted, check out this complete guide to form entries.
For example, you can view, search for, filter, print, and delete any form entries, making the process that much easier.
In addition, you can use our Zapier addon to automatically save file uploads to cloud services like Google Drive and Dropbox.
Click Here to Make Your Restaurant Online Order Form Now
FAQs on Restaurant Order Forms
Restaurant order forms come up a lot among WordPress site owners running takeaways, cafes, and catering businesses. Here are the questions I get asked most about food ordering forms.
Why Is online ordering better?
There are a lot of reasons why you might consider adding online ordering to your restaurant website. Here are a few:
- To keep an income flowing into your business if you are forced to close for dine-in
- You’ll get even more accurate orders when customers put in their own online orders
- You can expand your business reach by letting more customers discover your restaurant and try your food without dining in
- You’ll build an email list and can digitally market to your customers with things like coupons or online contests
- Employee productivity could increase with less time taking orders over the phone
How do I create a restaurant order form?
The easiest way is to use WPForms with the pre-built Takeout Order Form template. Install WPForms Pro, go to WPForms » Add New, search for “Takeout Order,” and customize the menu items and prices.
Add a payment gateway like Stripe or PayPal, then publish the form on your website. The entire process takes about 15 minutes.
Can I accept online food orders with payment on WordPress?
Yes, WPForms integrates with multiple payment gateways including Stripe, PayPal, Square, and Authorize.Net.
Add a payment field to your order form, configure your chosen gateway in WPForms settings, and customers can pay for their orders directly when submitting the form. All payments are processed securely through your payment provider.
How do I make a simple food order form for my restaurant website?
Use the WPForms Takeout Order Form template as your starting point. Customize the checkbox items to match your menu, add a Stripe or PayPal payment field, and configure email notifications to alert your kitchen staff.
For basic setups, you only need to modify menu items and prices. The template handles everything else including order totals and customer information collection.
What’s the difference between a restaurant order form and a full online ordering system?
A restaurant order form (like the one created with WPForms) collects orders and payments through a simple form on your website.
A full ordering system includes features like real-time inventory tracking, delivery zone management, and driver coordination.
For most small to medium restaurants, a well-configured order form provides 80% of the functionality at 5% of the cost and complexity.
Next, Turn First Orders Into Repeat Customers
You now have a working restaurant order form that takes quantities, handles pickup and delivery separately, collects payment, and messages your kitchen the moment an order lands.
The next thing worth your attention is the orders you nearly get. Plenty of customers build an order and leave before paying, and the guide on why order forms get abandoned covers what usually causes it and how to win them back.
Start Taking Online Food Orders Now
Ready to build your form? Get started today with the easiest WordPress form builder plugin. WPForms Pro includes lots of free templates and offers a 14-day money-back guarantee.
If this article helped you out, please follow us on Facebook and Twitter for more free WordPress tutorials and guides.
Ready to build your form? Get started today with the easiest WordPress form builder plugin. WPForms Pro includes lots of free templates and offers a 14-day money-back guarantee.
If this article helped you out, please follow us on Facebook and Twitter for more free WordPress tutorials and guides.



Awesome explanation and training. Thank you so much. I can go step by step now. Thanks again
Hi Corey!
We are glad to hear that you found it useful!
Have a good one 🙂
I need help. I want to design an order form but with an order summary on the right side of the form like this [URL Removed]
Please help
Hi Saqib- We do not have an inbuilt feature to display the summary as you have shown but we do have the Form Preview field that displays all field’s data before submission.
Thanks 🙂
Thank you, very interesting! I am looking for something similar, 3 important questions:
1. Are the data stored in a database?
2. Can I EASILY export data to xls format? (Does it handle special Hungarian fonts correctly???)
3. Can this database be exported AUTOMATICALLY to an external place, eg, MS drive/ Dropbox, or sent by email etc
Many thanks in advance
agnes
Hi Agnes!
Thanks for your questions.
Yes, the data will be stored in your site Database with any of our paid licenses. You will also able to see the form entries in your WordPress dashboard and also export them to CSV file.
With our Zapier addon, you can absolutely send the data to a third-party service (e.g. Dropbox, Google Drive, etc).
I hope this helps.
Have a good one 🙂
If someone need to order 5 same pizzas does it calculate by itself or I have to make a make drop menu and my calculations in the fields?
Hi Massimo!
Currently, our forms do not have the ability to run the calculations required for product quantities. I do agree it would be super helpful, though, and it’s certainly on our radar as we plan out our roadmap for the future. I’ll add your request to that, as well.
In the meantime, you might consider leveraging the Dropdown Items field to do what you’re asking for in a slightly different way. You can check out the tutorial on how to do that here.
Basically, you’d create a Dropdown Items field for each product and fill in the dropdown options with various quantities and associated prices. This would allow you to offer both multiple products and various quantities of each of those products.
I hope this helps.
Have a good one 🙂
Can users get receipt after placing order?
Can the form have a daily start and end time?
Can you help integrate paystack payment gateway too
Hi Boluwatife! You can use our Notifications feature to provide a receipt for your customers after they’ve placed an order. Details about how to set up Notifications can be found here. As for scheduling when your form is available, this can be done with our Form Locker addon’s (which is available with our Pro level and higher licenses) Scheduling feature. More information about this can be found here.
We don’t currently have an integration with Paystack payment gateway, but I’ve added your interest in this feature for future consideration 🙂
If you have any further questions, please submit a support ticket if you have an active WPForms license.
If you don’t have an active license, we provide limited complimentary support in the WPForms Lite WordPress.org support forum.
Thanks!
Is there any Print extension available? I want to print the order automatic with email confirmation.
Hey Muhib, Currently we don’t have an inbuilt option to print entries on submission as you’ve described. I understand that it would be super helpful. I have gone ahead and added your vote to consider this as a feature request for future enhancements.As a workaround, you can print entries to PDF as outlined here.
Thanks.
Is there a way to let the customer use his credit card info to guarantee the reservation, like in a hotel, but not charge him, unless he turns out to be a no-show?
Hi Stephan,
Unfortunately, we do not have an inbuilt feature to achieve what you have mentioned. I have gone ahead and added your vote to consider this as a feature request for future enhancements.
Thanks,
Is it possible to have different pick-up times on different days of the week, e.g. Tuesday 11am-6pm, Wednesday 11am-7pm etc.?
Hey Thomas – While we have the feature to Limit Hours, we currently don’t have the native feature that you’re looking for. I do agree this would be great, and I’ll add this into our feature request tracker. In the meantime, you can also take a look at our developer documentation for some custom code snippet that you can use to get started.