AI Summary
Do you want to send notification emails with a custom header image? This can be a great way to add personality and style to your emails.
This tutorial will show you all the steps to add a custom header to your notification emails in WPForms.
Selecting the HTML Email Template
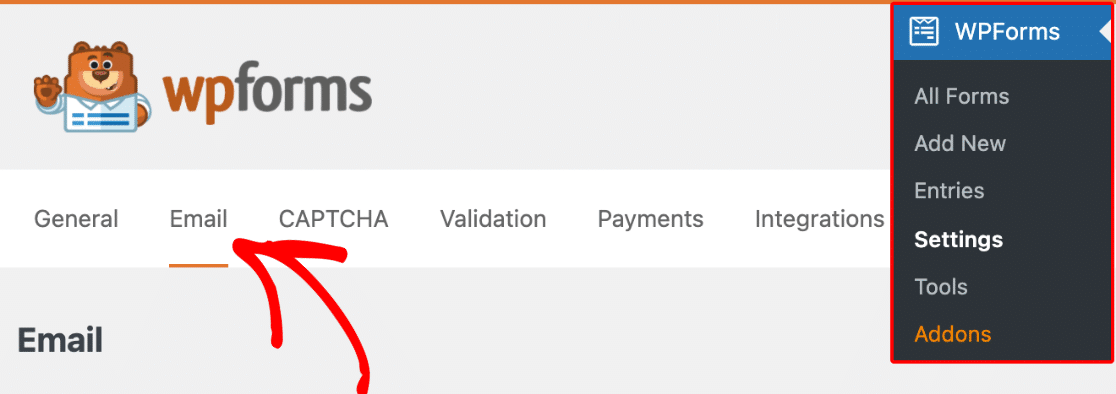
First, we’ll make sure we are using the correct email template in our WPForms settings. To get started, go to WPForms » Settings and select the Email tab.
Next, scroll down to the Template section. Here you’ll see various template choices: Classic, Compact, Modern, Elegant, Tech, and Plain Text.
To use a custom header image in the notification emails, choose any of the templates except Plain Text.

Selecting a Custom Header Image
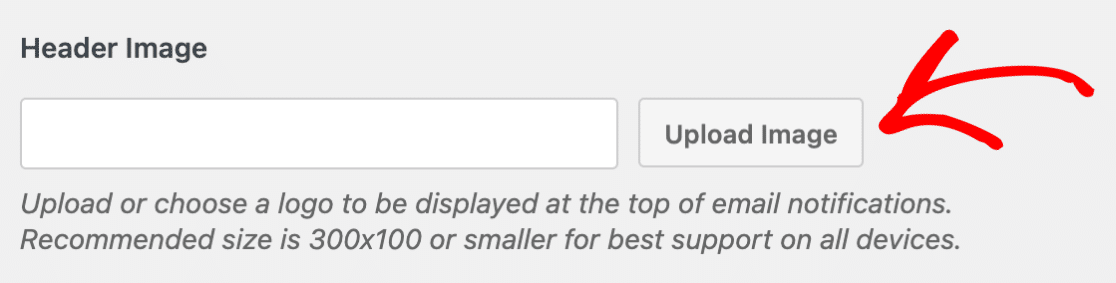
Next, we’ll add a header image to our email template. To do this, scroll down to the Header Image section and click on the Upload Image button.
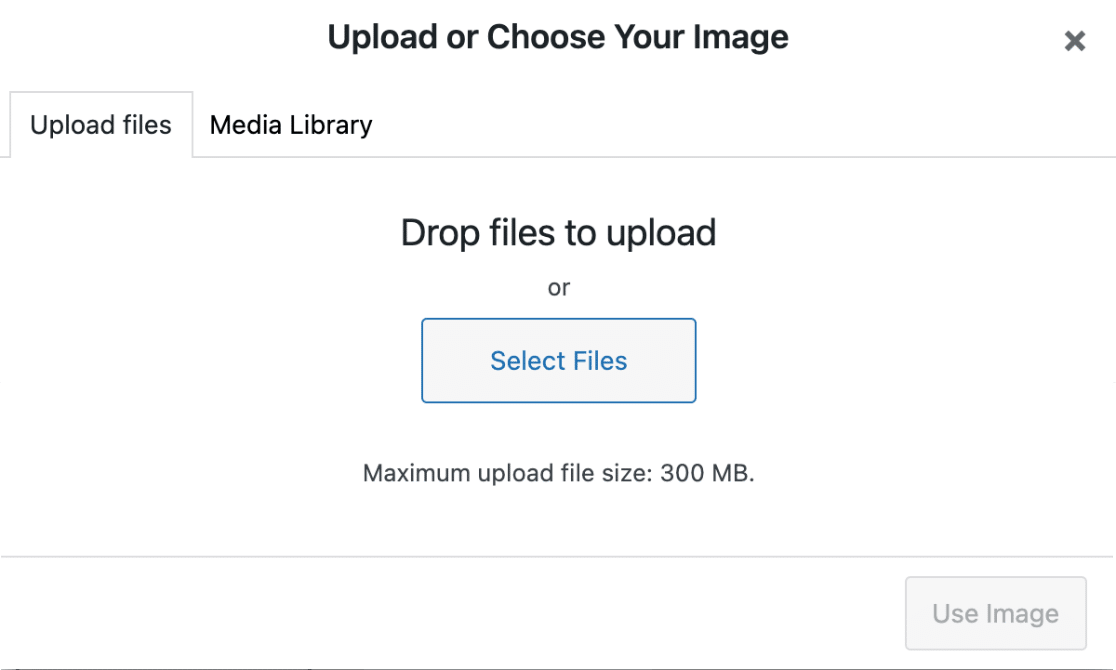
An overlay will appear where you can upload a new file, or select an existing file from the WordPress Media Library.
Note: For the best support on all devices, the recommended image size is 300×100 pixels.
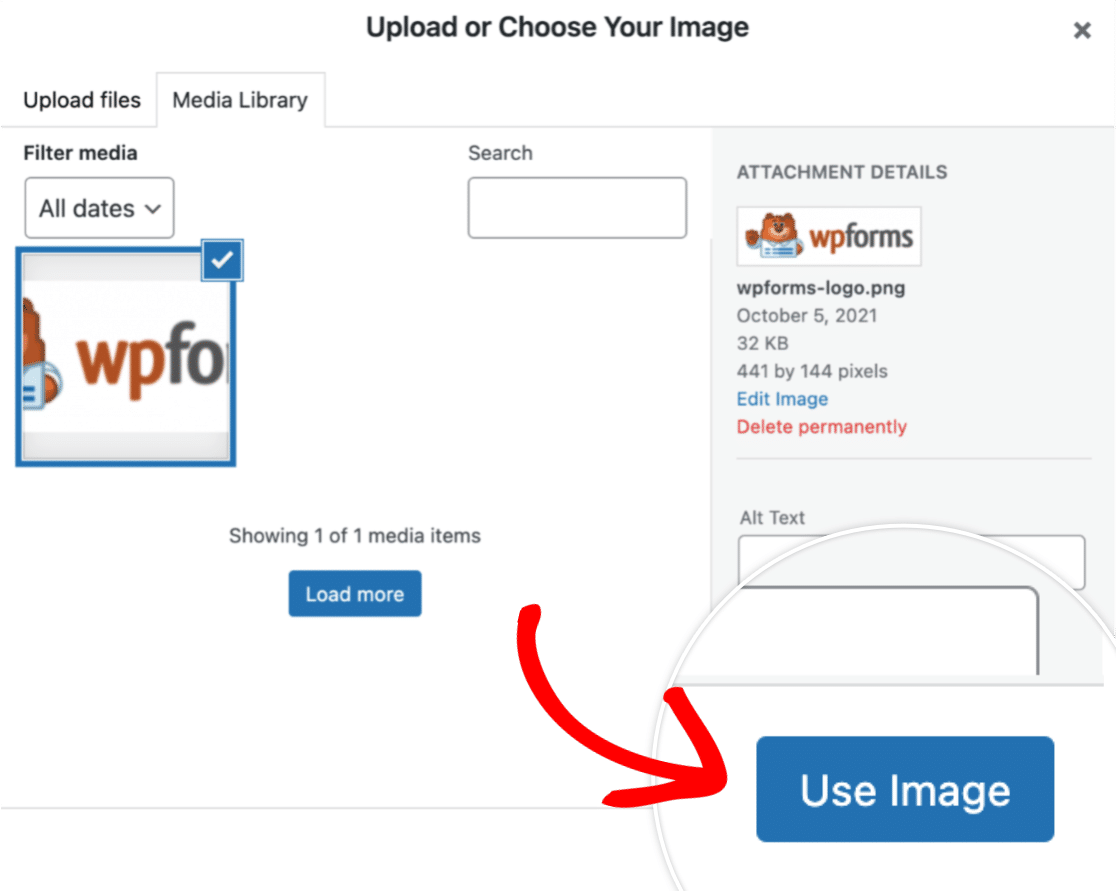
Once you’ve uploaded a new image, or selected an existing image, click on the Use Image button.
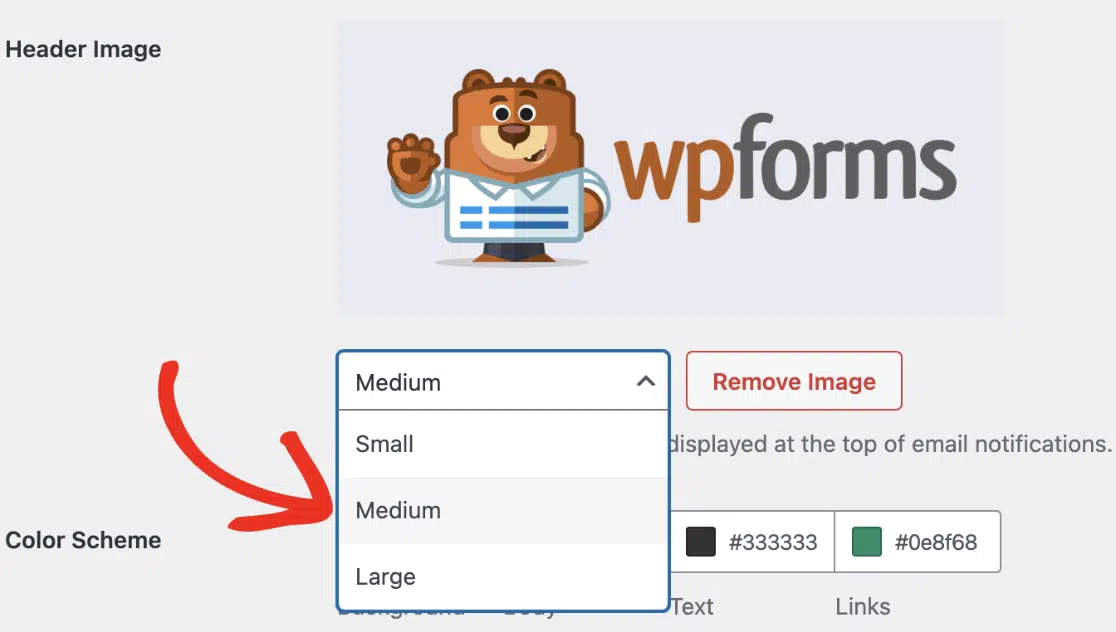
After selecting an image, you’ll see a dropdown where you can update the size of the image. Available size options include Small, Medium, and Large.
The email template has other customization settings, such as setting a color scheme. To learn more, be sure to check our tutorial on customizing form notification emails.
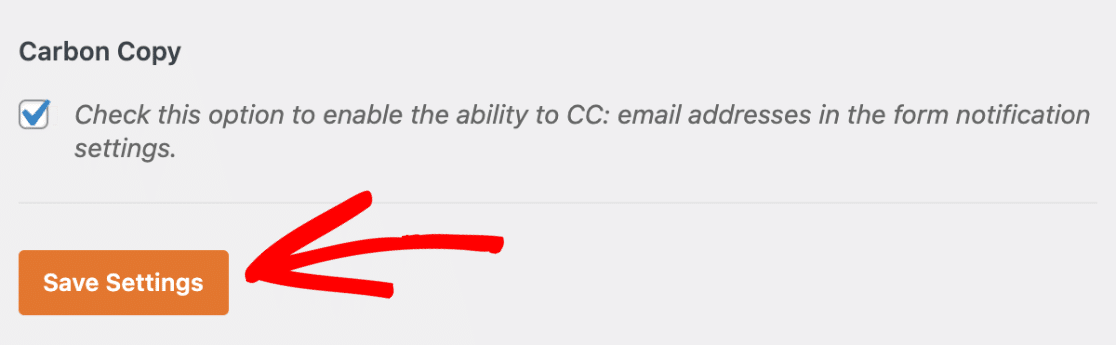
Now, to save your settings, click the Save Settings button located at the bottom of the page.
To test your custom header image, submit a test entry to your form and check that the notification email arrives with the header displayed correctly. For a complete walkthrough of testing both notifications and confirmations, see our form testing checklist. To learn more about configuring your notification settings, check out our guide on setting up form notification emails.
Here’s an example of what the email notification might look like with our custom header:

That’s it! You can now add a custom header image to your WPForms email template.
Next, do you want to send notification emails based on the user’s form selections? Be sure to check out our tutorial on how to set up conditional form notifications!