Do you want to prevent a page from reloading when someone submits one of your online forms?
Keeping a page from refreshing after someone submits on a form makes for a better user experience and can even help you get more leads.
In This Article
Create a WordPress AJAX Contact Form
This WordPress AJAX contact form tutorial will work with any of the 2,000+ WordPress form templates included with WPForms.
Note: AJAX is automatically enabled in the most recent versions of WPForms. This tutorial explains how to turn it on if you’ve used an older version to create your forms.
1. Create a New Form
To begin, install and activate the WPForms plugin. For more details, see this step by step tutorial on how to install a plugin in WordPress.
Once you’ve installed the WPForms plugin, go to WPForms » Add New to create a new form.
Select a template from the list:
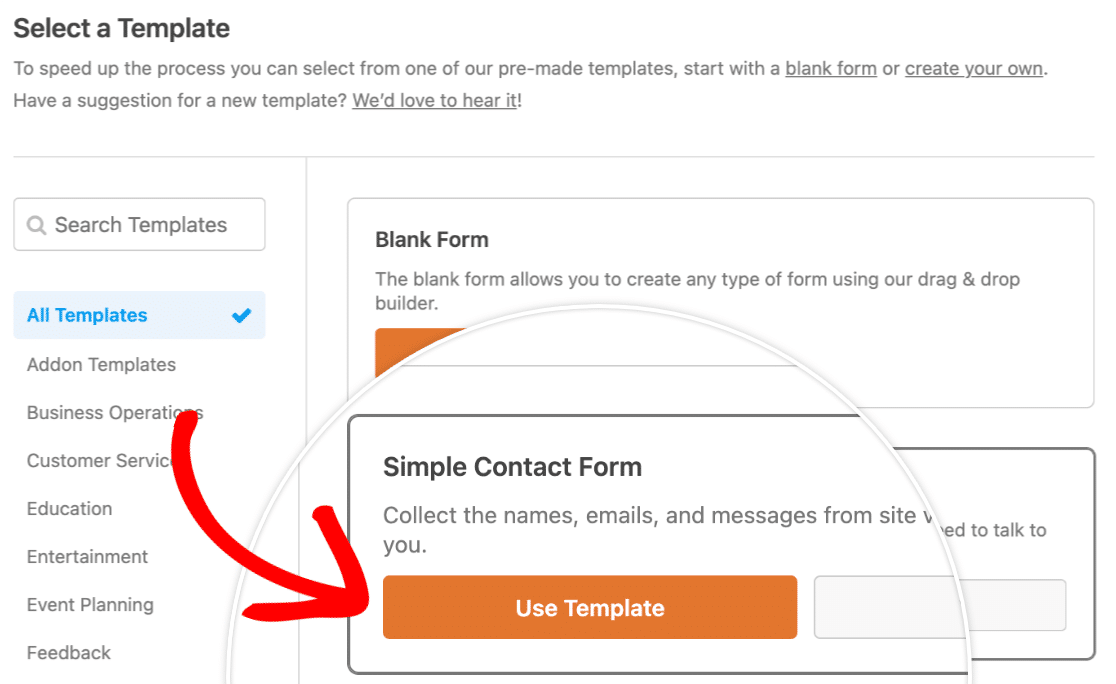
We’ll be using the Simple Contact Form template for this tutorial.
2. Customize Your Form
Now it’s time to build your form. You can easily customize the form fields by dragging them from the left side of the builder to the preview area on the right.
We’ll add a File Upload field to our contact form so users can include any relevant documents with their submission.
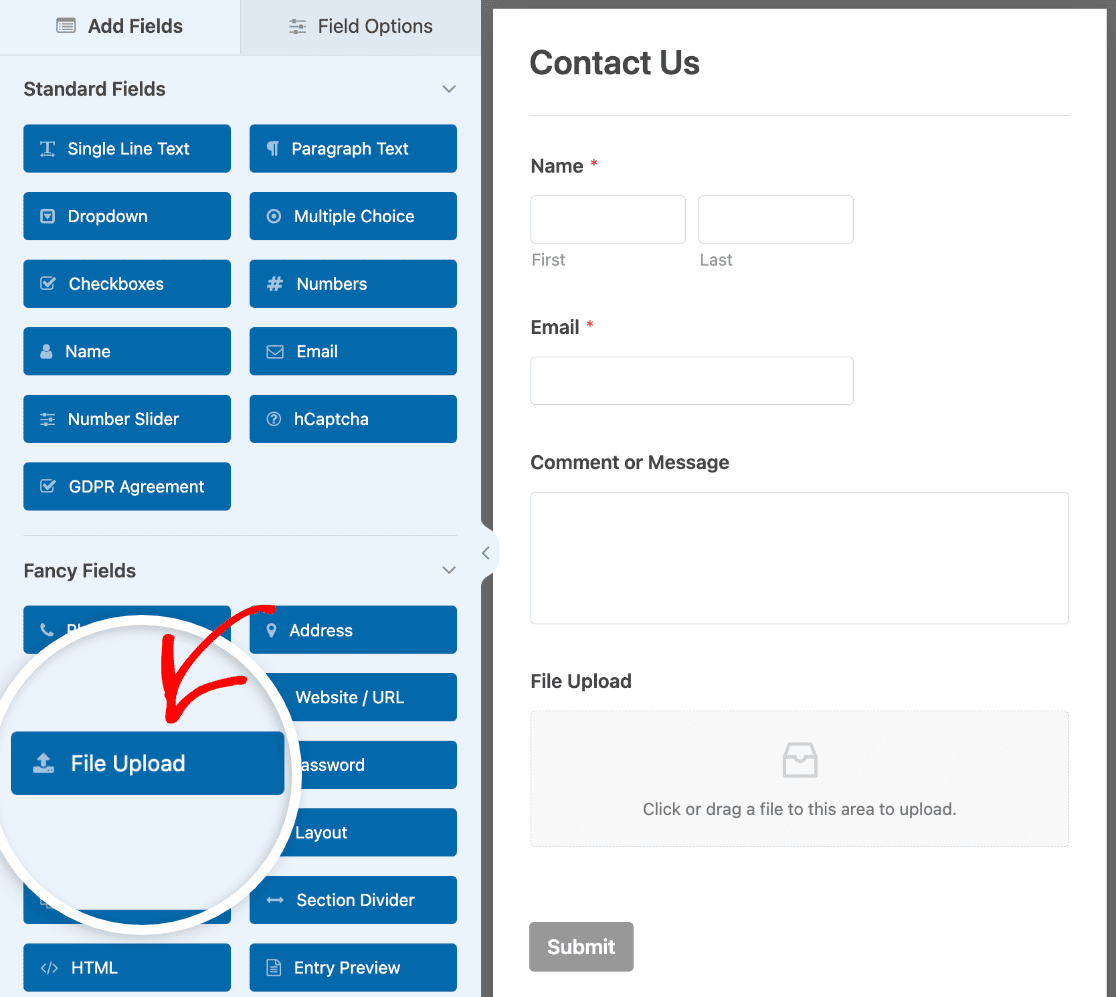
Adjust the placement of fields to your liking by dragging them up and down on your form.
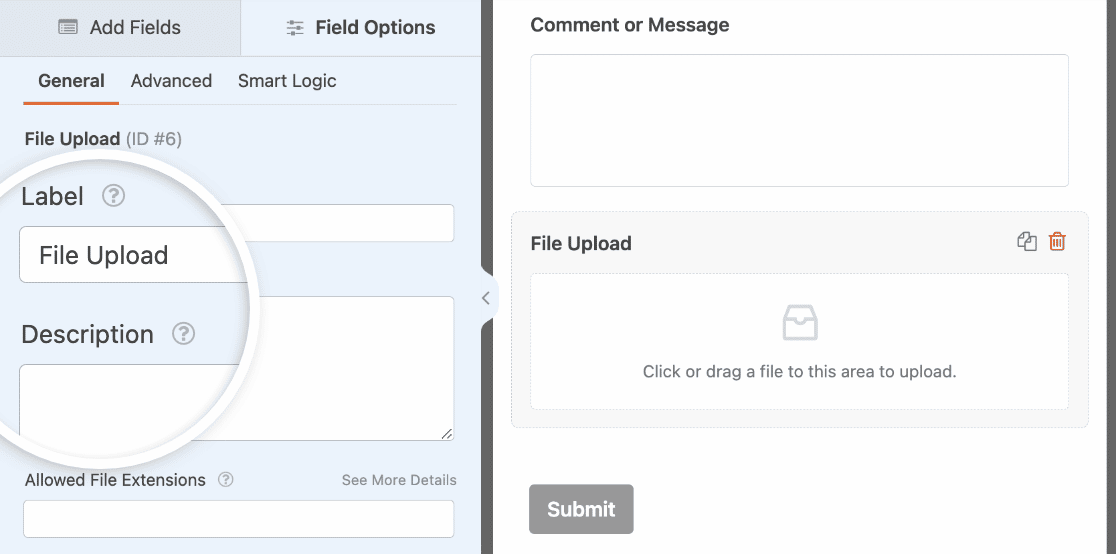
You can also click on any field in the preview area to open additional options. This will let you change field labels, add conditional logic, and more.
When you’re ready, click the orange Save button in the top right corner.

Now that we’ve created a form with a File Upload field on it, let’s enable it for AJAX.
3. Enable AJAX Form Submissions
Next, on the left-hand side of your page, click on Settings. Then select the General section.

At the bottom of the right-hand panel, expand the Advanced options and locate the Enable AJAX form submission setting. Make sure it’s toggled on.
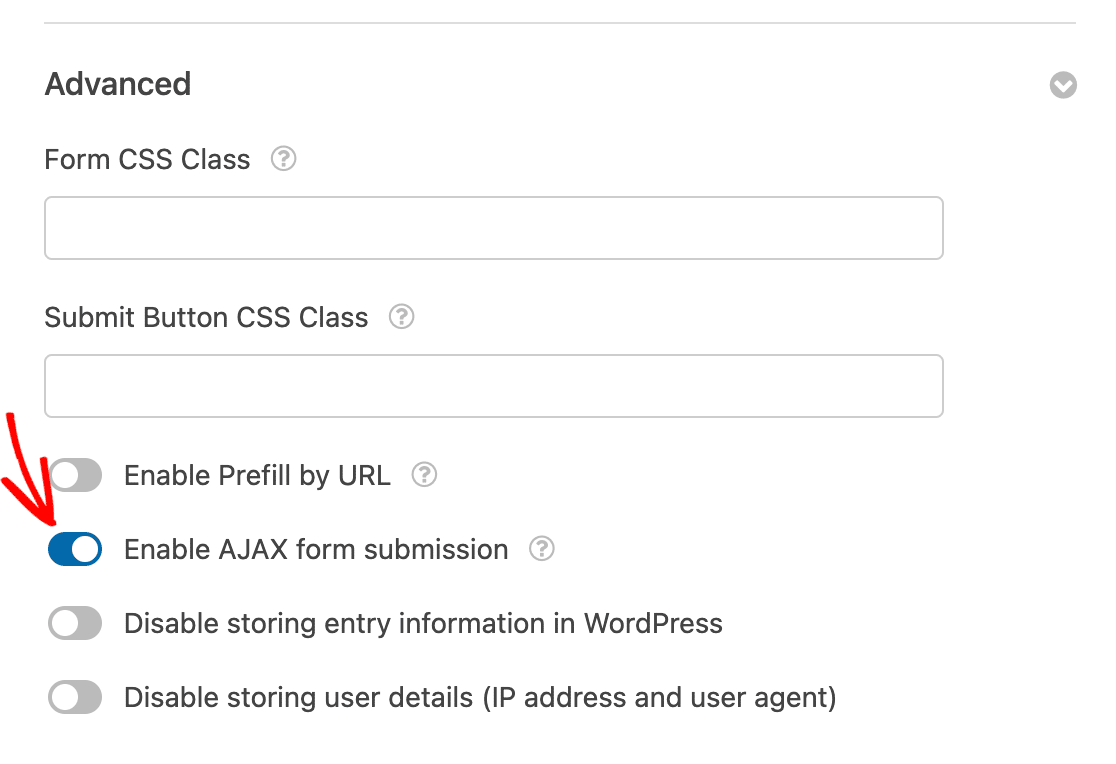
That’s it! Your form is now enabled for AJAX submissions.
Let’s configure a couple other important things with your AJAX contact form.
4. Configure Your Form Notifications
The next thing you’ll need to do is set up your form email notifications. These are an excellent way to know when someone submits one of your AJAX-enabled forms.
To begin, go to Settings » Notifications.
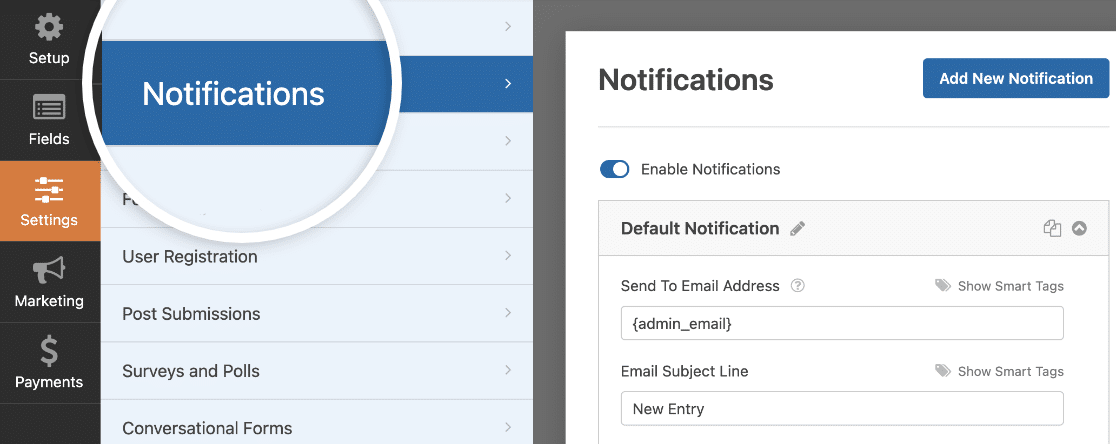
Unless you disable the notification feature, you’ll get an email notification whenever someone submits your AJAX form.
For help filling out these settings, see our tutorial on how to set up form notifications in WordPress.
This example has a grey background, but you can change the color to something else if you’d like. These personalized tweaks can make your email notifications look more professional and give them a personal touch. Check out our guide on adding a custom header to your email template.
5. Configure Your Confirmations
Form confirmations let you take action immediately (and automatically) after your user has submitted information to your form.
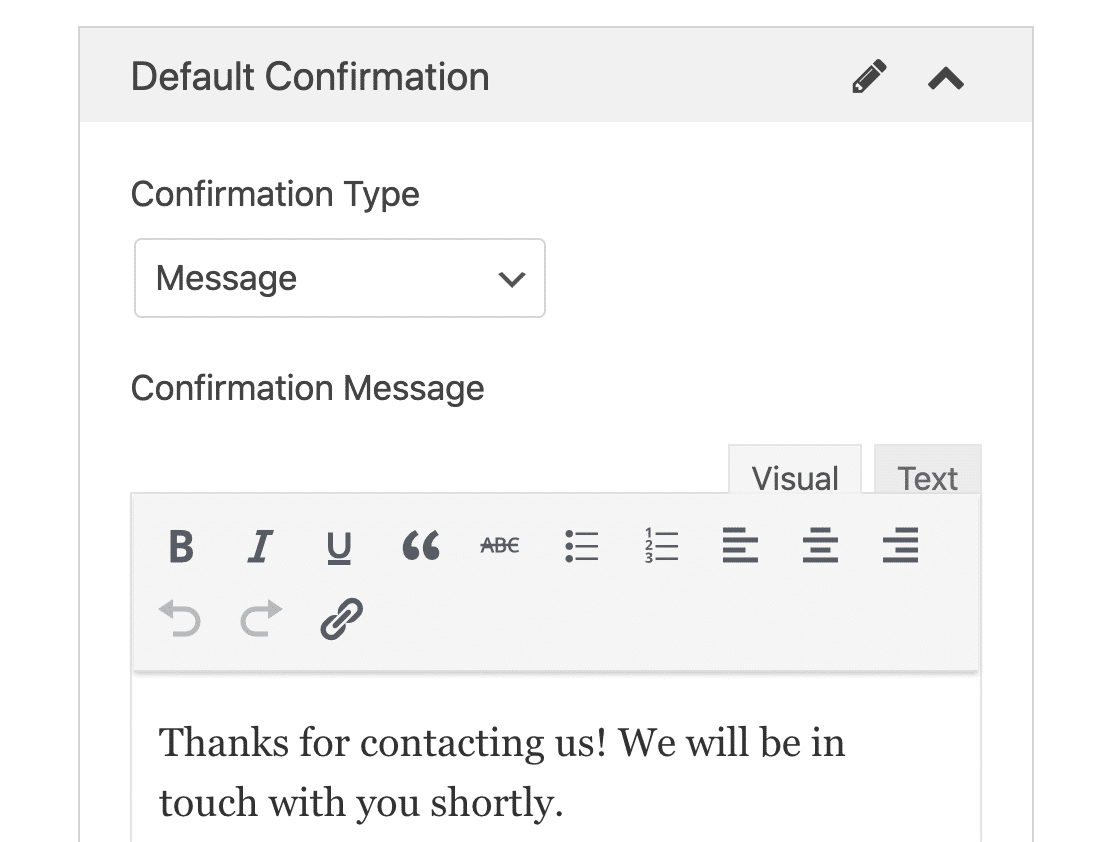
There are 3 different kinds of confirmations in WPForms:
- Message — This is the default confirmation type that appears after someone hits submit on your form, and it’s customizable. Check out our tips on ways to customize your confirmation message to boost your site visitors’ happiness.
- Display Page — Automatically send users to any page on your site.
- Redirect — Useful if you want to take the user to a different website or specialized URL for more complex development.
For extra help with this step, check out our tutorial on how to setup form confirmations.
Once you’re done setting up your notifications and confirmation, make sure to save your form again.
6. Embed Your AJAX Form
Once you’re done configuring your AJAX-enabled form to your liking, you’ll want to add it to your site.
WPForms lets you add your forms to multiple places on your website including your pages, blog posts, and sidebar widgets. Let’s take a look at the most common placement option: page or post embedding.
To begin, create a new page or post in WordPress, or open an existing one in the editor.
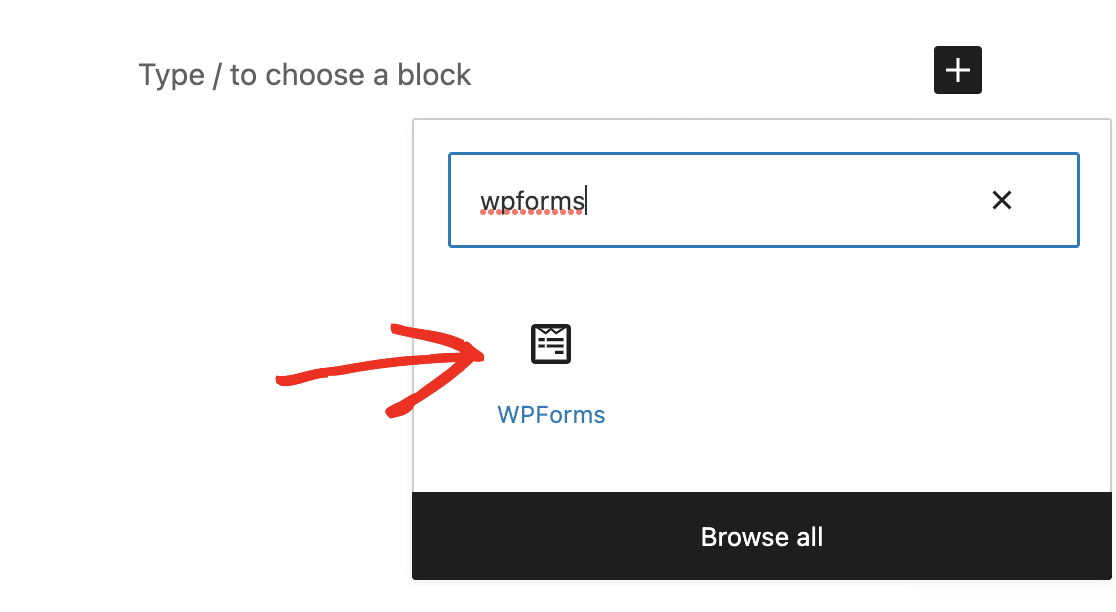
After that, add a new block and select the WPForms icon. If you don’t see it right away, you can search to find it.
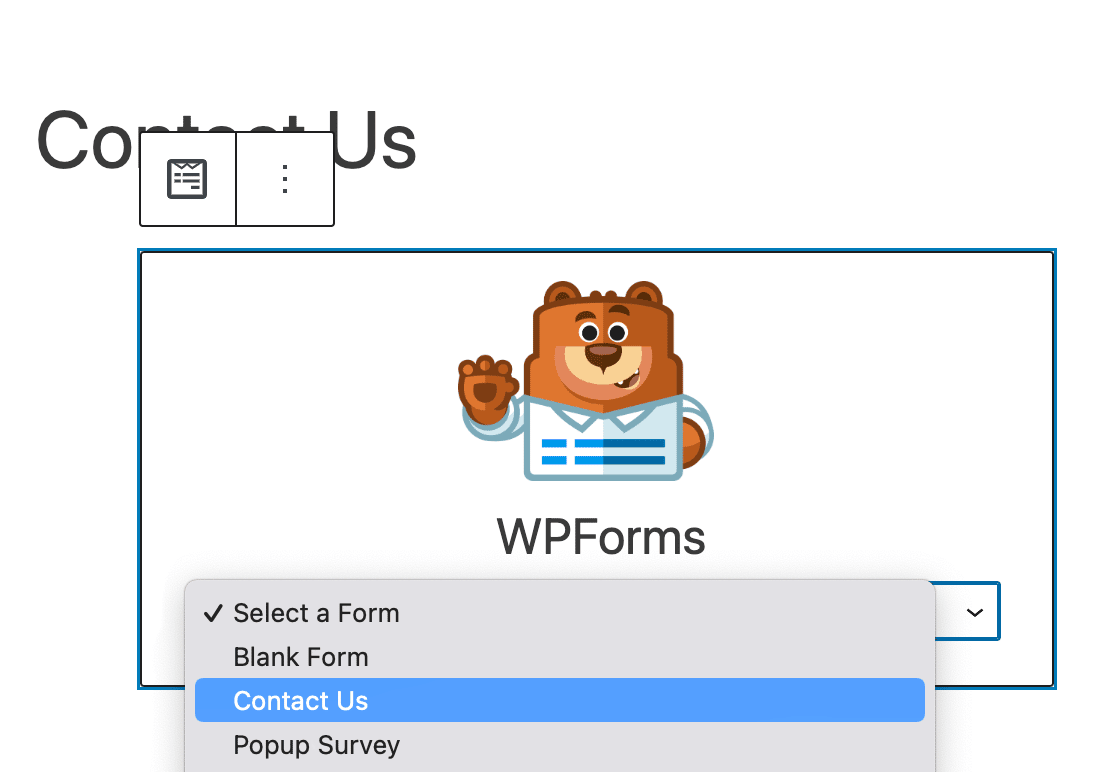
The handy WPForms widget will appear inside of your block. Click on the WPForms dropdown and pick which one of the forms you’ve already created that you want to insert into your page. Select your AJAX form.
Next, click on the blue button in the top right that says either Publish or Update, so your form will appear on your website.
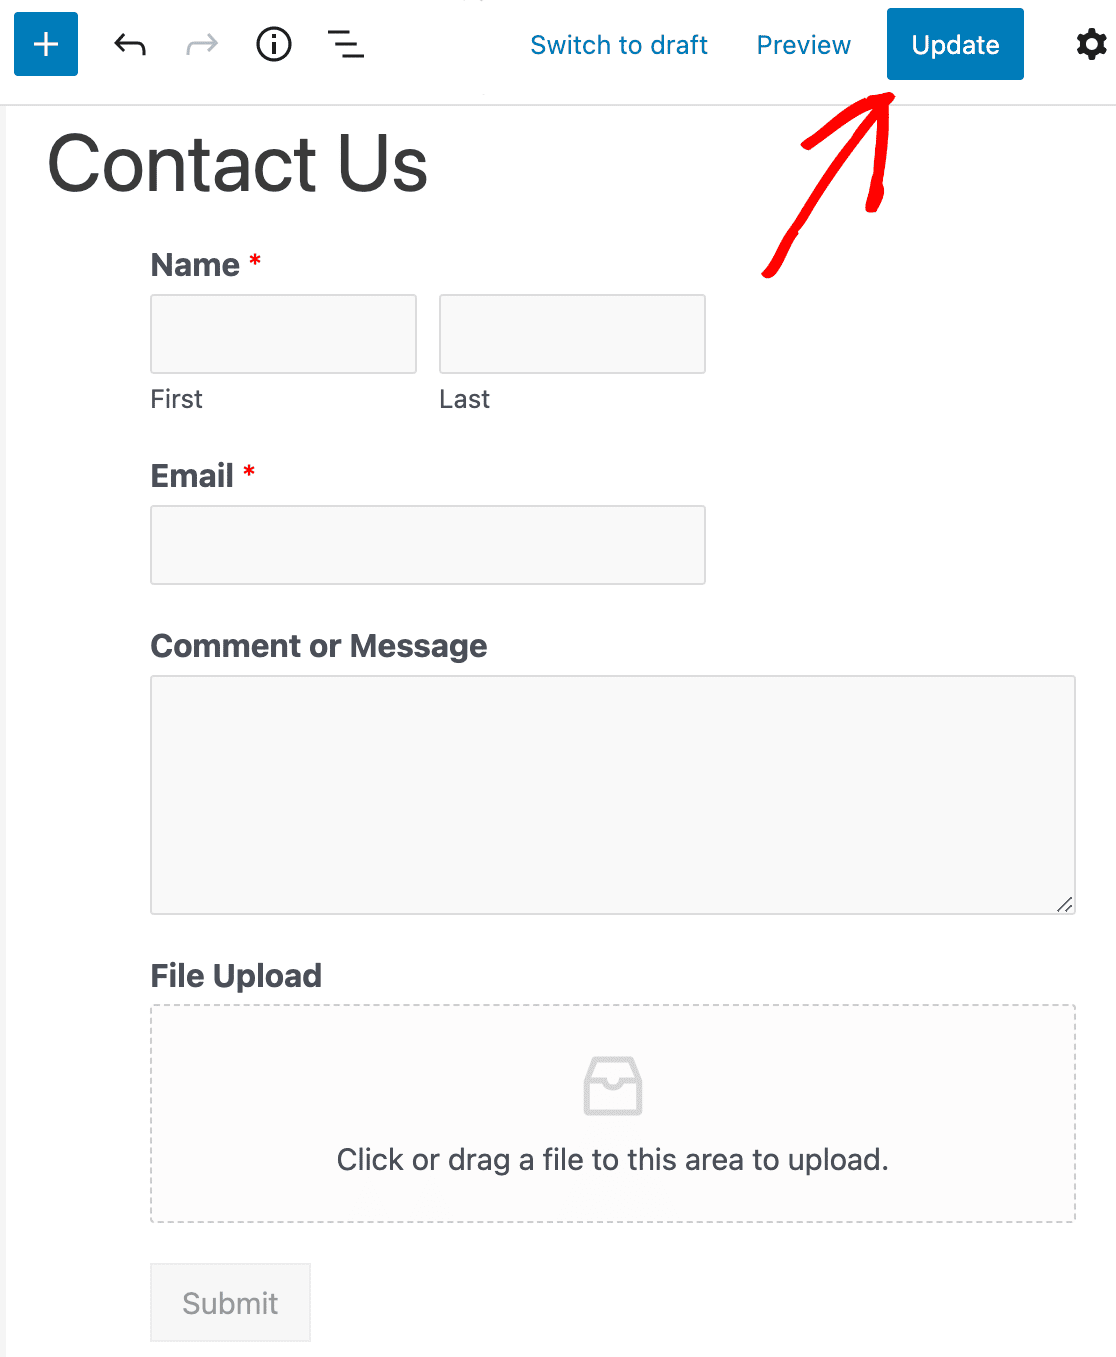
And there it is. You now know how to create a simple WordPress AJAX contact form with no page reload, and your website visitors will love you even more for it.
Frequently Asked Questions About AJAX Forms
What Is an AJAX Form?
An AJAX-enabled form is a fast and dynamic form that can submit and run backend processes without the need for the entire page to refresh.
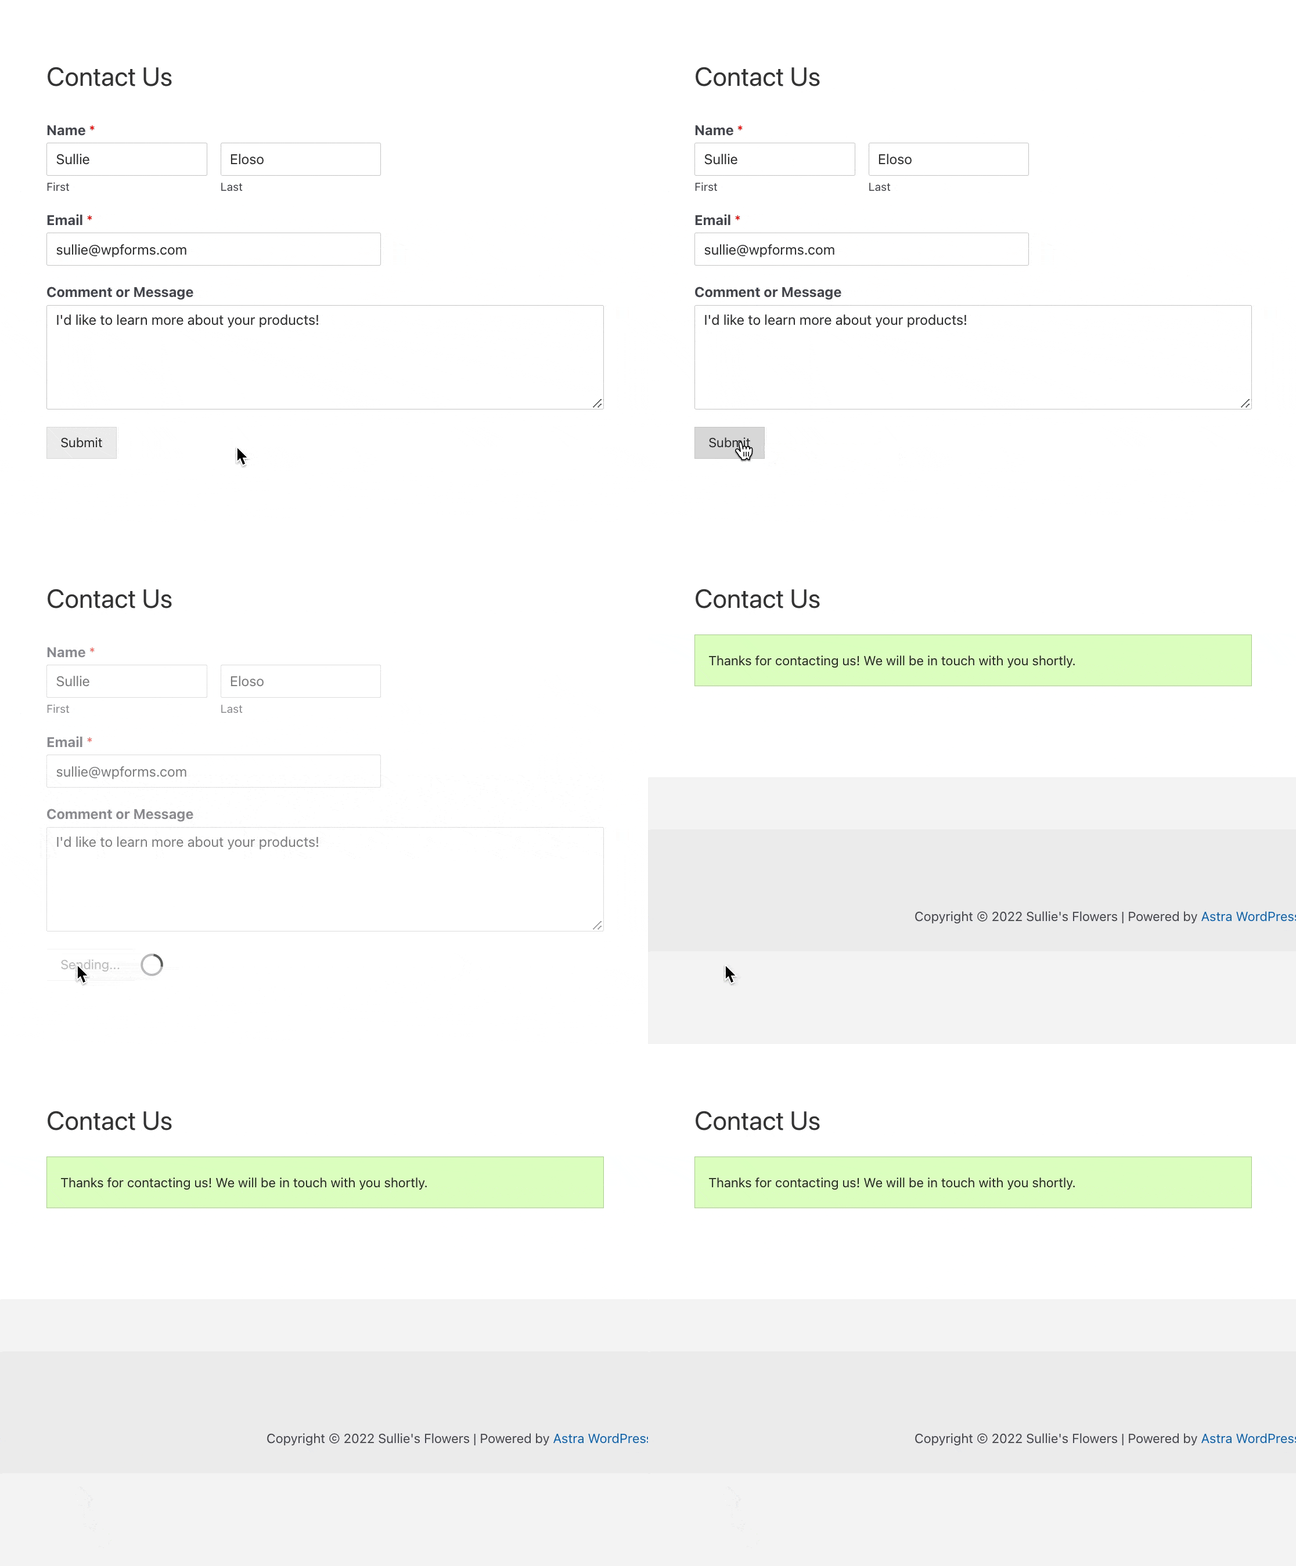
By default, an entire page needs to reload when a user hits submit. This is because certain processes need to run, including storing the form data, sending out notification emails, and more.
But because WordPress and WPForms support AJAX forms, you have the option to enable AJAX form submissions to keep your forms from refreshing after someone submits the form.
Why Is AJAX Used on Contact Forms?
AJAX-enabled forms have suddenly become a must-have for websites of all sizes.
Here are the top reasons why AJAX is quickly becoming popular to use on contact forms:
- Makes for a way better user experience.
- Lightning-fast loading times and increased WordPress site speed.
- Keeps modals and popups containing your form open so you can display a follow-up action or message to boost sales.
- Provides visual cues and assurance that the form is processing.
Next, Build a WordPress Popup Form
Now that you can keep your popups open after someone hits submit, you’ll want a great plugin to use to display a targeted message.
- Be sure to read our post on the best WordPress popup plugins.
- Check out 2 different ways to create a popup form in WordPress.
- And finally, learn how to create a popup with a coupon code using WPForms.
Ready to build your form? Get started today with the easiest WordPress form builder plugin. WPForms Pro includes lots of free templates and offers a 14-day money-back guarantee.
If this article helped you out, please follow us on Facebook and Twitter for more free WordPress tutorials and guides.




Thanks
I used the instructions, but it is not working.
when I submit a form with custom handling, I can see 2 requests to /wp-admin/admin-ajax.php
the first one (which is actually the one I trigger) fails with Forbidden (related to nonce) and I actually want to trigger a custom function that does some processing to the form data.
The second one succeeds, but it returns the confirmation that I want to skip.
How can I do this? How can I achieve an AJAX form with customer handling?
Thank you.
Hi Eli. It sounds like you’d need a custom solution to achieve what you’re looking for. We recommend checking in with Seahawk who can work with you on this.