
AI Summary
Do you need your WordPress contact form to send notifications to multiple email addresses? Maybe a team member needs a copy of every submission, or you want your site visitor to get a confirmation email while you get the full details.
WPForms handles all of these scenarios without any code. You can send the same notification to several people, create completely separate emails for different recipients, or route notifications based on how someone fills out the form.
In this tutorial, I’ll show you how to set up multiple email notifications for your WordPress forms using WPForms.
Create Multiple WordPress Form Notifications! 🙂
How to Make a Contact Form With Multiple Email Addresses
First of all, make sure that you’ve installed and activated the WPForms plugin. You can follow this step-by-step guide on how to install a WordPress plugin for help.

Also, make sure you’ve created a form to follow this tutorial. WPForms allows you to create different types of forms, such as a simple contact form, survey form, employee information form, and almost anything you can think of.
- Method 1: Send the Same Notification to Multiple Email Addresses
- Method 2: Send a Confirmation to the Person Who Submitted the Form
- Method 3: Route Notifications to Different People Based on Form Answers
- Method 4: Use Carbon Copy (CC) for Reply-All
- Method 5: Create Separate Notifications With Different Content
- Bonus Tip: Make Sure Your Notifications Actually Arrive
Method 1: Send the Same Notification to Multiple Email Addresses
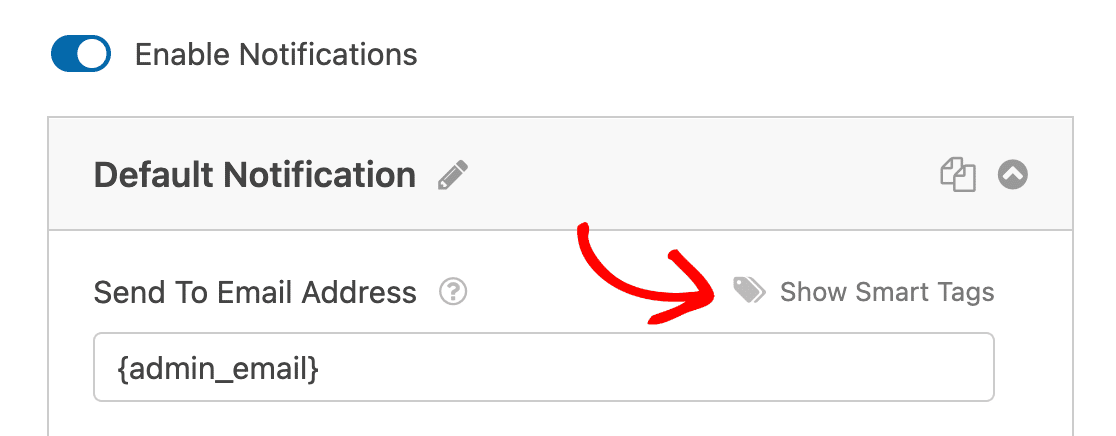
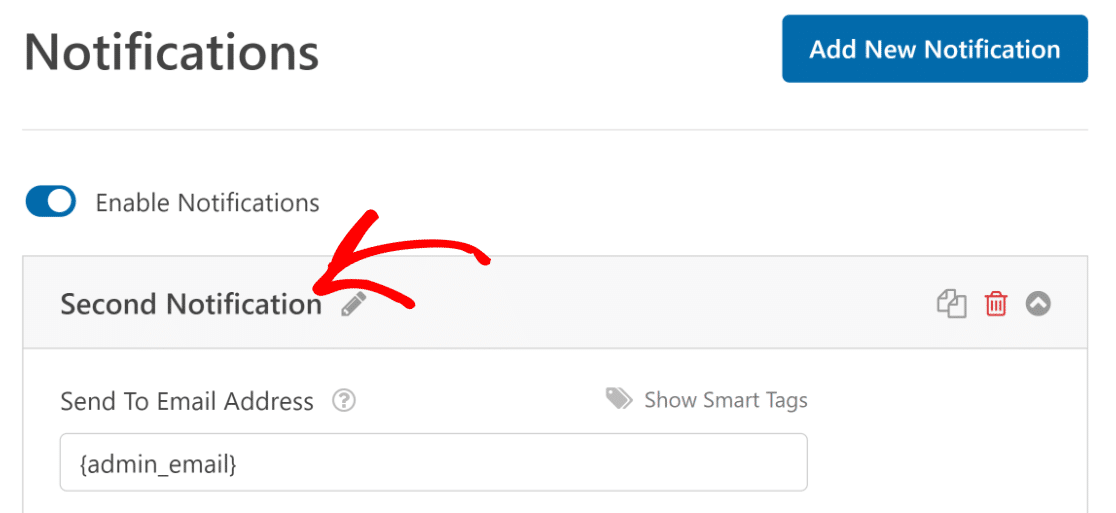
This is the simplest method. If you want the same notification email to go to more than one person, you just add their email addresses to a single field. In the form builder, go to Settings » Notifications.

In the Send To Email Address field present in the right panel, you can type in each person’s email address. Be sure to separate each email address with a comma (,).

When someone submits the form, every address in that field gets the same notification. Each recipient gets a completely separate email, so they won’t see each other’s email addresses.

Click Save when you’re done. For more details, check out the full guide on how to set up form notifications in WPForms.
Method 2: Send a Confirmation to the Person Who Submitted the Form
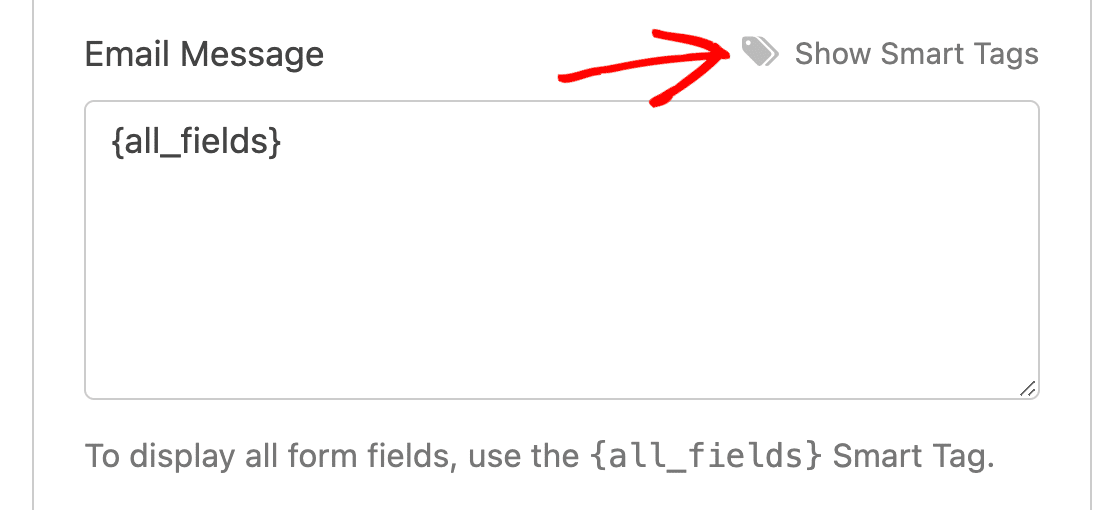
Since you don’t know the visitor’s email address ahead of time, you use Smart Tags to pull it from the submission. In the Send To Email Address field, keep the {admin_email} that’s there by default. Then click Show Smart Tags.
WPForms will show you any Email fields in your form. Click Email to add a Smart Tag that automatically inserts the submitter’s email address.
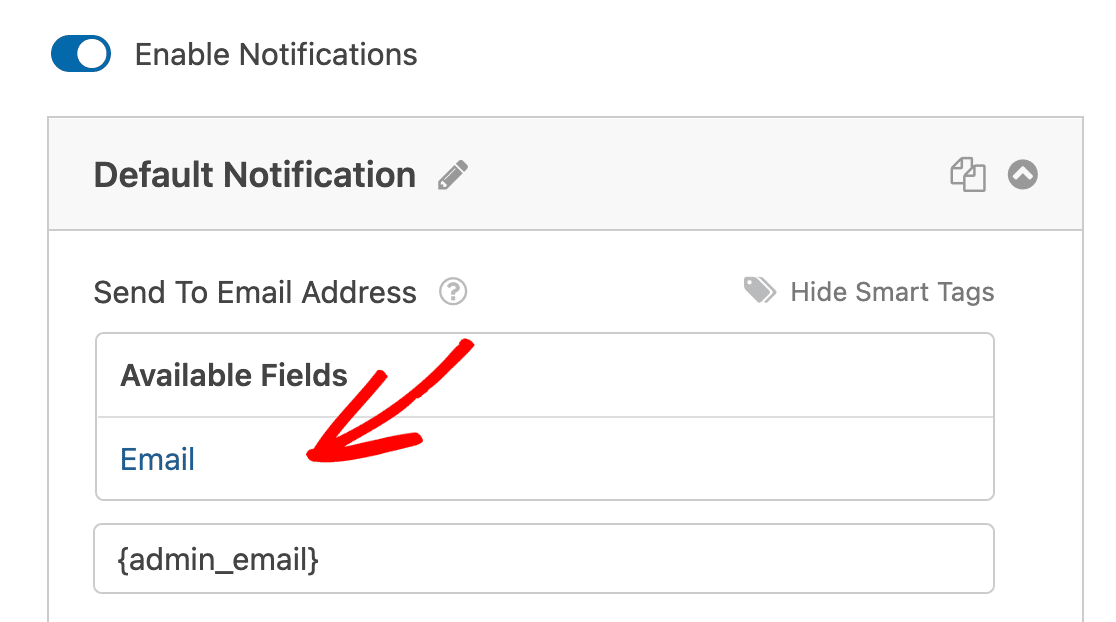
Now whenever someone submits the form, both you and the visitor get a notification. This is useful when you want to send visitors a confirmation email letting them know their submission was received.
If you want the visitor to receive a completely different message than you do (which is usually the case), see Method 5 instead for creating separate notification emails.
Method 3: Route Notifications to Different People Based on Form Answers
This is the most powerful method. With conditional logic, WPForms sends notifications to specific people depending on how someone fills out the form.
Go to Settings » Notifications. Scroll to the bottom of the notification and check Enable Conditional Logic.
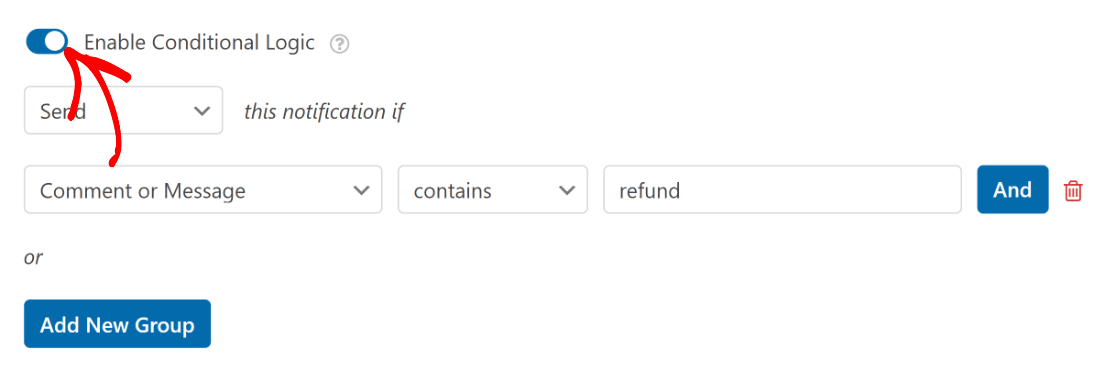
Set the condition to match your form field. For example, “Send this notification if Department is Sales” and enter the sales team email in the Send To Email Address field.
Then create additional notifications (one for each department) using the same pattern. Each notification fires only when its condition is met.
For more help setting this up, check out the conditional form notifications documentation. You can also let users select recipients directly from a dropdown on the form, without exposing the actual email addresses.
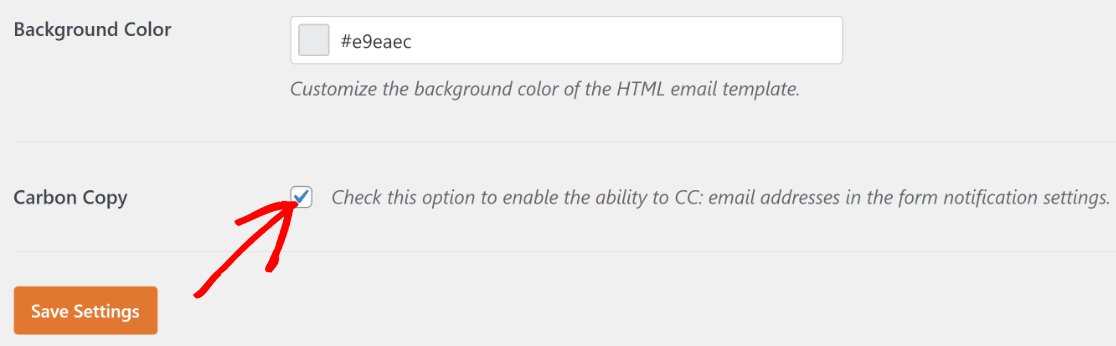
Method 4: Use Carbon Copy (CC) for Reply-All
The other methods send completely separate emails to each recipient. CC keeps everyone visible. To enable CC, go to WPForms » Settings from your WordPress dashboard and click the Email tab.
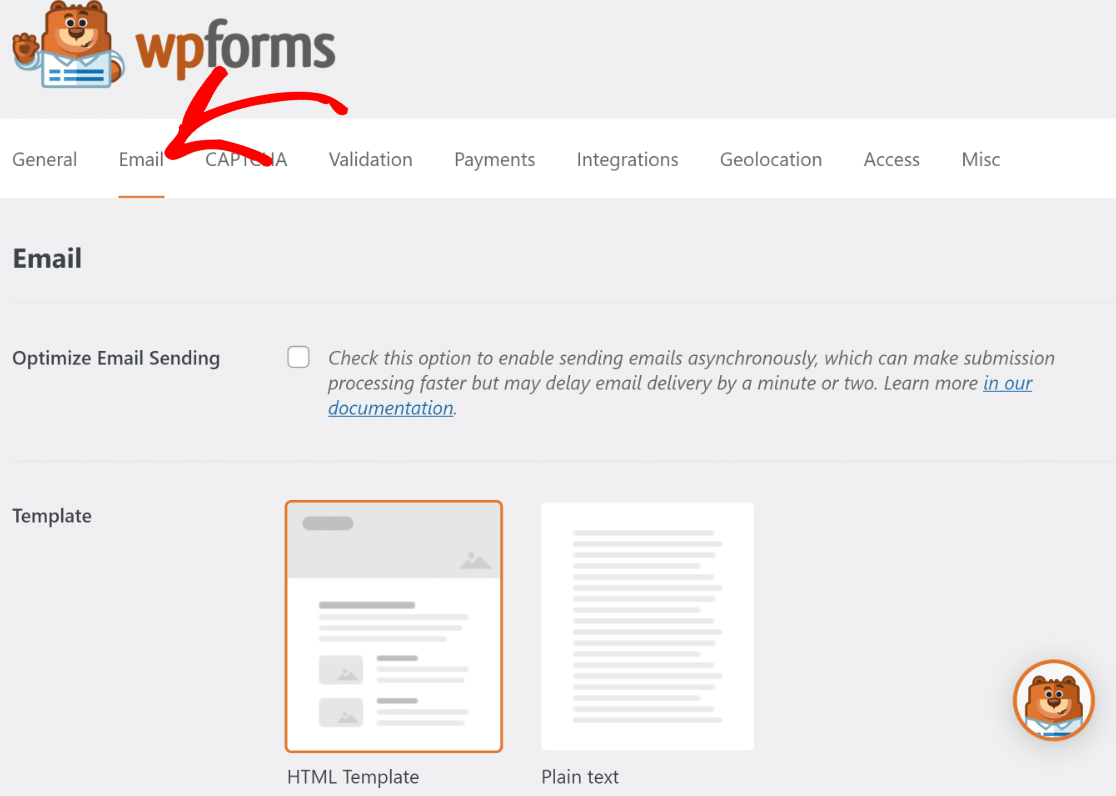
Scroll down and check the Carbon Copy checkbox. Click Save Settings.
Now when you go back to Settings » Notifications in the form builder, you’ll see a new CC field.
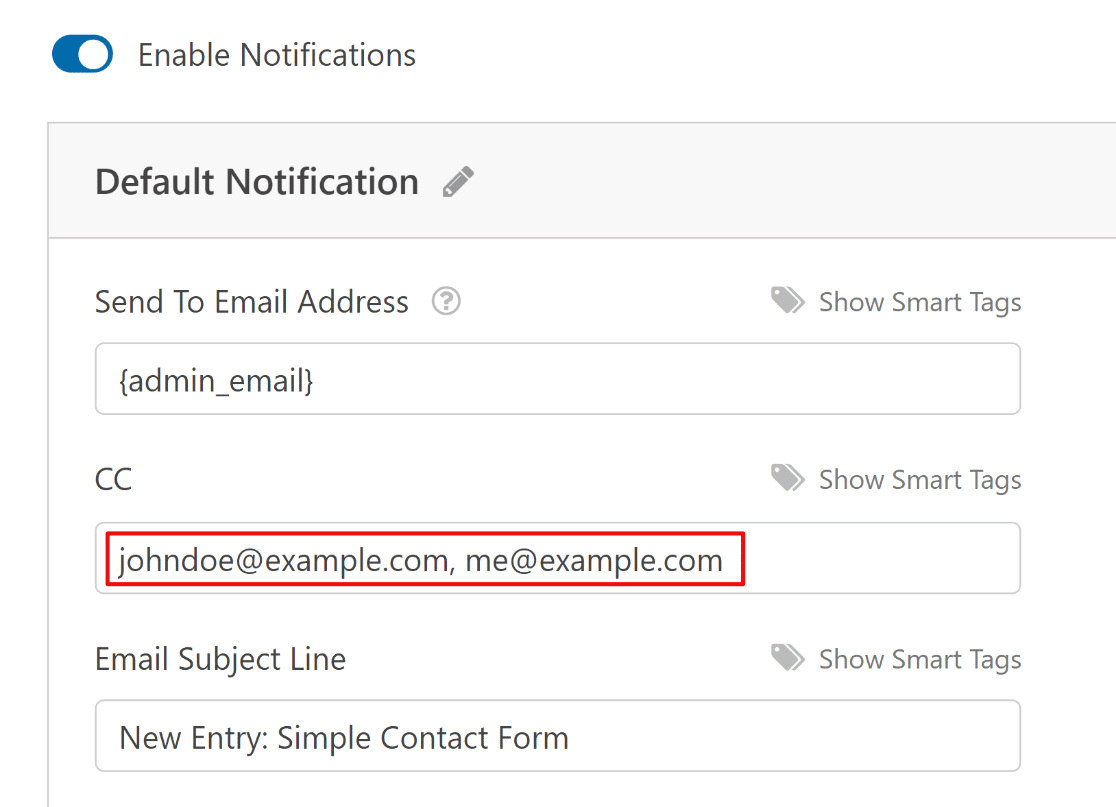
Add any email addresses you want CC’d on the notification. Recipients will be able to see each other’s addresses and use Reply-All.
Method 5: Create Separate Notifications With Different Content
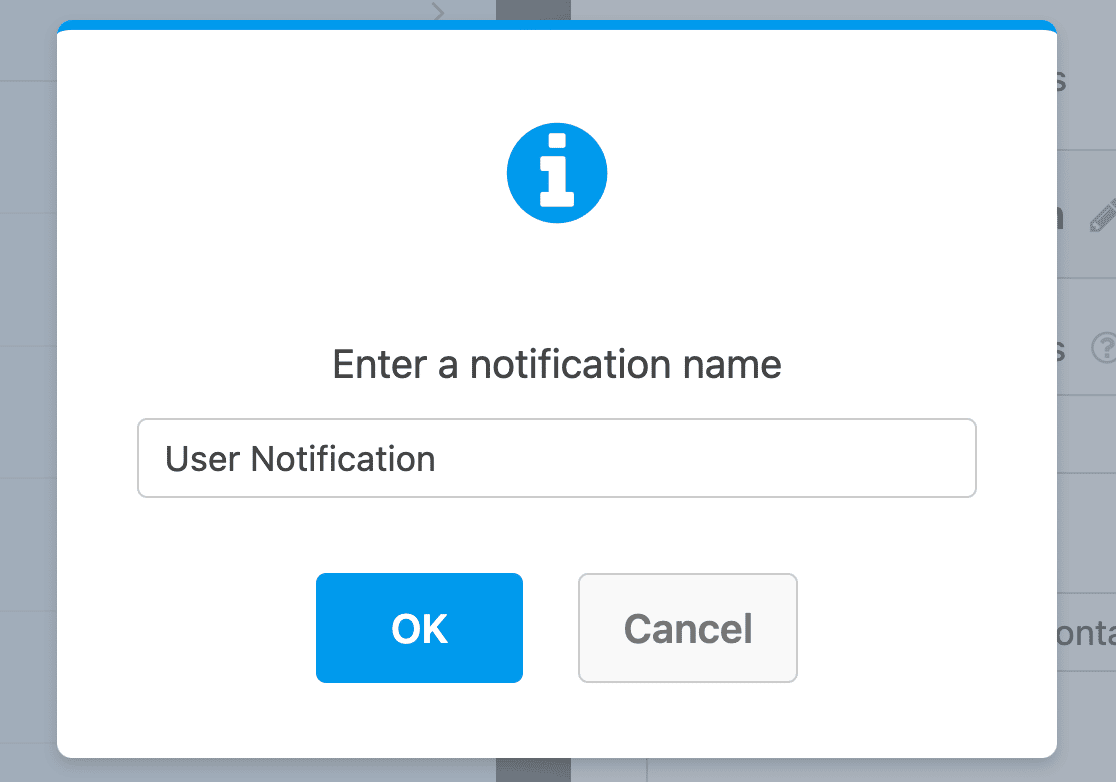
In the form builder, go to Settings » Notifications and click Add New Notification.
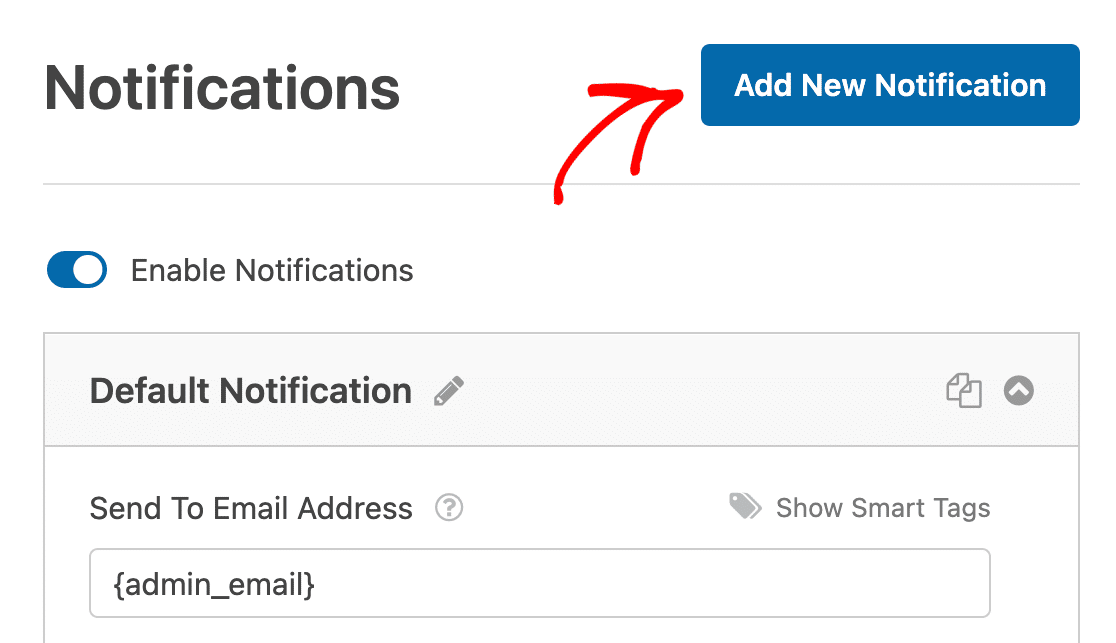
Give it a name (this is for your reference only). Click OK. You now have a second notification to configure independently.
For a notification going to the site visitor, click Show Smart Tags next to the Send To Email Address field and select Email so WPForms sends it to whatever email the visitor entered on the form.
Then configure the rest of the fields for this notification.
- Email Subject can be something like “Thanks for reaching out!”
- From Name should be your business name
- From Email should be your business email
- Reply-To is where responses go if the visitor replies to the notification
- Message controls what the visitor sees in the email body
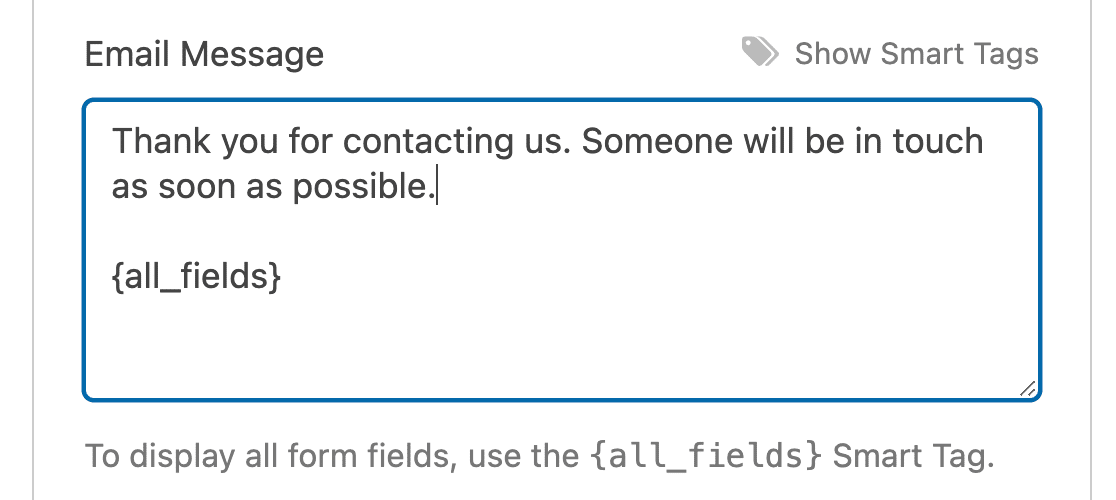
If you want the visitor to see all the data they submitted, use the {all_fields} Smart Tag in the Message field. If you only want to show them specific fields, click Show Smart Tags in the Message section and pick the ones you need.
You can also type a personalized message alongside the Smart Tags. If you need help using Smart Tags beyond the basics, check out this guide on how to use Smart Tags in WPForms.
File and CSV Attachments
Expand the Advanced settings in your notification. If your form has a File Upload field, toggle on Enable File Upload Attachments to include uploaded files with the notification email.
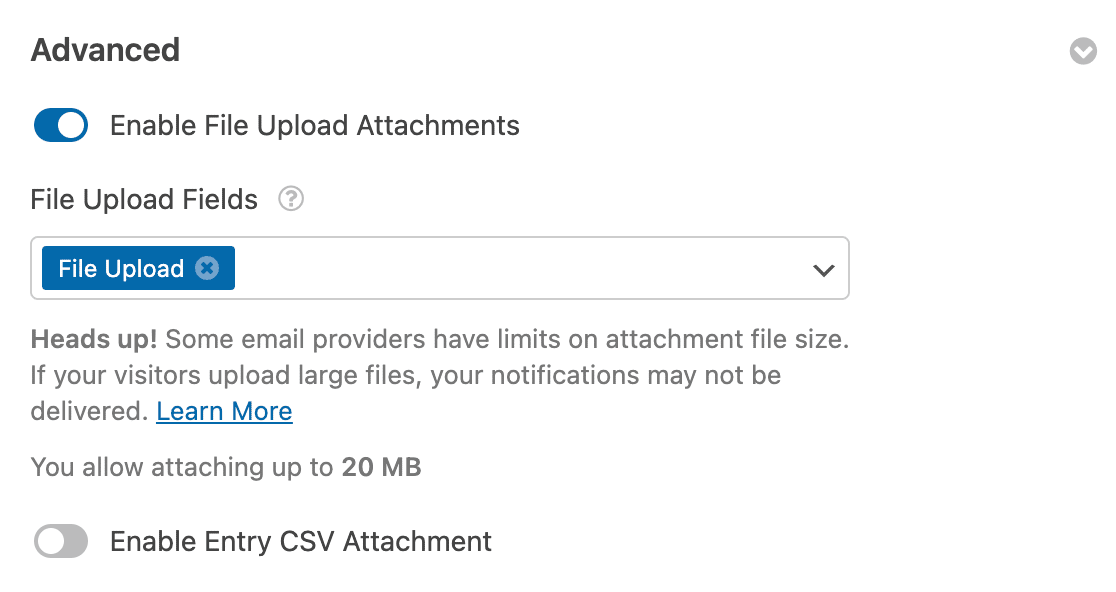
You can also toggle on Enable Entry CSV Attachment to include a CSV file with the entry data. This is handy if the recipient needs the data in a spreadsheet.
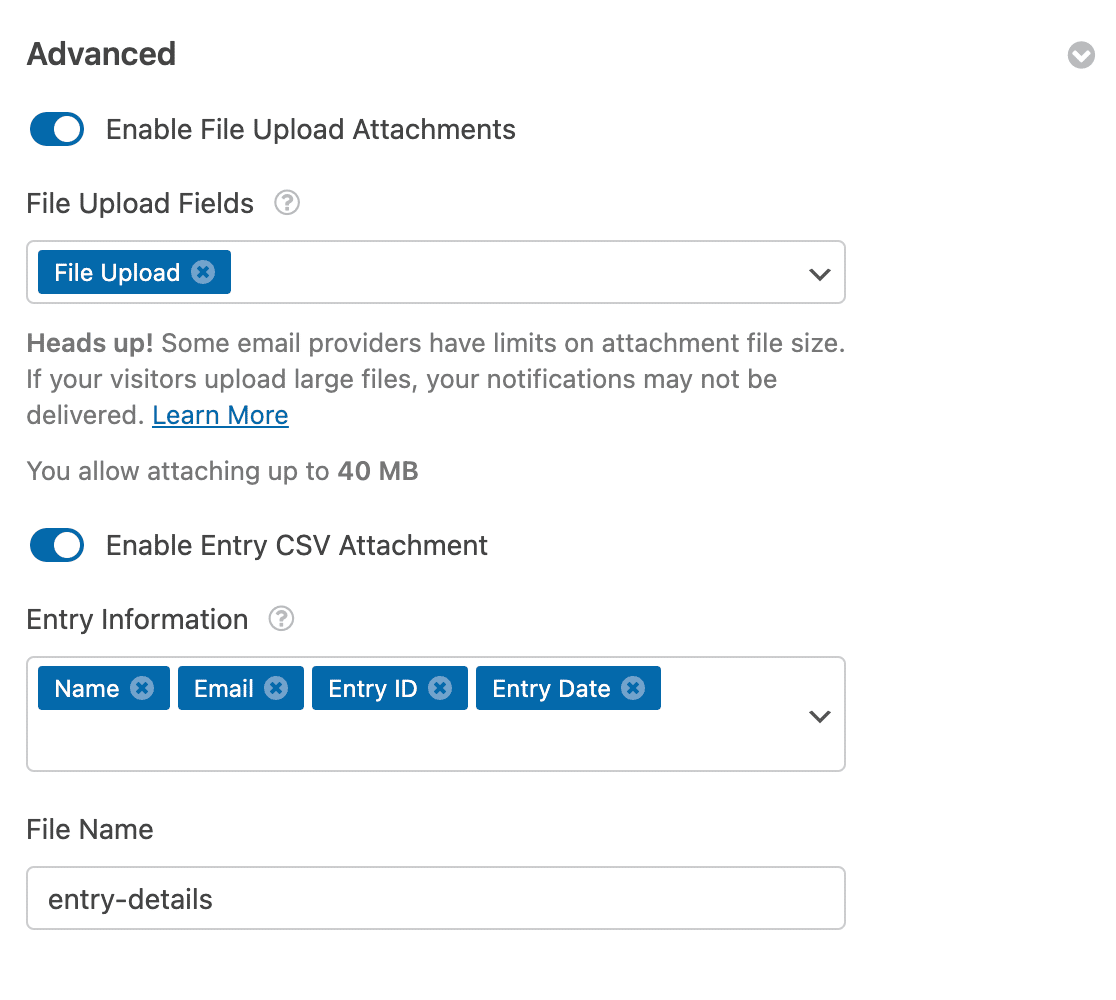
Check out the tutorial on exporting form entries to CSV for more on this. You can create as many separate notifications as you need. Just repeat the process for each one. Click Save when you’re done.
Bonus Tip: Make Sure Your Notifications Actually Arrive
Sending notifications to multiple email addresses means more chances for emails to land in spam or not arrive at all. WordPress uses PHP mail by default, which many hosting providers limit or block entirely.
If your notifications aren’t arriving reliably, set up WP Mail SMTP. It routes your WordPress emails through a proper SMTP server instead of PHP mail, and it makes a significant difference for deliverability.
Check out the guide on how to send emails in WordPress using SMTP or see how to fix SMTP connection issues if you’re running into problems.
FAQs About Sending WordPress Forms to Multiple Emails
Here are answers to common questions about setting up multiple email notifications for your WordPress forms.
Why use multiple form notifications?
Sending several email notifications from a single form saves time and keeps everyone in the loop automatically.
Instead of making visitors fill out multiple forms, or manually forwarding submissions yourself, the process runs on its own. You can use multiple email notifications to do things like this.
- Send a purchase receipt to a customer and a fulfillment order to a vendor
- Deliver a lead magnet as a PDF attachment in a notification email
- Email a thank you message to a client for a support request and a bug report to a developer
- Confirm event registration for attendees and send special request details to the caterer
Will recipients see each other’s email addresses?
No. When you add multiple addresses to the Send To Email Address field (comma-separated), each recipient gets a completely separate email. They won’t see anyone else’s address. If you need reply-all capability, use the CC method covered in Method 4.
How many email notifications can I create per form?
Unlimited. WPForms doesn’t cap the number of notifications you can add to a single form.
Can I send different notifications based on what someone selects on my form?
Yes. With conditional logic (Method 3), you can set conditions so specific notifications only fire when certain criteria are met. For example, you can route sales inquiries to your sales team and support requests to your help desk automatically.
Can I send AI-generated notifications?
Yes. WPForms integrates with ChatGPT to generate notification content dynamically. Check out the guide on sending AI-generated form notifications to set it up.
Why am I not receiving form notification emails?
This is usually a server-side email deliverability issue, not a WPForms problem. WordPress uses PHP mail by default, which many hosts block. Set up WP Mail SMTP to fix it. See the troubleshooting email notifications guide for step-by-step help.
Next, Customize Your Notification Templates
Now that your notifications are set up, you might want to customize how they look. WPForms lets you add custom headers, change colors, and create branded email templates.
Check out the guide on how to customize form email notifications for the full walkthrough. And for inspiration, browse our email notification examples and best practices.
Send Forms to Multiple Emails Now!
Ready to build your form? Get started today with the easiest WordPress form builder plugin. WPForms Pro includes lots of free templates and offers a 14-day money-back guarantee.
If this article helped you out, please follow us on Facebook and Twitter for more free WordPress tutorials and guides.


Hi WPform technical team,
I’m encountering an issue with receiving the same notification into multiple emails. I’ve followed step 1 closely, and I’m not receiving the notification in neither email addresses. Please assist asap if you can.
Hi LuLu,
I’m sorry to hear you’ve run into issues with email delivery, and unfortunately this is becoming more and more common across the internet. For details on why this happens, and how to fix it with an SMTP plugin, please see our tutorial on fixing email delivery issues.
Once you have a chance to set up one of the options from that tutorial, you should be all set! I hope this helps 🙂
Dear Team,
I want to send an email to an address that is provided by the user in one of the form fields (an ack reply). How is this possible?
Thanks….
Hi Lothar,
Sure! You can find instructions for this over in our notifications tutorial (we have a section there named “Emailing the Person Who Filled Out the Form” that will show what you need).
I hope this helps! 🙂
Hi WPform technical team,
I’m encountering an issue with receiving the same notification for two email addresses. I’ve followed step 1 closely, and I’m receiving the notification only for one email addresses. I separate them with a comma, as you said in the tutorial
Hi Dejan,
You’ll want to make sure that the email addresses are only separated by a comma and no spaces. However, if you’ve got it set up that way but you’re still not receiving the notifications, it may be due to a bigger issue. In that case, I’d strongly recommend you check out our article showing you to how to fix contact forms not sending email notifications with SMTP.
I hope this helps!
How do I allow post-creator to set ‘receiver-email’ when they add the wpforms which have been created? For. e..g
1. Post 1-> add wpform ‘RSVP Form’ -> set receiver-email [email protected]
2. Post 2 -> add wpform ‘RSVP Form’ -> set receiver-email [email protected]
Or do we have to create two separate rsvp form and define the receiver there?
Hi Manoj!
You add a hidden field to the form with the {page_url} pr {page_id} or {page_title} Smart tag as the default value of the field and then use in in the Notification Conditional logic to send the Notification email conditionally depends on the page ID/URL/Title. For more details please check this tutorial on our site.
I hope this helps.
Have a good one 🙂
Hi, I am having trouble with the forms being sent to an outside email address besides our standard website email address. It’s only working if I send it to our standard address.
Ex: I have a distributor form who’s inquiries needs to be forwarded to a certain member of the team. However the form is not working when I use their email address and only uses the standard website email. Is there a work around?
Hey Melanie – Sorry for the trouble you are facing. Our support team will be happy to help you with this.
If you have a WPForms license, you have access to our email support, so please submit a support ticket. Otherwise, we provide limited complimentary support in the WPForms Lite WordPress.org support forum.
Hi All! Can we use WP Forms to assign the recipient’s email address depending on the value that the user selects from the dropdown list?
For example: a user from the dropdown list selected “area A” and we want to send a message to the person who deals with area A. After selecting the value “area B” from the drop-down list we want to send message to another person dealing with area B.
Thank you in advance for your answer!
Hi Andrzej! This is totally possible by applying our Conditional Logic feature to the Notification settings. We actually have an article on how to set this up that you can check out here 🙂
I hope this helps to clarify 🙂 If you have any further questions about this, please contact us if you have an active subscription. If you do not, don’t hesitate to drop us some questions in our support forums.
Is it possible to enter different e-mails for two different forms in Word Press?
Hey Shamal – sure, you can absolutely enter different email for two different forms. For each of those forms, you can create notification email as outlined in this doc with your preferred email address. Hope this helps 🙂
Let me know in case I am not getting your query properly!
Thanks 🙂
I am trying to create two different notifications for the same email and only one notification is sent, is there no way to achieve what I am trying to do?
Hey Rafa – When you get a chance, please drop us a line with more details about the issue you are facing in support so we can assist further.
If you have a WPForms license, you have access to our email support, so please submit a support ticket.
Otherwise, we provide limited complimentary support in the WPForms Lite WordPress.org support forum.
Thanks 🙂