Do you want to make an online pledge form in WordPress? Pledge forms are super helpful if you want to raise funds for an urgent cause.
In this article, we’ll show you how to create an online pledge form for your WordPress site. We’ll also show you how easy it is to review entries so you can collect your donations.
Create Your WordPress Pledge Form Now
What’s the Difference Between a Pledge and a Donation?
Pledge forms are great for fundraisers that have a target or deadline. Normally, the supporter promises to make a donation if the target is reached.
Donation forms are a little different. On a donation form, the nonprofit would usually take payment right away.
Pledge forms have the advantage of being quick and easy to fill out, which is great for an urgent event. You can collect contact details for supporters and store them until you’re ready to collect their payment.
Pledge forms are also perfect for different types of fundraising campaigns, such as:
- Sponsored sports events or challenges
- Match funding campaigns
- Crowdfunders
- And more.
In this tutorial, we’ll make a sponsor form for a school event. You can easily use the same process for any fundraiser you’re planning.
How to Make an Online Pledge Form in WordPress
The WPForms plugin makes it easy to make many types of WordPress forms. Let’s take a look at the steps we’re going to work through to make a pledge form.
In This Article
Step 1: Install and Activate the WPForms Plugin
To start, install and activate the WPForms plugin on your website. If you need help, jump over to this beginner’s guide to installing a plugin in WordPress.
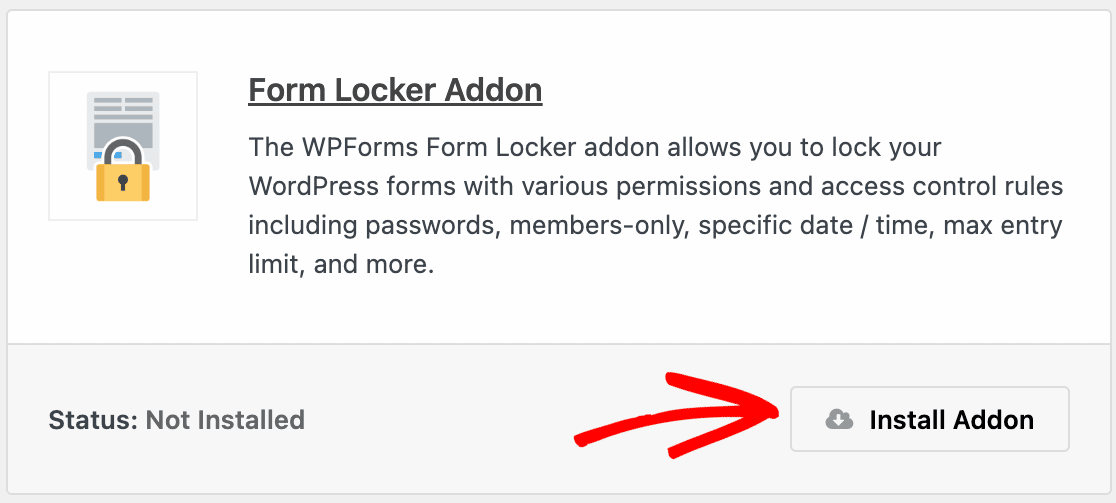
Next, we’re going to install the Form Locker addon. We’ll use this to make sure that our pledge form closes on the fundraiser deadline.
Go ahead and click WPForms » Addons in the WordPress admin menu to start. Find the Form Locker addon in the list and click Install Addon.
OK, we’re all set. Let’s open up the form template now.
Step 2: Design Your Online Pledge Form
WPForms makes it easy to create any kind of form. And because WPForms comes with 2,000+ WordPress form templates that you can customize however you like, we can get a head start with the design.
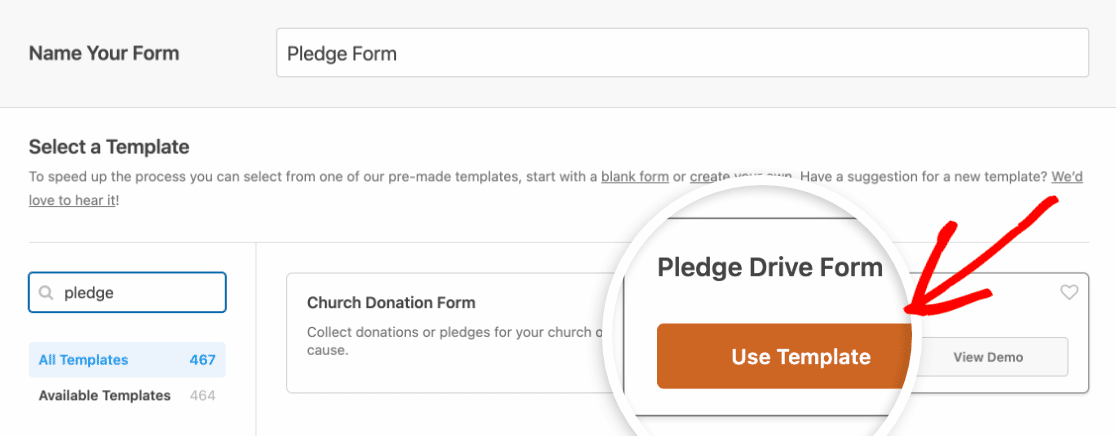
So let’s use the Pledge Drive Form template to speed things up.
Start in your WordPress dashboard. In the admin menu, click WPForms » Add New.
The form builder will open up in a fullscreen window. Go ahead and type in a name for your form at the top.

Next, scroll down to the Select a Template section. This section contains all of WPForms’ templates. Go ahead and search for “pledge.” Then click on Use Template to open the Pledge Drive Form.
Great! The template will open up in the form builder so you can get to work.
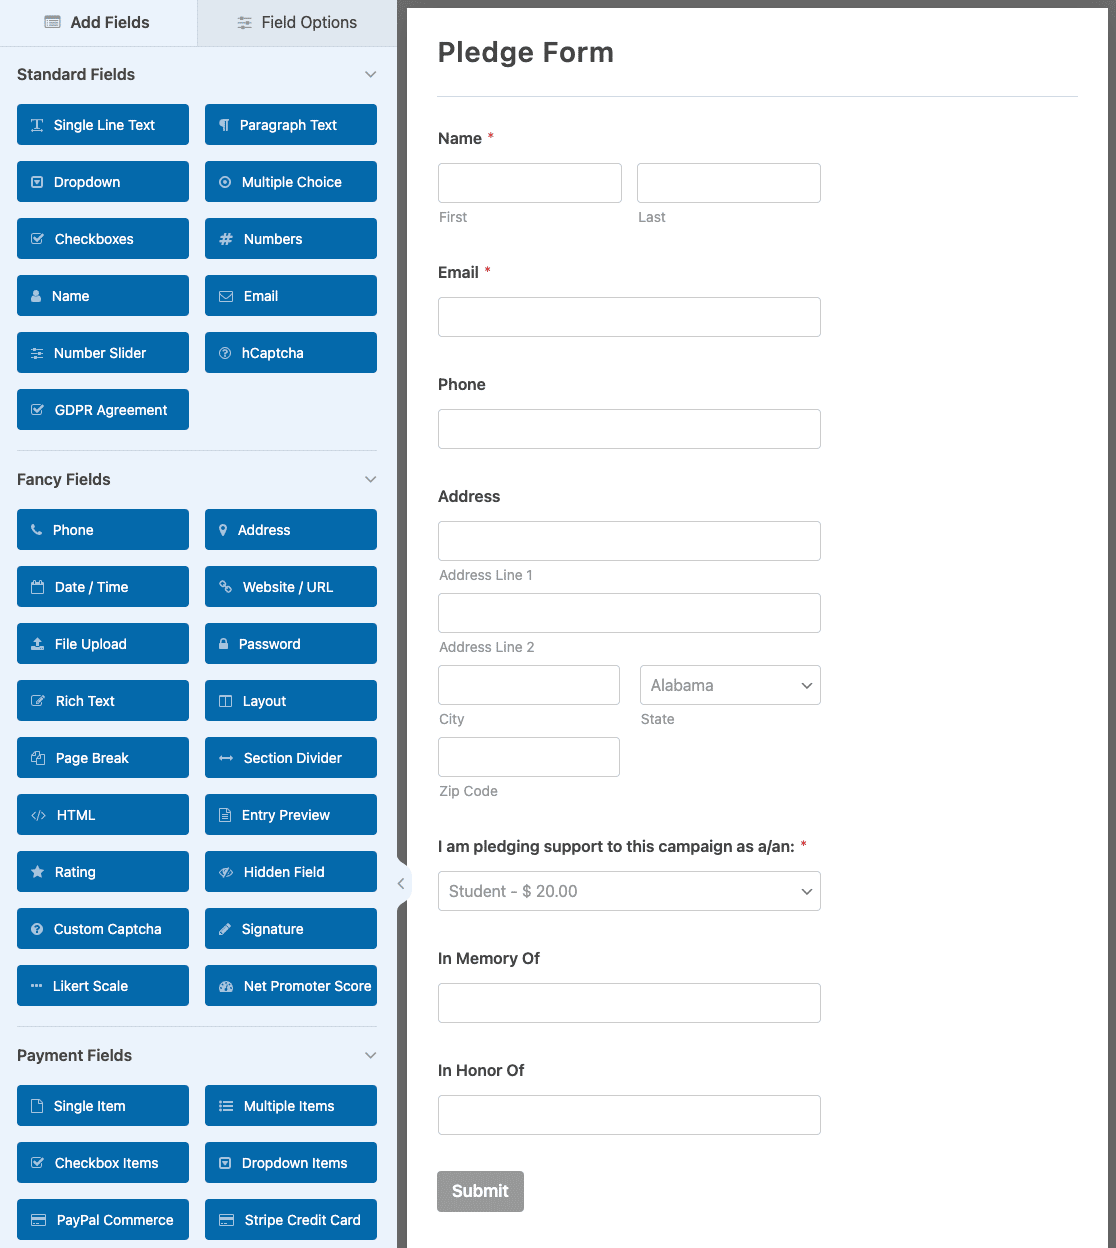
You’ll notice that your pledge form has the following fields already set up on the right hand side:
- Name
- Phone
- Address
- Pledge amount (I am pledging support to this campaign as…)
- In Memory Of
- In Honor Of
You can use this template right out of the box if you want to. We’re going to customize it to show you how to add your own fields.
Add a List of Pledge Amounts
We want the pledge form to be super easy to fill in. To help people out, let’s add a dropdown to make it easy to select a pledge amount from a list.
First, we’ll drag and drop a Dropdown field into the preview area.
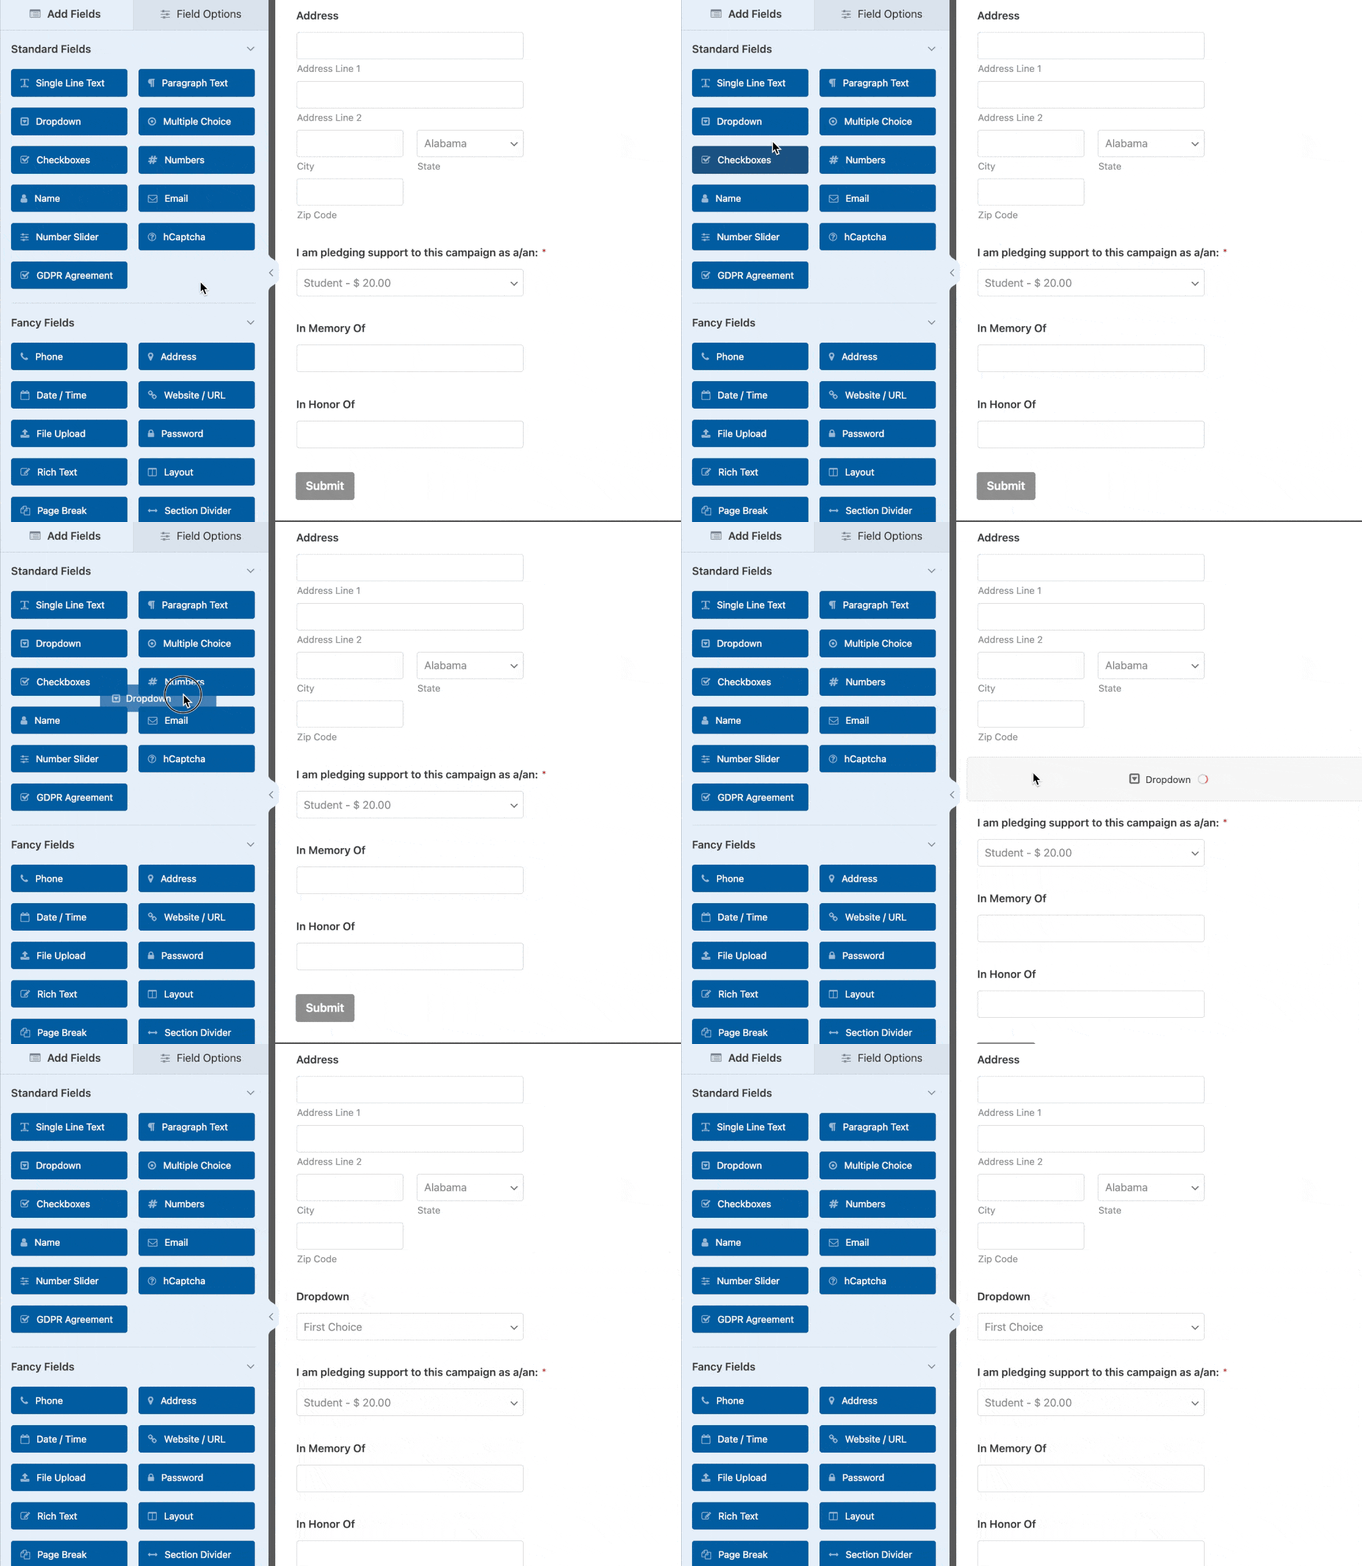
Next, we’ll click on the field in the preview area to open its field options. Let’s change the label text to “Pledge Amount” and add a few options.
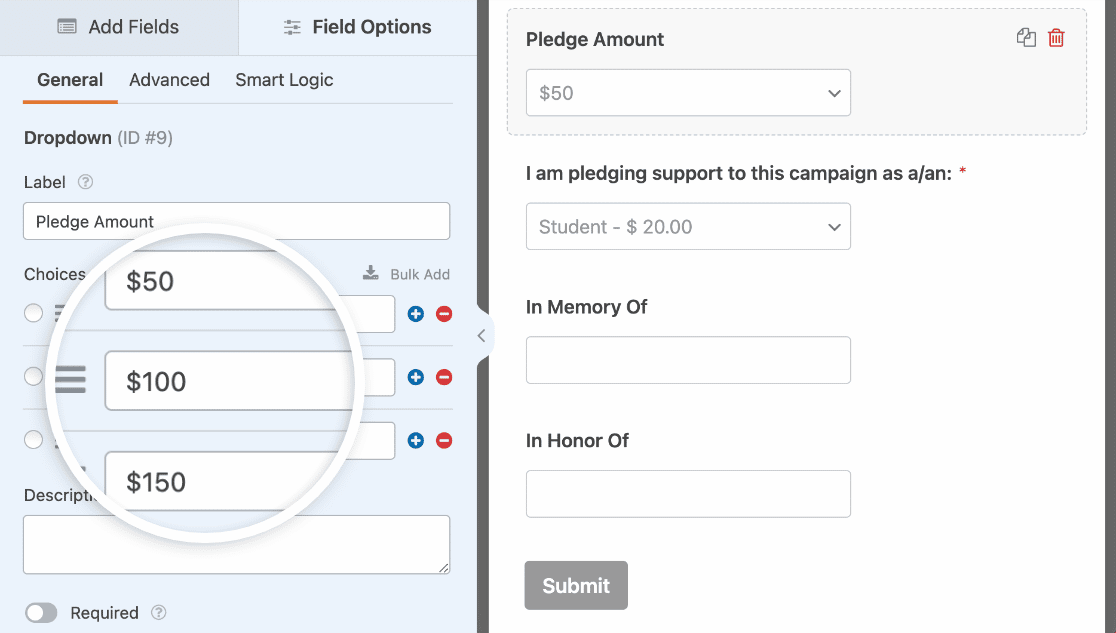
We’ll also delete the Dropdown field labeled “I am pledging support to this campaign as a/an”, since we’ve created our own custom amount selection field. Click on the trash icon to delete a field.

That’s it! Now supporters can quickly choose a pledge. But what about custom amounts?
Let’s add a field that people can use to type in their own pledge amounts.
Add a Custom Pledge Field
Now we’re going to add a field for custom pledges. We only want this field to appear if the user wants to use it.
To do that, we can use some easy conditional logic.
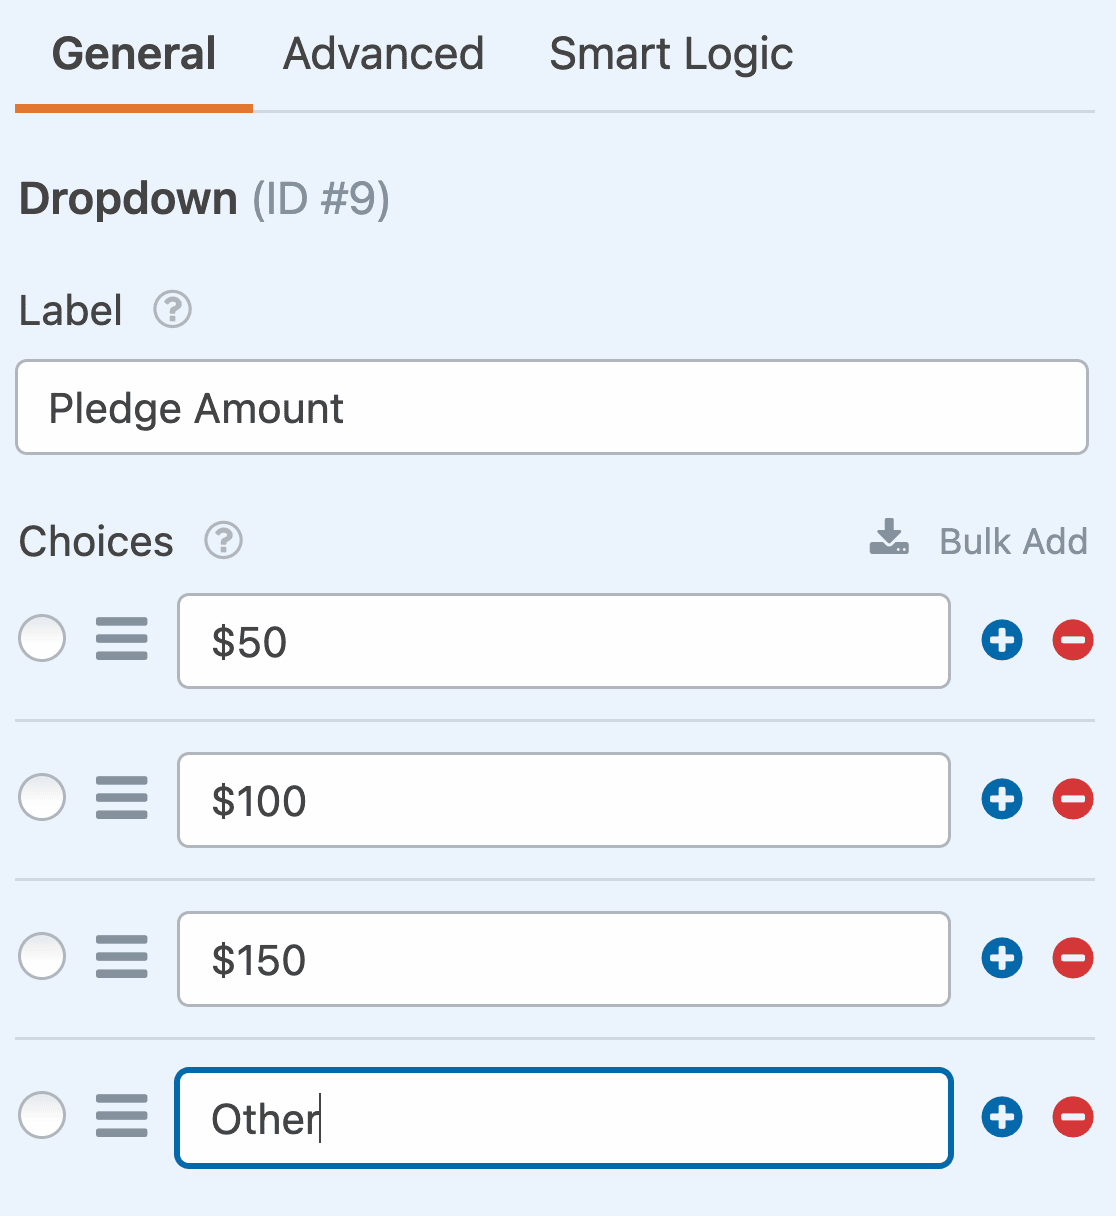
Let’s start by adding another answer choice to the Pledge Amount dropdown. Click the plus icon to add a new choice below your donation amounts.
Instead of adding an amount, simply type Other.
Next, drag a Numbers field onto the form builder. Let’s put it underneath the Pledge Amount dropdown.
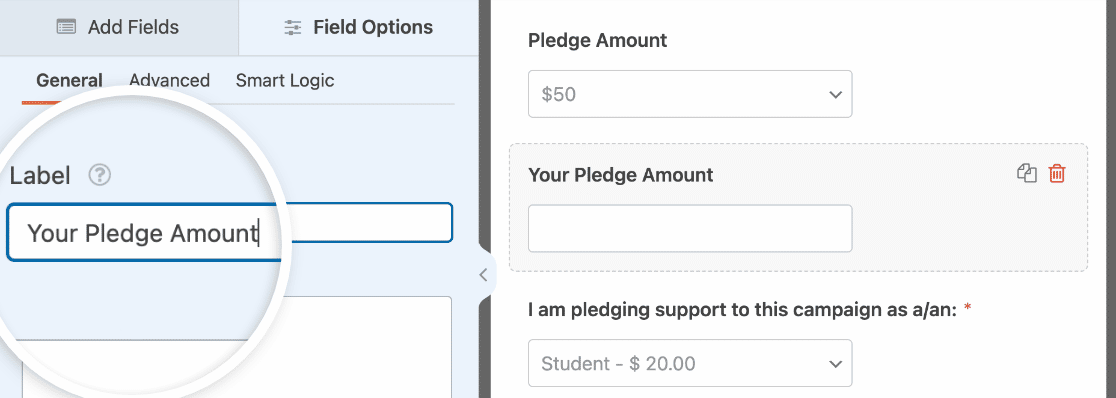
Open the Numbers field options and change the label to “Your Pledge Amount.”
Now we need to tell WPForms to show this field only if the Pledge Amount selection is Other.
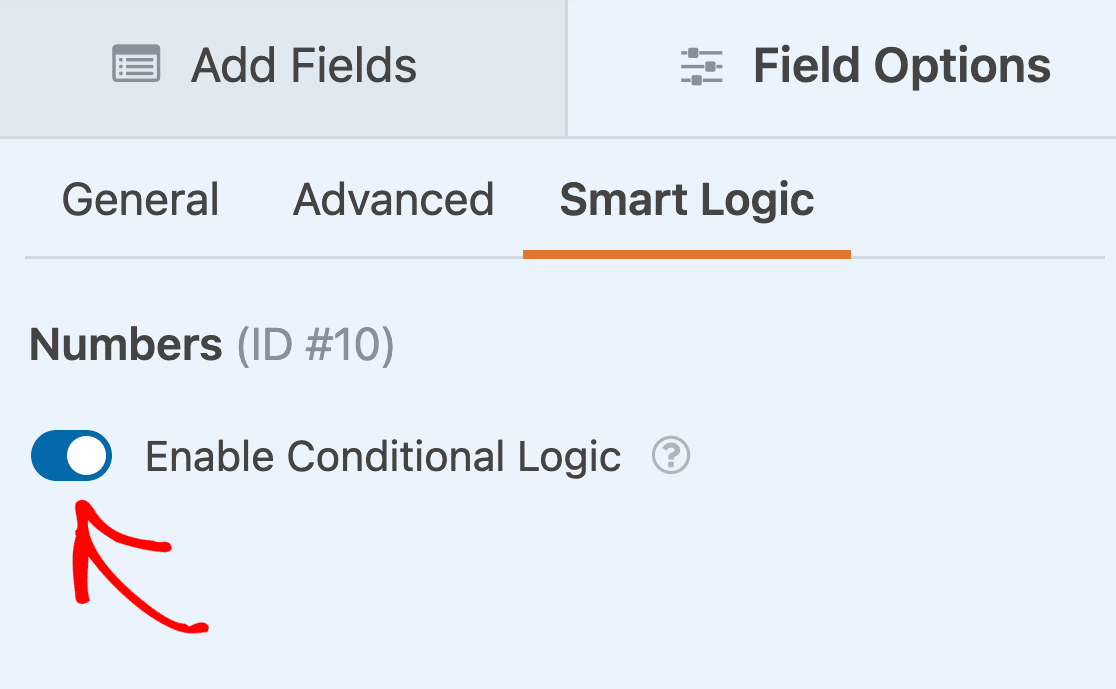
To do that, click once on the Numbers field to open its settings on the left. You’ll want to select the Smart Logic tab at the top of the Field Options panel.
Here, toggle on the Enable Conditional Logic option.
We’re almost done. Next, let’s use the dropdowns to tell WPForms only to show the Numbers field if the supporter selects Other as their pledge amount.
To do that, you’ll want to select Show this field if Pledge Amount is Other.
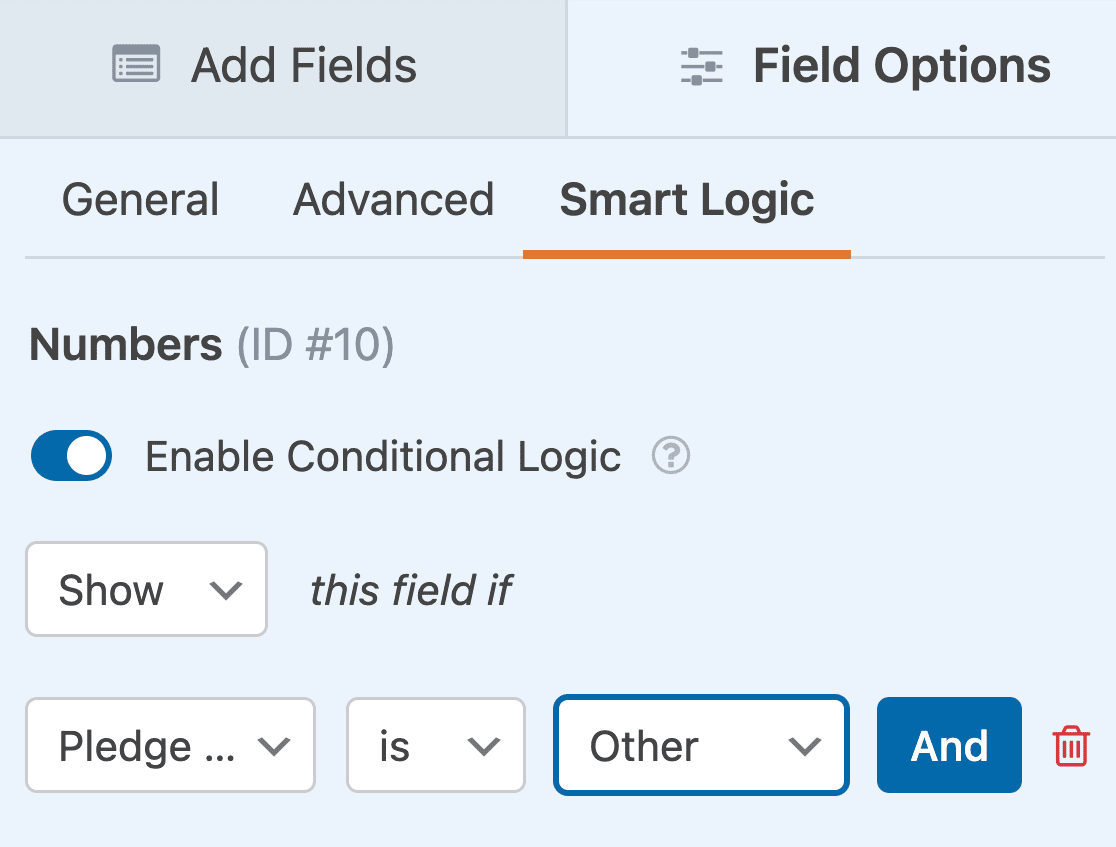
Great! Now we have an optional custom donation field on our pledge form. We’ll test this out later on when we publish the form.
Add Fields For Agreements and Terms
Depending on the status of your nonprofit, you might also need to add some legal terms or disclaimers to your form. WPForms makes it easy to create:
- A GDPR Agreement checkbox
- A Terms and Conditions checkbox
For now, we’re done editing our online pledge form. Don’t forget to click Save at the top of the form builder to save your progress so far.
Step 3: Set Up Pledge Form Notifications
Now let’s set up the notification emails that will be sent when the online pledge form is submitted.
To start, click Settings on the left hand side of the form builder. Then click Notifications to open up the email settings.
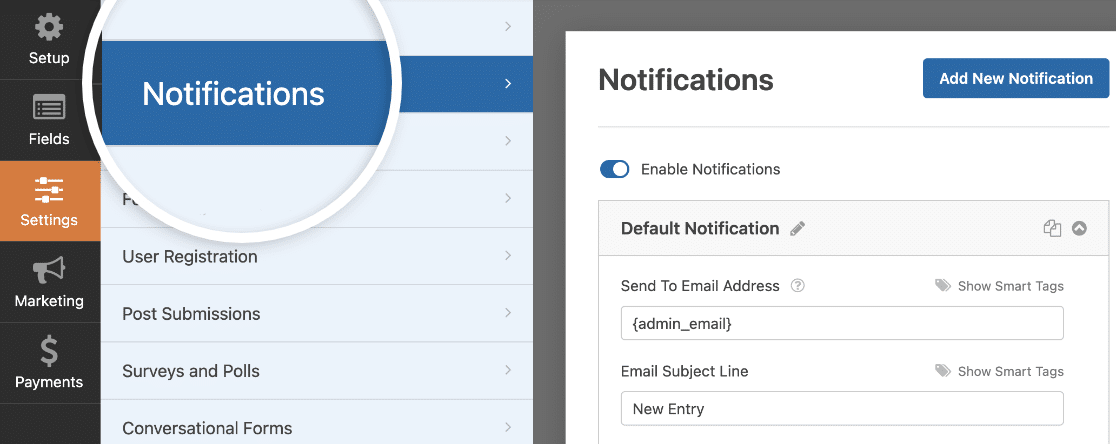
By default, WPForms has a notification that’s sent to the admin email in WordPress.
If you’d like to type in a different email address for your notification, it’s easy to change it. Go ahead and delete the {admin_email} Smart Tag and type in the address you want to use.
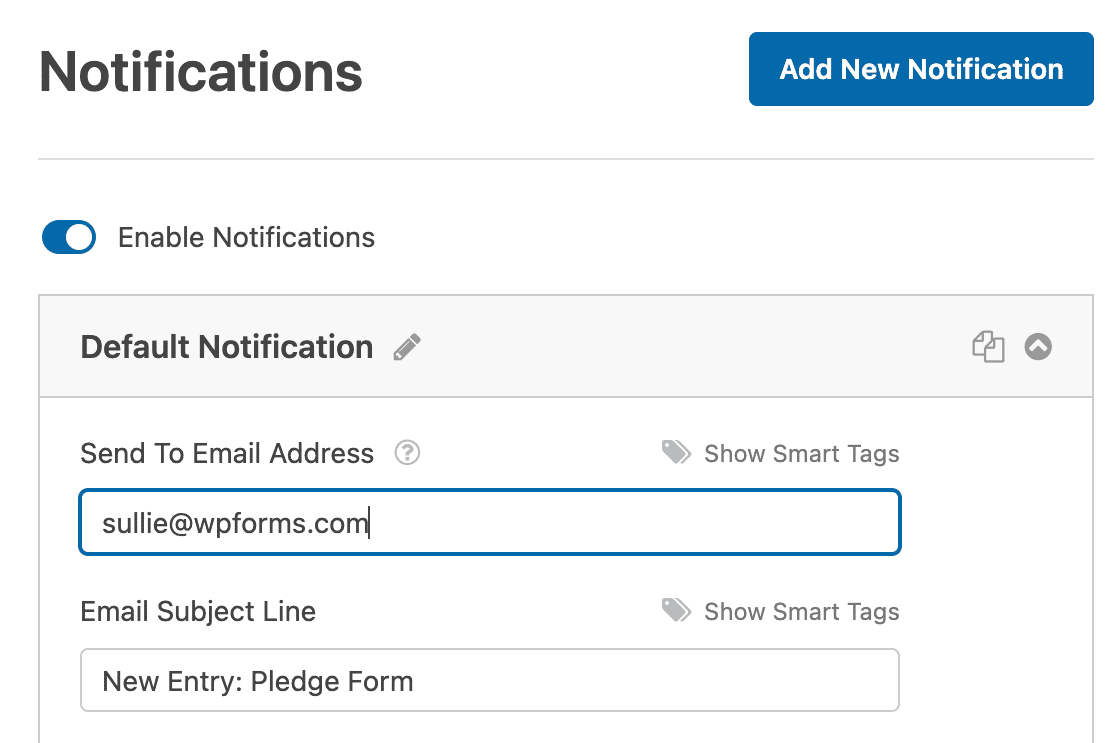
Next, let’s add another notification. We’re going to send the supporter an email when they make their pledge.
To do that, click the blue Add New Notification button.

Let’s give the new notification a distinctive name so we can easily find it later.
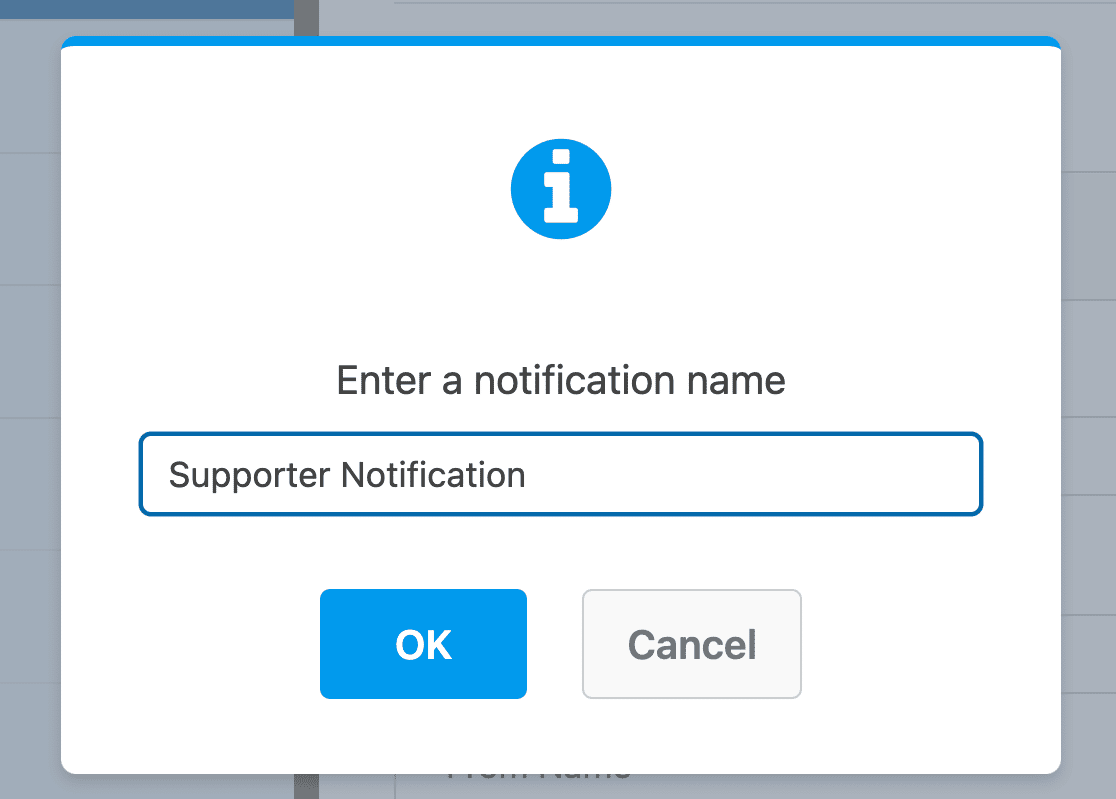
Now you’ll see 2 notifications, one above the other. Let’s edit the new one.
In the Send To Email Address field, we’re going to use the Email Smart Tag. That way, WPForms will automatically send this notification to the supporter’s email address.
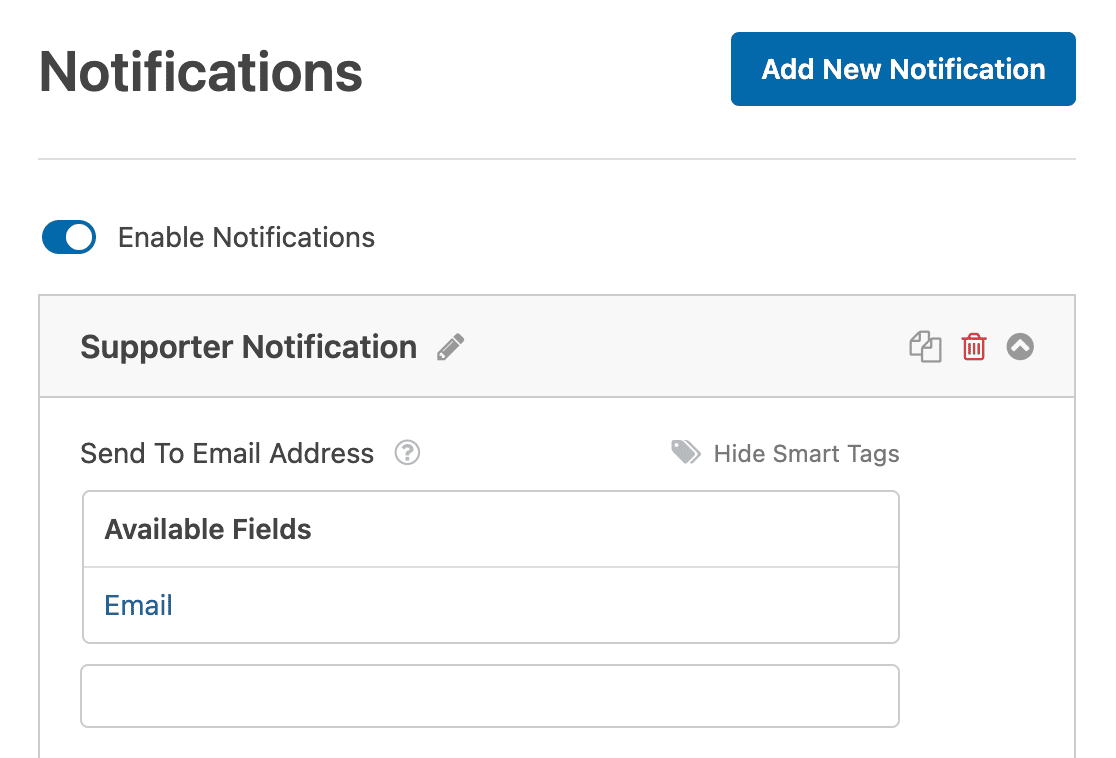
You can also customize the text in the subject and email body if you want to.
OK, that’s it. Everything’s set up. Let’s click Save.
Now we can set the closing date on the form.
Step 4: Set Up Your Pledge Form Closing Date
If you’re using your online pledge form to collect sponsorships before an event, it makes sense to close the form on the event date.
This is also a great technique to use on crowdfunding pledge forms. It adds a little urgency and FOMO.
We’re going to use the Form Locker addon because it lets us easily add an expiry date to your form.
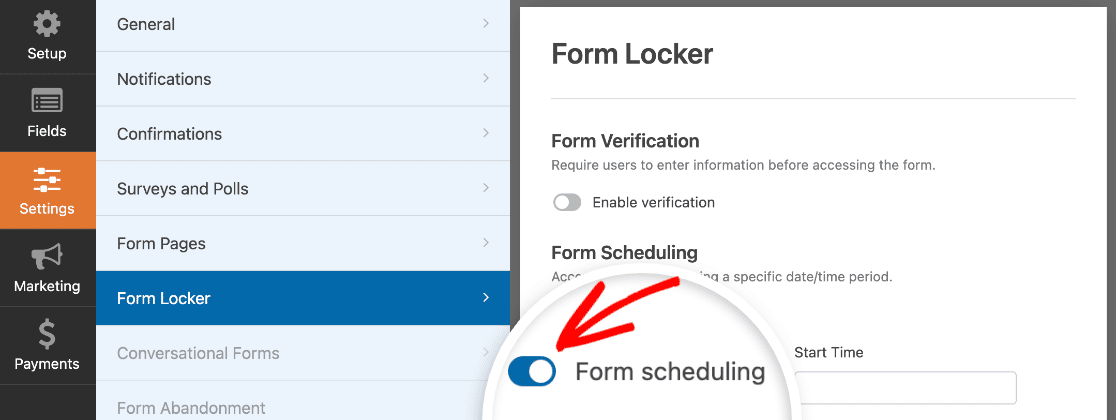
So from the Settings panel, click Form Locker. Then toggle on Form scheduling.
And now let’s set the closing date for the form using End Date and End Time.
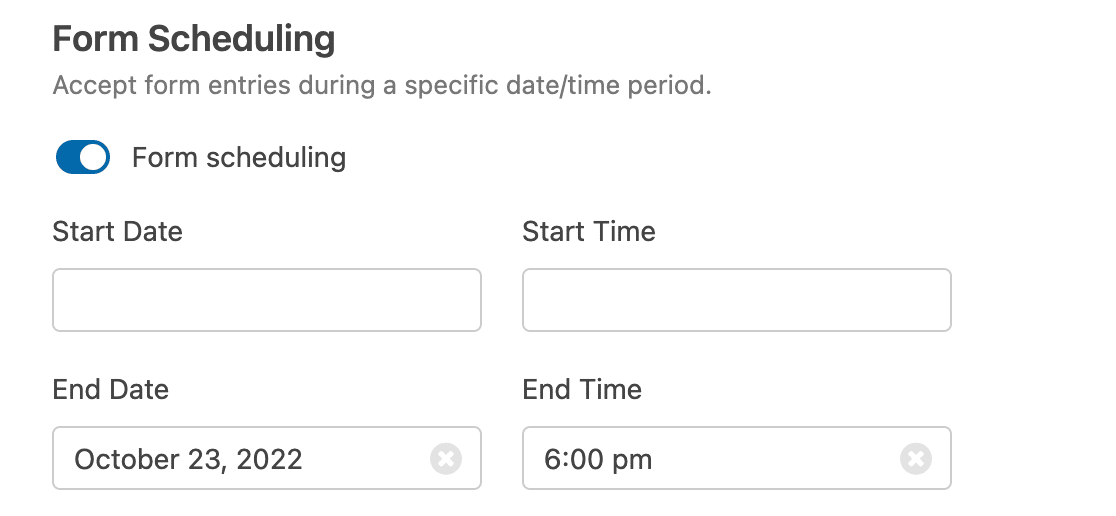
Remember: this field uses the timezone that’s set up in WordPress. If you need to check your site’s time settings, here’s a guide to changing the time and date in WordPress.
On this date, the form will automatically close and the form will disappear. When that happens, the Closed Message will appear in its place.
Underneath the date and time, you can customize the Closed Message. We’re going to add a link to our regular donation form so that our supporters still have an opportunity to give money to the fund.
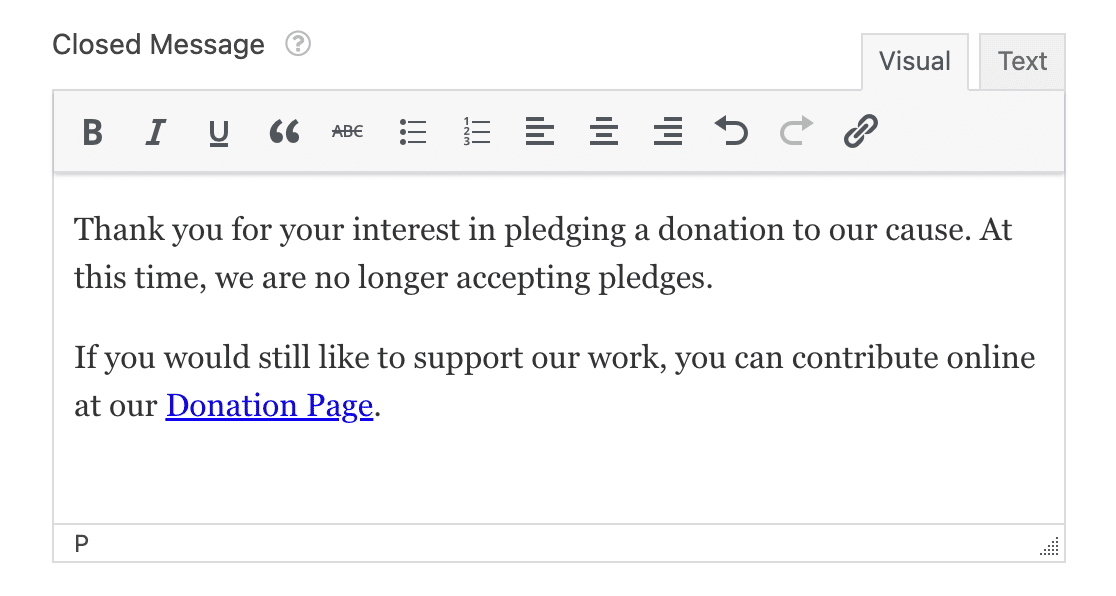
Don’t have a donation page yet? Here are some great donation page examples you can use as inspiration.
OK, we’re all set. Now we just need to publish the pledge form on your website.
Step 5: Publish Your Online Pledge Form
Now your pledge form is complete, let’s publish it on your WordPress site.
Start by clicking the Embed button at the top of the form builder.

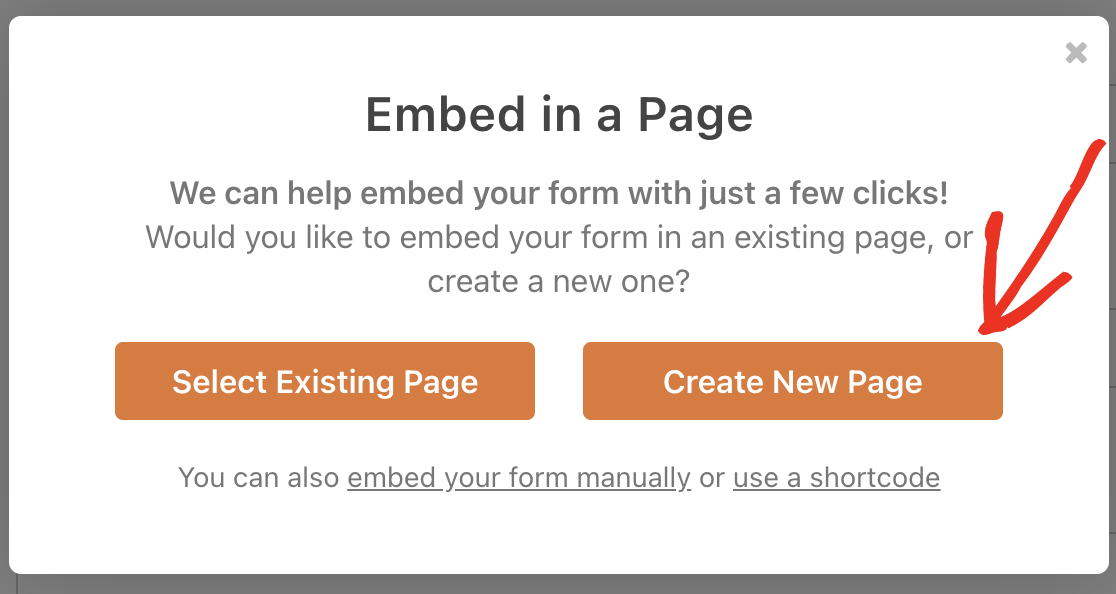
When this notification pops up, let’s click on Create New Page.
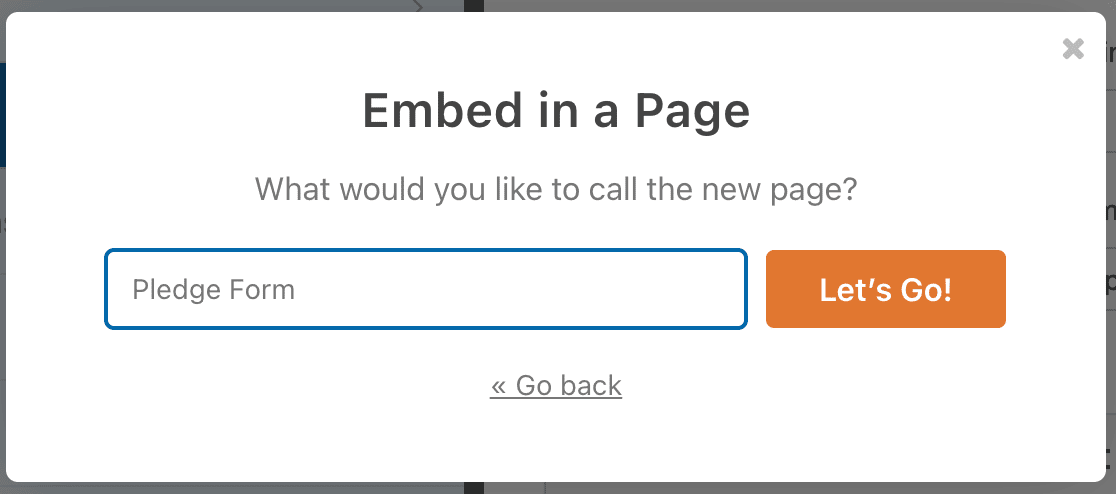
Next, WPForms will ask you to name your page. Type the title for the page into the box and click Let’s Go.
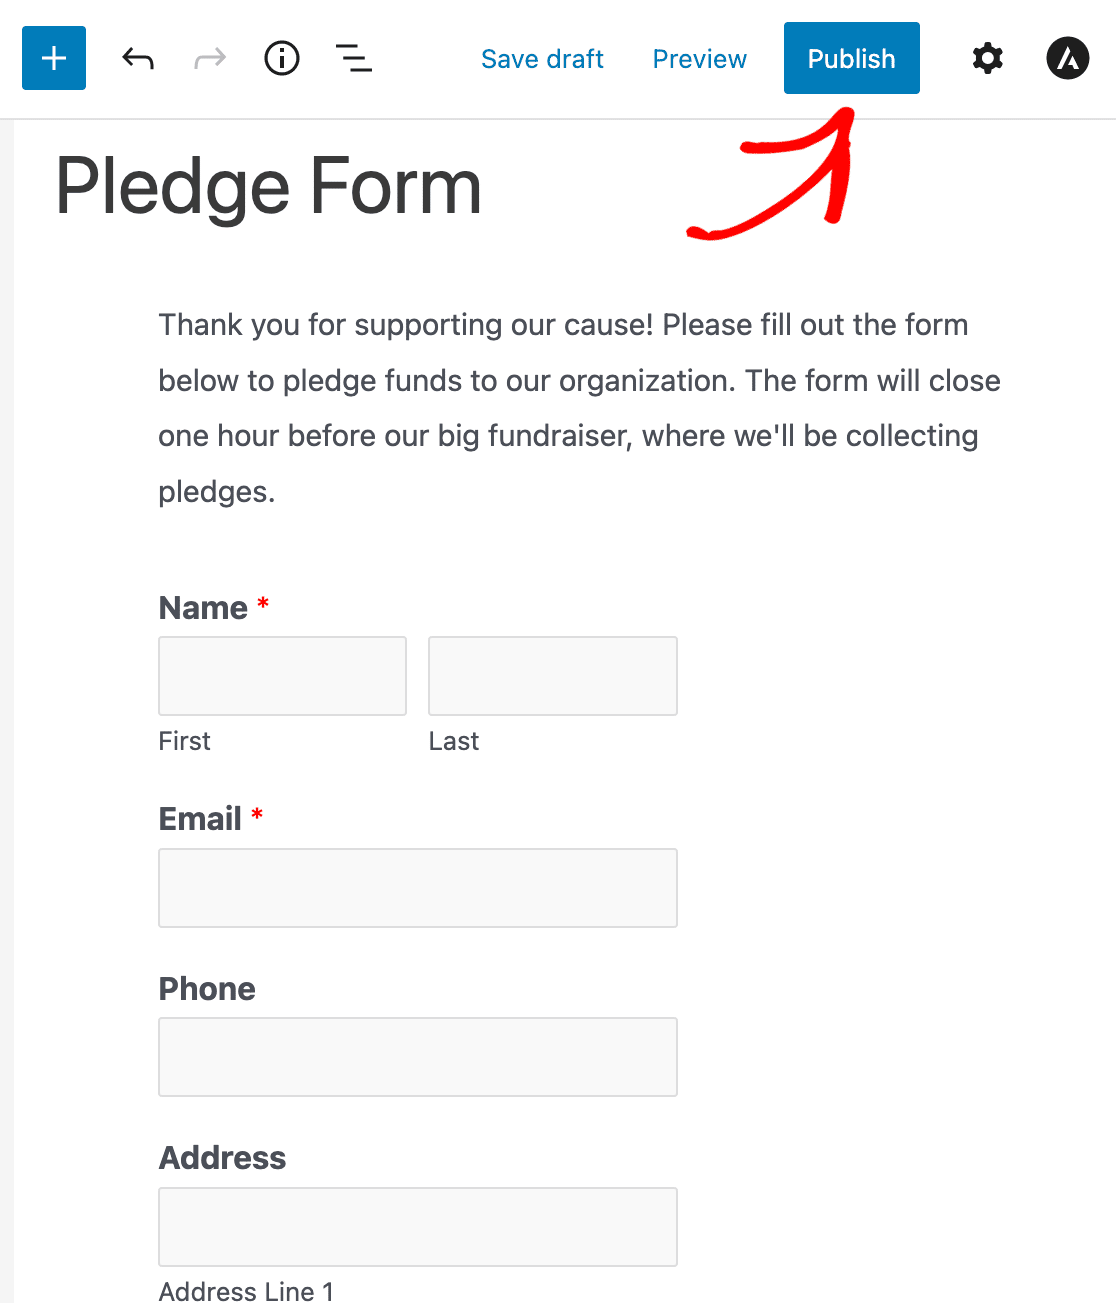
WPForms will open up a new page for your form.
Before publishing it, you might want to add a little content to explain:
- The cause you’re supporting.
- Information about your deadline (this will give your campaign more urgency).
- The trigger for pledges to be taken, if you have one.
- Any rewards or pledge tiers.
All set? Click Publish or Update at the top to publish the form on your site.
Now you can share the link to your form and start gathering pledges!
Here’s what our finished online pledge form looks like.
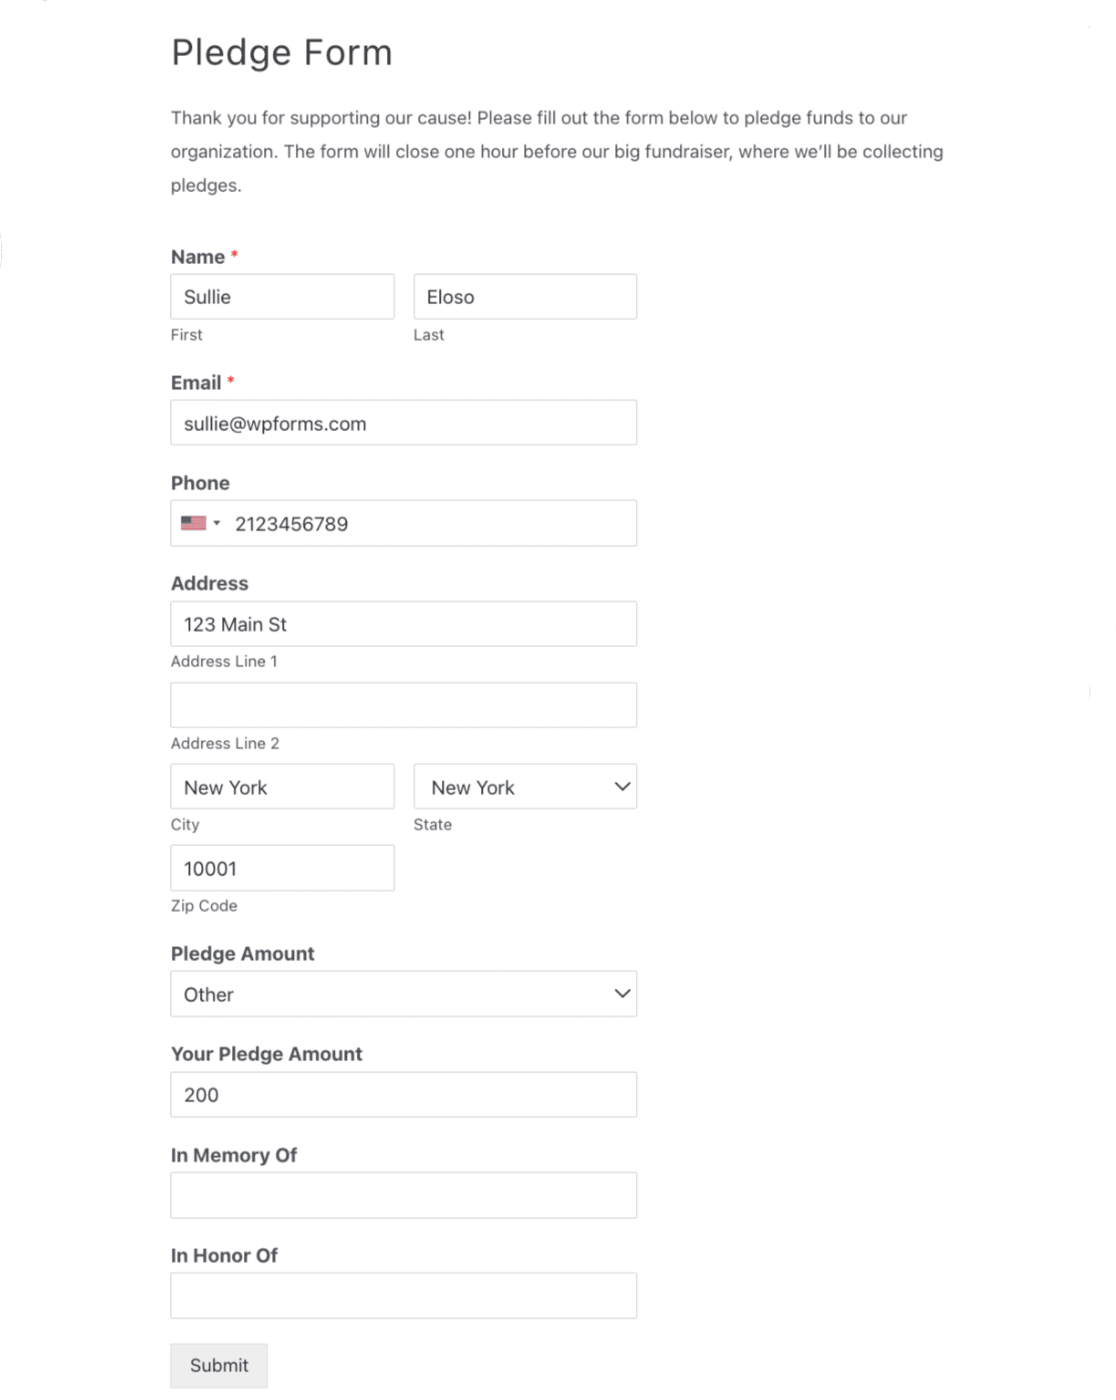
Notice how we selected Other, so the extra field has appeared for us to type in a custom pledge.
So the form is done. But the most important step is still to come. We need to collect your donations! Let’s look at the ways WPForms can help with that.
Step 6: Collect Donations From Your Supporters
When you have all of your pledges, you’ll want to go back and email your supporters to collect their donations.
With any paid license, WPForms saves your contact form data in the WordPress database. So you can easily export these to a CSV file to open them in Excel.
To view your entries, go back to the WordPress dashboard and click WPForms » Entries.
You can click the name of your form here to open up a list of all of the entries.

Now you can see all of your pledges in 1 place.
From here, you can export form entries to CSV so you can view all of your supporters’ contact details in Excel or Google Sheets.
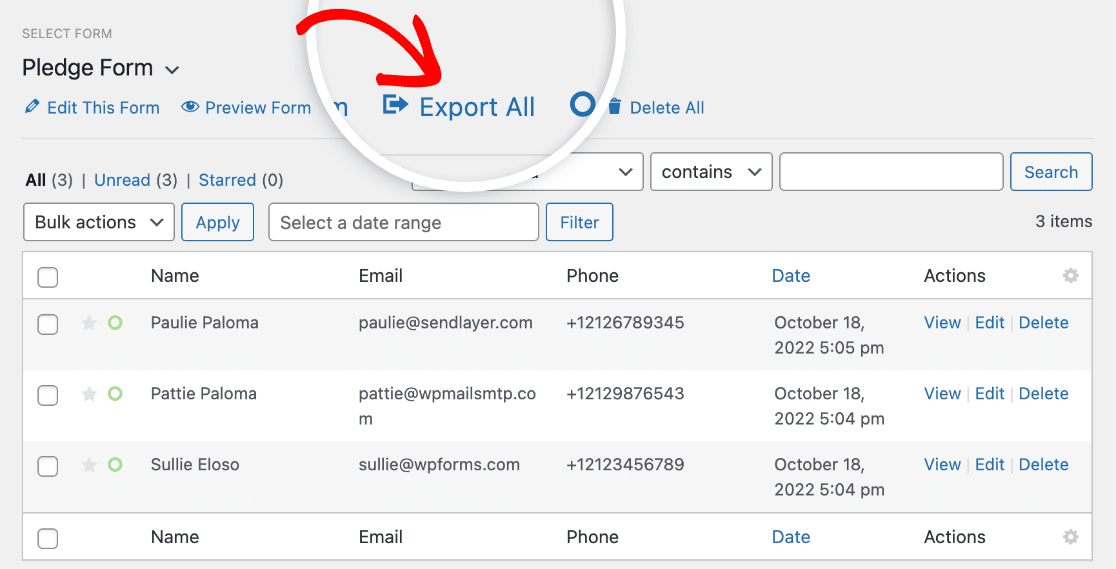
You can also use the WPForms Google Sheets addon to send pledges to Google Sheets automatically.
The Entries screen also allows you to work with entries in WordPress. For example, you can:
- Click the star icon next to the form entries you need to follow up
- Edit an entry if a sponsor wants to change their donation or contact details
- Search and filter the list of form entries to find specific pledges.
And that’s it! Now you have all of the information you need to run a successful fundraiser with a pledge form.
If you’re using Salesforce for Nonprofits, check out our guide to helpful Salesforce integrations that will help you save time.
Create Your WordPress Pledge Form Now
Next, Get More Nonprofit Form Conversions
Now you have your pledge form set up, you’ll want to get more people pledging and donating. Check out our insider tactics to boost nonprofit form conversions.
And don’t forget to make an online model release form. That way, you can legally use photos from your fundraising events on your website.
Finally, you can also utilize WPForms to create forms for taking paid leaves requests from your employees.
Ready to build your form? Get started today with the easiest WordPress form builder plugin. WPForms Pro includes lots of free templates and offers a 14-day money-back guarantee.
If this article helped you out, please follow us on Facebook and Twitter for more free WordPress tutorials and guides.


How to display the Total sum of donations in the frontend?. Is there a shortcode for this?
Hey Sharon, you can add the total field to your form and be sure to mark it as required as outlined in our great guide here.
I hope this helps.