Do you want to make an online model release form?
A model release form is a great way to obtain legal consent from your models for using their images in marketing materials as outlined in their contracts.
This is extremely important because it offers you legal protection in case a model backs down and decides to sue you for using their images.
In this tutorial, we’ll show you how to make an online model release form in WordPress. We’ll also show you how to comply with GDPR guidelines when collecting personal information in your form.
Create Your Model Release Form Now 📋
How to Make an Online Model Release Form in WordPress
We’re going to make our photography model release form in WordPress using WPForms. If you already have WPForms installed, or already know how to work with WPForms forms, you can skip to the sections you need using the links below.
We’ll start by installing the plugin.
We recommend that you check with a legal counsel in your country to find out exactly what you need to include in the terms and conditions of your model release form. This is especially true if the model is a minor.
Step 1: Install WPForms
To get started, install and activate the WPForms Pro plugin. If you need help with this, check out this beginner’s guide to installing a WordPress plugin.
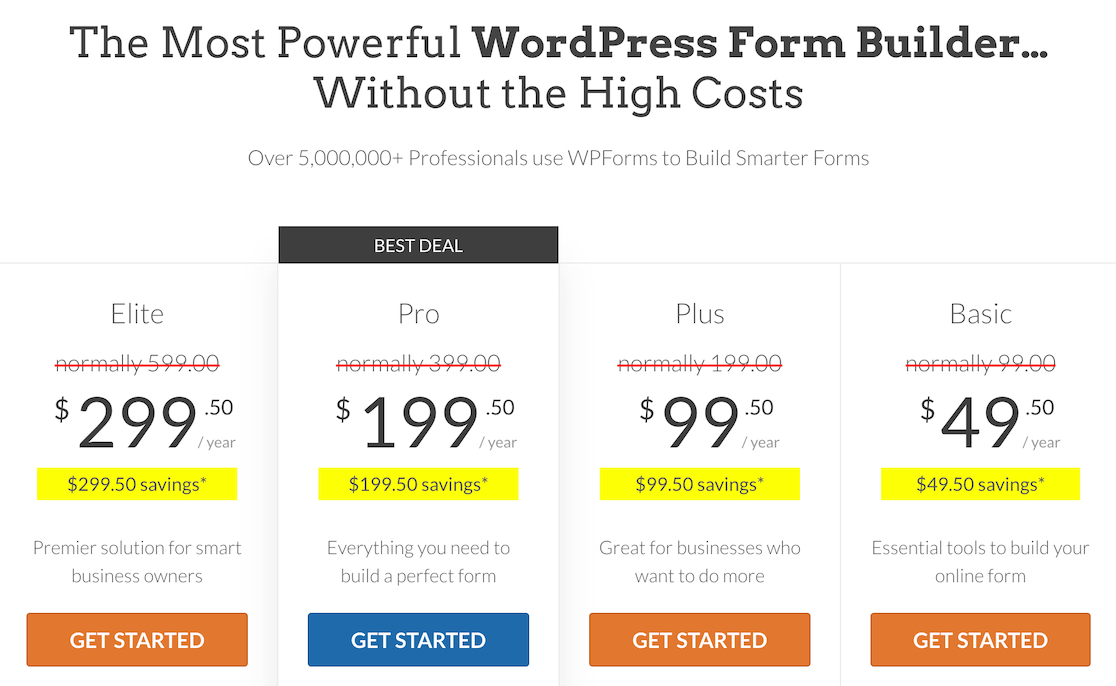
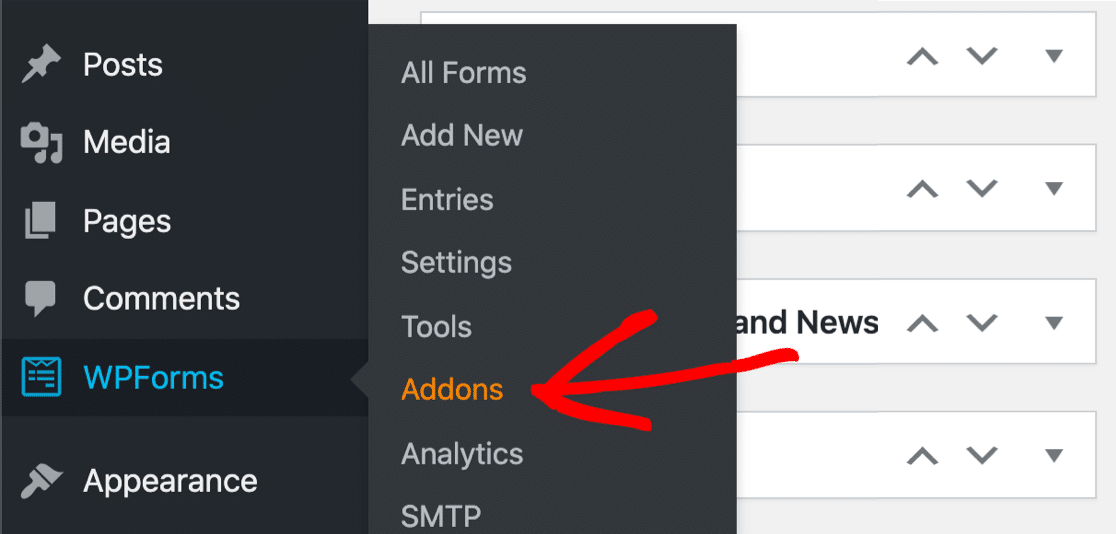
After you’ve installed WPForms, the next step is to install WPForms’ Signature Addon to allow models to add a digital signature when they submit a form. We can do this quickly from the plugin’s Addons page.
From the sidebar, click WPForms » Addons.
Scroll down until you find the signature addon, then click Install Addon here.
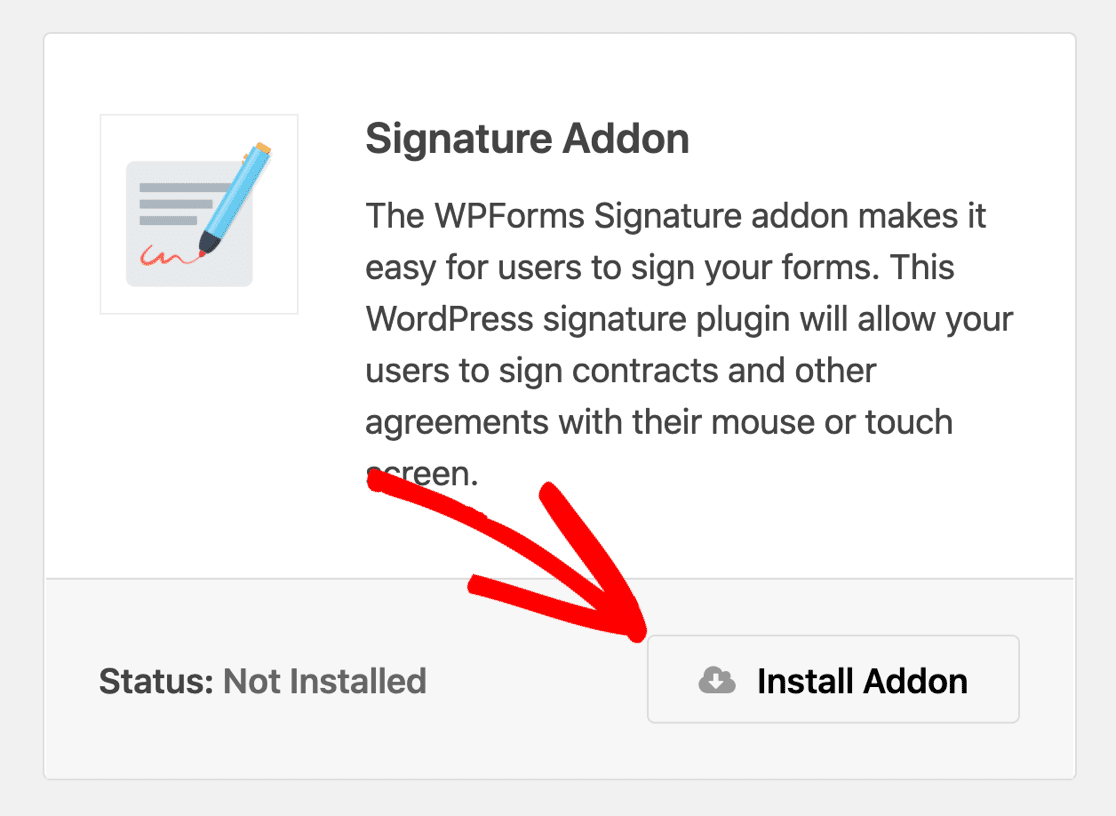
We’re all set! In the next step, we’ll use a ready-made template to speed up the process of creating a photography contract.
Step 2: Select the Model Release Form Template
Now, we’re ready to make the online model release form. You can do this from scratch using the drag-and-drop form builder, or simply get started by using the prebuilt model release form template.
The model release form template is one of 2,000+ form templates included in WPForms. Here’s how to load this template from your WordPress dashboard.
From the menu on the left, click WPForms » Add New.

This will open up the WPForms template library. Go ahead and search for Model Release Form and click Use Template.

This will open up your new model release form in the form builder, which already includes important fields like the name, phone number, and email of the model, along with a signature field.
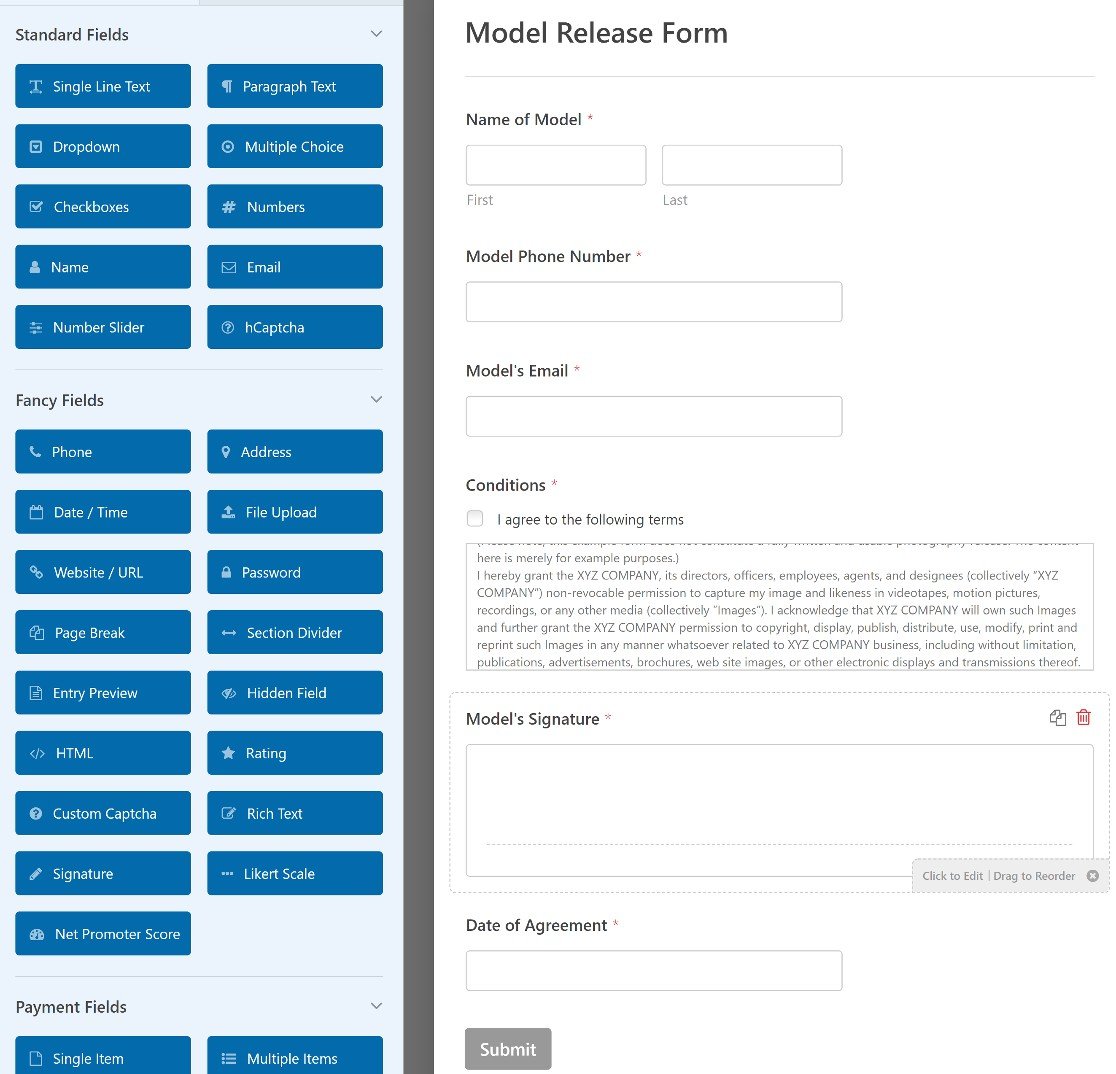
The template has everything you’d need for your model release form. But you might want to add an additional field or two.
All WPForms templates are 100% customizable, so you can change them up if the existing template doesn’t perfectly match your needs.
We’ll show you how to do some customization next.
Get the Model Release Form Template 📋
Step 3: Customize Your Online Model Release Form
At the end of the last step, we opened the form template.
And while this is a pretty comprehensive model release form template, you might want to edit some of the fields or add some extra fields.
To start with, the text provided in the conditions field is just a placeholder. You’ll need to edit this text to add relevant details such as your company name and so on.

We strongly recommend that you check in with your lawyer and seek legal advice when writing your terms and conditions.
Besides that, let’s make a few more changes to the template. For this example, we’re going to add a checkbox field to show the locations where a model’s images may be published.
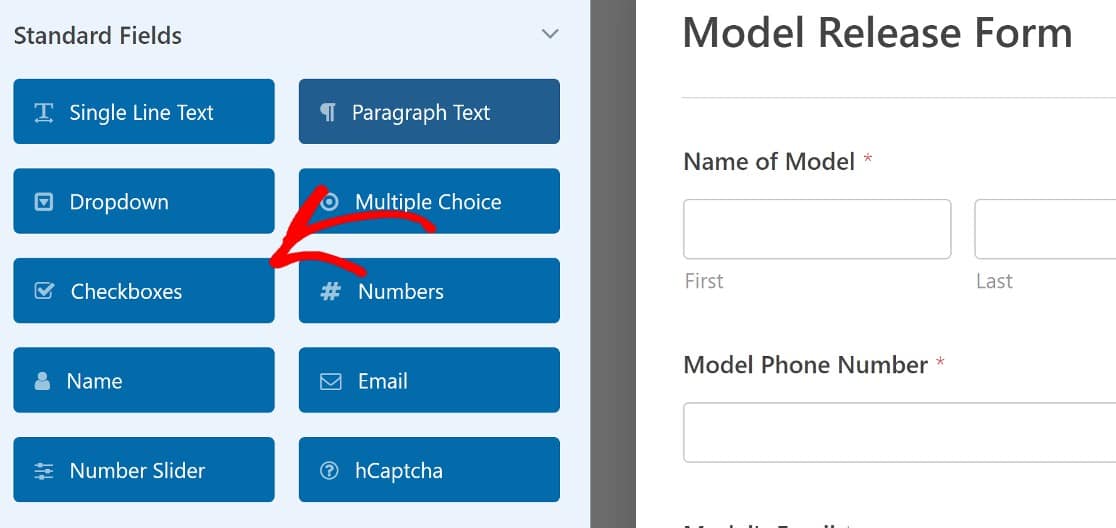
From the Standard Fields section, we’ll drag the Checkboxes field to your form template.
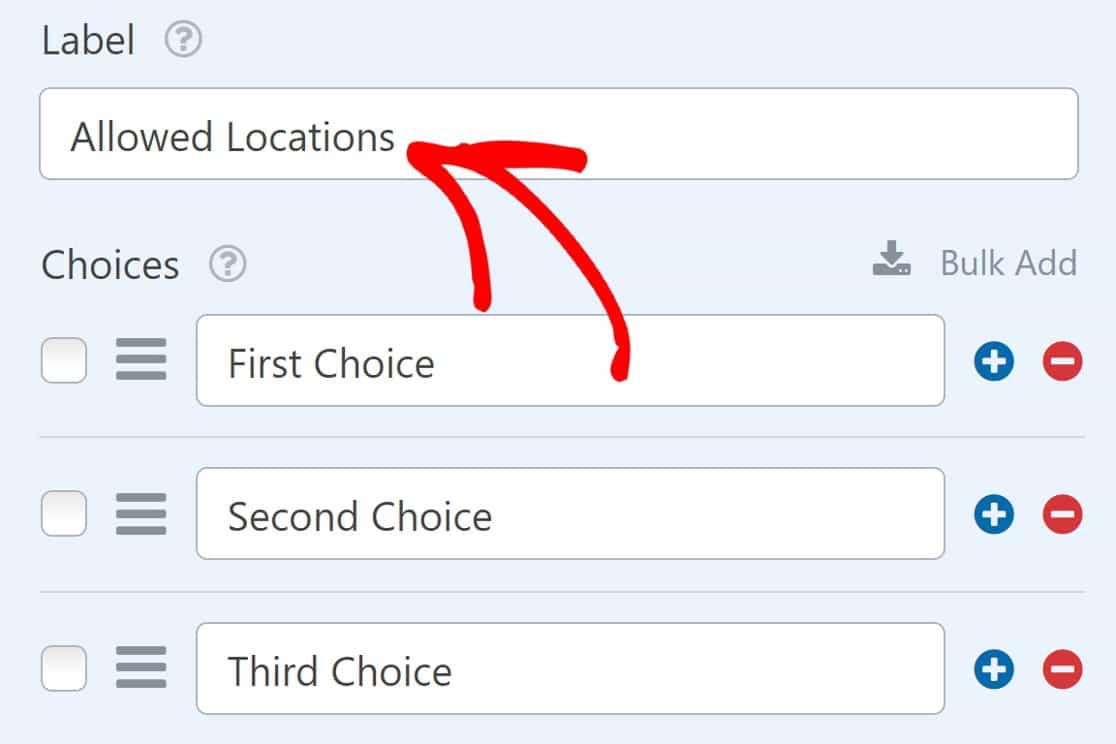
Next, we’ll need to edit this field to add the locations you want to include. To do this, simply click on the field.

In here, we’ll change the label of this field to Allowed Locations.
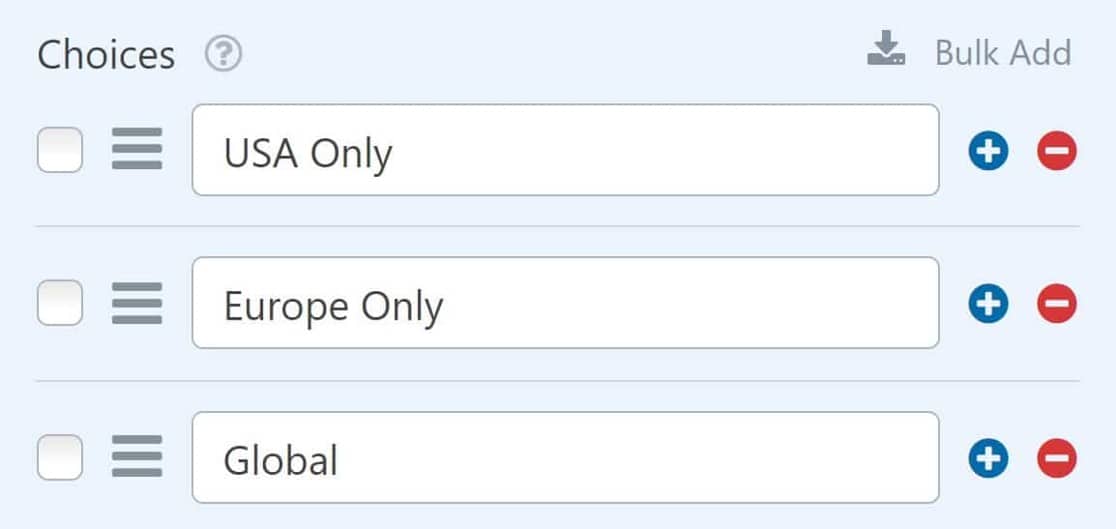
Then we’ll add the locations models will be permitted to choose from.
Now we’re going to add a dropdown for the model to select the compensation they’ve agreed to. We’re going to add 3 choices again:
- Payment
- Free prints
- Other
A dropdown makes sense here because it’s a concise way of including multiple options (but only one can be selected at a time). If you wanted them to be able to select multiple items from a dropdown field, you could add a multi-select dropdown to your form.

But what happens if your model selects the Other option? Let’s add some flexibility for models that want to select something other than the available options.
Adding a Field With Conditional Logic (Optional)
In this section, we’re going to add a field that only shows up if the model selects Other from the dropdown.
To get started, we’ll add the Single-Line Text field to your form and label it Agreed Compensation.
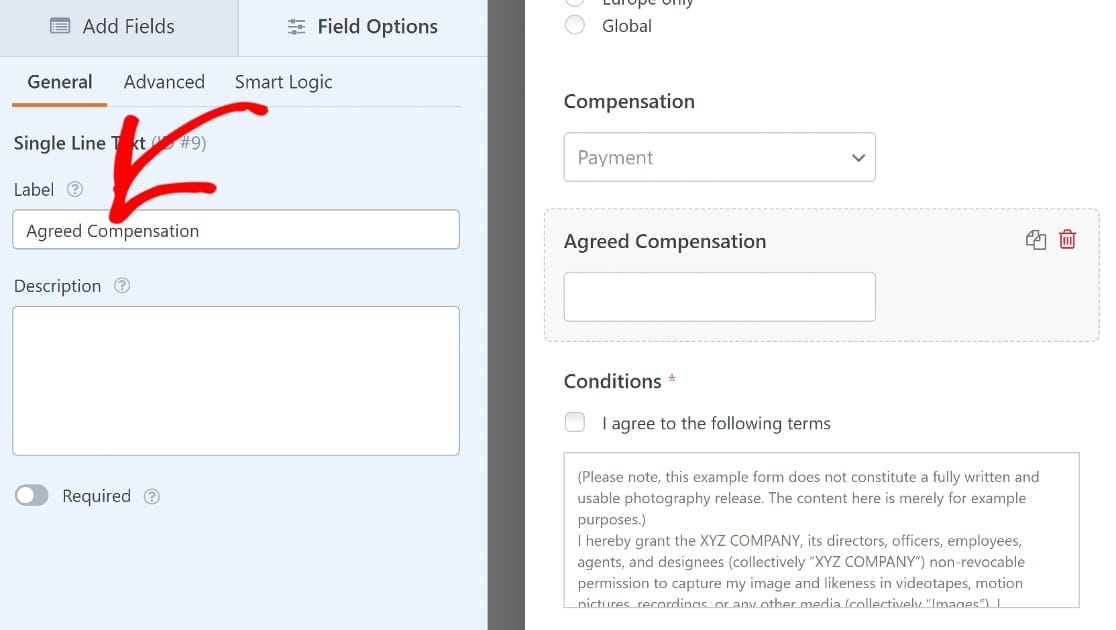
If this field shows up all the time, it could make the form confusing. So we’ll use conditional logic to make sure that this field only appears under certain conditions.
To set up conditional logic for this field, click once on the Agreed Compensation field. then navigate to the Smart Logic tab.
Toggle Enable Conditional Logic button.
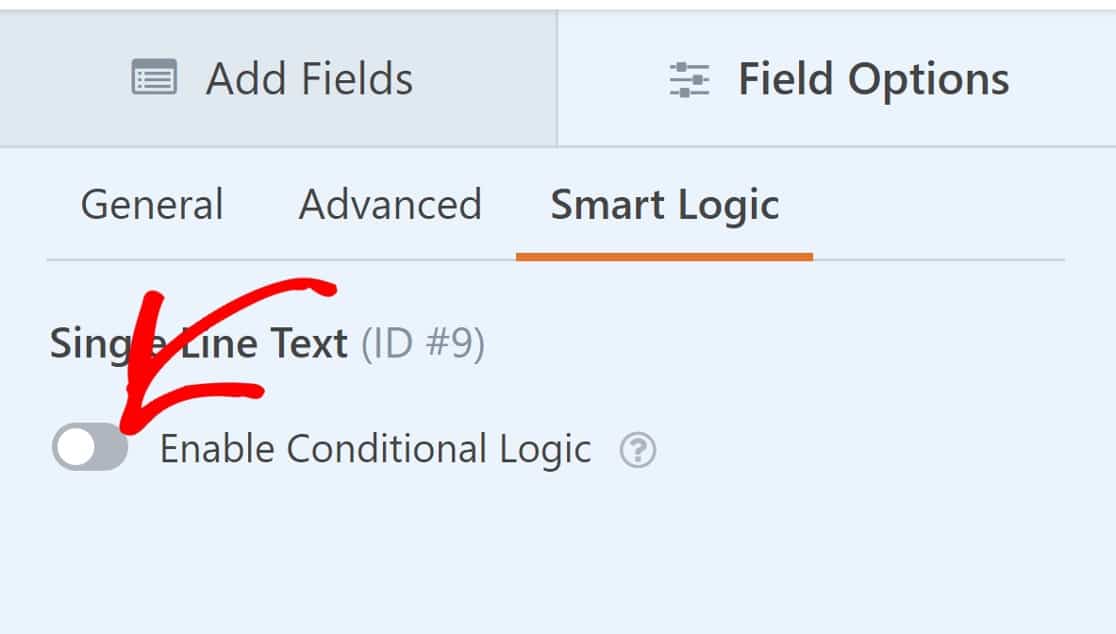
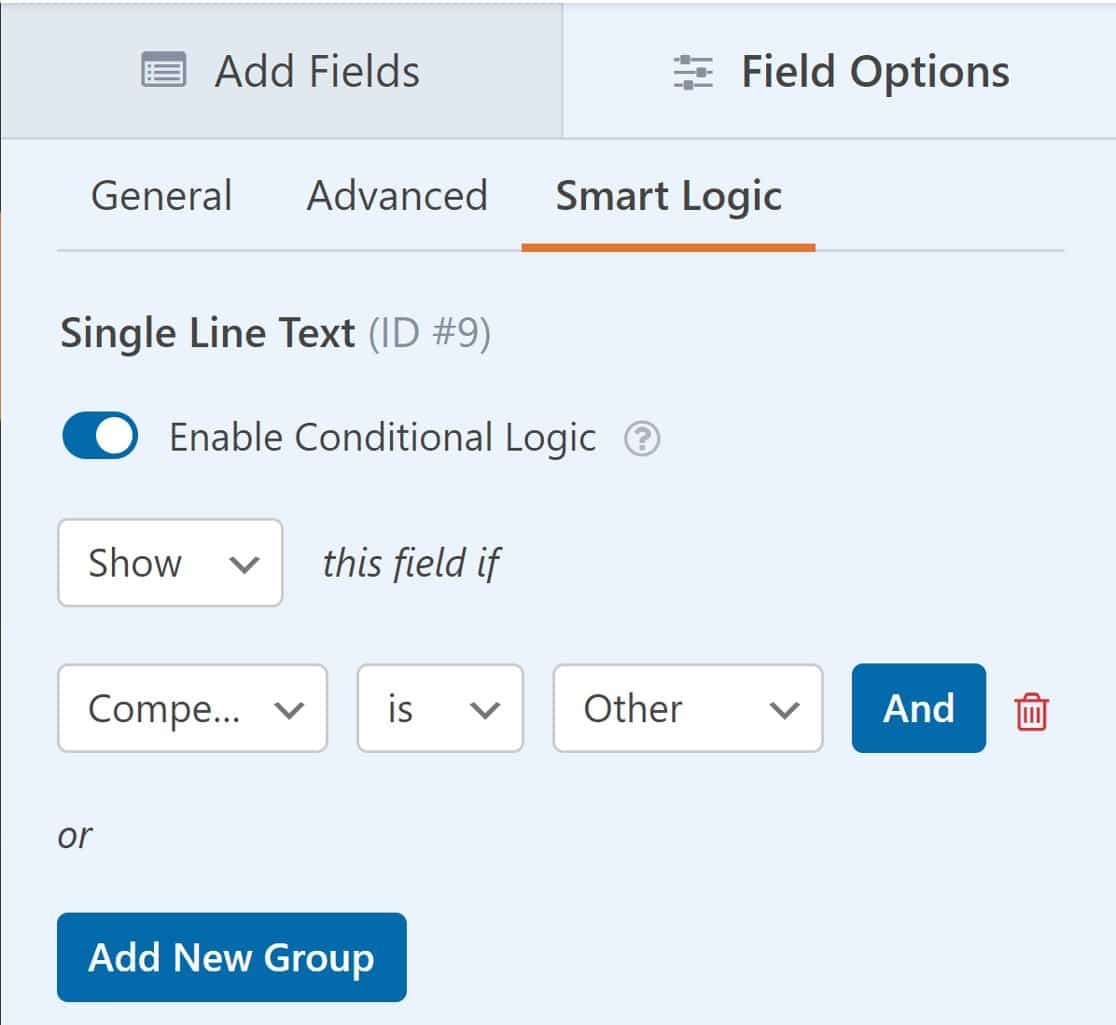
Then use the dropdowns to define the logic for when you want this field to appear on the form for a user.
In this example, we’ll set up these up to Show if the Compensation field answer is Other.
If you have models from the UK or the European Union, you’ll also want to add a GDPR agreement so that they give consent for you to save their personal data. To find out how to turn on GDPR features, check out this guide to adding a GDPR agreement to your forms.
Phew! That’s it. You made it to the end of this section, and the form is complete!
Click Save at the top to save your work so far.
Step 4: Configure Release Form Notifications
Now it’s time to review the notification settings on your online model release form. This is where we can customize the emails that will be sent when it’s submitted.
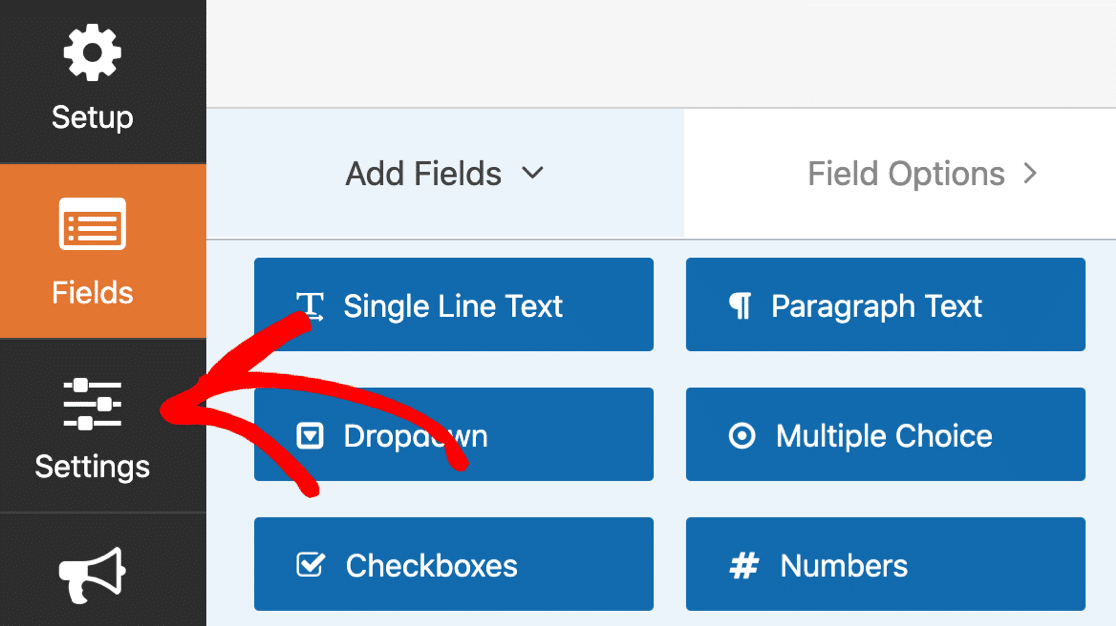
To start, click Settings.
Then click Notifications.
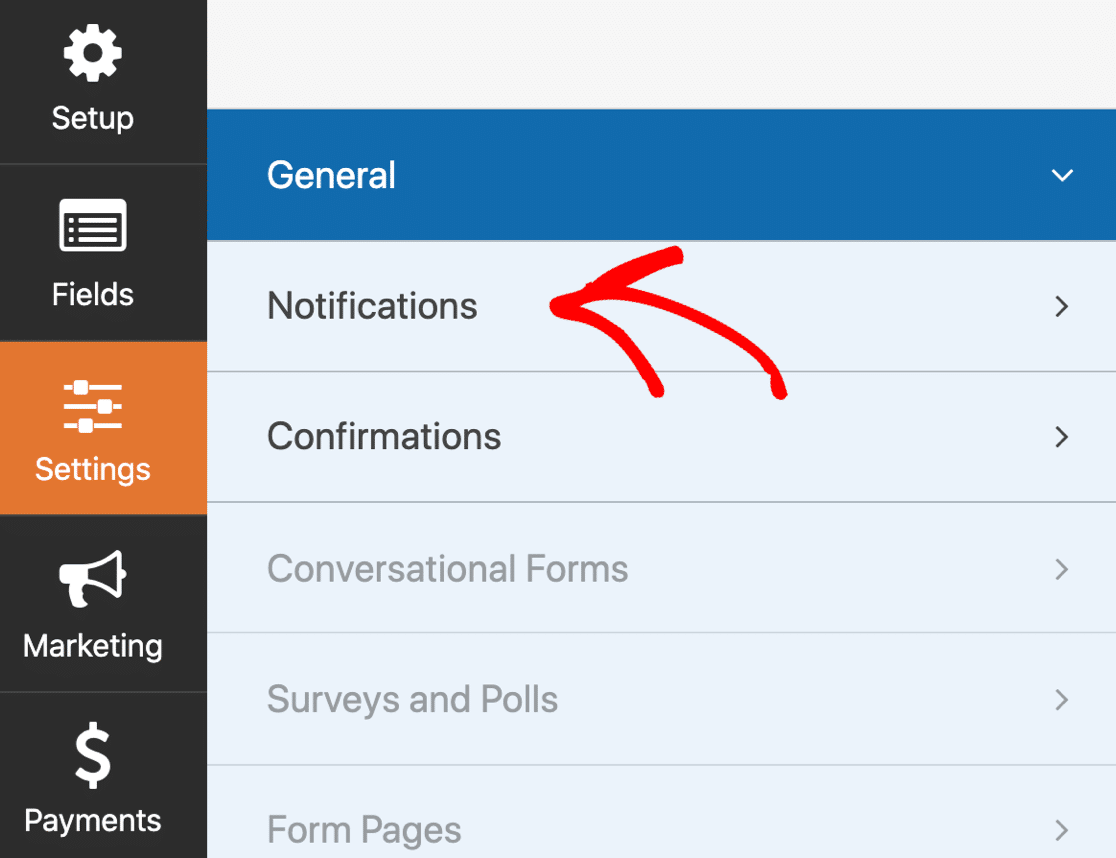
On the right, you’ll see the default notification that WPForms will send out. Here, you can change:
- Send To Email Address – This is the email address that the notification will be sent to when the form is submitted.
- CC – Any additional recipients you would like to add
- Email Subject Line – You can change the subject line if you want to.
- From Name – You can change the person the email appears to be from
- From Email – You can change the email address the email appears to be from
- Email message – The contents of the email message.
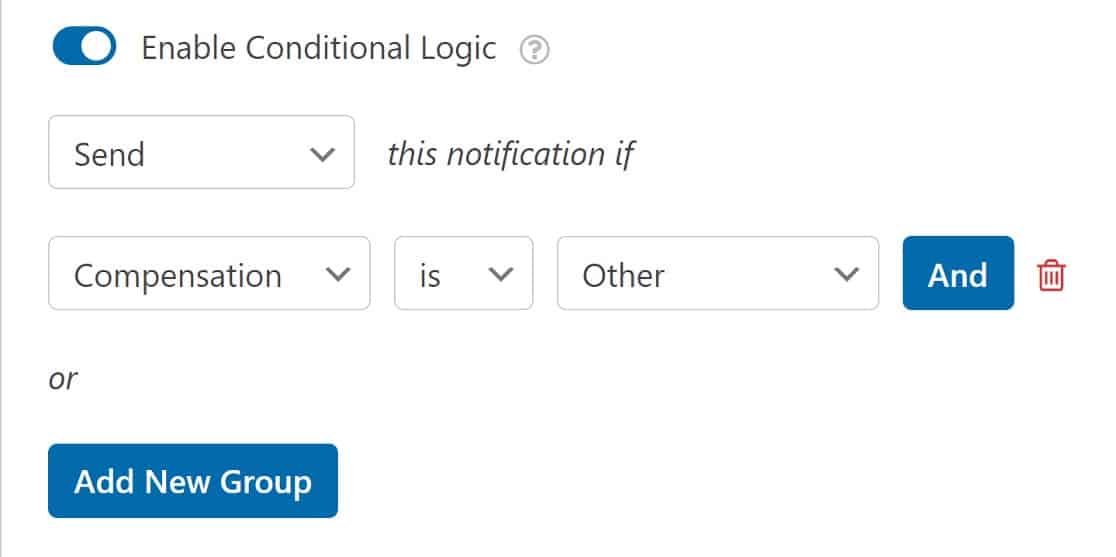
You can also enable conditional logic here if you’d only want notifications sent if certain conditions are met.
For example, you might only want notifications when a model chooses the Other option from the Compensation field.
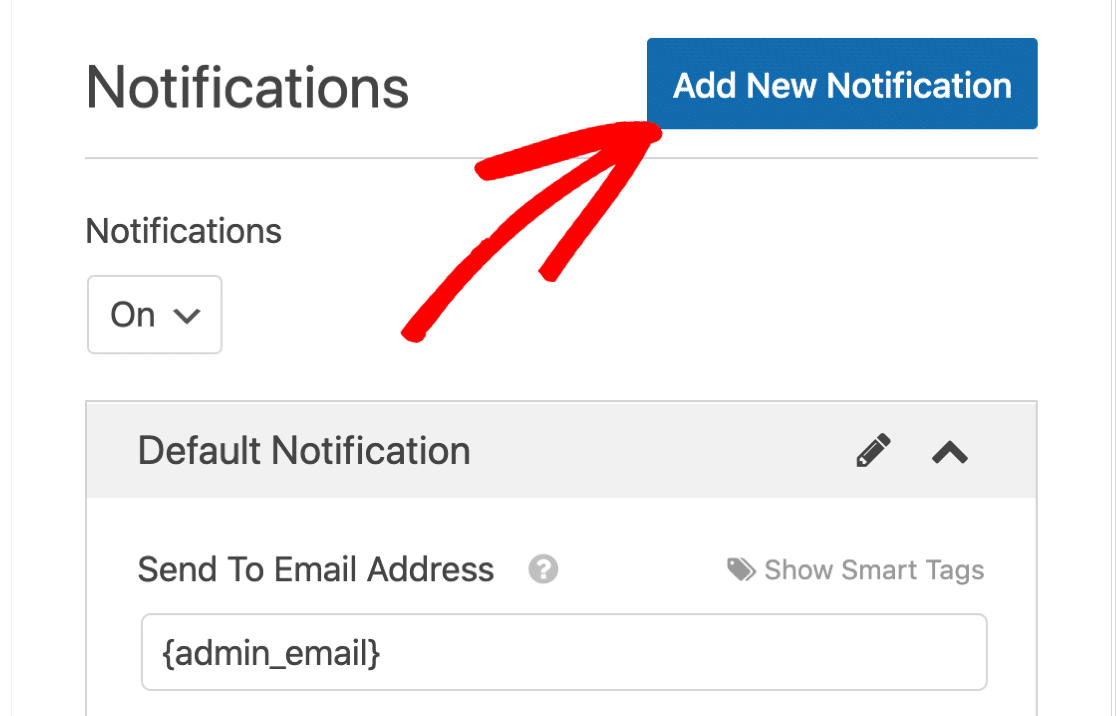
And if you want another email to be sent, you can click Add New Notification at the top.
When you’re happy with your settings, click Save at the top of the form builder.
Step 5: Configure Your Release Form Confirmations
We’re almost there! The last thing we need to check is the form confirmation.
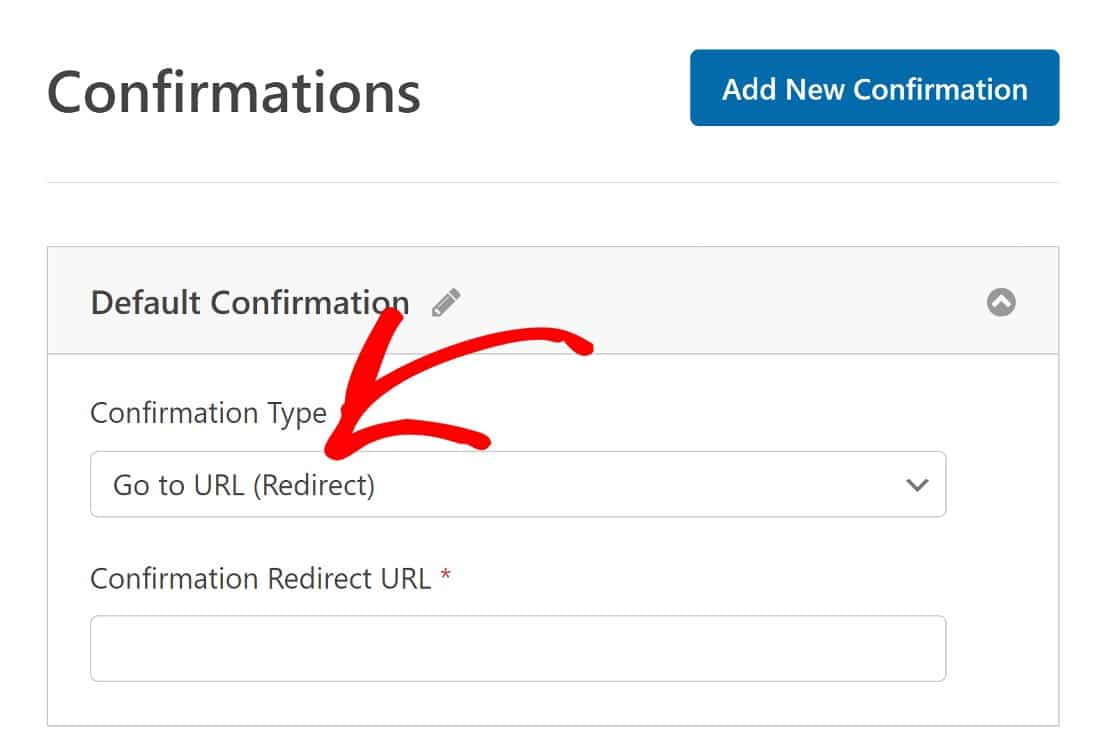
On the left, click Confirmations to open up the settings.
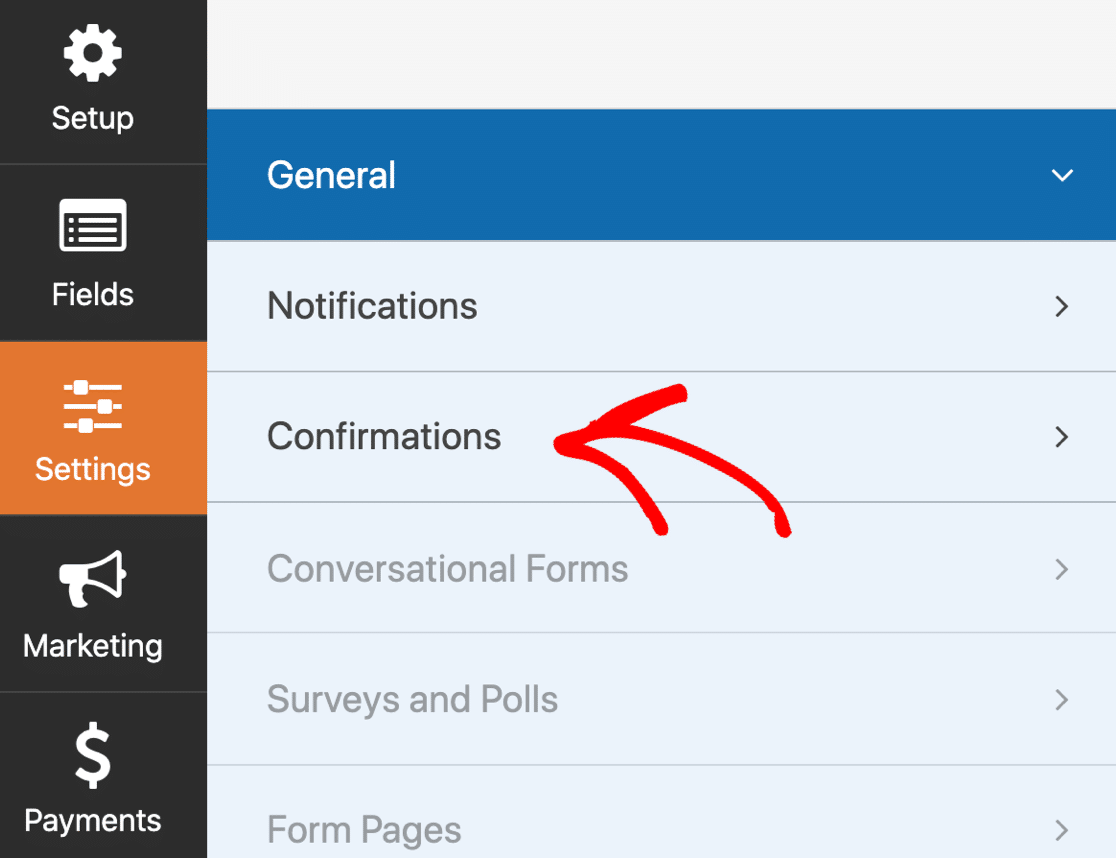
These settings will determine what happens when the form is submitted.
By default, WPForms will show a confirmation message on the screen.
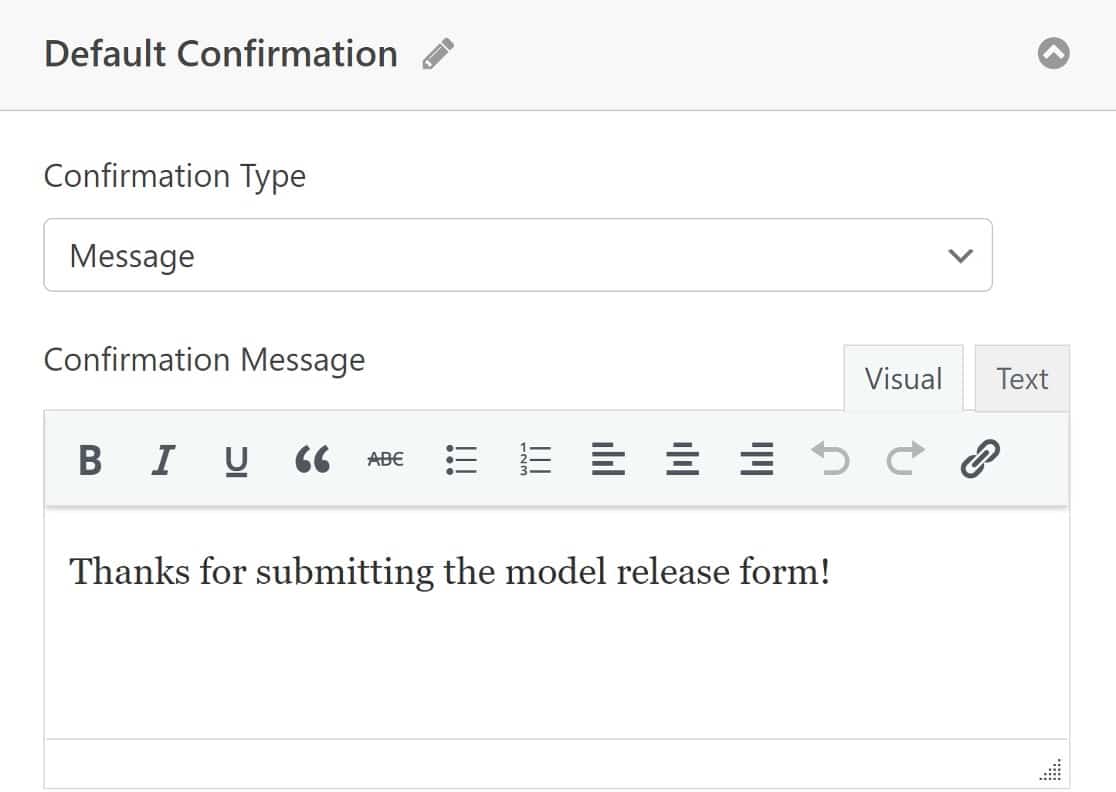
If you’d rather redirect your visitor somewhere else, click the Confirmation Type dropdown, change the confirmation to Redirect, then paste in the redirect URL below.
All set? Click Save.
And we’re done!
It’s time to go live. In the next step, we’ll publish your online release form and start accepting entries.
Step 5: Publish Your Online Model Release Form
Now your form is done, it’s time to publish it on your website. You can publish your form anywhere in WordPress, including:
- On a post or page
- In the sidebar
- In the footer.
For this particular form, it makes sense to create a new page.
You can use a shortcode, but the Embed wizard is even easier, so we’ll do it that way.
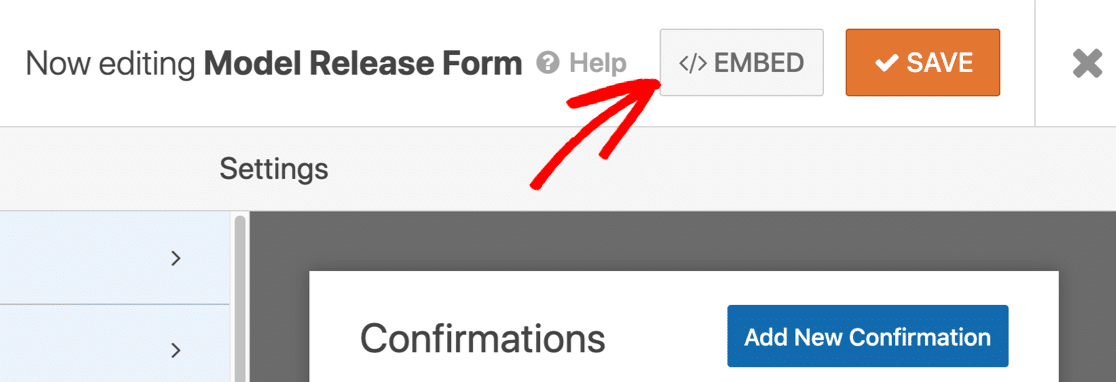
First, click Embed at the top of the form builder.
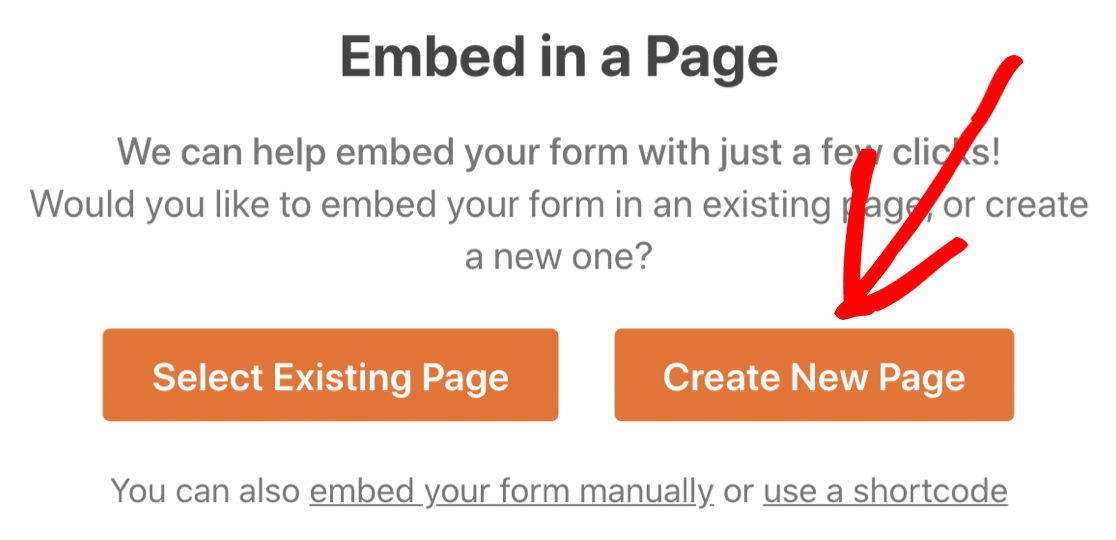
In the popup, click Create New Page…
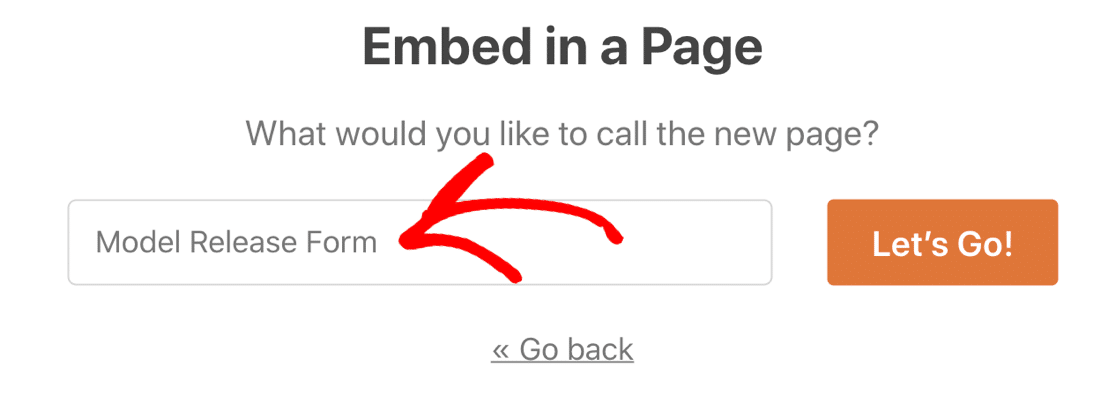
And finally, type in a name for your form and click Let’s Go.
WPForms will automatically make a new page and embed your form into it. If you want, you can edit the page to add more details about your photography business.
All done? Now click Publish to go live!
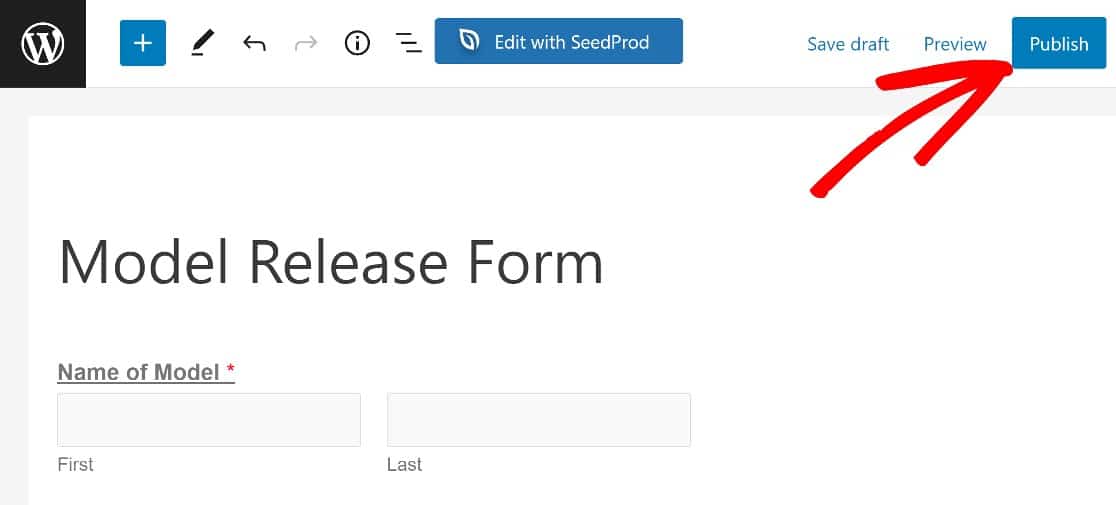
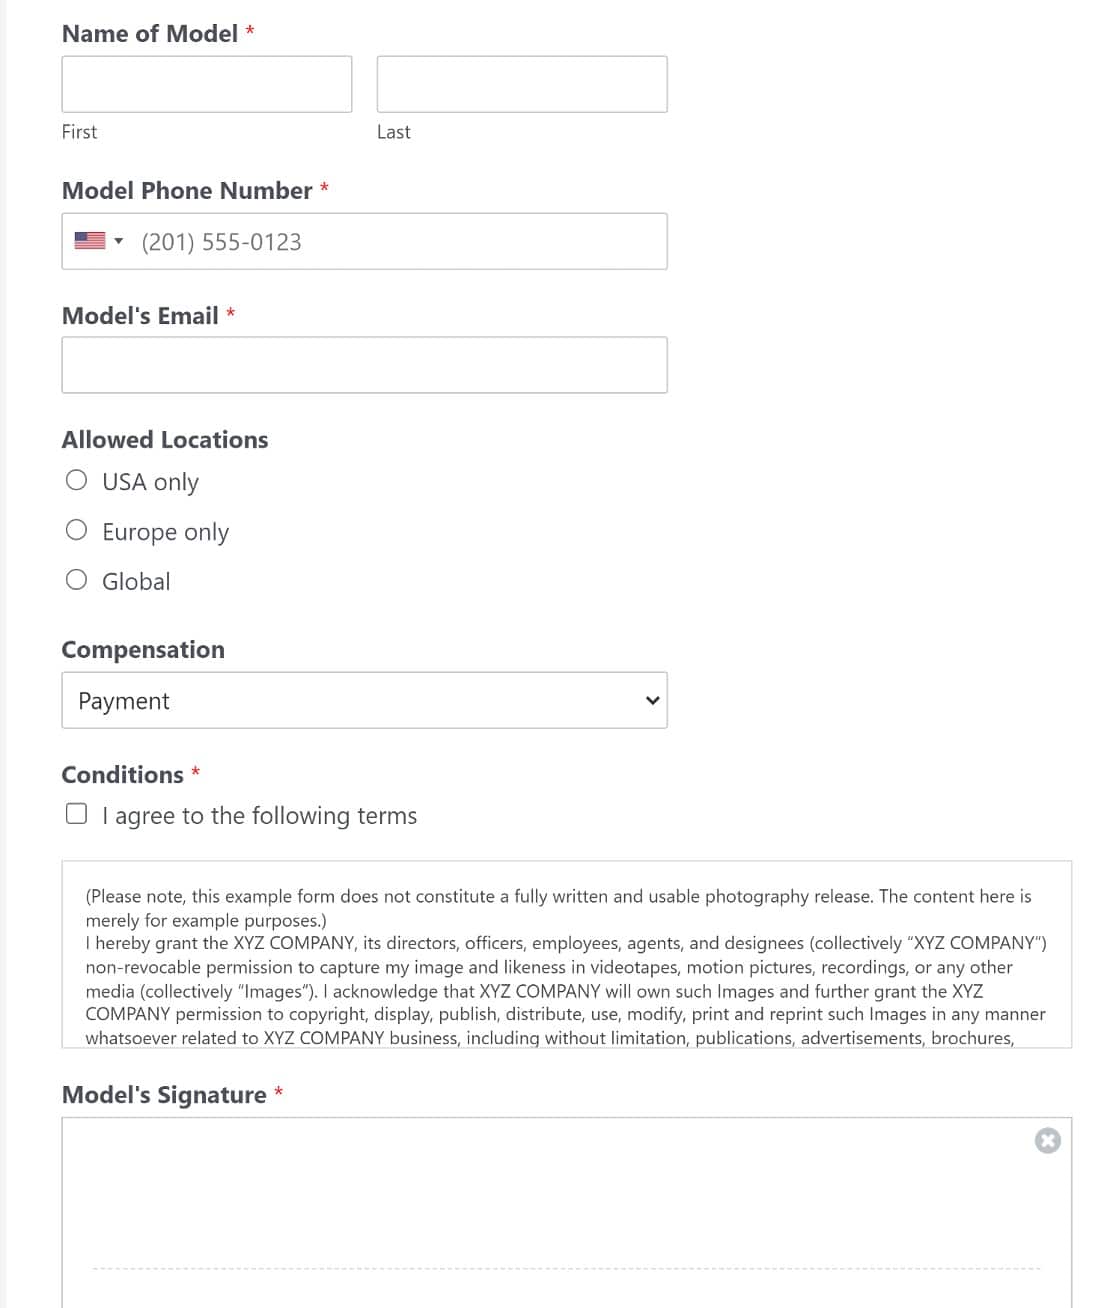
Now your models can easily fill out your form and sign it online.
All of your form entries will be saved in the WordPress database. You can easily export your form entries to a CSV file if you need to.
And to make it easy to view your entries, the CSV export will automatically include a link to the e-signature for each entry.
Create Your Model Release Form Now
FAQs on Model Release Form
Got more questions about setting up a model release form? Check out some of the commonly asked questions we’ve received lately on this subject:
What Is a Model Release Form?
Professional photographers use model release forms to get permission to publish photographs they’re going to take for commercial purposes. It’s good practice to get your models to fill out the form before the day of the shoot because it’s an important legal document that serves as evidence of the consent of the model.
Having an online form can really help with this because you can share the link at any time and get your release agreement signed electronically by the model in question.
In a typical photo release form, you’ll normally want to include:
- Personal details – First and foremost, the form should include fields for the model’s full legal name and contact details like phone and email.
- Terms and conditions – The models should be given the option to agree to your terms and conditions with a checkbox field, so they clearly know that their photos are intended for commercial use.
- Where the photos can be published – It may be a good idea to let your models pick the countries where the photos can be used.
- Compensation – The model should usually receive something in return for signing the waiver. This could be payment, free prints, refreshments, or simply the experience of being on the shoot.
- A signature field – Allowing model’s to sign release forms online, without having to print them out will save some time and resources.
Publishing this form online makes your workflow a lot easier. You can collect all of your waivers in WordPress and store the entries in the backend. That way, you don’t have to carry a bunch of pens and paper to every photo shoot.
Why do I need a model release form?
The model release form plays an important role in protecting you from legal issues and helping you avoid disputes. Since you can clearly define your legal terms on the form and obtain signed consent from your models, there’s every reason to use a form of this kind if you’re an agency or individual photographer.
Can models sign the release form electronically?
Yes, models can sign the release form electronically if you use the Signature field on your form. The top online form builders like WPForms support electronic signatures, so you can let your model sign the release form.
How do I store and manage signed model release forms?
If you’re using WPForms, the data from the signed model release form will be automatically stored in your WordPress dashboard where you can freely access it at any time. It’s also sent to you via email. You can also create a separate email notification with the signed copy of the form sent to the model for their record.
Is it possible to export the signed forms?
Yes, you can export the signed forms as PDFs. In WPForms, this means viewing the entry in question and clicking on Print. You can then proceed to save the signed form as a PDF file.
How can I ensure the form is legally binding?
It’s important to consult with a legal professional to ensure your form is properly written to ensure leal compliance. You’ll need to carefully incorporate legal language, clearly outline the rights being granted, and obtain a signature from the model.
Next, Make Your Release Form Available Offline
If you have a patchy WiFi connection in your studio, WPForms can help make sure you don’t lose form submissions.
Using the offline forms addon, WPForms will save the entry if the connection drops out. That way, the person filling it out can submit it when their device reconnects. It really helps to avoid losing form submissions when your connection is spotty.
And if your employees need to travel to a shoot, you can make an online travel request form to make sure they get their expenses reimbursed.
For some more ways to use WPForms optimally, here’s our guide to exporting WordPress form entries to excel. You might also want to learn how to make a WordPress form with PayPal Payments.
Ready to build your form? Get started today with the easiest WordPress form builder plugin. WPForms Pro includes a release form template and offers a 14-day money-back guarantee.
If this article helped you out, please follow us on Facebook and Twitter for more free WordPress tutorials and guides.


