Want to let your users upload multiple files through your WordPress forms? You’re in the right place. In this guide, I’ll walk you through creating professional-looking forms with multiple file upload fields – no coding required.
This method is perfect for collecting portfolios, documentation, or any situation where you need users to submit multiple files at once.
Create Your Wordpress Form Now
How to Allow Multiple File Uploads to WordPress Contact Forms
Giving your website visitors the ability to upload a file in your WordPress form makes it easier for you to collect the information you need. But sometimes you need more than just one file from them. For example, if you have a job application form, you may need to collect a resume as well as a cover letter.
WPForms is a great option for a file upload plugin if you want the ease of creating a file upload field with a drag-and-drop form builder. By default, the WPForms File Upload field allows users to upload multiple files at a time. All you need to do is add the field to your form.
Here’s what I’ll be covering in this tutorial:
Ready? Let’s get started!
Step 1: Create a File Upload Form in WordPress
For this tutorial, I’m going to assume you don’t have your form built yet and start from the beginning. If you already have a form and just want to see how to add a File Upload field to it, you’ll see how to simply drag the field onto your form in the editor in this 1st step.
The first thing you’ll need to do is install and activate the WPForms plugin. For more details on how to install it, see this step-by-step guide on how to install a plugin in WordPress.
Next, go to your WordPress dashboard and click on WPForms » Add New in the left-hand panel to create a new form and name it. You can choose whatever name you’d like.

Next, scroll down to the Select a Template section and search for the file upload form template. Then click on Use Template to open it.
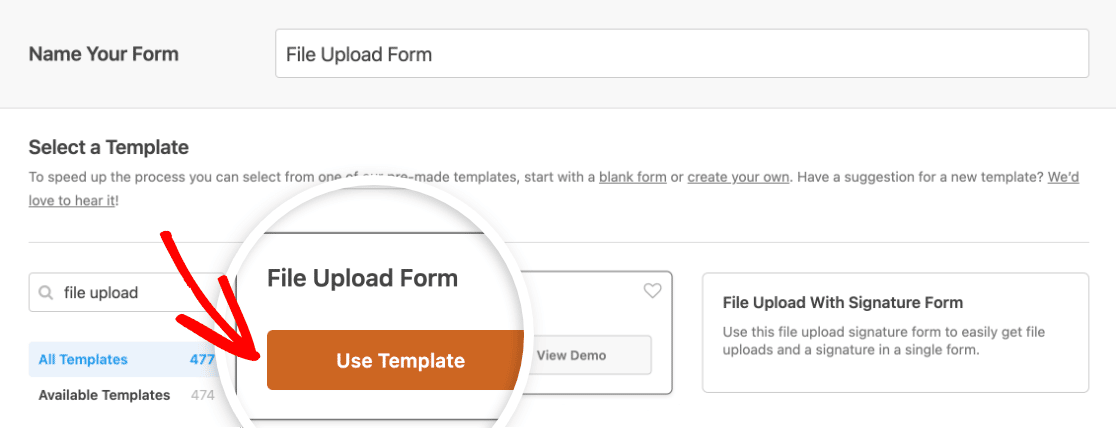
WPForms will now populate a pre-built File Upload Form and display the drag and drop builder.
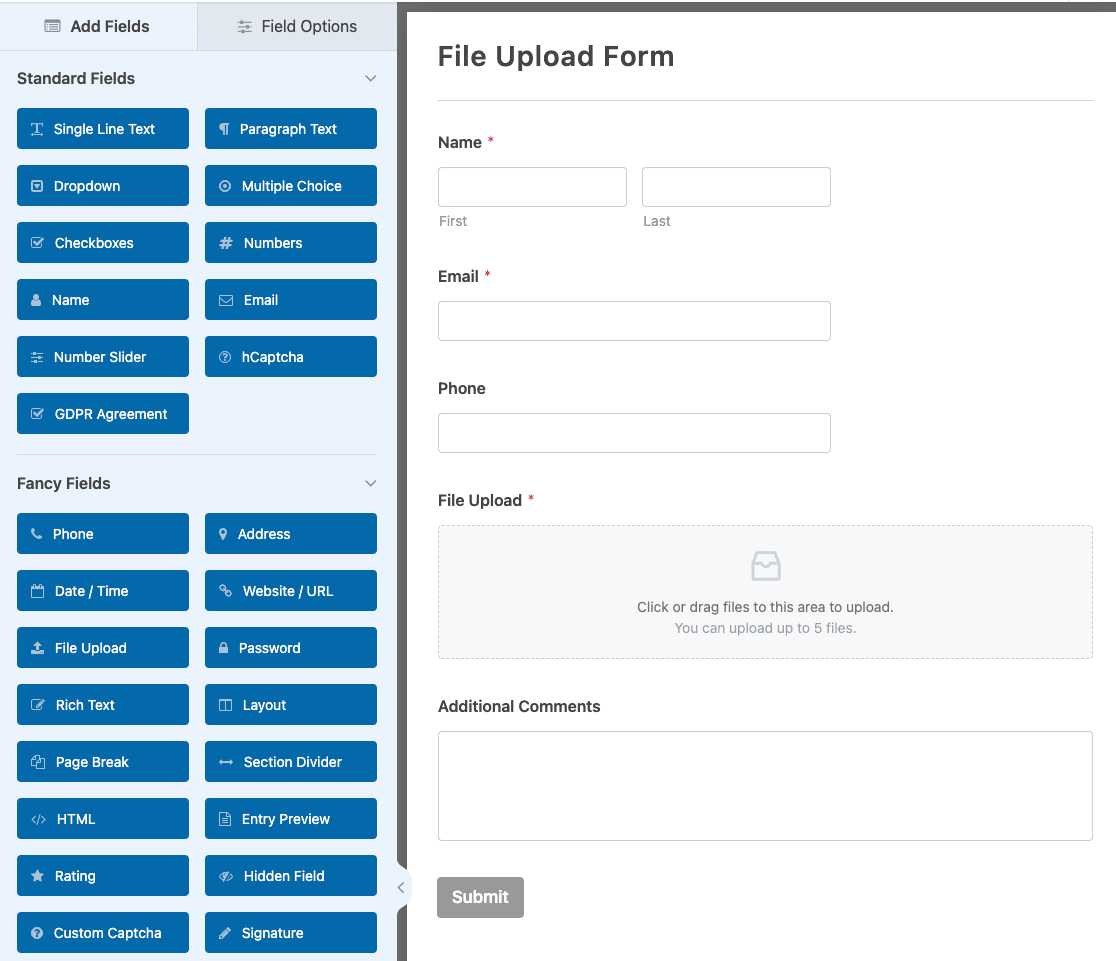
Here, you can add additional fields to your contact form by dragging them from the left-hand panel to the right-hand preview area.
With the File Upload Form template, you’ll already have the Name, Email, Phone, File Upload, and Additional Comments fields.
Click on any of the form fields to make changes. You can also click on a form field and drag it up and down to rearrange the order on your form.
Note: You can add the File Upload field to any WordPress form you create. Just drag the File Upload form field, found under Fancy Fields, from the left-hand panel of the form builder to the preview area.
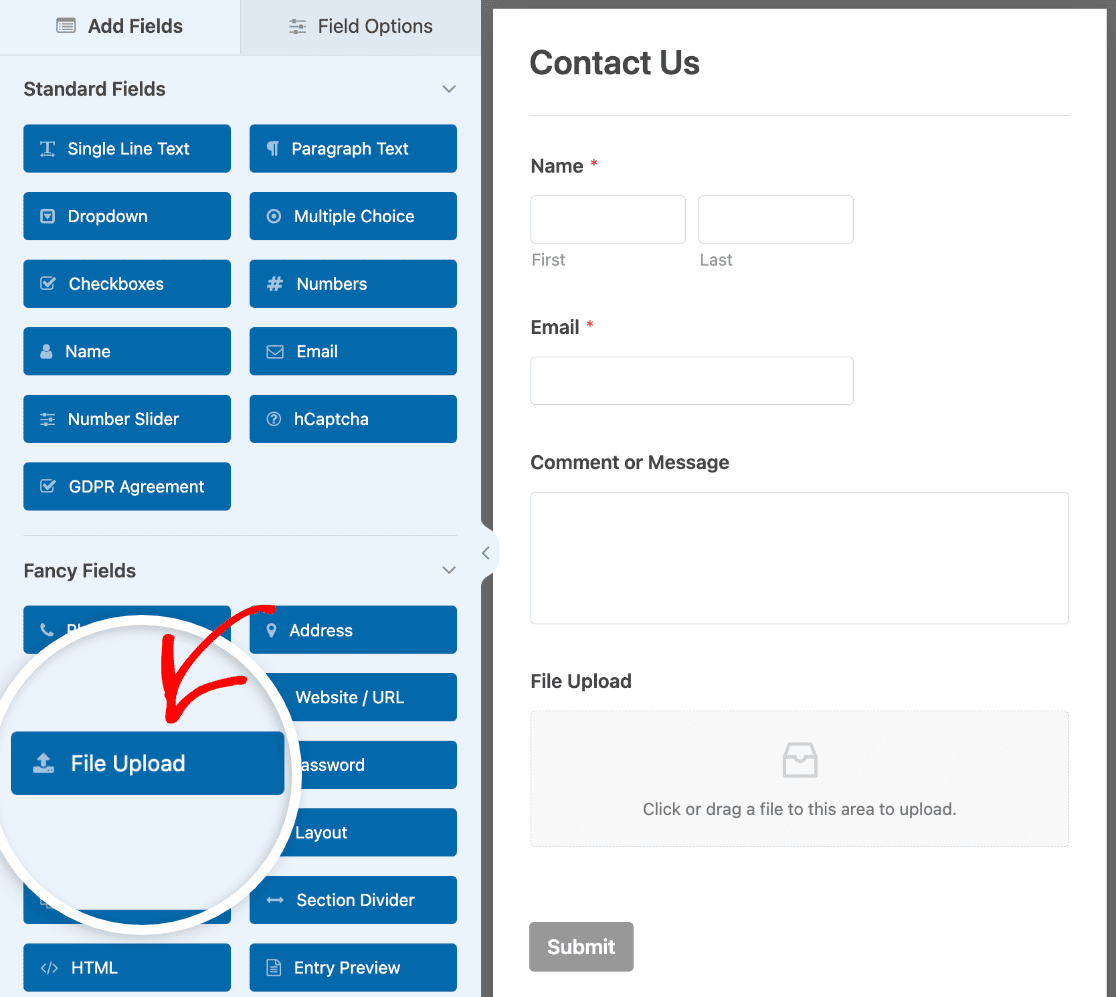
Step 2: Configure File Upload Field Options
You can click on the File Upload field to open its field options.
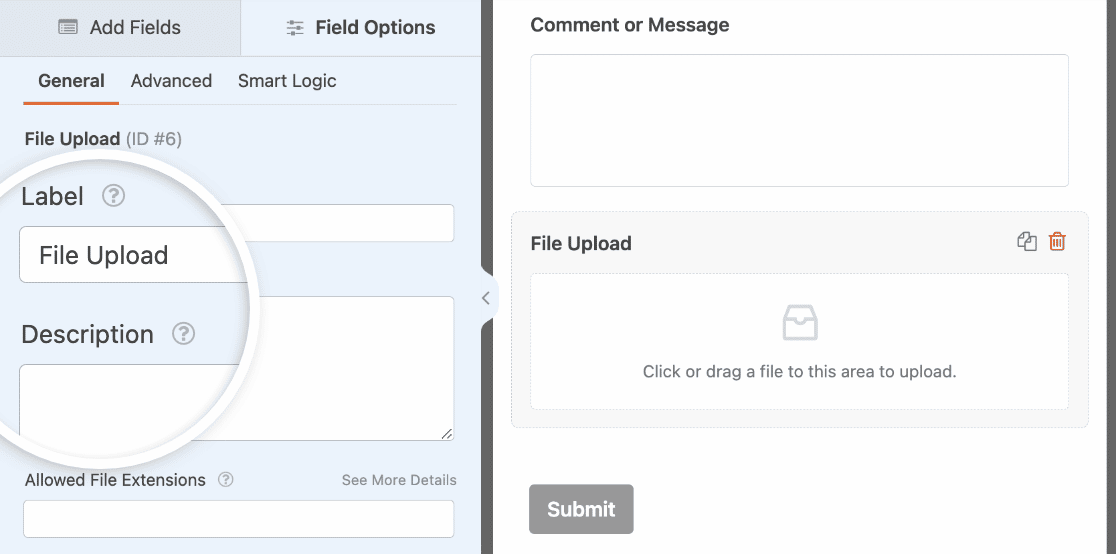
Here you can change the:
- Label — Name the form field so your site visitors know what it’s for.
- Description — Add a description explaining details to users. For example, if you only want people to upload an image, tell them that.
- Allowed File Extensions — If you want to restrict the types of files that can be uploaded to your WordPress form, put them here, each separated by a comma
- Max File Size — Specify, in megabytes, the max size file you’ll allow users to upload. If you leave this blank, WPForms will default to the maximum file size that your web host allows. If you need to change this, see this tutorial on how to increase the maximum file upload size in WordPress.
- Max File Uploads — Set the maximum number of files users can add to this form.
- Required — If you want to require that users upload a file before they can submit their form, toggle this option on.
Once you’ve customized the general field options, click on the Advanced tab. Here, make sure the Style is set to Modern.
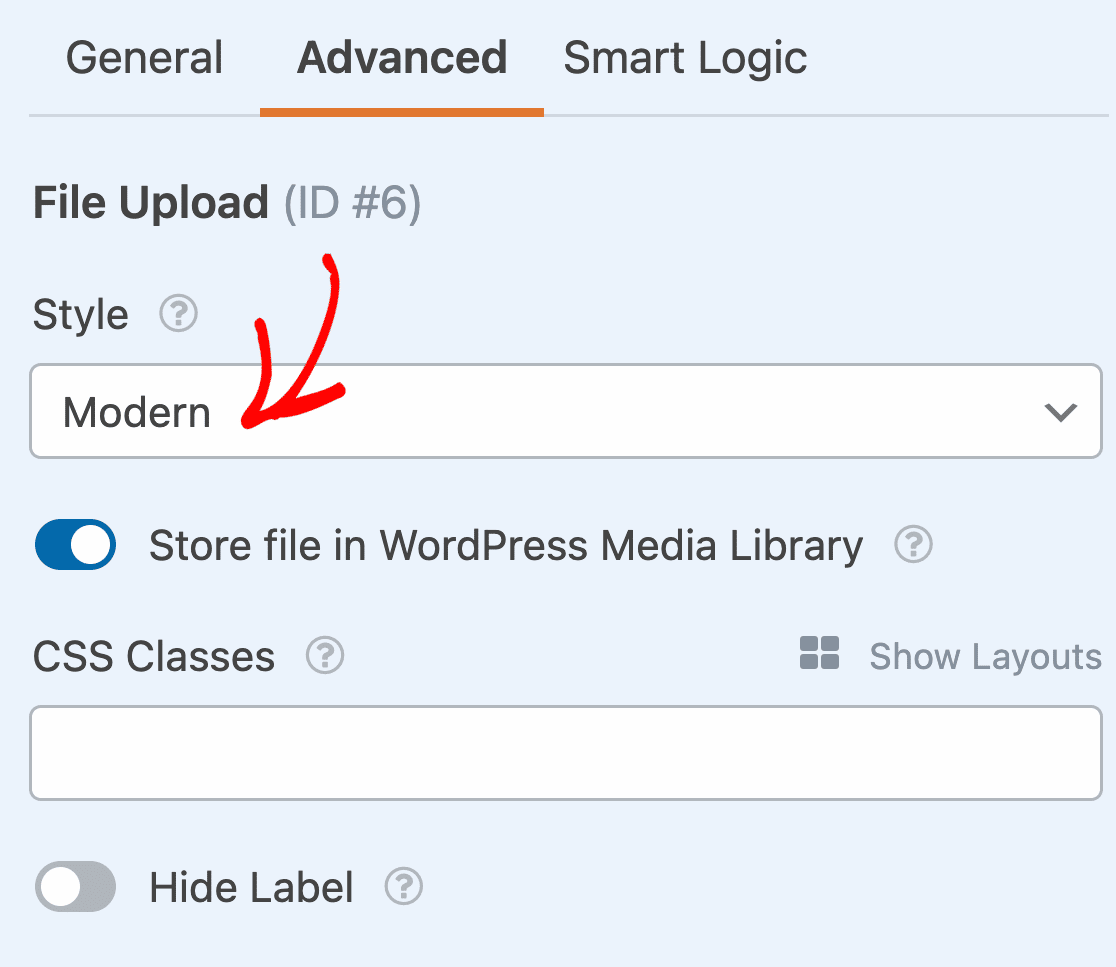
This is important because the Classic style doesn’t allow multiple file uploads.
Wondering where these file uploads will be stored?
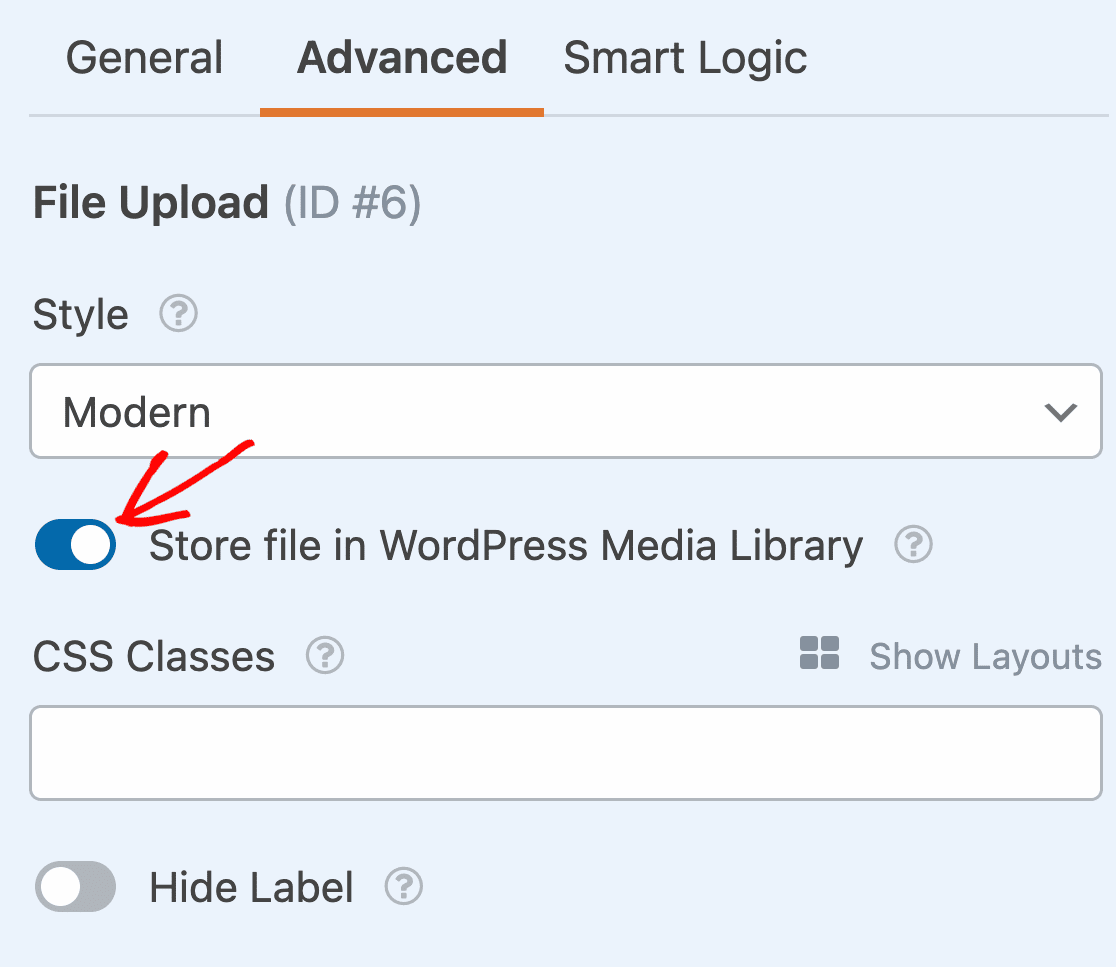
By default, all files uploaded by users are stored in the WPForms folder inside the Uploads directory of your site. To make things easier, you can also store these files in your WordPress Media Library by toggling on the Store field in WordPress Media Library option.
If you want to restrict access to uploaded files, that’s easy to do in WPForms. In the File Upload field’s Advanced tab, you’ll also so a toggle switch to Enable File Access Restrictions.
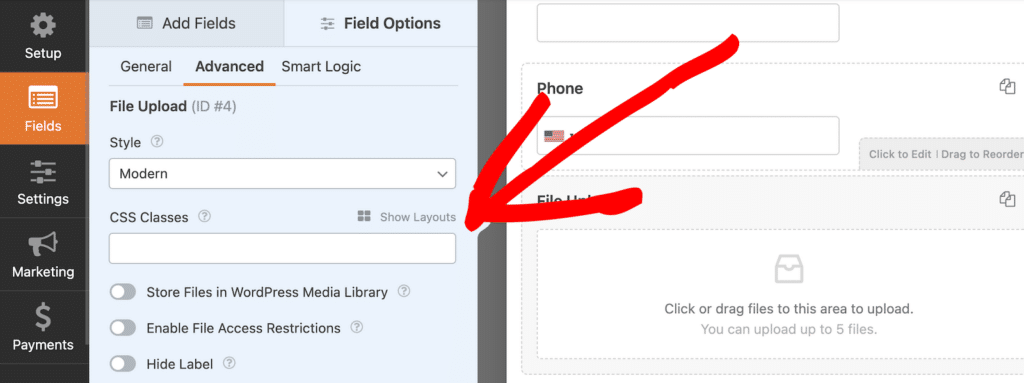
When you select this option, you can restrict access through password protection, or you can restrict it based on user roles. If you select user roles, the user must be logged in to access the uploaded files.
I’ll also show you how to access uploaded files from the Entries screen and in your form’s email notifications.
You can make forms look great by following the steps in our post on how to create a Multi-step form in WordPress. But for the sake of this tutorial, we’ll stick with a single page.
Step 3: Customize Your Form Settings
To start, go to Settings » General.

Here you can configure the following:
- Form Name — Change the name of your form here if you’d like.
- Form Description — Give your form a description.
- Tags — Add tags to your form to help keep your WordPress forms organized.
- Submit Button Text — Customize the copy on the submit button.
- Submit Button Processing Text — Change the text that shows while your form is submitting.
You can also expand the Advanced settings to configure the following options:
- CSS Classes — Add custom CSS to your form or submit button.
- Prefill by URL — Automatically fill some fields based on a custom URL.
- Enable AJAX form submission — Enable AJAX settings with no page reload.
- Disable storing entry information in WordPress — You can disable the storing of entry information and user details, such as IP addresses and user agents, in an effort to comply with GDPR requirements. Check out our step-by-step instructions on how to add a GDPR agreement field to your simple contact form.
Once you’re done in the general settings, click on the Spam Protection and Security settings.
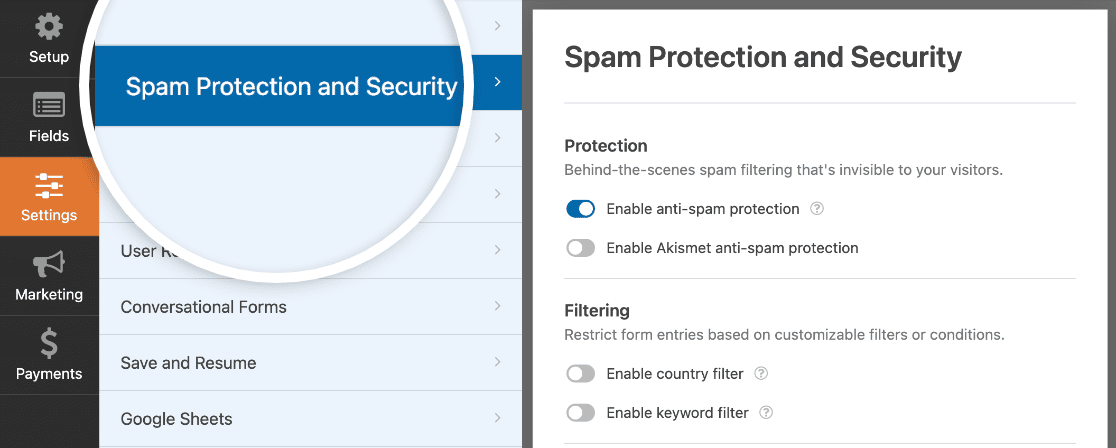
- Enable anti-spam protection — Stop contact form spam with the anti-spam feature, hCaptcha, or Google reCAPTCHA. The anti-spam checkbox is automatically checked on all new forms.
- Enable Akismet anti-spam protection — If you use the Akismet plugin to manage spam, you can connect it to this form to prevent fake submissions.
- Enable country filter — Block submissions from certain countries.
- Enable keyword filers — Prevent submissions that include certain words or phrases.
You can also set up a CAPTCHA to block spam entries. Check out our complete guide to anti-spam settings for more details.
And when you’re done, click Save.
Step 4: Configure Your Form’s Notifications
Notifications are an excellent way to know when someone submits one of your forms.
And, unless you disable the notification feature, you’ll get an email notification whenever someone submits a form on your site.
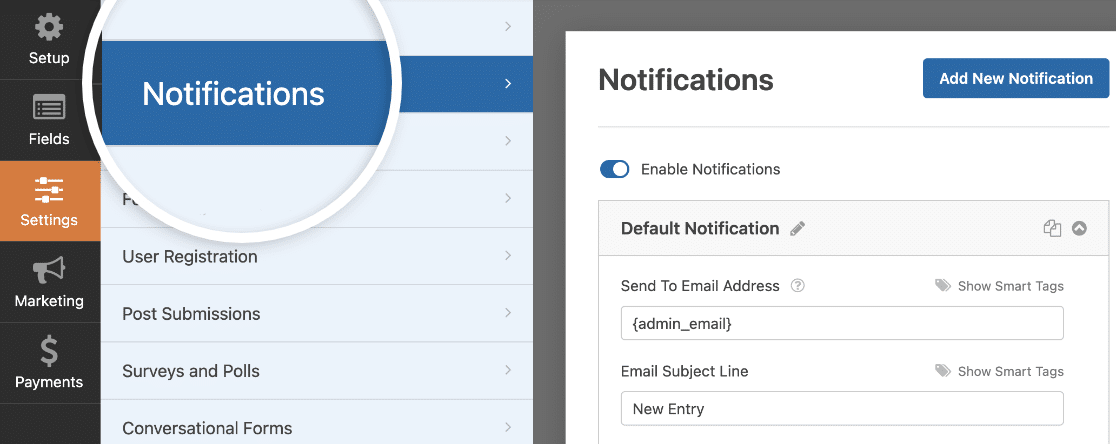
To get an email message when someone completes your form, you’ll need to set up form notifications in WordPress and provide your email address.
Also, if you use Smart Tags, you can send a personalized notification to your site visitors once they finish your form to let them know you received it. This assures users their form has gone through properly.
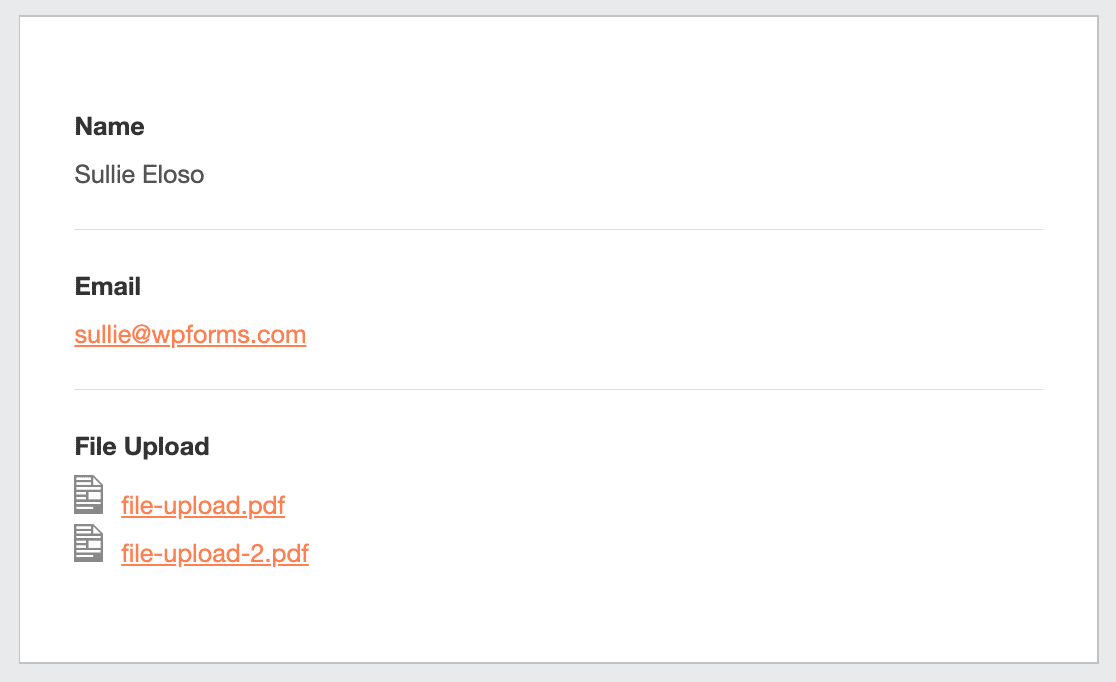
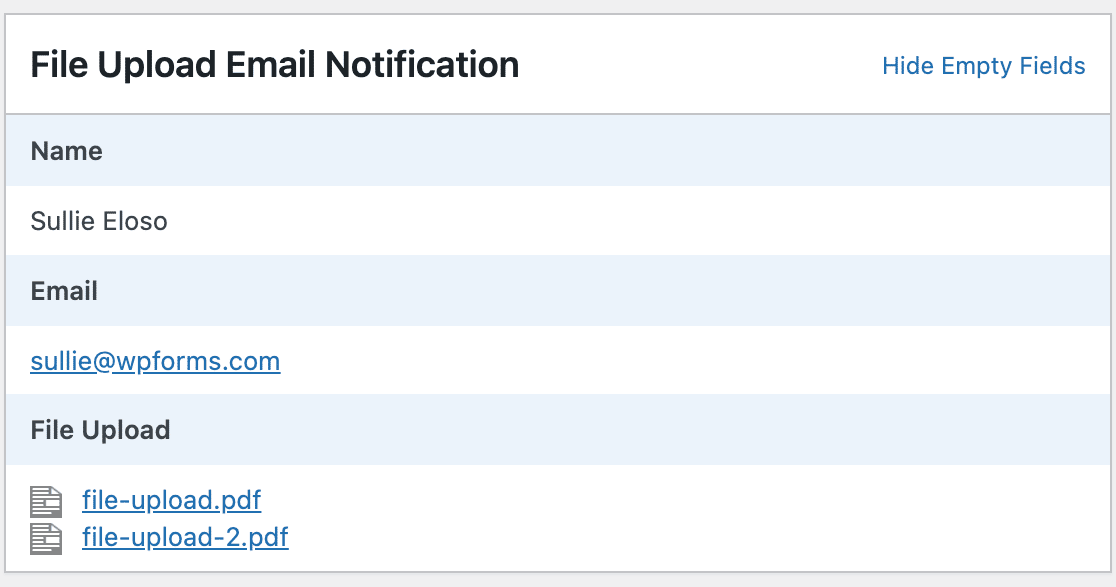
To include the uploaded files in your email notification, use a Smart Tag to include the content of the File Upload field in the body of the email. This will add links you can click to see the uploaded files.
For more on this, check out our step by step guide on how to send multiple form notifications in WordPress.
If you would rather include the uploaded files as email attachments, scroll to the bottom of your notification and expand the Advanced settings. Then toggle on the Enable File Upload Attachments setting.
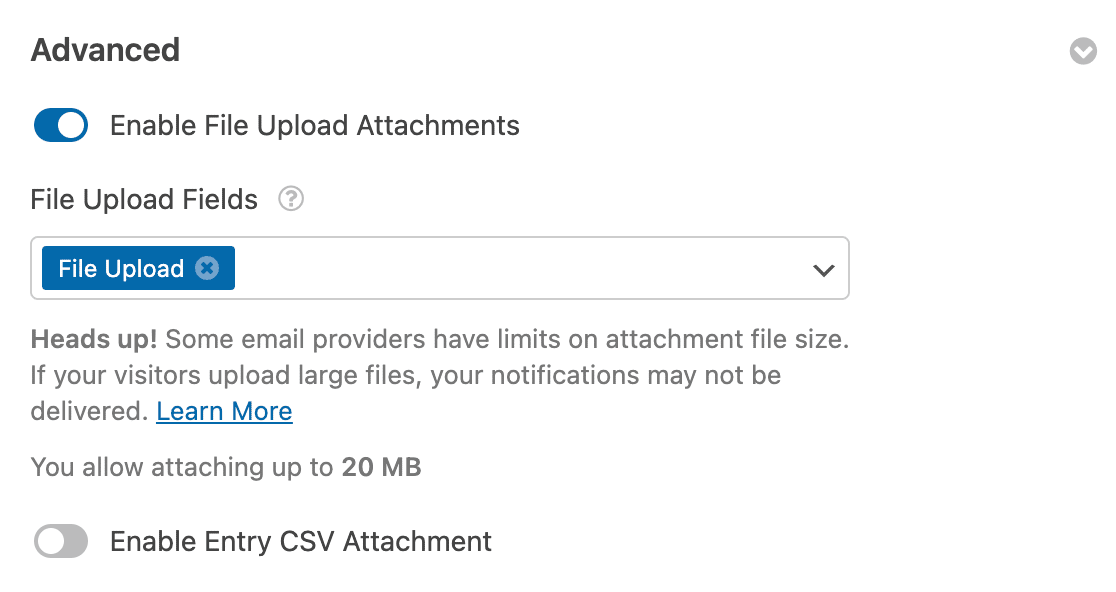
Keep in mind that some email providers won’t deliver emails with large attachments. You can change the maximum file size in the field options as we showed in Step 2.
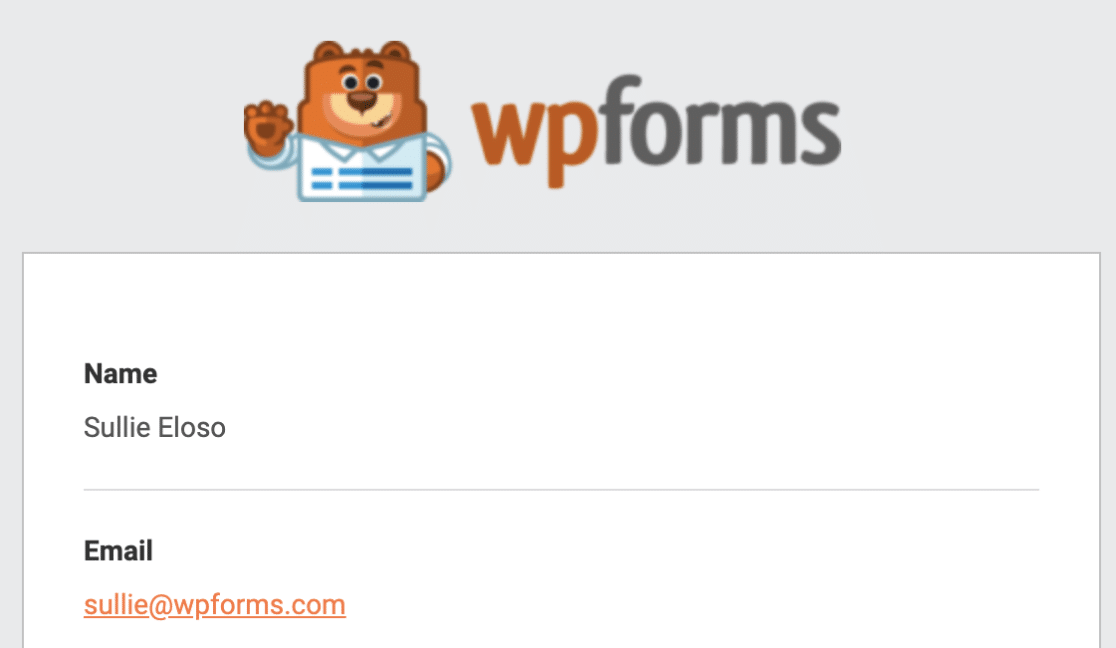
In addition, you have the option to easily brand your notification emails by adding your logo or any image you choose in the custom header image area. The image you choose will show up at the top of email notifications like the WPForms logo below.
Step 5: Configure Your Form’s Confirmations
Form confirmations are ways to take action immediately (and automatically) after your user has submitted information to your form. For extra help with this step, check out our tutorial on how to setup form confirmations.
There are 3 different kinds of confirmations in WPForms:
- Message — This is the default confirmation type that appears after someone hits submit on your form, and it’s customizable. Check out our tips on ways to customize your confirmation message to boost your site visitors’ happiness.
- Display Page — Automatically send users to any page on your site like a thank you page
- Redirect — Useful if you want to take the user to a different website or specialized URL for more complex development.
So let’s see how to set up a simple form confirmation in WPForms so you can customize the success message site visitors will see when they submit a form on your site.
To start, click on the Confirmations tab in the form builder under Settings.
Next, select the type of confirmation type you’d like to create. For this example, we’ll select Message.
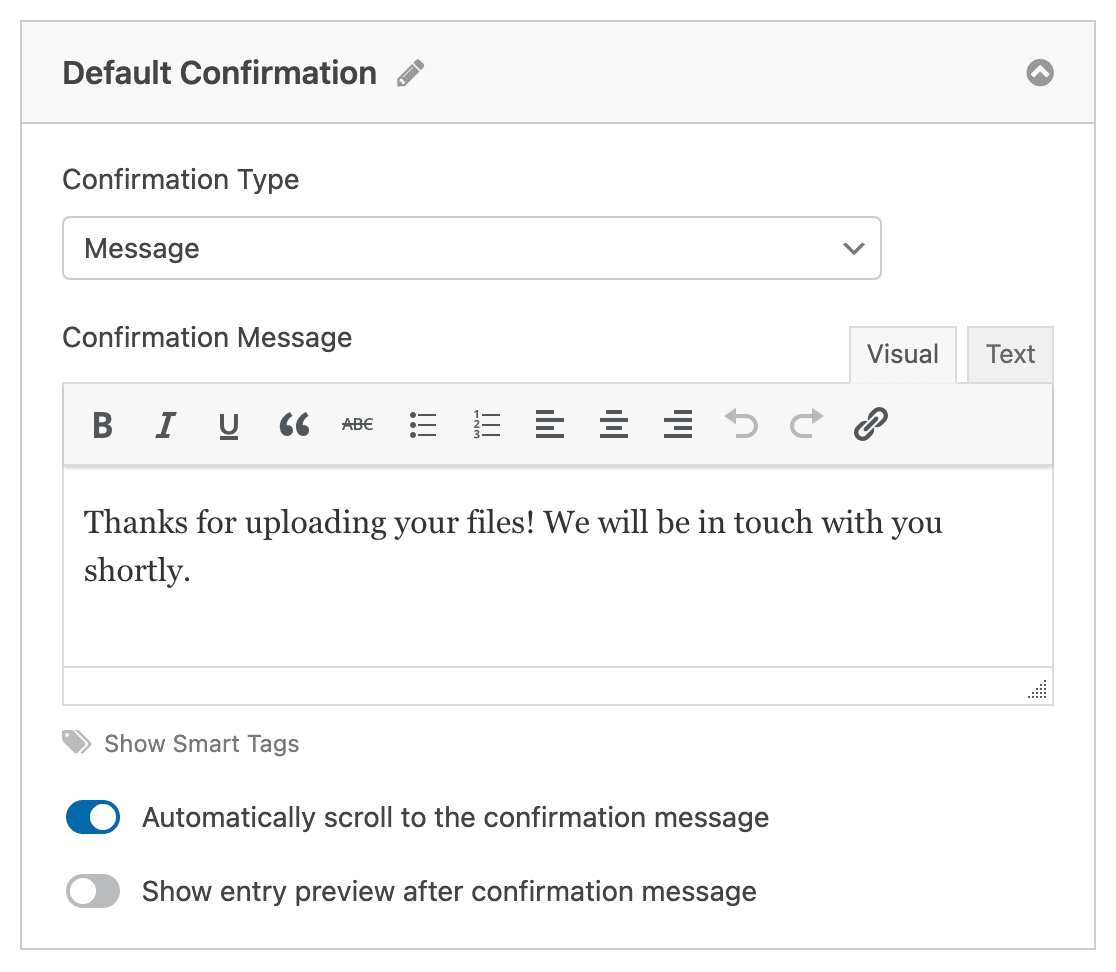
Then, customize the confirmation message to your liking and click Save when you’re done.
Now you’re ready to add your form to your website.
Step 6: Add Your Form to Your Website
After you’ve created your form, you need to add it to your WordPress website. WPForms lets you add your forms to multiple places on your website including your pages, blog posts, and sidebar widgets.
So let’s take a look at the most common placement option, page or post embedding.
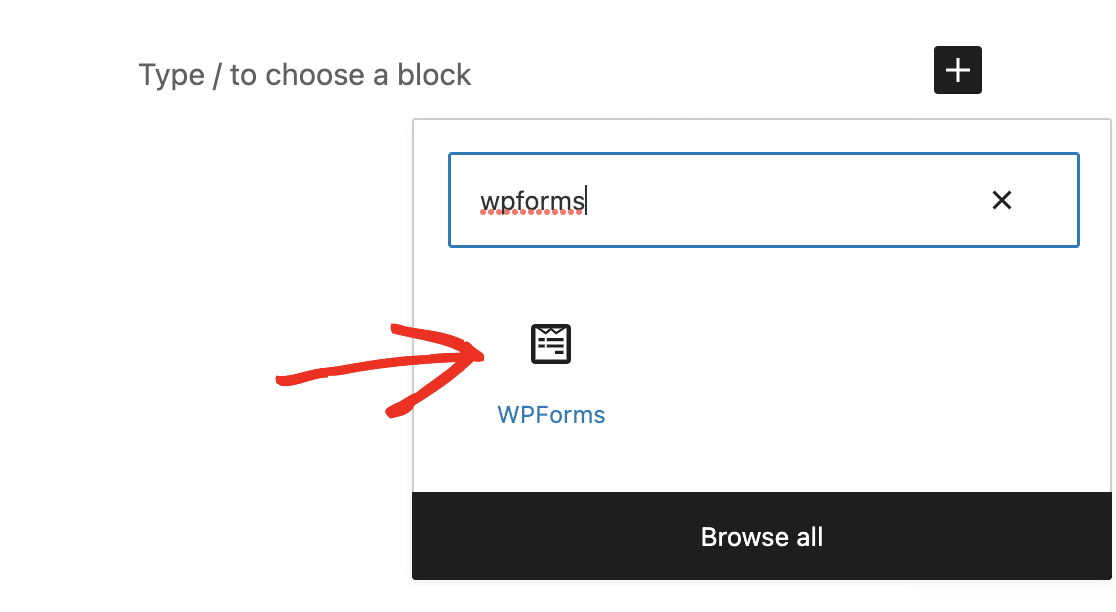
To begin, create a new page or post in WordPress, or open an existing one in the editor. After that, add a new block and select WPForms. You can search for it if you don’t see it right away.
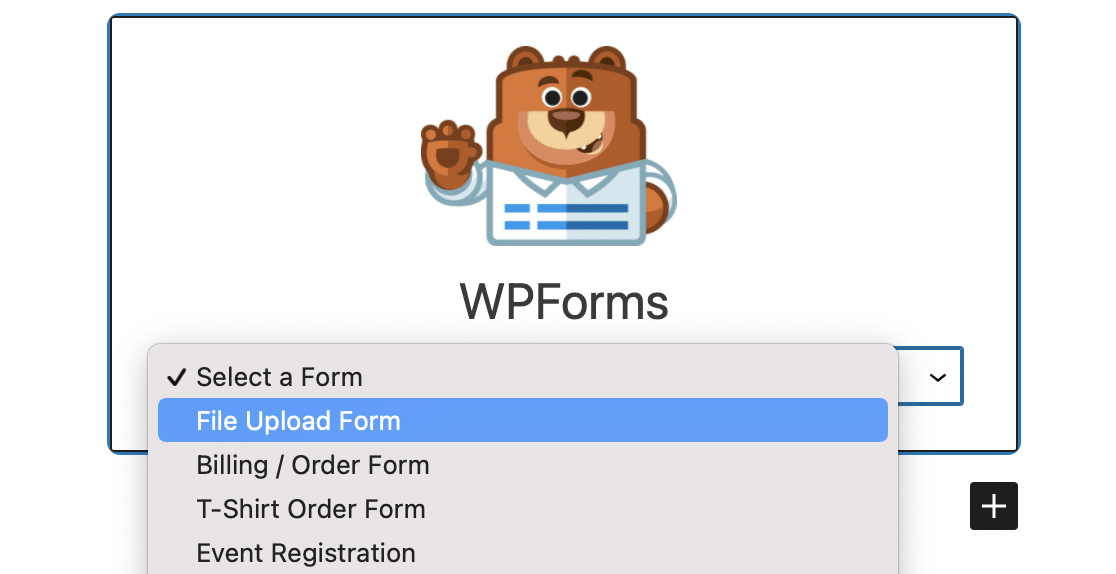
Now, the WPForms widget will appear inside of your block. Click on the WPForms dropdown and pick the file upload form you’ve already created that you want to insert into your page.
Next, click on the blue button in the top right that says either Publish or Update, so your form will appear on your website.

That’s it! Your form is now on your website.
Step 7: View The Files
WPForms stores each form submission as an entry. To view uploaded files, go to WPForms » Entries.
And from there, select the right form from the dropdown menu and click on View.
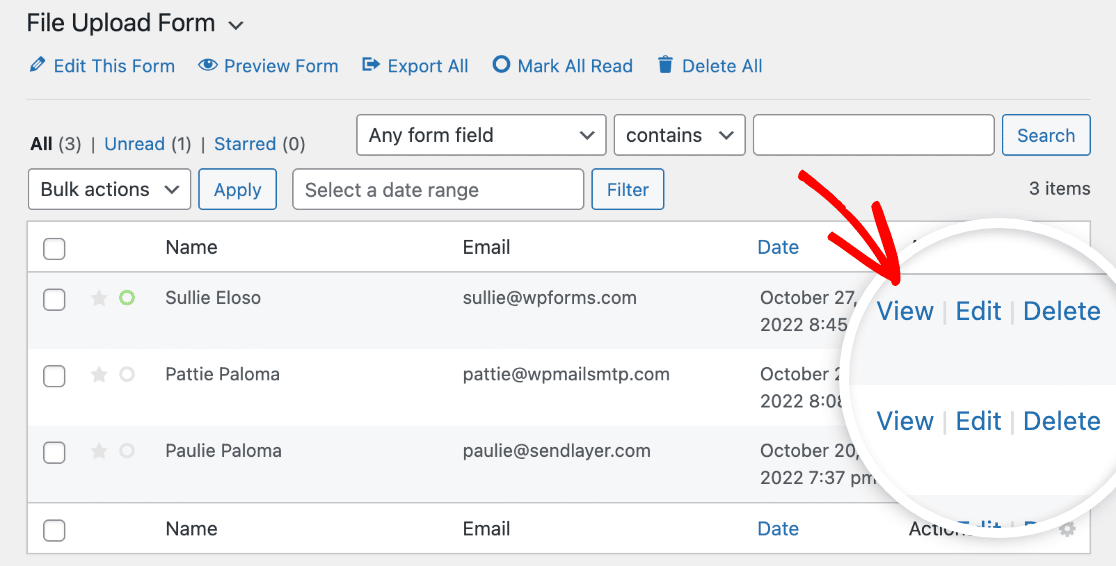
Here you can view or download the file uploads for this entry.
Better yet, you can use our Zapier addon to automatically save all file uploads to different web apps like:
- Google Drive
- Dropbox
- and many other cloud storage services
Create Your Multiple File Upload Form Now
FAQ — WordPress File Uploads
What kind of files can be uploaded to WordPress?
The WPForms plugin makes it easy for your site visitors to upload all kinds of file types to your contact forms. You can embed a File Upload field to upload:
- Documents (.doc, .xls, .ppt, and .pdf)
- Images (.png, .gif, and .jpg)
- Video (.mpg, .mov, and .wmv)
- Audio (.wav, .mp3, and .mp4)
You can use this same process to accept CSV file uploads in WordPress.
But for WordPress security reasons, some files can’t be uploaded. For example, you can upload images to WordPress, but you might find that some smartphone formats are blocked.
If you run into that problem, here’s how to allow additional file upload types to your forms. And here’s a more specific guide to allow Adobe Illustrator file uploads.
Next, Take Payment in Your WordPress Forms
There you have it! You now know how to create a WordPress form with multiple file uploads. You can also add a payment field and require payment with your file uploads.
And if you enjoyed this article, you might also want to look at some cool contact page design examples.
Ready to build your form? Get started today with the easiest WordPress form builder plugin. WPForms Pro includes lots of free templates and offers a 14-day money-back guarantee.
If this article helped you out, please follow us on Facebook and Twitter for more free WordPress tutorials and guides.




Really like this. I am re-designing a food site and want users to share their dishes. How easy is it for the user to upload images from mobile? Thank you
Hey Rick! It wouldn’t be difficult at all! Generally your users will be able to click on the file upload field, which would bring up the camera or files options (from which they make their selection), submit the form, and voila!
I hope this helps to clarify 🙂 If you have any further questions about this, please contact us if you have an active subscription. If you do not, don’t hesitate to drop us some questions in our support forums.