Want to find out why your customers are canceling with you? It’s so easy to create a cancellation survey form in WordPress that can help you find out what you need to focus on to improve your small business.
In this article, we’ll show you how to create a customer cancellation survey in WordPress with just a few clicks.
Edit Your Cancellation Survey Template Now
Why Create a Customer Cancellation Survey?
Wondering how to ask a customer why they canceled?
A perfect way to do this is with a survey form, which can help you understand your customers. With a Customer Cancellation Survey form, you can ask all the right questions to your former clients in an easy way. You can tell them how sorry you are to see them go and identify the reasons they left you.
The insights from this survey will help you create a strategy to retain your current customers.
How to Create a Customer Cancellation Survey in WordPress
Step 1: Create a Customer Cancellation Survey Form in WordPress
So the first thing you’ll need to do is install and activate the WPForms plugin. For more details, see this step-by-step guide on how to install a plugin in WordPress.
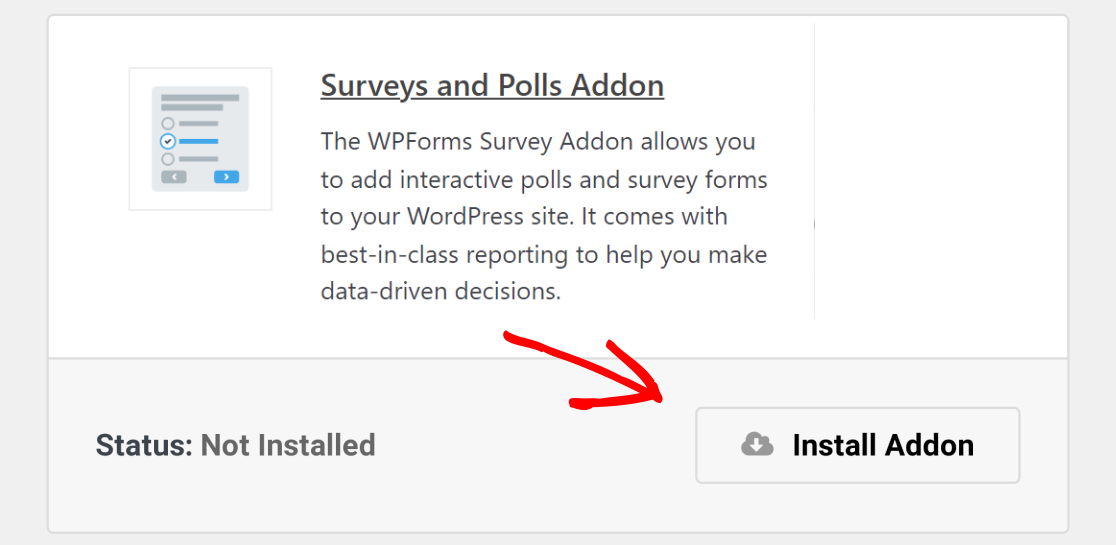
You’ll also need to go to WPForms » Addons and install and activate the Surveys and Polls addon.
Next, you’ll need to create a new form. To do this, go to WPForms » Add New, name your form, and choose the Cancellation Survey Form template.
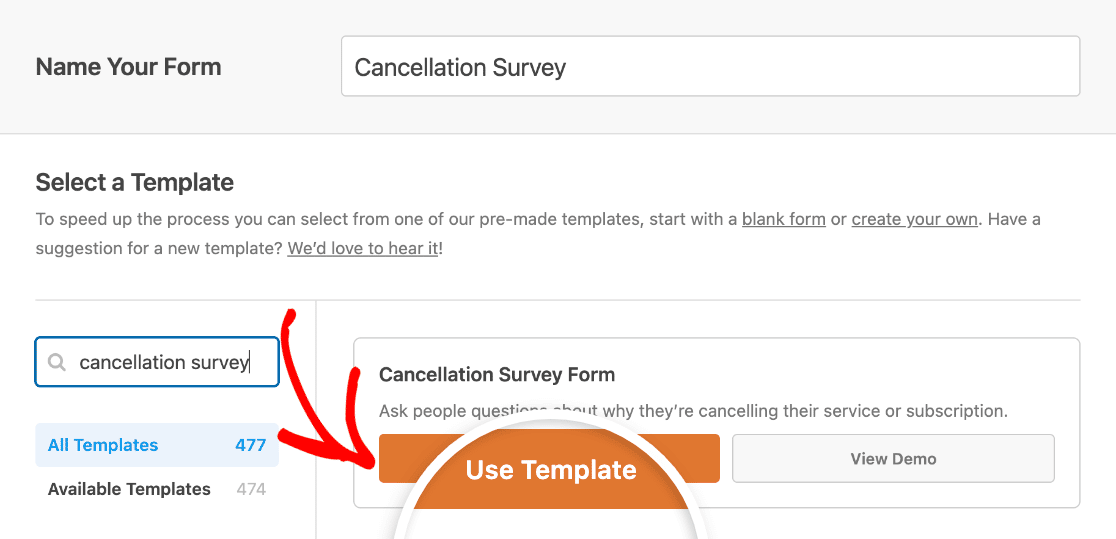
WPForms will load the form template for you in the builder.
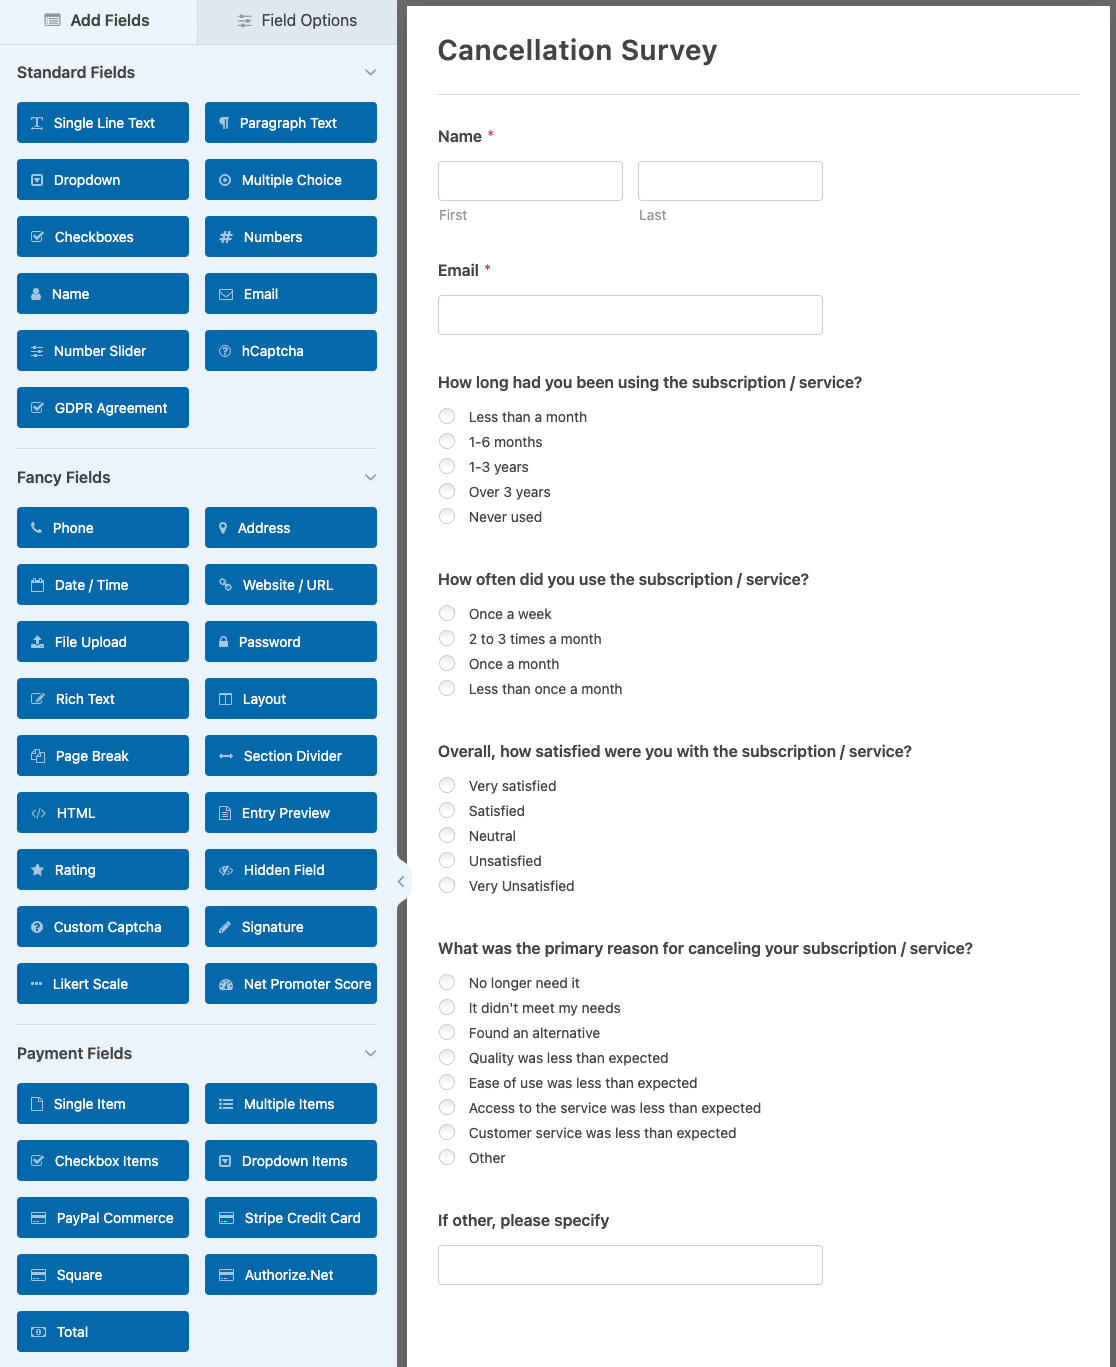
This form comes with pre-written questions to ask those who are canceling services with you. This includes multiple choice questions as well as open-ended paragraph text form fields where people can express their opinions and give you insight into how you might do things differently in the future.
You can add additional fields to your form by dragging them from the left-hand panel to the right-hand preview area.
Then, click on the field to open its options and make any changes, like editing the label or description. You can also click on a form field and drag it up or down to rearrange the order of your cancellation survey form.
You might want to read the top complaints about online surveys while you’re building this cancellation survey form, too.
Customize the Survey Form Fields
You can easily add Multiple Choice fields to your form to ask people more questions about why they’re canceling with you.
That said, let’s take a look at some of the other form fields you might want to add to your cancellation survey form. You can use different fields for different types of surveys. That way, you can get the most information from customers as possible:
- Net Promoter Score. The Net Promoter Score (NPS) form field is great for finding out whether past customers would recommend your company to a family or friend. After all, just because someone is canceling with you doesn’t mean they aren’t satisfied. Adding this field to your form lets you generate a Net Promoter Score to efficiently measure customer satisfaction with your business.
- Likert Scale. The Likert Scale form field is used to find out how people feel about something. For instance, in your cancellation survey form you can ask people how to improve your products, services, or customer service and see whether any of those caused them to cancel. Likert Scale fields are sometimes called matrix questions. Look here for some helpful Likert Scale questions to add to your cancellation survey form.
- Rating. Another great way to see how people feel about your business is to add a rating form field to your survey form. This way, no matter how your past customer feels, you’ll know whether you’re doing a good job or not. Plus, you can enable conditional logic on your rating field so that if someone rates your business low, you can have another field appear that asks them to explain why.
Luckily, customizing your cancellation survey form is easy to do when you use WPForms.
If you personalize your forms with the WPForms survey plugin, you’ll find that getting information from customers, angry or not, also becomes a lot easier. That way you can make the necessary changes in the future to stop people from canceling with you.
If you’d like more help writing your questions, check out these questionnaire examples and templates.
Step 2: Configure Your Cancellation Forms Settings
There are a lot of settings to configure once you’ve customized your form to look the way you want it to.
General Settings
First, head to Settings » General.

Here you can change things like your form’s name, description, and submit button copy.
You can also add form tags to organize your online forms and enable additional spam prevention features to keep your website secure from unwanted form submissions.
Spam Protection and Security
In Settings » Spam Protection and Security, you’ll find several options to protect your form from suspicious submissions.
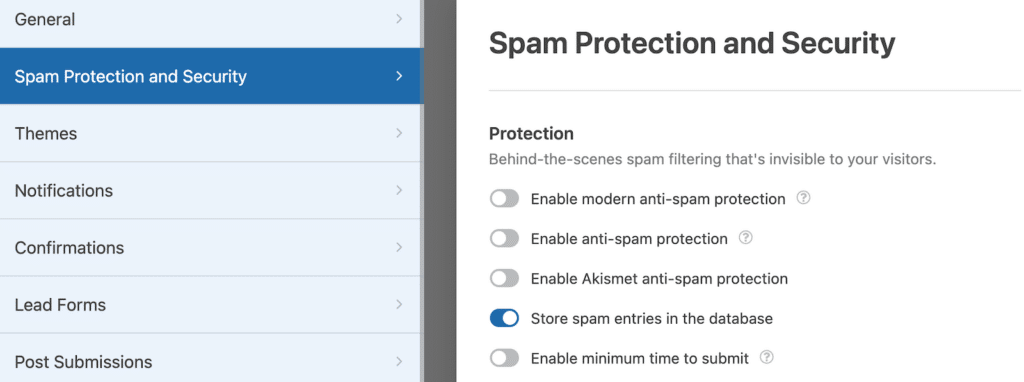
Here you can enable the WPForms modern anti-spam protection, connect your form to the Akismet anti-spam plugin, and set up filters to prevent spam entries.
You’ll also see all the CAPTCHA options available in WPForms. For more details, check out our complete guide to contact form spam.
Notifications
Notifications are a great way to send an email whenever an order is submitted on your website.
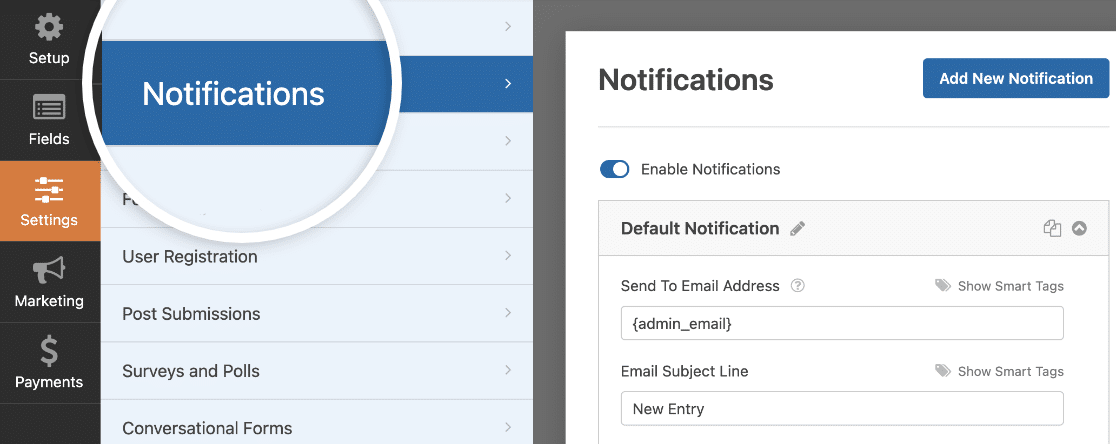
In fact, unless you disable this feature, whenever someone submits a customer cancellation survey form on your site, you’ll get a notification about it.
For help with this step, check out our documentation on how to set up form notifications in WordPress.
If you need to send more than one notification, for example, to yourself, the customer service team, and your previous customer, check out our step-by-step tutorial on how to send multiple form notifications in WordPress.
Confirmations
Form confirmations are messages that display to site visitors once they submit a form on your website.
WPForms has 3 confirmation types:
- Message: A simple message that displays once someone submits a form on your website thanking them and letting them know what the next steps are.
- Show Page: Redirect users to another page on your website, such as a thank you page.
- Go to URL (Redirect): Send site visitors to a different website.
If you want to display different confirmations to site visitors based on their survey answers, be sure to read up on how to create conditional form confirmations.
Step 3: Enable Survey Reporting
In order to get the results of your survey form the moment a site visitors fill it out, you’ll need to enable survey reporting.
To do this, go to Settings » Surveys and Polls. Then, click on the Enable Survey Reporting toggle. This will enable survey reporting for this form.
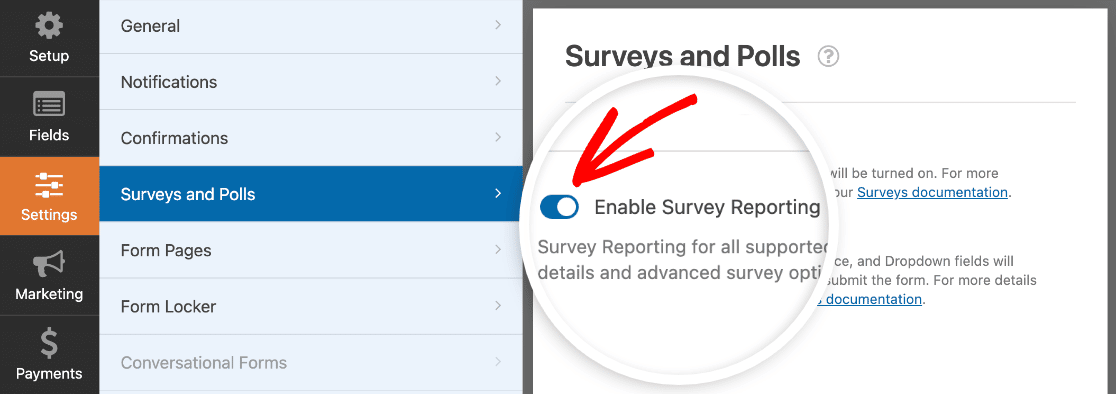
In other words, WPForms will collect survey results for any of the following fields:
- Single Line Text
- Paragraph Text
- Dropdown
- Checkboxes
- Multiple Choice
- Rating
- Likert Scale
- Net Promoter Score
If you only want to collect survey results for a specific field, you can instead turn on reporting just for that field. First, turn off form-wide survey reporting by clicking on the Enable Survey Reporting toggle in the Surveys and Polls settings.
In the preview area of the Fields section of the form builder, click on the field you want to collect data from. Then click on the Advanced tab in the Field Options panel. Here you can toggle on the Enable Survey Reporting setting for this field.
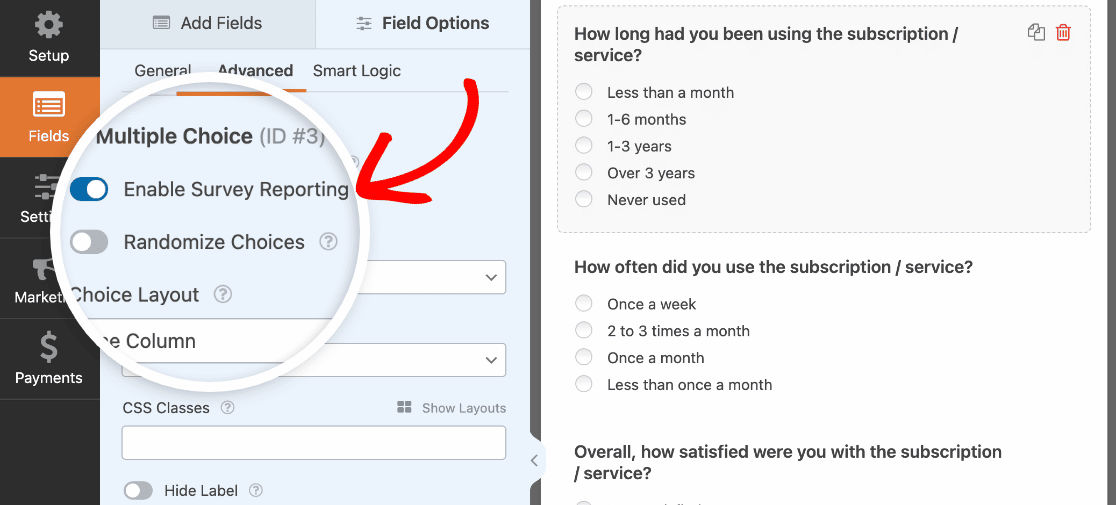
Now, only survey results on that particular form field will be collected. Do this for each form field you want to collect results for on your customer cancellation survey.
Step 4: Add Your Customer Cancellation Form to Your Website
Now that you’ve built your form, you’ll need to add it to your WordPress website to start collecting feedback.
WPForms allows you to add your forms to lots of locations on your website, including your blog posts, pages, and even sidebar widgets.
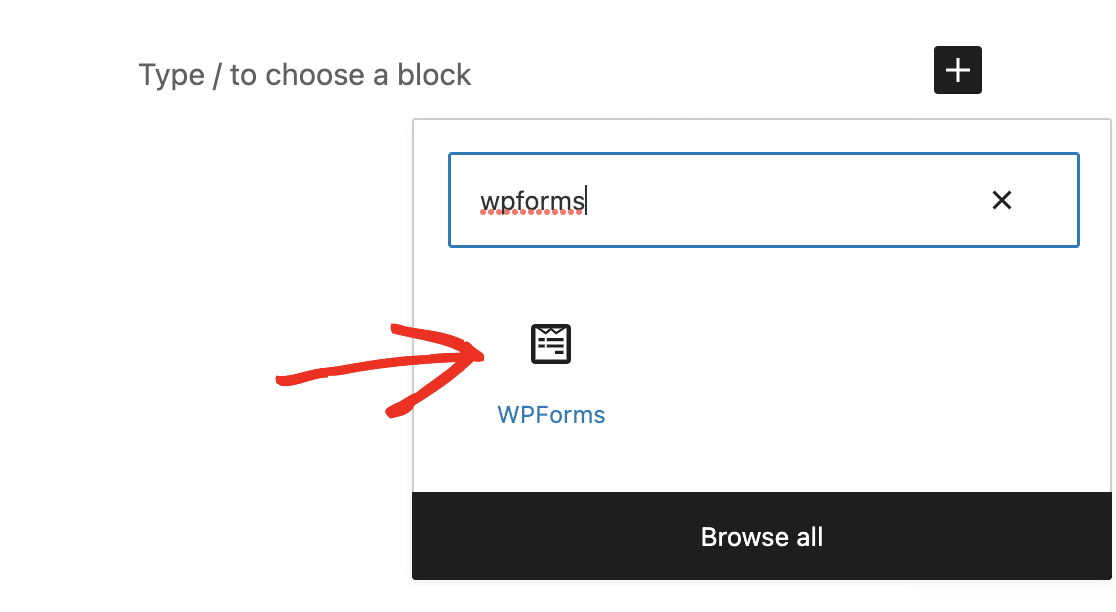
To begin, create a new page or post in WordPress, or open an existing one in the editor. After that, add a new block and select WPForms. You can search for it if you don’t see it right away.
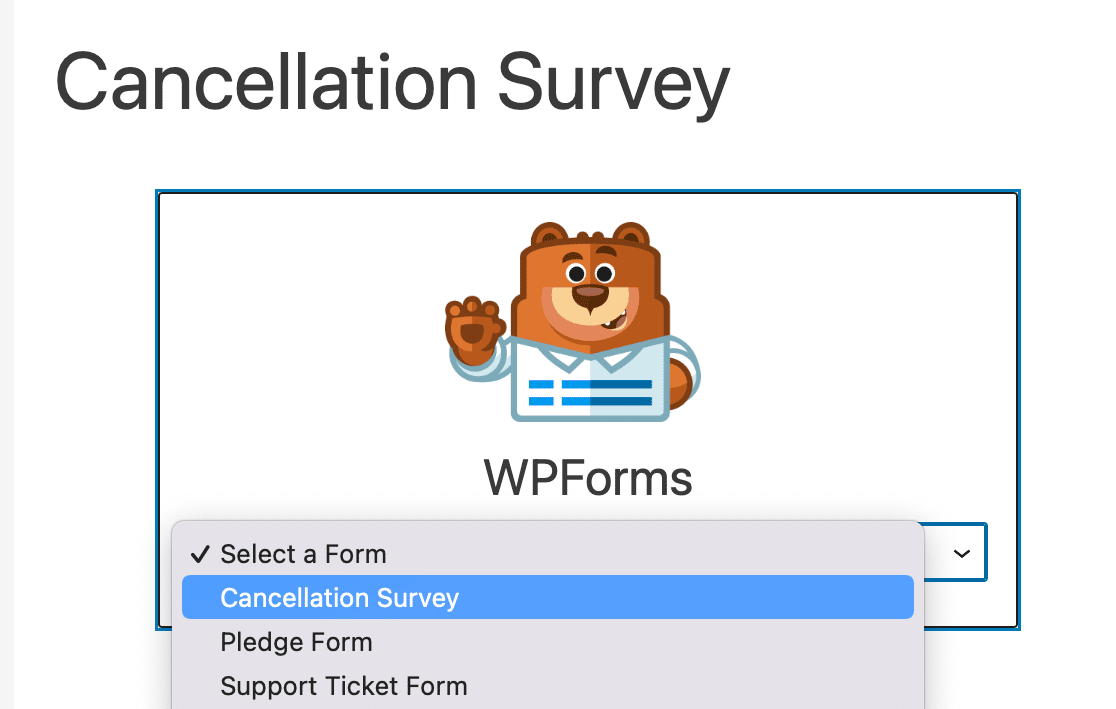
The WPForms widget will appear on your page. Click on the WPForms dropdown and select your Cancellation Survey form.
The form will now show up, and you can check to make sure you like the way it looks.
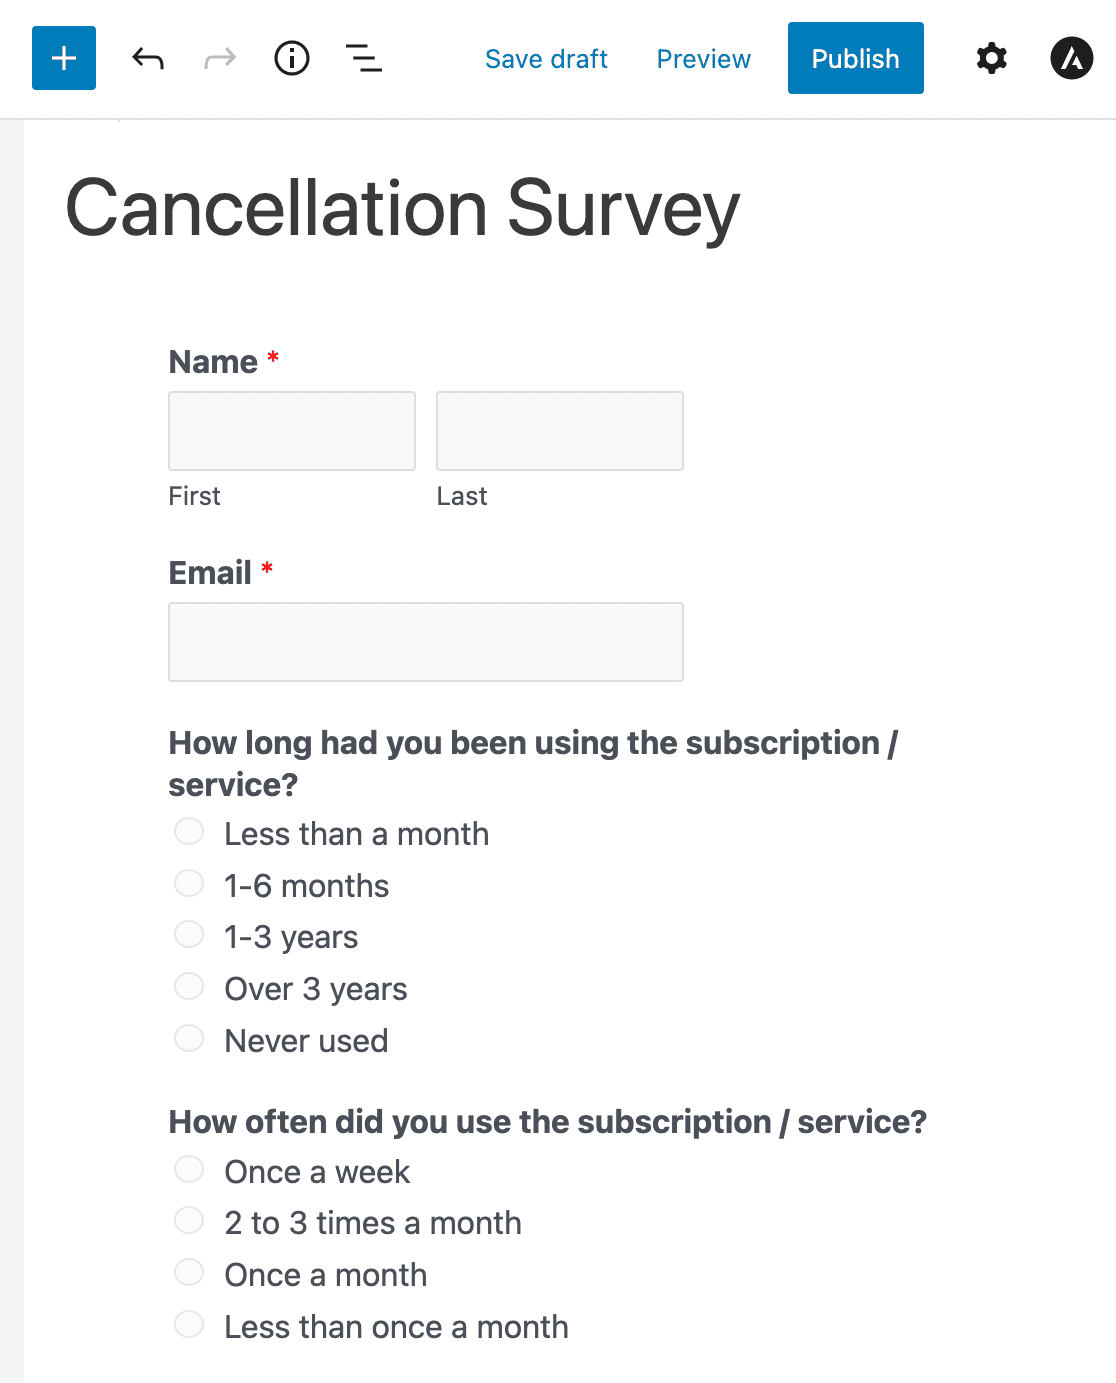
Then publish or update your page and your customer cancellation survey form will appear on your website.
Step 5: Generate Survey Reports
Once people start filling out your cancellation survey form, you can begin to analyze the data that’s collected.
So to generate a survey report, go to WPForms » All Forms and hover over your survey form to display the options. Then, click on Survey Results.

You’ll see survey results for each form field that has survey reporting enabled on it.
For instance, here’s what the results for the first question on your survey form might look like:
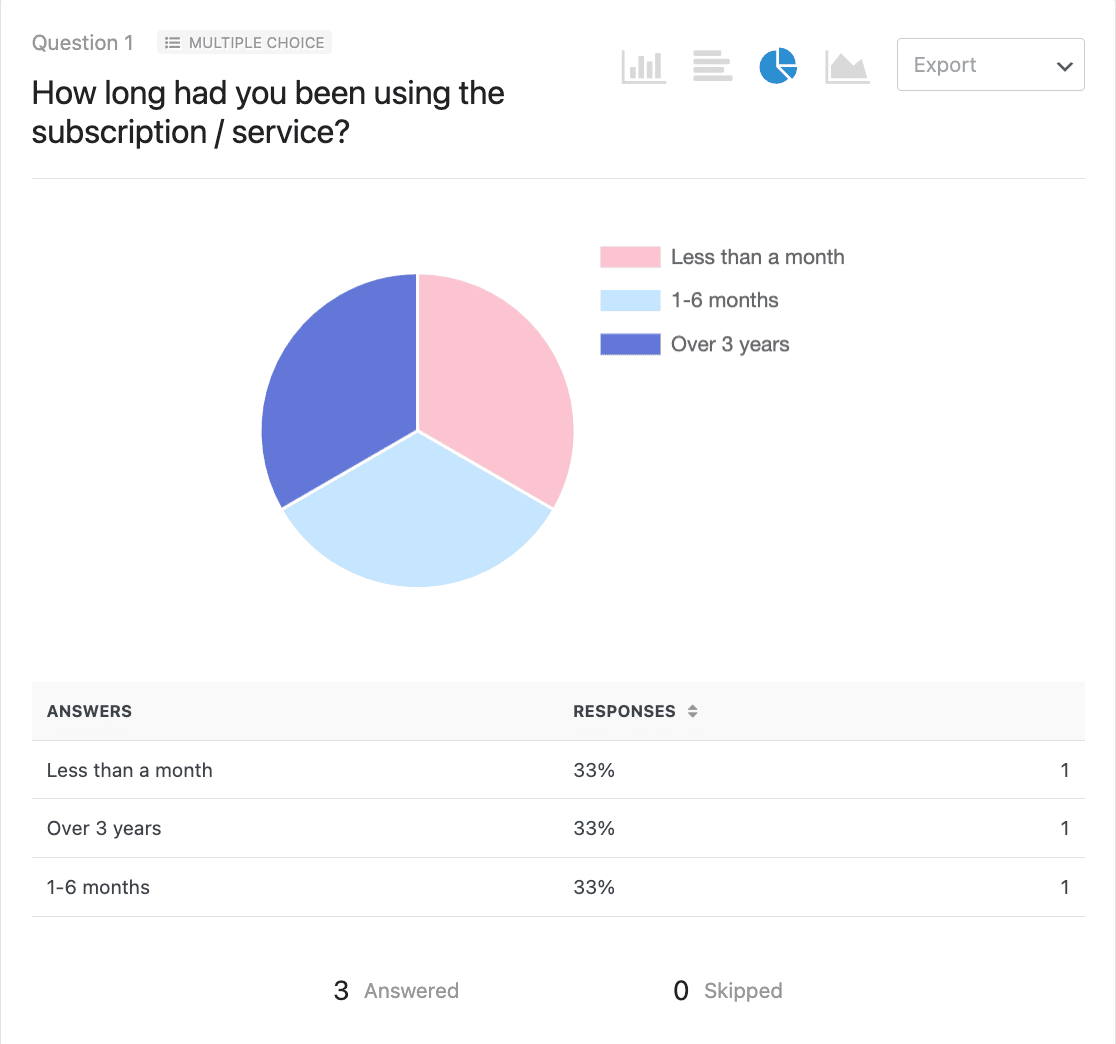
The WPForms Surveys and Polls addon lets you see survey results in several different ways, using data visualization.
If you need some tips on writing about your findings, check out this guide to writing a summary of survey results.
Sample Customer Exit Survey Questions
Since it’s basically a client exit survey template, the default survey questions in the cancellation survey template include:
- How long have you been using the subscription/service?
- How often did you use the subscription/service?
- Overall, how satisfied were you with the subscription/service?
- What was the primary reason for canceling your subscription/service?
- Would you use the product/service in the future?
- Would you recommend our product/service to colleagues or contacts within your industry?
- What could we do to improve our subscription/service?
These are great questions to ask if you’re wondering what to say when a customer wants to cancel or has already canceled. And to get the most responses, we recommend keeping your survey as short as possible. In other words, choose your questions wisely.
Here are a few other revealing cancellation questions you might consider asking:
- Did we meet your expectations?
- Is there anything we could have done differently?
- What was the greatest benefit you got from the product/service?
- Has the support team treated you with the attention and courteousness you expected?
- Was the billing process clear?
Asking these hard-hitting questions will get you the information needed to make data-driven decisions to grow your business into a success and reduce customer churn!
Edit Your Cancellation Survey Template Now
Next, Create a Request a Call Back Form
And there you have it! You now know how to easily create a customer cancellation survey form in WordPress. If you want to step in before someone cancels, try adding a request a call back form to make it easy for your customers to get help.
And, you can also check out our list of the best VOIP providers for small business to accept calls from customers right away.
If you enjoyed this article, you might also want to read up on how to increase survey response rates so you can continue to build your business.
Ready to build your form? Get started today with the easiest WordPress form builder plugin. WPForms Pro includes lots of free templates and offers a 14-day money-back guarantee.
If this article helped you out, please follow us on Facebook and Twitter for more free WordPress tutorials and guides.

