Want to build a request a call back form on your WordPress website?
Request a call back forms make it super easy for potential customers to let you know they’d like you to give them a phone call.
So in this tutorial, we’ve put together easy step-by-step instructions to show you exactly how to make a request a call back form in WordPress so you can start using one right away.
Create Your WordPress Form Now
Let’s start by installing WPForms on your site.
1. Install and Activate WPForms
To start, install and activate the WPForms plugin on your WordPress website.
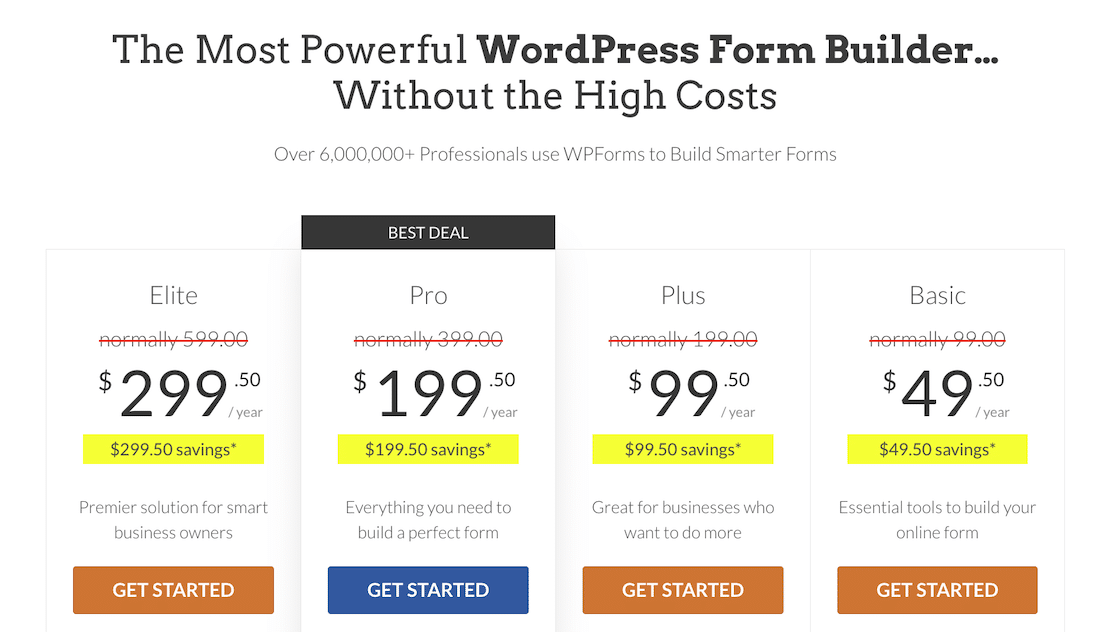
We recommend that you use WPForms Pro for this tutorial. It lets you export form entries to CRMs, which is handy when you’re collecting sales leads.
If you need a hand getting set up, check out this beginner’s guide to installing a plugin in WordPress.
Next, let’s open a form and design your request a call back form template.
2. Design Your Request a Call Back Form
Creating forms is so easy with WPForms. And most of the work of designing the form is already done for you!
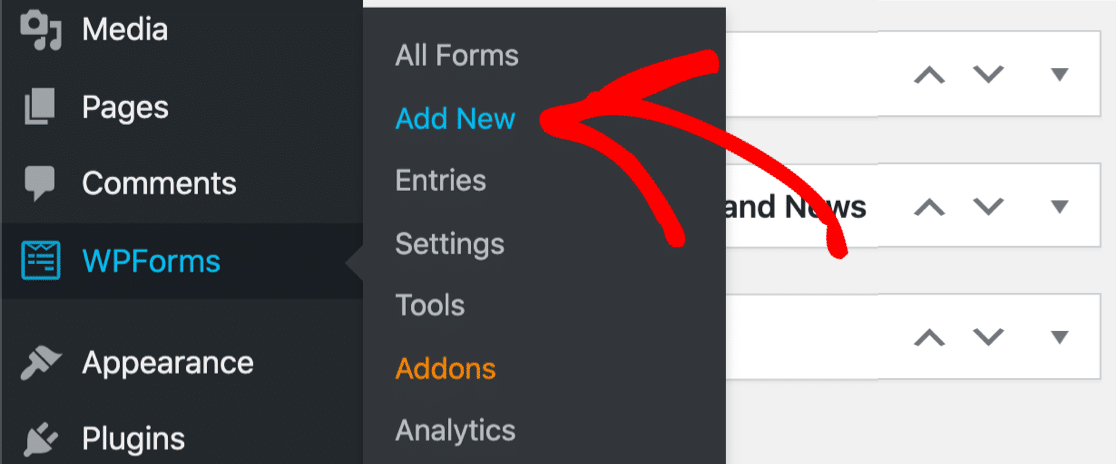
From your WordPress dashboard, go to the left-hand panel and click on WPForms » Add New.
The form builder will open up in a fullscreen window. Go ahead and name your form, then select a template. There are 2 options that you can use — the Call Back Form and the Request a Call Back Form.
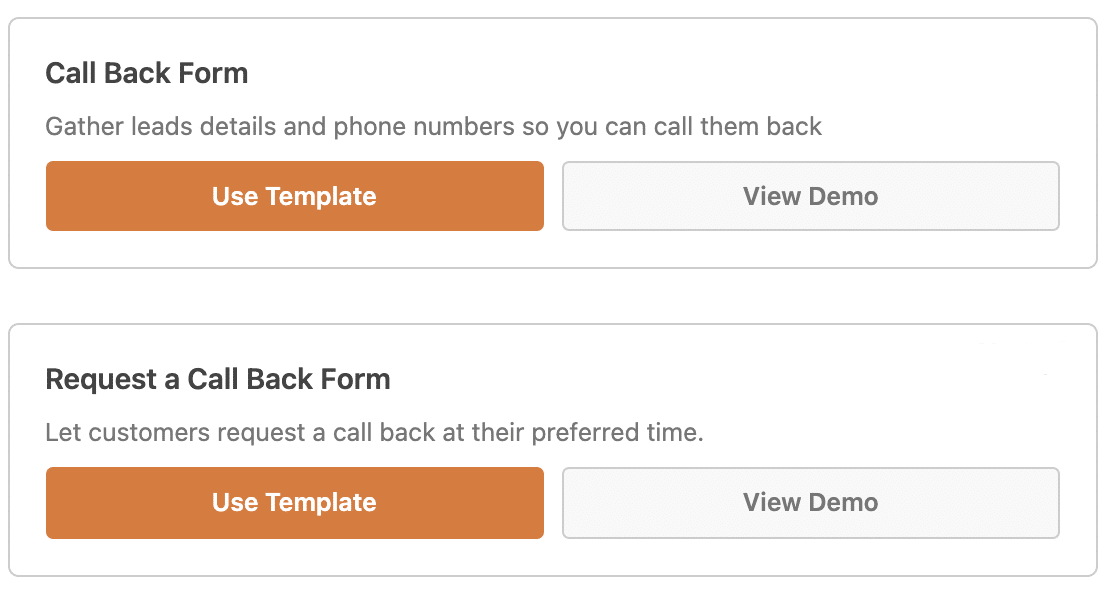
These are the fields each of them include:
| Call Back Form | Request a Call Back Form |
|---|---|
| Name (First and Last) | Name (First and Last) |
| Phone | Phone |
| Paragraph Text (Comment or Message) | Multiple Choice (When would you like us to call back?) |
As you can see, these templates are very similar. But the Call Back Form lets users explain what they want to talk to you about, and the Request a Call Back Form tells you the best time to get in touch with them.
Luckily, you can edit any WPForms template in the form builder. So we’re going to use the Request a Call Back Form template and make some changes to it.
After the template loads in the builder, we’ll drag a Paragraph Text field from the left-hand panel into the right-hand panel. Then we’ll click on it to open its options and change the label to “Comment or Message.”
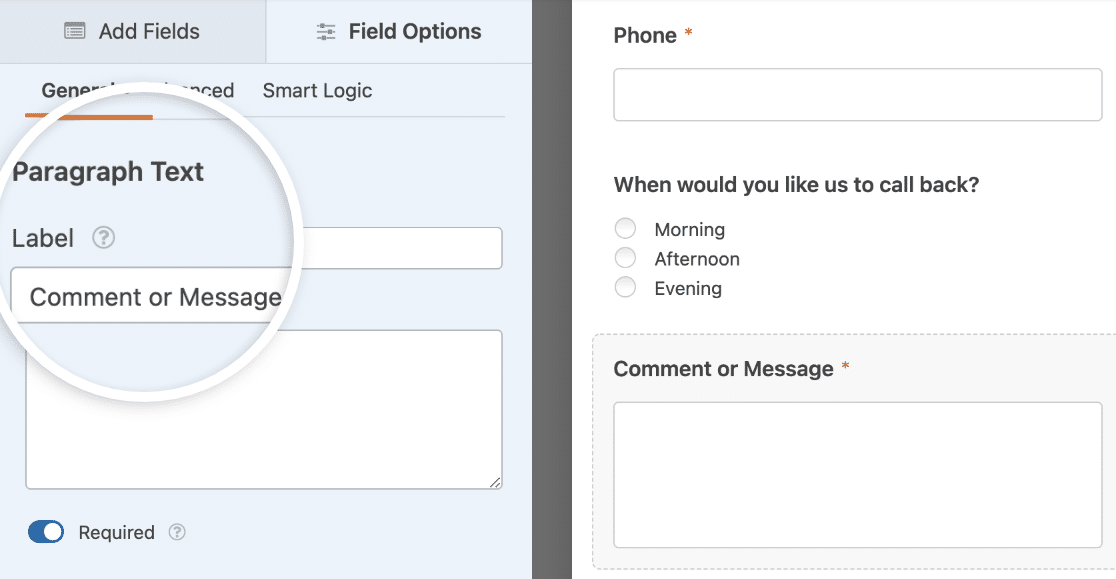
Now users can tell us what they want to talk to us about.
We’re also going to replace the Multiple Choice field with a Date / Time field so users can give us an even more specific call back time. To delete a field, just click on the trash icon next to it.

Then you can drag your new field into the preview area wherever you want it.
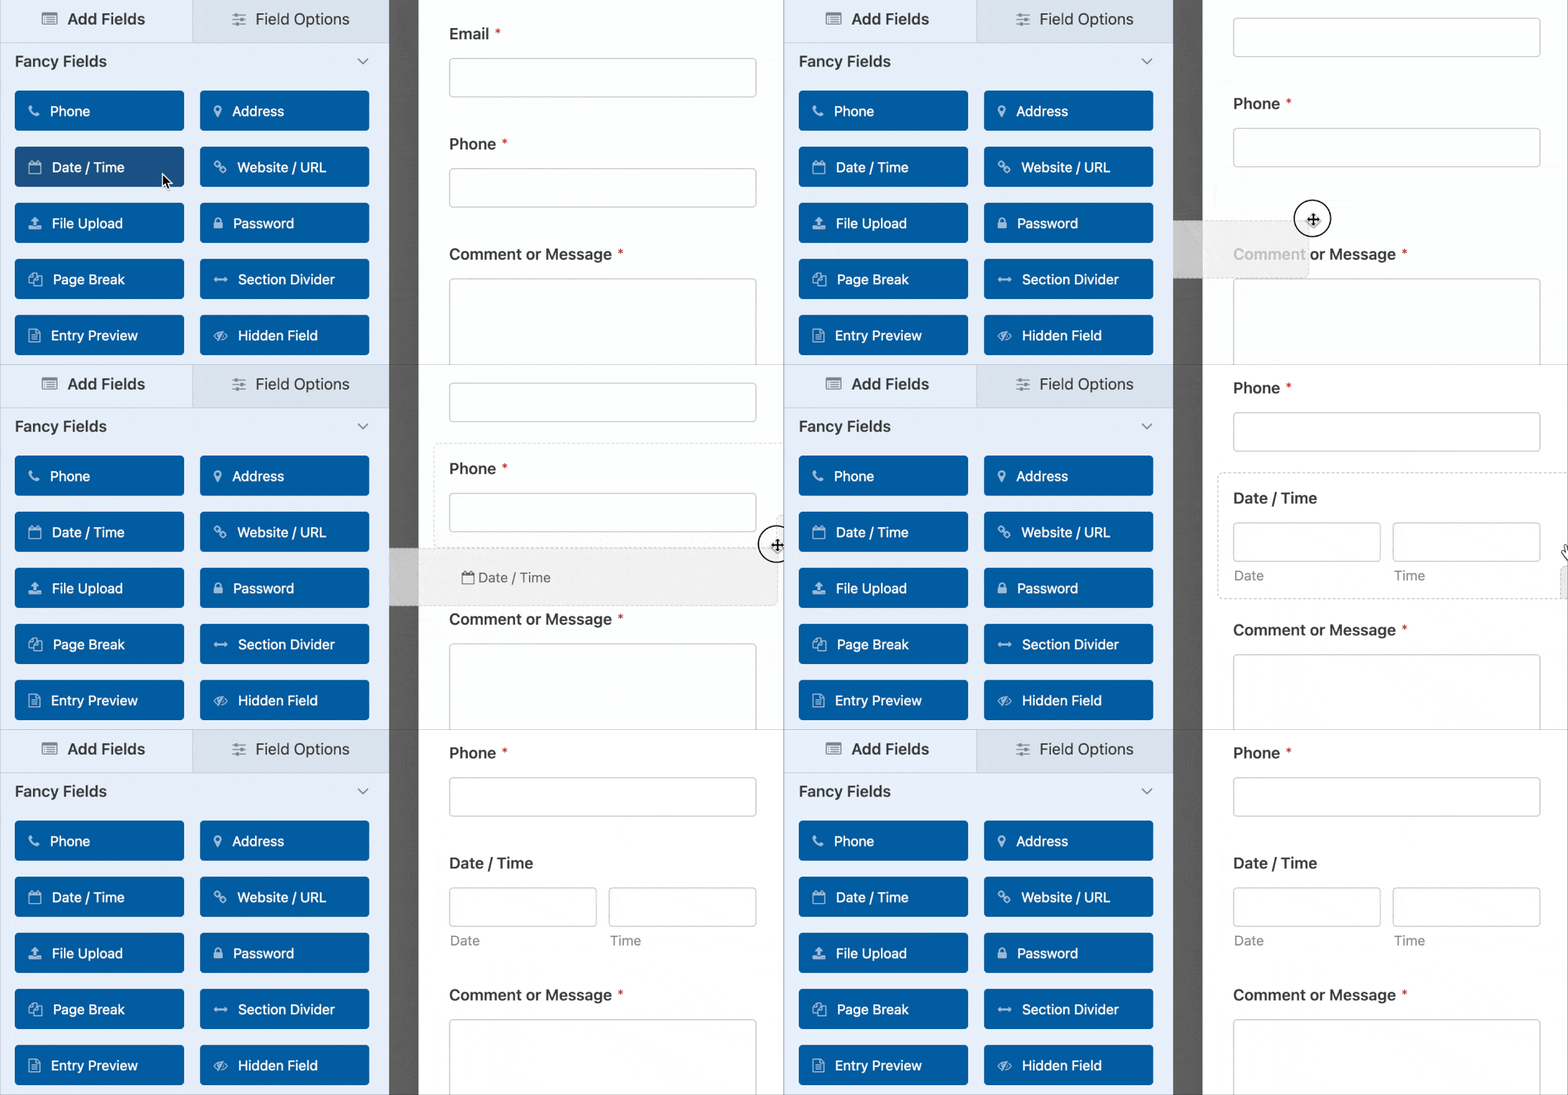
The WPForms Date / Time field is awesome because it lets you restrict the appointments that are available. To learn more, check out this guide to creating a WordPress form with a datepicker.
When your form looks the way you want it to, click Save.
3. Configure Your Form Settings
Let’s go ahead and configure your request a call back form’s settings next.
To start, go to Settings » General.
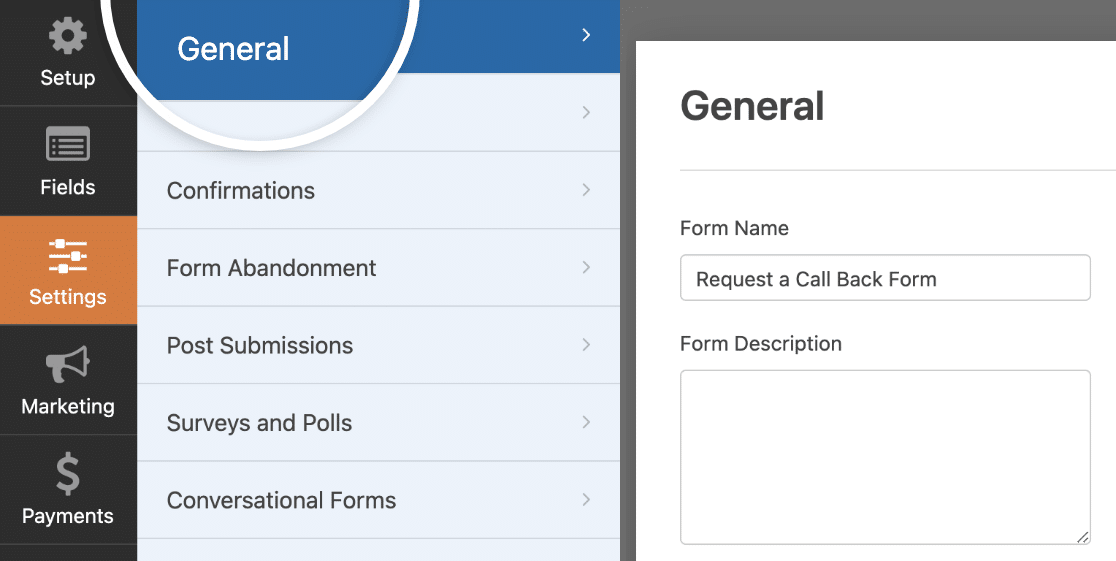
Here you can configure:
- Form Name: Rename your form here if you want to.
- Form Description: Give your form a description.
- Submit Button Text: Customize the copy on the submit button.
- Submit Button Processing Text: This is the text users will see while their form is submitting.
- Spam Prevention: Stop contact form spam with the anti-spam feature, hCaptcha, or Google reCAPTCHA.
There are also advanced options such as:
- Form CSS Class: Add your own custom CSS classes to your form.
- Submit Button CSS Class: Add custom CSS classes to your form’s submit button.
- Enable Prefill by URL: Turning on this setting will let you auto-fill fields with user information. See our tutorial on dynamic fields population for more details.
- Enable AJAX form submission: Let users submit your form without reloading the page. This setting is turned on by default.
- Disable storing entry information in WordPress: Keep WPForms from saving entry data on your site. This can be helpful for meeting GDPR requirements.
When you’re done, click Save.
4. Set Up Form Notification Emails
Now let’s set up the notification emails that will be sent when someone fills out your request a call back form. This is really helpful because you get to choose who they go to!
Plus, you can set this up to receive an email or send an email to a support team if you want people to be able to request a call back immediately.
To start, click Settings on the left-hand side of the form builder. Then click Notifications to open up the email settings.
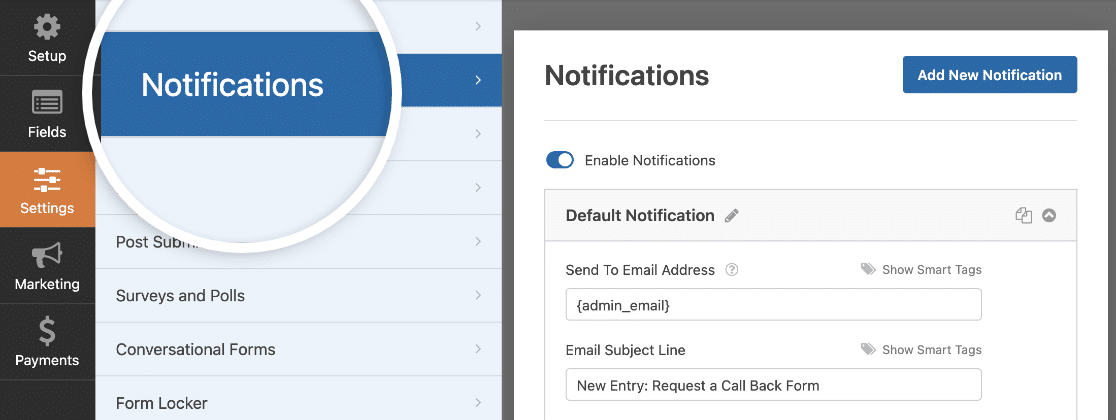
By default, WPForms sends notifications to the admin email in WordPress.
If you’d like to type in a different email address for your notification, it’s really simple to change it. Just delete the {admin_email} Smart Tag and type in the email address you want to use instead.

Next, let’s add another notification. We’re going to send the lead an email once they request a call back so they know their request was received.
So to do that, click the blue Add New Notification button.
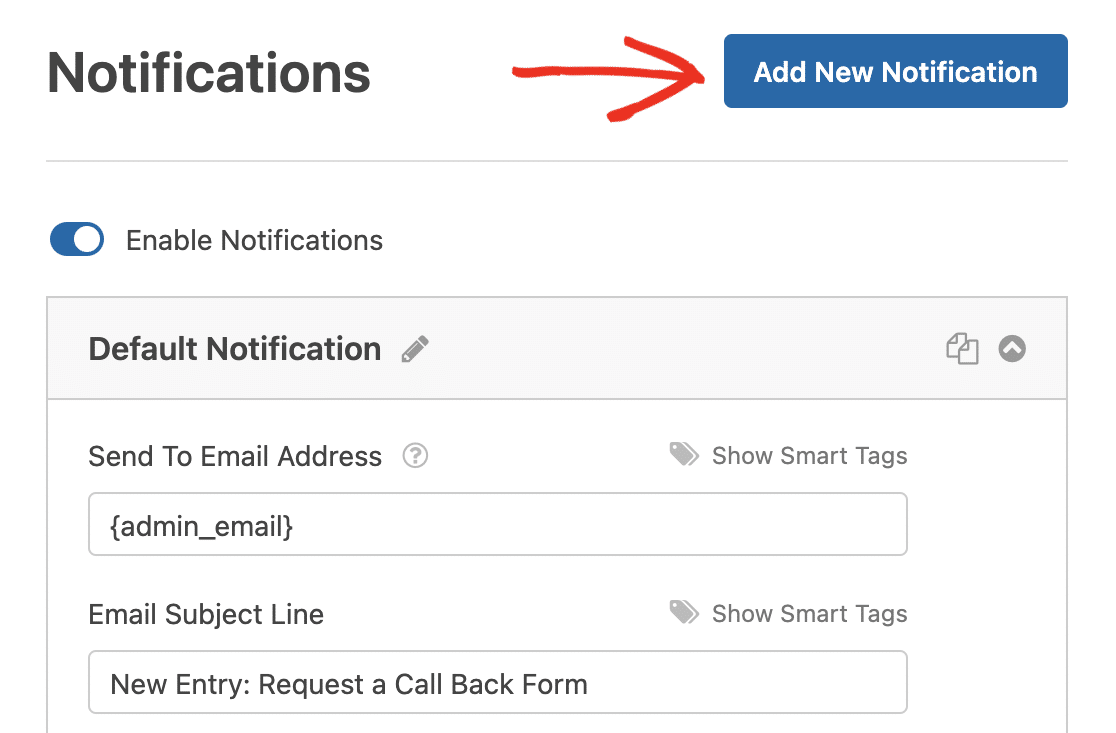
Let’s give the new notification its own name so we can easily find it later.
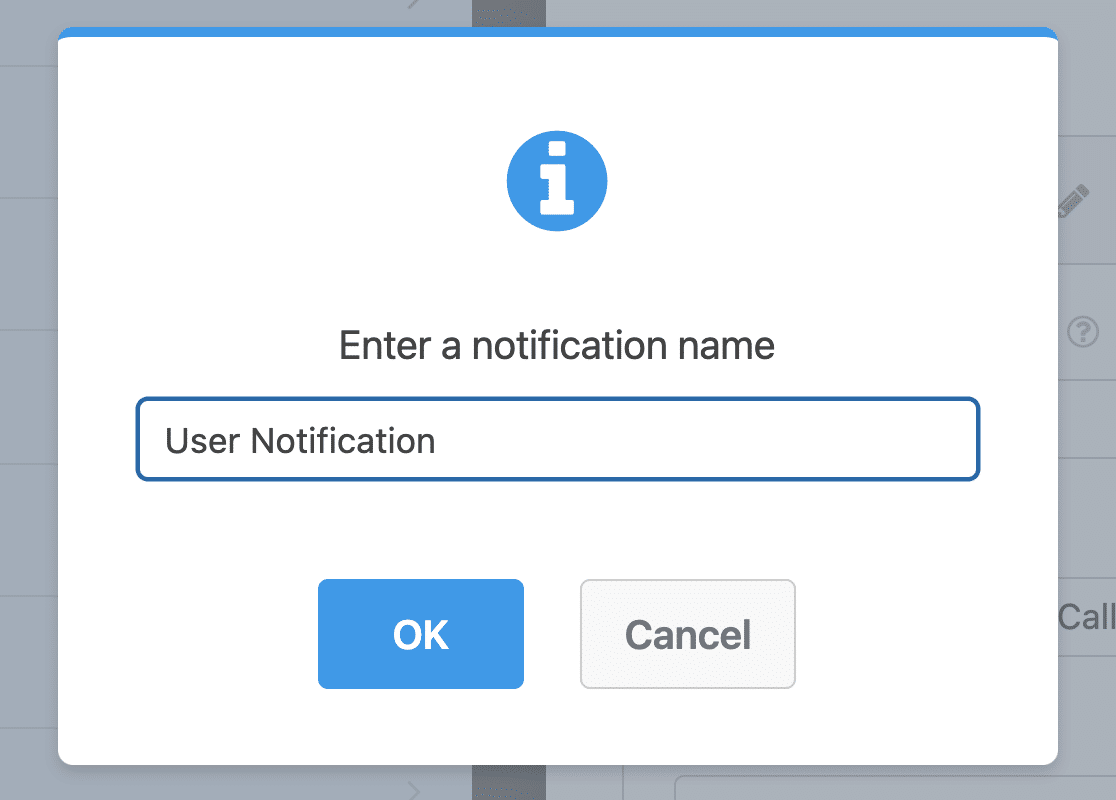
So now you’ll see 2 notifications in the right-hand panel if you scroll down. Let’s edit the one you just created.
In the Send To Email Address field, we’re going to use the Email Smart Tag. That way, WPForms will automatically send this notification to the lead’s email address.
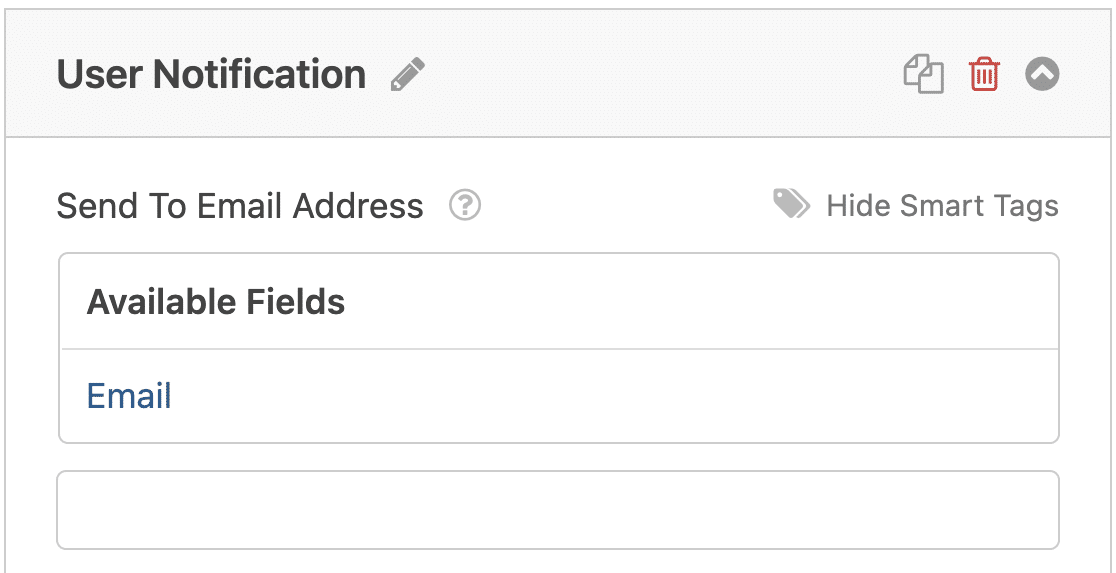
You can also customize the text in the subject and email body if you want to.
OK, awesome. Everything’s set up. Let’s click Save. You’re now ready to publish your call back form on your website.
5. Publish Your Form
Now that your request a call back form is built, let’s publish it to the web so leads can access it.
Start by clicking the Embed button at the top of the form builder.

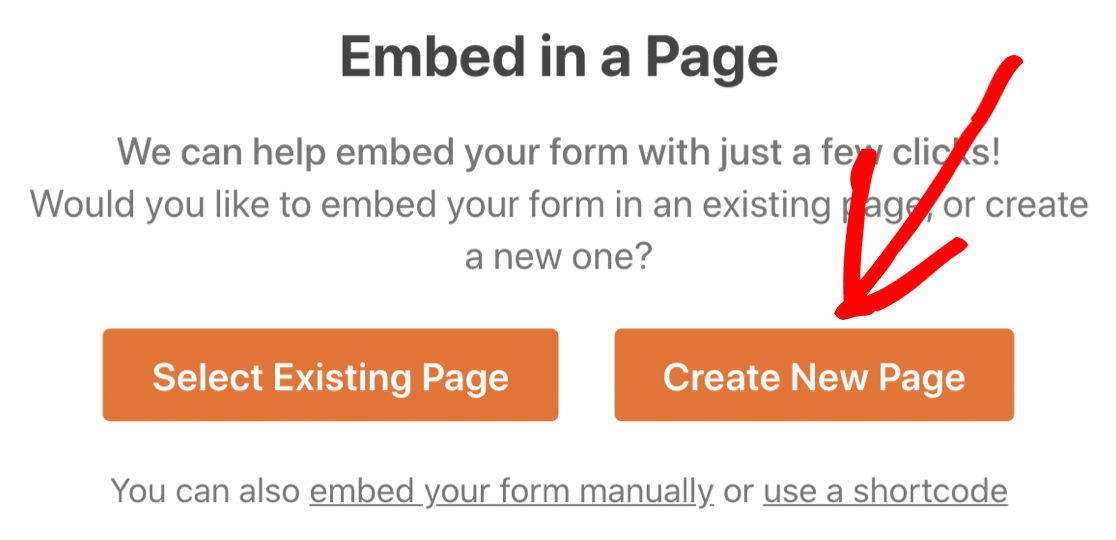
And then when the Embed in a Page notification pops up, go ahead and click Create New Page.
Next, WPForms will ask you to name your page. Type the title for the page into the box and click Let’s Go!
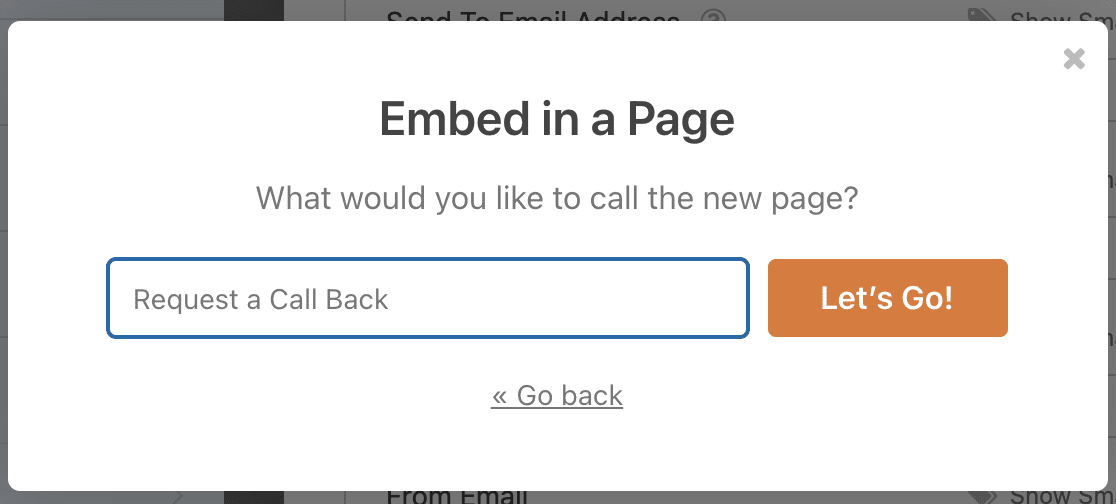
WPForms will open up a brand new page for your form.
Next, go ahead and click Publish at the top to publish the form on your site.
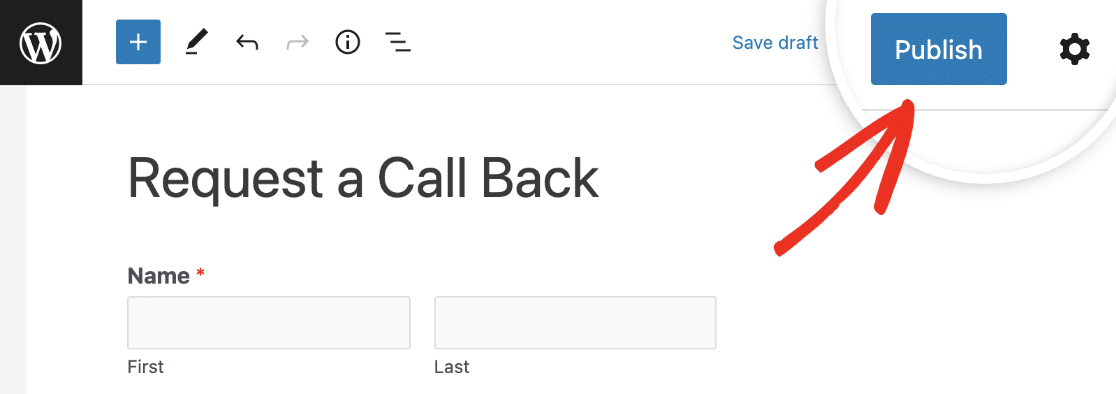
Fantastic work. So now you can share the link to the page with your form and start getting more leads!
If you’re curious, here’s what our finished online request a call back form looks like.
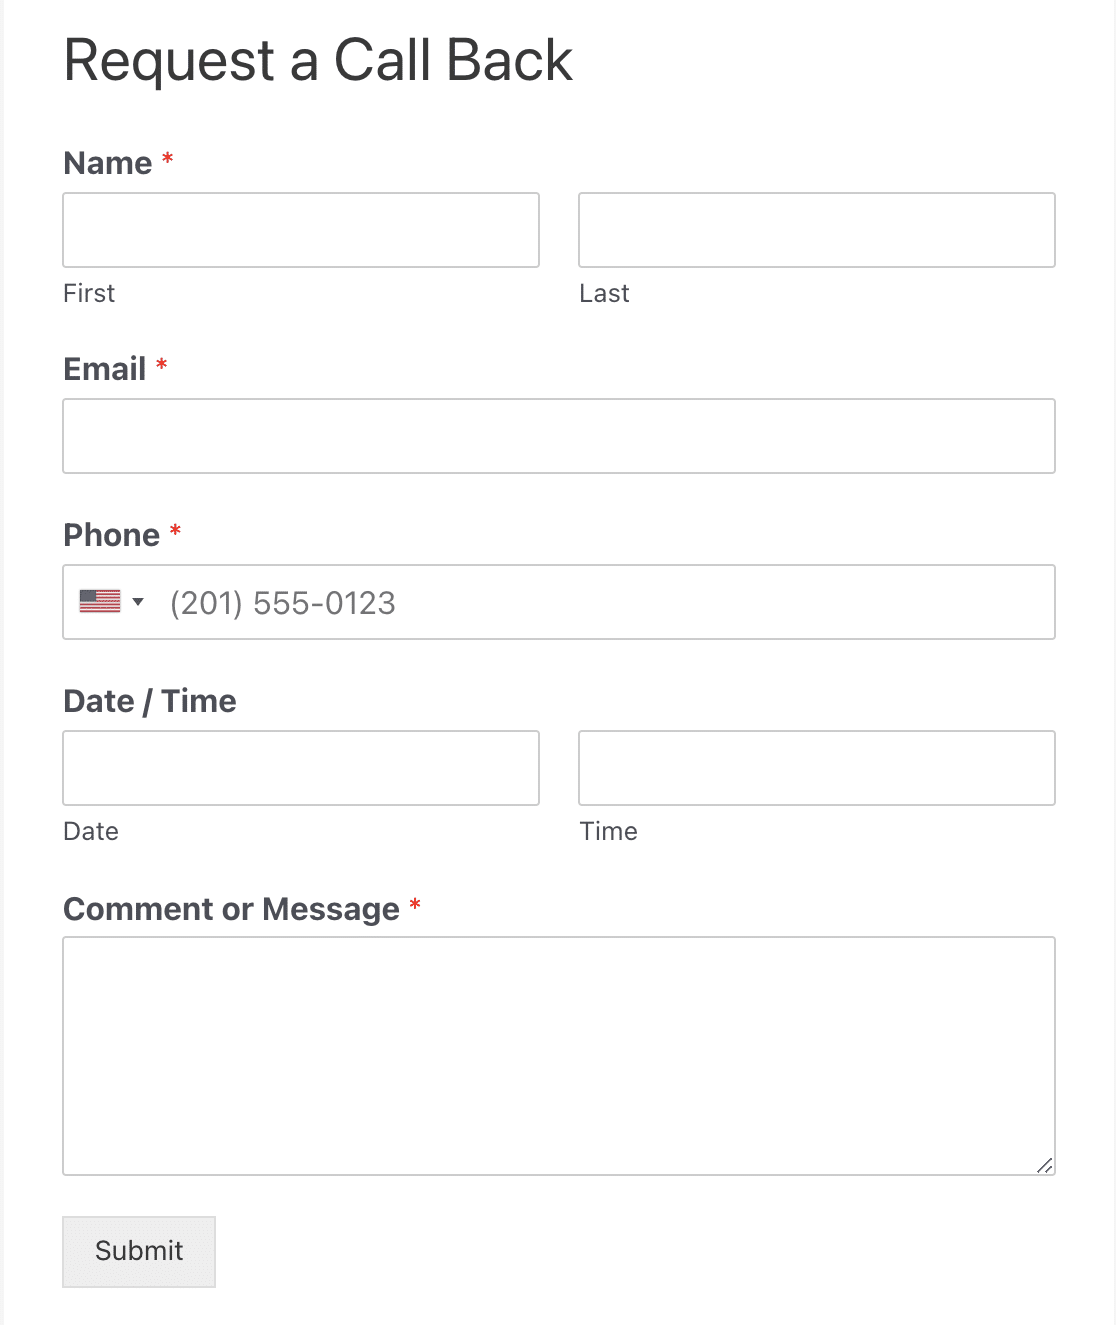
Want a cool tip to make your form look extra awesome? You can turn it into a form landing page in just one click with the Form Pages addon.
To do this, head back to the form builder and click Settings » Form Pages and then check the box next to Enable Form Page Mode.
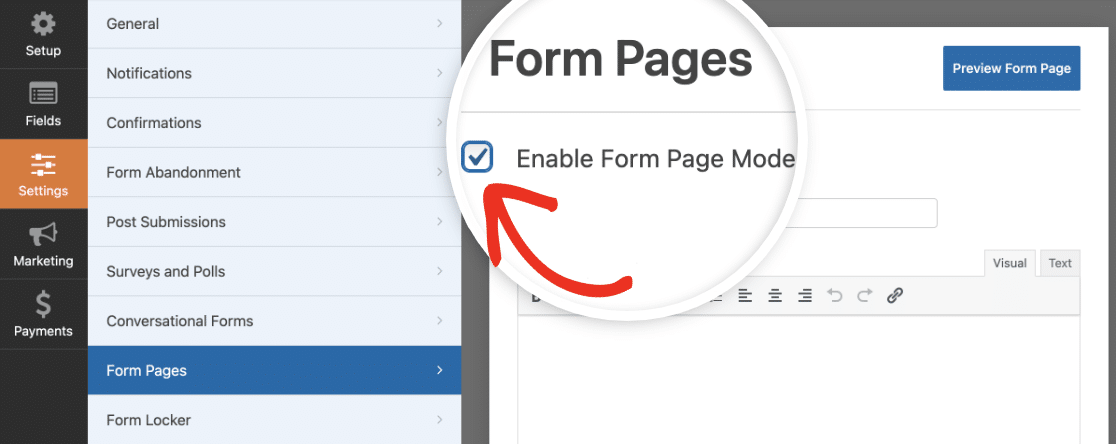
From here you can customize the page’s color, message, and more. Click Save when you like the way it looks.
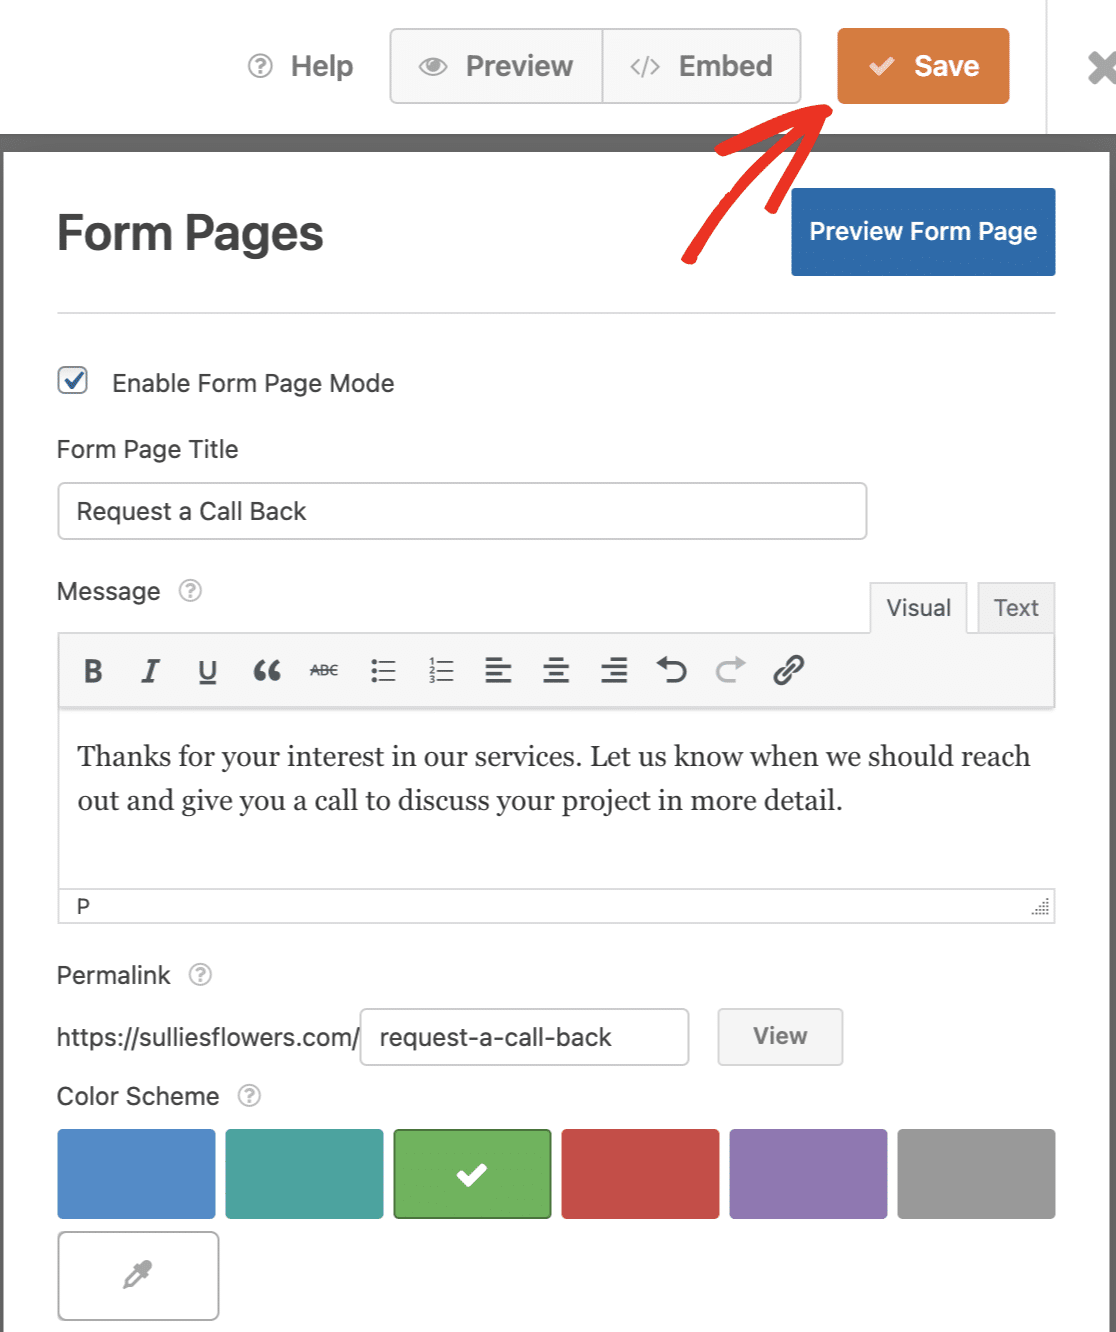
Now if you preview your form or head to the page it’s published on, you’ll see a really effective, distraction-free landing page of your request a call back form!
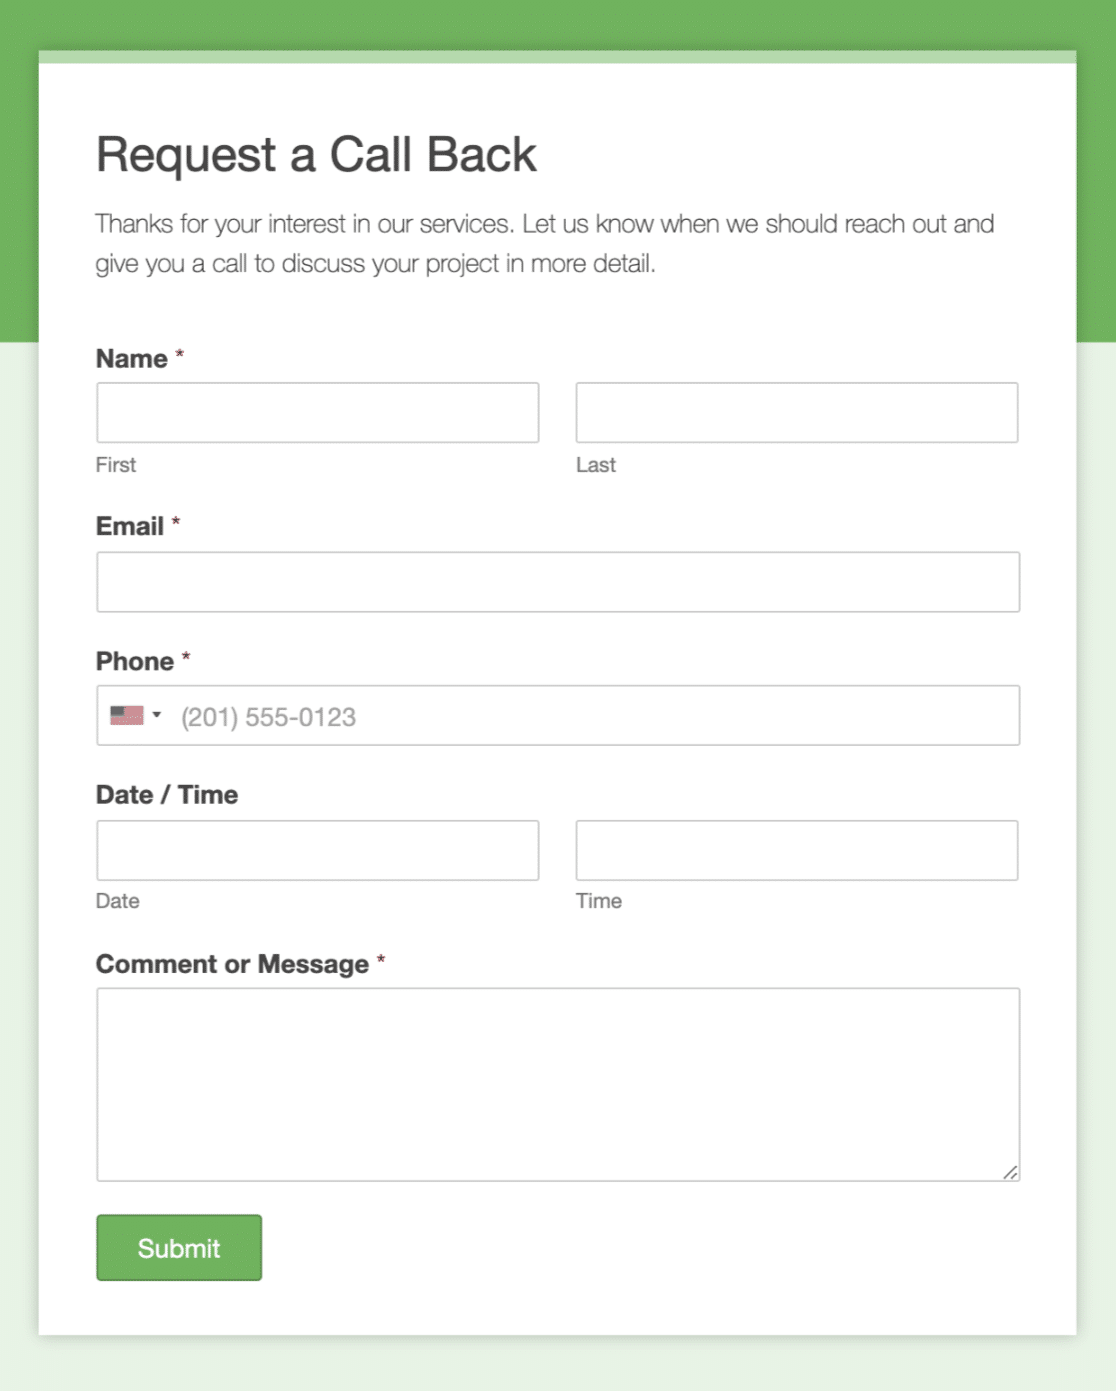
Great job! You’re all set. Don’t forget, you can do all kinds of things to your form to really put web forms to work for you and your site, including adding conditional logic.
Create Your WordPress Form Now
Next, Get Instant Form Notifications in Slack
When customers request a call back, you’ll want to respond right away. Here’s an easy way to get form notifications in Slack so you can return customers’ calls within seconds.
Ready to build your form? Get started today with the easiest WordPress form builder plugin. WPForms Pro includes 2,000+ form templates templates and offers a 14-day money-back guarantee.
If this article helped you out, please follow us on Facebook and Twitter for more free WordPress tutorials and guides.


