AI Summary
Do you want to create a user review form on your WordPress website?
Collecting user reviews online is important so you can sell more products. You can use testimonials on different pages on your website, and make it simple for leads to learn more about your product by reading reviews.
So in this tutorial, we’ll show you how to make a user review form on your WordPress website that asks people to submit their thoughts (the easy way).
In This Article
- Step 1: Install the WPForms Plugin
- Step 2: Launch the User Review Form Template
- Step 3: Customize Your User Review Form
- Step 4: Configure Your Form Settings
- Step 5: Customize Your User Review Form Notifications
- Step 6: Configure Your Form Confirmations
- Step 7: Create a Reviews Custom Post Type
- Step 8: Connect Your Form to the Reviews Post Type
- Step 9: Add Your User Review Form to Your Site
- Step 10: Display Your Customer Reviews
How Do I Add Customer Reviews to My Website?
The easiest way to add user reviews to your website is to use a WordPress plugin like WPForms.
You can use WPForms Pro to access a User Review Form template that can have you up and running in minutes.
Create Your User Review Form Now
And if you’re asking yourself, “Why create a user review form on your website?” we’ve listed some fantastic reasons next.
Why Create a User Review Form on Your Site
Did you know people’s friends have the most influence on their mobile purchasing decisions? That’s a bold but true eCommerce statistic every website owner should know.
That’s because social proof is super important to making sales online.
Whether you’re selling physical goods, digital products, or a service, user reviews can help you boost sales. Plus, there are tons of other benefits, such as:
- User reviews give you a way to collect positive feedback and testimonials you can use in your marketing campaigns.
- You can put your user review form on a form landing page and send it in a follow-up email after a purchase has been made.
- Having a user review form on your site increases your chances of getting reviews.
- Customer reviews and testimonials can greatly increase sales using psychology.
- The more user reviews you can get, the more likely you’ll find positive user reviews you can use.
- User review forms can give you an easy option to ask people if you can share their reviews (we’ll show you how).
Great, now that you have an idea of why people make user review forms and put them on their small business websites, let’s jump right in and explain how to make them.
How to Make a User Review Form for Your Site
If you’re using WPForms Pro, you’ll have instant access to a template that will get you up and running fast with this form.
Let’s get started!
Step 1: Install the WPForms Plugin
The first thing you need to do to add a user review form to your WordPress site is install and activate the WPForms plugin.
WPForms comes with pre-built form templates, including a user review form, and it’s a great alternative to installing a specialist product review plugin.
It’s very easy, but if you need any help with this part, check out this great tutorial on how to install a WordPress plugin.
Alright, now that you’ve activated the plugin, you can begin creating your new form.
Step 2: Launch the User Review Form Template
Next, head over to WPForms » Add New and type in a name for your user review form. Then you’ll need to choose a form template to start working on it. For this, we’ll use the User Review Form template.
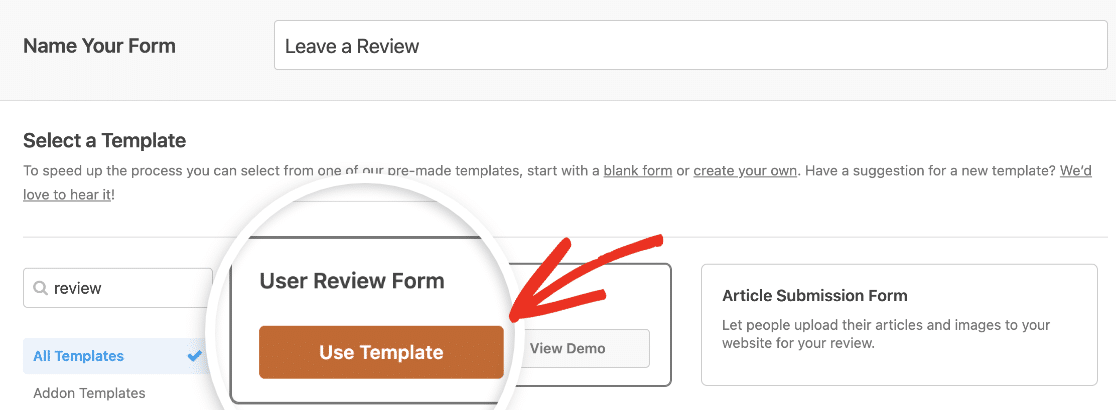
Once you click the Use Template button, you’ll be taken to the form builder so you can customize it.
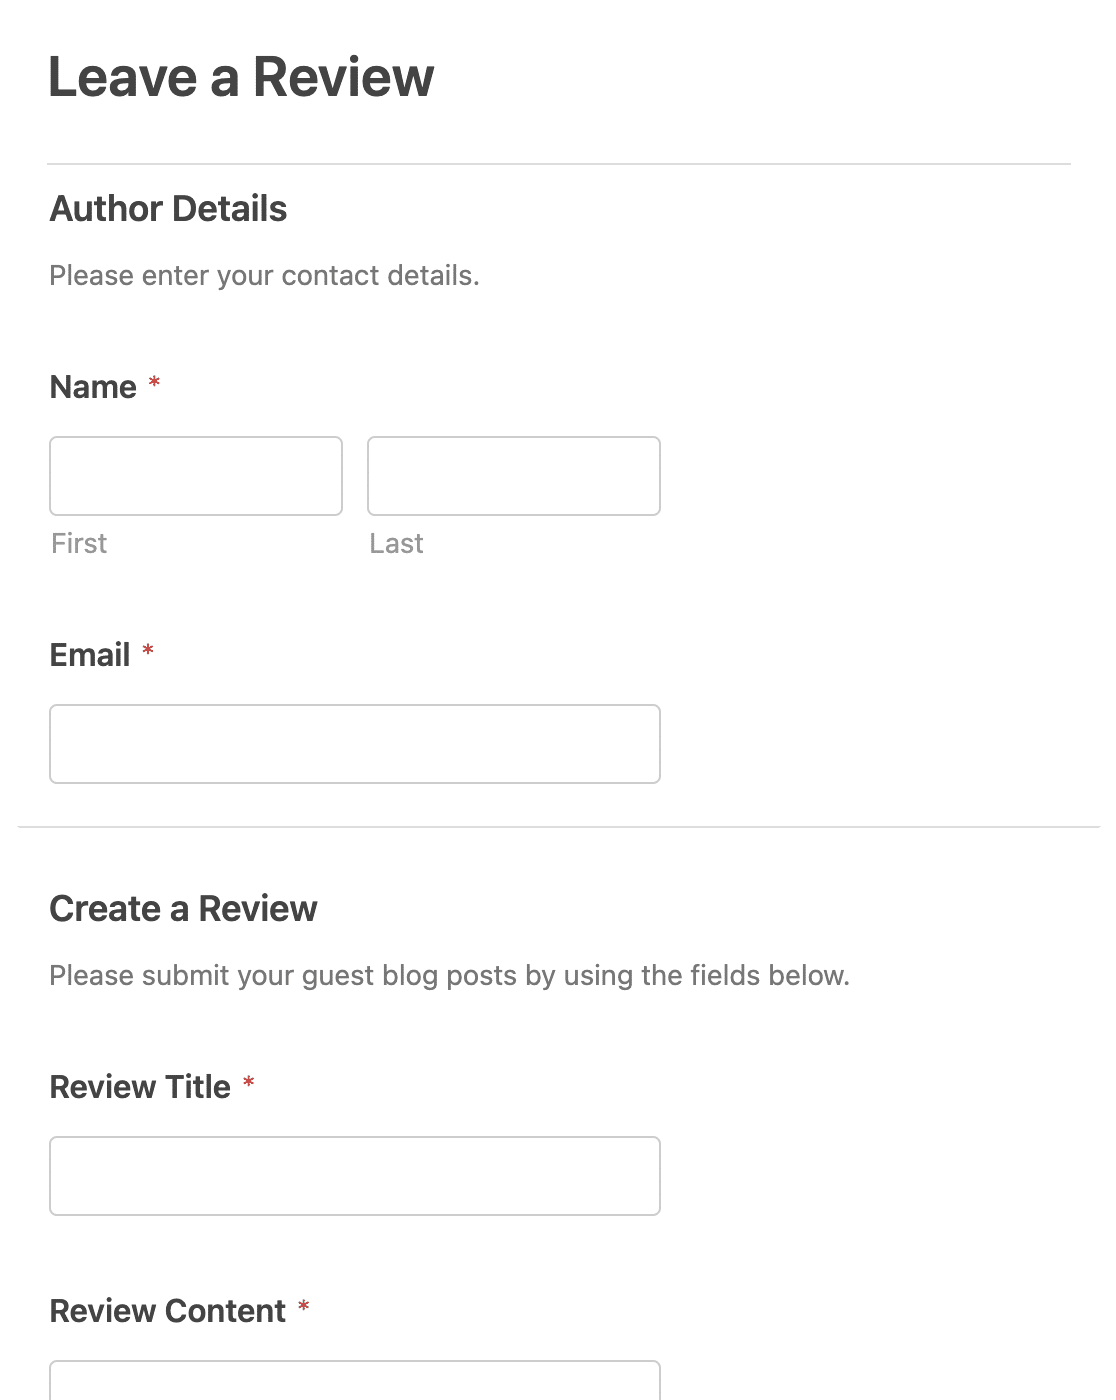
This template will include everything you need to collect user reviews and publish them on your website. But you can easily customize it as much as you want.
Step 3: Customize Your User Review Form
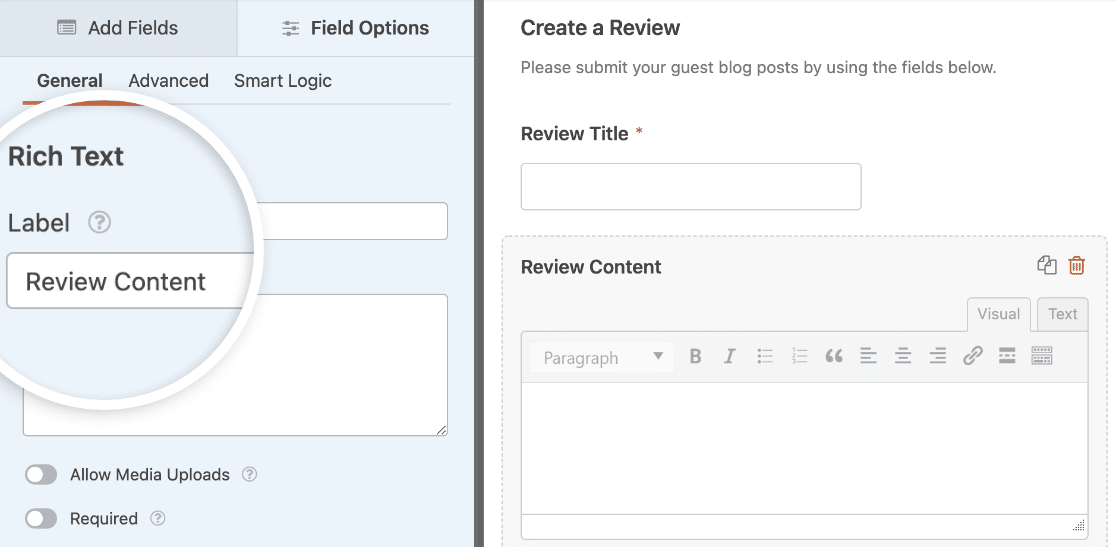
Next, you can make any changes to the User Review Form template. For example, you could replace the Paragraph Text and File Upload fields with a Rich Text field so customers can style their own text. Plus, it will make your form shorter and easier to fill out.
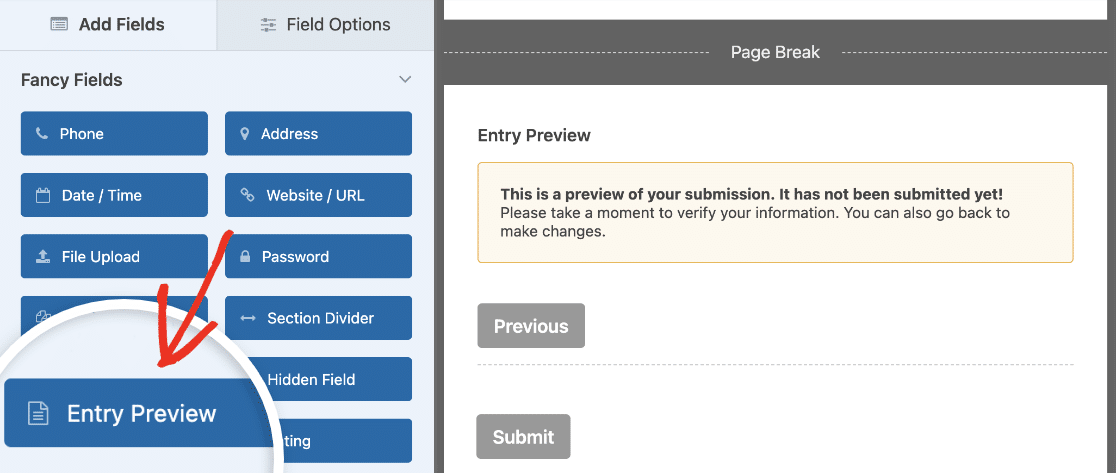
You can also add an Entry Preview field to allow users to preview their reviews before submitting the form.
And you can change any of the field labels or descriptions to fit your website better.
Notice the Checkboxes field at the bottom of the form where users can agree to let you use their reviews in your marketing campaigns. We recommend keeping this field so you can be sure your customers are happy to let you share their thoughts.

Once you’re happy with how your user review form looks, you can click Save and move on to the next step.
Step 4: Configure Your Form Settings
Next, go to Settings » General.

Here you can configure the following:
- Form Name: Change the name of your form here if you’d like.
- Form Description: Give your form a description.
- Submit Button Text: Customize the copy on the submit button.
- Submit Button Processing Text: Customize the text that shows while your form is submitting.
- Spam Prevention: Stop contact form spam with the anti-spam feature, hCaptcha, or Google reCAPTCHA. The anti-spam option is automatically enabled on all new forms.
There are also advanced settings you can configure, including:
- CSS Classes: Add custom CSS classes to your form or submit button.
- Enable dynamic fields population: Fill in some form fields automatically based on the form page’s URL.
- Enable AJAX form submission: Enable AJAX settings with no page reload.
- Disable storing entry information in WordPress: You can disable the storing of entry information and user details, such as IP addresses and user agents, in an effort to comply with GDPR requirements. Check out our step-by-step instructions on how to add a GDPR agreement field to your simple contact form.
Next, click Save.
Step 5: Customize Your User Review Form Notifications
Notifications are a great way to send an email whenever someone submits a user review form on your website.
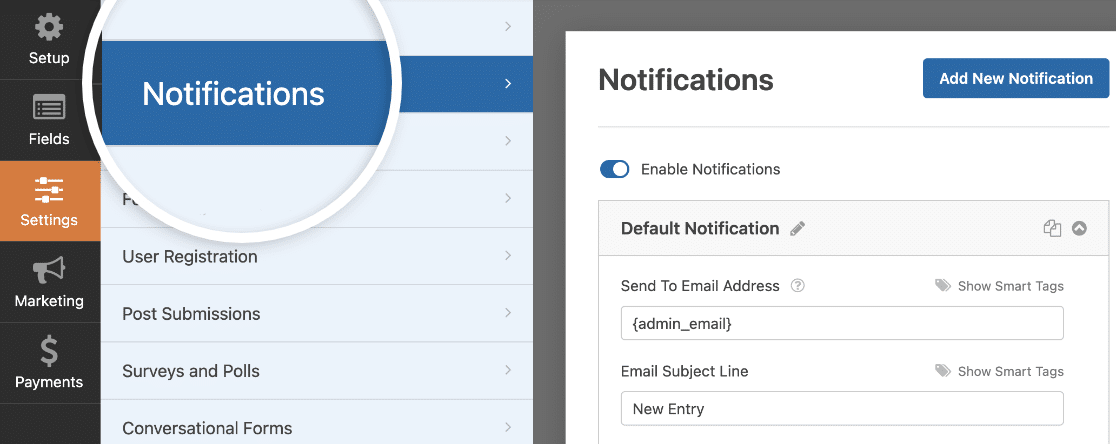
In fact, unless you disable this feature, whenever someone submits a form on your site, you’ll get a notification about it.
If you use Smart Tags, you can also send a notification to people who fill out your testimonial form, letting them know you’ve received their submission. This lets users know their review form has gone through properly.
For more help with this step, check out our documentation on how to set up form notifications in WordPress.
Also, you can send more than one notification when someone submits a user review form on your site. For example, you can send a notification to yourself, plus to the user who submitted it, and to other people on your team who may want to see it or access the review.
For help doing this, check out our step-by-step tutorial on how to send multiple form notifications in WordPress.
Lastly, if you want to keep branding across your emails consistent, you can check out this guide on adding a custom header to your email template.
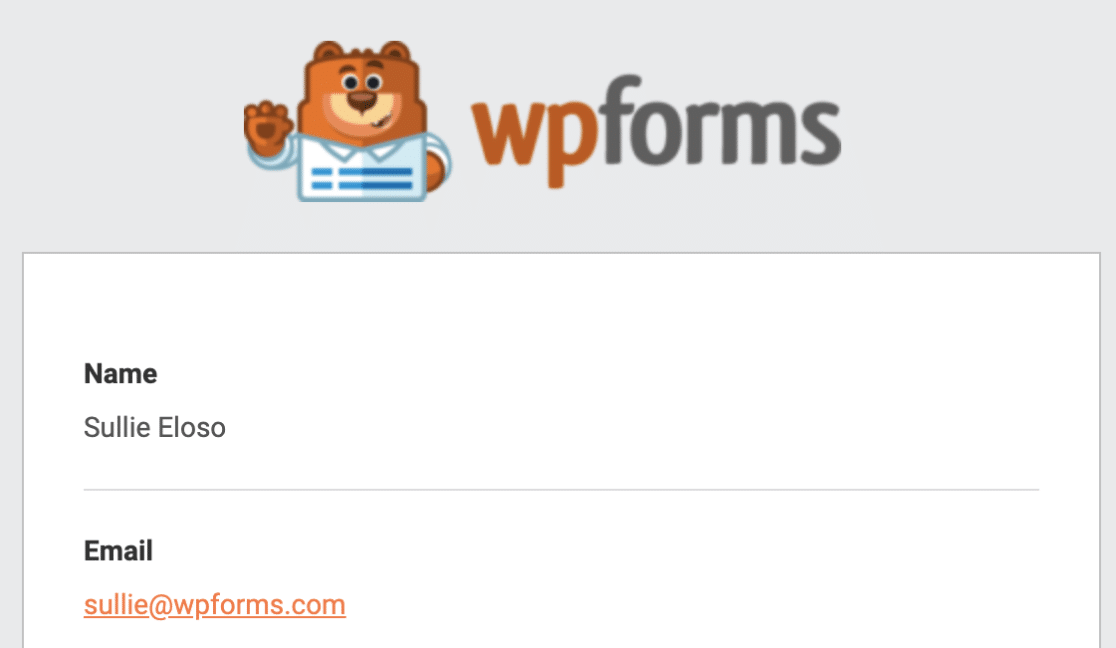
This will give your form a professional feel.
Step 6: Configure Your Form Confirmations
Form confirmations are messages that display to people once they fill out and submit a form on your website. They let people know that their form has gone through and offer you the chance to tell them the next steps.
WPForms has 3 confirmation types:
- Message: This is the default confirmation type in WPForms. When someone submits a user review form, a simple message confirmation will appear letting them know their form was received.
- Show Page: This confirmation type will take customers to a specific web page on your site to thank them for their submission. For help doing this, check out our tutorial on redirecting customers to a thank you page.
- Go to URL (Redirect): This option is used when you want to send people to a different website.
Let’s see how to set up a simple form confirmation in WPForms so you can customize the message people will see when they fill out the user review form on your website.
To start, click on the Settings » Confirmations tab in the form builder. Next, select the type of confirmation you’d like to create. For this example, we’ll select Message.
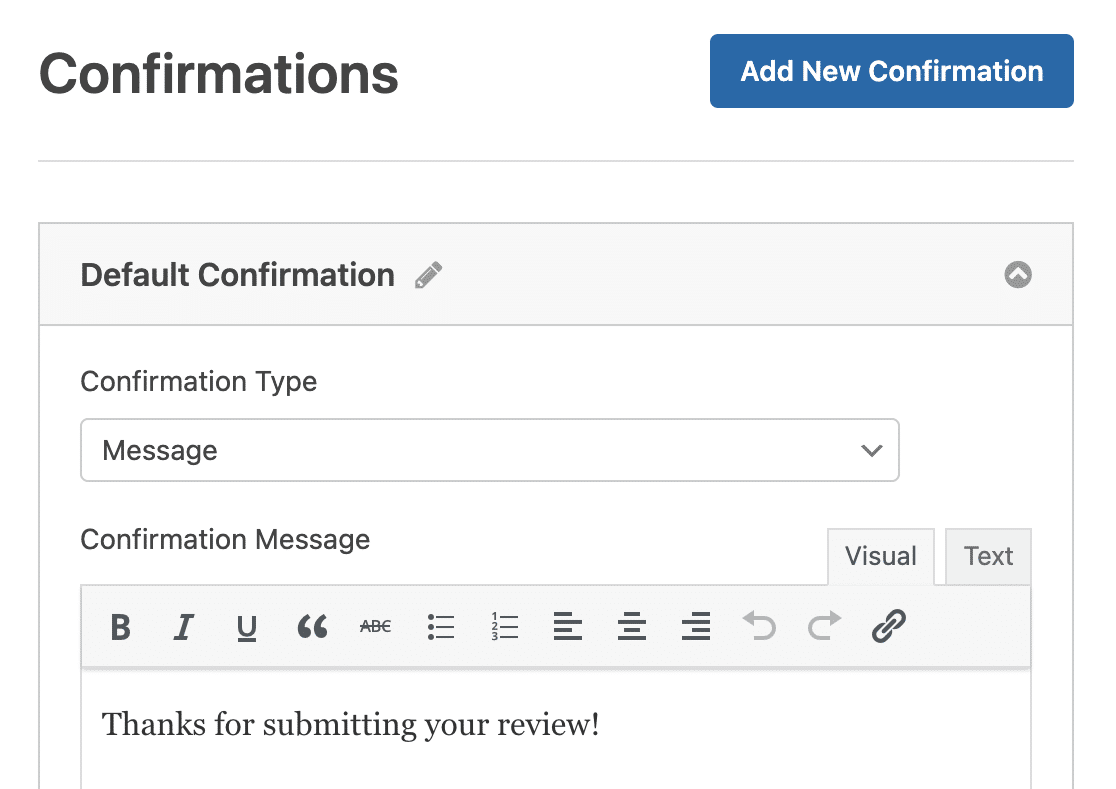
Then, customize the confirmation message to your liking and click Save.
Step 7: Create a Reviews Custom Post Type
Now that our form is ready, we’re going to make it so we can publish users’ reviews on our WordPress site. WPForms lets you do this easily with the Post Submissions addon.
But, for this to work, we need to create what’s called a WordPress custom post type. Custom post types are content types like posts and pages. A post type can be any kind of content.
We’re going to set up a custom post type for reviews so that they’ll appear as an item in the navigation menu and have all the features that standard blog posts would have but won’t mix in with our blog.
In our example, we’ve used the plugin Custom Post Type UI to create a post type named Reviews.
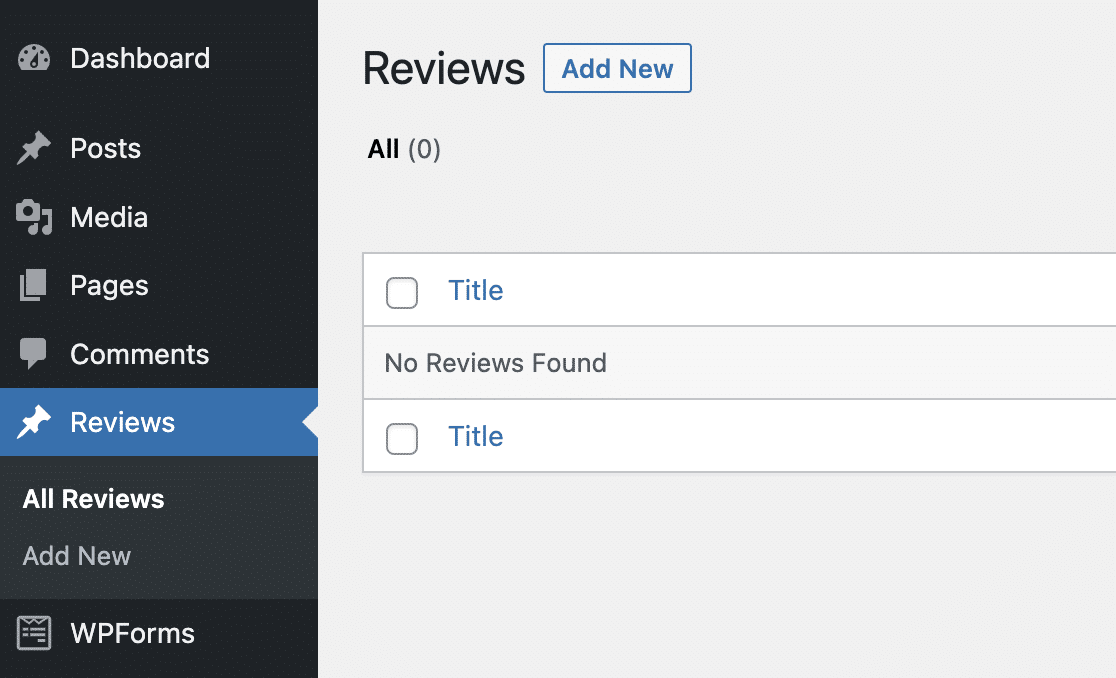
You can see this tutorial to learn more about setting up custom post types.
Step 8: Connect Your Form to the Reviews Post Type
Next up, we’ll install and activate the Post Submissions addon.
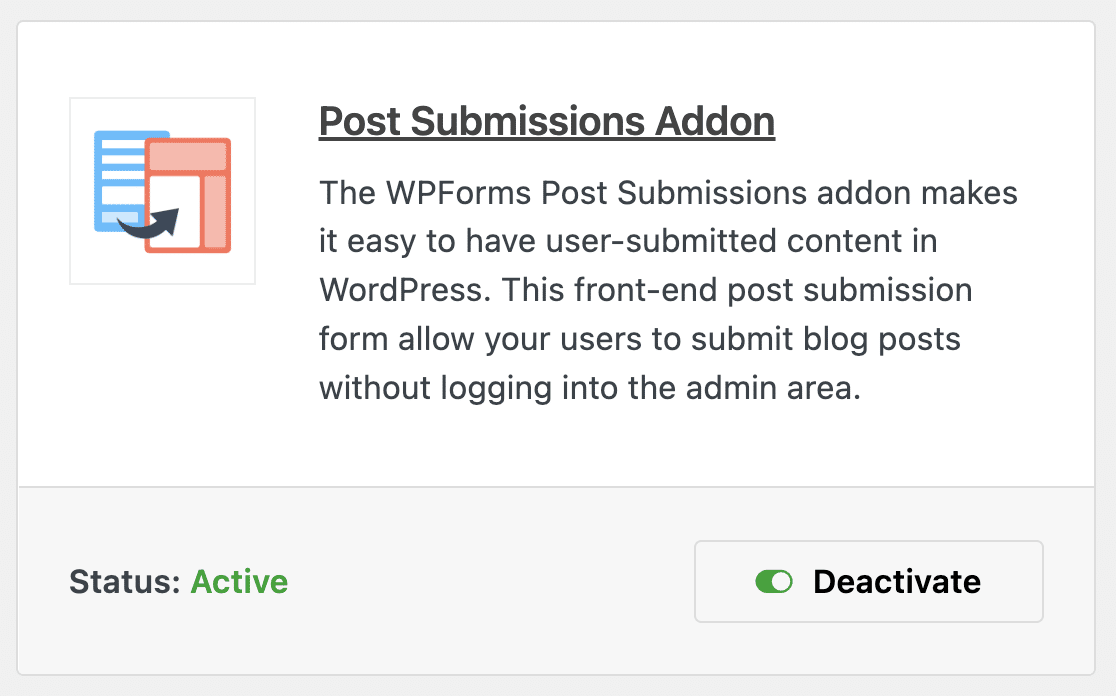
Normally this addon is used to accept guest posts on your WordPress site. Since we set up the Reviews custom post type, we can use it to publish user reviews automatically.
After activating the addon, open your user review form for editing again. Then go to Settings » Post Submissions. Here, toggle on the Enable Post Submissions setting.
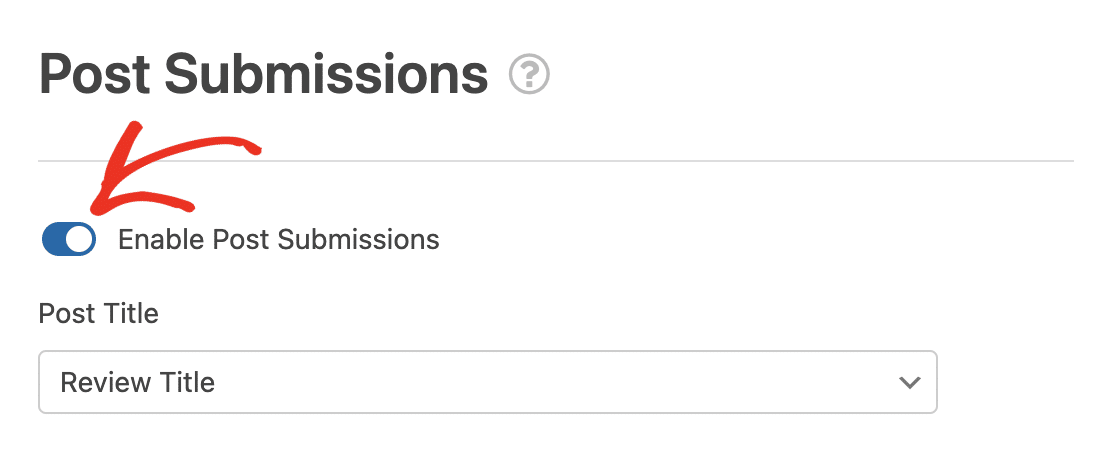
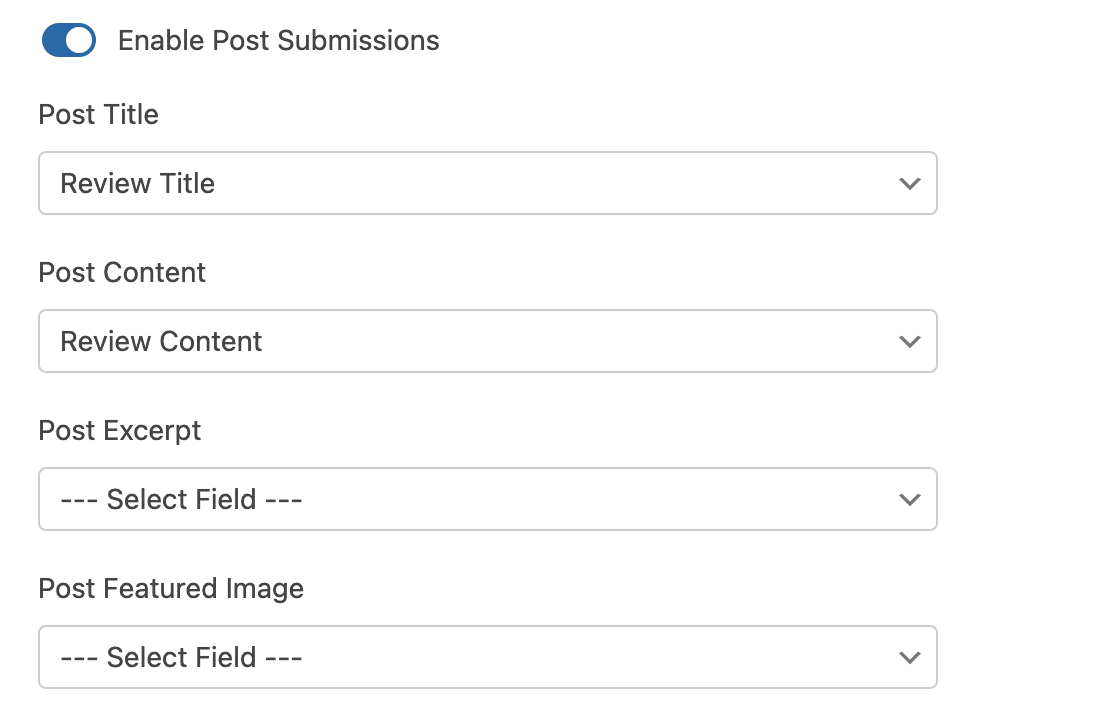
Then select your form’s fields from the corresponding dropdowns. For example, set the Post Title dropdown to the field where you want users to add their review’s title, the Post Content dropdown to the field where they’ll enter their review’s text, and so on.
For the Post Type dropdown, make sure to select your Reviews custom post type.
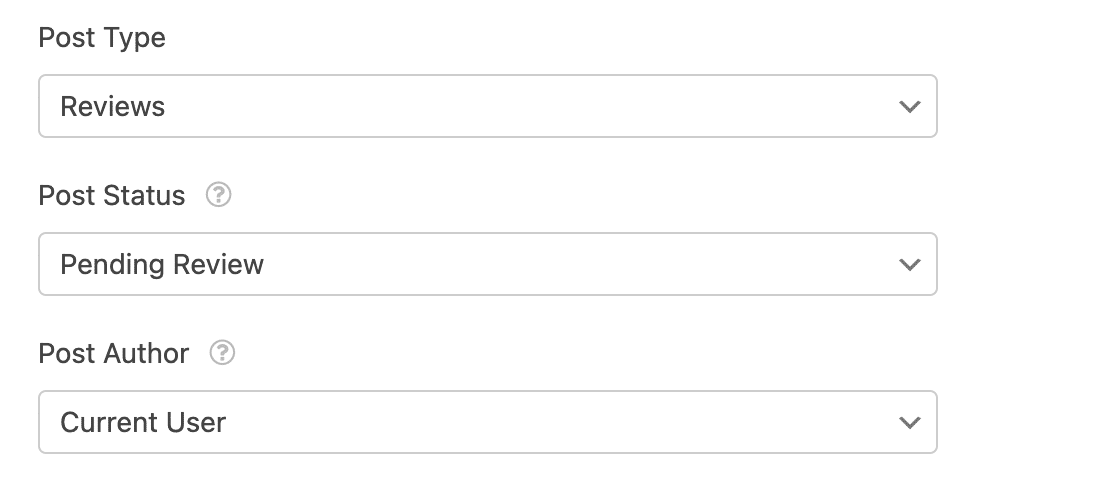
We recommend leaving the Post Status dropdown set to the Pending Review. This will give you the chance to read reviews before they go live on your site and make sure the user selected the checkbox to agree to let their review be used in your marketing campaigns.
Finally, you can choose who should be listed as the review’s author. If users must be logged in to leave a review, you can set this to Current User to display their name with the review.
Make sure to save your form again when you’re done with the Post Submissions settings.
Step 9: Add Your User Review Form to Your Site
Now that your form is built, we’re going to go ahead and publish it on your website.
Start by clicking the Embed button at the top of the form builder.

And then when this notification pops up, go ahead and click Create New Page.
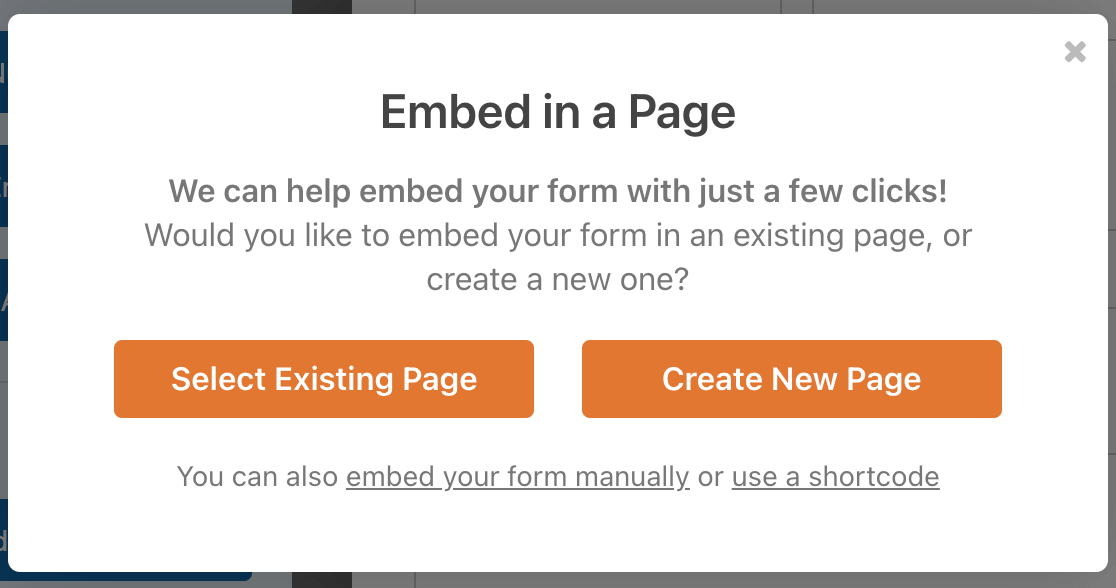
Next, WPForms will ask you to name your page. Type the title for the page into the box and click Let’s Go!

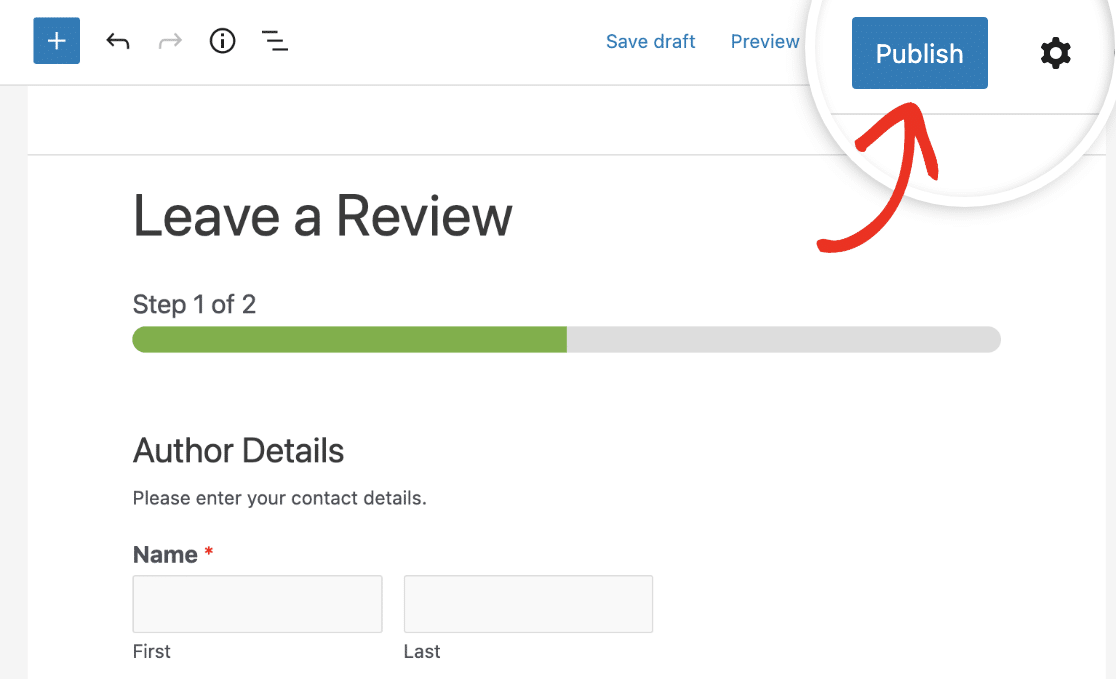
WPForms will open up a new page for your testimonial form. Go ahead and click Publish at the top to publish the form on your site.
Great job. Your form is live on your site, and here’s what our finished user review form looks like.
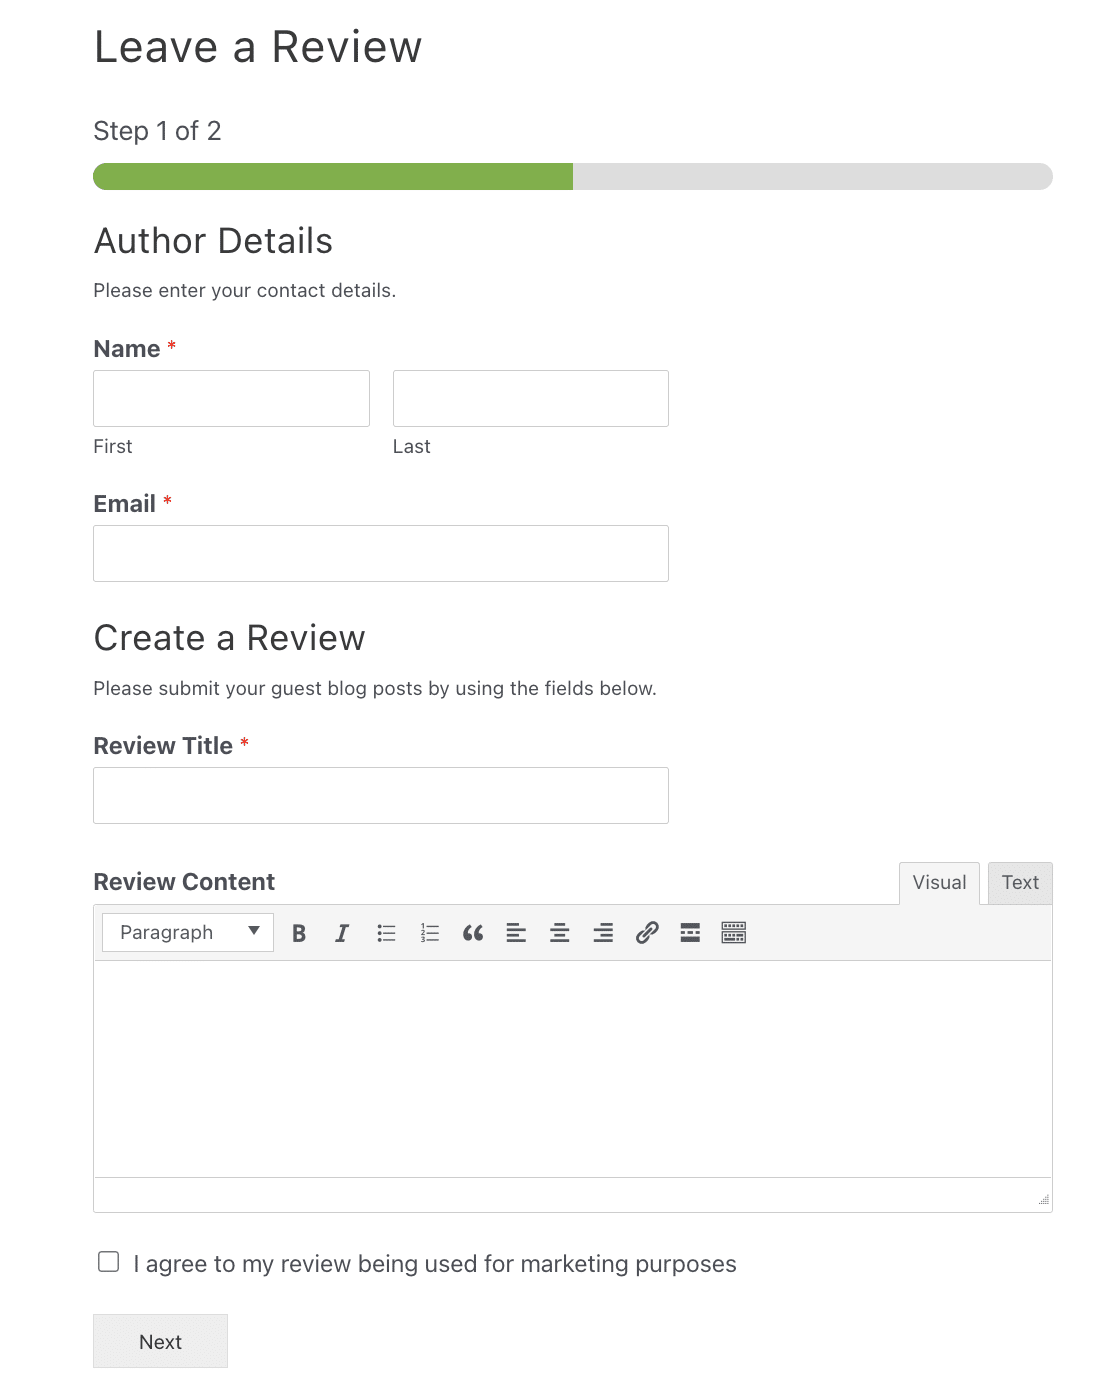
Now you can collect and publish customers’ reviews.
Step 10: Display Your Customer Reviews
Once a user submits a review, it will show up in the Reviews section of your WordPress admin area.
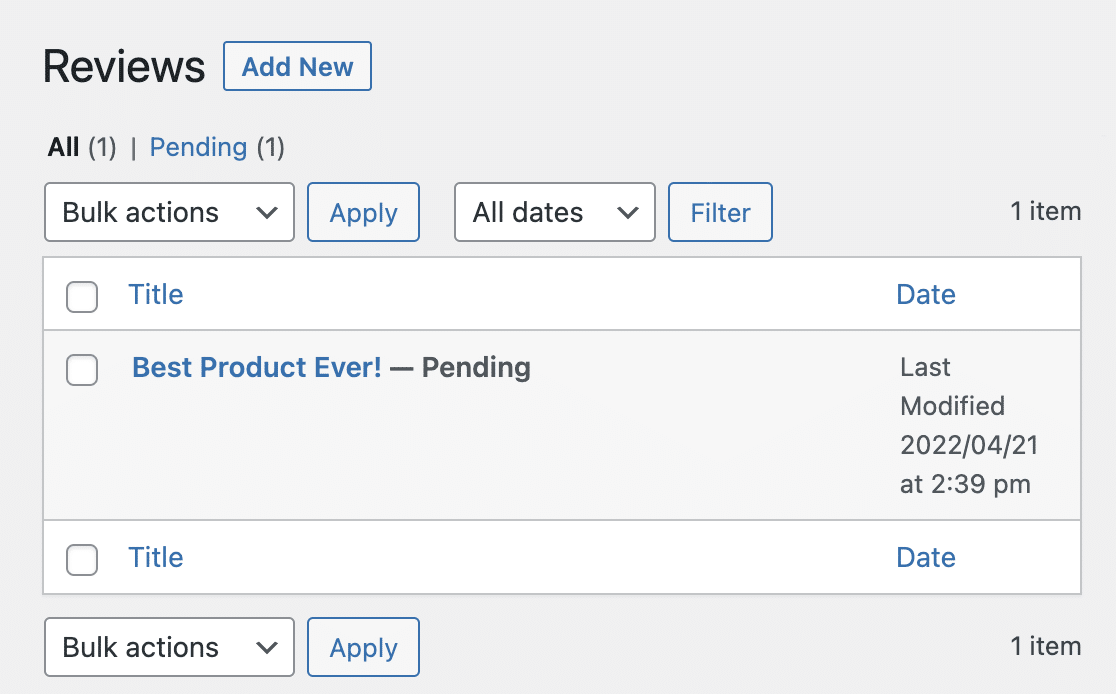
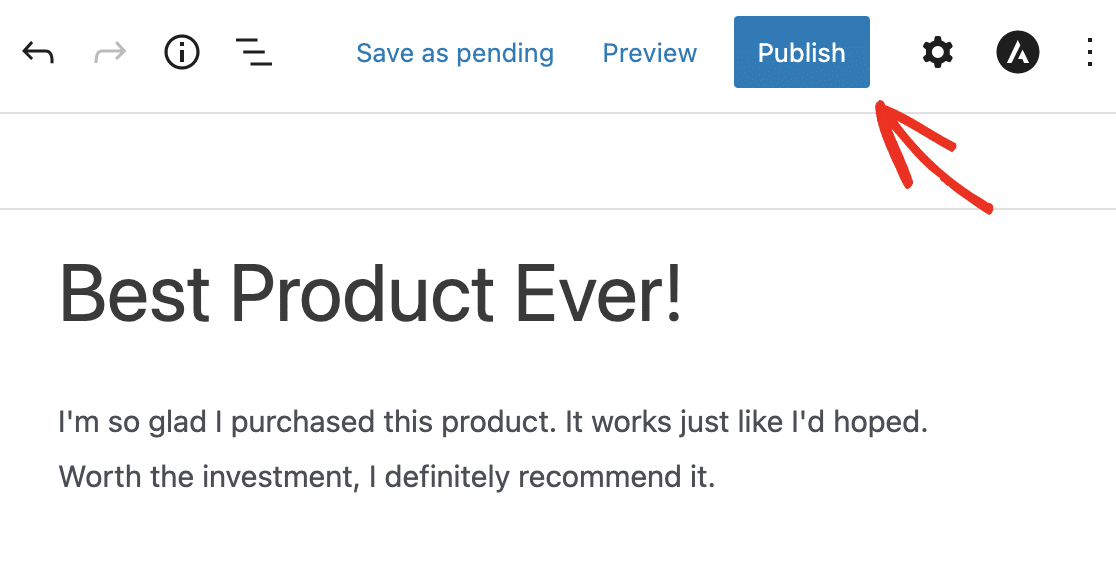
To publish it, just click on the title. Then click on the Publish button in the editor.
And there you have it! You now know how to add user reviews to your website with a form in WordPress.
For more advanced ways to display these reviews on your site, check out these resources:
- 12 Most Useful WordPress Custom Post Types Tutorials
- How to Style Contact Forms in WordPress
- How to Customize WPForms with CSS Hero
Create Your User Review Form Now
Add Your Own User Review Form to Your Site
You can add a user review form to your WordPress website just like this one using WPForms Pro.
WPForms Pro is the best way to get professional forms on your WordPress website without needing to pay a web designer to do it for you. You can build and manage all your forms on your own, even if you’re a beginner.
Not only does it come with the ability to add user reviews to your site through a form, but it also has a ton of other amazing features you can use to start getting more revenue from your website:
- It’s the most beginner-friendly WordPress contact form plugin and uses a drag-and-drop builder to create any form you’ll need.
- Remove the extra 3% transaction fee from Stripe and also unlock additional payment gateway integrations like PayPal, Square, and Authorize.net.
- It lets you create a multi-page form to break the form into multiple pages and enhance the user experience.
- You can use a File Upload form field to collect photos from people to add to their reviews.
- Integrates with the most popular email marketing services.
- It’s fully responsive so forms will look great on all devices.
- Use features like Conversational Forms to make your forms convert even better.
- Conditional logic helps you keep your forms clutter-free to keep visitors focused on completing the form.
- You get access to priority support from a friendly and knowledgeable team.
Next, Create an Order Form and Boost Sales
Ready to build your user review form? Get started today with the world’s best WordPress form builder plugin. WPForms Pro offers a 14-day money-back guarantee, so there’s nothing to lose.
If you’re interested in selling your products and services online, check out our post on how to create a simple order form in WordPress. You might also be interested in learning how to create an email subscription form to boost your lead generation efforts.
And don’t forget to check out the best hosting providers list to make sure you’re using the one that’s right for your website.
So, what are you waiting for? Get started with the most powerful WordPress form plugin today.
And don’t forget, if you like this article, then please follow us on Facebook and Twitter.


