AI Summary
Are you looking for a way to easily create an online travel request form for your WordPress website?
When employees of your business need to take work trips, you’ll need a way from them to request reimbursement for the expenses.
So in this post, we’ll show you how you can quickly add an online travel request form to your site, without hiring a developer.
Create Your Online Travel Request Form Now
What Is a Travel Request Form?
A travel request form is a form that gathers trip details from your employees so you can approve expenses for their travel. It’s a great way to streamline your employees’ requests for travel.
The form can gather all the info that your HR or admin team will need about the traveler. That way, you can send organized information on to the authority who needs to approve it, before the trip can be made.
If you’ve got a lot of outside salespeople who travel often, locally or nationally, you’ll want a way to organize reimbursement requests and the approval process.
A good online travel request form collects specific details about the trip and traveler like:
- Name
- Manager Name
- Trip Dates
- Trip Arrival/Departure Cities
- Type of Arrangements Needed (Flight/Rental Car/Both)
- …and more.
When building an online travel request form, you’ll want to look for a form builder that lets you add or remove form fields.
That way, your employees can request travel time that’s work-related as well as request things like a leave of absence for medical reasons. In this case, you could add a file upload field to collect a doctor’s note or other documentation about their leave. You can check some health and wellness templates offered by WPForms as well.
We’ll show you exactly how to do that and how to use an online travel request form template and customize it to your liking next.
How to Make An Online Travel Request Form
So let’s go ahead and get started. We’ll be using the WPForms travel request form for employees template for this tutorial.
Step 1: Open the Travel Request Form Template
Using WPForms is the easiest way to make an online travel request form in WordPress. WPForms comes with 2,000+ WordPress form templates for every niche and industry, including an online travel request form template.
So, the first thing you’ll need to do is install and activate the WPForms plugin. For more details, check out this step-by-step guide on how to install a plugin in WordPress.
Next, you’ll need to create a new form.
To start, go to WPForms » Add New, and name the form. Then, scroll down to the section labeled Select a Template and type “travel request” into the search bar.
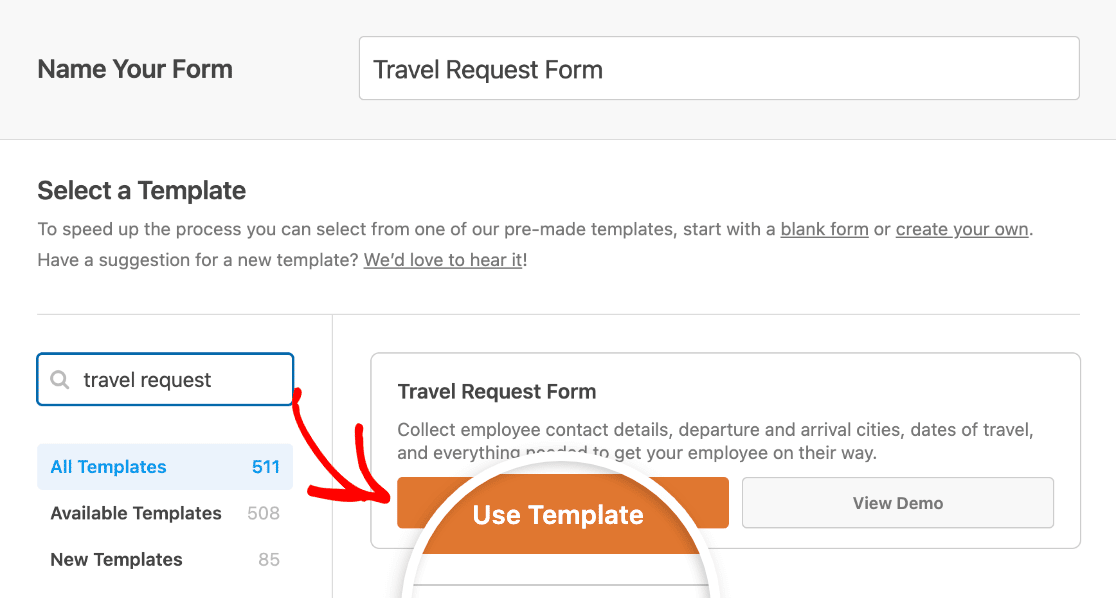
Once the pre-built online travel request form template loads, most of the work is already done for you.
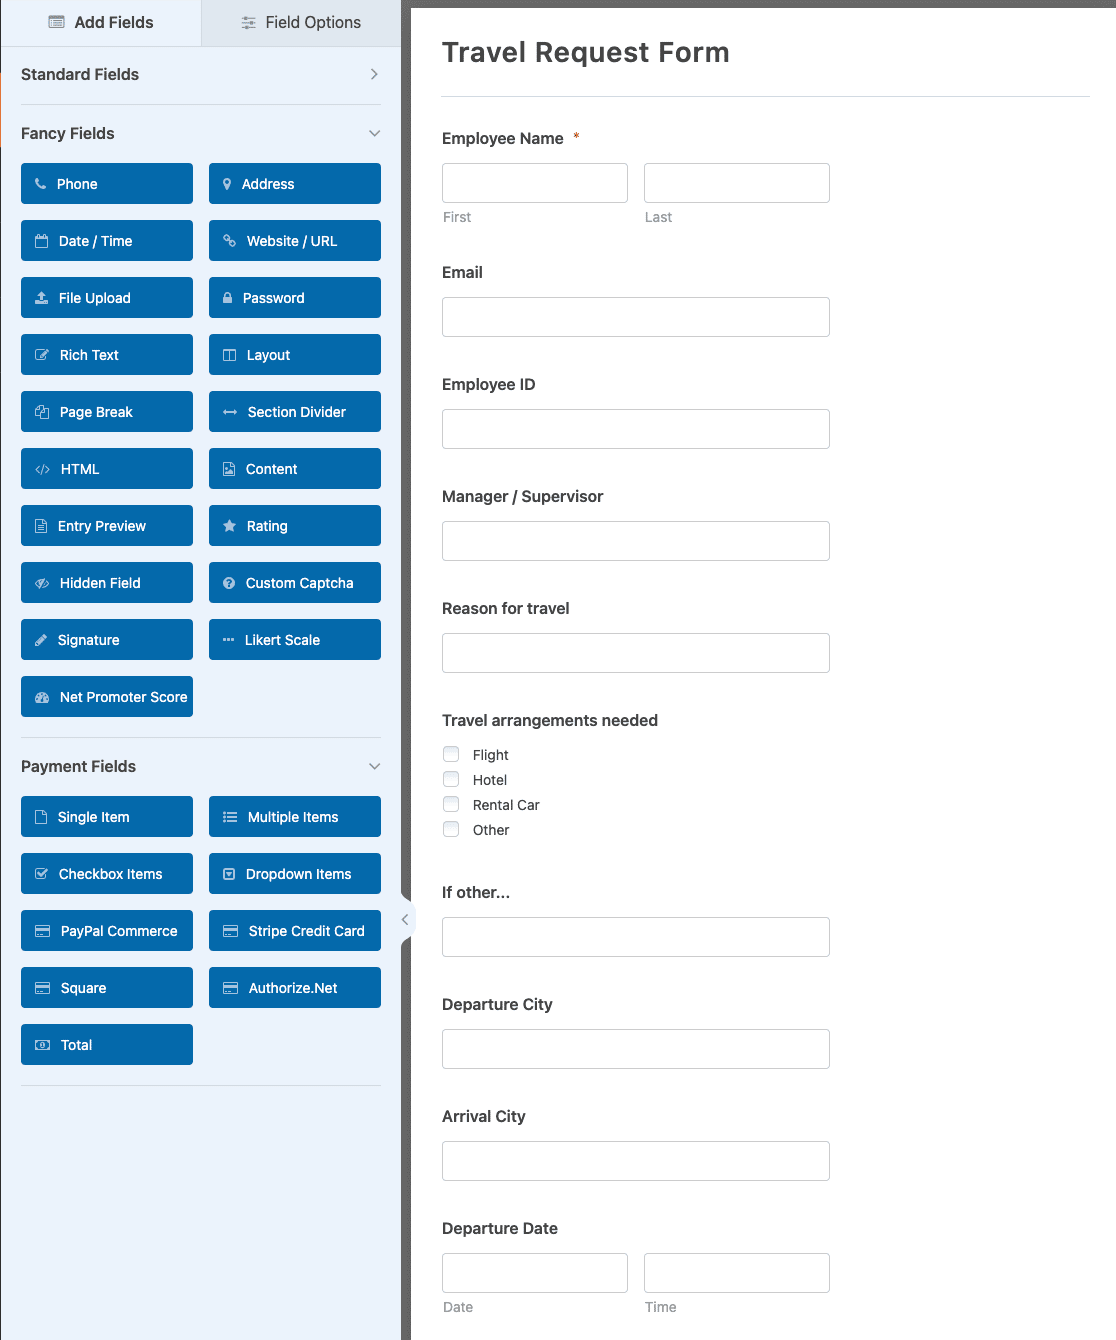
You’ll see fields for the following:
- Employee Name
- Employee ID
- Manager / Supervisor
- Reason for travel
- Travel arrangements needed (Flight, Hotel, Rental Car, and Other)
- Departure City
- Arrival City
- Departure Date
- Return Date
- Additional Information
Want to see a live version of the online travel request form in action? Head over and check out our online travel request form demo.
Step 2: Add Additional Fields (Optional)
You can add additional fields to your travel request form by dragging them from the left-hand panel to the right-hand panel.
Then, click on the field to make any changes. You can also click on a form field and drag it up or down to rearrange the order on your travel request form.
For example, if you want your travel request form to ask for a document, you could easily add a file upload field.
Simply head to the Fancy Fields section on the left and drag the File Upload field onto your form on the right, like so:
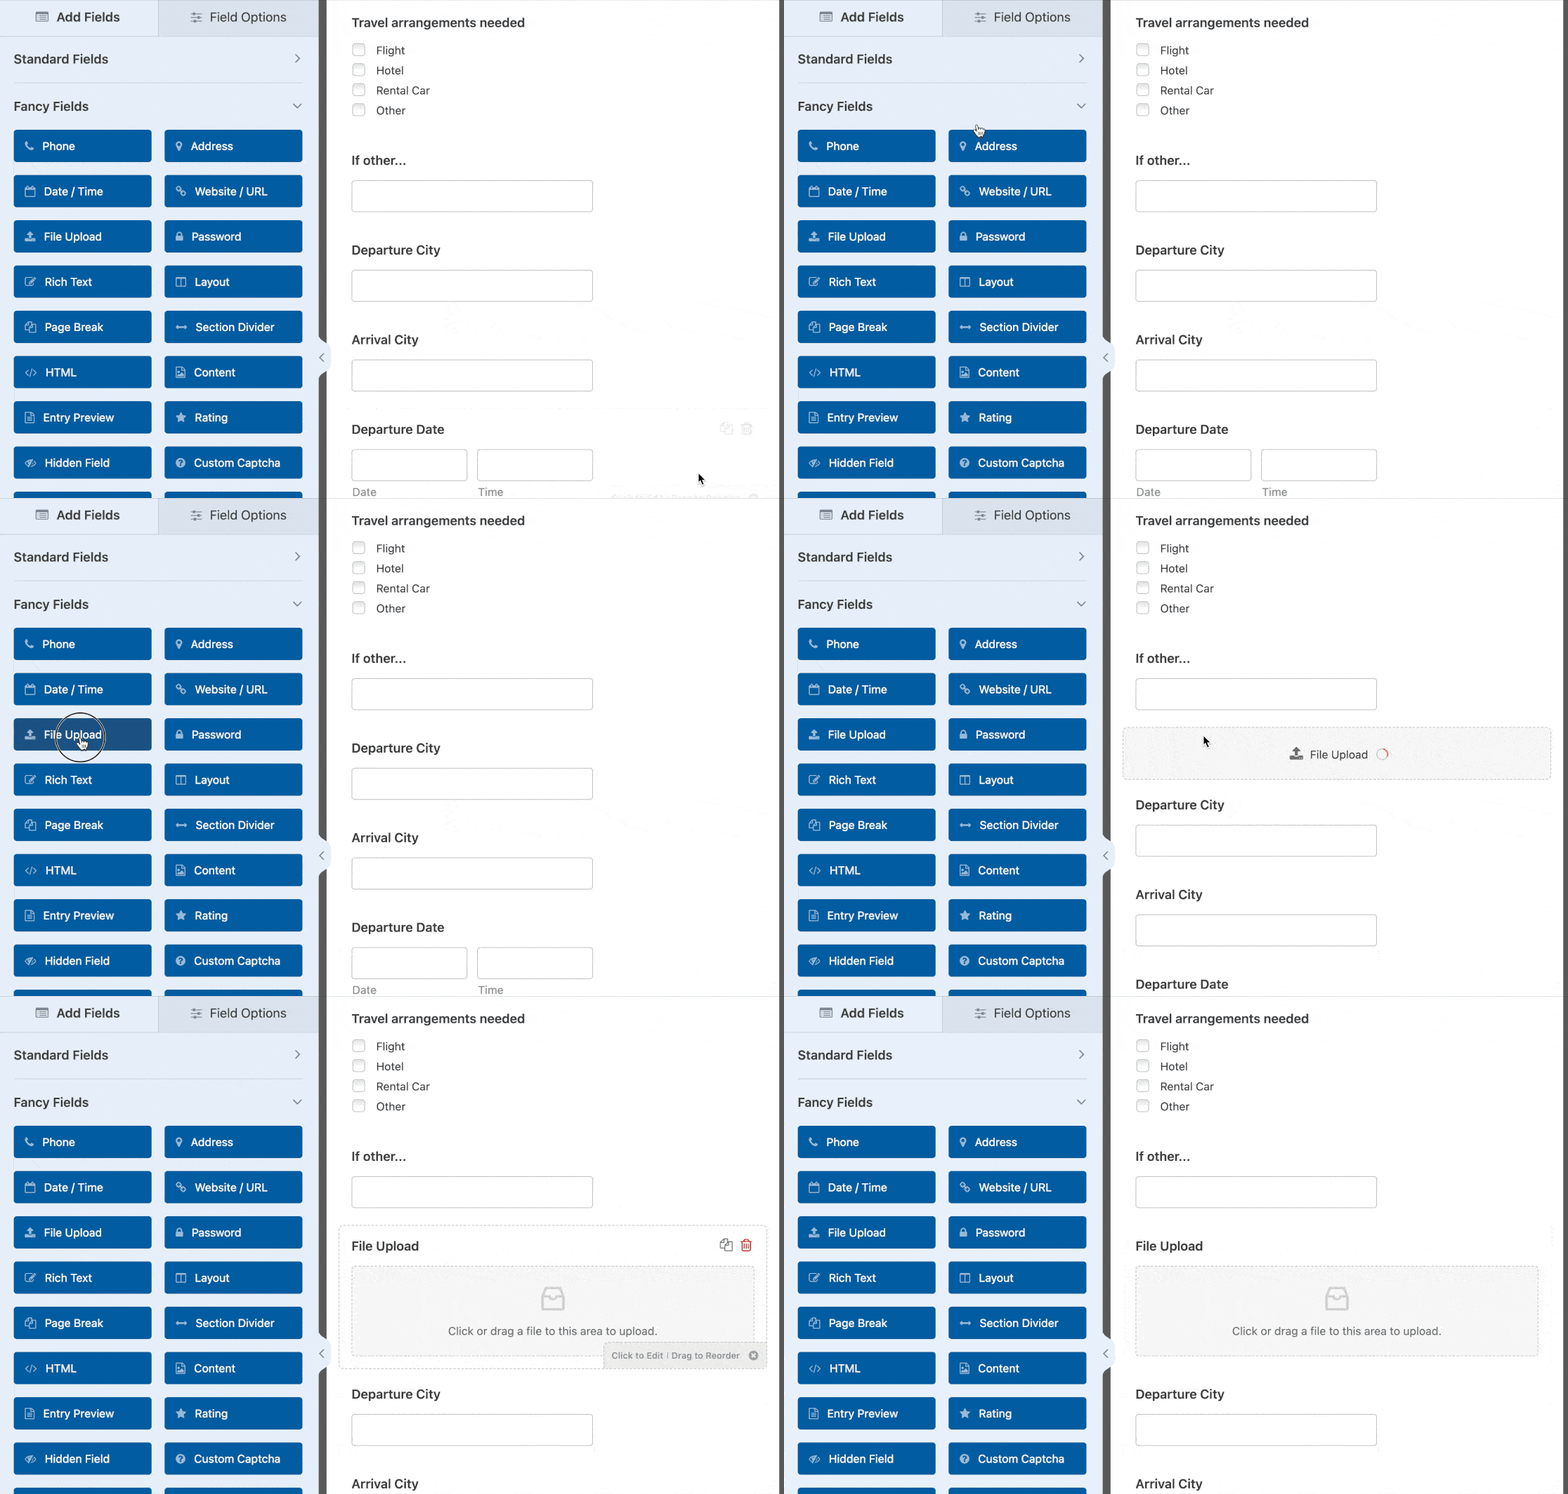
When your travel request form looks the way you want it to, click on Save.
Step 3: Configure Your Travel Request Form Settings
To start, go to Settings » General.

Here you can configure the following:
- Form Name — Change the name of your form here if you’d like.
- Form Description — Give your form a description.
- Tags — Organize your WordPress forms with tags.
- Submit Button Text — Customize the copy on the submit button.
- Submit Button Processing Text — Change the text that shows while your form is submitting.
Under the Advanced section, you can also:
- Add CSS Classes — Style your form or submit button with CSS.
- Enable Prefill by URL — Automatically fill some fields in your form using a custom URL.
- Enable AJAX form submission — Enable AJAX settings with no page reload.
- Disable storing entry information in WordPress — You can disable the storing of entry information and user details, such as IP addresses and user agents, in an effort to comply with GDPR requirements. Check out our step-by-step instructions on how to add a GDPR agreement field to your simple contact form.
After you’re done with the general settings, move on down to the Spam Protection and Security settings.

- Enable modern anti-spam protection — Stop contact form spam with the WPForms modern anti-spam protection. It’s automatically enabled by default on new forms, but you can choose whether you want to toggle it off on a form-by-form basis. This built-in spam protection runs seamlessly in the background to keep your forms safe. You can also pair it with another layer of security, such as a CAPTCHA.
- Enable Akismet anti-spam protection — If you use the Akismet plugin, you can connect it to your form.
- Enable country filter — Block submissions from certain countries.
- Enable keyword filter — Prevent entries that include specific words or phrases.
And you can also set up your preferred CAPTCHA. Check out our complete guide to spam prevention for more details.
Next, click Save.
Step 4: Configure Your Form Notifications
Notifications are a great way to send an email whenever someone submits a travel request form online.
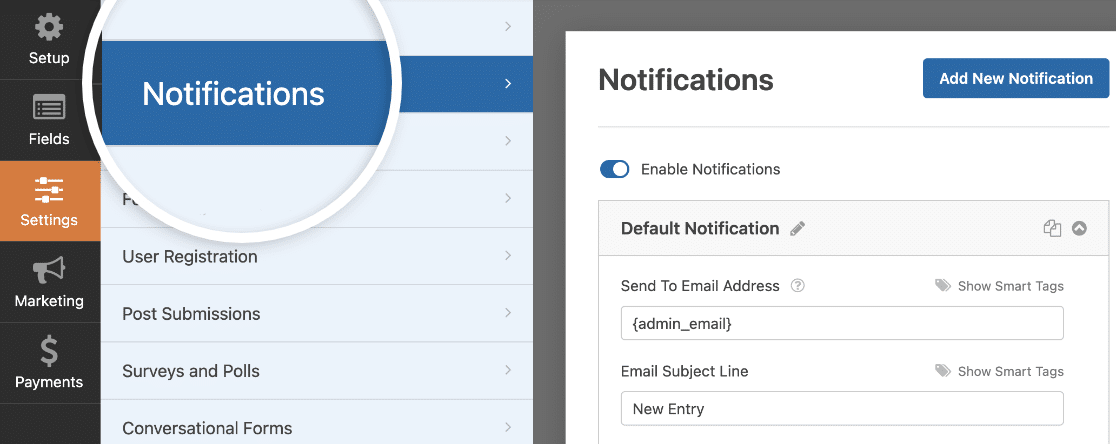
In fact, unless you disable this feature, whenever someone submits a form on your site, you’ll get a notification about it.
If you use Smart Tags, you can also send a notification to people who fill out your travel request form, letting them know you’ve received their form and will be in contact shortly if need be. This assures people their request form has gone through properly.
You can also add important information to the notification email like details on how the travel approval and reimbursement process works at your small business.
For help with this step, check out our documentation on how to set up form notifications in WordPress.
Something incredibly helpful to try with this kind of form is to send more than one notification when someone fills it out. For example, you can send a notification to yourself, plus one to the person who filled it out, and another to anyone in HR letting them know that they’ve got a new travel request in their inbox to review.
For help doing this, check out our step-by-step tutorial on how to send multiple form notifications in WordPress.
Lastly, if you want to keep branding across your emails consistent, you can check out this guide on adding a custom header to your email template.
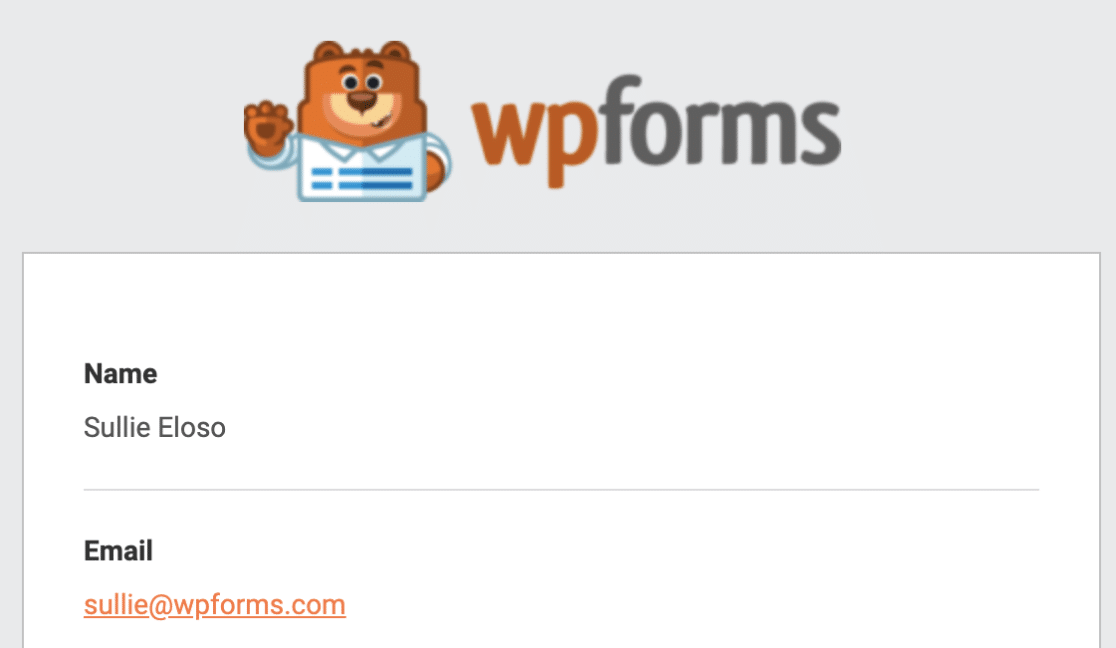
This will give your form a professional touch and make people filling it out feel more at ease.
Step 5: Configure Your Form Confirmations
Form confirmations are messages that display to people once they submit a form on your website. They let people know that their form has gone through and offer you the chance to let them know what the next steps are.
WPForms has 3 confirmation types:
- Message. This is the default confirmation type in WPForms. When someone submits a form, a simple message confirmation will appear letting them know their form was received and is being processed.
- Show Page. This confirmation type will take customers to a specific web page on your site thanking them. For help doing this, check out our tutorial on redirecting customers to a thank you page.
- Go to URL (Redirect). This option is used when you want to send people to a different website.
Ok so, let’s say we want to use a Message confirmation type to let people know it takes 3 business days to hear back about travel request approvals.
So let’s go ahead and check out how to set up a simple form confirmation in WPForms so you can customize the message people will see when they fill out a travel request form on your WordPress website.
To start, click on the Confirmations tab in the Form Editor under Settings.
Next, select the type of confirmation you’d like to create. For this example, we’re selecting Message and writing “Thanks for submitting your travel request! We’ll let you know if it’s approved or denied within three business days.”
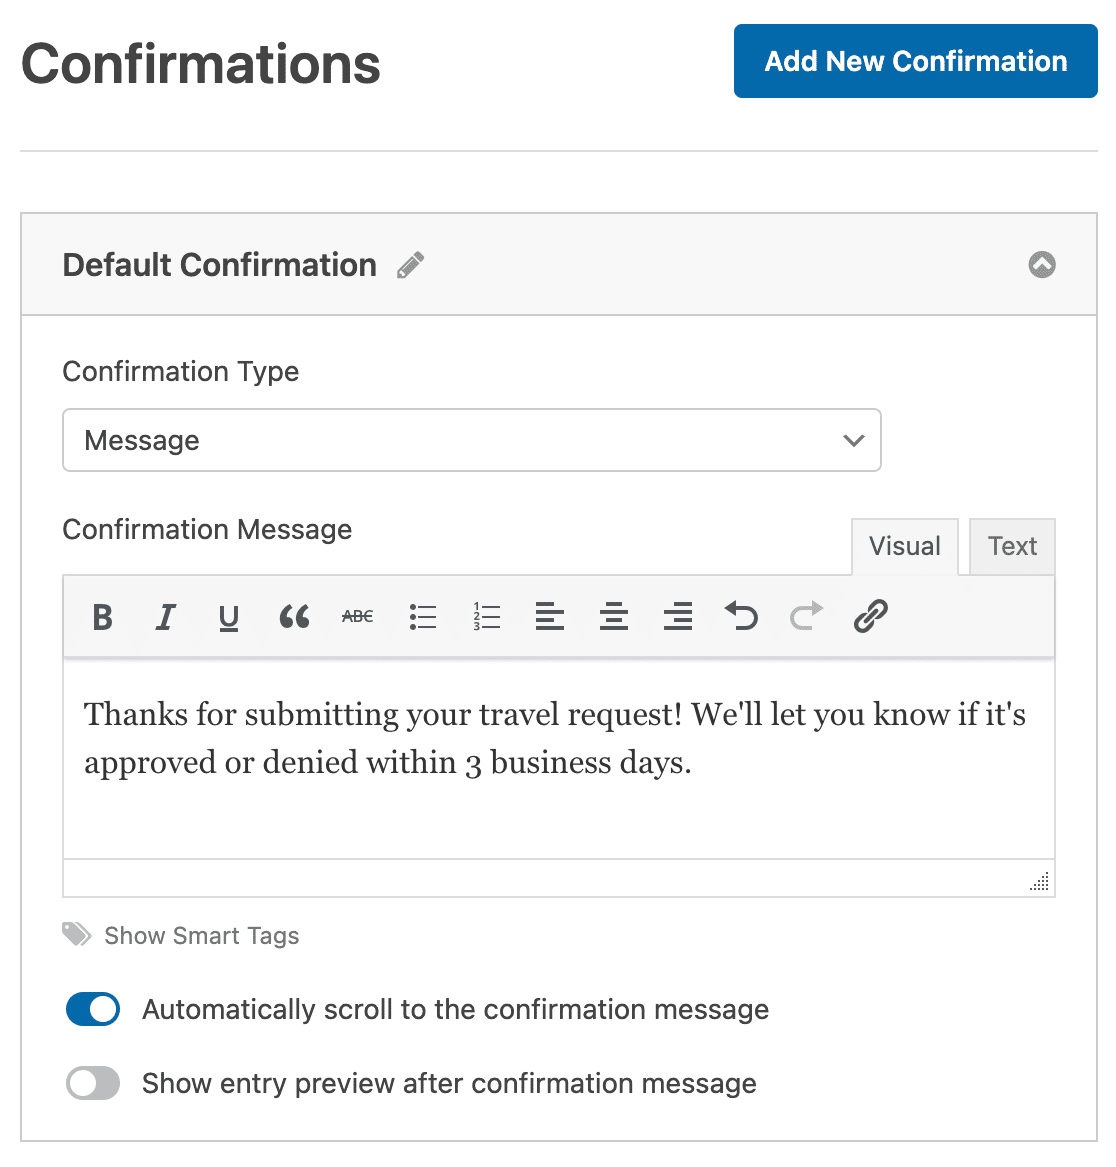
Once you’ve customized the confirmation message to your liking, click Save.
Step 6: Publish Your Form to Your Website
Now that your online travel request form is built, let’s go ahead and publish it on the web.
Start by clicking on the Embed button at the top of the form builder.

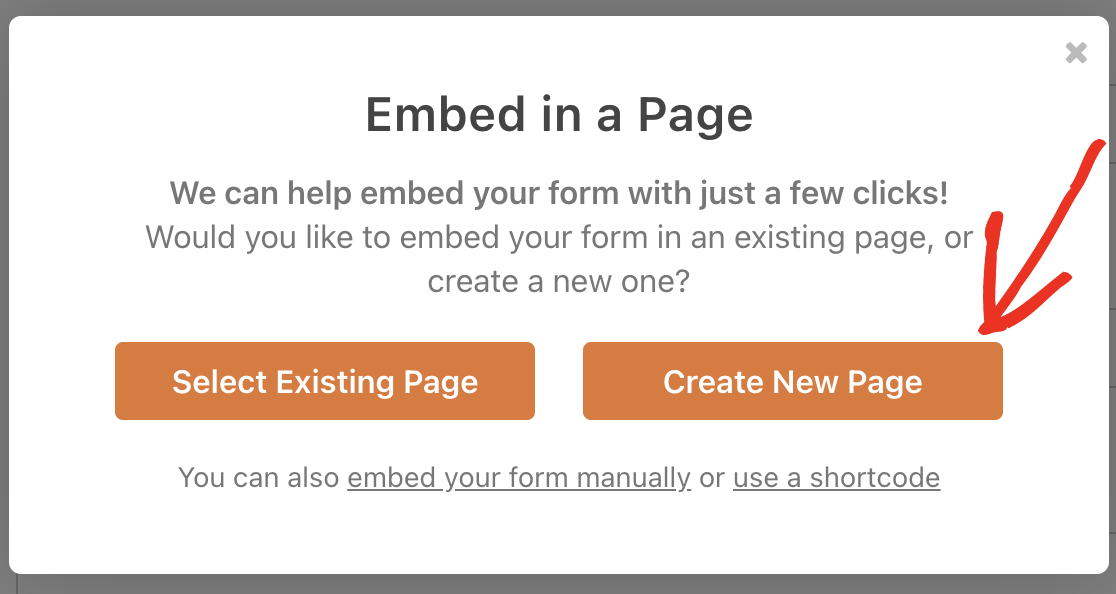
And then when the Embed in a Page notification pops up, go ahead and click on Create New Page.
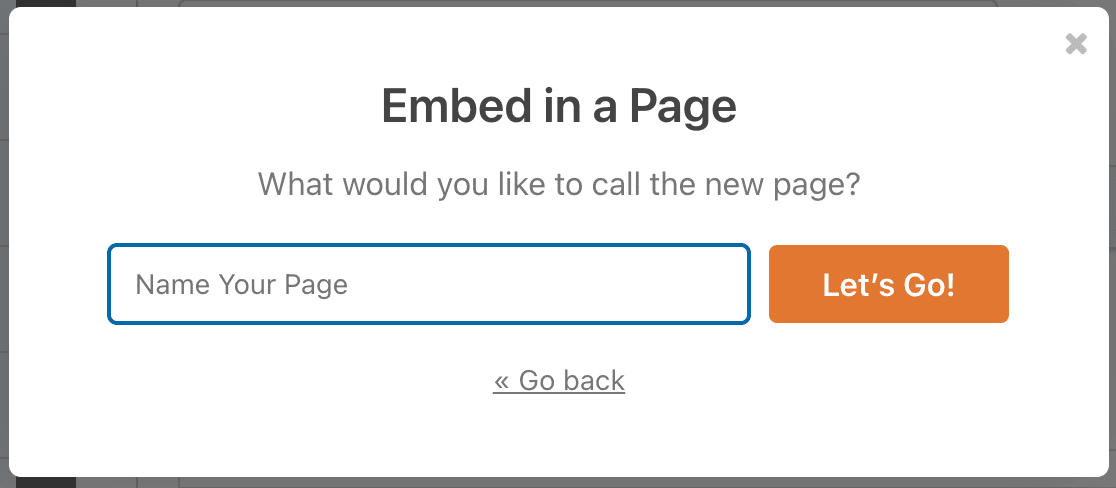
Next, WPForms will ask you to name your page. Type the title for the page into the box and click Let’s Go!
Now WPForms will open up a new page for your travel request form. Next, go ahead and click Publish or Update at the top to publish the form on your site.
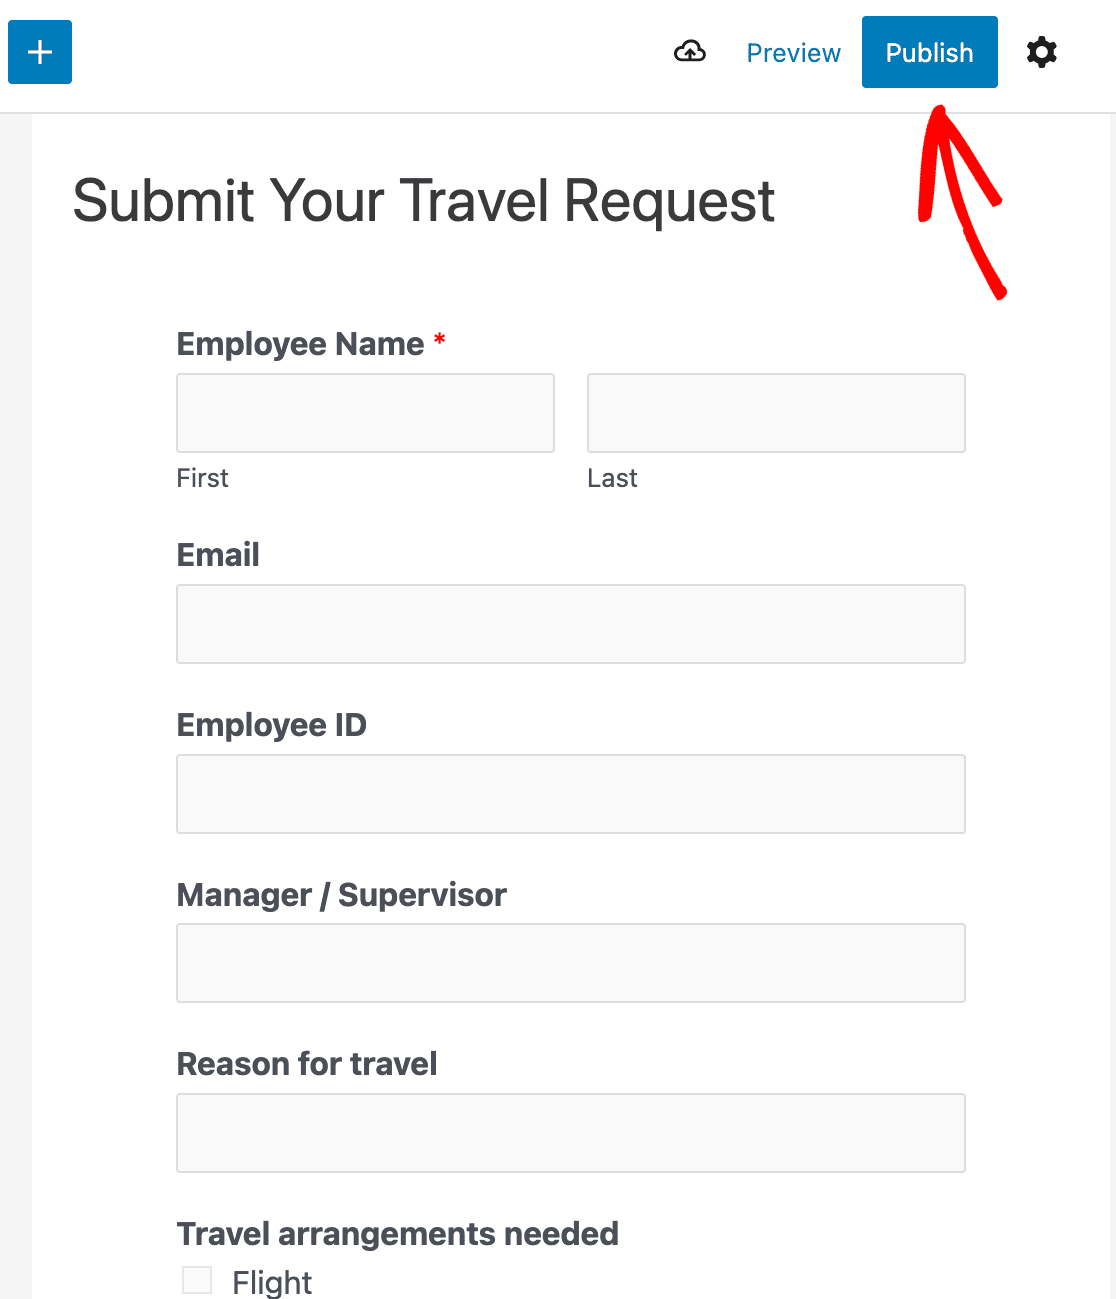
Great job. So now you can let your employees know they can submit travel requests online by using your business’s website.
And there you have it! You now know how to create a travel request form in WordPress.
Create Your Online Travel Request Form Now
Next, Improve Hiring With a Job Application Form
You can start building your travel request form now by using WPForms Pro. WPForms Pro is the easiest and best way to get professional forms on your WordPress website (without even needing to pay a web developer!).
Not only does it come with a free travel request form template that you can use internally, but it also includes tons of other amazing features to use to start getting more leads online.
- You can use features like Conversational forms to make your website forms convert like crazy, and increase your sales
- It’s the most beginner-friendly WordPress contact form plugin
- The File Upload field so you can accept documents through your forms
- Awesome User Journey tool that shows you where your form users have been on your site.
- It lets you create a multi-page form to break the form into multiple pages and enhance the user experience
- It integrates with the most popular email marketing services
- It’s fully responsive and forms look great on all devices
- Conditional logic helps you keep your forms clutter-free to keep visitors focused on completing the form
- You get access to priority support from a friendly and knowledgeable team
So, ready to start making your online travel request form right now? Go ahead and get started today with the world’s best form plugin. WPForms Pro includes a free travel request form template and offers a 14-day money-back guarantee, so you’ve got nothing to lose.
Hiring more employees soon? Check out our tutorial on how to create a job application form in WordPress so you can widen your candidate pool.
Ready to build your form? Get started today with the easiest WordPress form builder plugin. WPForms Pro includes lots of free templates and offers a 14-day money-back guarantee.
If this article helped you out, please follow us on Facebook and Twitter for more free WordPress tutorials and guides.


