AI Summary
Do you need to automatically send a WordPress order form email receipt to your customers from your WordPress website?
By doing this, not only will you be able to communicate with your consumers better, but you’ll also save time by not having to send out separate email receipts.
Any time you automatically provide information to a user regarding a form submission, it helps establish your reputation as being reliable and trustworthy.
In this article, we will show you how to send a WordPress order form email receipt automatically.
Why Are WordPress Order Form Email Receipts Important?
Sending WordPress order form email receipts automatically to customers is a vital communication instrument for businesses and customers, even if payment isn’t made on the form.
They can help enhance the overall user experience, facilitate smooth transactions, and provide transparency through a number of factors, such as:
- Confirmation of Purchases: Automatically generated order confirmation emails that contain details, such as the product/service purchased, quantity, price, and any applicable taxes, confirm that a purchase has taken place, reducing any doubts or uncertainties customers might have.
- Verification of Payments: Order form email receipts ensure that customers know exactly when the payment was successfully completed and typically include information like payment method used, timestamp, and transaction IDs, which can assist them with any future considerations.
- Record Keeping: Order form email receipts help with record-keeping for businesses and customers. They provide a documented history of purchases for customers to track deliveries, and request support (if needed), while helping businesses track inventory and maintain financial records.
- Customer Service: In case of any issues with a purchase, order, or delivery, email receipts are a convenient reference point for customers to seek assistance. At the same time, businesses can use email receipts to include support channels, enhancing customer service accessibility.
- Marketing Opportunities: With the strategic placement of promotional offers, upselling or cross-selling suggestions, and personalized messages, order form email receipts can be a valuable marketing tool. This can further help foster repeat sales and long-term customer relationships.
If you’re interested in learning how to automatically send WordPress order form email receipts, check out our step-by-step instructions below.
How to Automatically Send a WordPress Order Form Email Receipt
To automatically send WordPress order form email receipts, you can rely on the advanced features of WPForms. Follow the steps below to get started:
In This Article
- 1. Install and Activate WPForms
- 2. Connect WPForms with Stripe Pro
- 3. Create Your Order From with WPForms
- 4. Configure Stripe Payments in Your Form
- 5. Configure Your Order Form Settings
- 6. Customize Your Order Form Confirmation
- 7. Customize Your Order Form Notifications
- 8. Add Your Order Form to Your Website
1. Install and Activate WPForms
WPForms is an easy-to-use, drag-and-drop form builder and WordPress plugin that lets you create order forms with built-in email receipt generation.
You can also experience a seamless integration of your order forms with Stripe using the free WPForms Lite plugin.
However, there is usually a small charge associated with credit card processing. A 3% fee will be added to each transaction on top of Stripe’s standard rates.

If you want to remove the additional fees, consider an upgrade to WPForms Pro to access more advanced features and save costs in the long run.
For instance, WPForms Pro subscribers can access pre-made form templates like our sample order form. Additionally, it enables you to use Stripe Pro, an add-on that has advanced capabilities like conditional logic.
In this guide, we’ll utilize WPForms Pro to create an order form quickly and easily and personalize the auto-generated email receipts sent to customers.
After you decide which WPForms version suits your needs, it’s time to install and activate the plugin on your WordPress site.
After it’s activated, you can quickly get started with creating an order form with customizable email receipts by following the steps below.
2. Connect WPForms with Stripe Pro
Great job on installing WPForms! The next step is to integrate the plugin with Stripe. We’ll show you how you can do this.
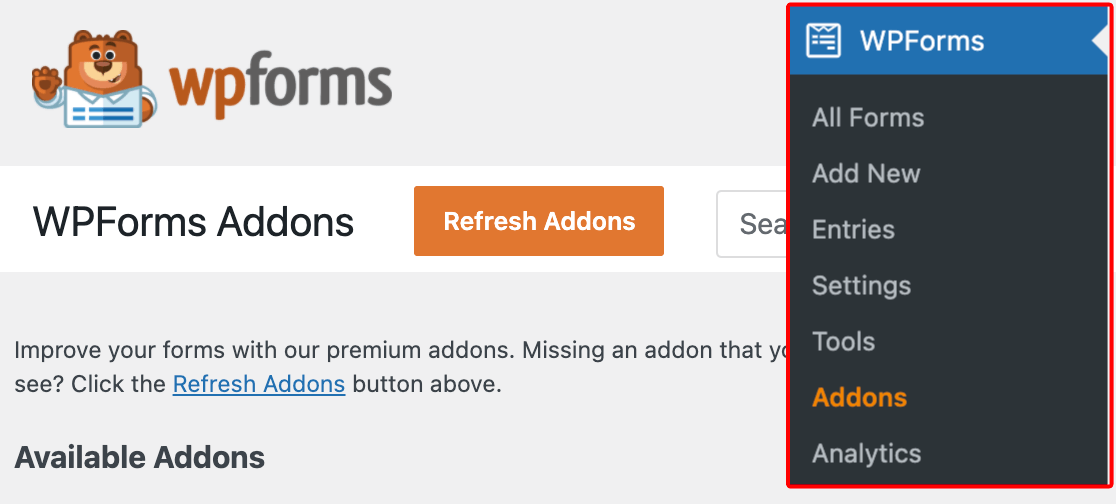
From your WordPress admin dashboard, navigate to WPForms and click on Addons from the list of options.
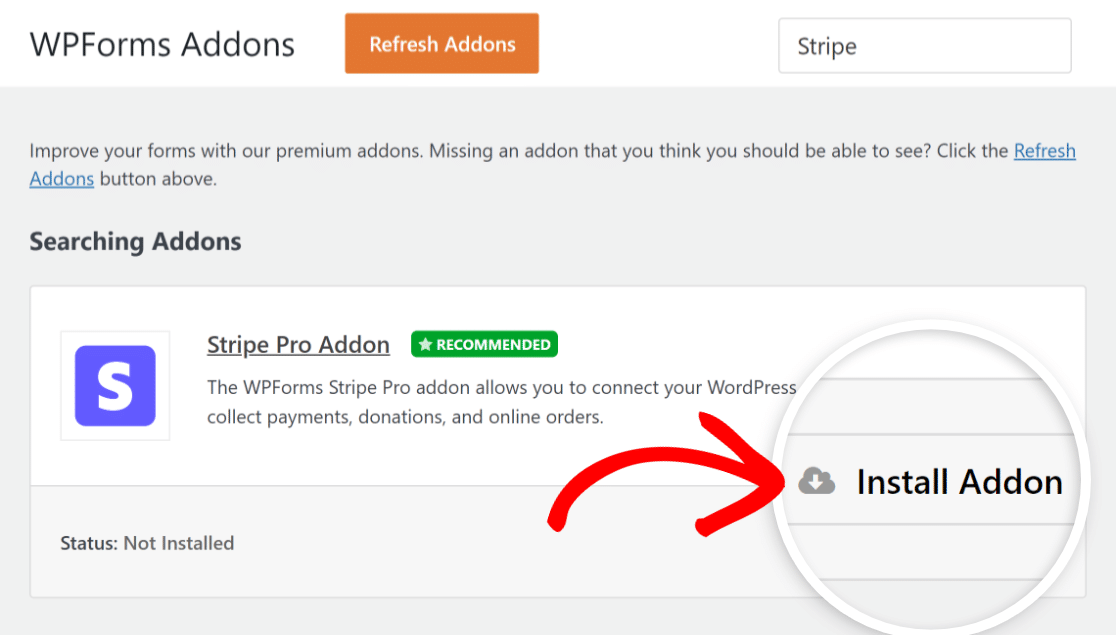
After that, search for the Stripe Pro Addon by typing its name in the Search Addons field. Next, click on Install Addon and then the Activate button.
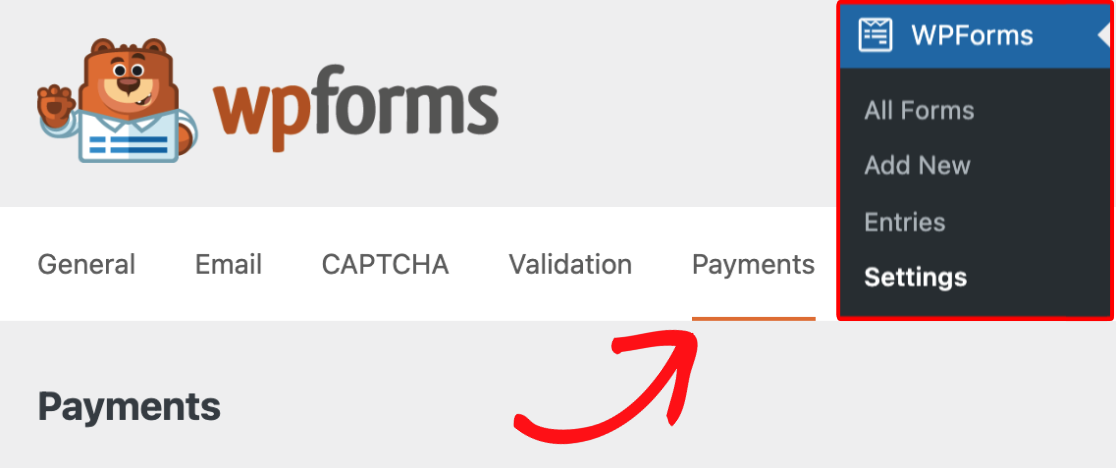
Now, you can set up your Stripe payment settings by going to WPForms » Settings and clicking on the Payments tab.
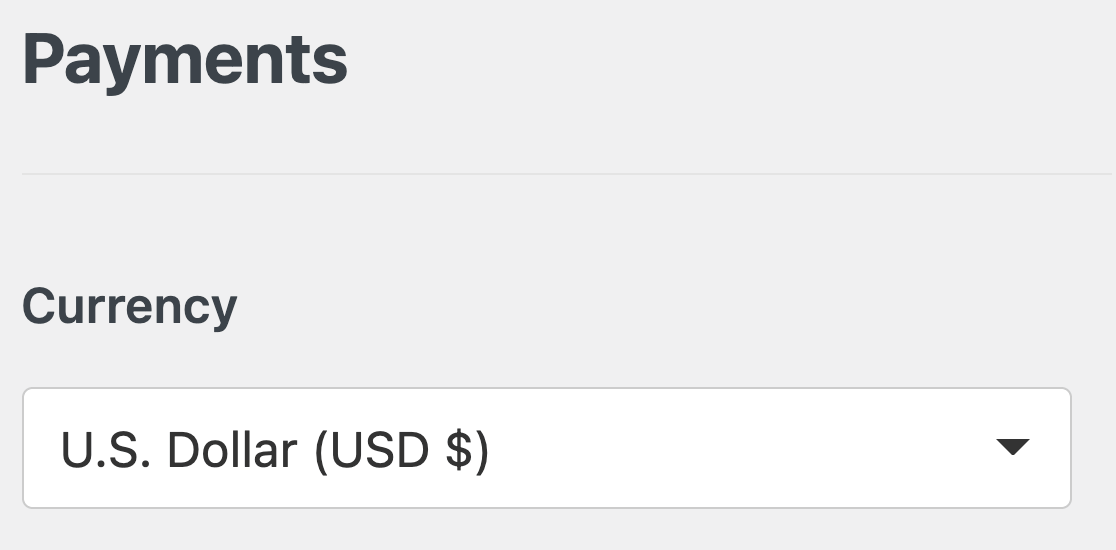
If you want to switch the currency that is being used on your website, select the desired currency from the drop-down menu before proceeding.
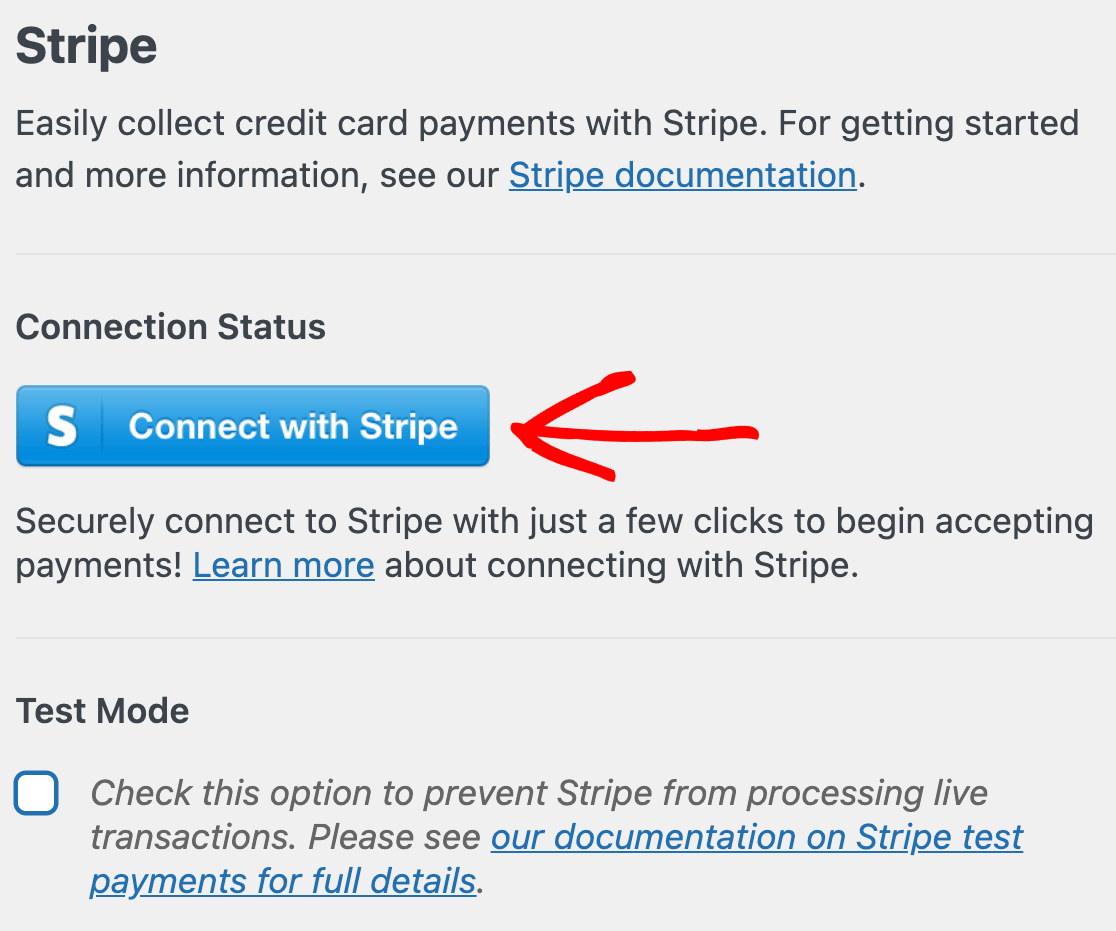
Excellent work! The time has come to incorporate the Stripe payment gateway into your site. Click the blue Connect with Stripe button under the Stripe heading.
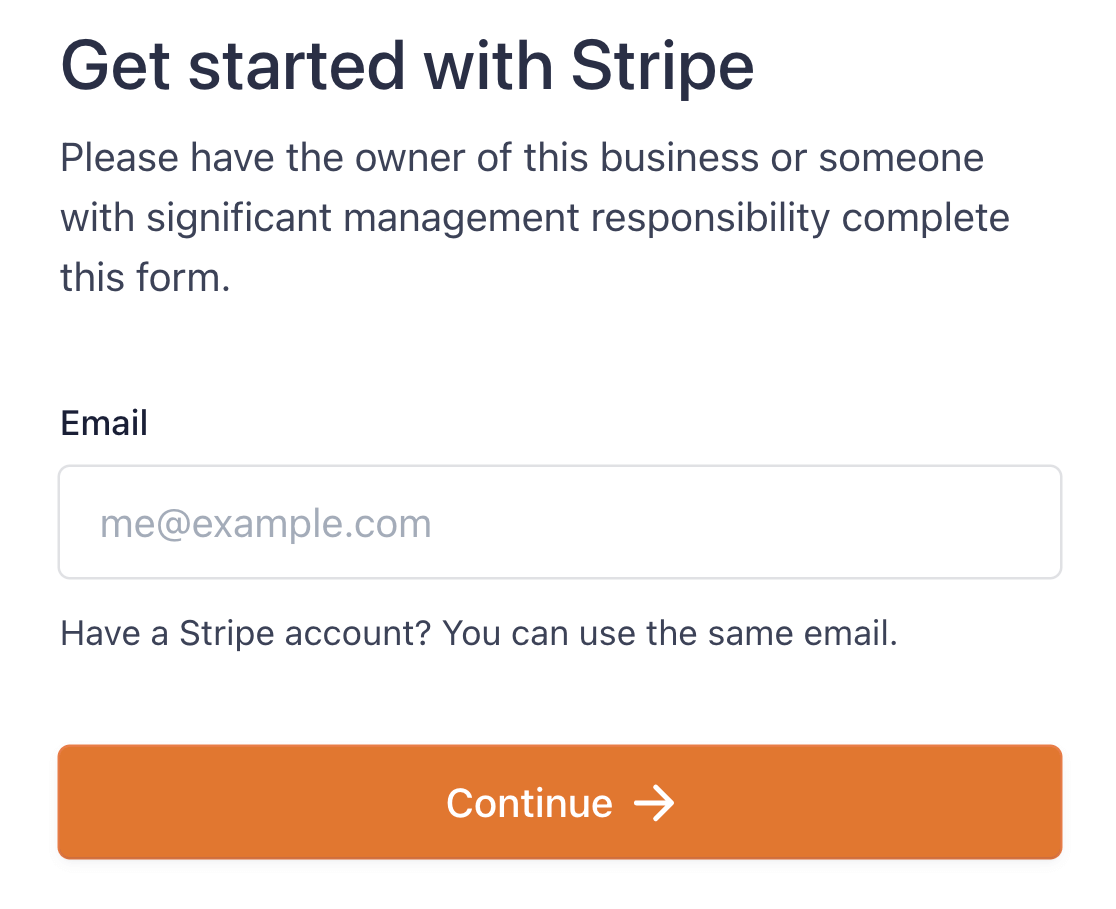
After that, you’ll need to provide your Stripe login details in order to link your WPForms account with your Stripe account.
If you don’t already have a Stripe account, you should think about creating one as soon as possible and sign up for it.
You will now be returned to your site’s administration panel once you have completed all the steps in the Stripe Connect Wizard.
If everything is functioning properly, a green checkbox will appear next to Connection Status with your Stripe ID name.

Bear in mind that you can’t use the Stripe Pro addon with WPForms Lite; you’ll need to upgrade to WPForms Pro for that.
In the case of using WPForms Lite, instead of installing the add-on, you may simply go to the Payments page and enter your Stripe credentials there.
Stripe is set to Payment Elements by default for new WPForms users, allowing them to accept payment methods, such as Apple Pay, Google Pay, and more.
If you previously used the Card Elements mode and are updating to WPForms 1.8.2, you’ll have the option to switch to Payment Elements.
3. Create Your Order From with WPForms
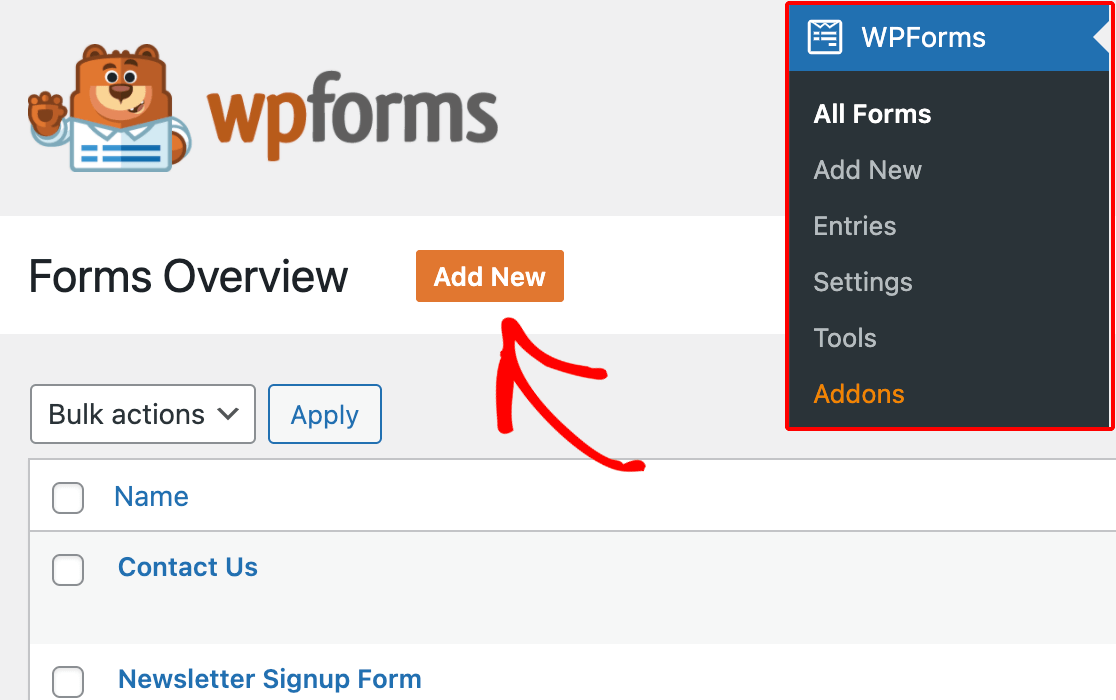
Now we can go ahead and create your order form. From your WordPress dashboard, navigate to WPForms » Add New.
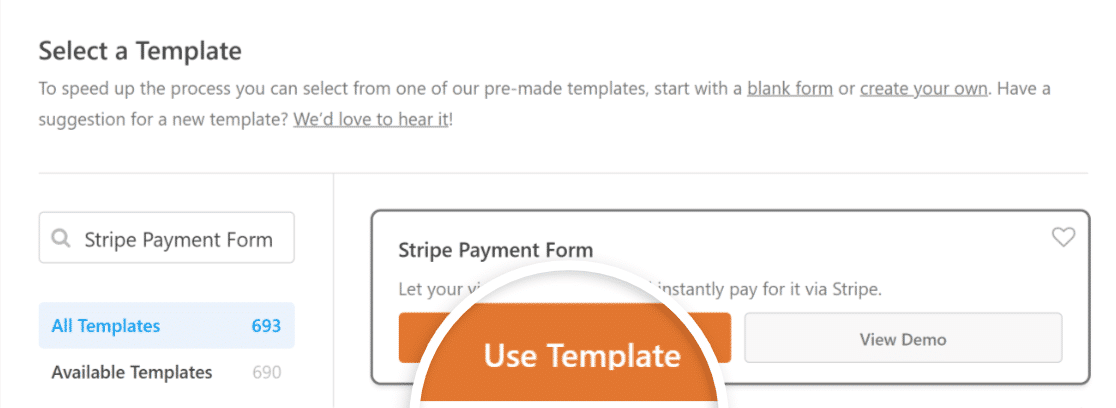
On the setup screen, name your form and select the Stripe Payment Form template. Once it shows up, click on the Use Template button.
As you can see, the template is pre-built with fields that capture a customer’s details, order selection, total, and Stripe credit card details.
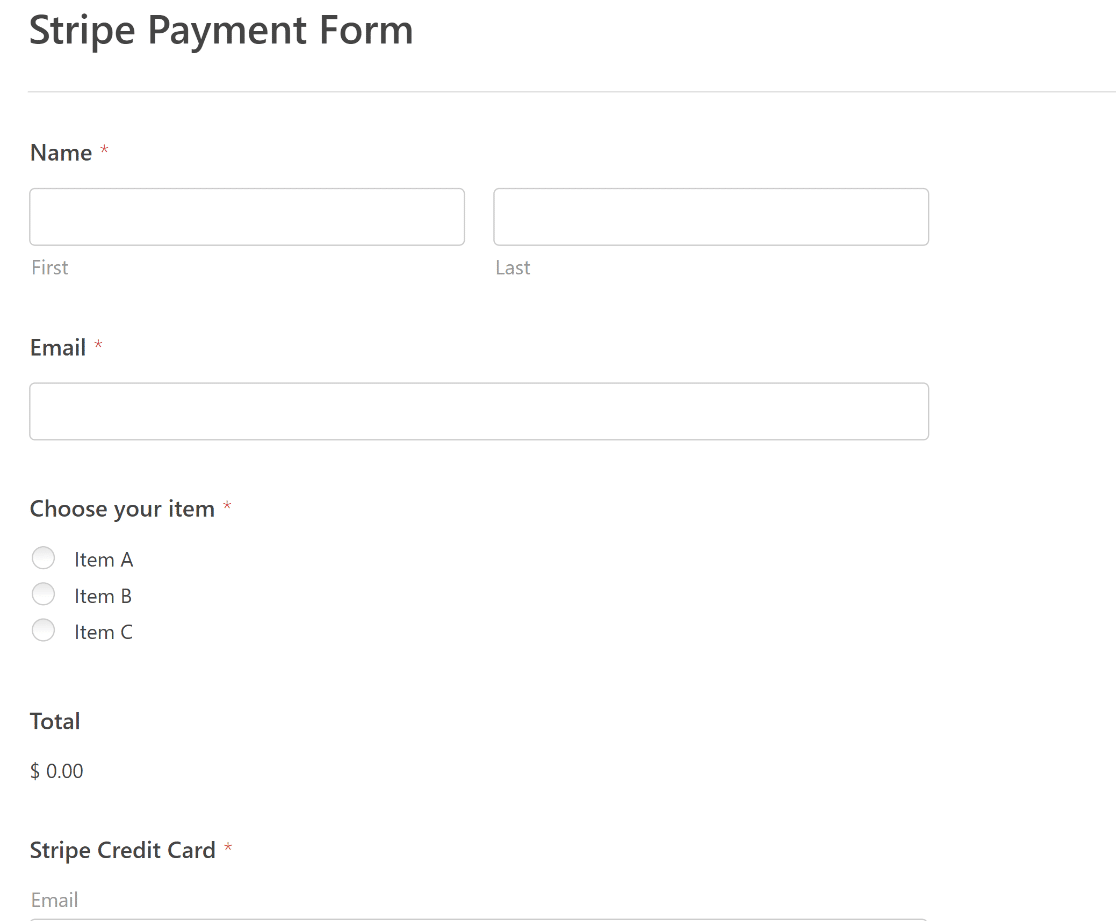
Feel free to use WPForms’ intuitive form builder to easily add, modify, and arrange fields to tailor the payment order form to your liking.
In the next step, we’ll enable Stripe payments so that the Credit Card field can start processing transactions.
4. Configure Stripe Payments in Your Form
After you’ve added all the required fields to your Stripe Payment Form, you can turn on the Stripe payments integration.
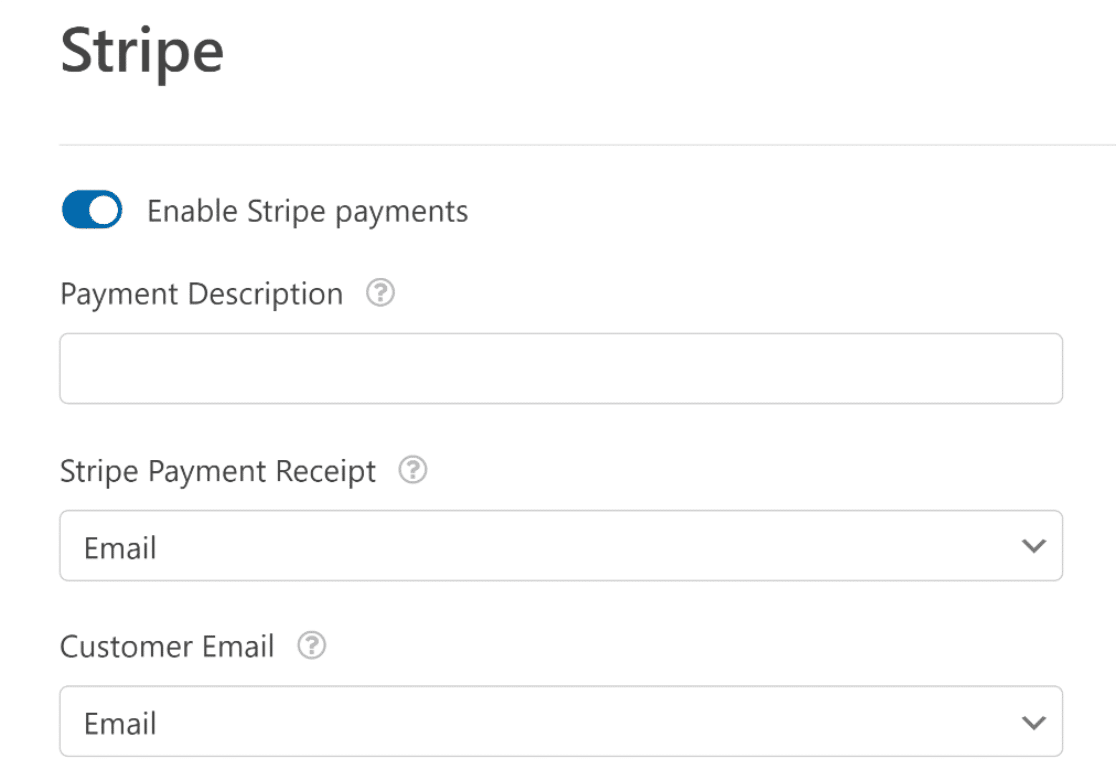
You can easily do that by going to Payments » Stripe in your form builder. Then, click the Enable Stripe Payments toggle button on the right panel.
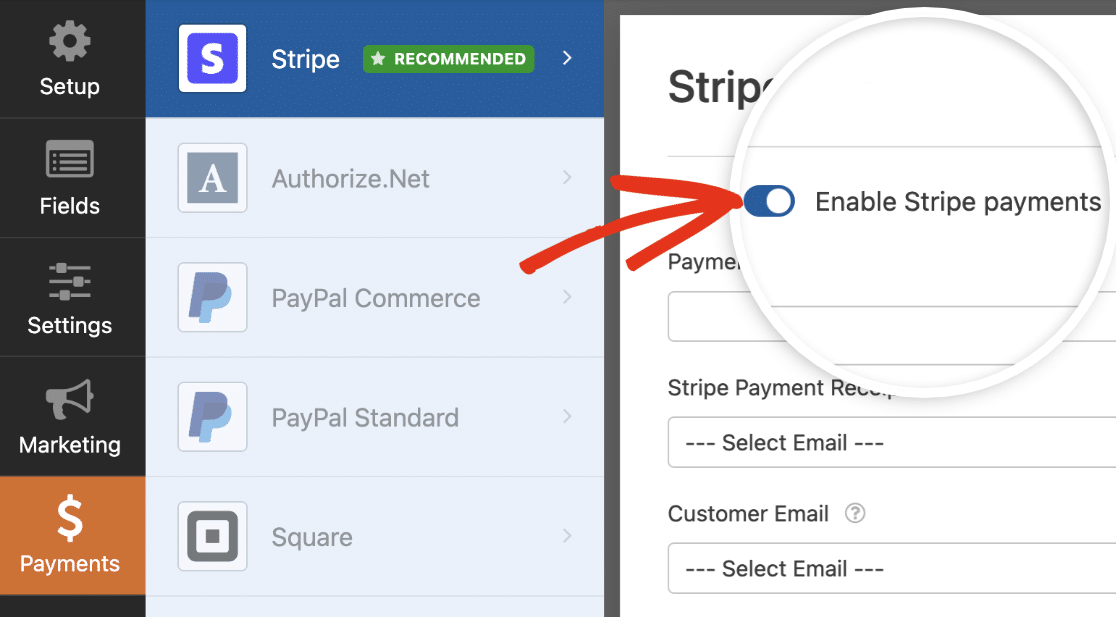
Once you’ve enabled Stripe payments, a variety of extra options will appear to allow you to tailor the checkout process of your order form to each customer.
Let’s explore what these different options mean:
- Payment Description: The description input here will be reflected on your customers’ bank statements, so choose a description that your customers can quickly identify.
- Stripe Payment Receipt: By choosing the appropriate Email field in your form, you can authorize Stripe to send automated payment receipts to customers’ email inboxes.
- Customer Email: Identify the Email field holding the customer’s email data. This will assist you in tracking payments directly from your Stripe account interface.
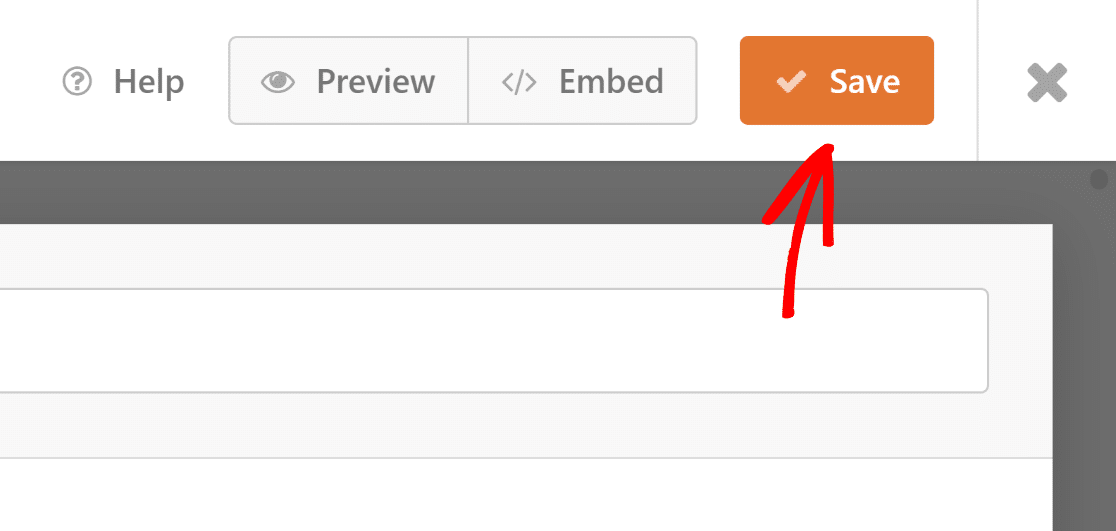
We’re almost there! Before moving on, make sure to hit the Save button to avoid losing any changes.
5. Configure Your Order Form Settings
There are a few settings to configure once you’ve customized your form fields and enabled Stripe Payments. Start by navigating to Settings » General.
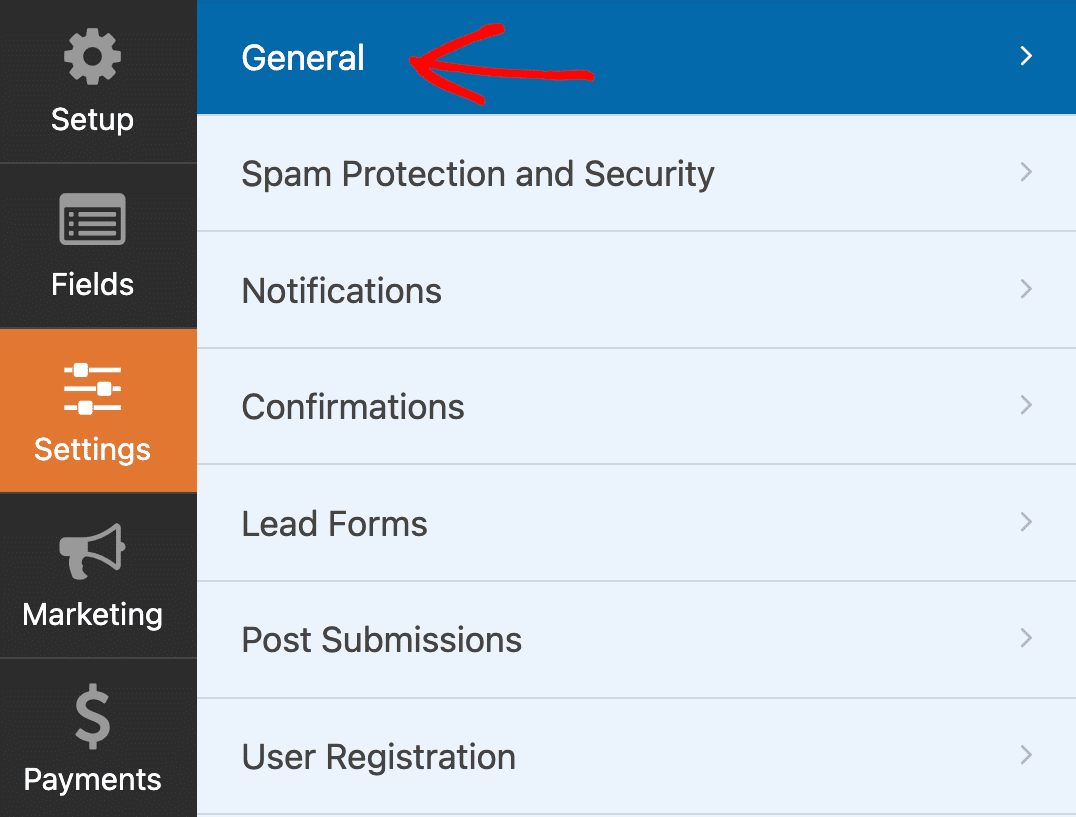
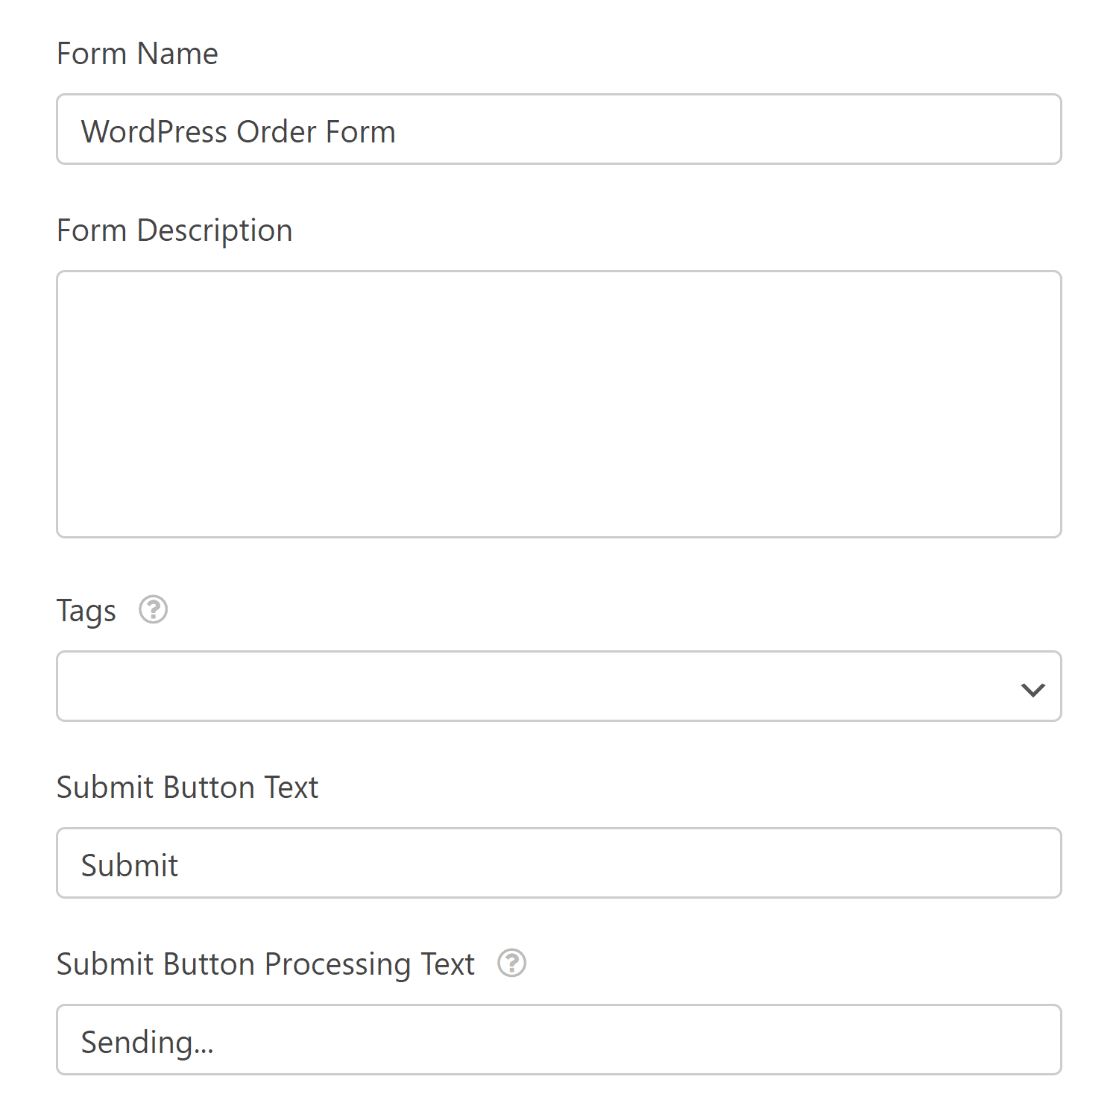
Here you can configure the following:
- Form Name — Change the name of your form here if you’d like.
- Form Description — Give your form a description.
- Tags — Use tags to keep your site’s forms organized.
- Submit Button Text — Customize the copy on the submit button.
- Submit Button Processing Text — Change the text that will be visible while your form is being submitted.
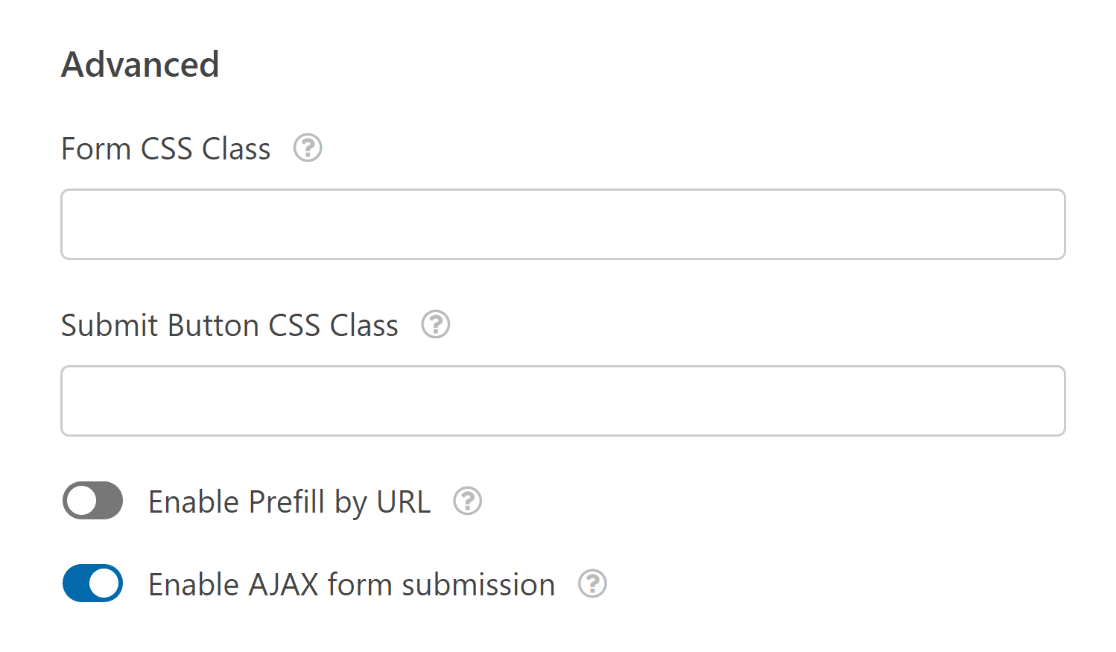
If you expand the Advanced section of the screen, you can also configure these options:
- Form CSS Class — Add custom CSS to your form.
- Submit Button CSS Class — Add CSS to your submit button.
- Enable Prefill by URL — You can use this setting to auto-fill some fields in your form.
- Enable AJAX form submission — Enable AJAX settings with no page reload.
Then, you’ll need to configure the Spam Protection and Security settings to ensure proper spam filtering.
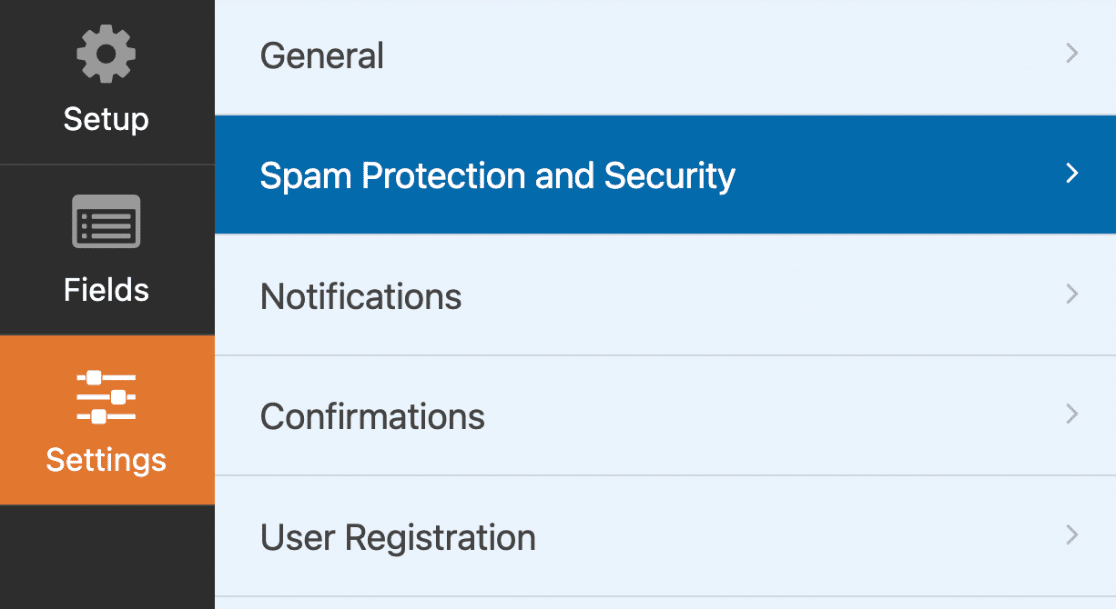
You can also easily connect with WPForms Custom Captcha, Google reCAPTCHA, hCaptcha, or Cloudflare Turnstile to prevent spam submissions.
In the next step, we’ll explain how to configure your form notification and confirmation settings to send a WordPress order form email receipt automatically.
You can also check out this guide for more information on how to customize form notifications with email templates, typography, and more.
6. Customize Your Order Form Confirmation
Now, you’ll want to adjust your form confirmation settings that are displayed to site visitors once they submit an order form on your website.
They let people know that their order has been processed and offer you the chance to let them know what the next steps are.
To customize the automatically generated confirmation message sent to customers, go to Settings and click on Confirmations.
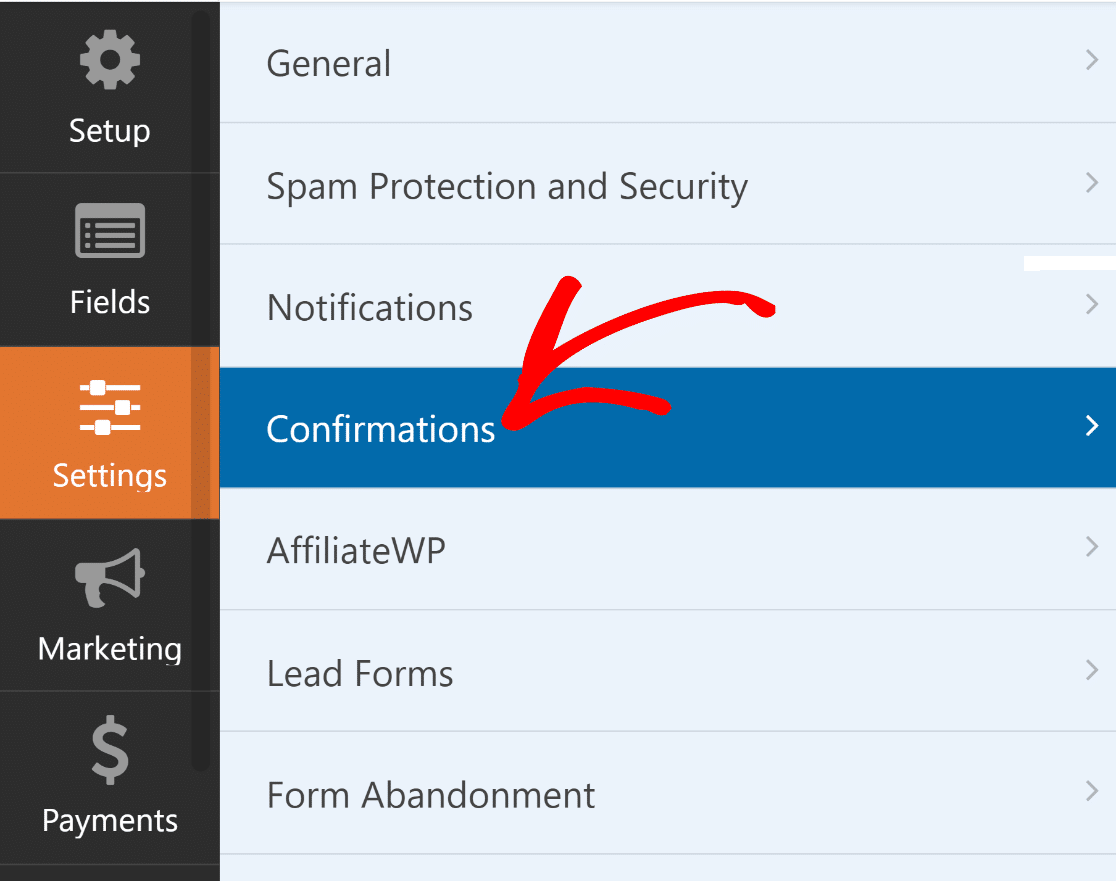
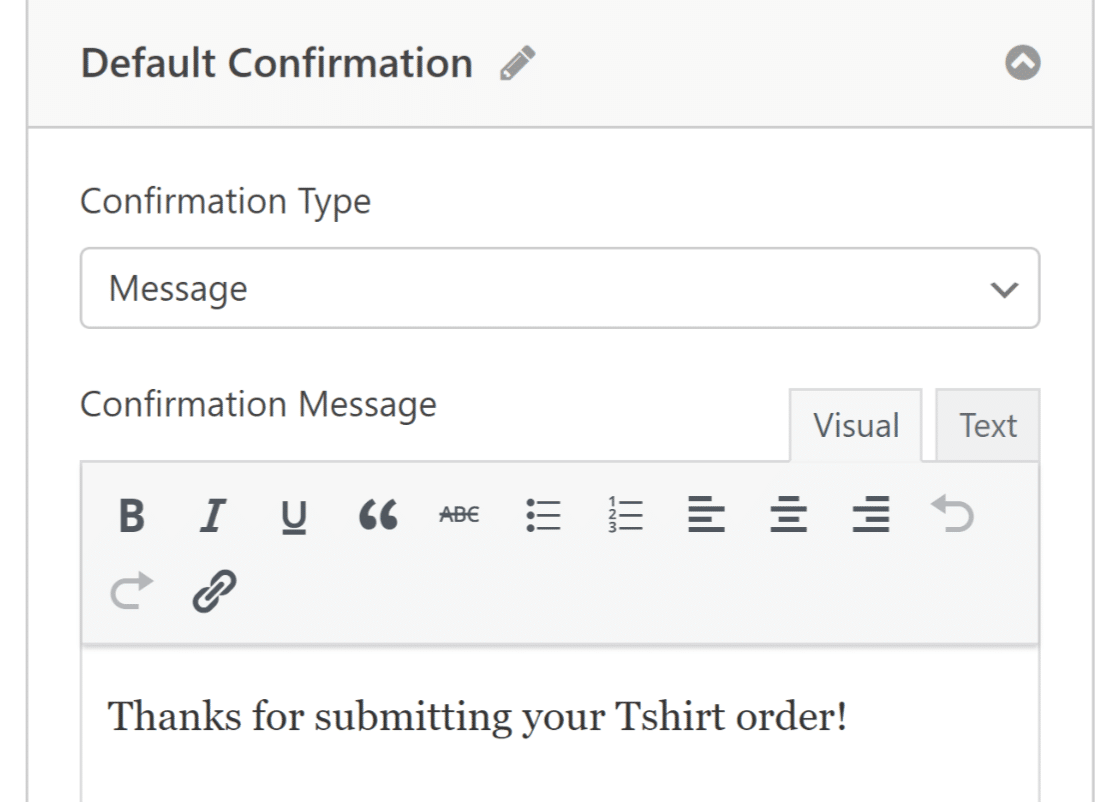
WPForms has three confirmation types:
- Message. A simple message that displays once someone submits a form on your website thanking them and letting them know what the next steps are.
- Show Page. Redirect users to another page on your website, such as a thank you page.
- Go to URL (Redirect). Send site visitors to a different website.
If you want to display different confirmations to visitors based on the type of products they order, read up on how to create conditional form confirmations.
7. Customize Your Order Form Notifications
Notifications are a great way to send emails whenever an order form is submitted on your website. To configure yours, go to Settings » Notifications.
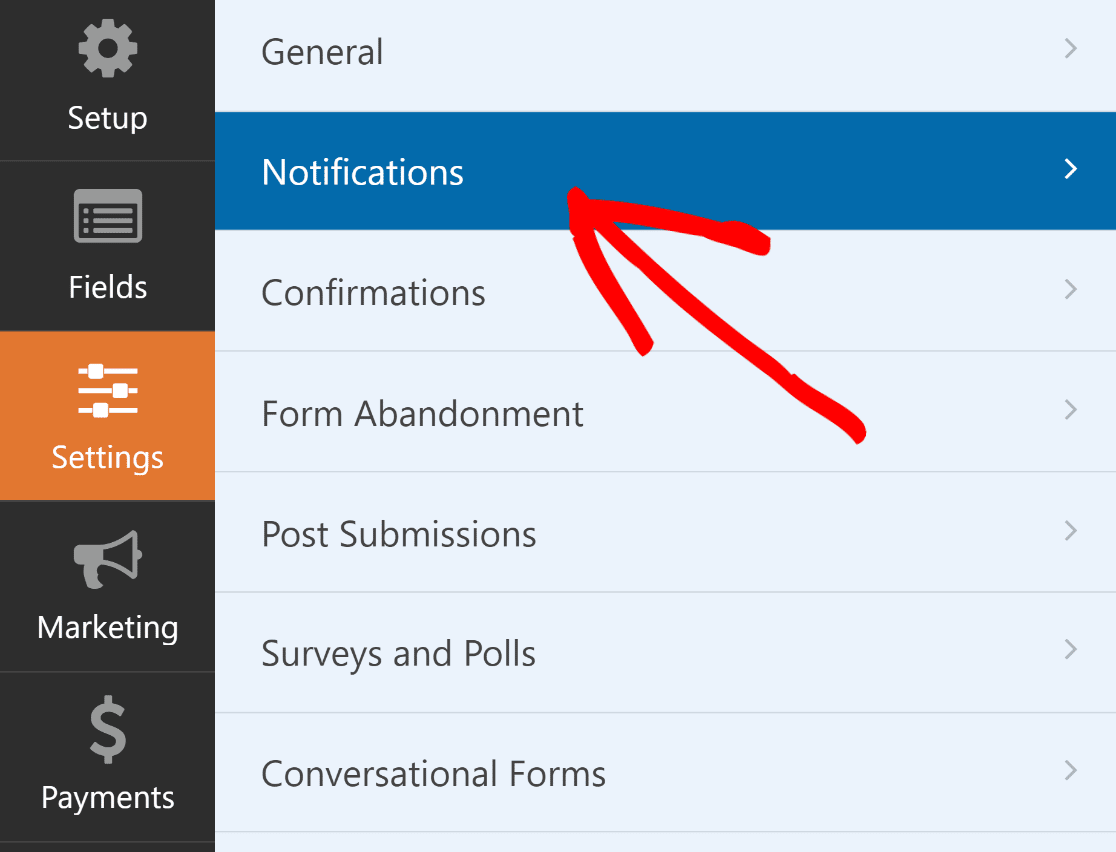
While admin notifications are enabled by default, you can edit the subject, message, and add or change recipient email addresses for these notifications.
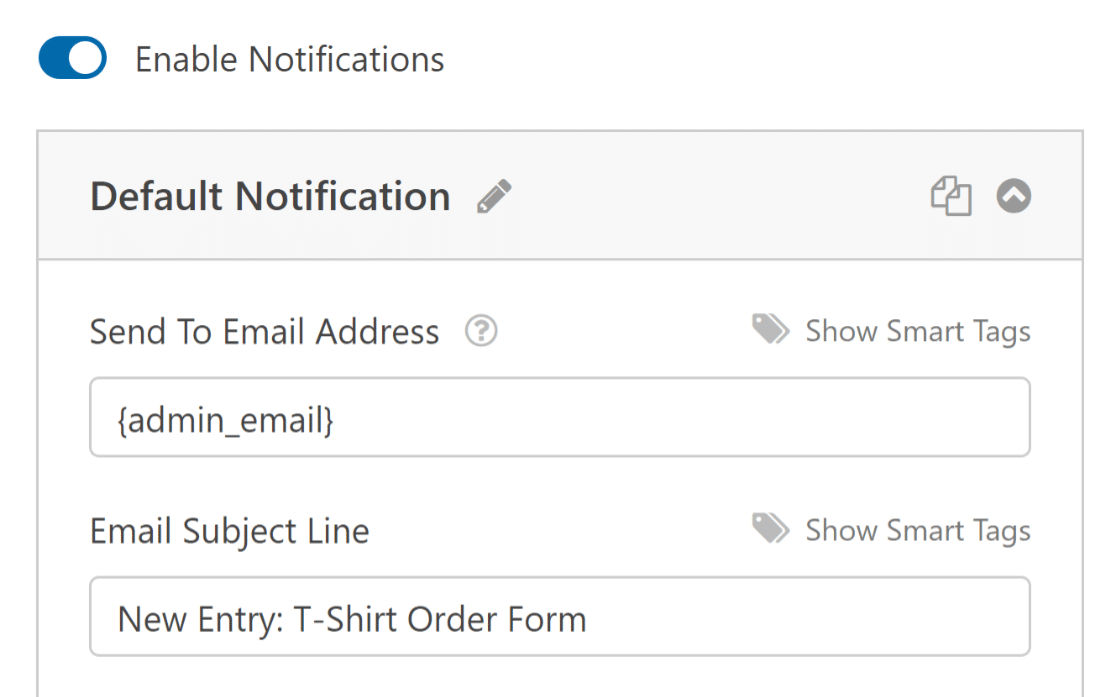
Form notifications are also a great way to send order form email receipts to customers after they submit an order and the form is processed.
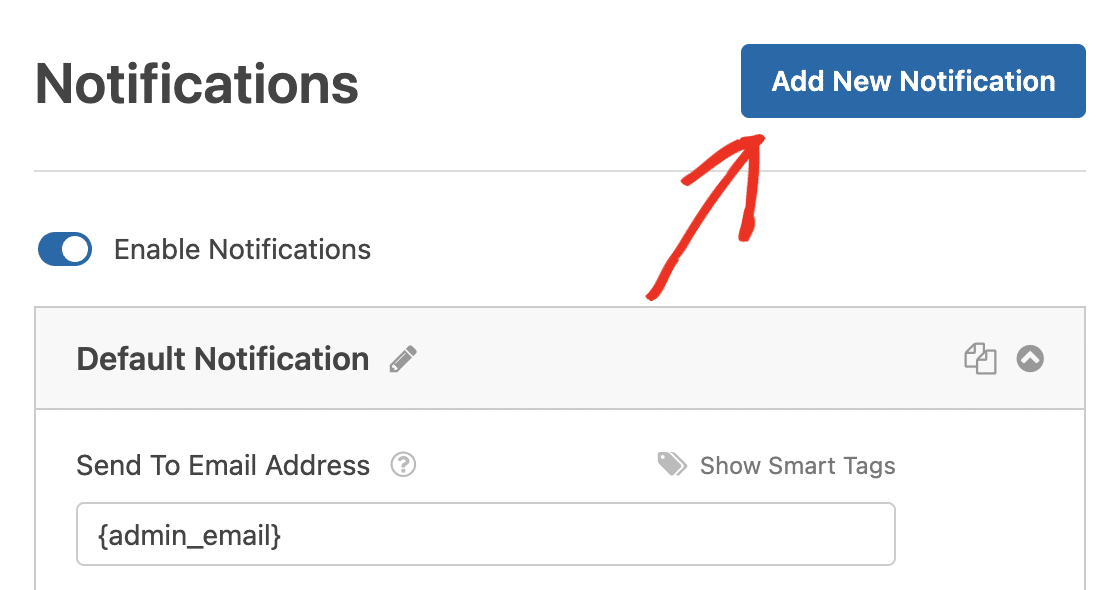
It’s a great idea to send a confirmation email to users when they submit your form. To configure this, select Add New Notification.
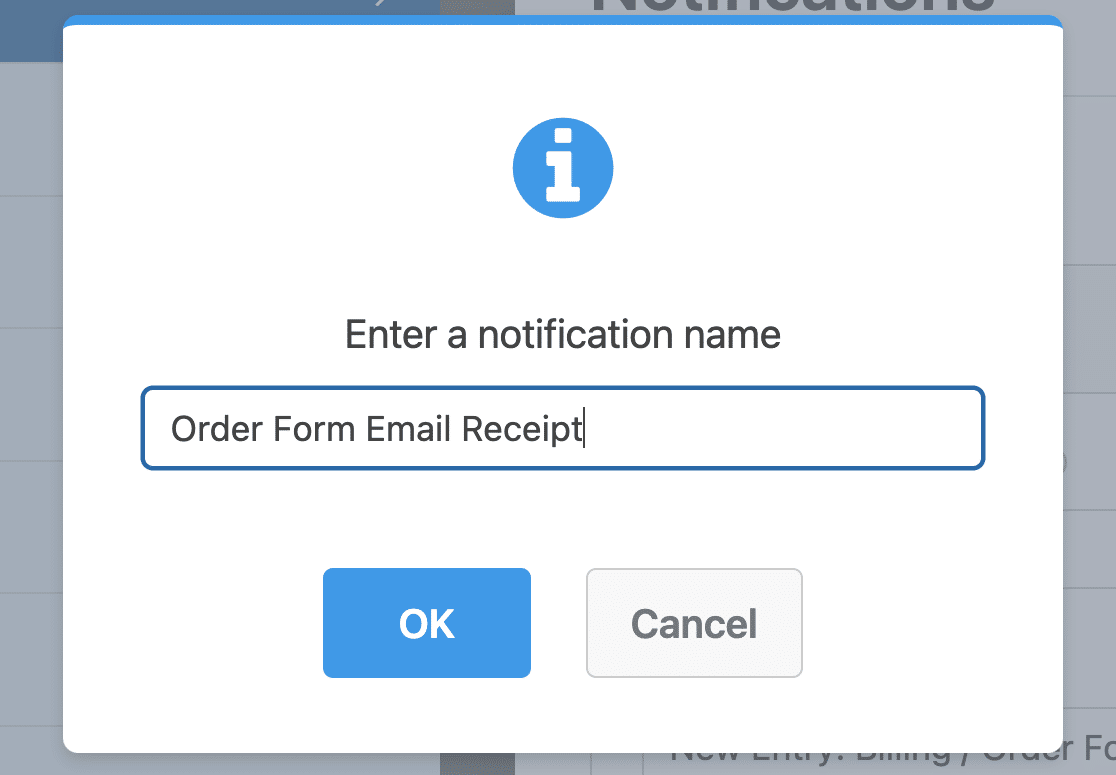
A modal will pop up asking you to name your notification. Name it anything you want, since it’s for your reference only, and click OK.
Next, click the Show Smart Tags link next to the field labeled Send To Email Address field to customize it.

Then, choose Email from the dropdown menu to ensure that an email notification is sent to whatever email your customer put into your order form.
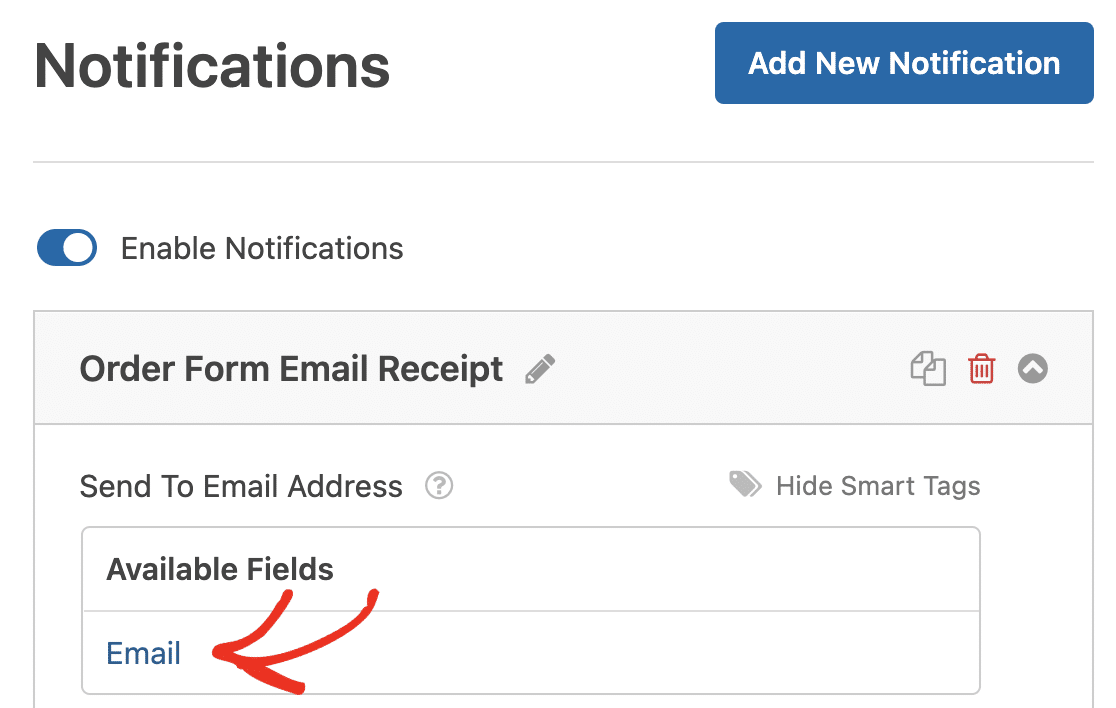
Remember the number in the Smart Tag represents the field number on your form. For instance, the 2nd form field on our order form is an email form field.

You can then customize the email subject, from name, from email, and reply-to fields using Smart Tags as well.
Next, in the Email Message section, customize the message your customer will see in the email order receipt.
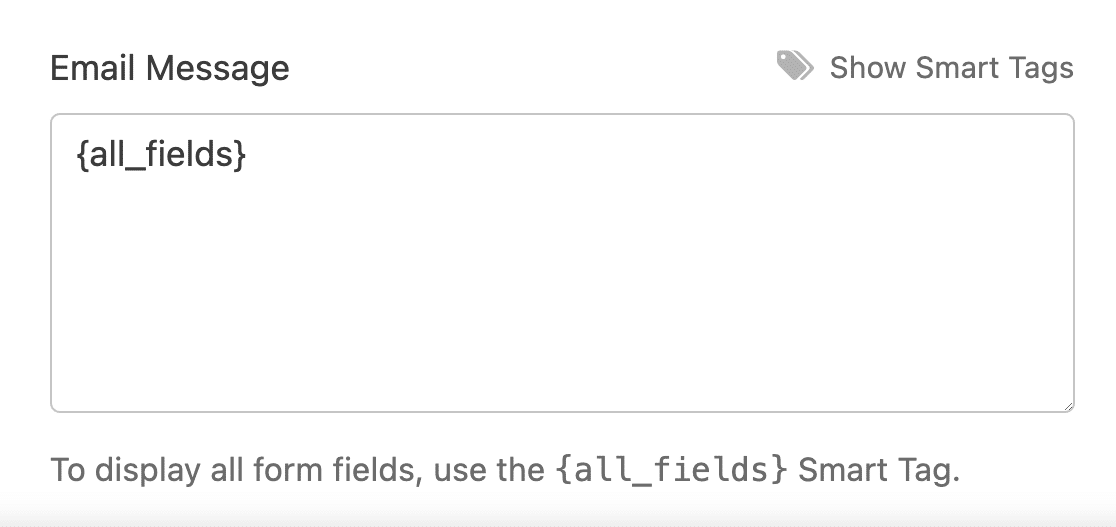
For instance, thank them, let them know their order was processed, tell them you’ll be in touch shortly, etc.
Next, select individual Smart Tags from the dropdown to insert specific pieces of form submission information into the email receipt.
For instance, you can add the items purchased and the total amount paid so your customer knows exactly what they bought and for how much.
Or, if you want to include all form fields in the message of your WordPress order from email receipt, click on the Smart Tag labeled {all_fields}.
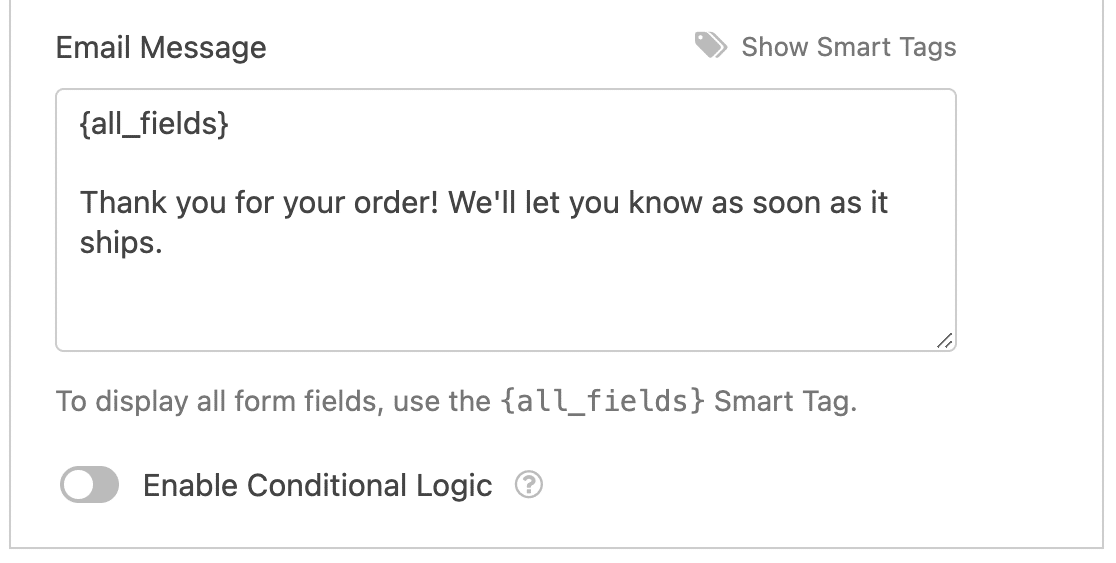
Lastly, if you want to keep branding across your emails consistent, you can check out this guide on adding a custom header to your email template.
Alternatively, WPForms provides many templates that you can use to customize the look and feel of your notification emails.
Great, your form notifications and confirmations are good to go! Now, just hit the Save button again, and we can add the form to your website.
8. Add Your Order Form to Your Website
After you’ve created an order form and customized the order form email receipt, you need to add it to your WordPress website.
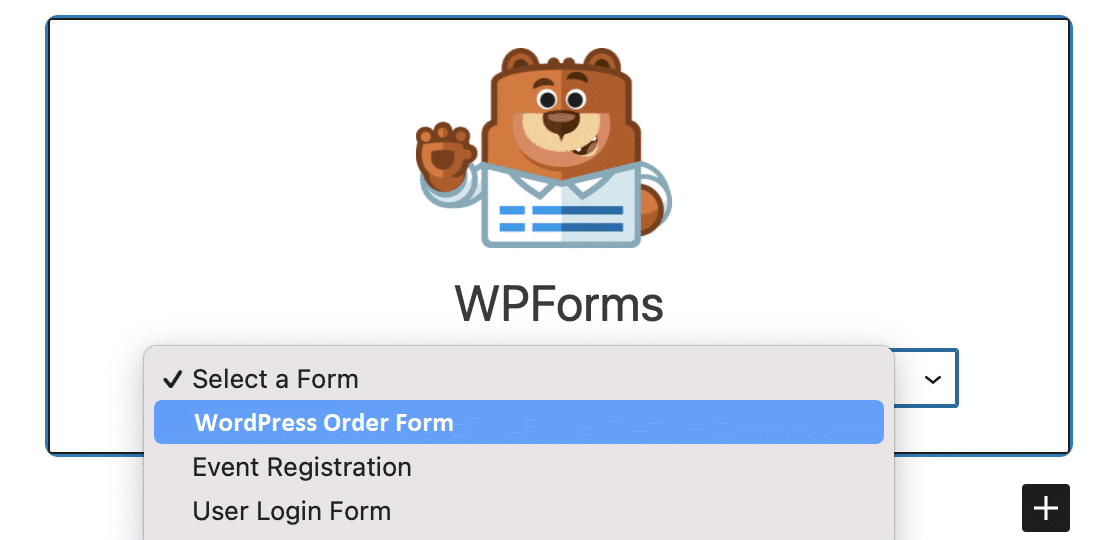
Create a new page/post or simply update an existing one. After that, click on the Add Block button and select the WPForms icon.
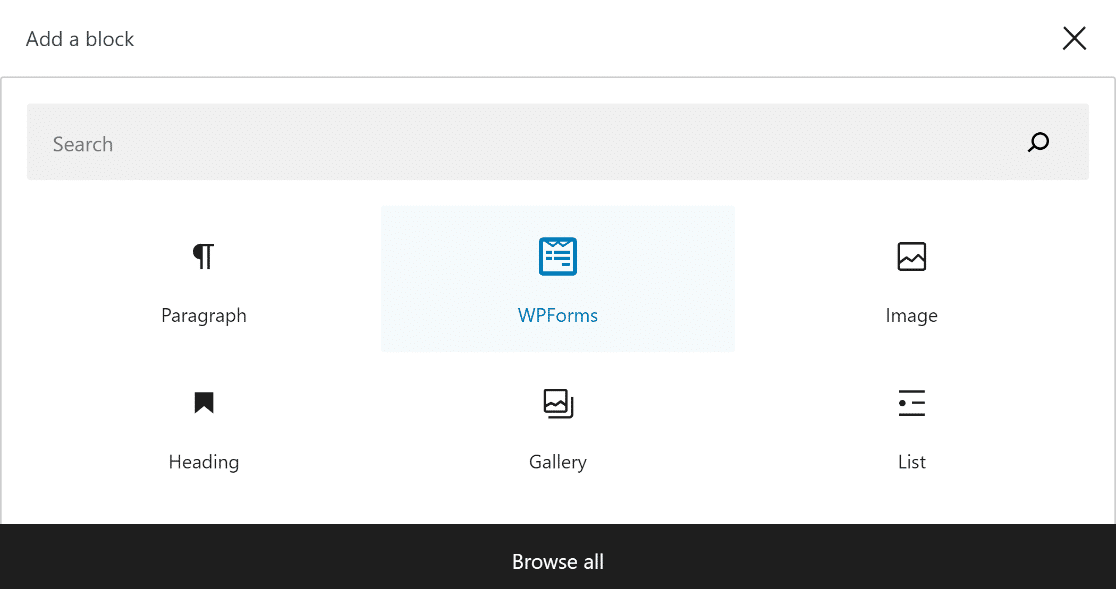
Next, select your custom order form from the dropdown menu in the WPForms widget to attach it to your page/post.
If you’re satisfied with how your form looks and functions, go ahead and click Publish or Update at the top to publish it.
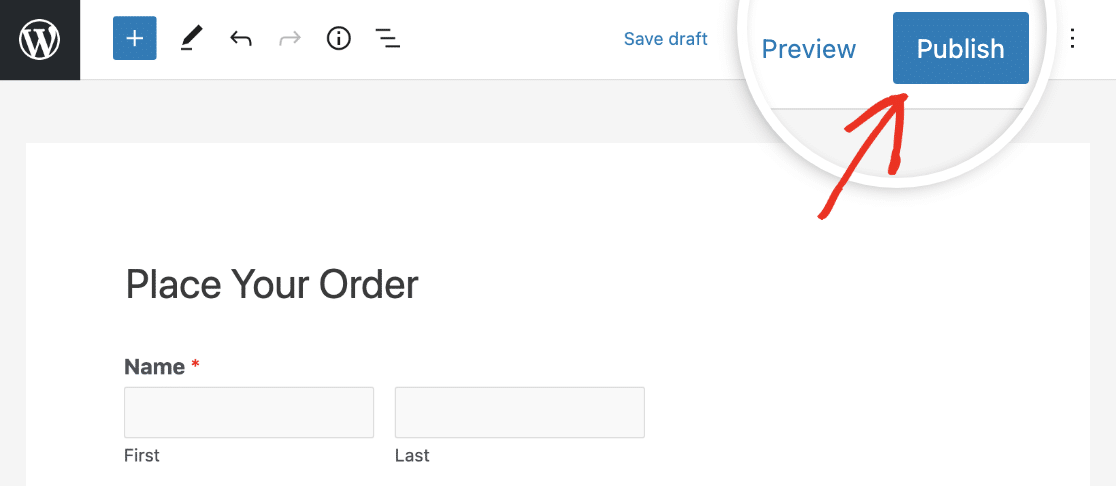
After you’ve published the form, all that’s left to do is ensure it works as planned by testing the embedded form.
Next, Learn How to Build Engaging, Interactive Forms
If you want to make the form look better, we have you covered in that regard as well. Discover how you may further contribute to a great ordering experience for your customers by learning how to style WPForms utilizing the block editor.
Looking for a more clean and organized way to present complex data on your WordPress forms? It may also be a good idea for you to explore our guide on creating accordion form designs to boost your website’s functionality and user experience.
Create Your WordPress Order Form Now
Ready to build your form? Get started today with the easiest WordPress form builder plugin. WPForms Pro includes lots of free templates and offers a 14-day money-back guarantee.
If this article helped you out, please follow us on Facebook and Twitter for more free WordPress tutorials and guides.

