
AI Summary
Want to add MailPoet subscribers straight from the forms already running on your WordPress site? You can connect any WPForms form to MailPoet and send every new submission to your email list automatically.
In this guide, I’ll walk you through the full setup, including how to map fields, add an opt-in checkbox, and route subscribers to the right list.
By the end, you’ll have a form that collects leads, captures payments, or handles contact requests, and quietly grows your MailPoet audience in the background.
Do You Need WPForms to Build a MailPoet Form?
MailPoet ships with its own form editor. You can make a basic signup form, drop it in a popup or sidebar, and start collecting emails. For a plain “join my newsletter” box, that’s often all you need.
So when should you reach for WPForms instead? When the form is doing more than just email capture. I’ve found that most sites want one form to handle several jobs at once, and MailPoet’s native editor is really only built for opt-ins.
How to Create a MailPoet WordPress Form
I’m going to show you how to connect WPForms and MailPoet directly from the WPForms integrations tab. Here’s a quick look at what we’ll cover.
Step 1: Install the WPForms Plugin
WPForms is the best form builder plugin for WordPress. It lets you create any type of WordPress form using a drag-and-drop builder. And it has different types of spam protection you can use on any form.
In all versions of WPForms, you can accept payments with Stripe. But with WPForms Pro, you can:
- Store all of your form entries in the WordPress dashboard
- Create surveys and polls
- Accept payments with Square and PayPal
- Track the user’s journey through your site
- Make multi-step forms with progress bars
- And more
So let’s download and install the WPForms plugin now. Don’t forget to activate the plugin before moving on.
Step 2: Install and Activate MailPoet
Now, make sure that the MailPoet plugin is installed and activated on your WordPress site.
Go to WPForms » Settings and click on the Integrations tab.

Locate the MailPoet option and proceed to install the MailPoet plugin from there.

This step will automatically take you to MailPoet on the WordPress Add New Plugin screen.
Here, click Install Now and then Activate to complete the installation of the MailPoet plugin.

Once the MailPoet plugin is installed, activate it and start the setup by clicking the Begin setup button in the MailPoet welcome page.

Step 3: Configure the MailPoet Connection
By clicking Begin setup, you will launch MailPoet’s setup wizard.
Follow the on-screen instructions to complete the basic setup. You can enter sender information now or skip it and configure these settings later in MailPoet.
Once you’ve completed or skipped the onboarding steps, you’ll need to connect your MailPoet account to activate the plugin.
Click the Connect MailPoet button, which will open a new tab taking you to the MailPoet website. This is where you’ll need to select a plan and create an account.

If you already have a MailPoet plan, you can close the new tab that opens. Simply return to the setup screen where you’ll see the Activation key field.
With your MailPoet account created and plan selected, navigate to the Account page from MailPoet and locate the subscription information. Next, click the Copy button to copy your activation key.

Then, return to your WordPress site where the MailPoet activation page is open, paste the activation key into the Activation key field, and click Verify account.

Once your key is verified and MailPoet is connected, you’re ready to integrate it WPForms.
Step 4: Add the MailPoet Integration to Your Form
Now we’re going to make a contact form that will sign visitors up to your MailPoet list automatically when it’s submitted.
If you already have a form set up in WPForms, open it up now and navigate to the Marketing » MailPoet section. Click the Add New Connection button to create a new MailPoet connection for your form.

In the overlay that appears, enter a connection nickname.
You can use any nickname you’d like, since this won’t be visible to your users. Once you’ve added a nickname, click the OK button.

Next, you need to configure your subscription settings, such as choosing between Subscribe or Unsubscribe actions and mapping form fields to MailPoet lists.
Subscribe
Clicking Subscribe will add users to your MailPoet email list when they submit the form. Once selected, additional settings will appear:
- Email: Choose the form field that collects the subscriber’s email address.
- Lists: Select the MailPoet list(s) where new subscribers should be added.
- Custom Fields: Map your WPForms fields to MailPoet custom fields to collect additional subscriber information beyond their email address. Click the blue plus (+) button to add more mappings.

Unsubscribe
Selecting Unsubscribe will remove users from your MailPoet email list. This is useful for unsubscribe forms. After choosing this action, you’ll need to configure these options:
- Email: Choose the form field that contains the subscriber’s email address.
- Lists: Select the MailPoet list(s) from which users will be unsubscribed when they submit the form.

Step 5: Customize Your Contact Form
Now that the MailPoet integration is configured on your contact form, let’s finish customizing the form.
Adding Separate Name Fields
By default, WPForms has a First Name and a Last Name field. These 2 fields are combined into a single ‘Name’.
MailPoet stores the First Name and Last Name separately, so let’s tweak the form to match that. First, drag a Layout field onto your form.

Then drag 2 Single Line Text fields into the columns of the Layout field so that they’re side by side. We’ll use these as our First Name and Last Name fields.

Click on the 1st Single Line Text field to open its field options. Then change the Label to First Name.

Do the same thing for the 2nd Single Line Text field, but label it Last Name. Now your form should look like this:

Great! Now we have 2 separate fields for the visitor’s first and last name. Don’t forget to delete the original Name field by hovering over it and clicking on the trash can.

Adding an Optin Field
GDPR is an important law that protects personal data. Any time you create a signup form, you should get the person’s explicit consent.
Drag a Checkbox field onto your form and use it as a dedicated opt-in. If the box isn’t ticked, the visitor won’t be added to your MailPoet list.
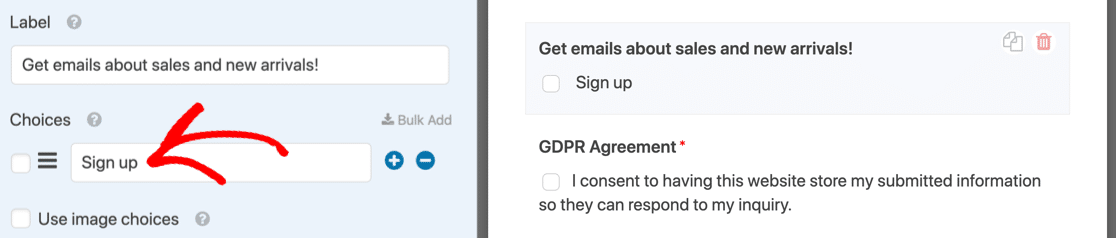
Write the label and choice text in plain language. Something like “Yes, add me to the monthly newsletter. You can unsubscribe any time.” works well because it tells the visitor exactly what they’re agreeing to.
Make a note of the exact text you use in the Choices field, because we’ll need it again when we set up conditional logic. You’ll also want to decide between single opt-in and double opt-in.
- Single opt-in adds the subscriber to your list as soon as they submit.
- Double opt-in sends them a confirmation email first, and only adds them if they click the link.
Read our guide on single opt-in vs. double opt-in if you want a deeper look before you choose.
You might also want to add a GDPR field to your contact form to cover storage of their data. If you’re not sure whether you need this, I’d recommend speaking to a lawyer for GDPR guidance.
Enabling Conditional Logic (Optional)
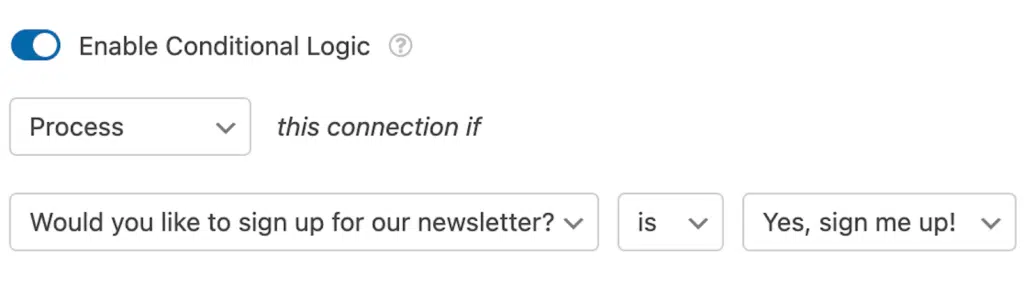
Conditional logic lets you control when the MailPoet integration runs based on the visitor’s answers. The classic use case is gating the signup behind the opt-in checkbox.
Toggle on Enable Conditional Logic on the MailPoet connection, then add a rule that says “Process this connection if Newsletter Opt-in is checked.” Now only people who tick the box get added to your list.
You can go further with conditional logic. If your form asks “Which topics interest you?” with a checkbox field, create one MailPoet connection per topic.
Then, route each visitor to the right segmented list based on what they picked. The visitor fills out one form, and you end up with a properly segmented audience without any manual cleanup.
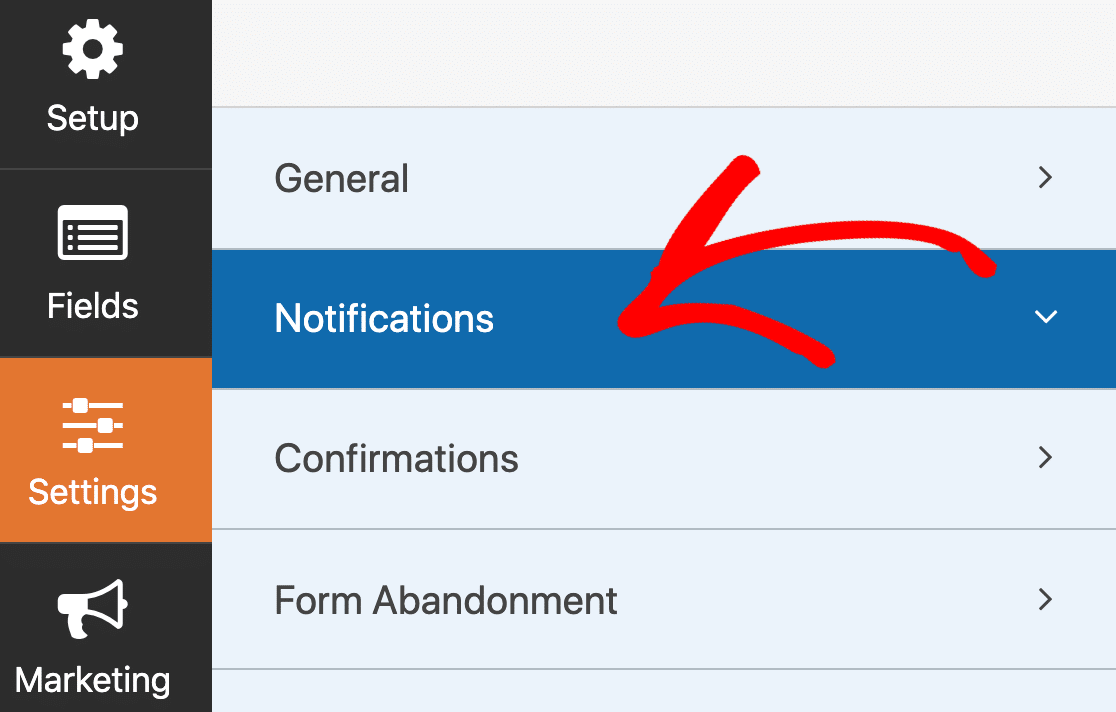
Checking Your Form Settings
Before we finish up in WPForms, it’s a good idea to check your form Notifications and Confirmations. Click Settings on the left-hand side of the form builder.
- Notifications are emails sent out when the form is submitted. For a contact form, you’ll want these on. Our guide on setting up your form notifications has the details.
- Confirmation is the message that shows on screen after submission. Take a look at how to edit the form confirmation message if you want to customize it.
When your form settings are set up the way you want them, click Save.
That’s it! Now every visitor who uses your contact form can opt in to your MailPoet list.
Bonus: Test Your MailPoet WordPress Form
It’s always a good idea to test out new integrations. Fill in your contact form and submit it to ensure everything works as expected. Check under MailPoet » Subscribers to see if your new subscriber appears in the correct list.
If the subscriber doesn’t show up, retrace your steps through the connection settings. The most common culprit is the Email field mapping, so double-check that you mapped the right field in Step 4.
FAQs About MailPoet WordPress Forms
The MailPoet and WPForms combo comes up often in the comments on our blog, so here are answers to the questions we get asked most. These cover pricing, list routing, GDPR, and conditional logic for your MailPoet WordPress form.
Is the MailPoet addon free in WPForms?
The MailPoet addon is included with the WPForms Plus license and higher. If you’re on WPForms Lite (the free version), you’ll need to upgrade to Plus to unlock MailPoet along with every other email marketing integration.
Can I add WPForms subscribers to multiple MailPoet lists at once?
Yes. When you configure the Lists setting inside the MailPoet connection in Step 4, you can select more than one list. Every new subscriber from that form will be added to each list you pick. You can also create multiple MailPoet connections on a single form if you want different lists to receive different subsets of subscribers.
Do I need a paid MailPoet plan to use this integration?
MailPoet has a free tier that supports small lists, and the WPForms integration works with both free and paid MailPoet plans. You’ll need a paid MailPoet plan once your list grows past the free tier’s subscriber limit. The WPForms side is the same regardless of which MailPoet plan you’re on.
How do I make my MailPoet form GDPR-compliant?
Add a dedicated opt-in checkbox to your form (unchecked by default), use conditional logic so only people who tick the box are added to your list, consider double opt-in so subscribers confirm via email, and include a clear privacy notice near the submit button. You might also want to add a separate GDPR agreement field to cover data storage. For anything beyond the basics, speak to a lawyer who handles data protection.
Can I use conditional logic with MailPoet in WPForms?
Yes. Every MailPoet connection has its own Enable Conditional Logic toggle, and you can stack rules to decide when the connection runs. This is how you gate signups behind an opt-in checkbox, route subscribers to different lists based on their answers, or prevent certain submissions from syncing at all.
Next, Create a Blog Post Notification Form
There are a lot of ways to use WPForms with MailPoet to grow your subscriber count. One of my favorites is a simple post notification signup.
Build a WPForms signup form with an email field, then add it to your blog using a sidebar widget. Connect it to MailPoet’s Post Notification newsletter, and your subscribers will get an email every time you publish something new.
You can also put your signup form on a dedicated landing page to cut out the distractions that hurt conversions. Check out these landing page form examples for inspiration, or explore our roundup of how to create an email newsletter from scratch.
Ready to build your form? Get started today with the easiest WordPress form builder plugin. WPForms Pro includes lots of free templates and offers a 14-day money-back guarantee.
If this article helped you out, please follow us on Facebook and Twitter for more free WordPress tutorials and guides.
Ready to build your form? Get started today with the easiest WordPress form builder plugin. WPForms Pro includes lots of free templates and offers a 14-day money-back guarantee.
If this article helped you out, please follow us on Facebook and Twitter for more free WordPress tutorials and guides.


Hi,
Do you have any options that don’t require an additional purchase? I’d love to keep using WPForms and have free option to connect the info to Mailpoet.
Thanks!
Hi Sarah! Currently, we do not have any built in integration with MailPoet. I do agree it would be super helpful, though. I’ve made a note of the feature request and we’ll keep it on our radar as we plan out our roadmap for the future. I apologize that we can’t provide what you’re looking for right now, but I appreciate the suggestion! It’s always helpful to get insights from our users.
If you have any further questions about this, please contact us if you have an active subscription. If you do not, don’t hesitate to drop us some questions in our support forums.
Hi Henry,
any update on this? I mean is there any development on the built-in integration with MailPoet?
Regards, David
Hey David, I apologize that we don’t have this feature ready yet. Giving an estimated time when the feature may be released is not possible at the moment but I will share this feedback with our team. I apologize for the same.
I’ve noted your interest in this feature and added your email to our list to receive updates about this feature.
Thanks!
This explanation is great. I am planning to get the Automator Pro but before this I was wondering how to manage multilingual forms and emails after these forms are filled-in. Any advice?
Thank you in advance~
Hey Laura,
In that case, I’d recommend you to check out this guide on multilingual translation with WPForms and WPML.
Hope this helps! 🙂
so this requires wpformspro, paid uncanny automator and mailpoet,right? expensive, bloated and slow. cf7+cf7blacklist and it works right out of the box. how were you able to complicate a simple thing so much? simply allow wpforms free to integrate with mailpoet.
Hey Jan – I apologize, we currently don’t have integration with MailPoet. I do agree that this would be great, and I’ll place this into our feature request tracker. In the meantime, the steps shared in the docuemntation will require you have paid version of Uncanny Automator.