
AI Summary
Do you want to create an RSVP form in WordPress? Collecting RSVPs on your site is an easy way to keep track of attendees so you can plan your event more easily.
In this article, we’ll show you the easy way to create an RSVP form in WordPress. We’ll also explain how you can limit the number of RSVPs if you need to.
Create Your WordPress RSVP Form Now
How to Create an RSVP Form in WordPress
Want to read the instructions instead? Here’s a written list of steps that we’ll walk through in this tutorial.
- Can I send confirmation emails for RSVP submissions in WordPress?
- What’s the difference between a contact form and an RSVP form?
- Step 1: Install the WPForms Plugin
- Step 2: Create Your WordPress RSVP Form
- Step 3: Edit Your RSVP Form Notifications & Confirmations
- Step 4 (Optional): Limit the Number of RSVPs You Receive
- Step 5: Add Your RSVP Form to Your Website
Let’s dive in and get the plugin set up first.
Step 1: Install the WPForms Plugin
To start, you’ll want to install the WPForms plugin on your site. If you need help installing the plugin, hop over to this beginner’s guide to installing a plugin in WordPress.

After the plugin is installed, you can use WPForms to make any type of form for WordPress including RSVP forms. Plus, it comes with 2,100+ form templates that you can customize using the easy drag and drop builder.
Many of our customers use WPForms to create RSVP forms for events such as:
- Business conferences
- Parties
- Weddings
- Online webinars
- Training sessions
- Summer camps
- Class reunions
Step 2: Create Your WordPress RSVP Form
While you’re inside your WordPress dashboard go to WPForms » Add New.

This will open the WPForms form builder, where you can type in a name for your form at the top of the Setup screen.

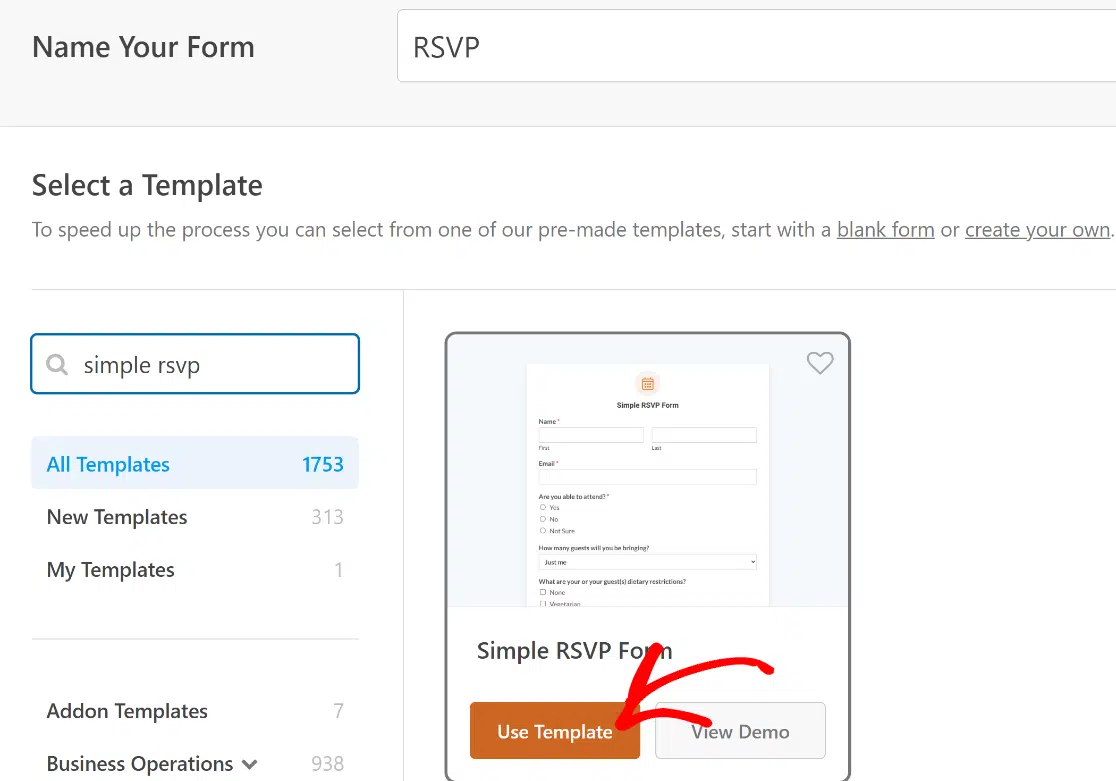
Next, scroll down to the section labeled Select a Template and search for “RSVP”. WPForms works wonders as an RSVP plugin for WordPress, with dozens of ready-made RSVP form templates suited for different kinds of events and scenarios.
For this example, I’ll keep things as general as possible and go with the Simple RSVP Form form template. Click on Use Template to open the template you want to use.
⚡ Try This: It’s possible to automatically send data from your forms to Google Sheets as you receive submissions. Here’s an RSVP tracker form template that utilizes the WPForms Google Sheets integration – great for tracking RSVPs in a spreadsheet!
The Simple RSVP Form template will now open in just a few moments. You’ll find a live preview of your form on the right.
If you need to insert additional fields, you can simply drag the field you need from the left-hand pane and drop it on the live preview area.

You can also click on any field to change the settings.
💬 Did You Know: You can also add payments to your RSVP form. It’s a great way to collect a booking fee or donation for your event. To add a payment field to your form, check out our guide on taking Stripe payments on your website.
When your RSVP form looks the way you want it to, click Save.

In the next step, let’s look at some important settings for the form.
Step 3: Edit Your RSVP Form Notifications & Confirmations
WPForms gives you the flexibility of customizing your form notifications, which are sent after every successful submission.
You can check and update your form notifications by going to Settings » Notifications.

By default, WPForms will send a notification to {admin_email} — the administrator’s email address in WordPress.
If you want to change that, you can delete the {admin_email} Smart Tag and replace it with a different email address.

You can go ahead and customize the subject line and message here too.
Sending RSVP Notification to Attendees
For an RSVP form, it’d be a good idea to let the person know that you received their submission. Just click Add New Notification to set up a new email notification for the attendees.

This time, you can use Smart Tags to send the email to the attendee’s email address automatically.
Click the Show Smart Tags link above any field and choose the Smart Tag you need from the list.

Check out our step-by-step tutorial on how to send multiple form notifications in WordPress if you want more details on how this works.
RSVP Form Confirmations
In addition to email notifications, it’s also good practice to display a confirmation message on the screen immediately after form submission.
You can edit your RSVP form confirmation by clicking on the Confirmations menu option (which appears right underneath Notifications).

Inside the Confirmations menu, you can select the type of confirmation you want to display and edit the message itself.
I used a quick thank you message appropriate for the occasion, so feel free to tailor your messaging to your event.

All done? Be sure to click Save.
The next step is optional, but you might want to follow on if you have limited seats at your event.
Step 4 (Optional): Limit the Number of RSVPs You Receive
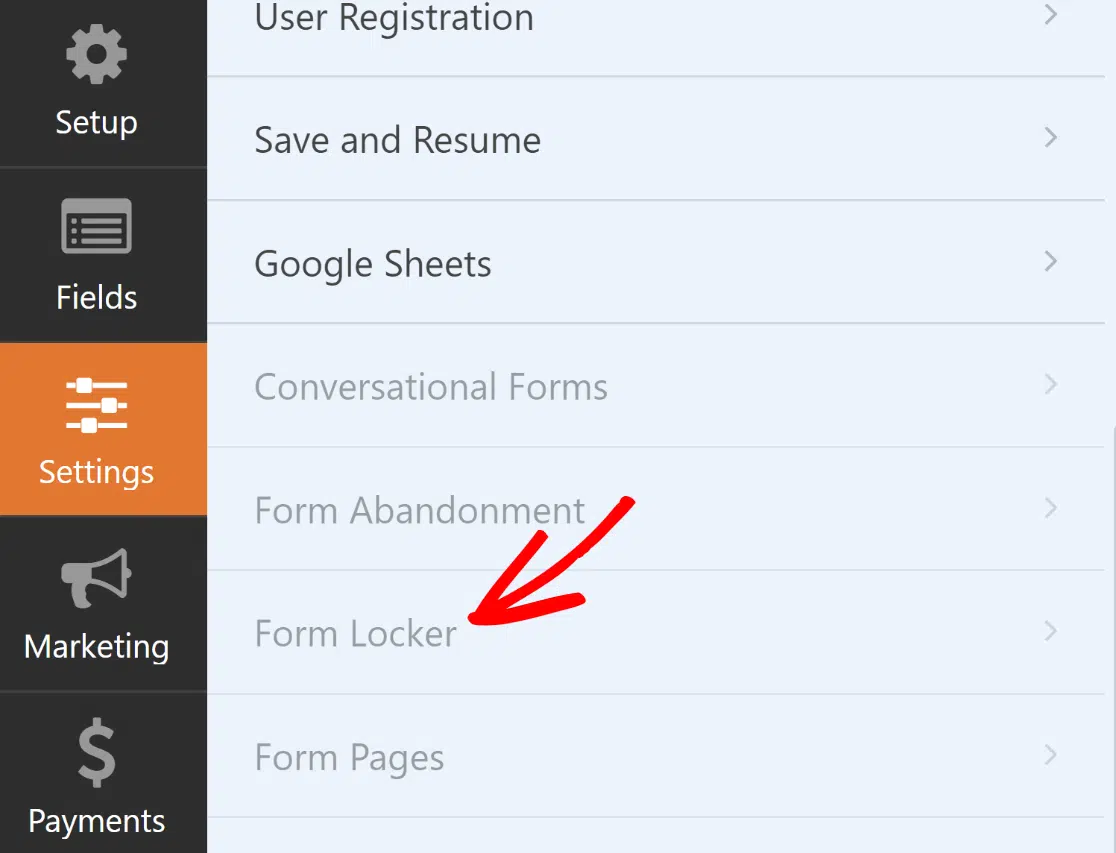
Using the Form Locker addon, you can have WPForms automatically close the form when you reach the maximum number of entries and prevent duplicate entries.
If you don’t already have the addon installed, don’t worry. It’s super easy to set it up. Start by going to Settings and then click on the grayed-out Form Locker option.
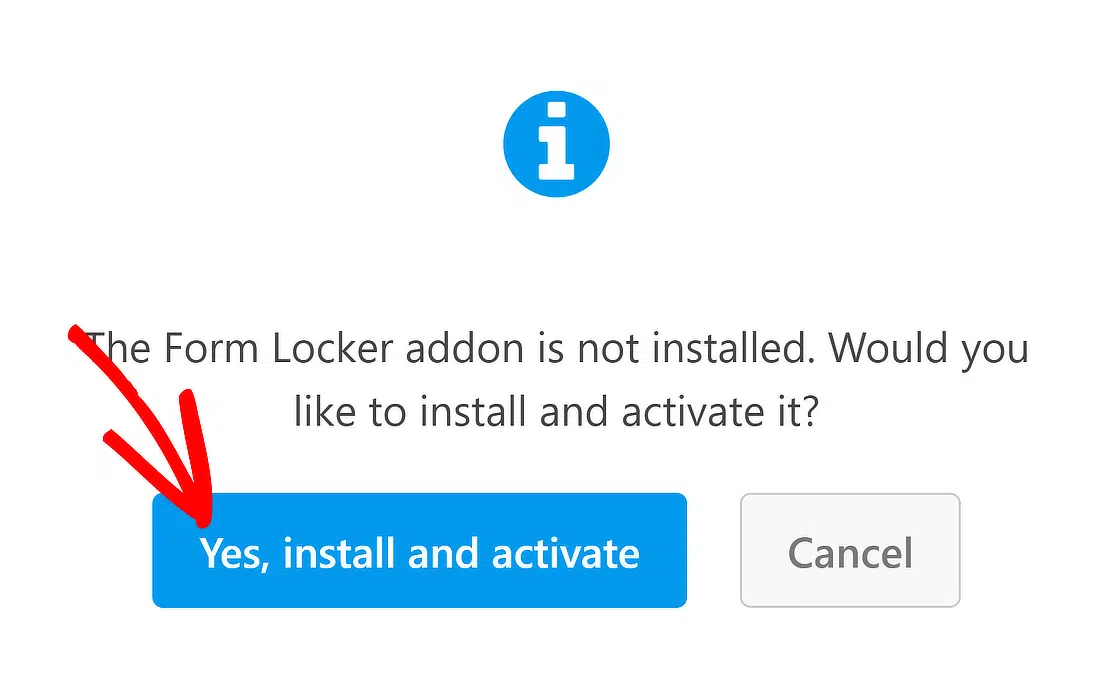
After that, a modal will appear asking if you want to install the addon. Click on Yes, Install and Activate to continue.
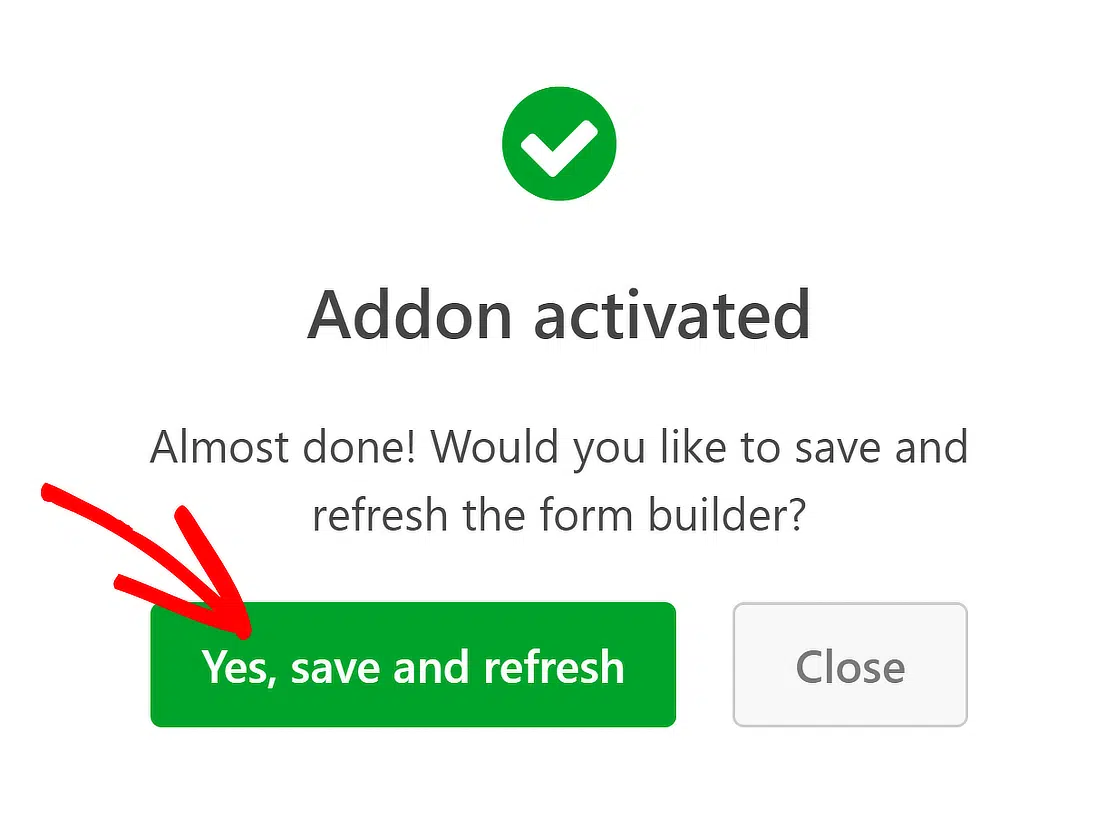
Great! Now, just click on Yes, Save and Refresh to reload your form. You’ll now be able to use the incredibly helpful Form Locker addon.
Go ahead and click the Form Locker option open from the settings page.

All of these settings are pretty handy for events, so feel free to use them as needed. I’m just going to zoom in on the Entry Limit here for this example.
To place a limit on the number of people who can submit the form, simply press the total entry limit toggle button.

Then in the Limit box, type in the maximum number of RSVPs that you want to receive.

You can also add a message to display when your form has reached the maximum number of entries.

Apart from that, you can also change the field settings to ensure you don’t receive duplicates, such as the same email address registering twice.
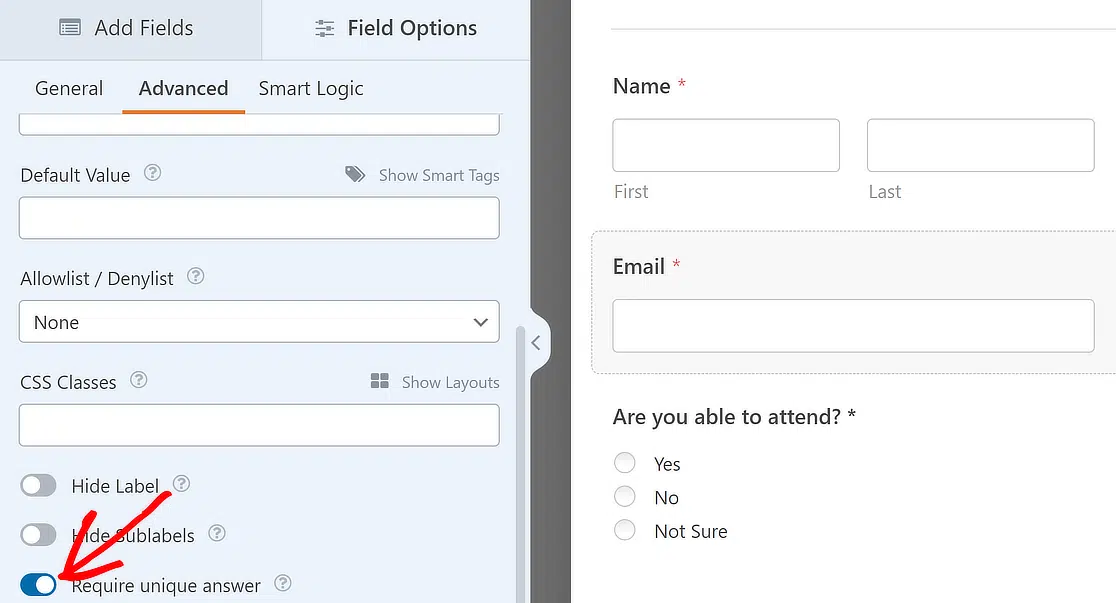
Require a Unique Answer for Every RSVP
To ensure you only receive a unique entry for each RSVP, go to the Fields tab inside the form builder. Then, select the field that you want to accept only unique answers to open its Field Options.
Scroll to the bottom of the Advanced tab options and click the Require unique answer toggle button.
I used this setting for the email field only because emails are unique. Names are not!
There are other ways to lock your form using the Form Locker. For example, you could set an automatic expiry date for your form. That way, WPForms will automatically close your form on the date you choose, even if your maximum capacity hasn’t been reached yet.
OK, we’re done making the form, so let’s publish it. This is the final step, and it just takes a couple of minutes.
Step 5: Add Your RSVP Form to Your Website
WPForms allows you to add your forms to many locations on your website, including:
- Blog posts
- Pages
- Sidebar widgets.
We also have a really easy way to add an Elementor contact form.
In this example, I’ll use the Embed button to put the form on a new page.

When you see a popup about your method of embed, click on Create New Page.

Type a name for your new page and click the Let’s Go button.

Now, you’ll find yourself inside the WordPress block editor with your form embedded and ready to be published.
But before you do that, remember that you can also add any other WordPress blocks to develop your page further as usual if you need.

At this point, the form looks rather plain from a visual standpoint. I really recommend trying WPForms themes, which can give your form an instant makeover with beautiful colors and styles.
To access form themes and style options, simply click anywhere on the area around the form to open the WPForm block options on the right-hand pane.
Here, you can try pre-designed form themes and see the style changes occur in real-time as you select themes.
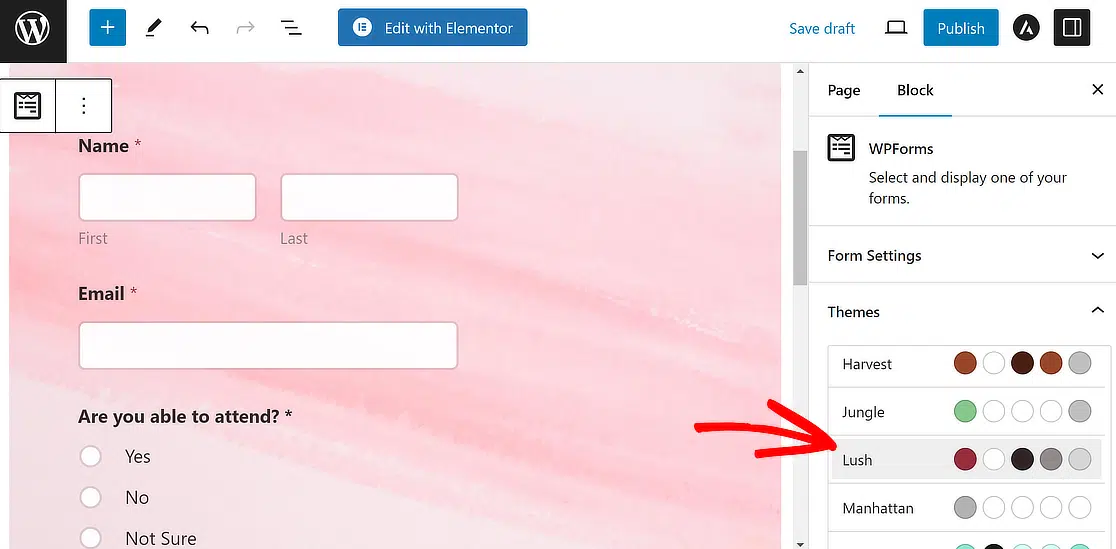
For a casual event, I’m inclined to use a rather festive theme. But if that doesn’t work for you, there are tons of other options to pick from. So feel free to try the different themes available at your fingertips!
💪 Power User Tip: Like customizing form designs yourself? The WPForms custom styling features are perfect for users who want to add their own personal creative flair to form design.
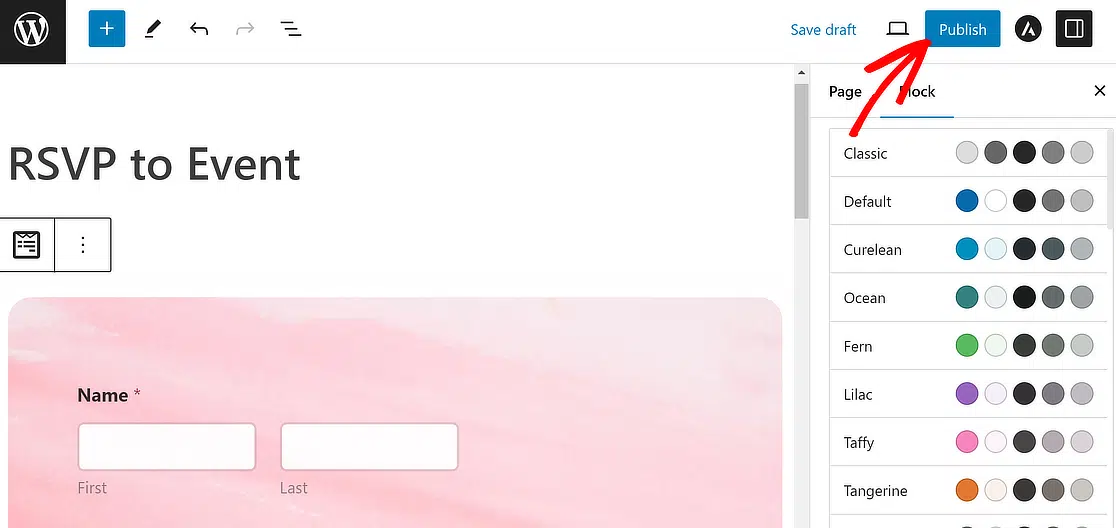
When you’re satisfied with your form in every respect, go ahead and press Publish.
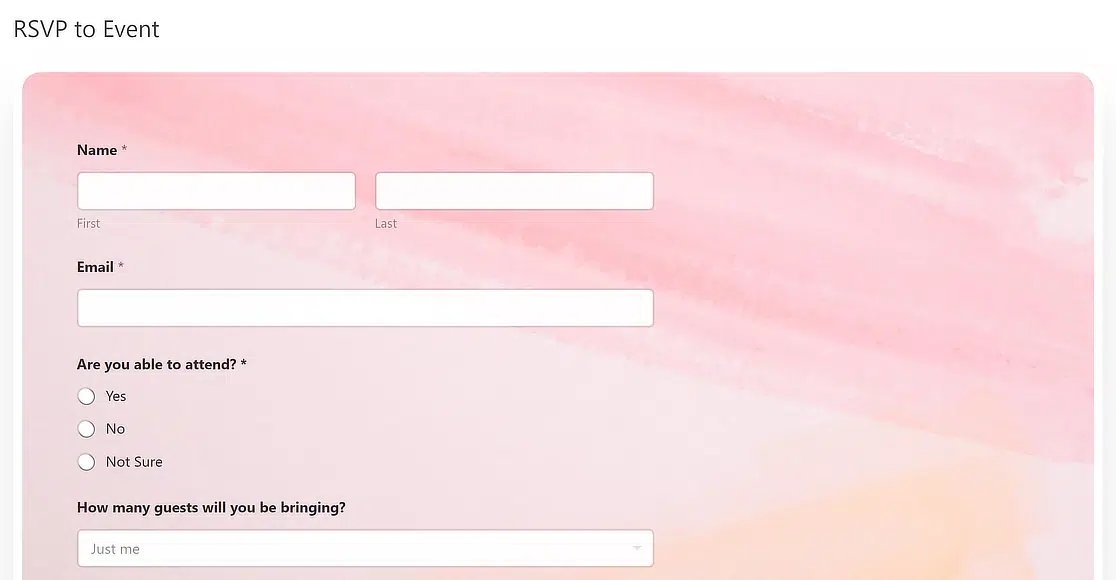
Don’t forget to check out the published page and play around with the form on the frontend yourself to make sure everything looks good.
Once people start filling out your form to confirm RSVP, you can view the form entries easily right inside your WordPress dashboard. This way, you can keep track of every guest who’s planning to attend your event.
That’s it! Now that your RSVP form is done, you can share the link to your form on social media or via email so your target audience can discover it.
Create Your WordPress RSVP Form Now
More Questions on RSVP Forms
Can I customize the RSVP form to match my website’s branding?
Yes, WPForms allows you to customize the RSVP form’s design, including colors, background, borders fields, and layout, to ensure it aligns with your website’s branding. You can even add your logo to the form without any custom HTML.
Can I integrate my RSVP form with other tools and services?
WPForms integrates with various third-party services like Mailchimp, Brevo, Drip, Active Campaign, and even Google Sheets. This way, you can send entries wing you to enhance the functionality of your RSVP form.
Is it possible to set a limit on the number of RSVPs received?
Yes, you can set a submission limit for your RSVP form using the WPForms Form Locker addon, ensuring you don’t exceed your event’s capacity.
How can I confirm and manage RSVPs once they are submitted?
You can receive email notifications for each RSVP submission and manage responses directly from the WordPress dashboard. If you’d rather work in a spreadsheet, you can bulk export your entries into a spreadsheet for further analysis.
Is there a way to prevent spam submissions on my RSVP form?
WPForms includes a suite of anti-spam powerful anti-spam features including Cloudflare Turnstile, reCAPTCHA, hCaptcha, keyword fitlers, country filters, and a lot more to ensure your form remains spam-free and only valid responses are collected.
Which WordPress plugin supports RSVP with conditional logic?
WPForms supports RSVP forms with conditional logic. This means you can show or hide questions based on what someone picks in the form.
Can I send confirmation emails for RSVP submissions in WordPress?
Yes. With WPForms, you can set up automatic emails to confirm each RSVP. You can also customize the message before sending it.
What’s the difference between a contact form and an RSVP form?
A contact form is used to send general messages. An RSVP form is made for event replies. It often includes fields like guest name, attendance, and meal choice.
How do I export RSVP form entries from WordPress?
In WPForms, you can go to the Entries section and export all responses to your RSVP form as a CSV file. This file can be opened in Excel or Google Sheets.
Next, Accept User-Submitted Events
Many websites in the event management space allow community members to submit events directly to their site’s calendar.
If that sounds like a functionality you’d like to enable on your site, check out our guide on setting up a user-submitted events calendar.
Also, if you’re comfortable with code and prefer styling your forms with CSS, here are some contact form designs you can steal (it also includes the codes you can use to copy the designs).
And we’re done! Ready to build your form? Get started today with the easiest WordPress form builder plugin. WPForms Pro includes free RSVP form templates and offers a 14-day money-back guarantee.
If this article helped you out, please follow us on Facebook and Twitter for more free WordPress tutorials and guides.

