With a camp registration form, you’ll register more campers, collect payments immediately, and eliminate waiting for registrations to arrive by mail.
In this guide, I’ll share my experience with creating a camp registration form for your WordPress website in the easiest way possible.
Make Your Camp Registration Form Now ⛺
How to Create a Camp Registration Form
Here’s our easy step-by-step tutorial that shows you how to build your own camp registration form online.
In This Article
Step 1: Install the WPForms Plugin
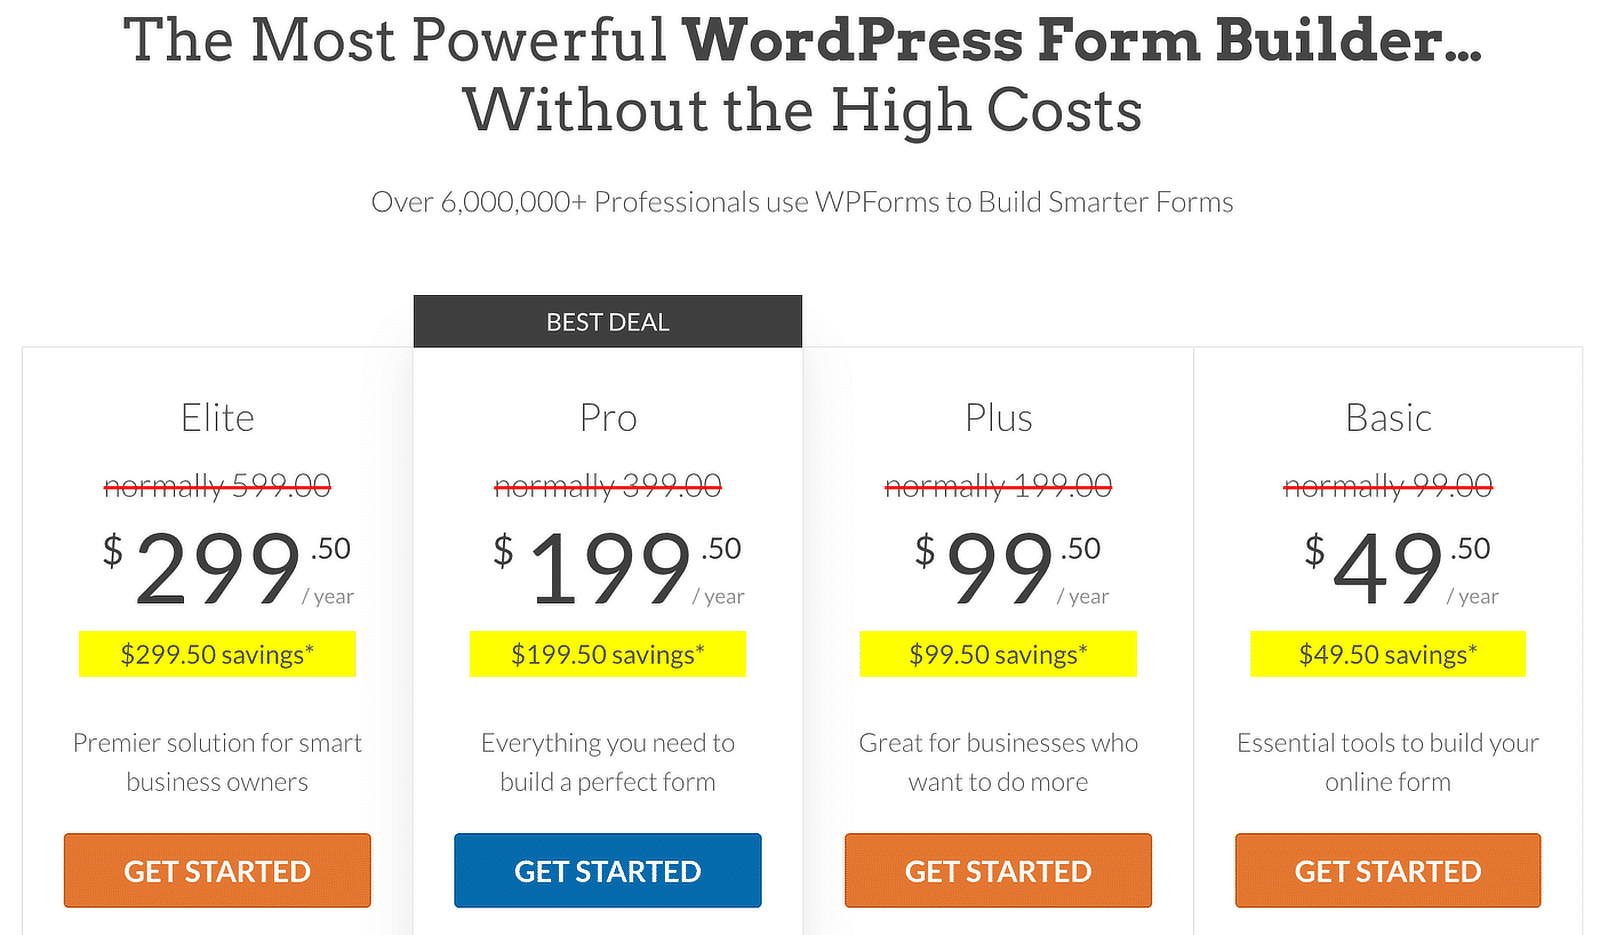
WPForms is the easiest way to create an online camp registration form. You can get started right away with WPForms Pro, which will unlock ready-made camp registration form templates for you along with many other advanced features.
Go ahead and install your newly purchased WPForms plugin. If you need assistance, check out our guide on installing WPForms. Done with the installation? Great job! Let’s begin creating the form.
Step 2: Start With the Camp Registration Form Template
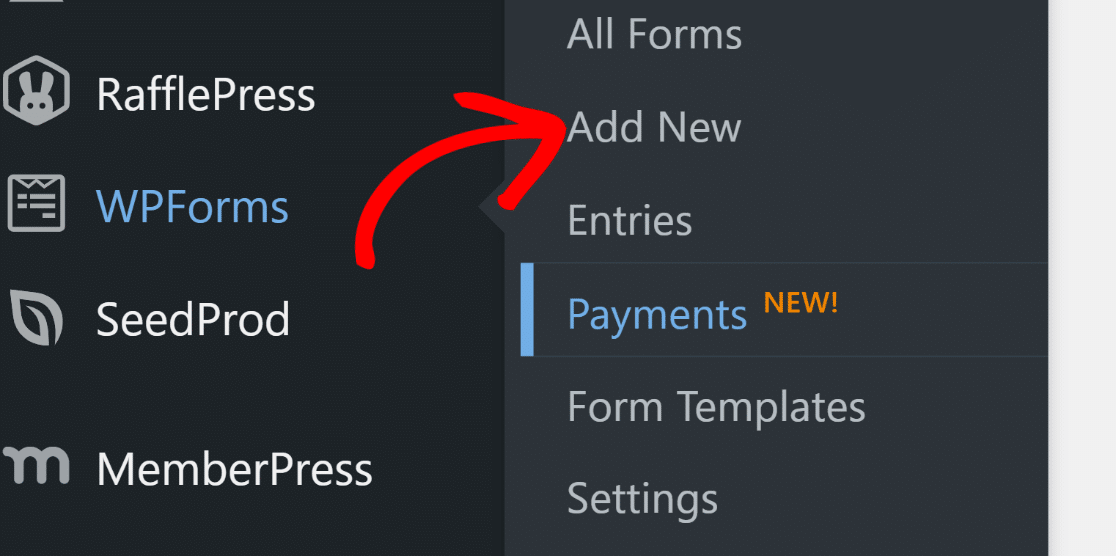
Once installed, head over to WPForms » Add New from the WordPress admin menu.
As soon as you click, you’ll find the WPForms form builder open. Let’s begin by adding a name for your form and selecting a template.
WPForms is home to over 2,000+ form templates. But for this case, the Summer Camp Registration Form is exactly what you need so let’s select that one.
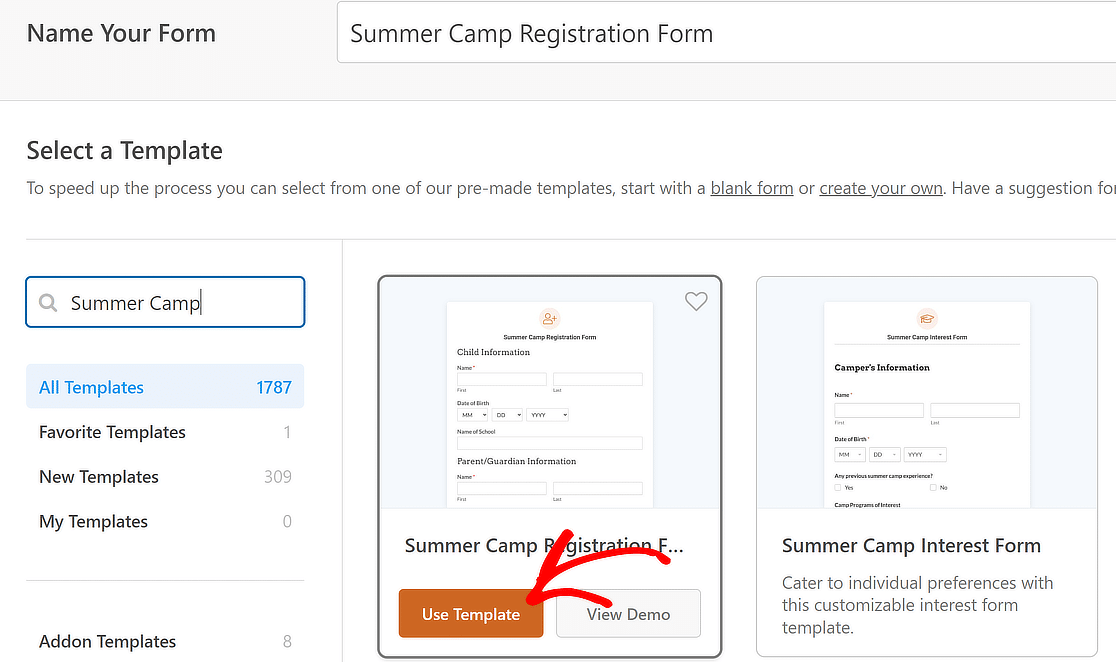
In fact, there are a few other similar templates you could try:
- Camp Registration Form
- Boy Scout Camp Registration Form
- Adult Camping Registration Form
- Dance Camp Registration Form
Keep in mind that you can completely customize any of the templates to include whatever fields you need.
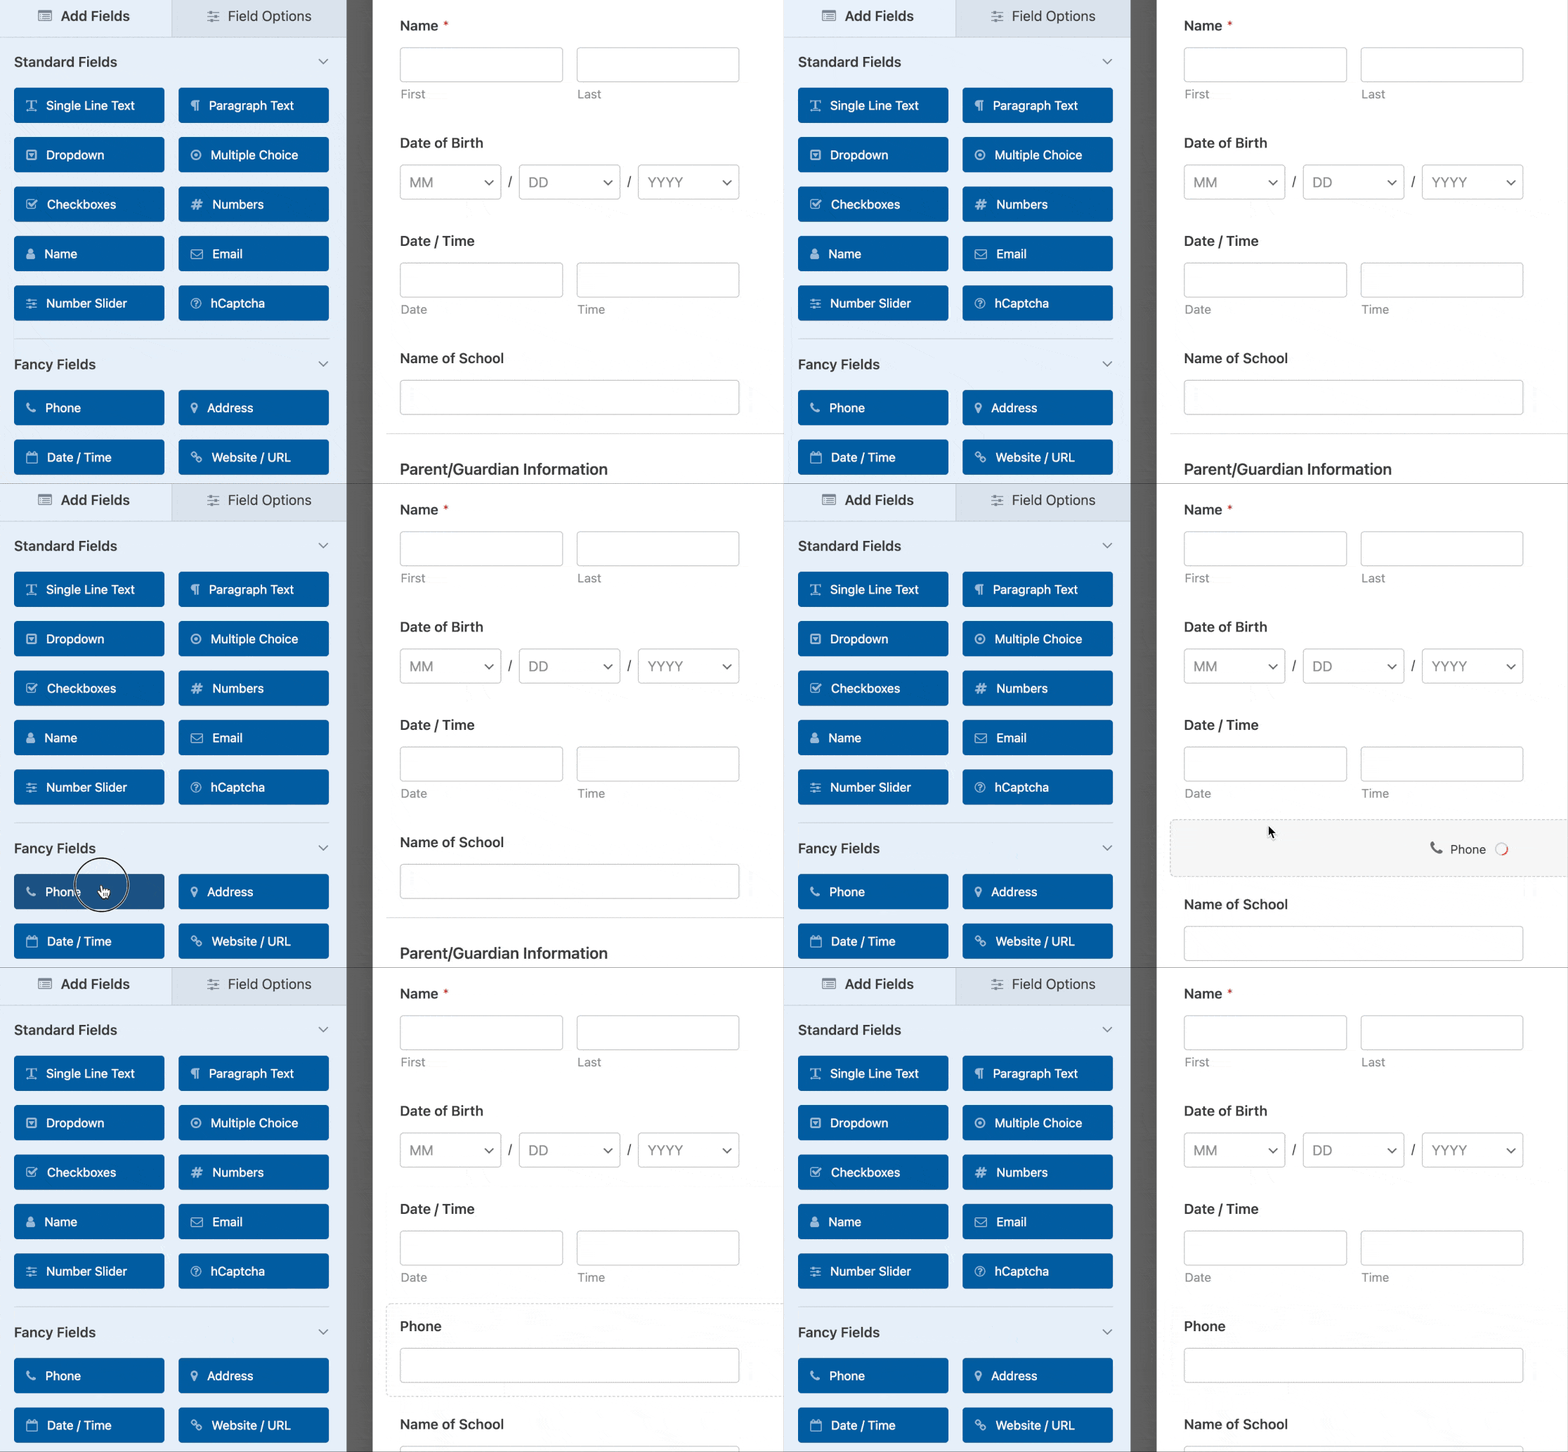
Once you’ve selected your template, it will load in just a few moments. Feel free to add any new fields to your form or change any existing fields if you want by using the easy drag-and-drop controls.
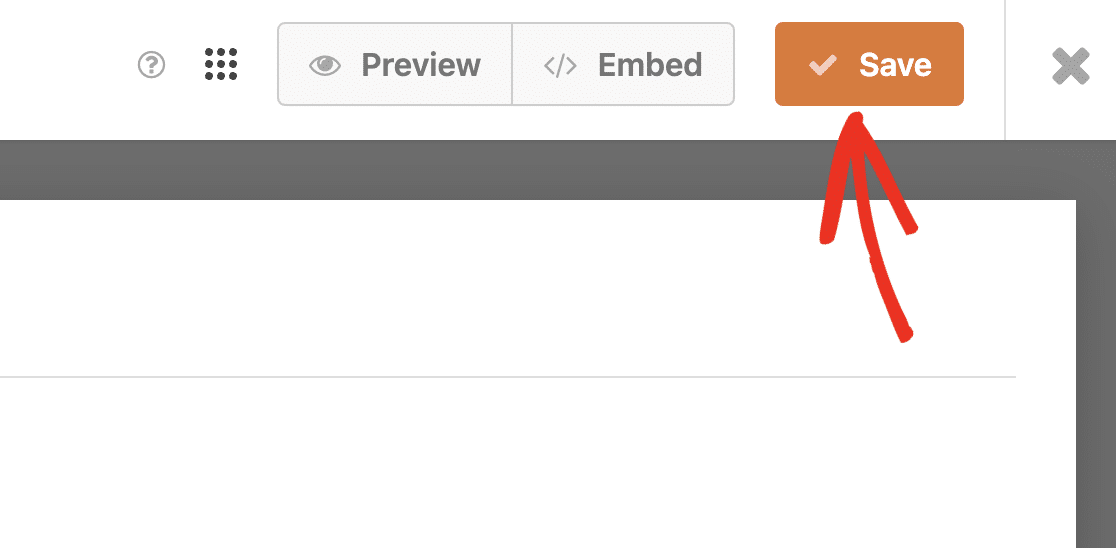
Have you got your form set up to your liking? It’s a good idea to save your form frequently after making changes. Just press the Save button at the top.
Perfect. Let’s move on to some general settings for your camp registration form.
Step 3: Configure Your Camp Registration Form Settings
Now, let’s configure some settings. To start, go to Settings » General.

Here you can configure the following:
- Form Name — Change the name of your form here if you’d like.
- Form Description — Give your form a description.
- Tags — Organize your WordPress forms with form tags.
- Submit Button Text — Customize the copy on the submit button.
- Submit Button Processing Text — Change the text that shows while your registration form is submitting.
Lower down on the page, there are also advanced settings, including:
- CSS Classes — Add custom CSS to your form or submit button.
- Enable Prefill by URL — Fill out some fields automatically based on a custom URL.
- Enable AJAX form submissions — Enable AJAX settings with no page reload.
- Disable storing of entry information in WordPress — You can disable the storing of entry information and user details, such as IP addresses and user agents, in an effort to comply with GDPR requirements. In addition, check out our step-by-step instructions on how to add a GDPR agreement field to your simple contact form.
Next, move down to the Spam Protection and Security settings.
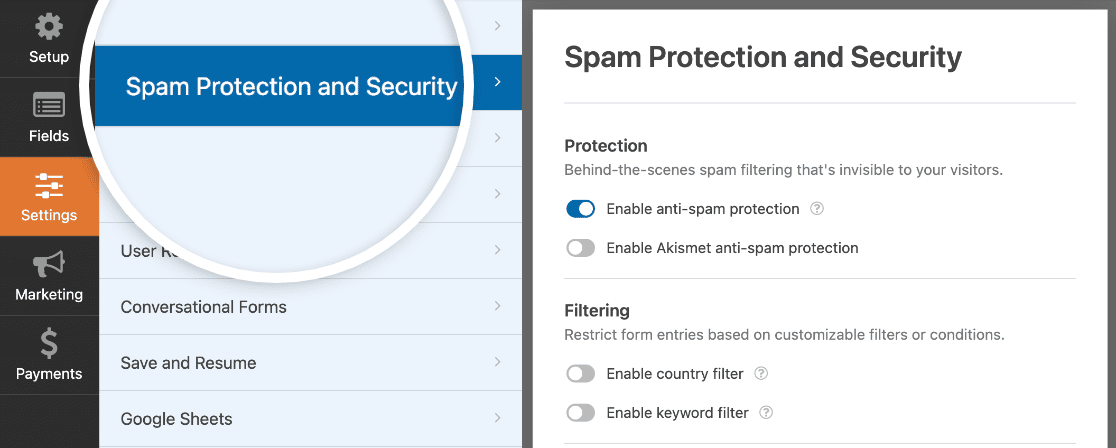
Here you can:
- Enable anti-spam protection — Stop contact form spam with the WPForms anti-spam token. The anti-spam feature is automatically enabled on all new forms that you create.
- Enable Akismet anti-spam protection — Connect your form to the Akismet plugin to prevent suspicious entries.
- Enable country filter — Block submissions from certain countries.
- Enable keyword filter — Prevent entries that include certain words or phrases.
You’re making great progress!
💡 Try this: Want to collect registration charges online? You can accept payments with Stripe by integrating it with your camp registration form. For better results with signups, you could even offer an early bird discount with a coupon code connected with your form and watch your registration numbers climb.
When you’re done, click Save.
Step 4: Configure Your Form Notifications & Confirmations
The camp registration form will automatically send you a notification whenever a new entry is submitted. This is a great way to stay updated as new registrations come in.
To access notifications and make any changes, simply go to Settings » Notifications.
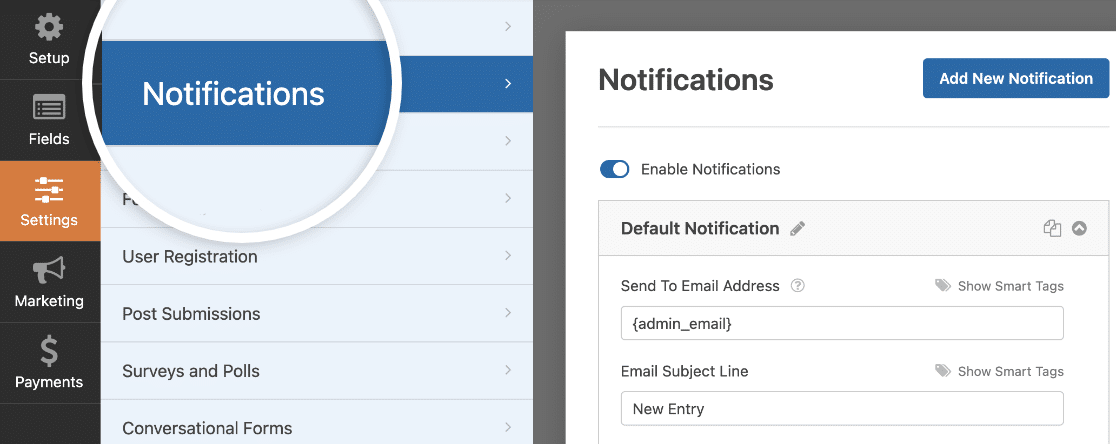
You can edit the recipient of the notification (this can be just one user or multiple email addresses separated by commas), the notification subject line, and the message.
What’s more, you also have the flexibility of creating separate notifications to be sent to different people at the same time.
For instance, it’s good practice to send a notification to the person who just registered, letting them know that their registration was successfully received.
So, for example, you can send a notification to:
- Yourself
- The person who registered
- Your camp coordinator
- And others
Next, I also advise you to take a look at your form confirmations. A confirmation message is what those who register for your camp will see once on the page immediately once they’ve completed the signup.
To access your confirmation settings, click on Settings » Confirmations in the form builder. Then, customize your confirmation message. Once you’re done, be sure to click Save.
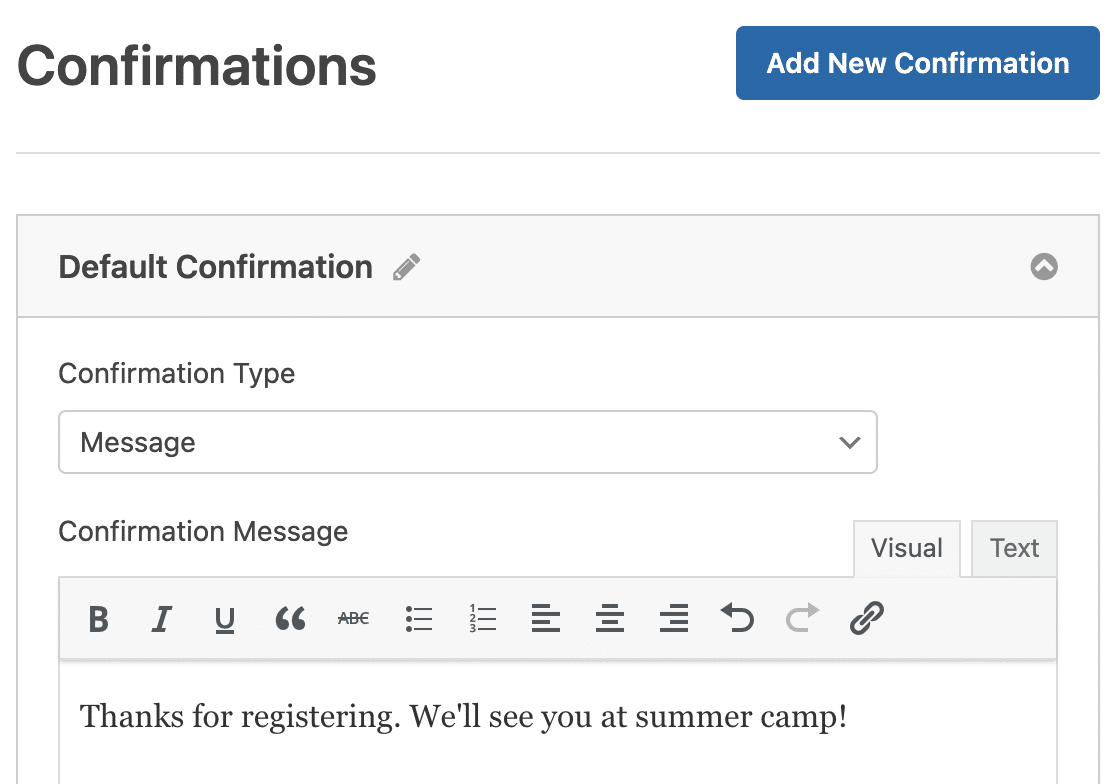
For help with other confirmation types, see our documentation on setting up form confirmations.
Now here’s the last step.
Step 5: Add Your Camp Registration Form to Your WordPress Site
Now that you’ve finished creating your camp registration form, you just need to add it to your WordPress website. Don’t worry. This is the easiest part.
WPForms lets you place your forms on blog posts, pages, and sidebar widgets.
To get started, click on the Embed button at the top of the form builder.

After that, select whether you want to embed the form in an existing page or a new one. I’ll select the latter option i.e. Create New Page here but the steps are similar for either.
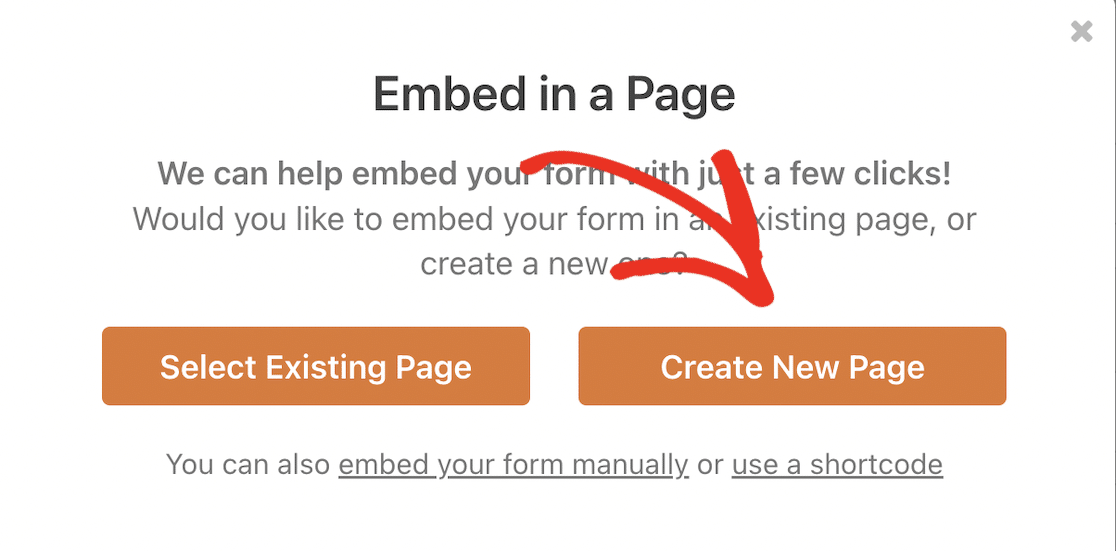
When you’ve done that, you’ll be required to enter a name for the page where you want to embed your form. Enter a name and press Let’s Go.
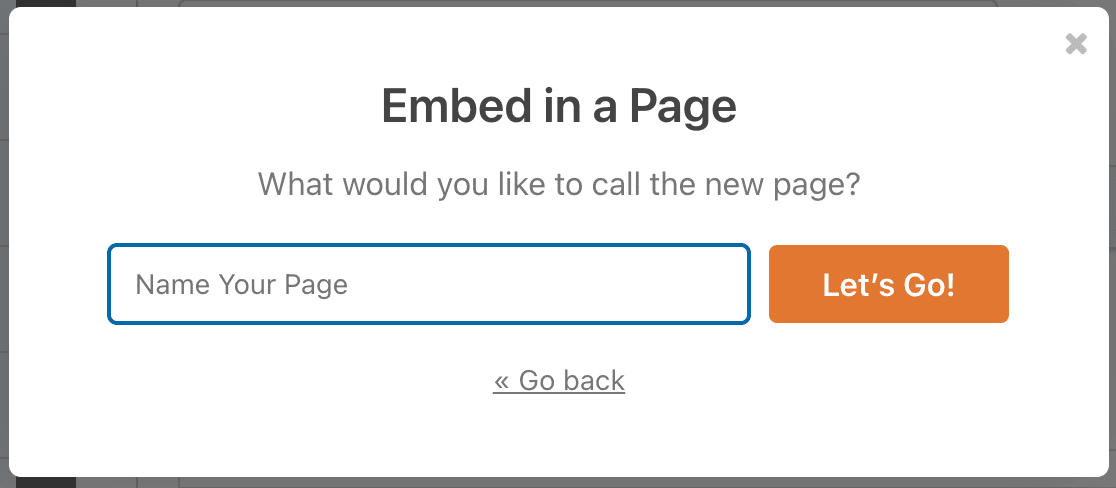
After that, the WordPress block editor will open. Here, you should see the form you just created.
The cool part is that, if you want to add some cool styles to this form to make it more visually appealing, you can do that here.
Click on the area around the form to open options for the WPForms block on the right-hand panel. Scroll down to find the Themes section and select one. You’ll see changes occur instantly as you cycle through the different themes.
For the summer camp, I chose the Range theme which I think suits the occasion nicely. But you’re free to choose any ready-made theme.
In fact, you can even customize styles yourself by using easy controls for adjusting colors, background images, container styles, field labels, buttons, and more.
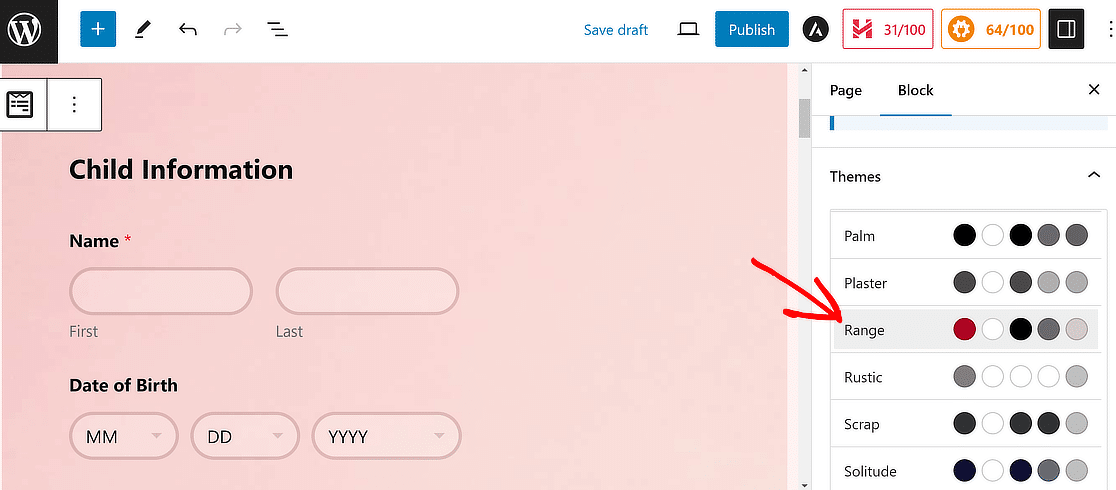
Click the Publish button to launch your registration form when you’re ready.
Here’s my summer camp registration form in its final form (pun not intended):
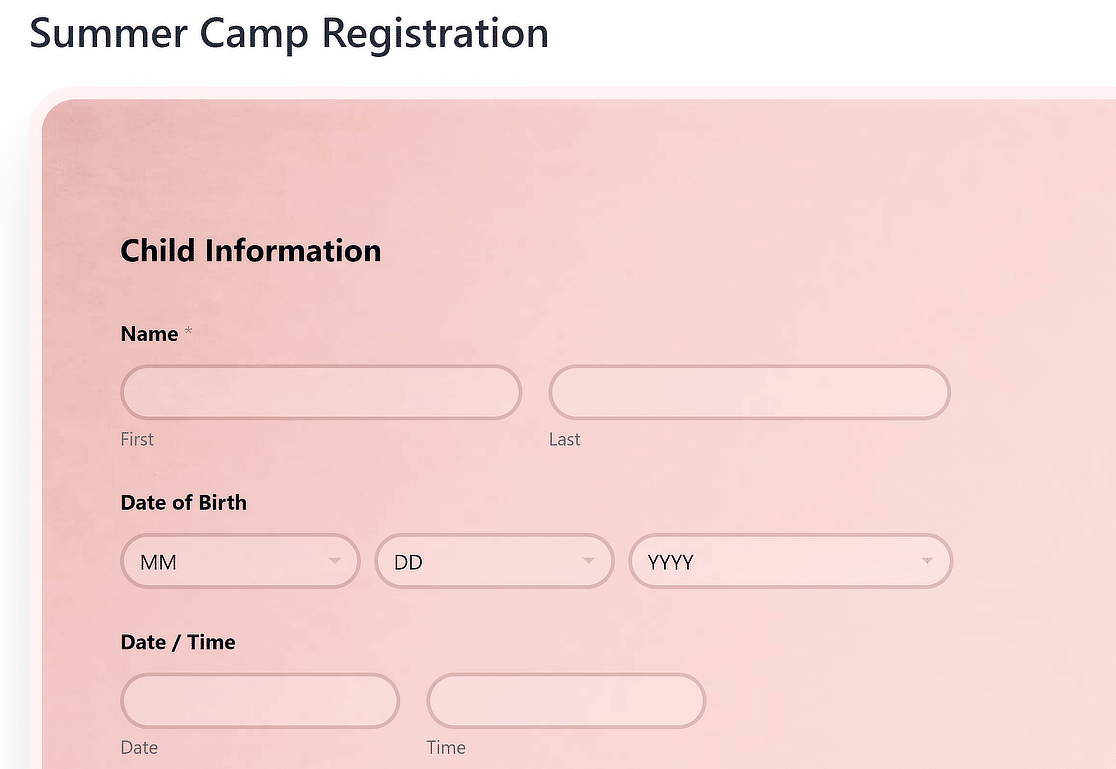
And you can easily view your registration form entries too. Just check out our complete guide to form entries. WPForms makes it easy to see, search for, filter, print, and delete registration forms, and makes planning so much easier.
Make Your Camp Registration Form Now ⛺
FAQs on Camp Registration Forms
Here are some questions that we’ve been asked before by people interested in the idea of summer registrations but not so familiar with online forms:
Why use a camp registration form in WordPress?
Campers see camp as a time to slow down, eliminate stress, and clear their minds. But if you’re a camp administrator, this is the most hectic and stressful time of the year.
Also, campers don’t want to fill out lengthy paper forms and then send a check by mail. And camp administrators don’t enjoy dealing with all that paperwork either. It’s frustrating to waste hours sorting through mail, trying to decipher people’s handwriting, and dealing with paper checks.
What makes a good design for a camp form?
A well-designed camp registration form should serve 2 purposes: produce a great user experience and give camp administrators better information.
So, your camp registration form should take campers less than a couple of minutes to fill out while still providing you with what you need to get them signed up.
And we all know that people aren’t always using a desktop computer. All forms built with WPForms are mobile-friendly, so your forms will look great and function like a charm across all devices without requiring any extra settings on your end.
Can I integrate my registration form with other services (e.g., email marketing, payment gateways)?
Yes, WPForms supports integrations with email marketing services like Mailchimp, Drip, and others and payment gateways like PayPal, Stripe, Authorize.net, and Square.
Is it possible to allow users to save their progress and complete the form later?
Yes. some plugins like WPForms let you add the Save and Resume functionality to your forms. This way, people can save their progress at any time and return to complete the form later with a special link.
Can I add conditional logic to my registration form?
Yes, you can use conditional logic with WPForms to either show or hide any field based on user responses. It’s a handy feature that lets you create more dynamic, interactive, and concise forms that are easier to fill.
Next, Create a Popup for Your Camp Website
You did it! Now you know exactly how to create a camp registration form in WordPress. You’ll also want to read our post on the best WordPress popup plugins.
Keeping things as simple as possible on your form is a powerful way to get more people to register for your camp this year.
Create Your WordPress Form Now
So what are you waiting for? Get started with the most powerful WordPress forms plugin today. WPForms Pro includes a free online camp registration form for WordPress and offers a 14-day money-back guarantee.
And if you enjoyed this post, follow us on Facebook and Twitter for more free WordPress tutorials.

