Do you want to stop contact form spam forever? A lot of us have been there, annoyed and looking for a way to stop the spam.
The good news is you don’t have to go through tons of spam emails to find genuine questions and leads anymore. WPForms makes it super easy to stop email spam from reaching your inbox.
In this article, we’ll show you all of the anti-spam tools in WPForms so you can quickly stop WordPress contact form spam for good.
What Is WordPress Contact Form Spam?
WordPress contact form spam is what happens when bots fill out your online forms. This spam typically points to malware, phishing links, or sales messages. You can prevent it by using services like Google reCAPTCHA, hCaptcha, or Cloudflare. You can also block and restrict certain messages or IP addresses.
How to Stop WordPress Contact Form Spam
WPForms is the best form spam prevention plugin. Check out this video to learn how to use the plugin to stop spam from contact forms in WordPress.
As the top-rated contact form-building tool, WPForms offers numerous methods to prevent form spam in WordPress.
- 1. Enable the WPForms Modern Anti-Spam Protection
- 2. Connect Your Form to Akismet
- 3. Enable reCAPTCHA
- 4. Use hCaptcha in Your Contact Form
- 5. Enable Cloudflare Turnstile for Your Form
- 6. Use the WPForms Custom CAPTCHA Addon
- 7. Block or Allow Specific Email Addresses on Your Forms
- 8. Block Profanity in Form Submissions
- 9. Restrict Submissions by Country
- 10. Block Spam Active IP Addresses
- 11. Use Dedicated Anti-Spam Plugins
- 12. Detect Spam With AI
- 13. Filter Spam Entries
1. Enable the WPForms Modern Anti-Spam Protection
If you want a super easy spam prevention method, the built-in spam protection from WPForms is simple and secure. Everything runs behind the scenes. All you have to do is enable it for your forms and let us take care of the rest.
To enable the WPForms anti-spam protection, open your form in the form editor. From the left-side navigation options, click on Settings.
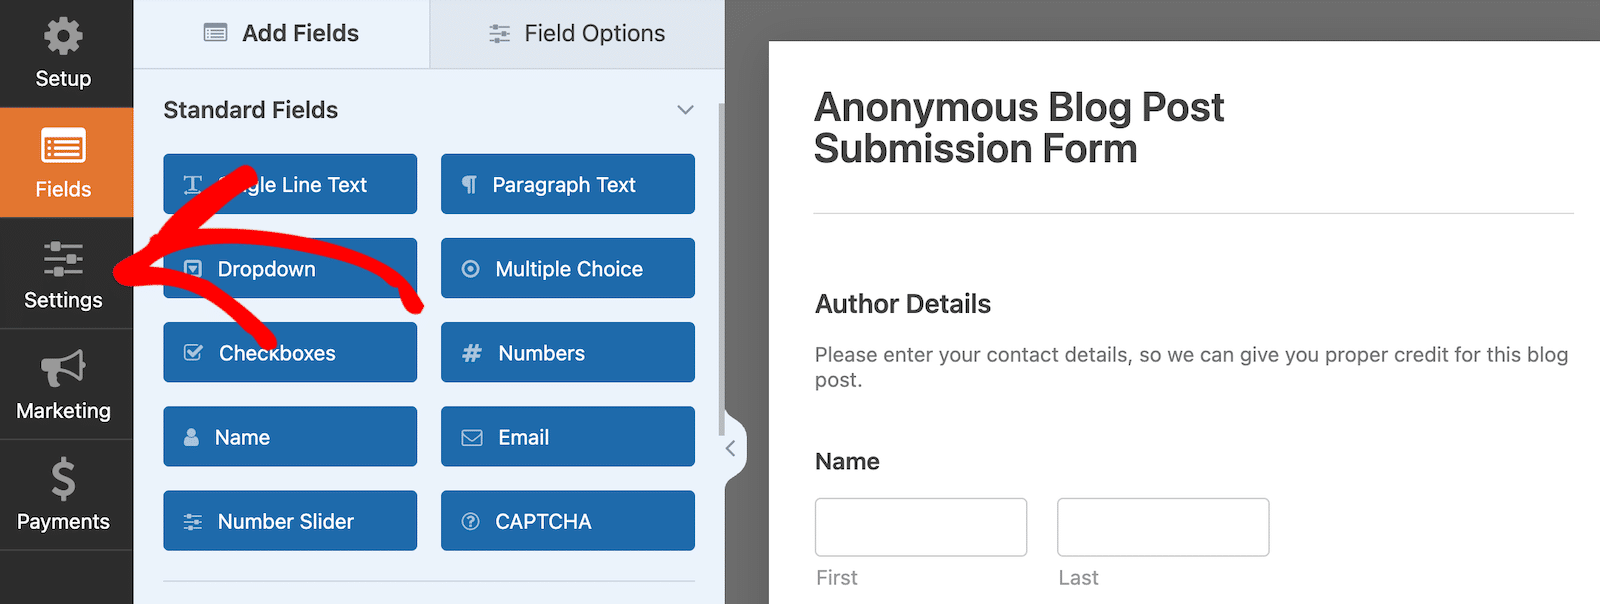
You’ll see some basic settings categories available to you. Click on Spam Protection and Security.
Next, if it’s not already enabled, flip the toggle switch to enable modern anti-spam protection.

There are a few other options there too that you can look at, but as long as you have modern anti-spam protection enabled, it will run silently in the background to help protect your forms from spam. It really is that easy!
Let’s look at another anti-spam tool in Method #2.
2. Connect Your Form to Akismet
Akismet is a popular anti-spam plugin. It can identify and block suspicious form submissions automatically to prevent fake entries, making it one of the top alternatives to Google reCAPTCHA.
To learn how they compare, look at our Akismet vs reCAPTCHA review. If you already have the Akismet plugin set up on your WordPress site, integrating it with WPForms is easy.
All you have to do is open the form you want to filter spam for and go to Settings » General. Then toggle on the Enable Akismet anti-spam protection option.
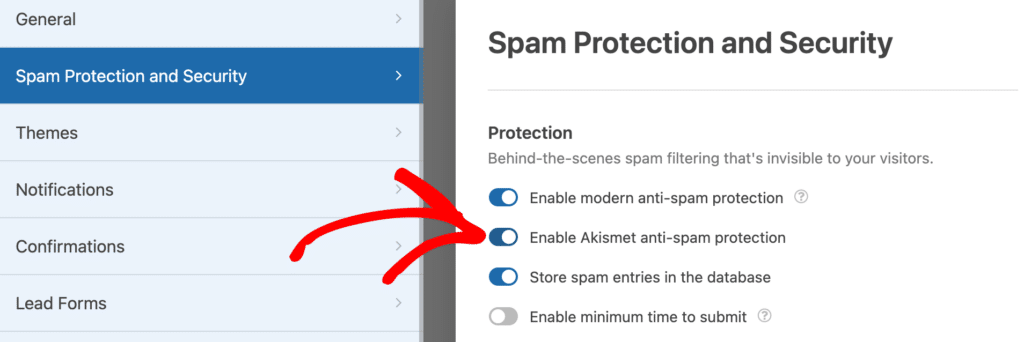
Just remember, if you haven’t connected your site to your Akismet account, you won’t see this setting in the form builder.
The best part is that you can use WPForms to create Akismet-enabled forms that work with Elementor.
Because Elementor doesn’t directly support Akismet, WPForms offers an easy way to get Akismet in Elementor Forms for free.
For more details about setting up Akismet, check out our guide to filtering contact form spam with Akismet or our documentation on using Akismet with WPForms.
3. Enable reCAPTCHA
Google’s reCAPTCHA is probably the best-known CAPTCHA service out there. It automatically detects human visitors using puzzles, or by detecting their behavior while they’re on your site.
This can be very effective in blocking spam contact form submissions from bots. By verifying that a human user is submitting a form, all automated spam attempts are blocked.
The added security of a reCAPTCHA can also make users feel that the form is secure and help reduce form abandonment.
reCAPTCHA is free for up to 1 million uses per month. In the next section of the guide, we’ll look at how to add reCAPTCHA to contact forms.
3.1. Select a reCAPTCHA Type in WPForms
We’re going to start by selecting the type of Google reCAPTCHA you want to use in the WPForms plugin.
To start, open up your WordPress dashboard and go to WPForms » Settings.
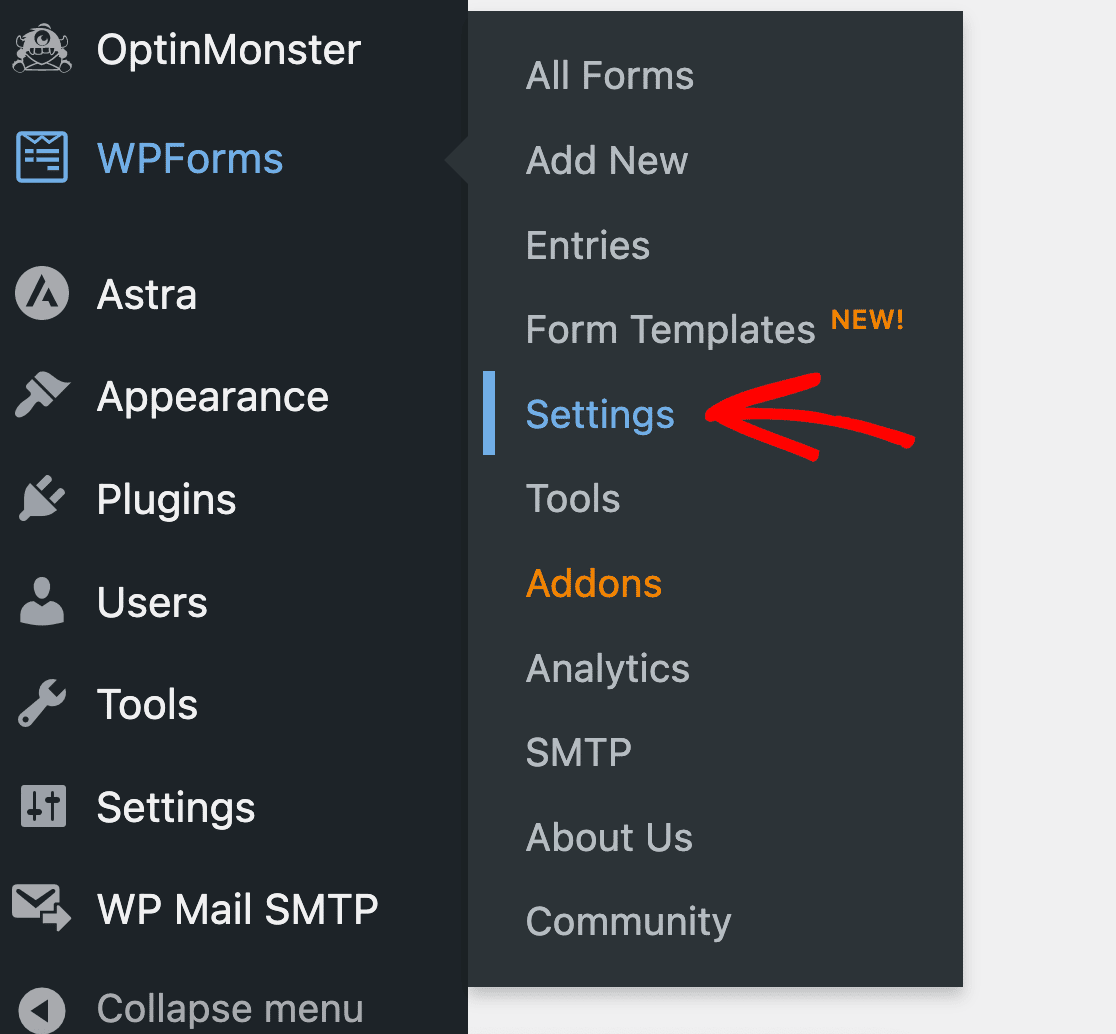
Then, look at the tabs across the top. Click on the CAPTCHA tab.

You’ll see the options for CAPTCHAs on this page. Click on the reCAPTCHA icon in the center of the page.
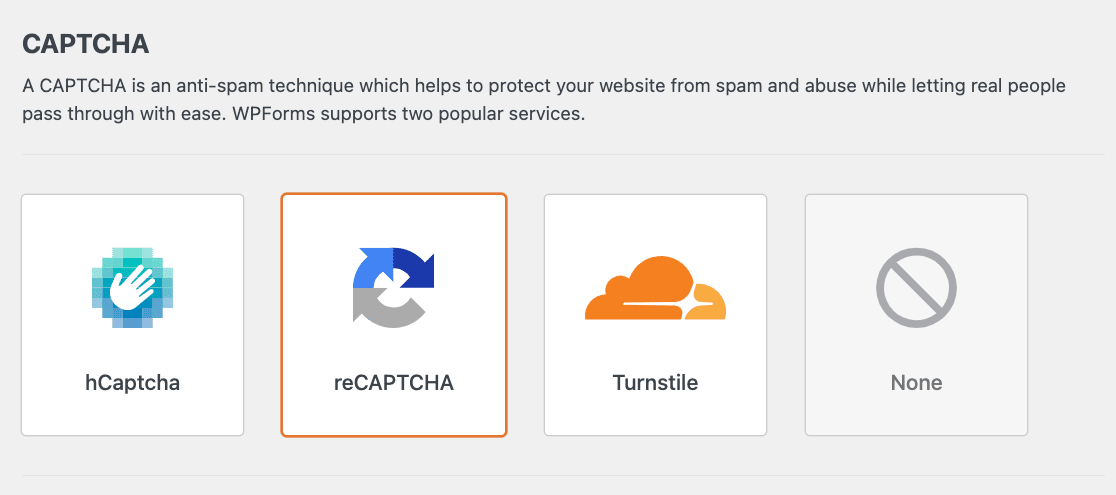
Now you’ll want to scroll down a little more until you see the reCAPTCHA settings. These settings are the same for all of the forms you make on your site.
Here’s a basic rundown of the differences between contact form spam prevention methods:
- Checkbox reCAPTCHA v2 lets visitors hover their mouse over a checkbox to submit the form. This is called a ‘challenge’, and it usually displays with the words ‘I am not a robot’ next to it.
- Invisible reCAPTCHA v2 doesn’t show a checkbox. Instead, the reCAPTCHA service detects user activity to decide if the visitor is human. This is a great way to prevent spam without showing a challenge every time.
- reCAPTCHA v3 is an advanced CAPTCHA that uses JavaScript to detect human visitors. It’s ideal for AMP pages, but it can occasionally prevent genuine visitors from submitting your forms. That’s why we recommend it for advanced users who are ready to troubleshoot if they run into any issues.
Select the reCAPTCHA method you want to use using the radio buttons.

Let’s switch over to the reCAPTCHA site and get your keys set up.
3.2. Set Up Google reCAPTCHA
Next, we’re going to switch over to the reCAPTCHA website to add your site there.
To start, visit Google’s reCAPTCHA site. You’ll want to open this link in a new tab or window so you can easily switch back to WPForms in a few minutes.
Once you’re on the reCAPTCHA homepage, click on the Admin Console button at the top.
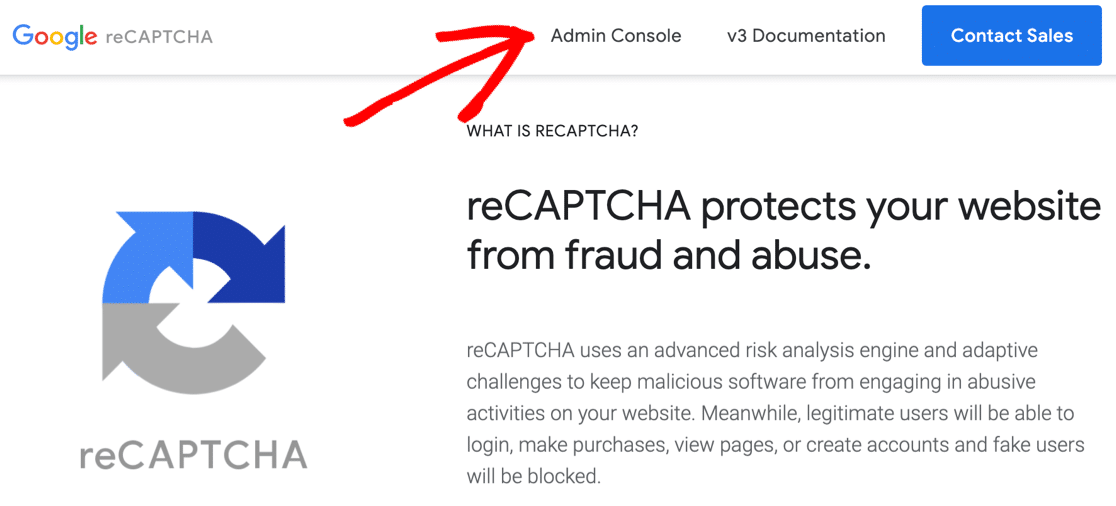
You might need to sign in to your Google account at this point. After that, you’ll be redirected to a page where you can register your site for reCAPTCHA.
To start, enter the name of your website in the label field. This is for your own use, so you can type in a name or the full domain name – whatever you prefer. The label here will help you identify the keys later.
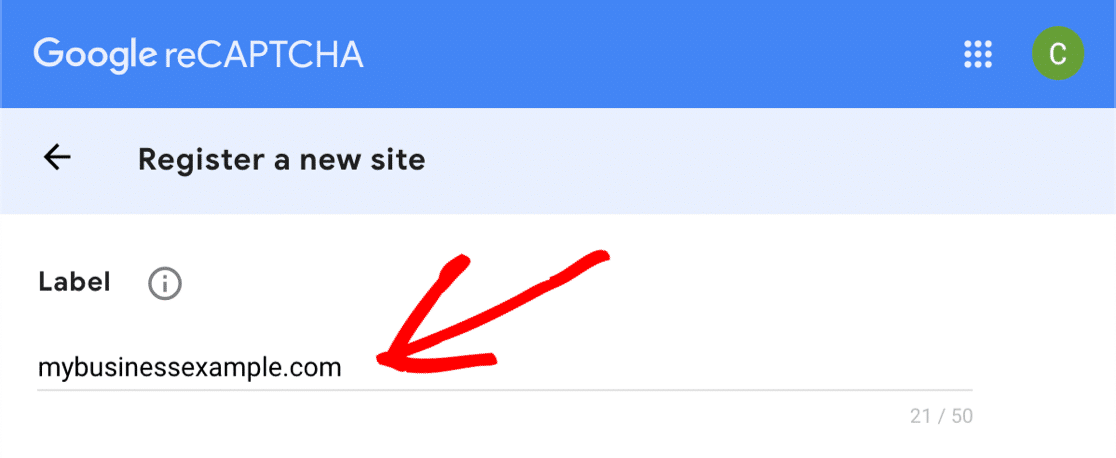
Then, choose the type of reCAPTCHA you want to add to your website. If you want to use reCAPTCHA v3, you’ll just have to click the top radio button here.

If you decide you want to use reCAPTCHA v2, select that radio button first. Then select either the ‘I am not a robot’ checkbox or the invisible reCAPTCHA.
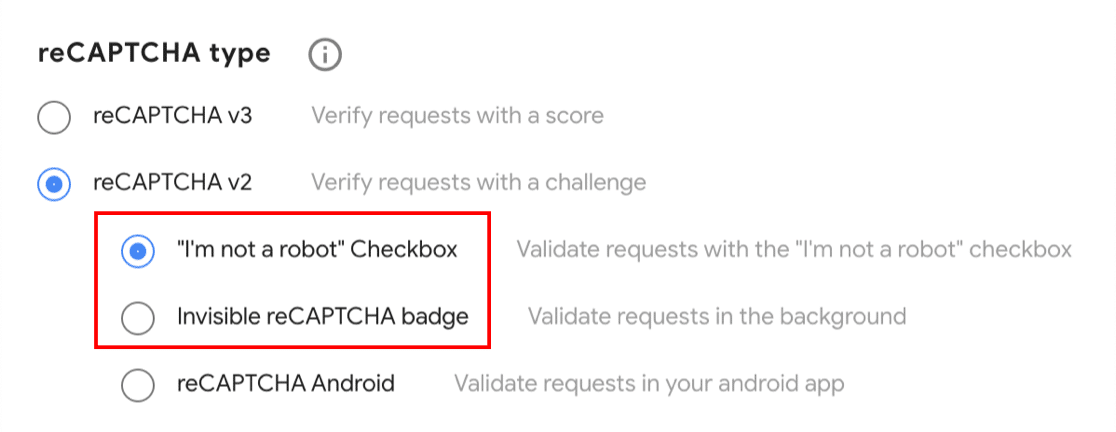
In this example, we’ll use the Checkbox method to show you how the form settings work. If you choose a different reCAPTCHA type, some of the screenshots from this point might look slightly different.
After choosing your reCAPTCHA, you’ll need to add your website’s domain. This time, you’ll want to type in the full domain name without the leading https://

Go ahead and click the Accept checkbox if you’re happy to proceed. You can also receive alerts about your reCAPTCHA by clicking the second checkbox.
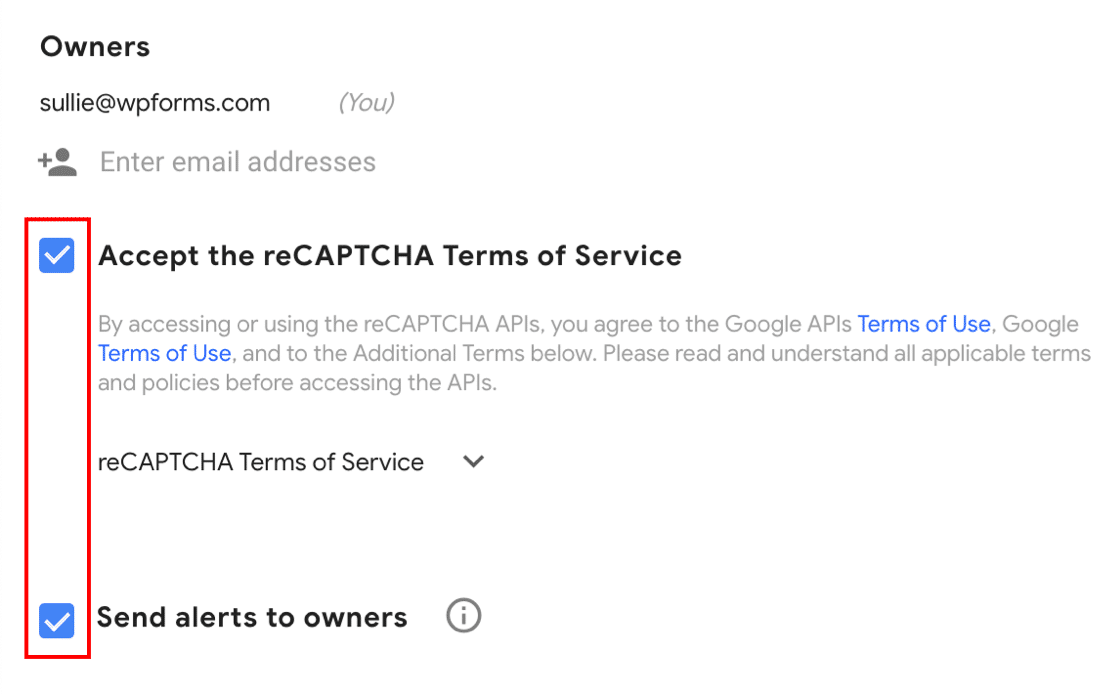
Click Submit to save your progress so far.
3.3. Grab Your reCAPTCHA Keys
Before we go ahead and copy your reCAPTCHA keys, there’s 1 super important thing to remember.
Each of these reCAPTCHA methods uses different types of keys. So if you start out using a certain type of Google reCAPTCHA, then you decide to switch to a different type, you’ll need to generate new keys to match.
Let’s pick up from the last step. You should see a notice saying your site has been registered with reCAPTCHA. Underneath, you’ll see a site key and secret key for your website.
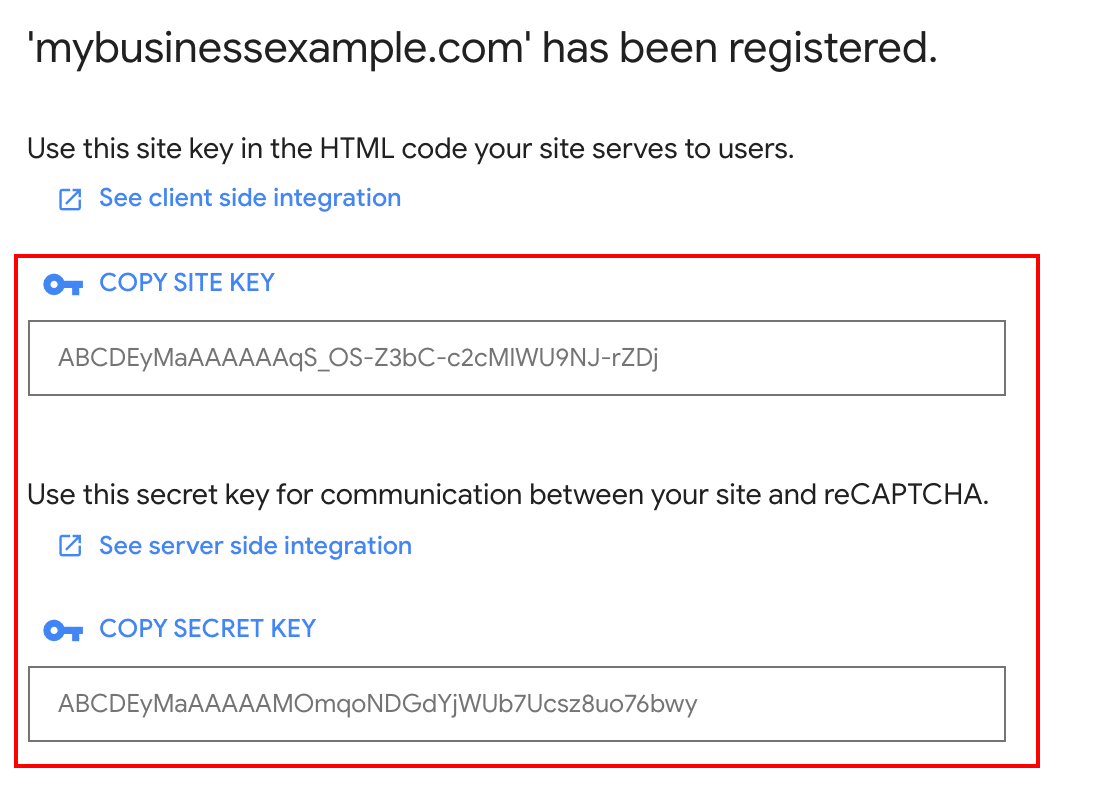
Switch back to the WPForms » Settings page we were looking at in the last step. You can go ahead and paste your site and secret keys under the reCAPTCHA settings.

To finish up, there are a couple of other settings in WPForms. Let’s quickly look at what those mean:
- Fail Message – This field lets you customize the message that appears if reCAPTCHA stops the form from being submitted.
- No-Conflict Mode – Sometimes other plugins can also try to load reCAPTCHA code. If this happens, you might see a message like ‘This field is required’, even though all required fields are filled in. To avoid this problem, you can check the No-Conflict Mode checkbox to force disable other reCAPTCHAs. See our guide on fixing reCAPTCHA for more help.
All set? Click on the Save Settings button to store your changes. Now you’re ready to add the reCAPTCHA to your contact form to stop spam.
3.4. Add the reCAPTCHA to Your Online Form
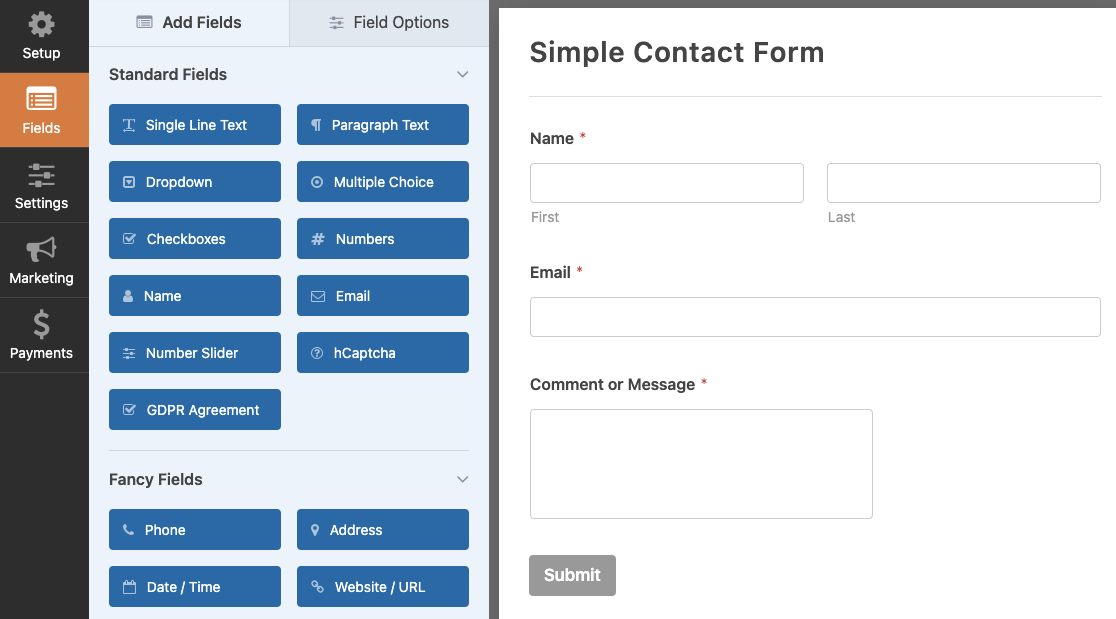
Now, we need to switch back to the form builder to enable reCAPTCHA on your form. First, open up your form in the form builder.
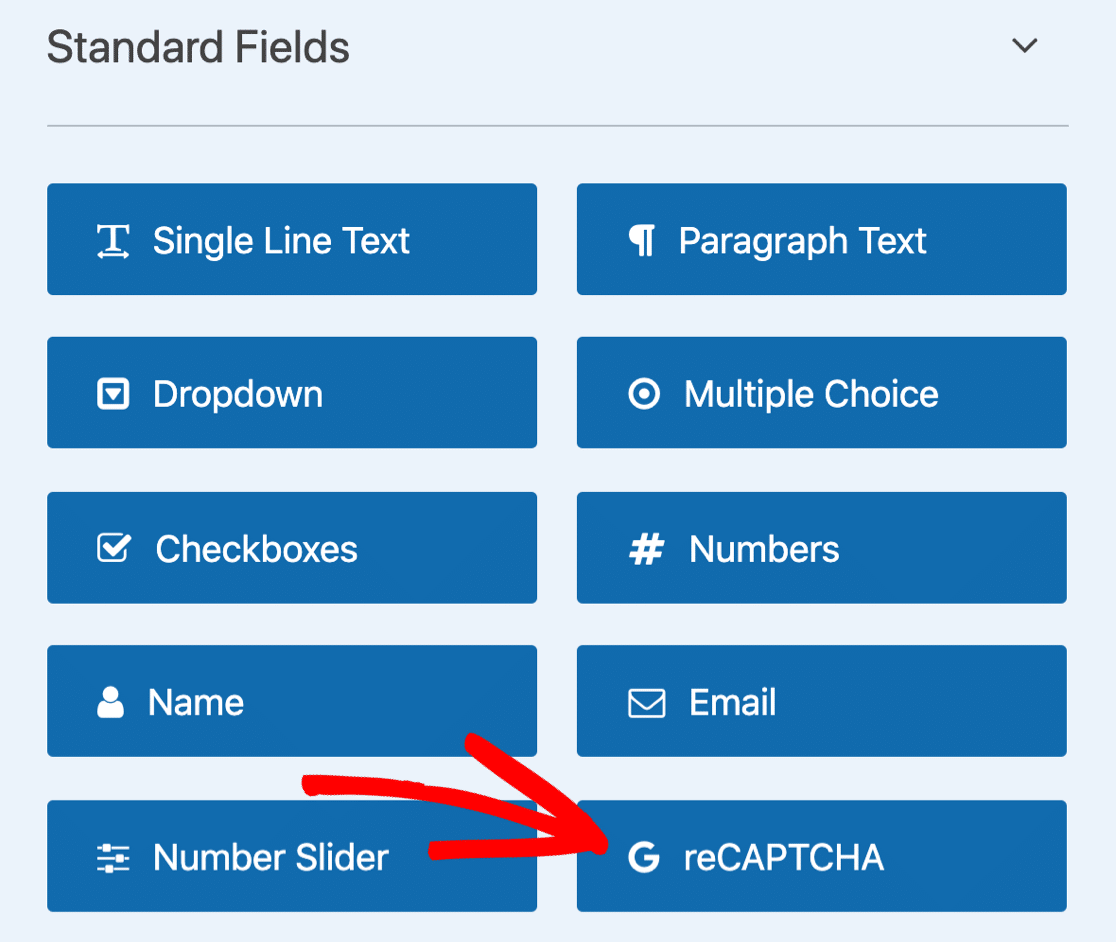
Look to the Standard Fields on the left and click on the reCAPTCHA field.
In case you’re wondering how this works, you don’t need to drag the reCAPTCHA onto your form. You can just click on the field once to activate the reCAPTCHA.
A message will pop up to confirm that reCAPTCHA is enabled on your form. Click OK.
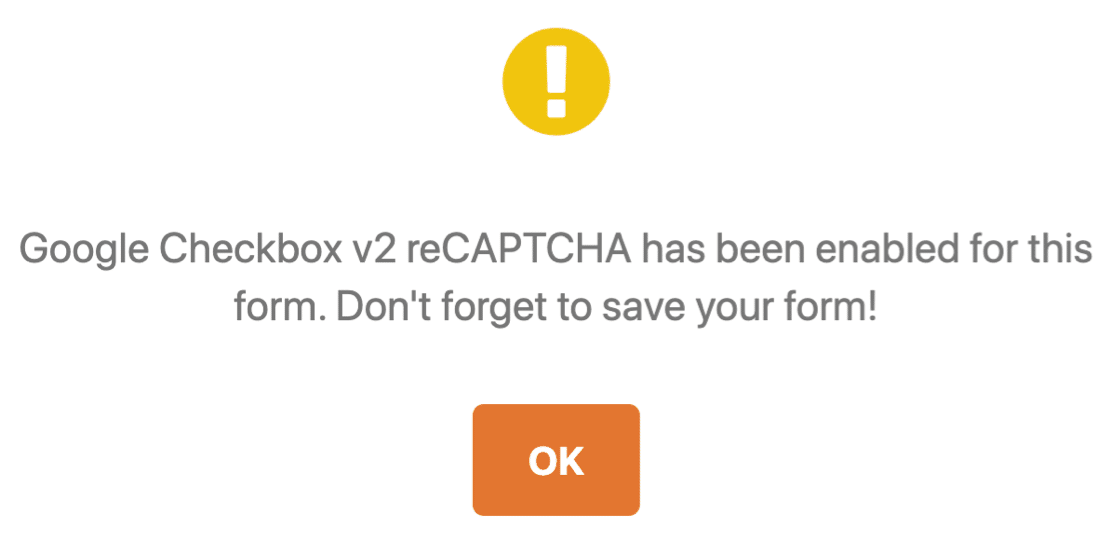
Great! You’ll see the reCAPTCHA badge in the form builder to show that reCAPTCHA is active on this form.
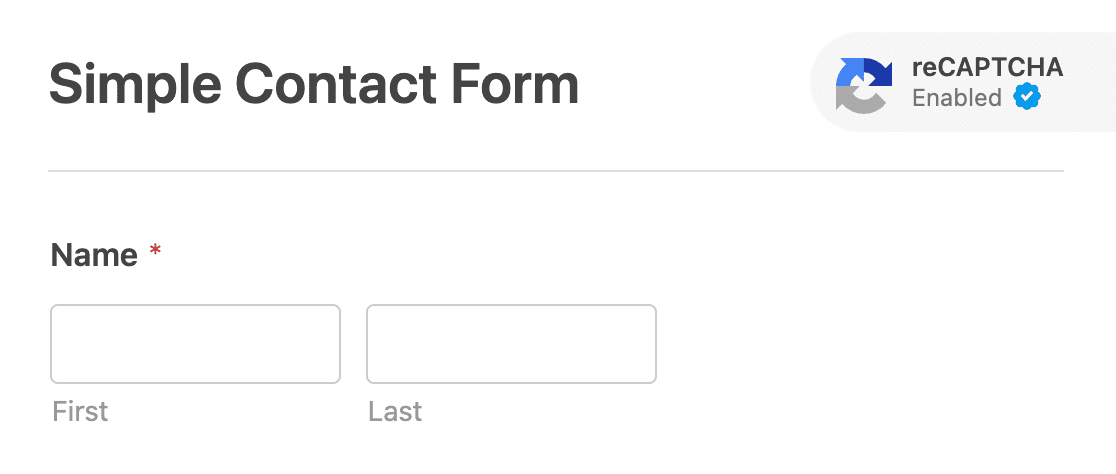
This badge won’t show on your finished form when you publish it. Don’t forget to save your form now.
And that’s it! Now you know how to add a v2 or v3 Google reCAPTCHA to stop contact form spam.
If you ever want to disable reCAPTCHA on your form, just edit the form and click the reCAPTCHA field again to turn it off.
Next up, we’ll show you how to use hCaptcha. This is an awesome alternative to reCAPTCHA if you’re looking for a different way to show a challenge.
4. Use hCaptcha in Your Contact Form
With WPForms, you can easily use hCaptcha to stop contact form spam.
The hCaptcha service is a great way to stop spam bots in their tracks by showing your visitors a challenge.
If the challenge isn’t completed, the form won’t submit and the spambot will get stuck.

Wondering about the difference between Google reCAPTCHA and hCaptcha? There are 2 main reasons why hCaptcha might be a good fit for your site:
- Improve privacy on your website – Some site owners use hCaptcha because of privacy concerns about reCAPTCHA. If you’re worried that Google might retarget ads to your visitors, hCaptcha will be a better choice for you because it collects less data about them.
- Support charities – If you want, you can donate the earnings from your hCaptcha account to charity automatically.
Just like reCAPTCHA, hCaptcha is free for basic use. The main downside of the free version is that there’s no invisible CAPTCHA option.
But there’s an Easy mode that you can use if you want to minimize the number of CAPTCHAs your visitors see. Here’s our guide to hCaptcha vs reCAPTCHA for a full comparison.
It’s super easy to use hCaptcha in WPForms. The steps are very similar to the Google reCAPTCHA settings we already showed you.
Let’s dive in and set it up.
4.1. Set Up hCaptcha in WPForms
Have you installed the WPForms plugin and created a simple contact form?
Great! You’re ready to add hCaptcha.
We’ll start in your WordPress dashboard. On the left, go to WPForms » Settings.

From the tabs across the top, click CAPTCHA.

Now click on the hCaptcha icon.
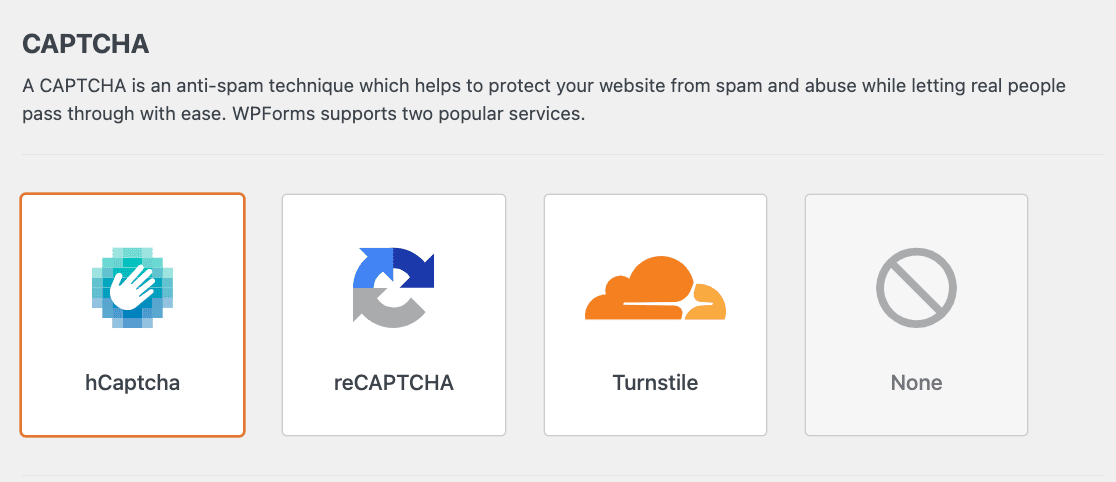
You’ll see the settings for hCaptcha displayed underneath. Let’s go ahead and set up your keys in the next step.
4.2. Generate hCaptcha Keys
In this step, we’re going to sign up for hCaptcha and grab your site keys.
Keep WPForms open in another tab so we can easily switch back to it in a minute.
Start by opening up the hCaptcha site in a new tab. Then click the Sign Up button.

To select the free plan, click the button under Add hCaptcha for Publshers to my website or app.
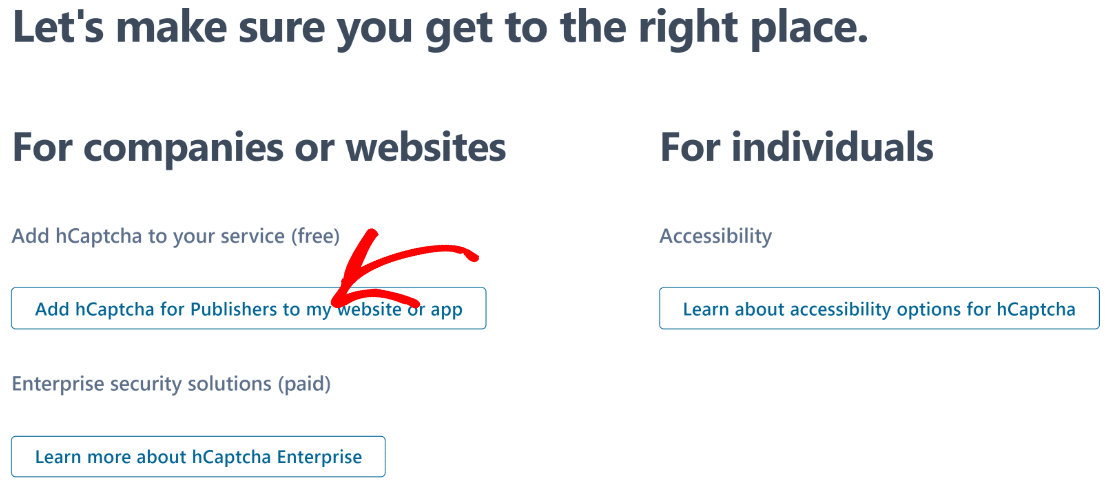
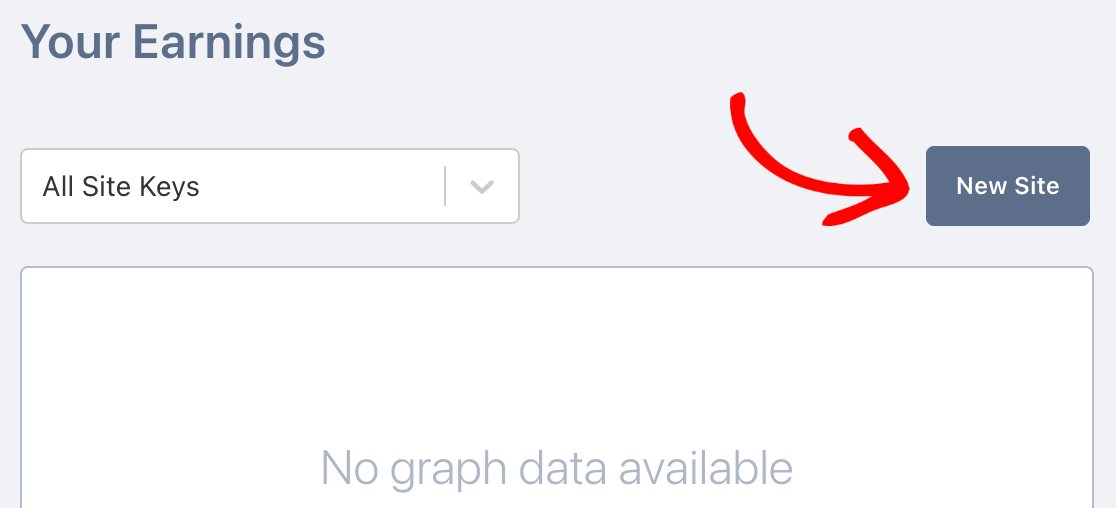
Set up your login using the signup form and sign into your account. Once inside your dashboard, click on the New Site button.
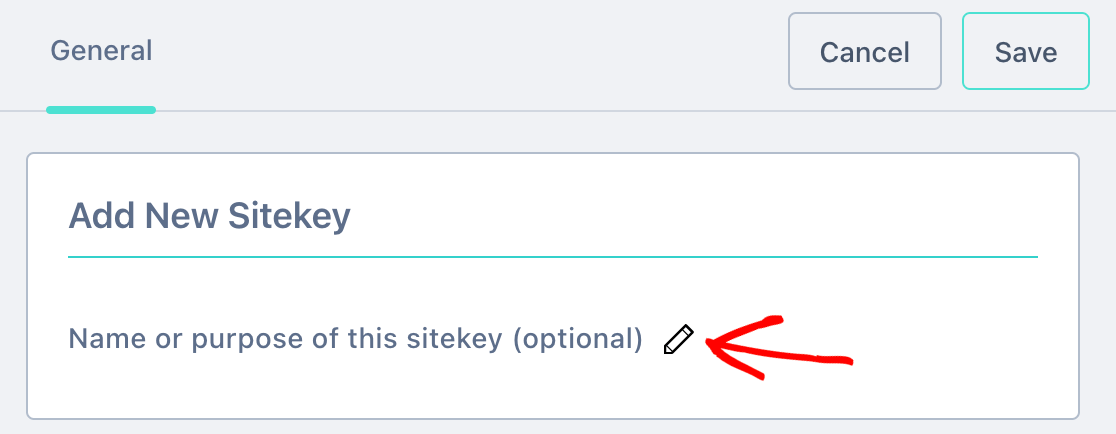
At this point, you can give a name to your new SiteKey. This name won’t be visible to your visitors. It’s for your internal reference only.
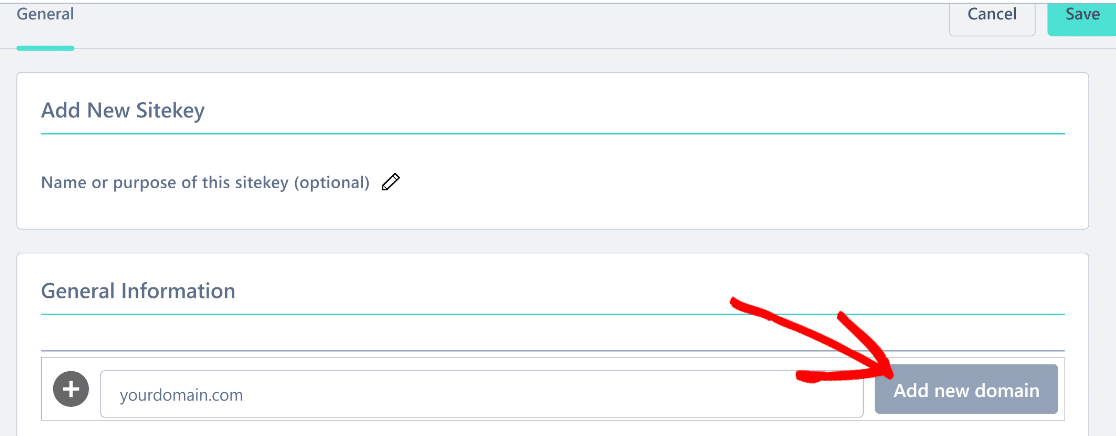
In the next field, type in your site domain and click Add New Domain.
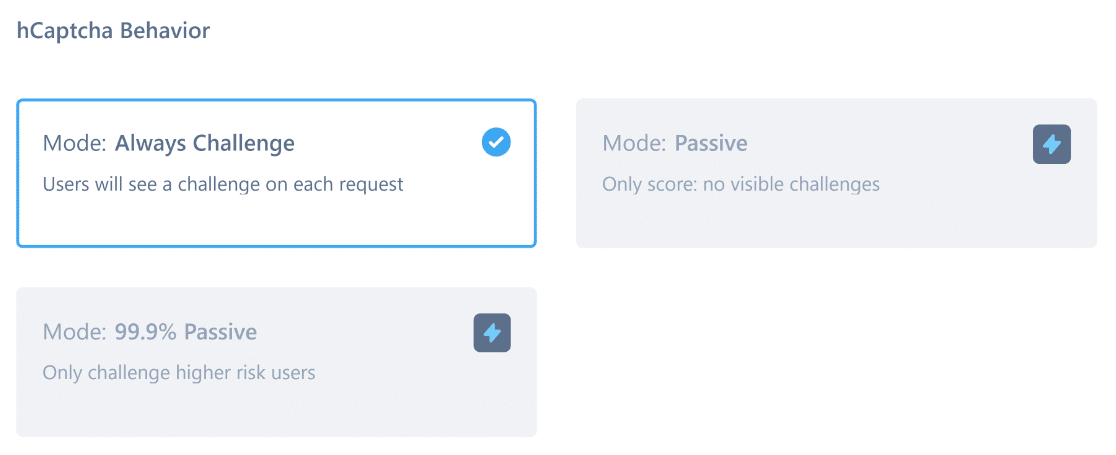
Next, you can configure the behavior of your hCaptcha to determine whether you want it to display a challenge every time.
You can also limit or completely remove visible challenges in the paid plans which give you the Passive behavior modes.
Next, configure the difficulty level for your hCaptcha by selecting an appropriate passing threshold. It’s a good idea to leave this setting to Auto.
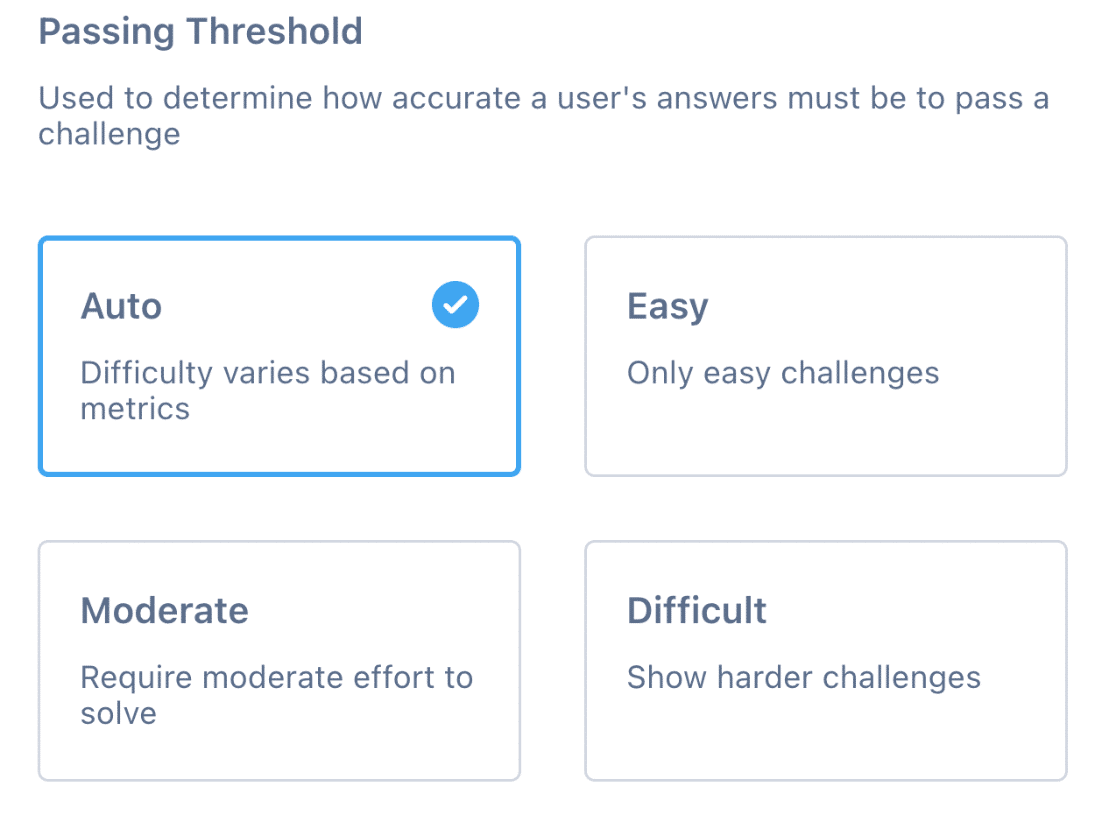
If you find you’re still getting spam, you can go back and increase the difficulty. Now, you’ll want to scroll back up to the top and click Save.
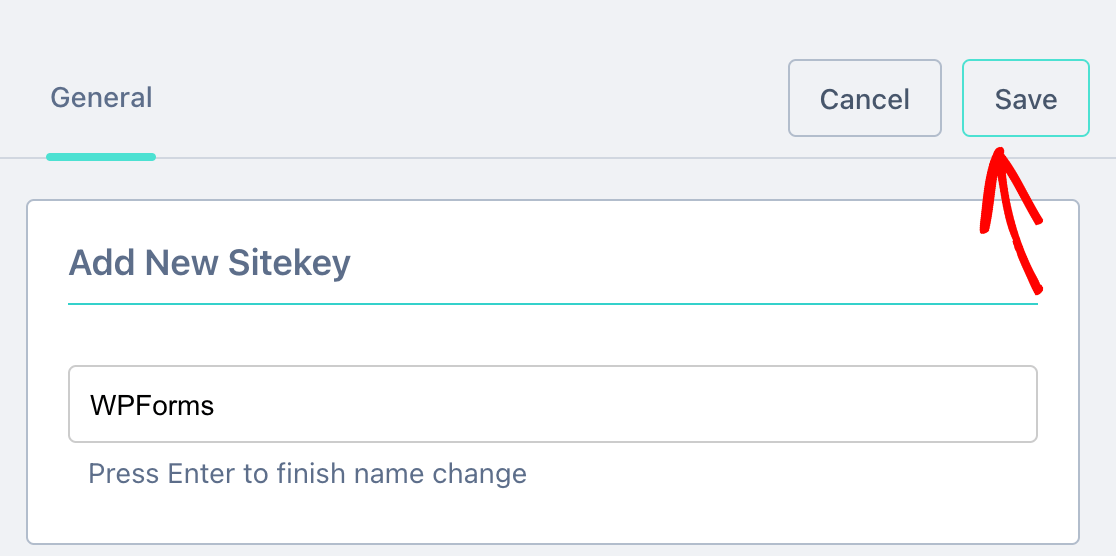
Now it’s time to copy your keys into WordPress.
4.3. Grab Your hCaptcha Keys
Remember the WPForms tab we kept open? In this step, we’re going to grab the keys from hCaptcha and paste them into WPForms.
After pressing the Save button in the previous step, you’ll see the site you just added under Active Sites. On the right, click Settings.

Now, copy the site key and paste it into the Site Key field in WPForms.
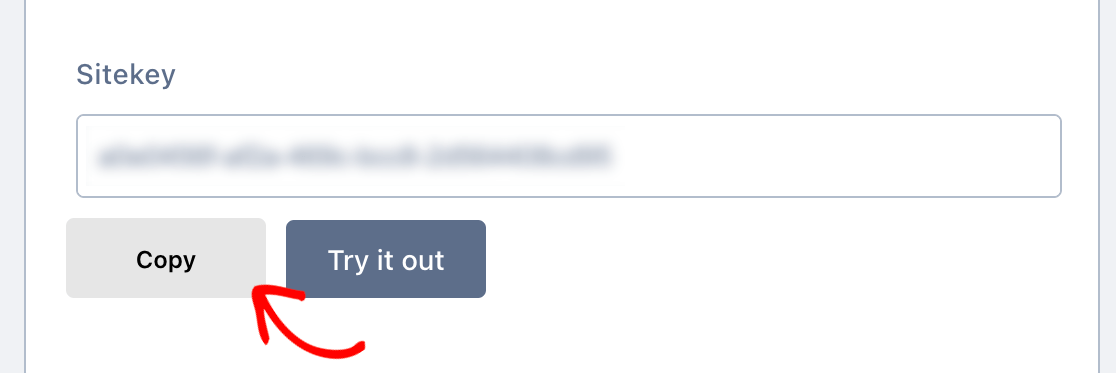
You can paste the key into a notepad editor for now. We’ll need this very soon.
Back in hCaptcha, click your profile icon on the top-right and press Settings.
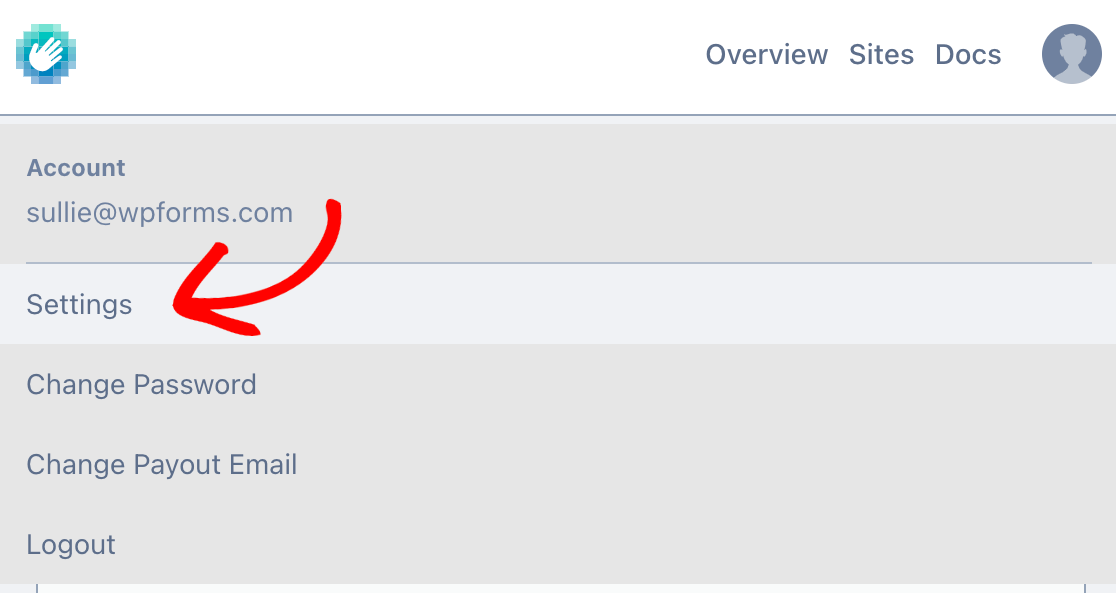
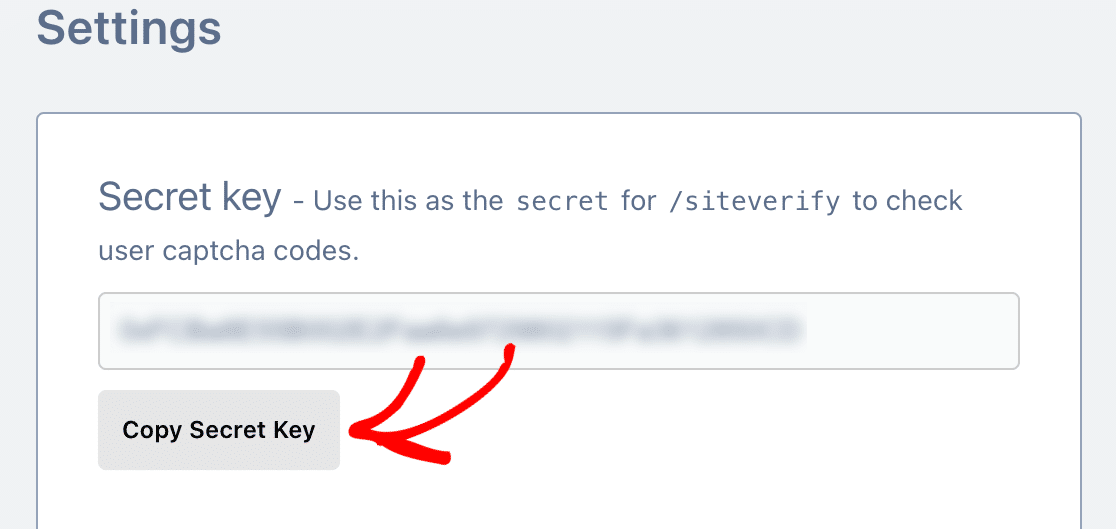
You’ll see your Secret Key at the top. Go ahead and copy it, then paste it into WPForms.
In WPForms, you should now have your hCaptcha Site Key and Secret Key ready to go. Enter your keys into the appropriate fields.
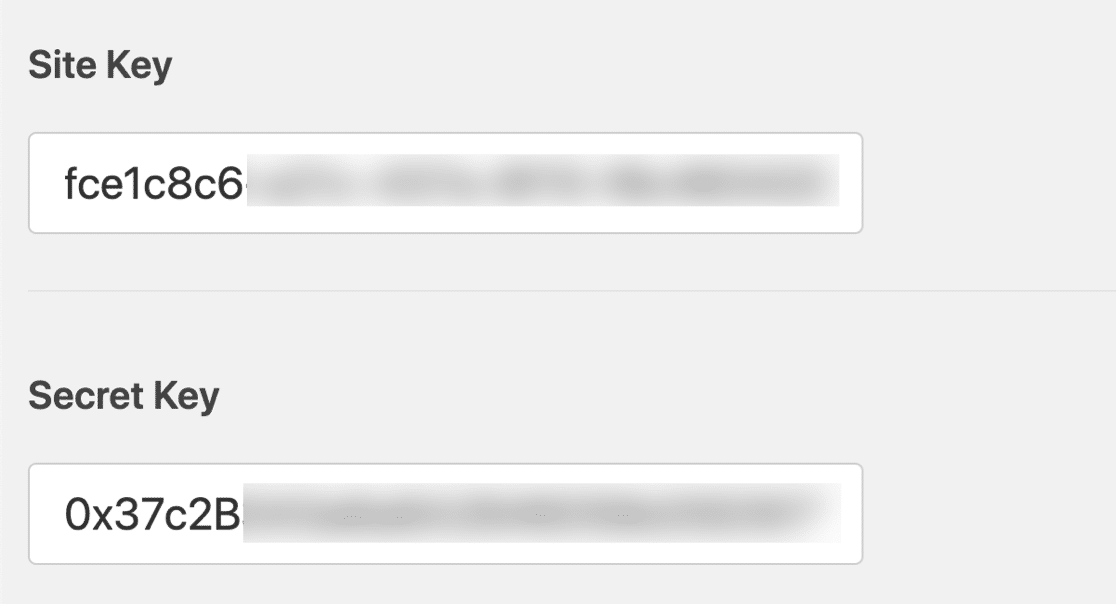
There are 2 more settings underneath that you might want to use:
- Fail Message – Customize the message that appears if hCaptcha stops the form being submitted.
- No-Conflict Mode – Sometimes other plugins can also try to load CAPTCHA code. If this happens, you might see an error. To avoid this problem, you should deactivate hCaptcha in all of your other plugins. But if the problem persists, you can check the No-Conflict Mode checkbox to force disable any conflicting hCaptcha code.
Click Save to save your hCaptcha keys. Now we’re done with the settings, let’s enable hCaptcha on your form.
4.4. Add hCaptcha to Your WordPress Form
Now you can turn on hCaptcha for your form. Start by opening WPForms in the WordPress dashboard and clicking Edit under the form name.
The form will open up in a fullscreen window.

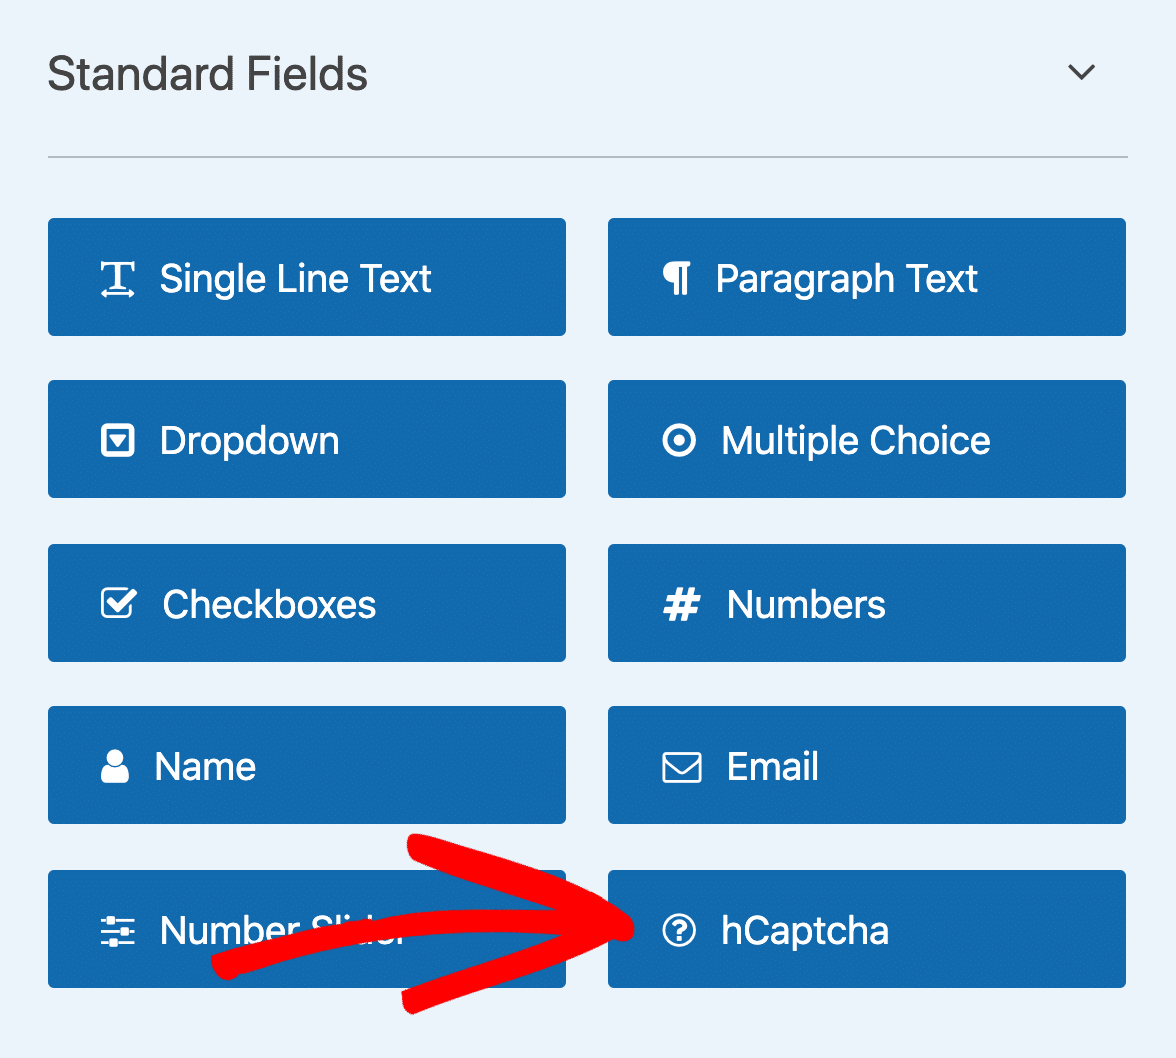
Look to the Standard Fields on the left and click on the hCaptcha field.
In case you’re wondering how this works, you don’t need to drag the field onto your form. You’ll just need to click on the field once to turn on hCaptcha.
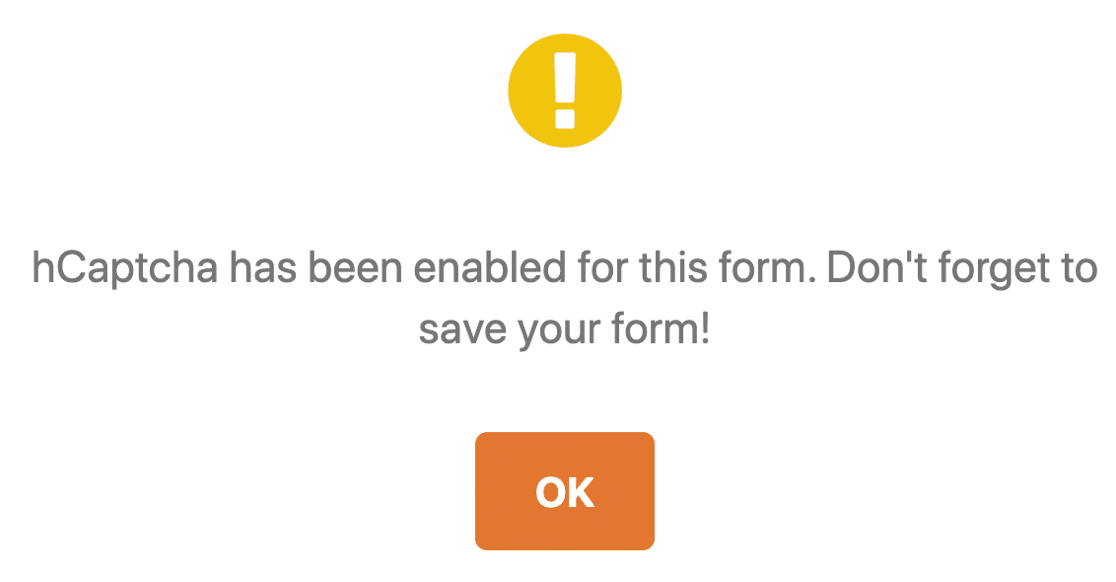
A message will pop up to confirm that you’ve turned on hCaptcha for this form. Click OK.
Great! Now you’ll see the hCaptcha logo to confirm that everything’s working.
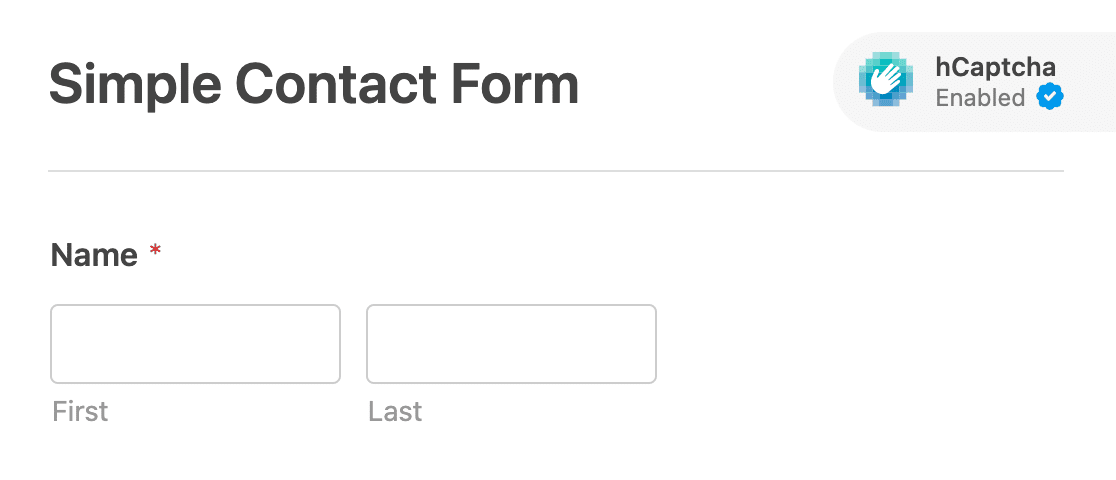
The hCaptcha logo won’t show up on your published form. It only shows in the form builder as a reminder that hCaptcha is active.
And that’s it! Now you know how to add hCaptcha easily to stop contact form spam. If you ever want to disable it on your form, just edit the form and click the hCaptcha field.
5. Enable Cloudflare Turnstile for Your Form
Another CAPTCHA solution you can use with WPForms is Cloudflare Turnstile.
It adds a simple checkbox to your form to verify your users when they submit a form on your website.

Like hCaptcha, Cloudflare Turnstile is a great reCAPTCHA alternative. It’s free to use and offers high privacy standards to protect your site visitors from data harvesting.
Here’s how to set it up in WPForms.
5.1. Connect WPForms to Cloudflare
First, open your WordPress dashboard and go to WPForms » Settings.

Then click on CAPTCHA in the menu at the top of the page.

You’ll see all of the CAPTCHA integrations WPForms offers. Choose Turnstile.
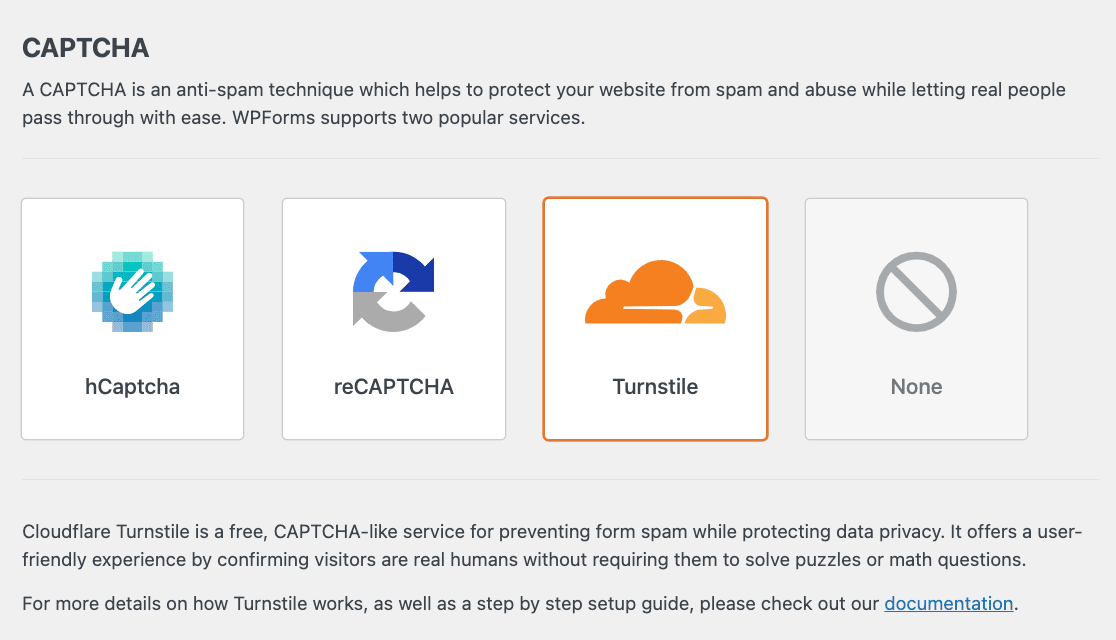
Now, WPForms will ask for your Cloudflare Turnstile site and secret keys.
5.2. Access Cloudflare Turnstile Keys
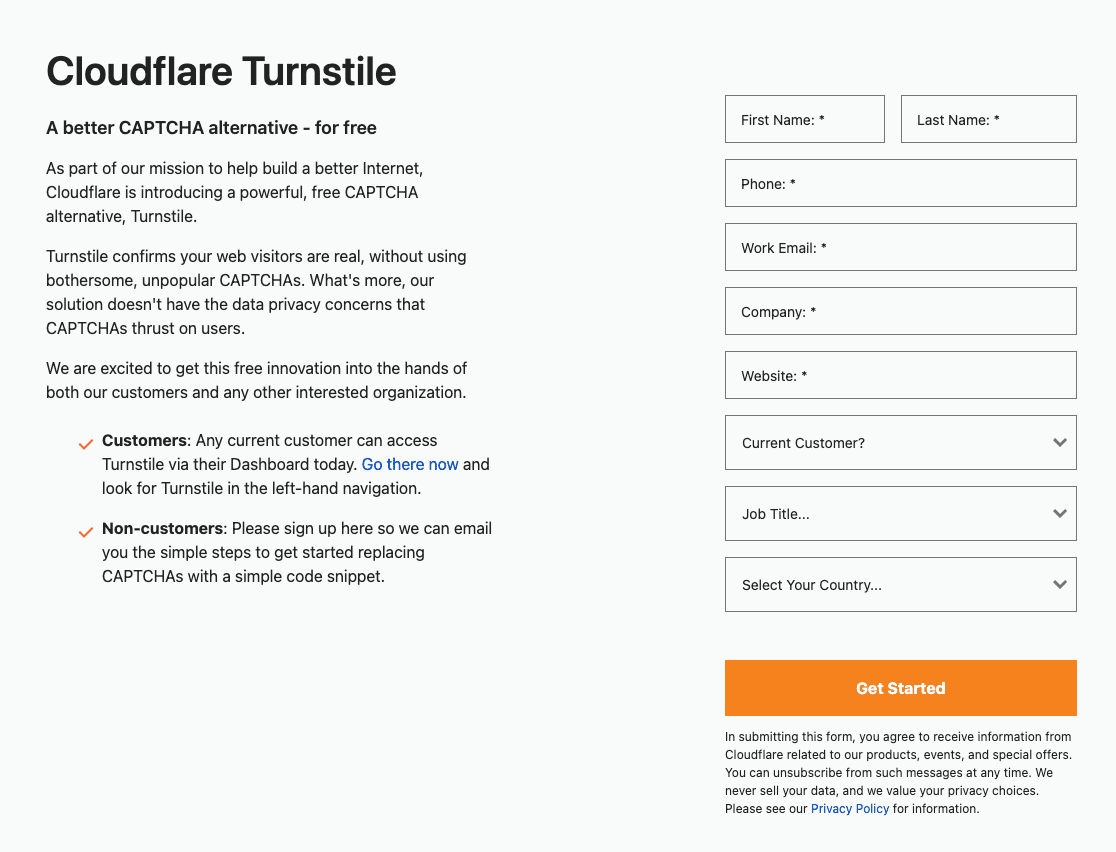
To find your Cloudflare Turnstile site and secret keys, you’ll need to log in to your Cloudflare account or create a new one.
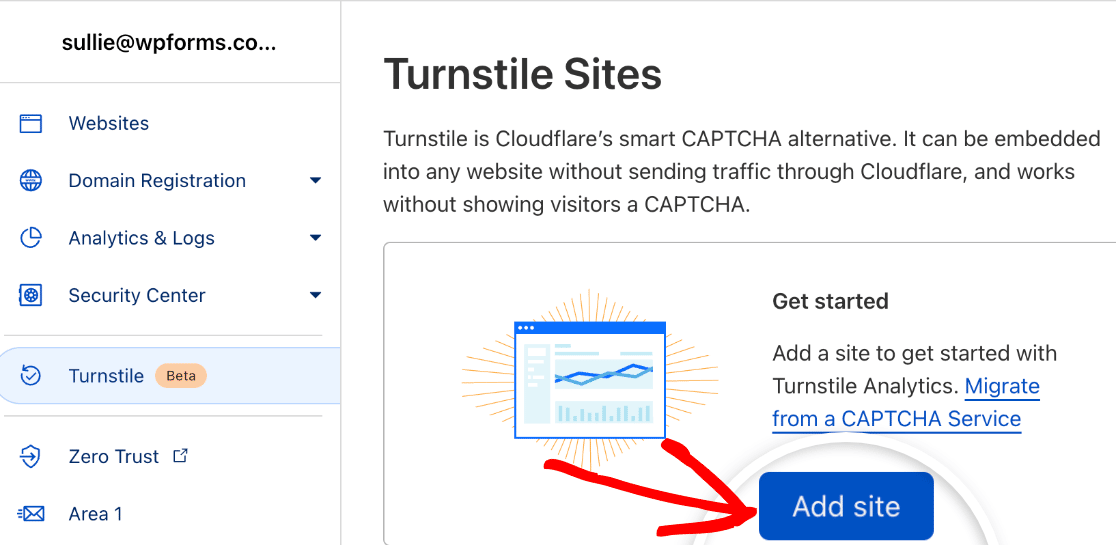
Once your account is set up, go to the Turnstile page in your dashboard and click Add Site.
You’ll then fill in some information about your website. Once that’s done, select your preferred widget type. This will determine how Cloudflare verifies your site visitors.
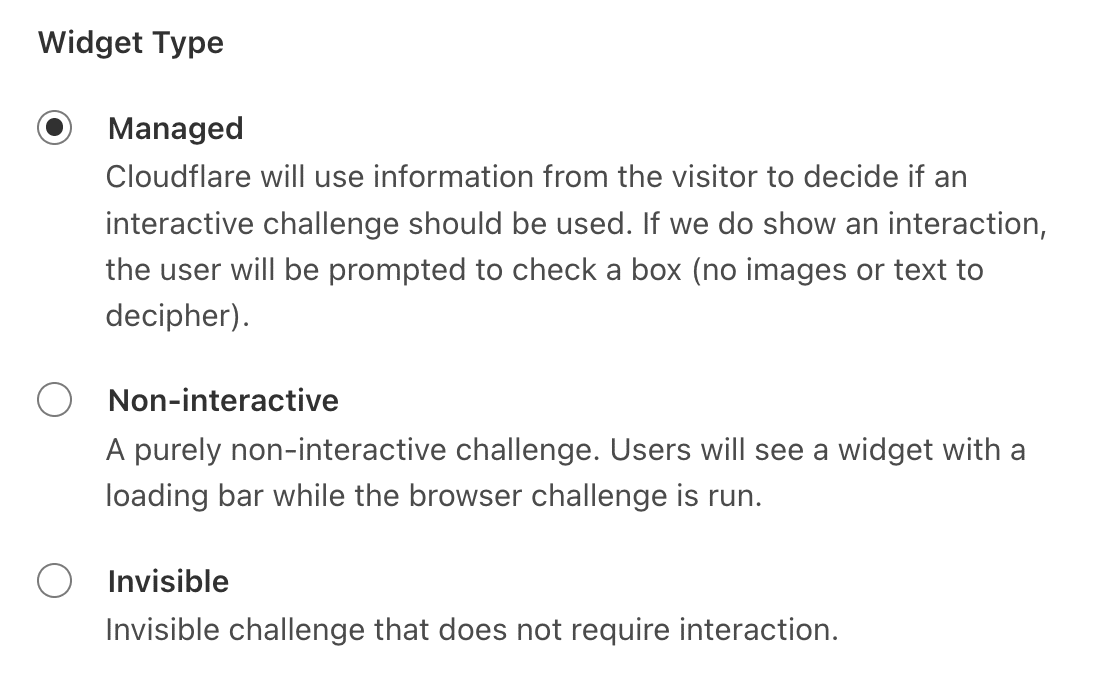
Then click the Create button.

Your site and secret keys will be generated
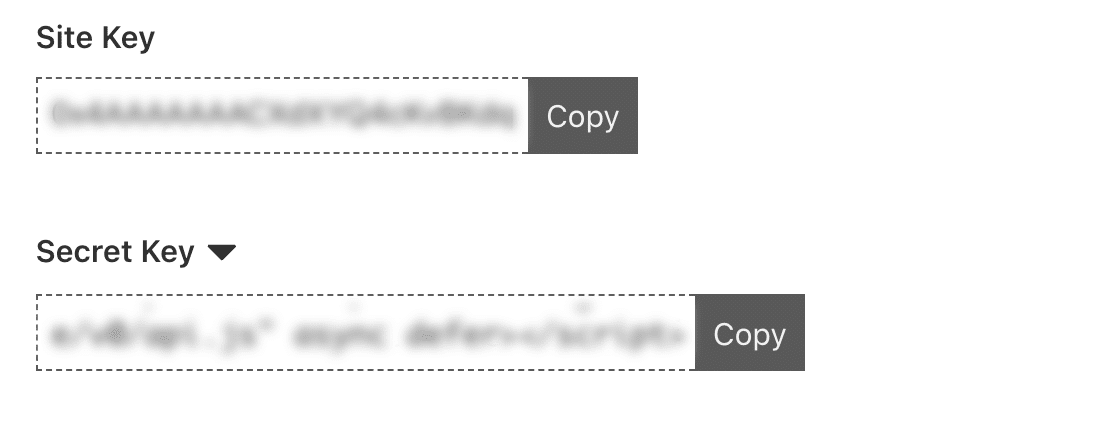
Copy and paste them into your WPForms settings.
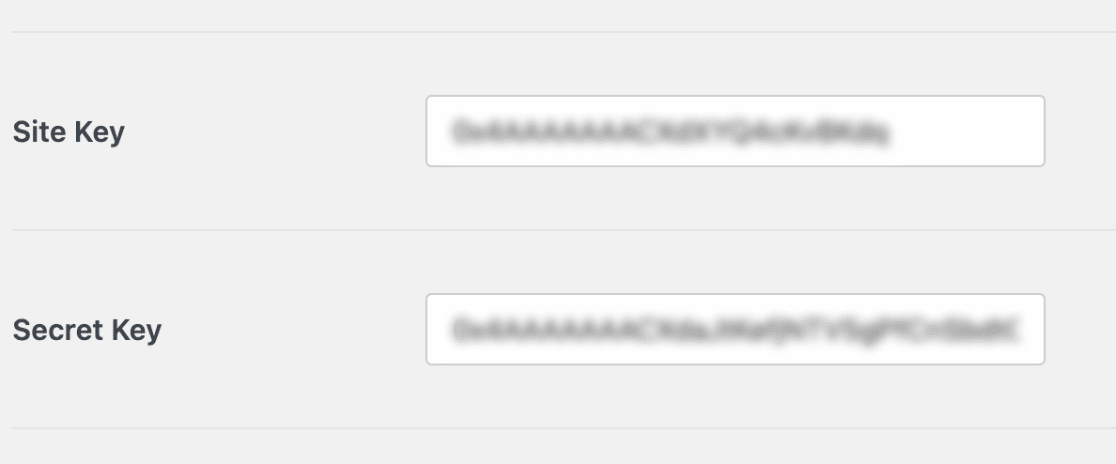
There are some other settings you can fill out here, including the fail message and whether you want to enable no-conflict mode.

When you’re happy with your settings, click Save Settings at the bottom of the screen.
5.3. Add Cloudflare Turnstile to Your Form
To add Cloudflare Turnstile to a form, open it in the form builder for editing. Then add a Turnstile field to your form.
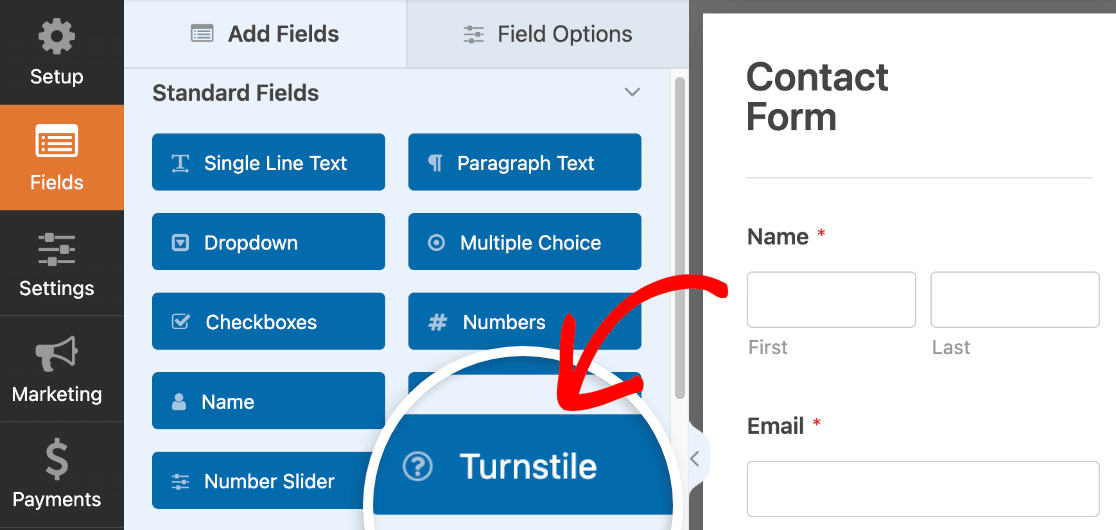
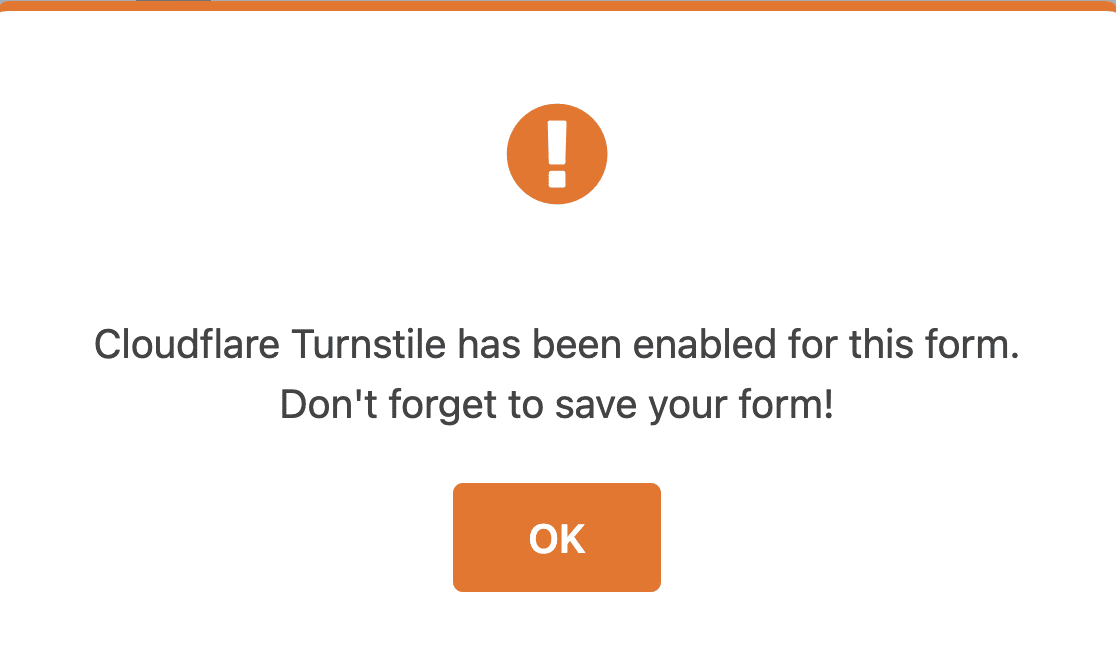
You’ll see a popup reminding you to save your form. Click OK to dismiss it.
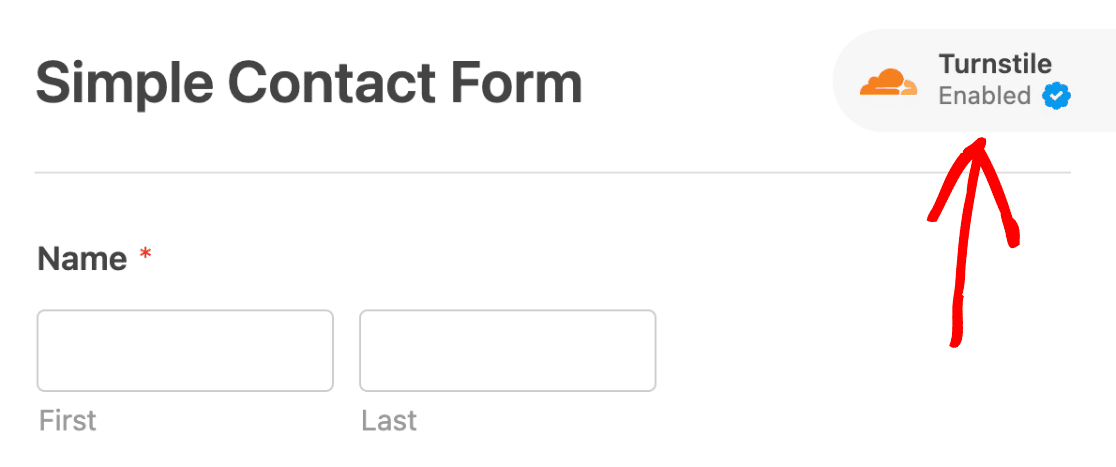
Now Turnstile will be enabled for your form. You’ll see a badge in the top right corner of your form verifying that it’s now protected.
That’s it! You can just as easily remove Turnstile from your form if you choose to.
For additional details, check out our guide on enabling Cloudfare Turnstile on forms.
Next up, we’ll show you how to make your own CAPTCHA with WPForms.
6. Use the WPForms Custom CAPTCHA Addon
Are you still getting spam with reCAPTCHA or hCaptcha?
You can use the WPForms Custom CAPTCHA addon to create your own challenge.
With this addon, you can set up custom questions or use random math puzzles as a CAPTCHA to fight spam form submissions.
This method is easy and quick to set up and doesn’t need any site keys.
6.1. Add a Custom CAPTCHA Field in WPForms
First, open up your form in the form builder.

Now, scroll down to the Fancy Fields section. If you’re using an older version of WPForms (1.8.6 or below), you’ll need to install the Custom CAPTCHA addon first.
But if you’re on the latest WPForms version, you can start using Custom CAPTCHA immediately without requiring any extra addon installation.
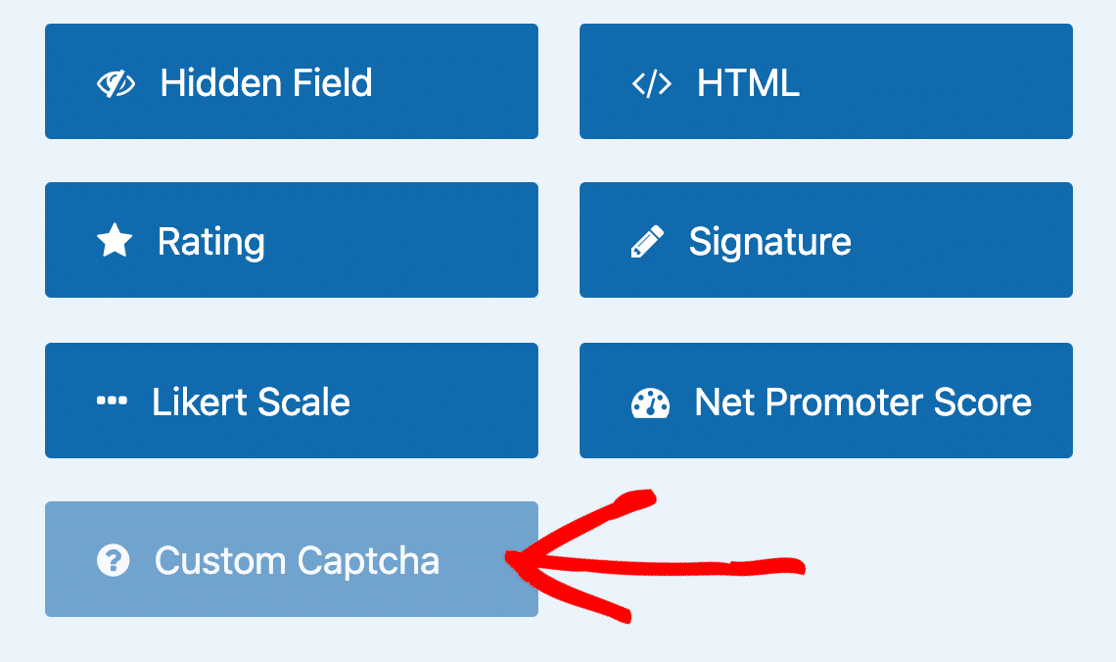
In either case, you’ll have to click on the Custom CAPTCHA field on the left-hand pane.
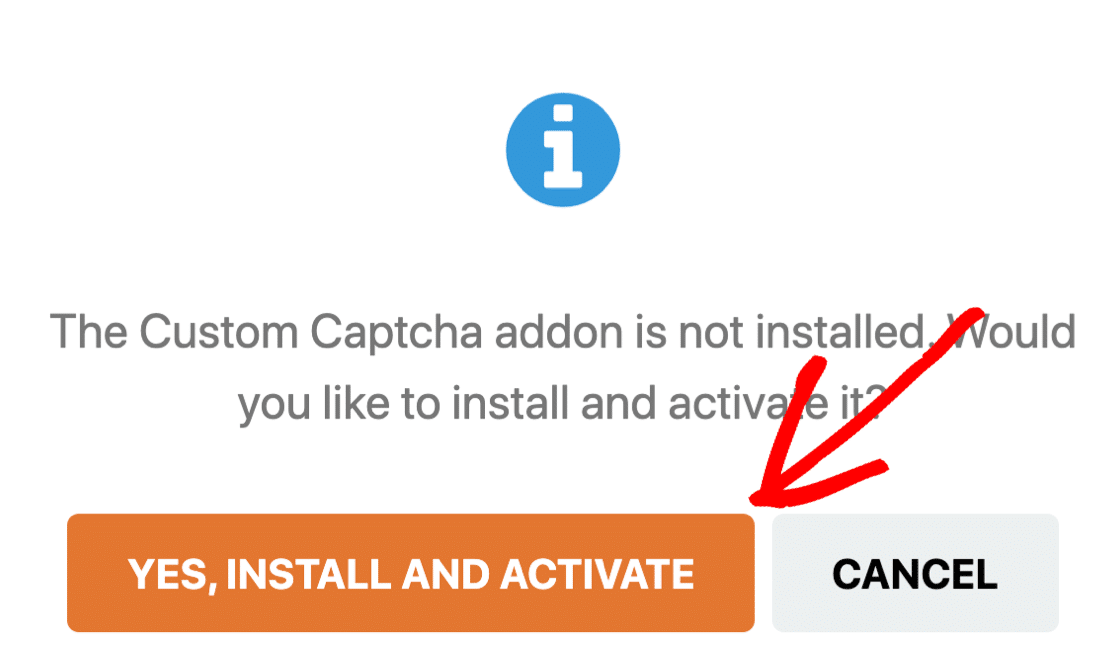
If the addon needs to be installed first, you’ll now see a prompt asking if you’d like to install the plugin. Click on Yes, Install and Activate to proceed.
After the installation is complete, click Yes, Save and Refresh.
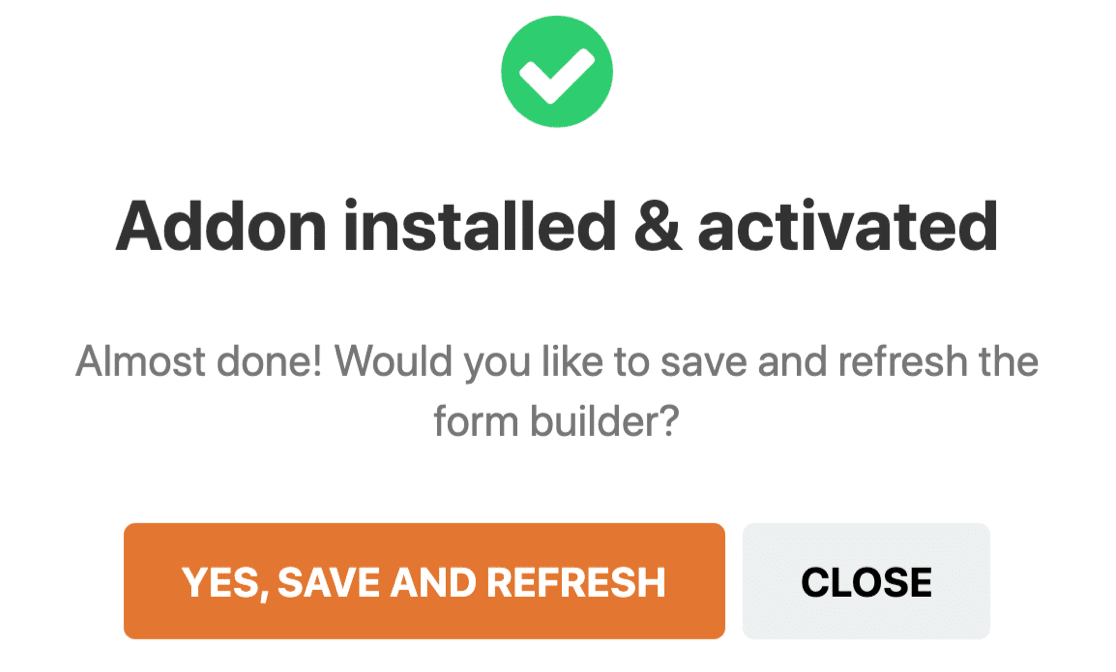
Your Custom CAPTCHA addon is now active and ready to be added to your form.
6.2. Set Up Your Custom CAPTCHA Questions
Once you’ve created a contact form, stay in the form builder to add your custom CAPTCHA questions.
First, drag the Custom CAPTCHA field from the left-hand panel to the right-hand panel to add it to your form. When you click on the field, you’ll see the settings open up on the left.
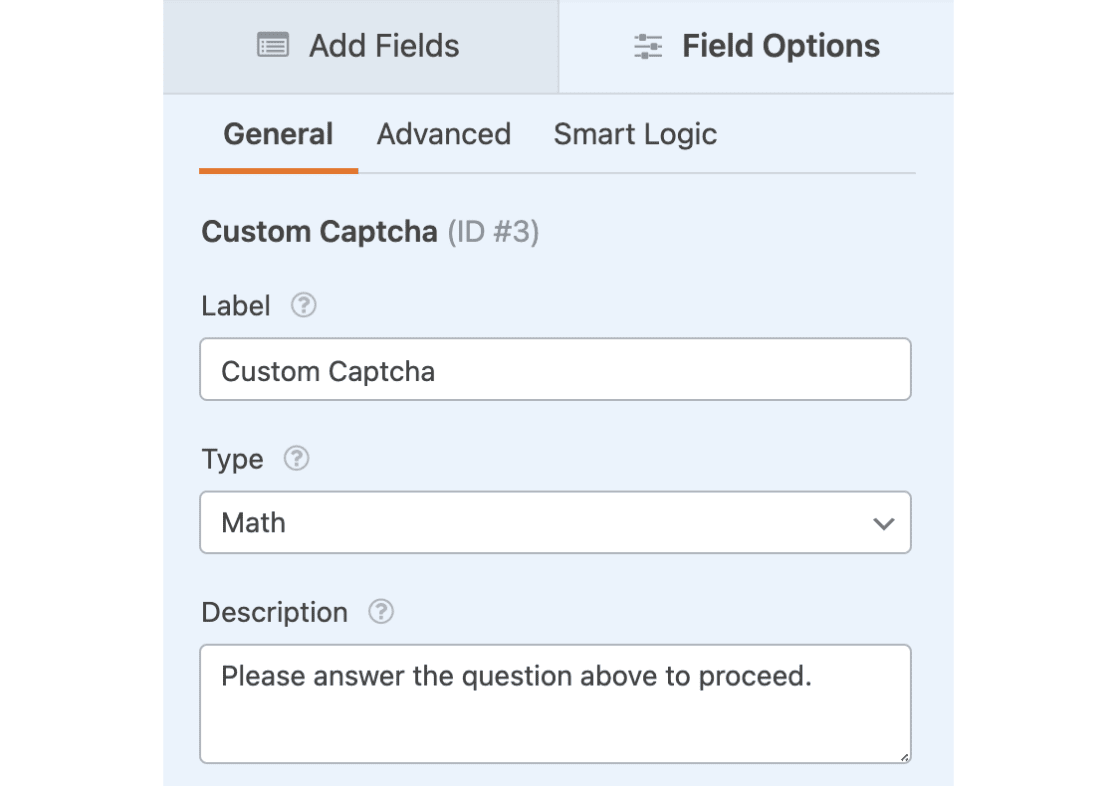
The form field will automatically display a random math question for site visitors to answer before they can submit their form on your site.
A new math problem (addition, subtraction, or multiplication) will appear every time the page loads or refreshes.
If you’d like to know how to customize the questions, check out our documentation on how to change the math CAPTCHA.
If you prefer to use a custom question and answer instead of the math CAPTCHA, change the type to Question and Answer in the Field Options section.
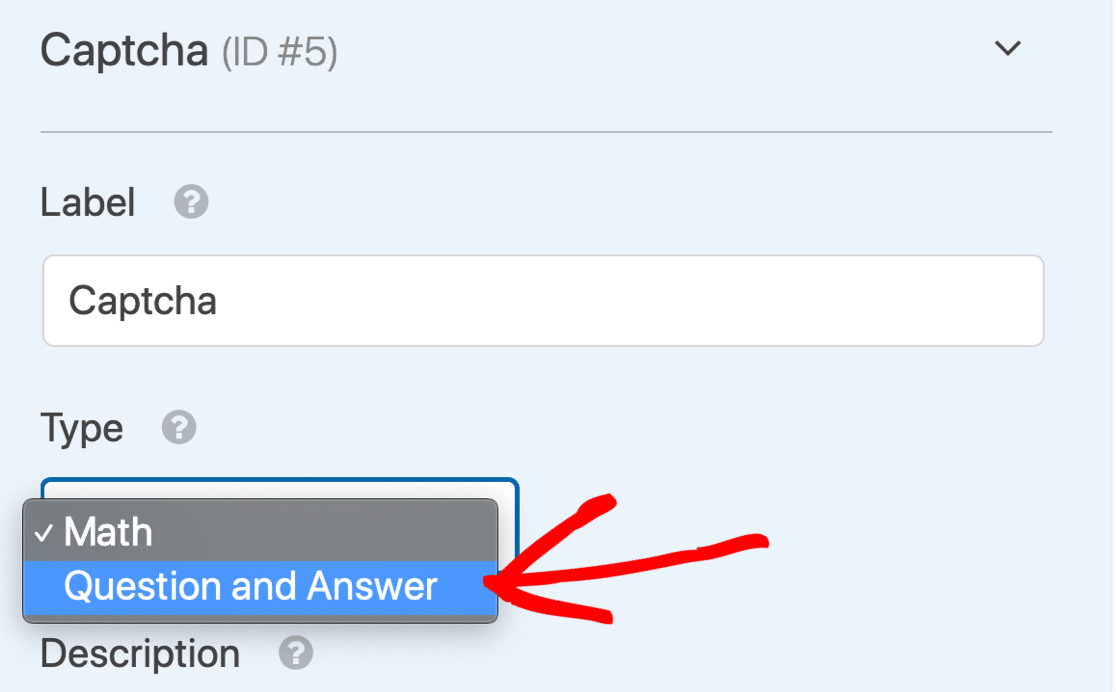
There, you can also change the question and answer that site visitors have to type out a response to in order to submit their form on your site.
If you want to display random questions and answers every time your page loads or refreshes, click on the (+) button to add another question and answer.
Click Save when you’ve customized your custom CAPTCHA to your liking.
💡 Pro Tip: When creating Custom CAPTCHA questions, it’s a good practice to ensure they’re simple but not too obvious. Rotate questions periodically to prevent spambots from bypassing them. You can even use ChatGPT or other AI tools to get decent ideas for your Custom CAPTCHA questions.
For robust protection, combine multiple anti-spam methods. Use the native WPForms modern anti-spam protection with reCAPTCHA or hCaptcha and an email denylist to cover all bases against automated and manual spam submissions.
CAPTCHAs are great at stopping automated scripts and spam bots. But what if you have a persistent human spammer using your forms?
Let’s look at a way to block those users.
7. Block or Allow Specific Email Addresses on Your Forms
Sometimes, we all get spam submissions from human visitors. Sales teams and scammers can visit your forms over and over again, manually sending you tons of spam emails.
CAPTCHAs don’t stop these spam messages because the spammers are real visitors.
In WPForms, you can easily block or allow a list of email addresses so that these visitors can’t submit new entries anymore.

Each form has its own allowlist and denylist, and you can have custom settings for each one.
Let’s take a look at stopping contact form spam with a blocklist in WPForms.
7.1. Edit Your Form
Start in the WordPress dashboard.
In WPForms, find the form you want to add a denylist to. Then click Edit under the name of the form.
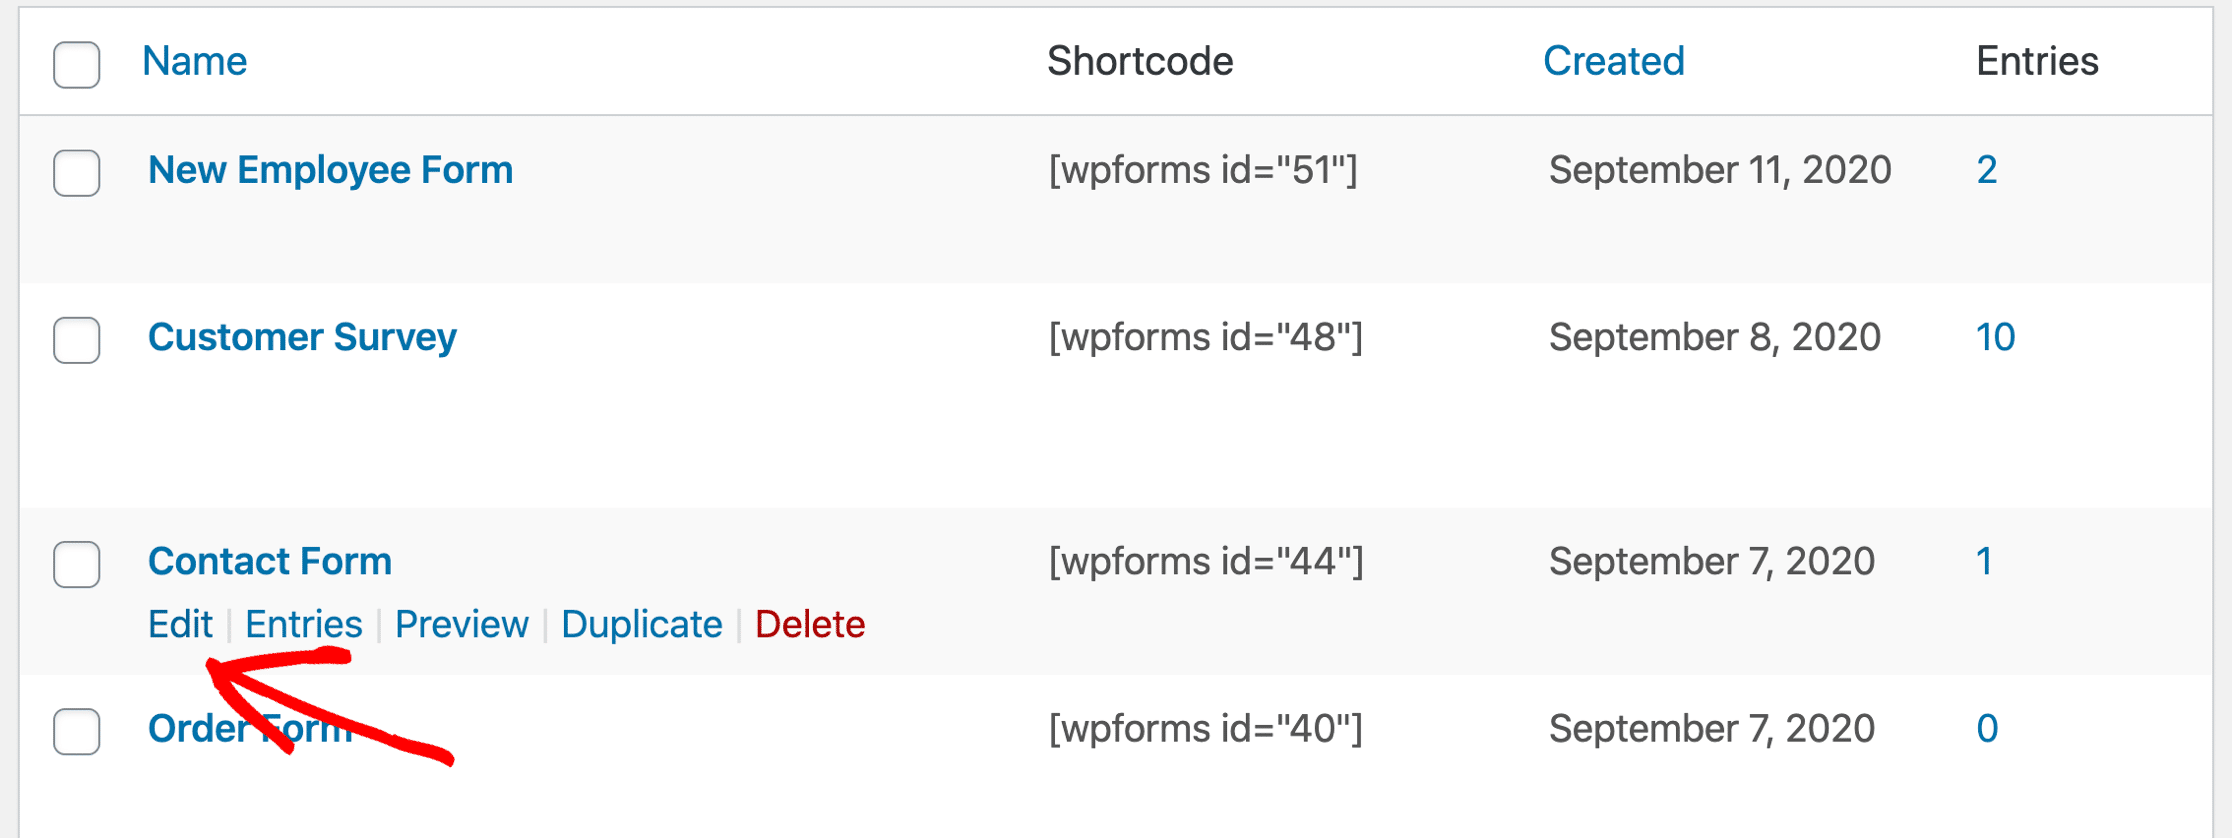
Next, you’ll want to click on the Email field on your form to open up the settings for the field.
Go ahead and click Advanced Options to expand this section.
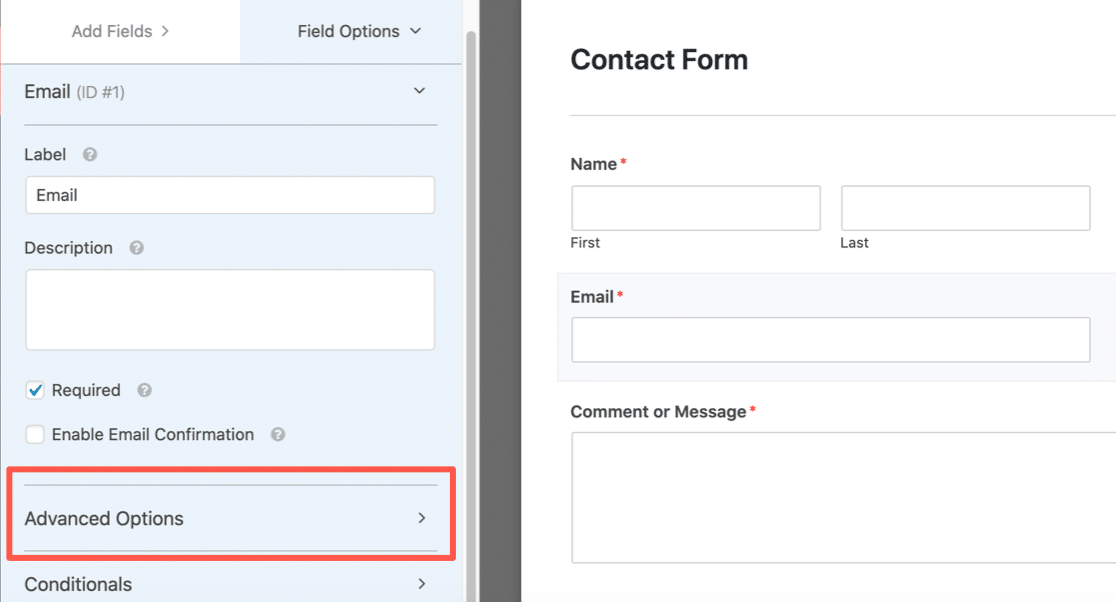
Now that Advanced Options is open, you’ll see lots of extra settings for the email field. Let’s choose the email blocking method you want to use.
7.2. Set Up Your Allowlist or Denylist
WPForms lets you set up email restrictions in 2 ways:
- The Allowlist will only allow specified email addresses to submit your form. This is a great option if you want to allow entries from a small group of people, like users from your own domain.
- The Denylist will block email addresses or domains you specify. This helps to block persistent spammers, domains, or parts of domains.
To see how this works, scroll down and click the Allowlist / Denylist dropdown. Choose which method you want to use on this form.
We’ll select Denylist in this example.
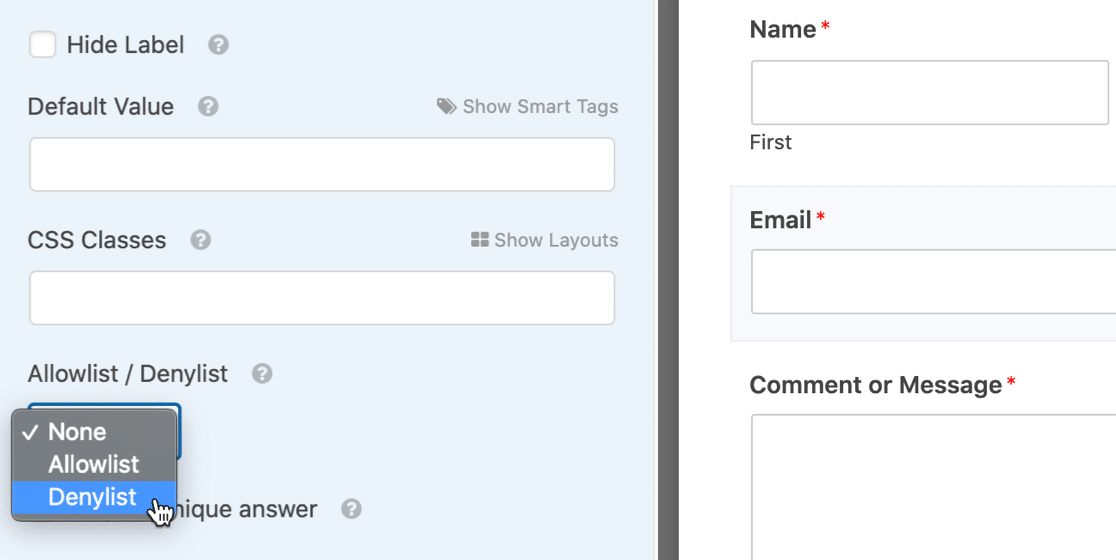
In the box underneath, type in the email addresses you want to block to stop contact form spam.
You can type a complete email, or use an asterisk * to create a partial match.
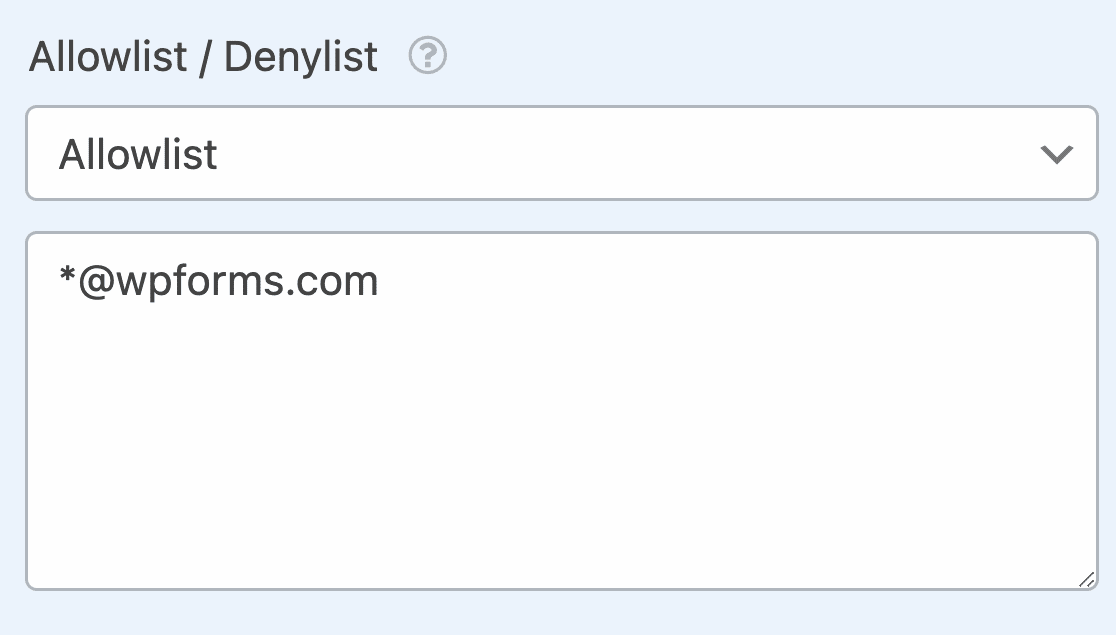
This setting is super powerful. You can create partial matches in any format you like. Here are a few examples you can try:
[email protected]– the exact specified email address will be blockedspammer*– this blocks all email addresses starting with ‘spammer’*@example.com– blocks all email addresses at theexample.comdomains*@example.com– this blocks all email addresses starting with the letter ‘s’ at theexample.comdomain[email protected],[email protected],spammer@*.co.uk– blocks the first 2 email addresses, and creates a partial match with the 3rd.
You can add as many comma-separated emails or partial matches as you need, and place the asterisk anywhere you want.
When you have your denylist set up, save your form.
7.3. Test Your New Allowlist or Denylist
After saving your form, it’s a good idea to test out the denylist or allowlist on the frontend. When you type in an email you’ve blocked, you’ll see an error message and the form won’t submit.
If you want to change the message that shows up for blocked email addresses, you can customize it easily. Just open up WPForms » Settings in the WordPress dashboard and click the Validation tab.

If you still get spammy submissions, there are a few more options to try.
8. Block Profanity in Form Submissions
If you’re getting spam submissions from human visitors, it can be tricky to block them. Human-submitted contact form messages are a slightly different type of spam that CAPTCHAs typically can’t block.
To deal with human-generated spam and profanity, you can use the keyword filter tool built into WPForms. Just toggle on the Enable keyword Filter button and enter a list of keywords that you want to be blocked from submissions.
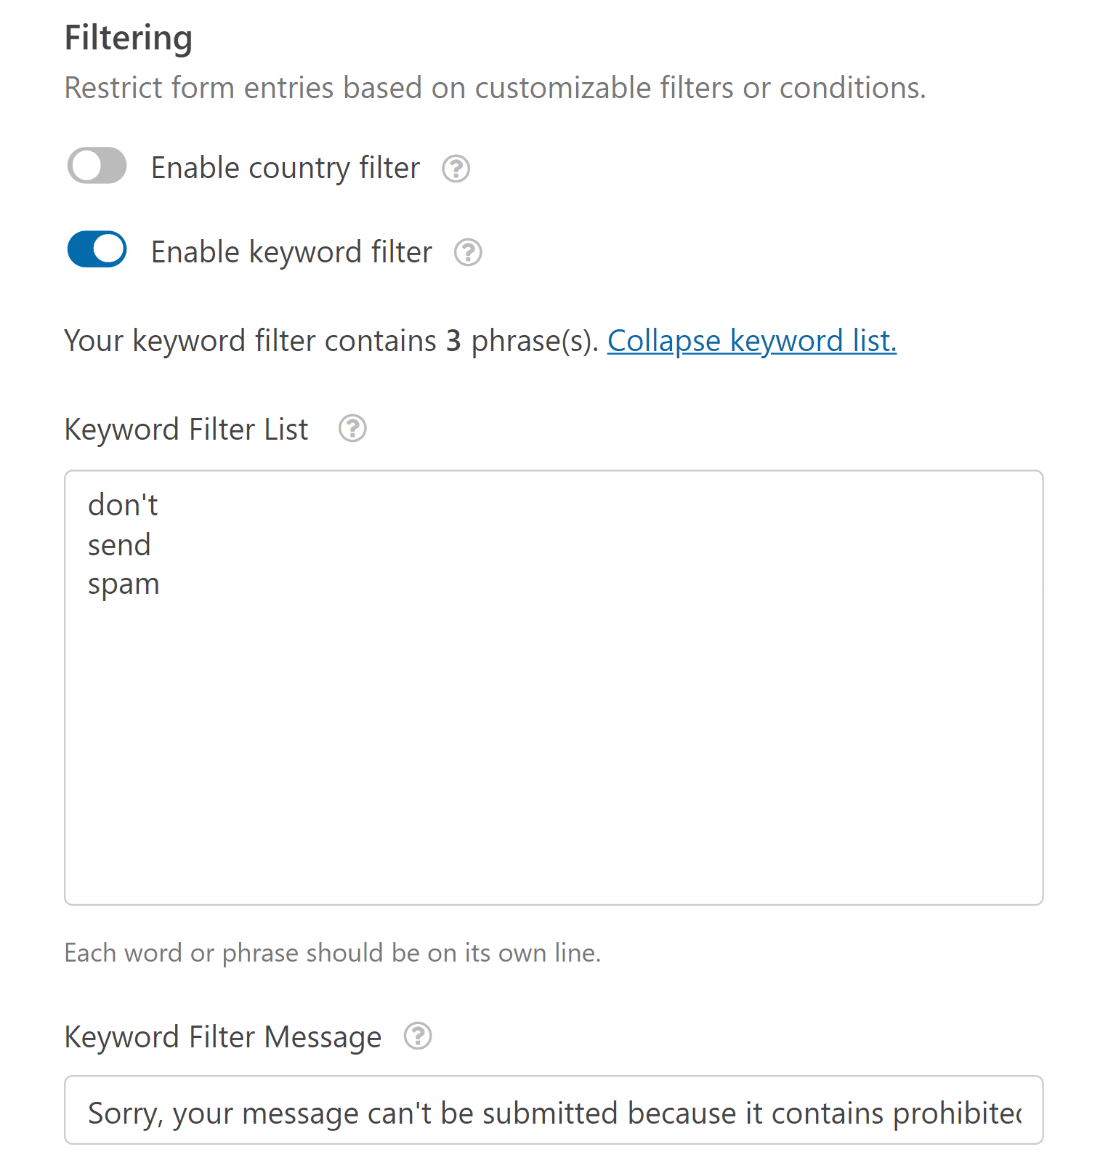
Use this option with care. It’ll block all submissions containing the words you add to the snippet, so you’ll want to be very specific to avoid blocking legitimate messages.
Upgrade to WPForms Pro & Block Keywords 🛑
9. Restrict Submissions by Country
In some cases, your forms may get targeted by spammers from a specific country. If you’re seeing a lot of spam from users with a specific country (by checking their IP location, for instance), you can use a country filter to deny or accept submissions from specific locations.
WPForms has a country filtering tool in its suite of advanced spam blocking methods. You just have to toggle on the Enable Country Filter button, and then you can either restrict entries from specific countries or accept submissions exclusively from selected countries.
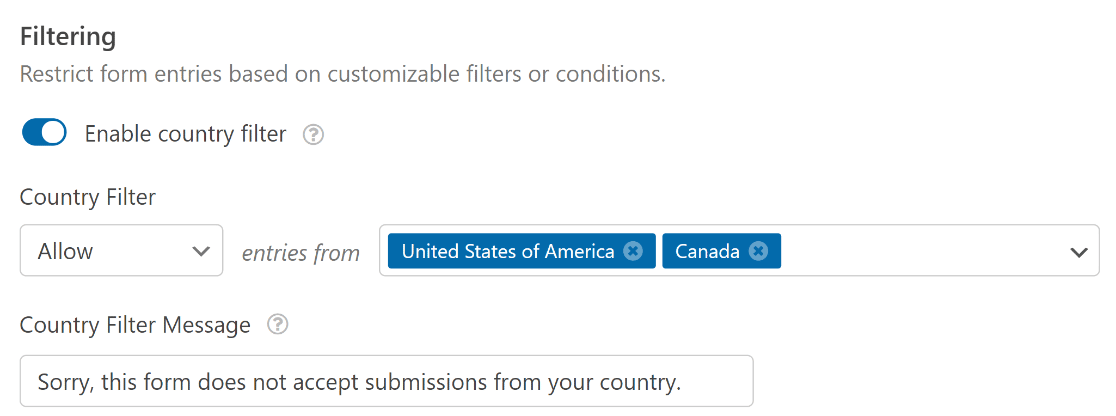
🎩 Pro Tip: You can use keyword and country filtering tools of WPForms in addition to reCAPTCHA, Akismet, or modern anti-spam protection. Adding multiple layers of spam protection is the most effective to keep your WordPress forms spam-free.
Get WPForms Pro to Restrict Locations 🛑
10. Block Spam Active IP Addresses
Another way you can block spammers that have bypassed your CAPTCHA is by blacklisting their IP addresses.
In WordPress, every user comment automatically leaves an IP address. If you’re repeatedly seeing similar IP addresses attacking your site with spam, you can simply blacklist these IPs on your site.
To do so, open your WordPress dashboard and click on Settings » Discussion on your left. Now, enter the IP addresses you want to block in the Disallowed Comment Keys text field (only one IP address per line).

This is an effective way of blocking repeat human spammers that are slipping through your CAPTCHAs.
11. Use Dedicated Anti-Spam Plugins
There are several very useful anti-spam plugins that can add additional layers of spam filters for your contact forms and WordPress site in general.
For more details about these plugins, see our list of recommended anti-spam plugins for WordPress. We’ve tested these plugins individually, and all of them are reliable options that helped us combat comment spam.
Plus, they can also add spam protection to your default core WordPress forms if you aren’t using WPForms. Though we strongly recommend WPForms Lite, at the very least, because it offers more advanced spam filters for free!
And that’s it! Now you know all of the ways WPForms helps to stop contact form spam.
12. Detect Spam With AI
Many spam form entries have common characteristics that make it easy to filter them out.
You can do this with AI and use your own custom rules to decide how the spam will be filtered. If you’d like to try this, we recommend the WPForms integration with AI by Zapier.
To set it up, you’ll want to use the your form entries as a trigger and the Parse Freeform Text action in AI by Zapier. You just need to provide a few examples of spam submissions and the AI will do the rest.
Even better, this doesn’t require an API keys to work.
For more ways to use AI to fight spam, see this article on how to filter spam submissions with AI.
13. Filter Spam Entries
It’s nice when any service, be it your email or a forms plugin, can filter spam for you. Fortunately, WPForms makes it super simple to set up.
With the flick of a toggle switch in your form’s Spam Protection & Security Settings, you can enable the option to store spam entries in the database.
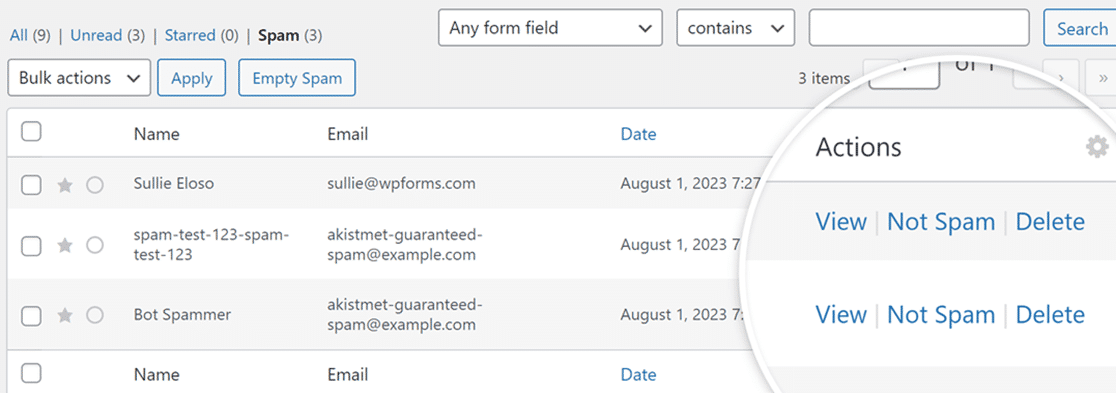
If WPForms detects a spam submission, that entry will be flagged and marked as spam.
When you view your form entries in WPForms, you’ll be able to easily view spam entries as well.
If they’re all truly spam, you can go ahead and mass-delete them. If something was marked as spam in error, you can tell WPForms that it’s not spam.
Check out our doc on viewing and managing spam entries if you’re interested to learn more.
FAQs on Combating Contact Form Spam
Fighting contact form spam is a common concern among our readers. Here are a few questions we receive about spam filter tools in WordPress.
Why Do Bots Spam Forms?
Bots spam forms to try and spread malware, phishing links, or sales messages. Since most website owners don’t publish their email addresses, using forms is an easier way for people to add spam comments.
This is why you need a secure contact form plugin that helps you stop spam form submissions, especially if you’re running a small business site.
Not only will it cut out the hassle of dealing with spam contact form submissions, but it’ll also reduce the security risk of you (or your customers) receiving phishing emails.
Why is my contact form getting spammed?
Bots often target contact forms as a means to disseminate spam, phishing attempts, or to exploit vulnerabilities for malicious purposes.
They are programmed to automatically fill out and submit forms en masse, aiming to advertise products, spread malware, or simply disrupt services.
The impersonal nature of bots allows them to attack a wide range of websites indiscriminately, making any unprotected contact form a potential target.
WPForms offers robust anti-spam features to combat this. By enabling features like smart CAPTCHA technology, WPForms effectively filters out bot submissions, ensuring that your contact forms are spam-free and only genuine messages get through.
Why is my contact form getting spammed?
Your contact form might be getting spammed due to a lack of sufficient protective measures against the sophisticated tactics used by spammers.
Spammers and bots continuously evolve, using more complex algorithms to bypass standard security measures. Without up-to-date and robust protection, your contact form can become an easy target.
To protect your forms, consider using WPForms. It integrates advanced anti-spam solutions, including customizable CAPTCHA options, and the ability to integrate with powerful spam-fighting plugins like Akismet.
Next, Stop Your Emails From Going to Spam
Now that you’ve dealt with form spam, here’s another issue to consider: how do you stop legitimate emails from WordPress from going to the junk mail folder? This is a common complaint with contact forms, and it can be frustrating for you and your visitors.
Email deliverability is a widespread issue with WordPress, but it’s very easy to fix. Check out this guide on why your WordPress emails are going to spam (and how to fix it).
PS. Did you know that WPForms Lite has a lot more anti-spam tools than Contact Form 7? Check out this head-to-head review of WPForms Lite vs Contact Form 7 to see the huge differences between these 2 plugins.
Ready to build your form? Get started today with the easiest WordPress form builder plugin. WPForms Pro includes lots of free templates and offers a 14-day money-back guarantee.
If this article helped you out, please follow us on Facebook and Twitter for more free WordPress tutorials and guides.



in my website, i am using wpforms before, i set the ” from email ” to required. But the spam is still able to send me emails with empty form data ( i set it to required ). please help.
Hi Rio,
I’d recommend that you include and enable at least one of the anti-spam features mentioned in this article. Our users generally have good results with Google reCAPTCHA or with hCaptcha.
Alternatively, you could also try setting the other form fields to be “Required” as well.
I hope this helps to clarify 🙂 If you have any further questions about this, please contact us if you have an active subscription. If you do not, don’t hesitate to drop us some questions in our support forums.
Hi Henry,
I have the same issue like Rio. To be honest, I disagree that I have a good result with Google reCAPTCHA. I get on a daily base 10 Spam messages through your plugin. I’m a bit upset, even with the anti spam check.
What can additionally help to stop this spam – it causes every day additional costs because someone has to check the entries…
cheers,
Daniel
Hi Daniel, we are sorry to hear that you are getting some spam emails. In case you’ve included and enabled at least one of the anti-spam features mentioned in this article.
You can consider increasing the security level of the reCAPTCHA integration on your site. For V2, you can do as outlined here and for v3 reCAPTCHA, you can adjust the settings in your WordPress admin area by going to WPForms > Settings > reCAPTCHA. In this Score Threshold field, you can increase the score to a higher number for stricter security.
Having said that, in order to make sure we answer your question as thoroughly as possible, could you please contact our team with some additional details about the issue you are facing?
If you have a WPForms license, you have access to our email support, so please submit a support ticket. Otherwise, we provide limited complimentary support in the WPForms Lite WordPress.org support forum.
Thanks.
Hi,
Exact same issue like Daniel and Rio… Telephone number and email are required fields and i keep receive daily spam forms with absolutly NO DATA in those fields.
reCAPTCHA V2 is ON and Anti-Spam protection is ON… Solution needed guys ^^’
Hey Loic, we are sorry to hear that you are getting some spam emails. In case you’ve included and enabled at least one of the anti-spam features mentioned in this article.
You can consider increasing the security level of the reCAPTCHA integration on your site. For V2, you can do as outlined here. In this Score Threshold field, you can increase the score to a higher number for stricter security.
Having said that, in order to make sure we answer your question as thoroughly as possible, could you please contact our team with some additional details about the issue you are facing?
If you have a WPForms license, you have access to our email support, so please submit a support ticket. Otherwise, we provide limited complimentary support in the WPForms Lite WordPress.org support forum.
Thanks.
Thanks for your reply Mike.
I’ve just set the security preference to “most secure”. Totally forgot that the reCAPTCHA V2 had this option.
Will see if that modification keep spammers away from my mailbox 😉
If not, will get in touch with your team to see how those spammers bypass my required fields…
Hey Loic, you are welcome, happy to help, and in case anything else comes, please reach out to our team.
If you have a WPForms license, you have access to our email support, so please submit a support ticket.
Thanks.
“If you’re comparing Ninja Forms vs WPForms, keep in mind that Ninja Forms doesn’t support v3, but WPForms does.” – Last updated on Jan 5, 2022 by Claire Broadley
Ninja Forms added reCAPTCHA v3 compatibility in version 3.5.5 (June 7, 2021) [URL Removed]
You might want to fix this incorrect information on your sites.
Hey Justin,
Thanks for the heads up! We have notified our team and we will be updating this information soon.
Hi there. Same as all the other guys. I am all set up but still receive spam. I don’t think recatcha helps has I have noticed that the spammers don’t even fill in the form online: Google analytics does nog show any traffic on my Contact page and still I receive a spam.
Hey Guillaume, we are sorry to hear that you are getting some spam emails. In case you’ve included and enabled at least one of the anti-spam features mentioned in this article.
You can consider increasing the security level of the reCAPTCHA integration on your site. For V2, you can do as outlined here. In this Score Threshold field, you can increase the score to a higher number for stricter security.
Having said that, in order to make sure we answer your question as thoroughly as possible, could you please contact our team with some additional details about the issue you are facing?
If you have a WPForms license, you have access to our email support, so please submit a support ticket. Otherwise, we provide limited complimentary support in the WPForms Lite WordPress.org support forum.
Thanks.
I have WPForms Basic license, and reCapcha added to my contact form. Yet I still get lots of spam email. Very frustrating. I’d like to add the ‘Custom Capcha Addon’ to my form, with a math question. So I have activated this add-on but nothing shows up in my Contact form edit page. Does my Basic license not inlcude the use of this add-on?
Hey Michael — Sorry to hear about the frustration here! As you are a paid license holder, please reach out to our support team and we will be happy to troubleshoot the issue for you.
Thanks 🙂
Hi there, wanted to follow this tutorial, but some options are not available – are options like “Enable anti-spam protection” only available in the pro version?
Regards, SVen
Hi Sven,
Sorry about the confusion. This feature is available with the lite version. If you haven’t yet tried WPForms lite (free version) here you can download it. This is the free limited plugin so you can have an idea about how the form builder works.
Hope this helps 🙂
I am using WPForms Lite (free version), and I’m getting spam from users using their name with my domain name as their email address. They are not using their domain name as the return email. I do have reCAPTCHA setup and it is functioning.
Is there any way to block users (or bots) from using my domain name as their return email address?
Thanks.
Hey Robert – Yes! You can absolutely block your domain by using our Allowlist / Denylist feature.
To do this, please click on the Email field in the form builder and go to the Advanced Options section. In the Allowlist / Denylist dropdown, you can use an asterisk (*) to create a partial match, like so: *@yourdomain.com. Here’s a screenshot for reference: https://a.supportally.com/Mamt5I
In case it helps, you can check out more details about the Allowlist / Denylist feature in this doc.
Thanks.
I get more spam from your forms than I’ve ever seen, so frustrating.
Hey Saymour – I apologize to hear that you are getting some spam emails. When you get a chance, can you please give the spam prevention tool that we’ve shared a try? In case you’re still seeing spam emails, please drop us a line in support so we can assist.
If you have a WPForms license, you have access to our email support, so please submit a support ticket.
Otherwise, we provide limited complimentary support in the WPForms Lite WordPress.org support forum.
Thanks 🙂
Hi, I was using a jetpack contact form + akismet and getting a lot of spam. I did mark these messages as spam in Akismet, but no improvement. According to Akismet support I should look for another form with more antispam options, so I installed WPForms lite and created a contact form. I did tick the antispam + akismet antispam protections, but I’m still receiving spam through the contact form.
Do you have any other suggestions?