
AI Summary
Do you want to use Akismet with Elementor forms?
While Elementor Forms includes a few anti-spam options, it doesn’t integrate with Akismet.
In fact, the range of spam prevention tools in Elementor Forms is quite lacking.
But there’s a very easy way to deal with this problem.
In this post, we’ll show you how you can use Akismet with Elementor Forms to create spam-free contact forms on your site.
Filter Form Spam With Akismet Now
Does Akismet Work With Elementor Forms?
By default, there’s no way to connect Akismet with Elementor Forms. That’s because Elementor hasn’t yet added support for Akismet.
However, the good thing is that Elementor integrates with other form builders like WPForms which offer more spam prevention options including Akismet.
So, if you want to block spam submissions for forms you’re embedding using Elementor, your best bet is to build an Akismet-enabled form in WPForms and then use the WPForms widget in Elementor to embed the form anywhere on your page.
Now that you know more about using Akismet in Elementor, let’s go over the steps you’ll need to perform in detail.
How to Use Akismet With Elementor Forms
In This Article
Step 1: Install WPForms
Because Elementor doesn’t directly support Akismet, we’ll be taking advantage of WPForms’ native Akismet integration. We can then use Elementor’s WPForms widget to add a form with the Akismet spam filter enabled to a page.
While WPForms supports Akismet across all pricing plans, we recommend getting WPForms Pro. Then, go ahead and install WPForms on your website.

With a Pro license, you’ll have access to over 2,100 pre-built form templates, along with a variety of advanced features like Coupons and Lead Forms.
After installing WPForms, it’s time to set up Akismet.
Step 2: Install and Set Up Akismet
Akismet often comes pre-installed in WordPress. But if you don’t already have it installed, you can install it by opening your WordPress admin menu and going to Plugins » Add New.

Then, search for Akismet and click on Install Now.

Once you’ve installed and activated Akismet, you’ll be redirected to the Akismet settings page. You can also manually visit that page by going to

On the Akismet settings page,, click on the Set Up Your Akismet Account button.

You’ll be taken to the Akismet pricing page. Select an appropriate license plan for your business. We’ll get the Personal plan for this tutorial.

Akismet allows you to select your own pricing for the Personal plan. You can move the slider all the way to zero to get Akismet for free.

Scroll down to find checkboxes to confirm that you’re using Akismet for non-commercial websites. Akismet’s free Personal plan is only available for site owners who aren’t using their website for commercial purposes.
So, if you’re a blogger without anything to sell, you can use Akismet completely for free. Otherwise, please choose a paid plan and continue with the steps below.

Enter your billing information on the checkout screen and press Continue to Payment.

If you’ve selected the free plan, you can choose to assign a payment method later and skip entering your credit card details altogether.
Scroll down and click on Complete Checkout.

You’ll now be taken to the WordPress.com login page (because Akismet is owned by the same company that’s behind WordPress.com). Click on the Continue button to proceed.

You’ll find your API key as soon as you log in. Copy the Akismet API key.

Now, return to the browser tab with the Akismet settings screen and click on Manually Enter an API Key.

Simply paste your API key inside the box and click on the Connect with API Key button.

As soon as you connect with the API, Akismet will be ready to use on your site.
Step 3: Create a WordPress Contact Form
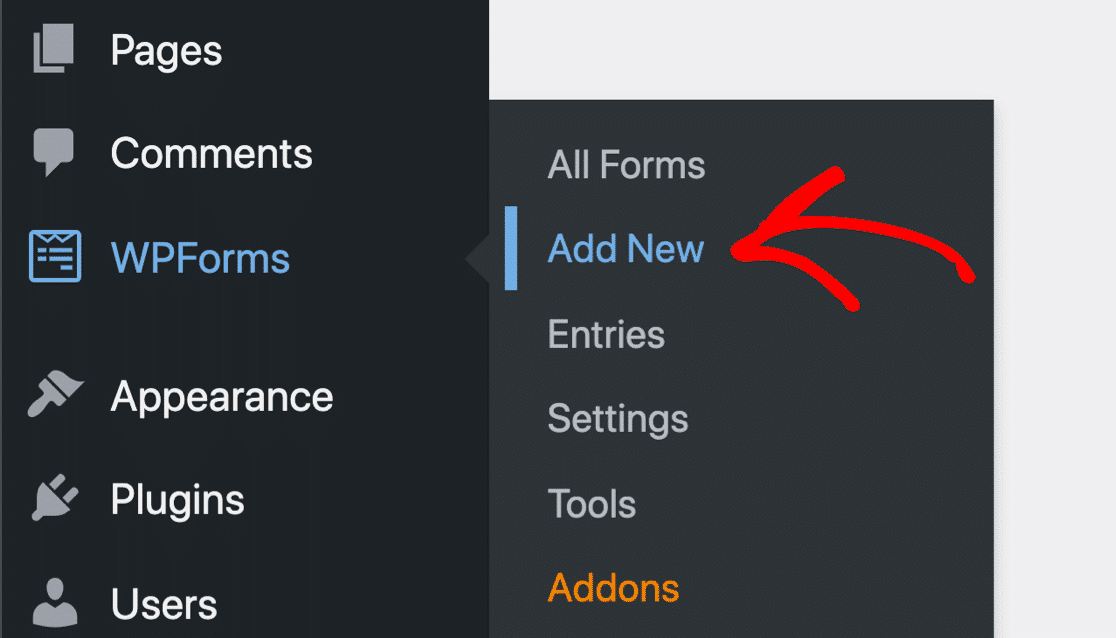
With Akismet set up, we can go ahead and create a new form using WPForms. From your WordPress dashboard, go to WPForms » Add New.
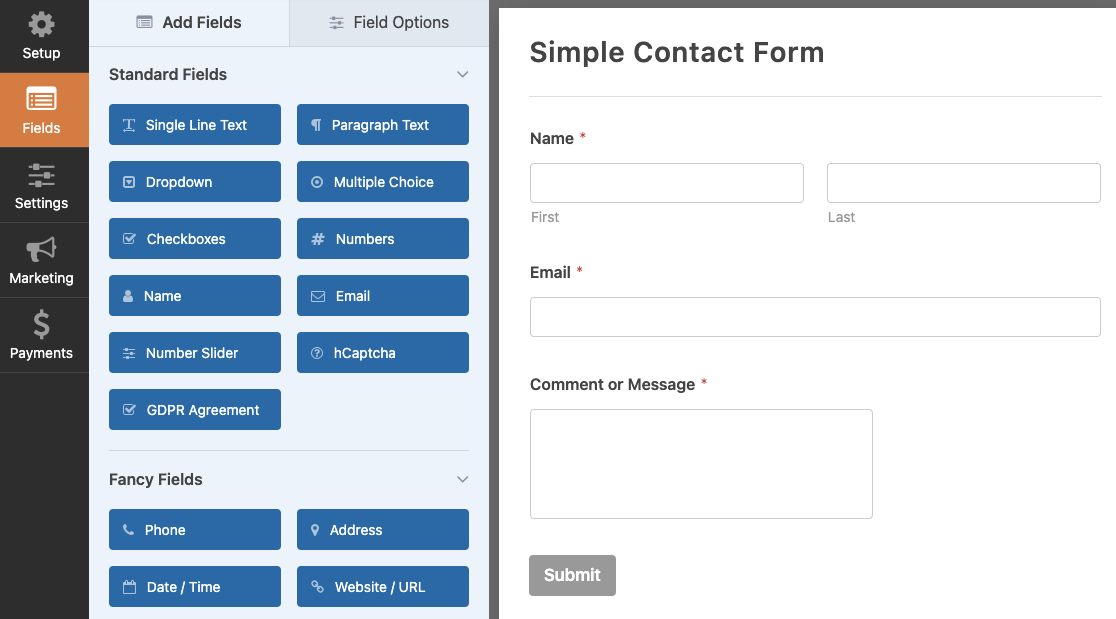
You’ll now see the form setup screen where you can name your form and get started with a ready-made form template. For this tutorial, we’ll use the Simple Contact Form template.

As soon as you select your template, it will load up inside your form builder. You can customize the form template by adding other fields to your form or edit any existing ones.
Once you’re happy with how your form looks, move on to the next step.
Step 4: Enable Akismet on Your WordPress Form
While you’re inside the WPForms form builder, navigate to WPForms » Spam Protection and Security.
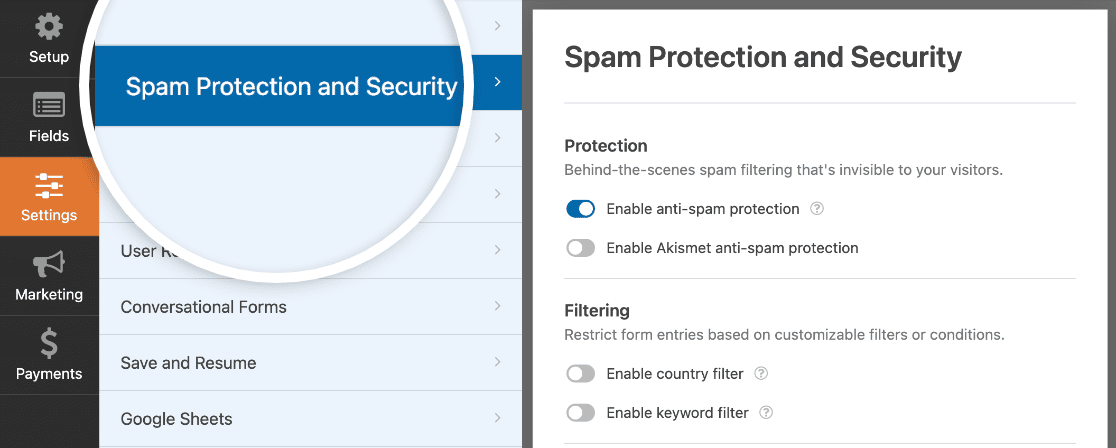
You’ll see multiple anti-spam options available here. Simply click on the Enable Akismet anti-spam protection toggle button to add Akismet spam filter on your form.
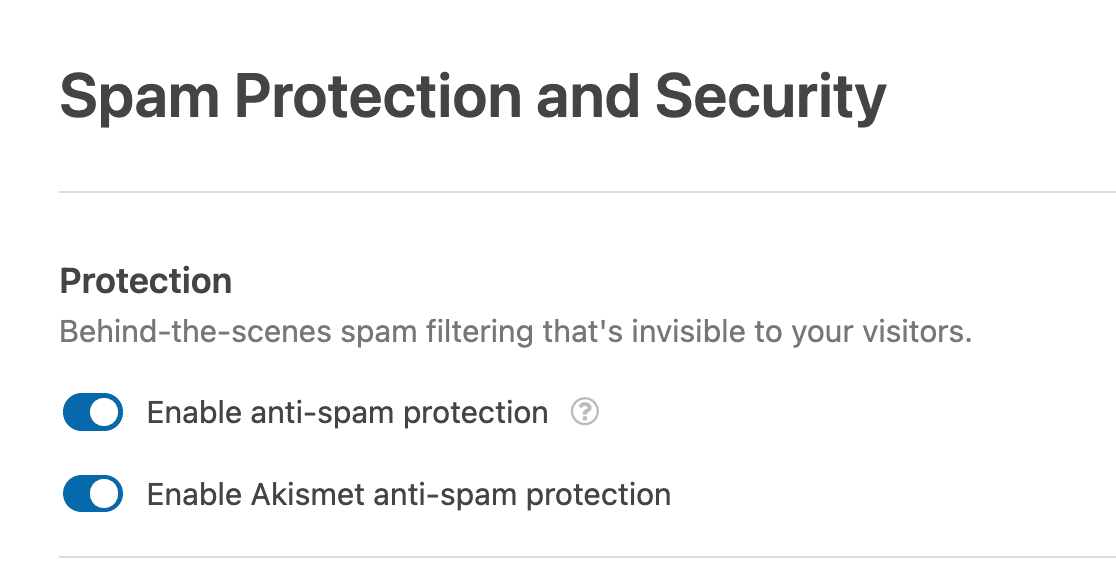
Great. Now that you’ve turned on Akismet, your form submissions will be automatically checked by Akismet for signs of spam.
Go ahead and press Save to save your settings.

Brilliant! We have everything set up now. All that remains is to embed this form using Elementor.
Step 5: Publish Your Akismet-Enabled Form With Elementor
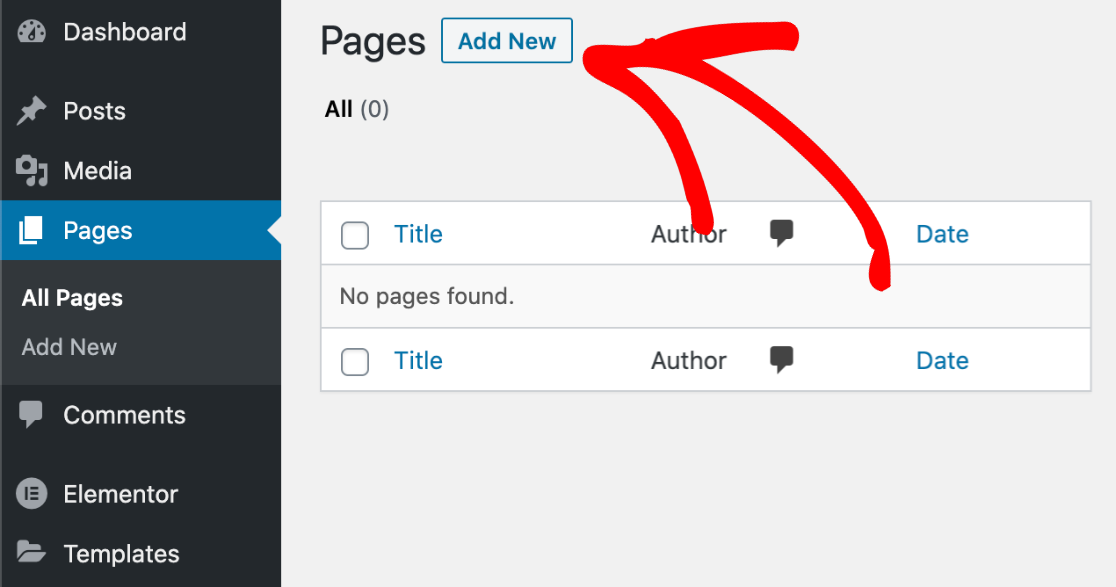
After saving your form, return to your WordPress dashboard and go to Pages. Next, select the Add New button.
This will lead you to your WordPress block editor. If you have Elementor installed, you’ll see a blue Edit with Elementor button.

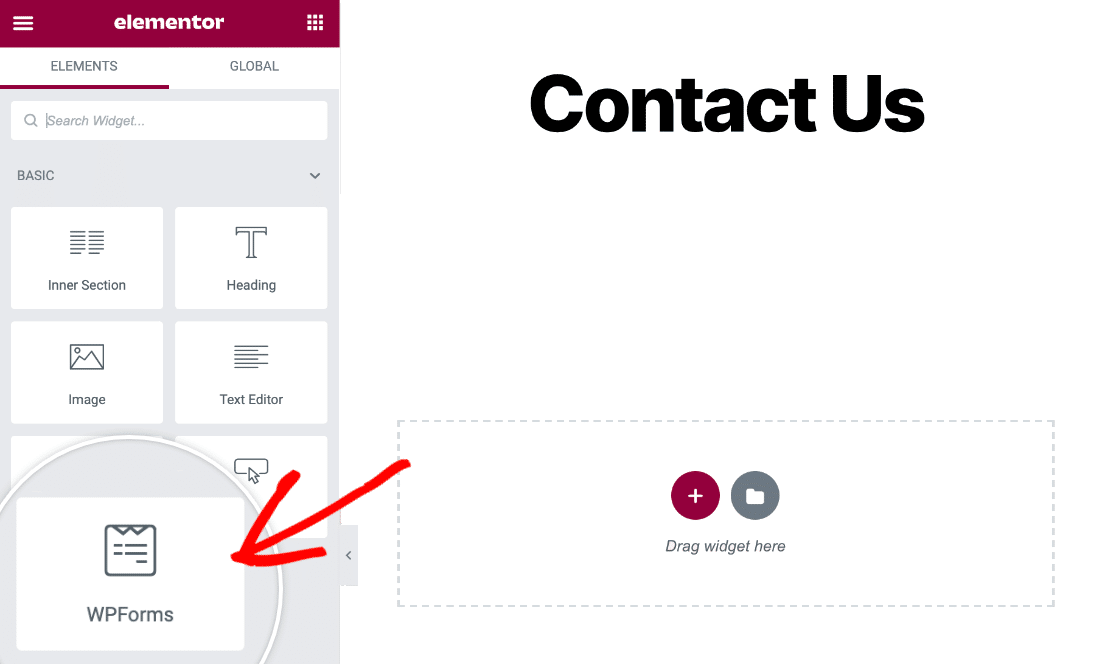
As soon as you press this button, the Elementor page editor will start loading. Inside the Elementor interface, you can find the WPForms widget on your left.
Drag and drop the WPForms block on the right-hand side.
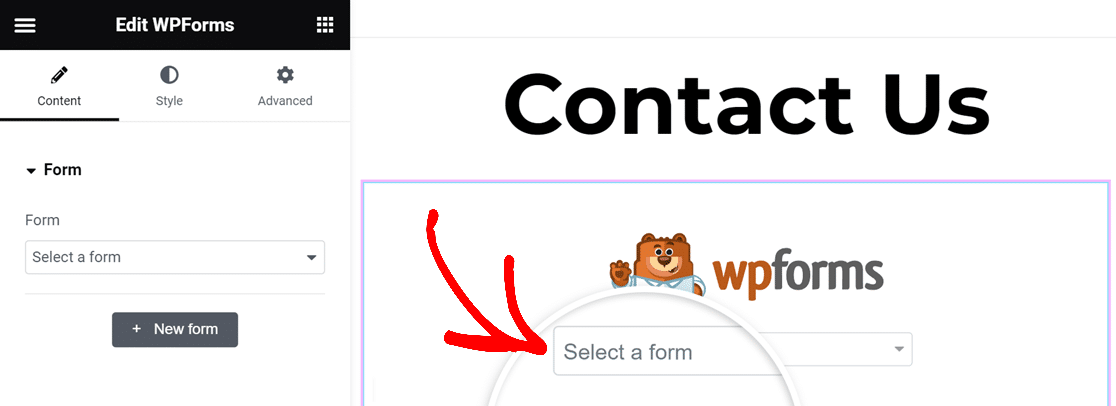
After you’ve added the WPForms widget to your page, you can select any form that you’ve previously created and saved with WPForms using the dropdown.
We’ll select our simple contact form using this dropdown.
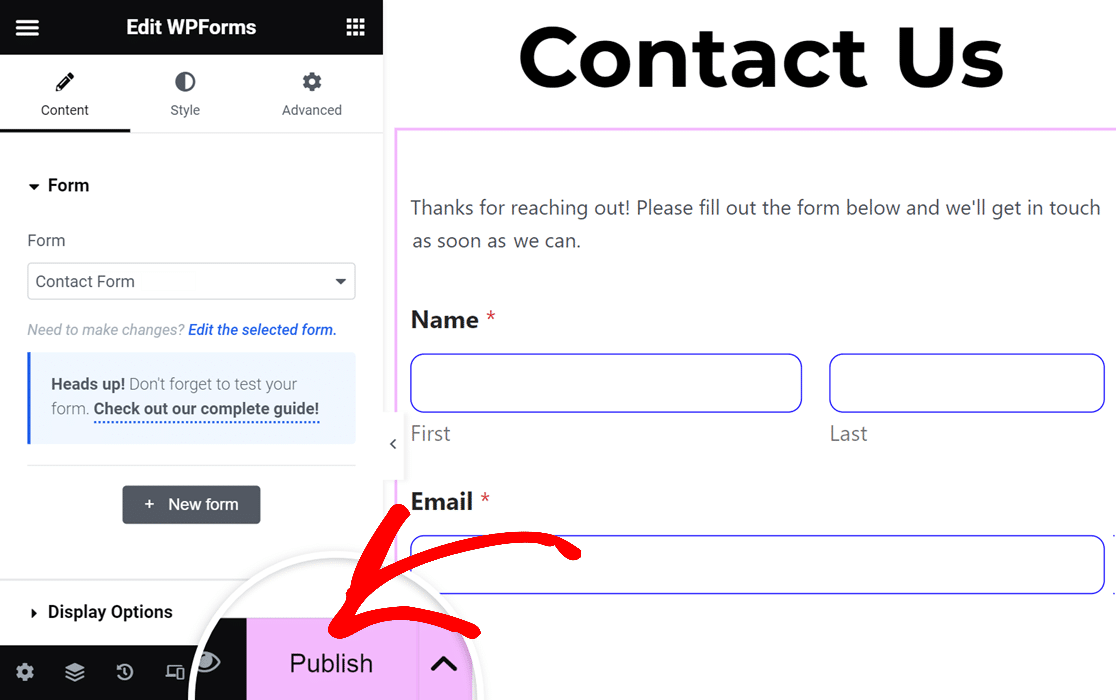
Your selected form will appear exactly the way you set it up in WPForms. At this point, you can also customize the appearance of your form extensively, as shown in our guide on creating Elementor forms.
When you’re ready to embed this form, simply press the Publish button at the bottom of the left-hand pane.
Your Akismet anti-spam form will now immediately be embedded on your site.
But before you do anything else, we strongly recommend testing your form to ensure that Akismet is properly filtering spam submissions.
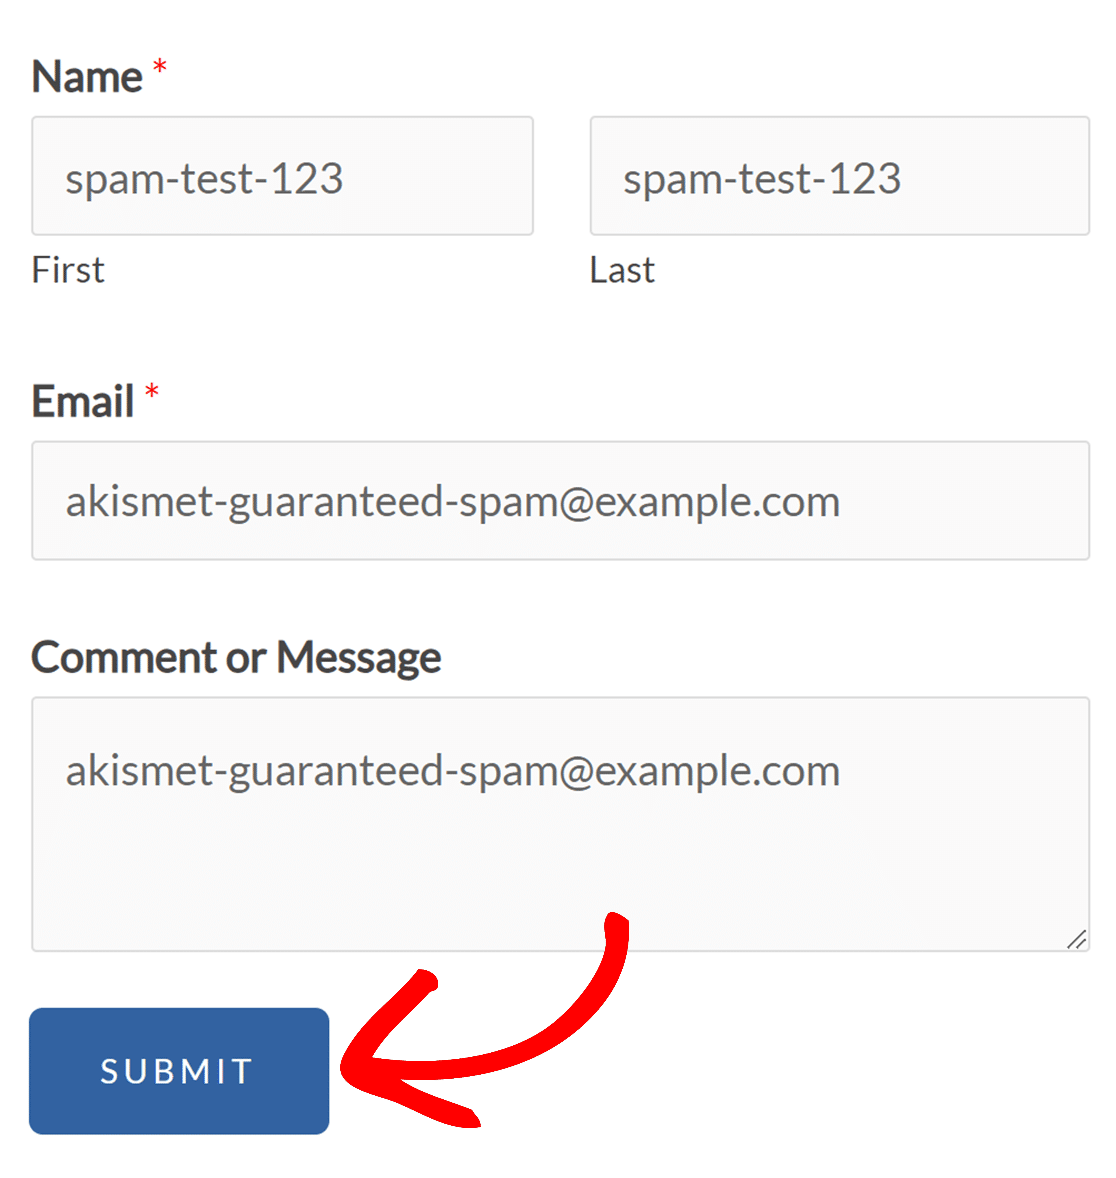
To do that, simply visit the form you just published with Elementor and try entering one of Akismet’s spam triggers, such as:
- Name: spam-test-123
- Email: [email protected]
- Comment Body: akismet-guaranteed-spam
Filling out form with a spammy entry as above and then press submit.
If Akismet is functioning correctly, you’ll notice that your message won’t submit and an error will pop up indicating that the entry was identified as spam.
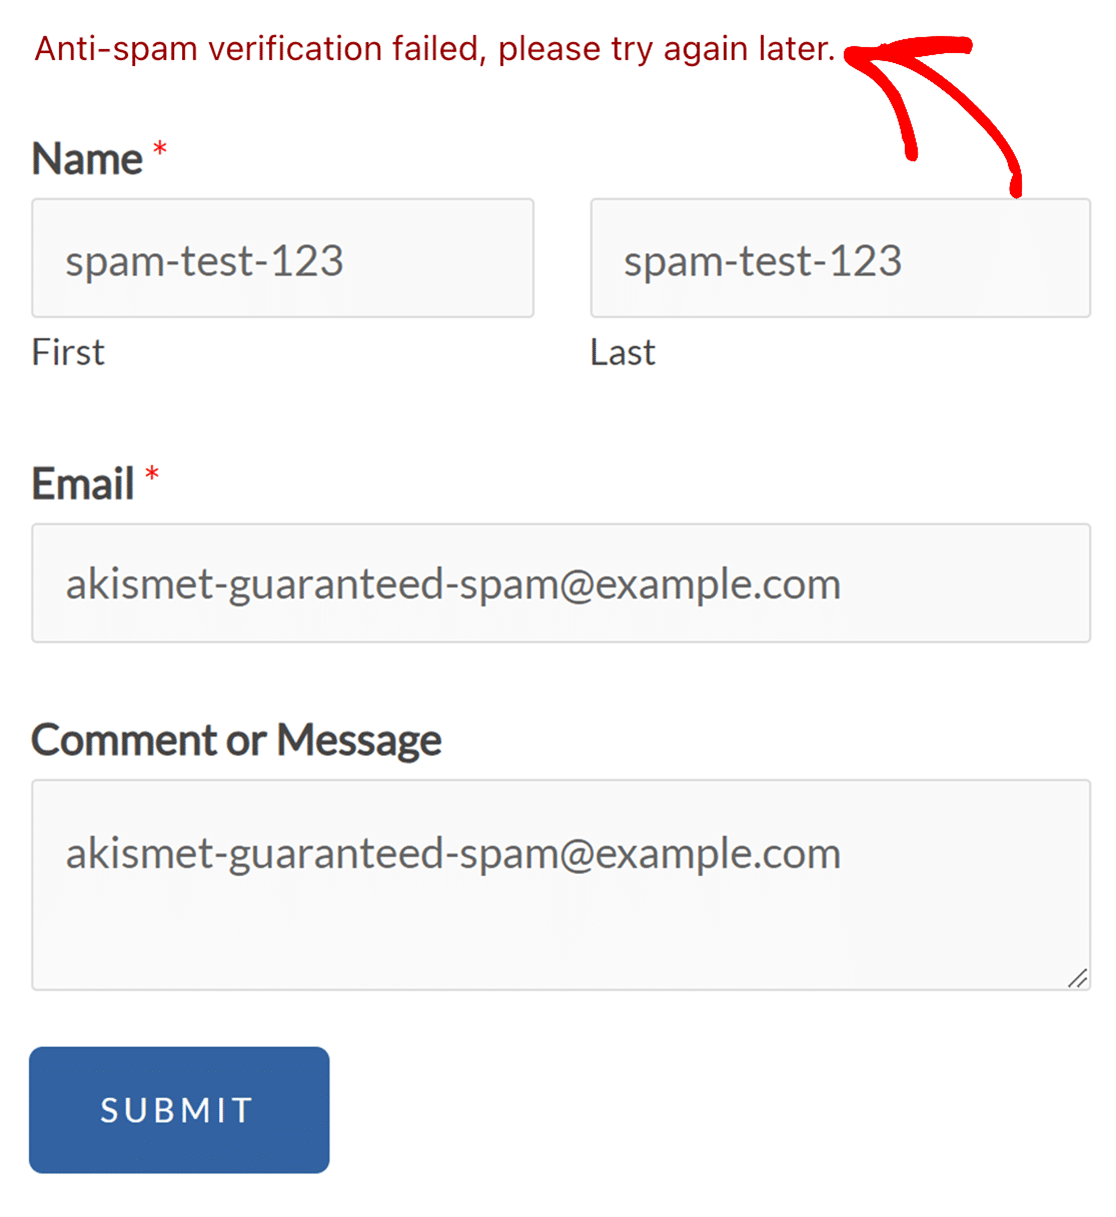
And that’s exactly what we want to happen.
With the steps we’ve shown above, you can now easily use Akismet with Elementor Forms and keep your site spam-free.
Next, Integrate WPForms With WooCommerce
If you’re an eCommerce store, you should automate as many processes as you can to save you time. One of the best ways to do that is by integrating WPForms with WooCommerce.
Also, do you know that you can design accordion forms with WPForms? It’s an excellent way to make your forms easier to fill and improve user experience.
Filter Form Spam With Akismet Now
Ready to build your form? Get started today with the easiest WordPress form builder plugin. WPForms Pro includes lots of free templates and offers a 14-day money-back guarantee.
If this article helped you out, please follow us on Facebook and Twitter for more free WordPress tutorials and guides.

