
AI Summary
Want to grow your email list with zero stress? If you’re using Mailchimp and WordPress, you can create a powerful signup form in just minutes. And with no code, no hassle!
Since so many WPForms users rely on Mailchimp for email marketing, I wanted to write a simple, step-by-step guide to get your integration set up and running smoothly.
Create Your Mailchimp Signup Form Now 🚀
In This Article
- Step 1: Install and Activate the WPForms Plugin
- Step 2: Configure the Mailchimp Integration
- Step 3: Create a Mailchimp Signup Form in WordPress
- Step 4: Connect Your Newsletter Form to Mailchimp
- Step 5: Configure Your Subscribe Form Notifications & Confirmations
- Step 6: Style and Publish Mailchimp Signup Form in WordPress
- Mailchimp Signup Form – FAQs
Does Mailchimp Have a Form Builder?
Mailchimp has a form builder that lets you create signup forms from your Mailchimp dashboard. However, this form builder is fairly basic and offers only limited features.
In contrast, a dedicated form builder like WPForms comes with an extensive set of features that enable you to design easy-to-use and high-converting forms.
Plus, you can change the layout of your forms and even create embeddable lead forms that show only one field at a time in a stylish format to maximize lead generation and signups.
WPForms also integrates natively with Mailchimp, so you can easily use powerful WPForms features to capture leads and send your data to Mailchimp. For this reason, I strongly recommend using WPForms to embed Mailchimp forms on your site.
Create a Mailchimp Subscribe Form in WordPress
Just follow the step-by-step tutorial below to embed a Mailchimp signup form on your WordPress site.
Step 1: Install and Activate the WPForms Plugin
The first thing you’ll need to do is install and activate the WPForms plugin. To access the Mailchimp integration, you’ll need a WPForms Plus license or more.
I recommend getting the WPForms Pro license so you can unlock the most powerful WPForms features and integrations, along with full access to our form template library.
If you’ve never installed WPForms and need an easy guide, see our full documentation on installing WPForms.
Step 2: Configure the Mailchimp Integration
After you’ve installed WPForms, you can immediately integrate it with your Mailchimp account.
This can be done by opening your WordPress dashboard and navigating to WPForms » Addons. On the addons screen, find the Mailchimp addon and click on Install Addon.

Once you’ve installed the addon, you’ll see its status change to Activated. You can jump to Mailchimp integration configuration from this point by clicking on Settings.

You’ll now find yourself in the WPForms Integrations settings screen. Look for Mailchimp here and click on it to expand settings.

To connect WPForms with your Mailchimp account, you’ll need your Mailchimp API key, which you can get by logging into your Mailchimp account.
If you’re not sure how to locate your Mailchimp API key, we’ve got detailed instructions in our Mailchimp addon doc guide.
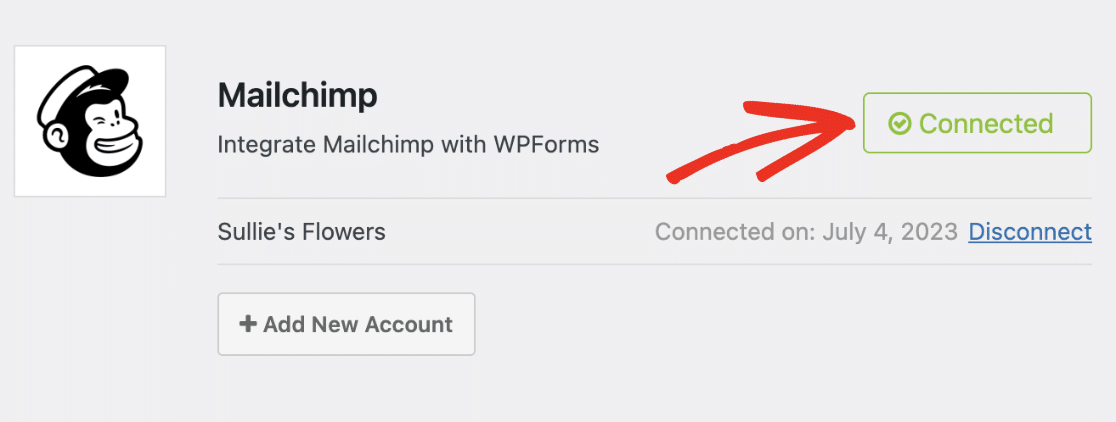
When you have your Mailchimp API key, simply enter it in the Mailchimp integration settings, along with an account nickname. Then, click on the Connect to Mailchimp button.

If your API key is valid, the Mailchimp integration status will now read Connected.
Great job! Now that you’ve successfully integrated WPForms with your Mailchimp account, it’s time to create your custom subscription form to build your Mailchimp list.
Step 3: Create a Mailchimp Signup Form in WordPress
Once your WPForms Mailchimp addon is active, go to WPForms » Add New to create a new form.

On the setup screen, name your form and select the Newsletter Signup Form template. WPForms comes loaded with over 2,100+ WordPress form templates, and you’re free to select any that matches your needs.

Once you’ve selected the template, it will load up in just a few moments.

Here, you can add additional fields by dragging them from the left-hand panel to the right-hand panel.
Then, click on the field to make any changes. You can also click on a form field and drag it to rearrange the order on your Mailchimp subscribe form.
Want to stay compliant while building trust with your users? Just enable the GDPR Enhancements feature to easily add a consent checkbox, disable cookies, and skip storing IP addresses.
You can do it all in WPForms » Settings.
Then, you’ll have a GDPR-compliant form that lets your site visitors expressly consent to you storing their personal information and sending them newsletters.

Once you’re done customizing your form, click Save.
Now, we’ll take a look at how to configure the Mailchimp settings so you can connect your signup form to your newsletter service.
Get the Newsletter Signup Form Template 👉
Step 4: Connect Your Newsletter Form to Mailchimp
With the Mailchimp integration ready, you’ll now need to define how the integration should behave every time a person submits this form.
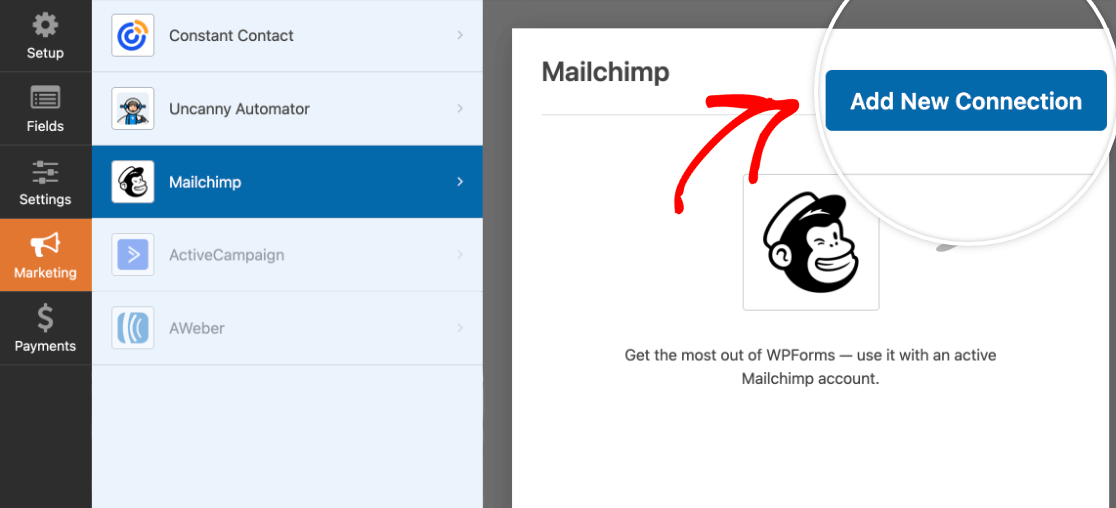
From your form builder, go to the Marketing tab and select Mailchimp.

Now, you’ll have to create a new connection. Click on the Add New Connection button at the top right.
You’ll need to enter a nickname for the new connection (this is for your internal reference only and can be anything you want). Press OK after entering a connection nickname to proceed.

As soon as you’ve created a new connection, you’ll see various options appear that allow you to control how this form should connect with your Mailchimp account.
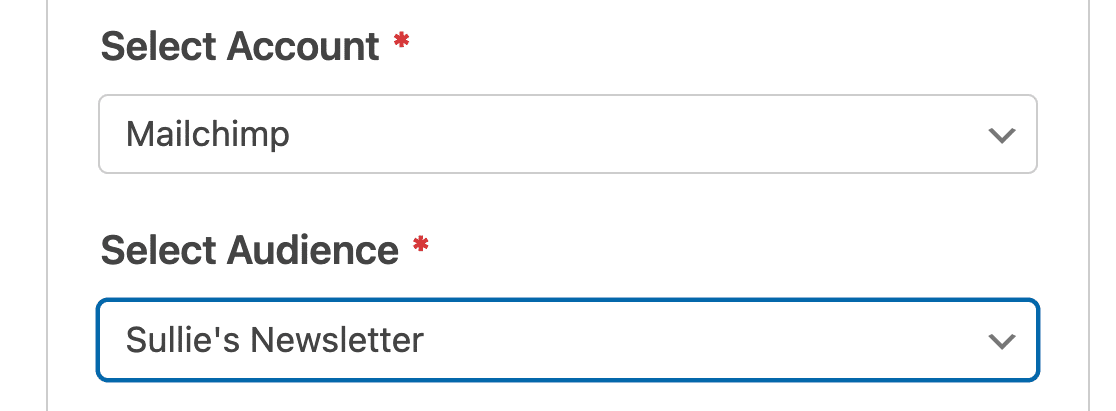
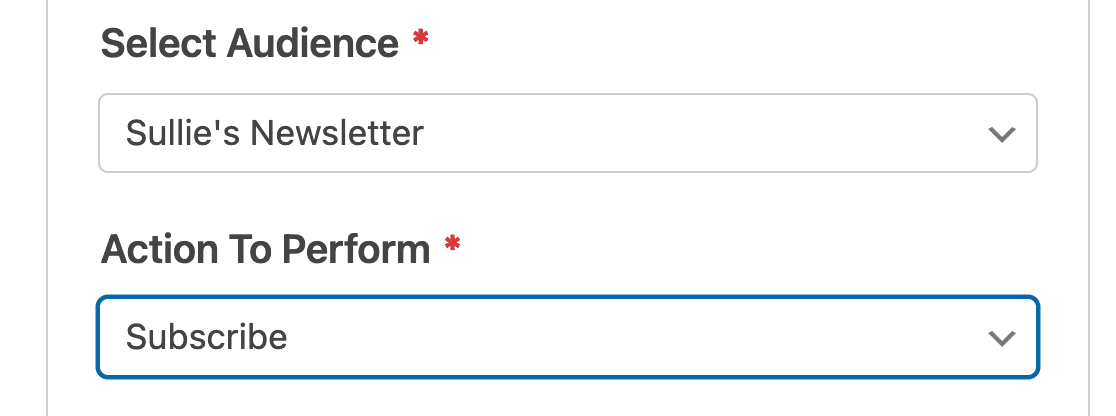
Start by selecting your Mailchimp account from the dropdown. This should be the Mailchimp account that you’re planning to build your email list in.
If you’ve created any Audience lists in your Mailchimp account, you’ll be able to choose it in the Select Audience dropdown. People who submit the form will then automatically be added to your selected audience inside Mailchimp.
After you’ve selected your Mailchimp account and the audience you want to add subscribers to, you’ll need to choose an action that should be performed every time this form is submitted using the Action To Perform dropdown.
The WPForms Mailchimp integration lets you choose from the following actions:
- Subscribe: Adds the user as a new contact to your Mailchimp audience.
- Unsubscribe: Unsubscribes an existing contact from your Mailchimp account.
- Archive: Archives an existing contact in your Mailchimp audience.
- Permanently Delete: Permanently removes an existing contact from your Mailchimp account.
- Record Event: Records an event for a specific contact after form submission.
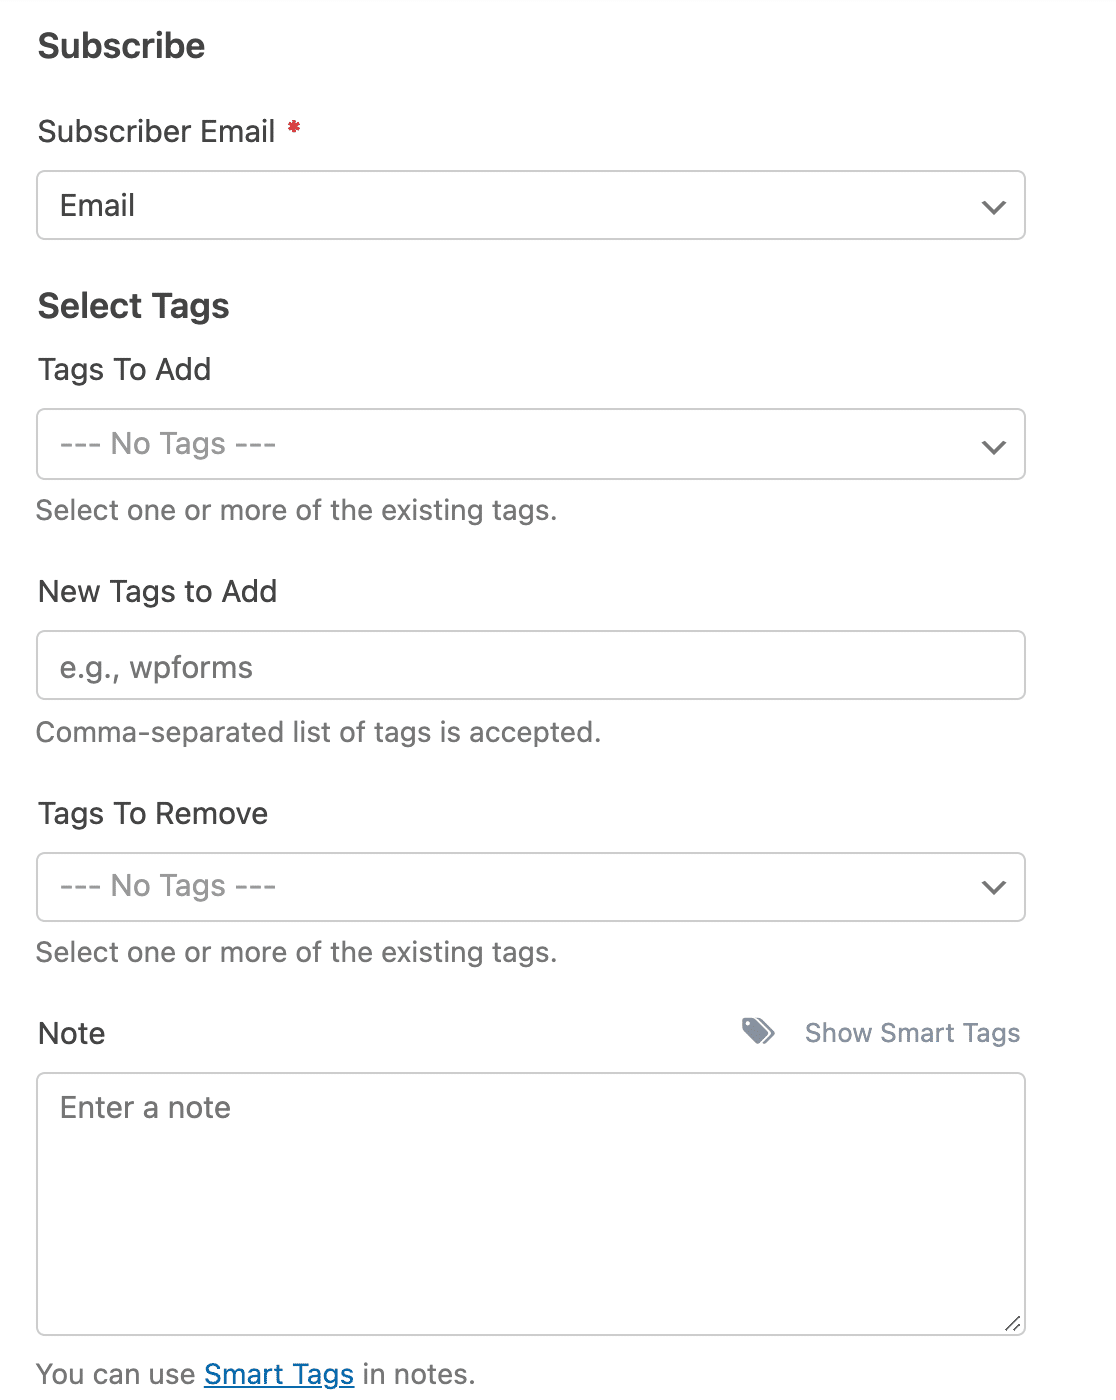
As soon as you select an Action To Peform, you’ll see an additional set of options appear underneath. There’s only one mandatory setting here – Subscriber Email.
This dropdown should be set to the Email field in your form, so that WPForms can directly pull the email address entered in this field and add it to our Mailchimp audience.
Apart from that, there are a bunch of useful settings here that you can use to automate processes like assigning an existing tag (or remove it) to each contact after they’re added to your Mailchimp list.
Plus, the Subscribe action gives you access to several other options, such as enabling double optin so that contacts are only added to your Mailchimp list after they’ve confirmed their subscription via email.
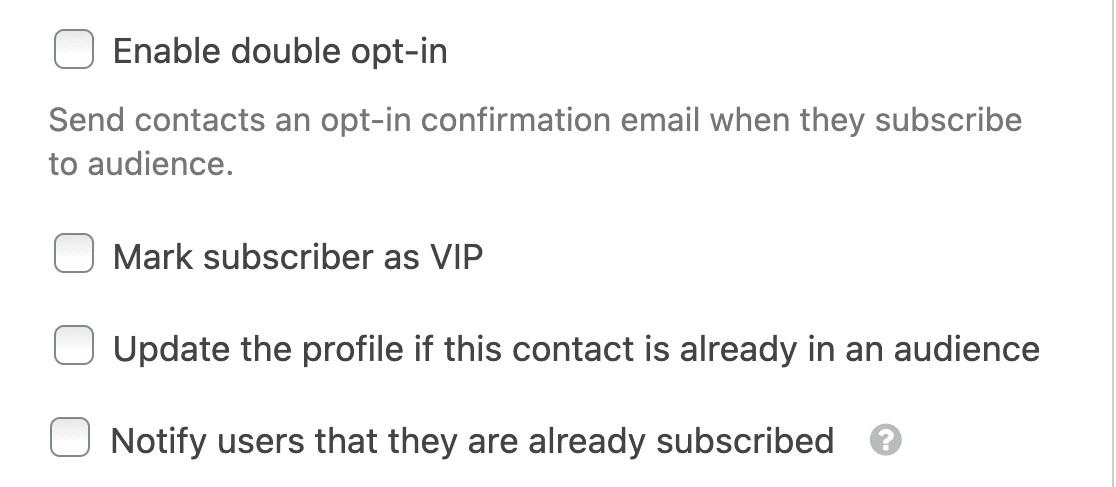

“🎩 Pro Tip: Consider using double opt-in for your Mailchimp subscription form. This helps verify the email addresses and ensures that your email list consists of genuinely interested subscribers. With stricter email-sending guidelines being enforced by Google and Yahoo, it’s vital to take proactive measures to reduce the chances of your emails being marked as spam.”
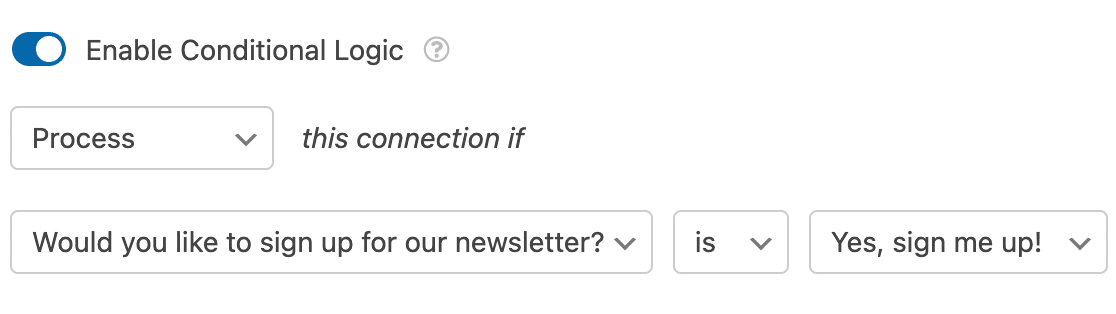
Finally, you can use conditional logic to add people to a particular audience and assign certain tags based on the user’s preferences while filling out the form.
You could use a Checkboxes field and then use it as a criteria for deciding which audience they should be added to using conditional logic for each Mailchimp connection you’ve created.
After configuring these settings, click Save.
Step 5: Configure Your Subscribe Form Notifications & Confirmations
Notifications are a great way to send an email whenever your subscribe form is submitted on your website.

You can send an email to yourself, which WPForms does automatically unless you disable form notifications.
You can also send a notification to a member of your team by adding their email to the Send to Email Address field.
Confirmations are a great way to let your site visitors know immediately that their form has been submitted.

For step-by-step instructions, check out this documentation on setting up form confirmations.
Step 6: Style and Publish Mailchimp Signup Form in WordPress
After you’ve created your Mailchimp subscribe form, you need to add it to your site.
WPForms allows you to add your forms in several locations, including your blog posts, pages, and even as a sidebar widget.
Click on the Embed button on the top-right of your form builder.

Now, WPForms will ask you if you want to embed your form to a new page or within an existing page. For this tutorial, we’ll select Create New Page.

When you click on this button, WPForms will ask you to enter a name for your new page. Enter a name and then press Let’s Go.

WPForms will then take you to your WordPress page editor window, where you’ll find your Mailchimp form already embedded.
At this point, you can style your form inside the WordPress block editor. Simply select the embedded form block to open From Styles on the sidebar to your right.
The easiest way to add styles to your form is by selecting a ready-made form theme. In this example, I’m using the Aero form theme.
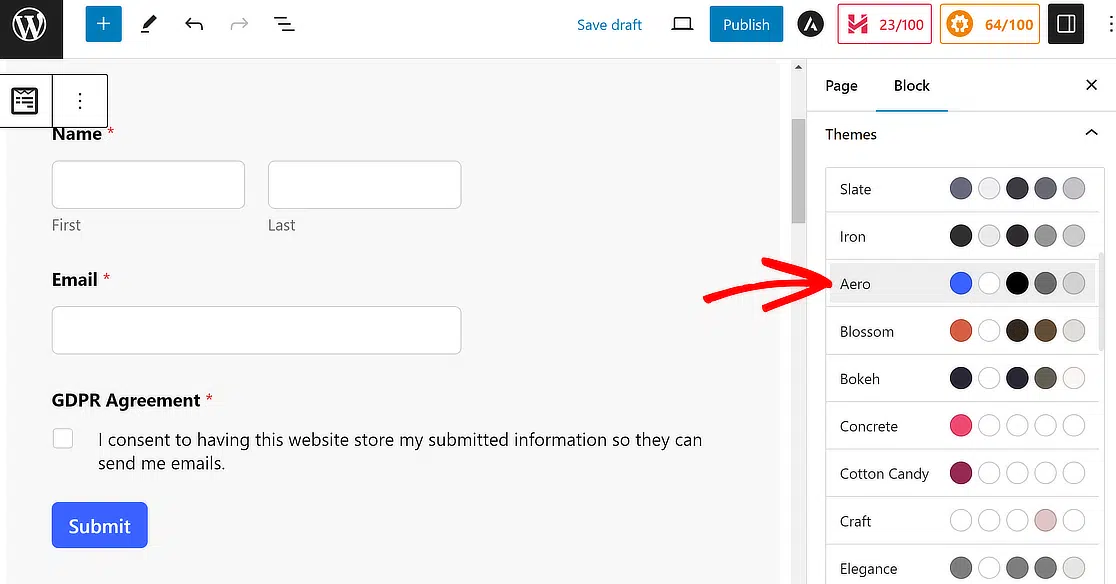
In addition to using a theme, you can customize the field borders, label colors, submit button styles, and more without any code.

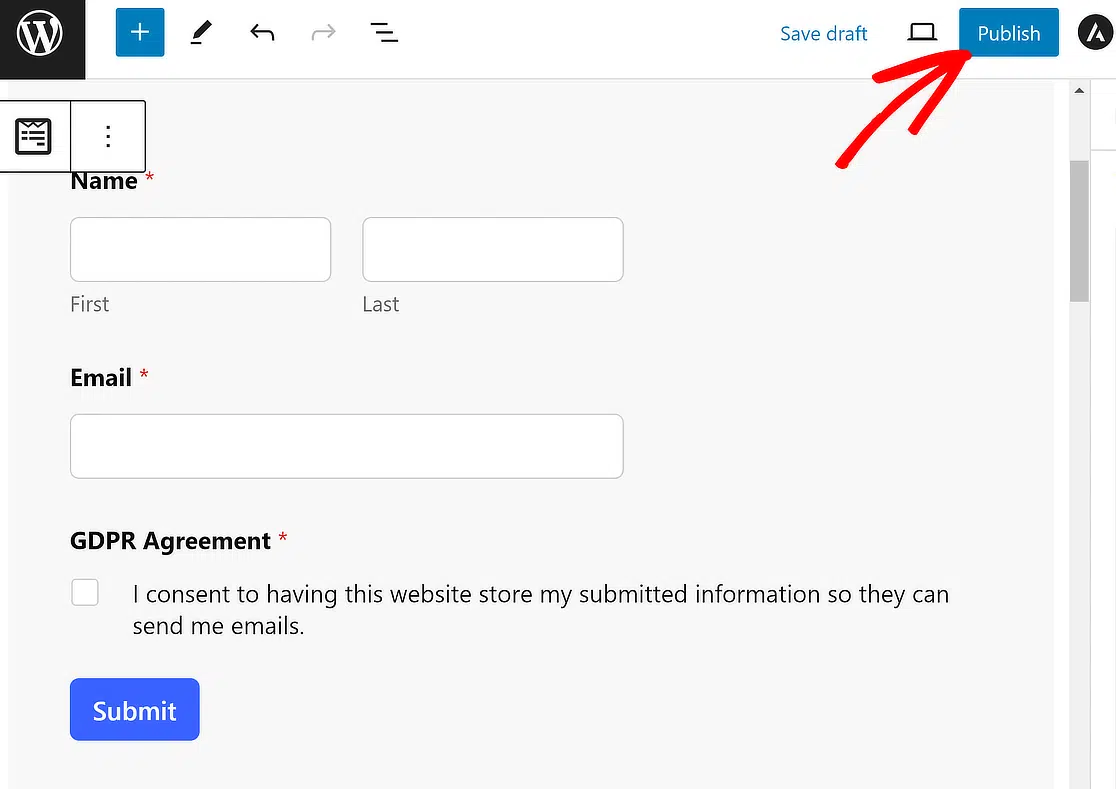
When you’re happy with how your form looks, you can press Publish to make your page live.
And there you have it! You now know how to create a Mailchimp subscribe form in WordPress to help build your email list.
Create Your Mailchimp Signup Form Now 🚀
Mailchimp Signup Form – FAQs
Take a look at some of the most commonly asked questions about creating Mailchimp signup forms in WordPress.
What information should I collect on my Mailchimp signup form?
It’s important to keep the signup form concise, having only the essential fields. Name and Email fields should obviously be included in your signup form. You can also consider adding Checkboxes to allow people to select their email preferences while signing up.
This way, you can only send relevant emails to people based on their preferences rather than sending bulk emails to your entire list without any interest-based segmentation.
How can I track the performance of my Mailchimp signup form in WordPress?
WPForms lets you track the number of entries on any given date range. For your Mailchimp-integrated signup form, you can easily track the number of people signing up over a custom date range.
You can use this feature to measure how fast your email list is growing right within your WordPress dashboard.
What should I do after someone signs up through my Mailchimp signup form on WordPress?
After a contact signs up to receive emails from you, you can start nurturing your contacts by sending them value-driven emails that strongly match their interest. For instance, if you’re offering a SaaS tool, you could set up an onboarding email automation in Mailchimp.
As soon as a new person subscribes via your WordPress form and they’re added to your Mailchimp list, the automation can start sending onboarding emails to educate new users about your product.
Next, Explore More Mailchimp Integrations
You’ve already integrated Mailchimp with WPForms using the steps above. You can improve your marketing workflows even further by using these Mailchimp integrations.
If you want a way to boost form conversions and encourage more site visitors to subscribe to your email list, consider delivering a content upgrade to subscribers in exchange for their email address.
You might also want to read some other Mailchimp related posts we’ve written:
- WPForms vs Mailchimp Form Builder: Which One Should You Use?
- 5 Mailchimp Alternatives That Are More Powerful (+Better Support)
Create Your WordPress Form Now
So, what are you waiting for? Get started with the most powerful WordPress forms plugin today.
And don’t forget, if you like this article, then please follow us on Facebook and Twitter.


I’d like to try WPFprms lite but comes up with this page not found when I enter the Wordpress website in the box. Any idea what I’m doing wrong please?
Thanks
Hi Morag! I apologize, but I’m not sure I understood the issue that you’re facing.
Could you please reach out and contact us with more details about the issue that you’re experiencing?
Thanks!
Hello,
I need to know if your MailChimp Addon will meet my specific requirements:
My newsletter subscription form will allow subscribers to select multiple newsletters (up to 4). The form will look something like this:
Name: _____________________ Email: __________________________
Newsletter Type: ____ HTML _____ Text (Radio button)
Newsletter Subscriptions
____ No ____ Yes Community Events Newsletter
____ No ____ Yes Town Board Minutes Newsletter
____ No ____ Yes Recreation Newsletter
____ No ____ Yes Emergency Alerts Newsletter
Submit
So, since a subscriber can choose up to FOUR different newsletters to subscribe to on one form, will your MailChimp Addon collect the information necessary, and pass that information to MailChimp in a format that will allow MailChimp to send out multiple emails (with attached PDF newsletter files, or at least links to those PDF newsletters)?
Also, will the HTML/Text option selection be passed to MailChimp?
If so, will MailChimp be able to automatically distinguish which subscribers receive the HTML version of the email vs. the Text version of the email?
Hoping this can all be automated using your MailChimp Addon and MailChimp.
Thank you.
Hi Larry,
Conditional logic allows you to set rules for events based on users’ selections or input in their form entries. For example, you could use conditional logic to allow users to choose if they’d like to join your mailing list or which Groups they’d like to be in.
Unfortunately, the HTML Fields cannot be sent to the MailChimp account from WPForms as HTML Field is not a input field.
Also, we do not have an inbuilt feature to distinguish between the HTML version vs Plain Text email.
In case it helps, here is a complete guide on the MailChimp addon.
Hope this helps! 🙂