
AI Summary
Creating a job application form in WordPress is a great way to collect essential details from job candidates in one organized place.
A plugin like WPForms makes this easy, offering everything you need to build and manage a professional job application form. And with no coding required!
Create Your Job Application Form Now 🙂
In this guide, I’ll show you how to set up a job application form in WordPress, so you’re ready to start collecting resumes, cover letters, and more.
Making a Job Application Form Online [Video Tutorial]
I’ll be using the best WordPress employment application plugin to show you how to create a simple job application form.
Prefer to read instead? The written steps below include the most up-to-date details.
How to Create a Job Application Form in WordPress
Here’s what we’ll cover:
1. Install and Activate the WPForms Plugin
As one of the best form builder plugins, WPForms allows you to create job application forms that look great and are fully customized to suit your specific needs and goals. To start, you can purchase a WPForms Pro license.
The paid version of WPForms comes with a host of useful features, including the ability to create job application forms, calculations, and handy integrations with Google Sheets and other marketing platforms.

These features make WPForms the go-to solution for streamlining your hiring process.
After purchasing the license, you should go ahead and install WPForms on your site. If you need help with installing a plugin on your site, you can see this step-by-step guide on how to install a WordPress plugin.
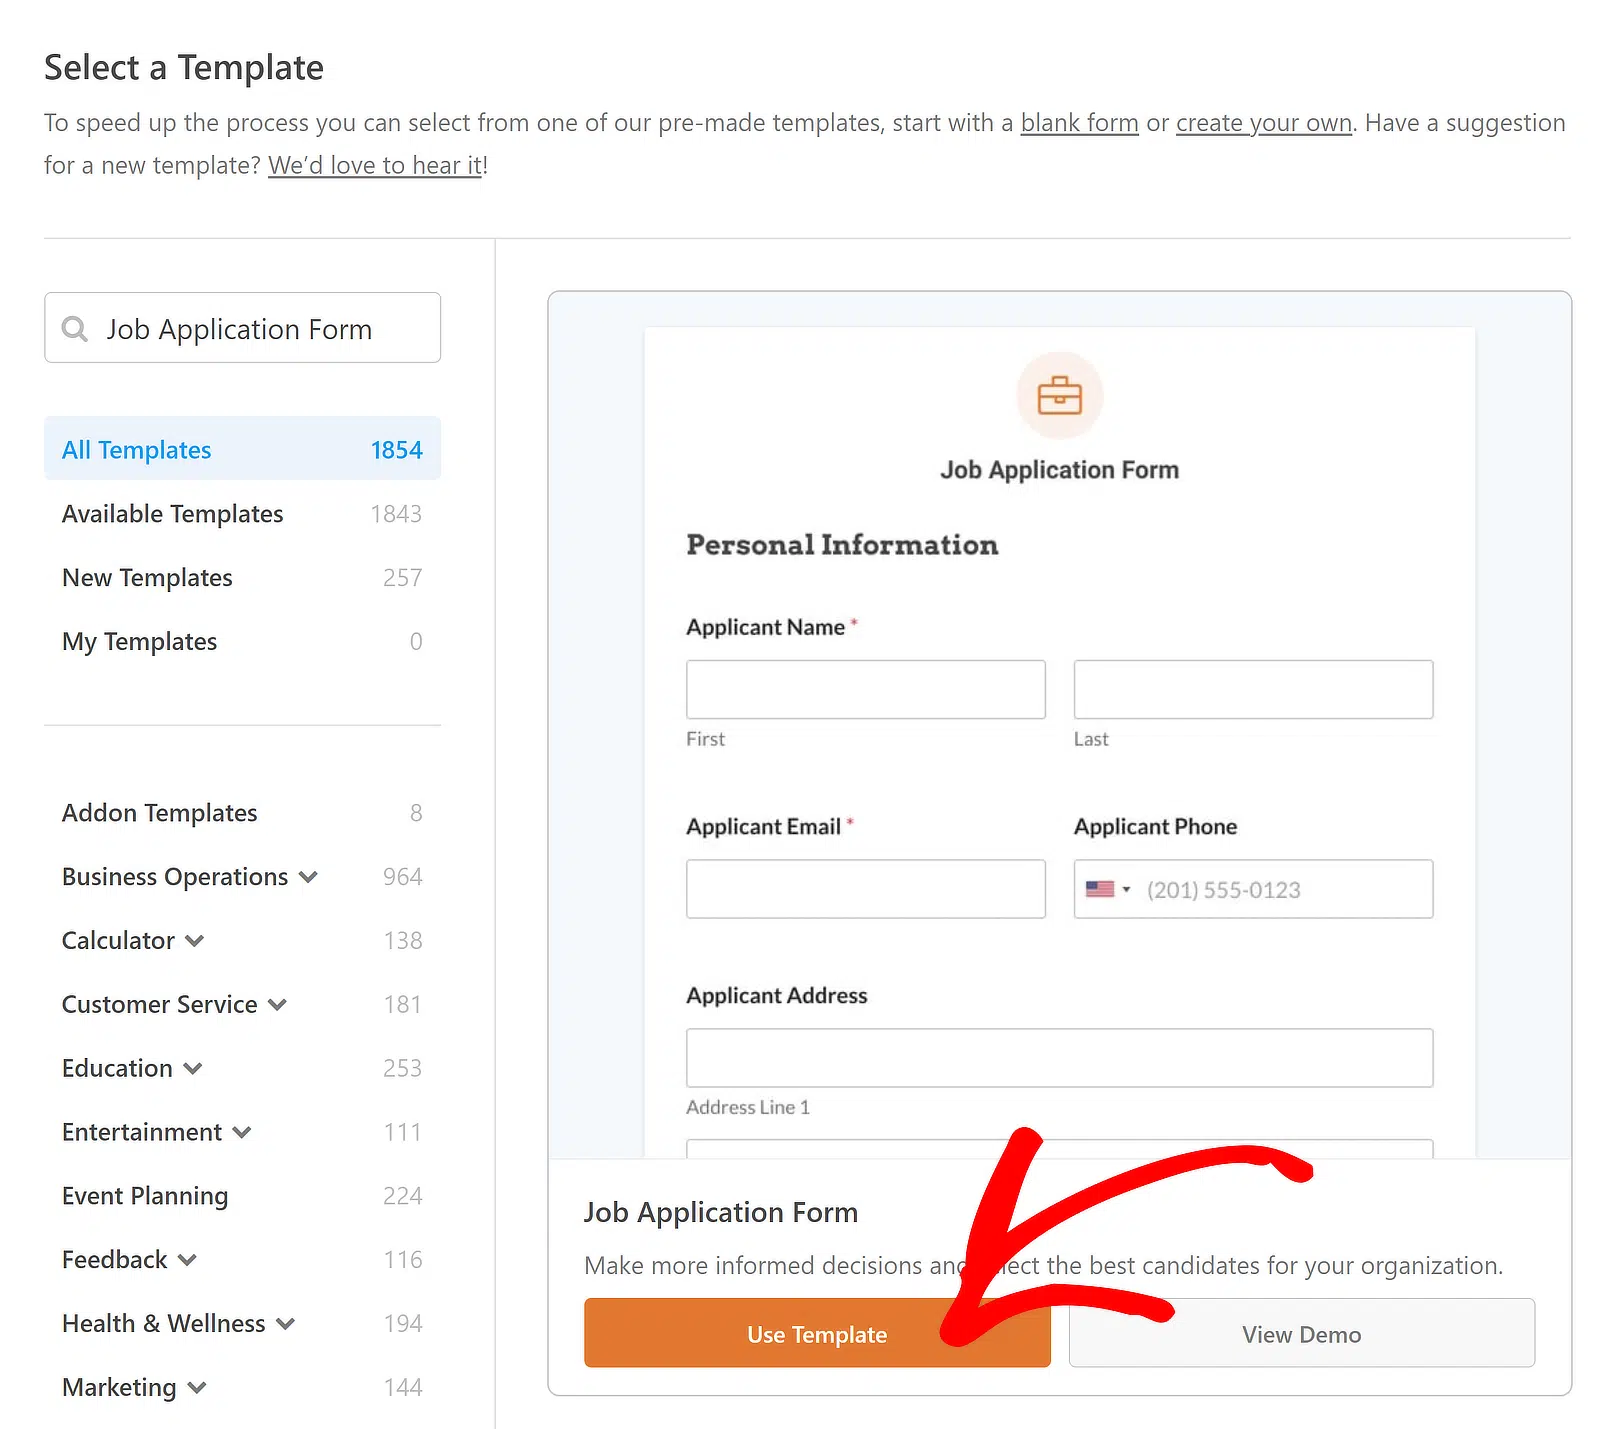
2. Select a Job Application Form Template
With the plugin installed, you can now easily create your job application form. From your WordPress dashboard, simply navigate to WPForms and click on the Add New button.

Give your form a name, then scroll down to select a template. For your convenience, WPForms includes 2,100+ form templates to choose from, including templates for business forms and job applications, such as:
- Simple Job Application Form
- Simple Employment Application Form
- Restaurant Application Form
- Job Application Upload Form
To keep things simple for this tutorial, I will name my form the “Job Application Form,” and I will select the Job Application Form Template by clicking on the Use Template button.
After you select the template, it will load inside your form builder in just a few moments. Notice how it already includes almost all the fields you’ll typically need in your job application? That’s the advantage of using a WPForms template.
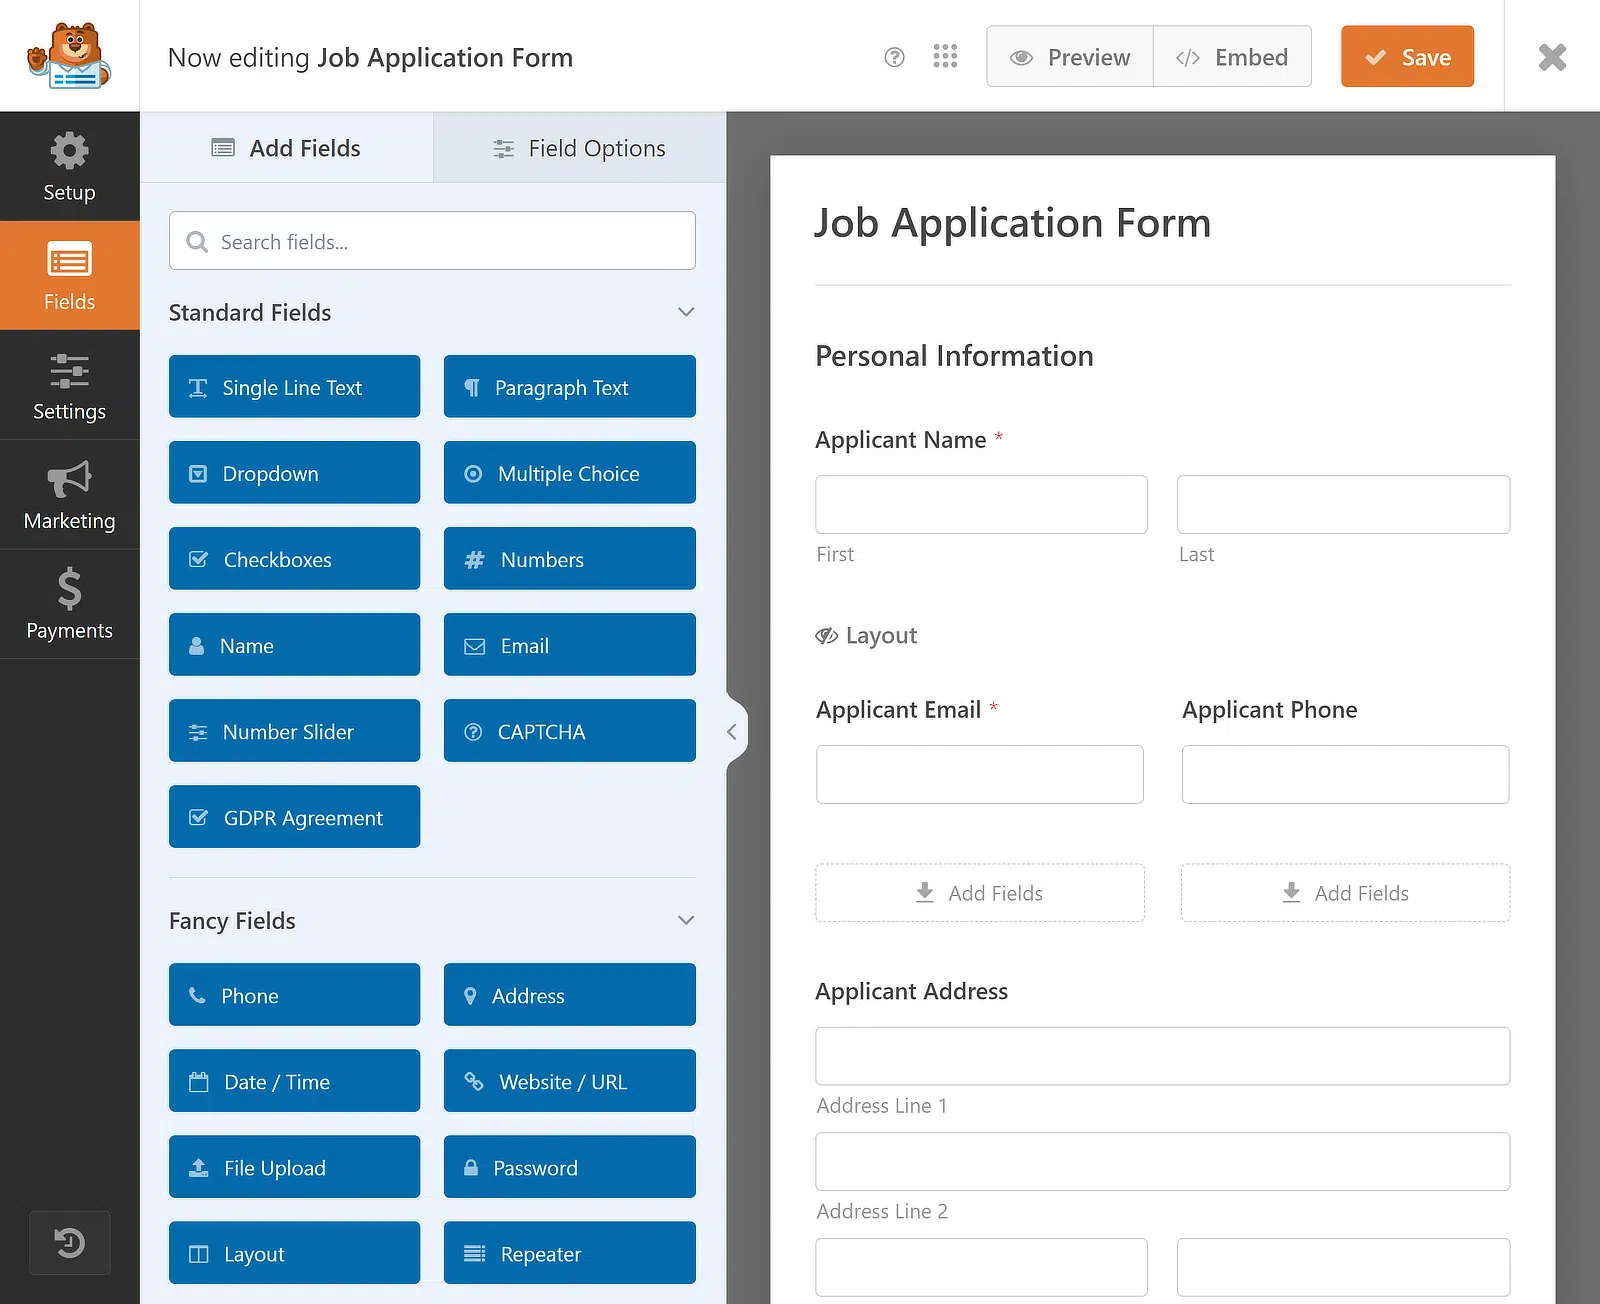
The best part is that even if you want to add, remove, or change anything about this template, you can easily do it with the drag-and-drop form builder. I’ll show you how in the next step.
3. Customize Your Job Application Form
WPForms makes it super easy to create a form from scratch or customize an existing one. Some simple customizations include specifying file types, adding a Repeater field, and an entry preview.
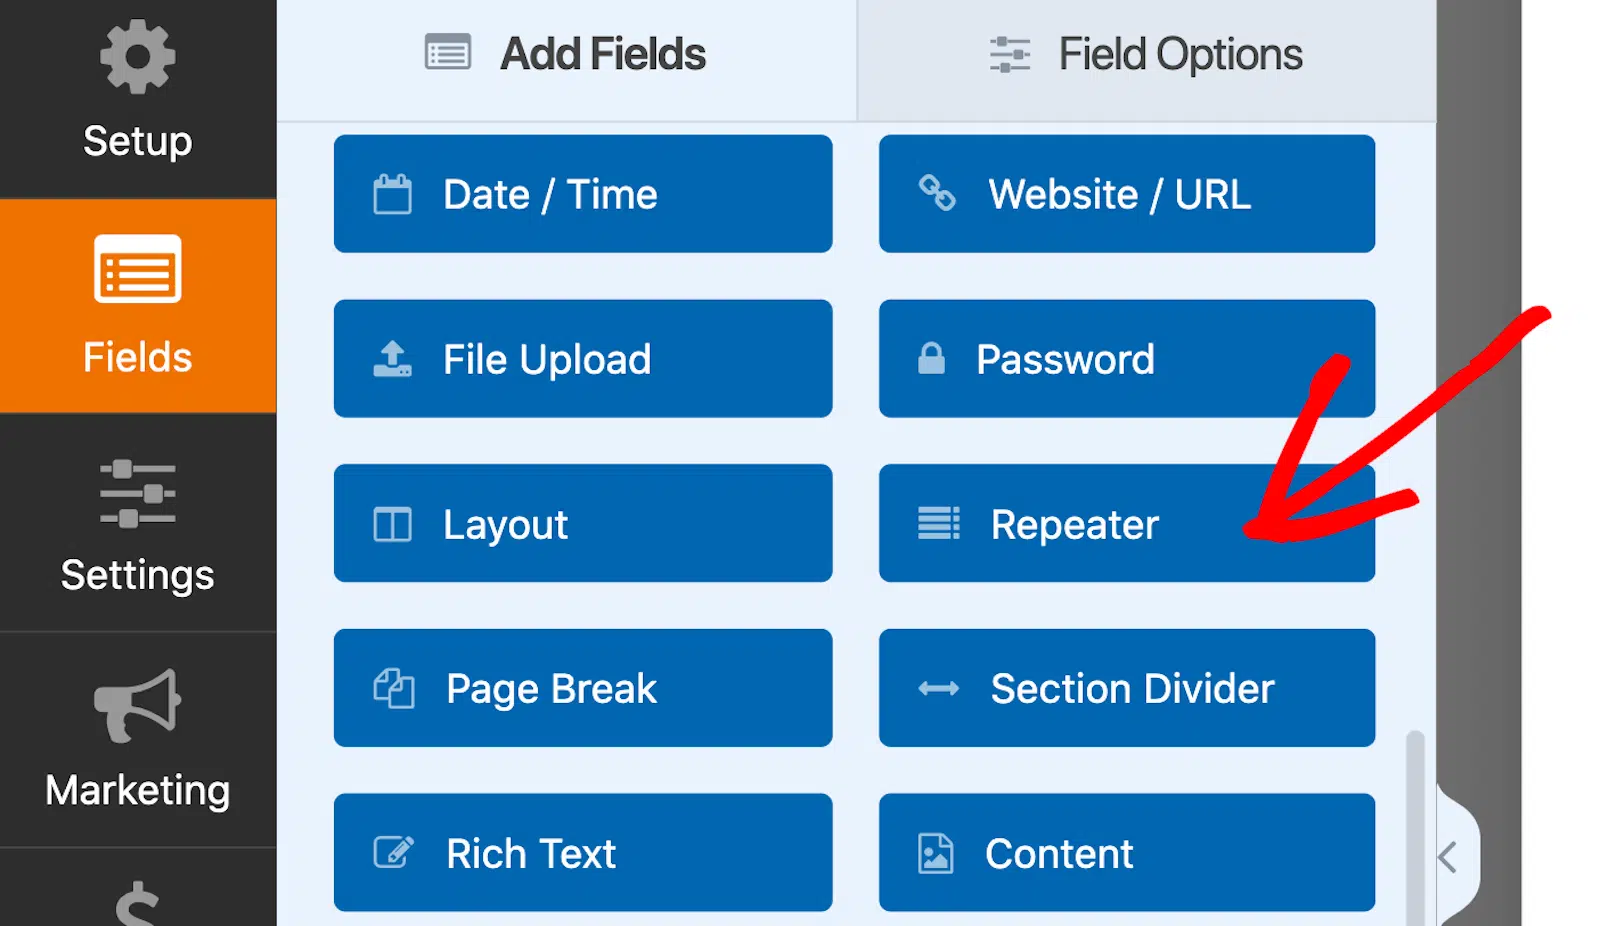
Add a Repeater Field to Your Form
If you want to capture more details from candidates applying to your job, here are a few ideas of additional form fields you might want to add using the drag-and-drop form builder and the Repeater field specifically:
- Organization — You can use a Single Line Text field to have people specify the organization they previously worked for.
- Job Title — Add a job title field and make it repeatable to see the numerous experiences of your job candidates.
- Start Date — A Date selector field field is ideal for collecting information on joining dates for the particular job.
- End Date — This will give you a brief idea for how long the candidate has worked in the organization.
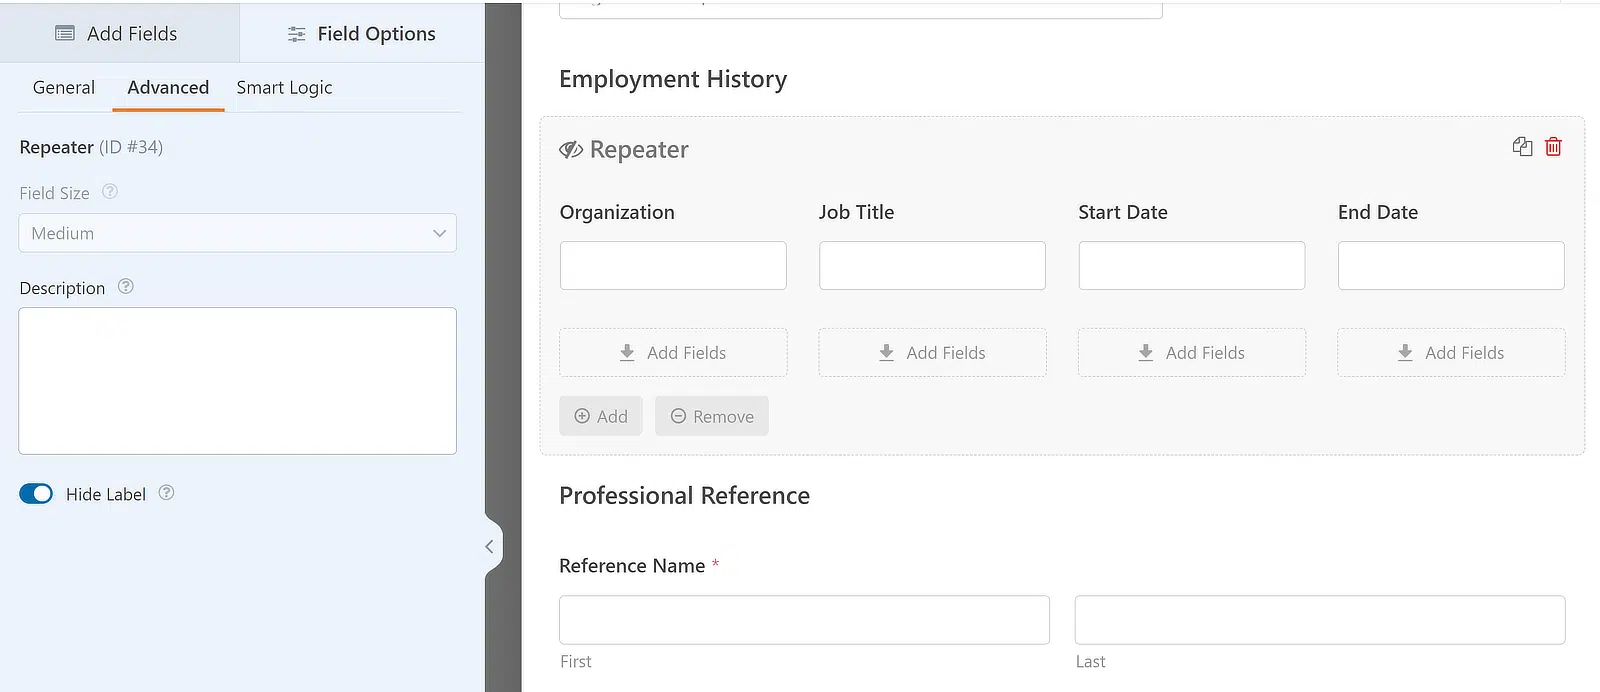
These fields should already be available in the template, but you just need to add them to a Repeater field. Simply drag and drop the Repeater field from the left-hand side of the screen to the right.
Once the Repeater field has been inserted, click it to display the associated Field Options on the left. For the Display, I would recommend choosing the Blocks option to make it easier to add multiple sets of data in a single row.
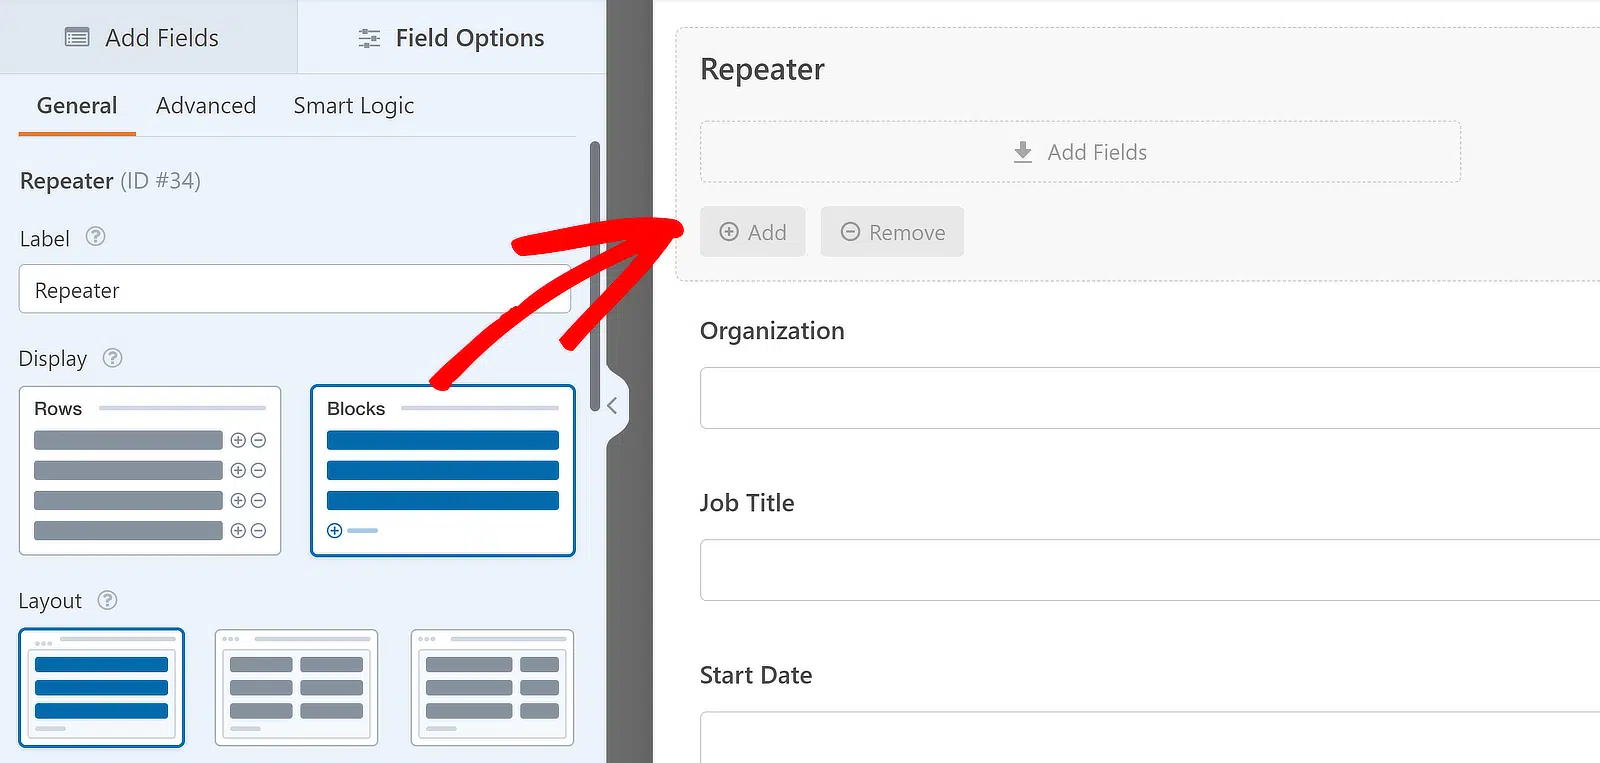
Regarding the Layout, I’ll be selecting the four-column layout, but you’re free to choose one that works best for you. There are 9 different layout presets available for the Repeater field.
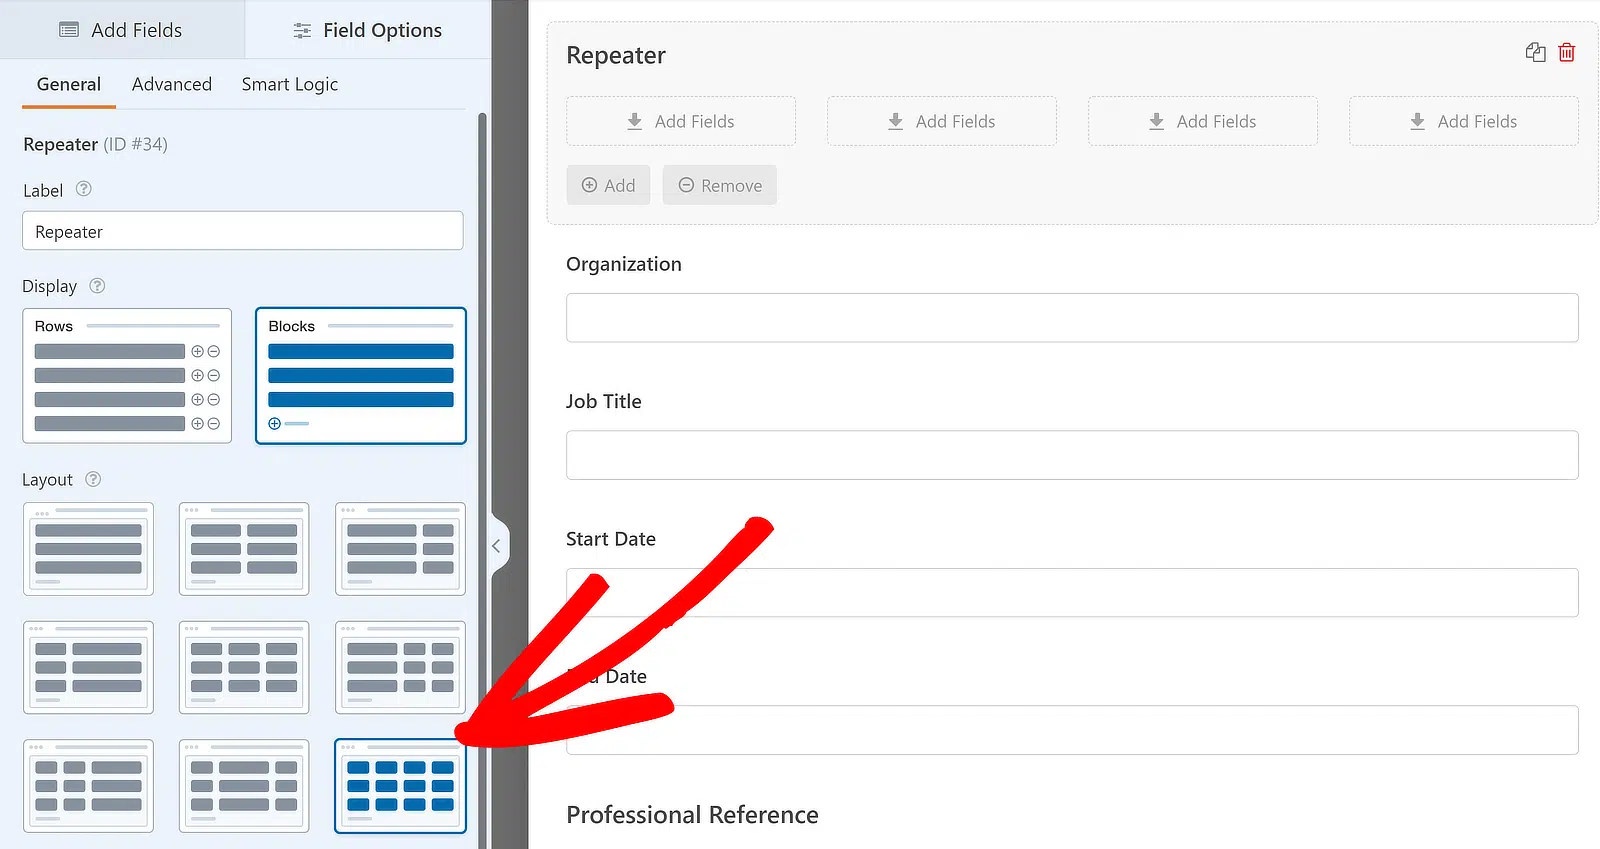
After choosing the Display and Layout and editing the Label, you can add fields to the columns in the Repeater field. To add a field to any column of the Repeater field, click and drag it from the sidebar to the desired column.
For this tutorial, I will drag the Organization, Job Title, Start Date, and End Date fields one by one to the Repeater field drop zones and hide the label to give it a complete look. Here’s what it looks like:
Customize the File Upload Fields Settings
You can also customize the file upload fields to attach CVs and cover letters. To change the file upload field settings, first click on the field inside your form. This will open its Field Options menu on the left.
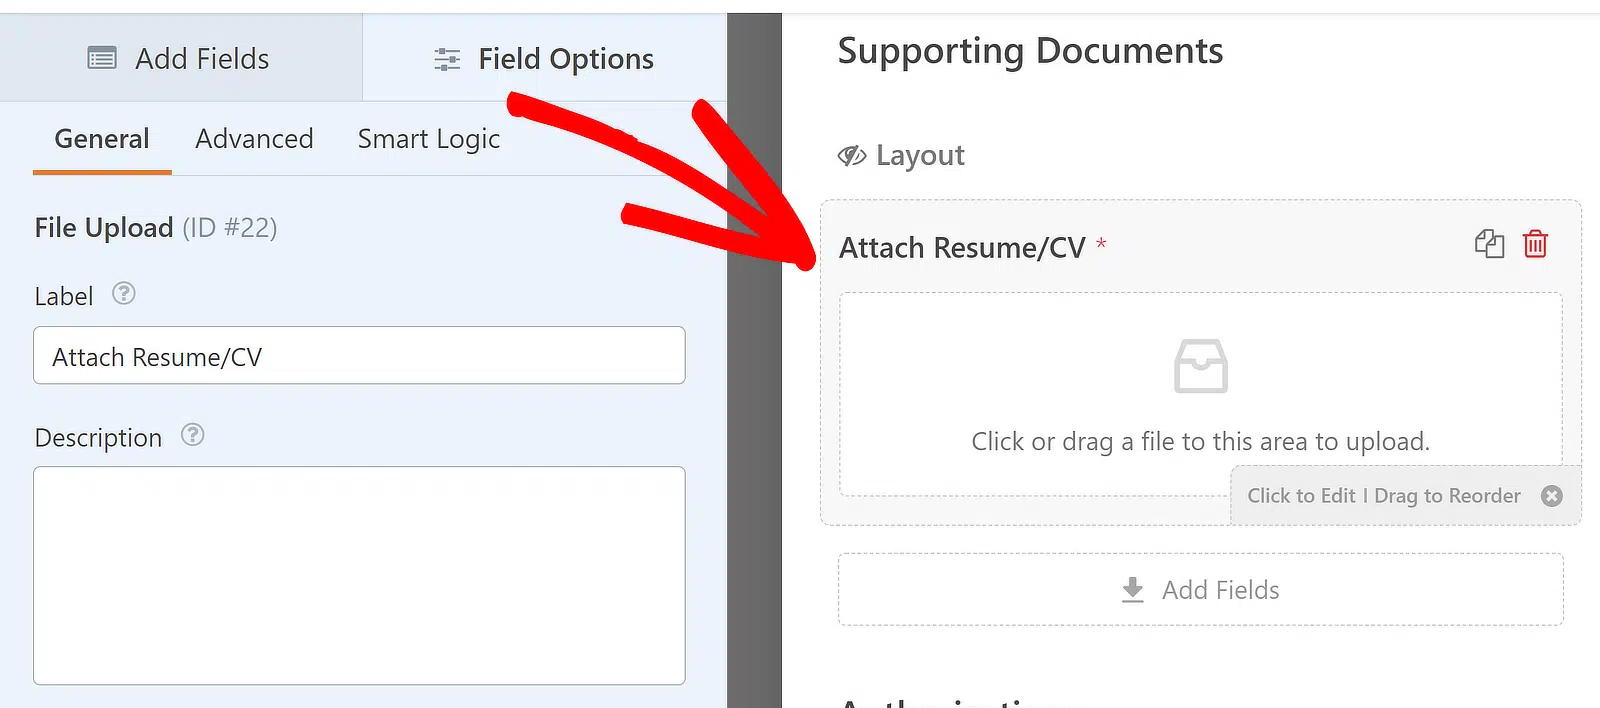
You’ll now find various options on the left-hand pane of the form builder. I suggest editing the field label to specify the file type you want to restrict candidates to.
You can easily change the label by updating the text inside the Label box on your field options. The label will immediately reflect on the form preview on your right so that you can see changes in real-time.
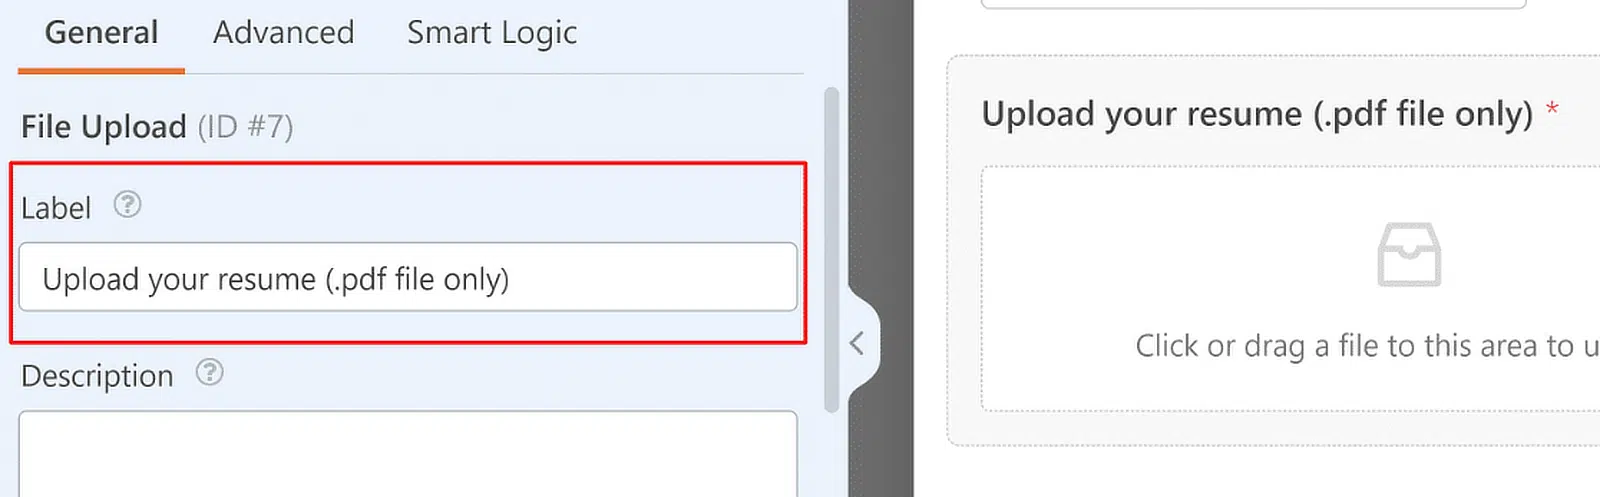
By clearly mentioning your requirements in the field label, you can eliminate any confusion, as the candidates will know exactly which types of files to upload when applying.
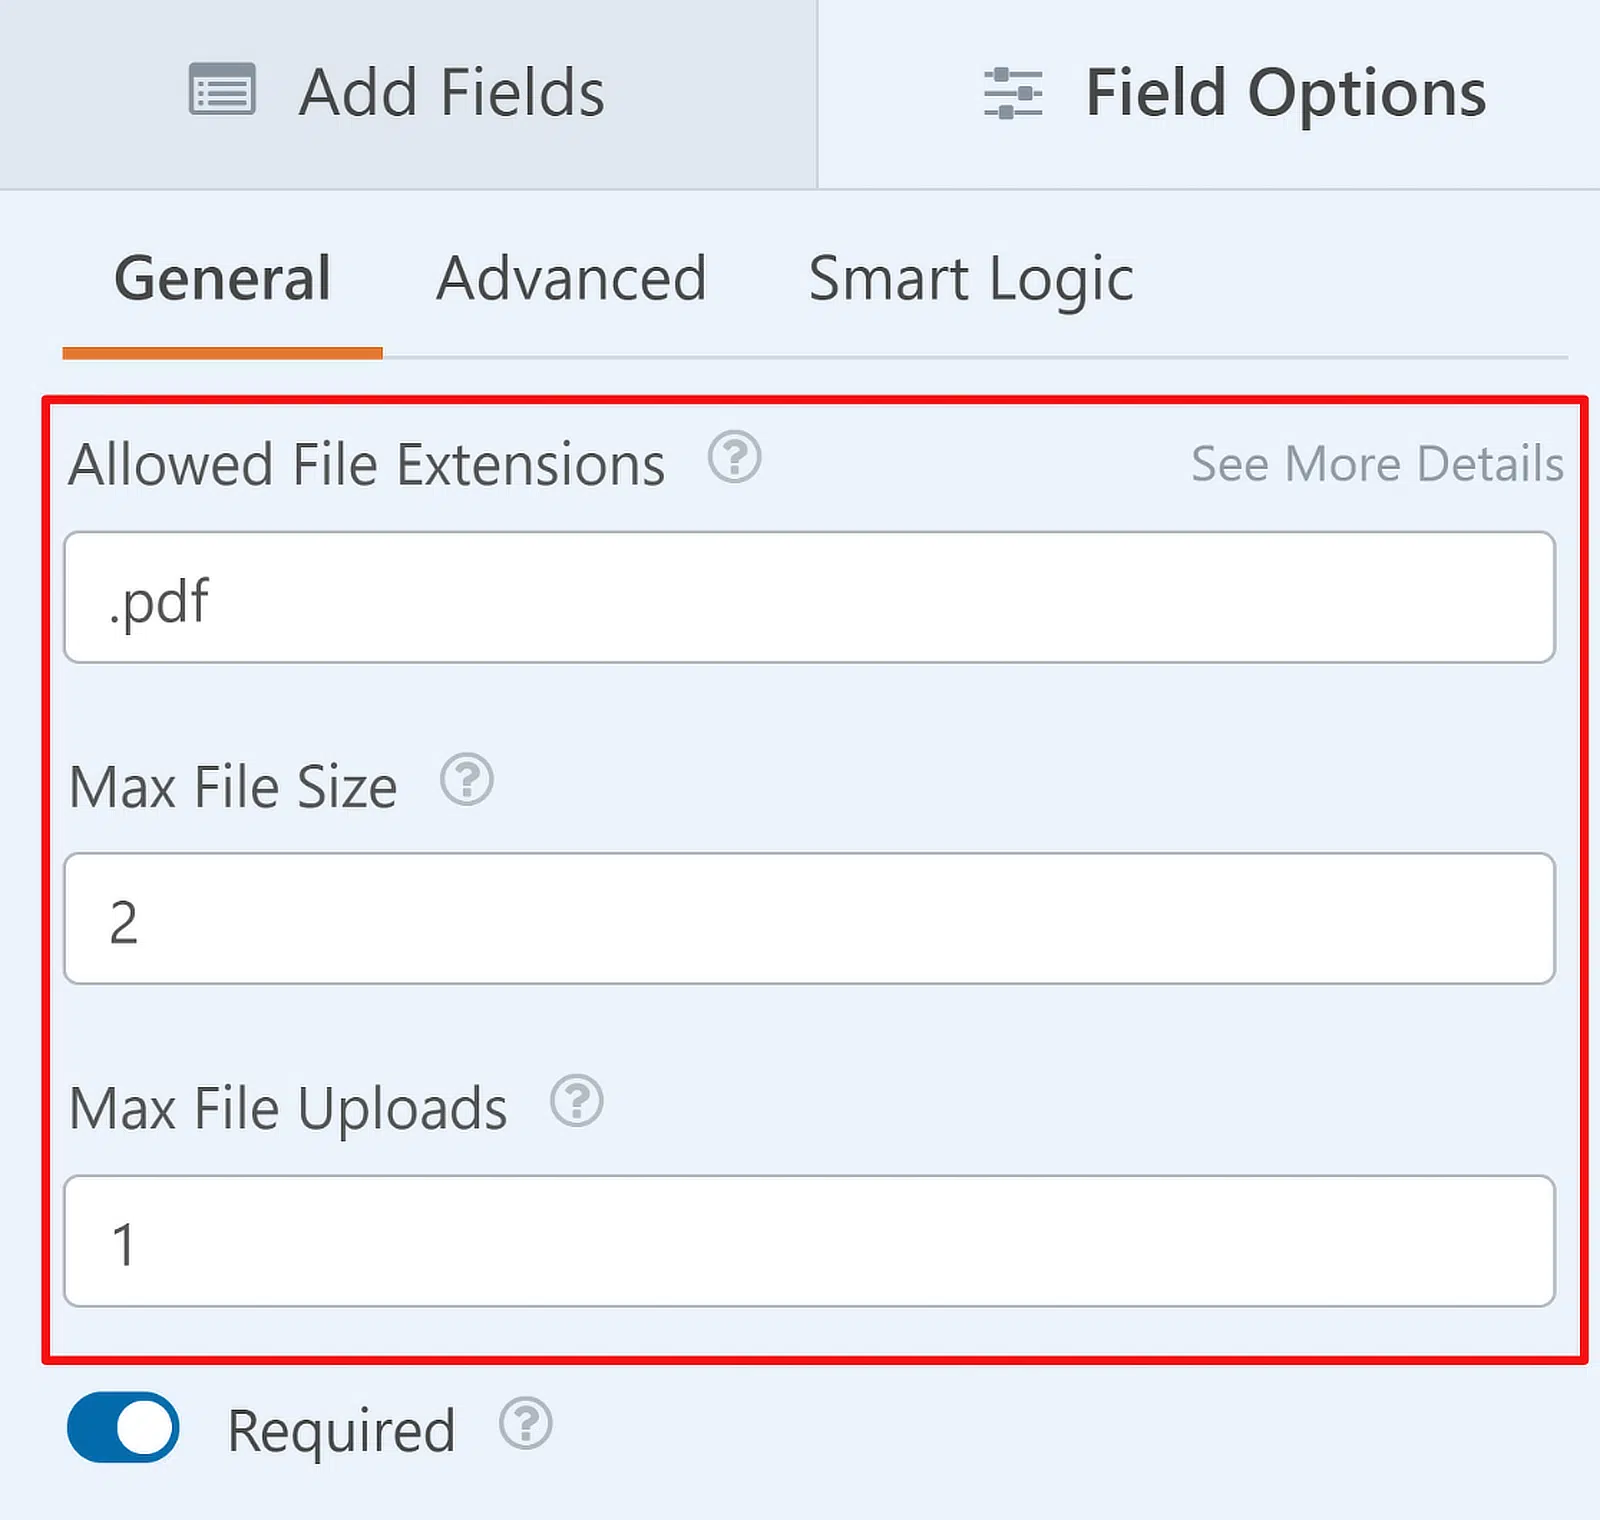
But the label only indicates a requirement. If you actually want to enforce restrictions on your file upload field, you’ll find a few options as you scroll down below the label and description settings, such as:
- Allowed File Extensions – Entering the names of file extensions here will force the field to accept only these file types. Make sure to separate the file types by commas (.pdf, .docx, and so on).
- Max File Size – Enter any number below your default max file size settings to limit the size of the files that can be uploaded in this field. This option accepts values in megabytes (MBs).
- Max File Uploads – Specify the total number of files that can be uploaded in the field. For instance, you can set the limit to 1, since you just need the applicant to upload their CV in this field.
You can repeat the same steps as above for the second file upload field in this form (which is for cover letters). Editing labels of fields to reflect important details like the file type is always a good idea!
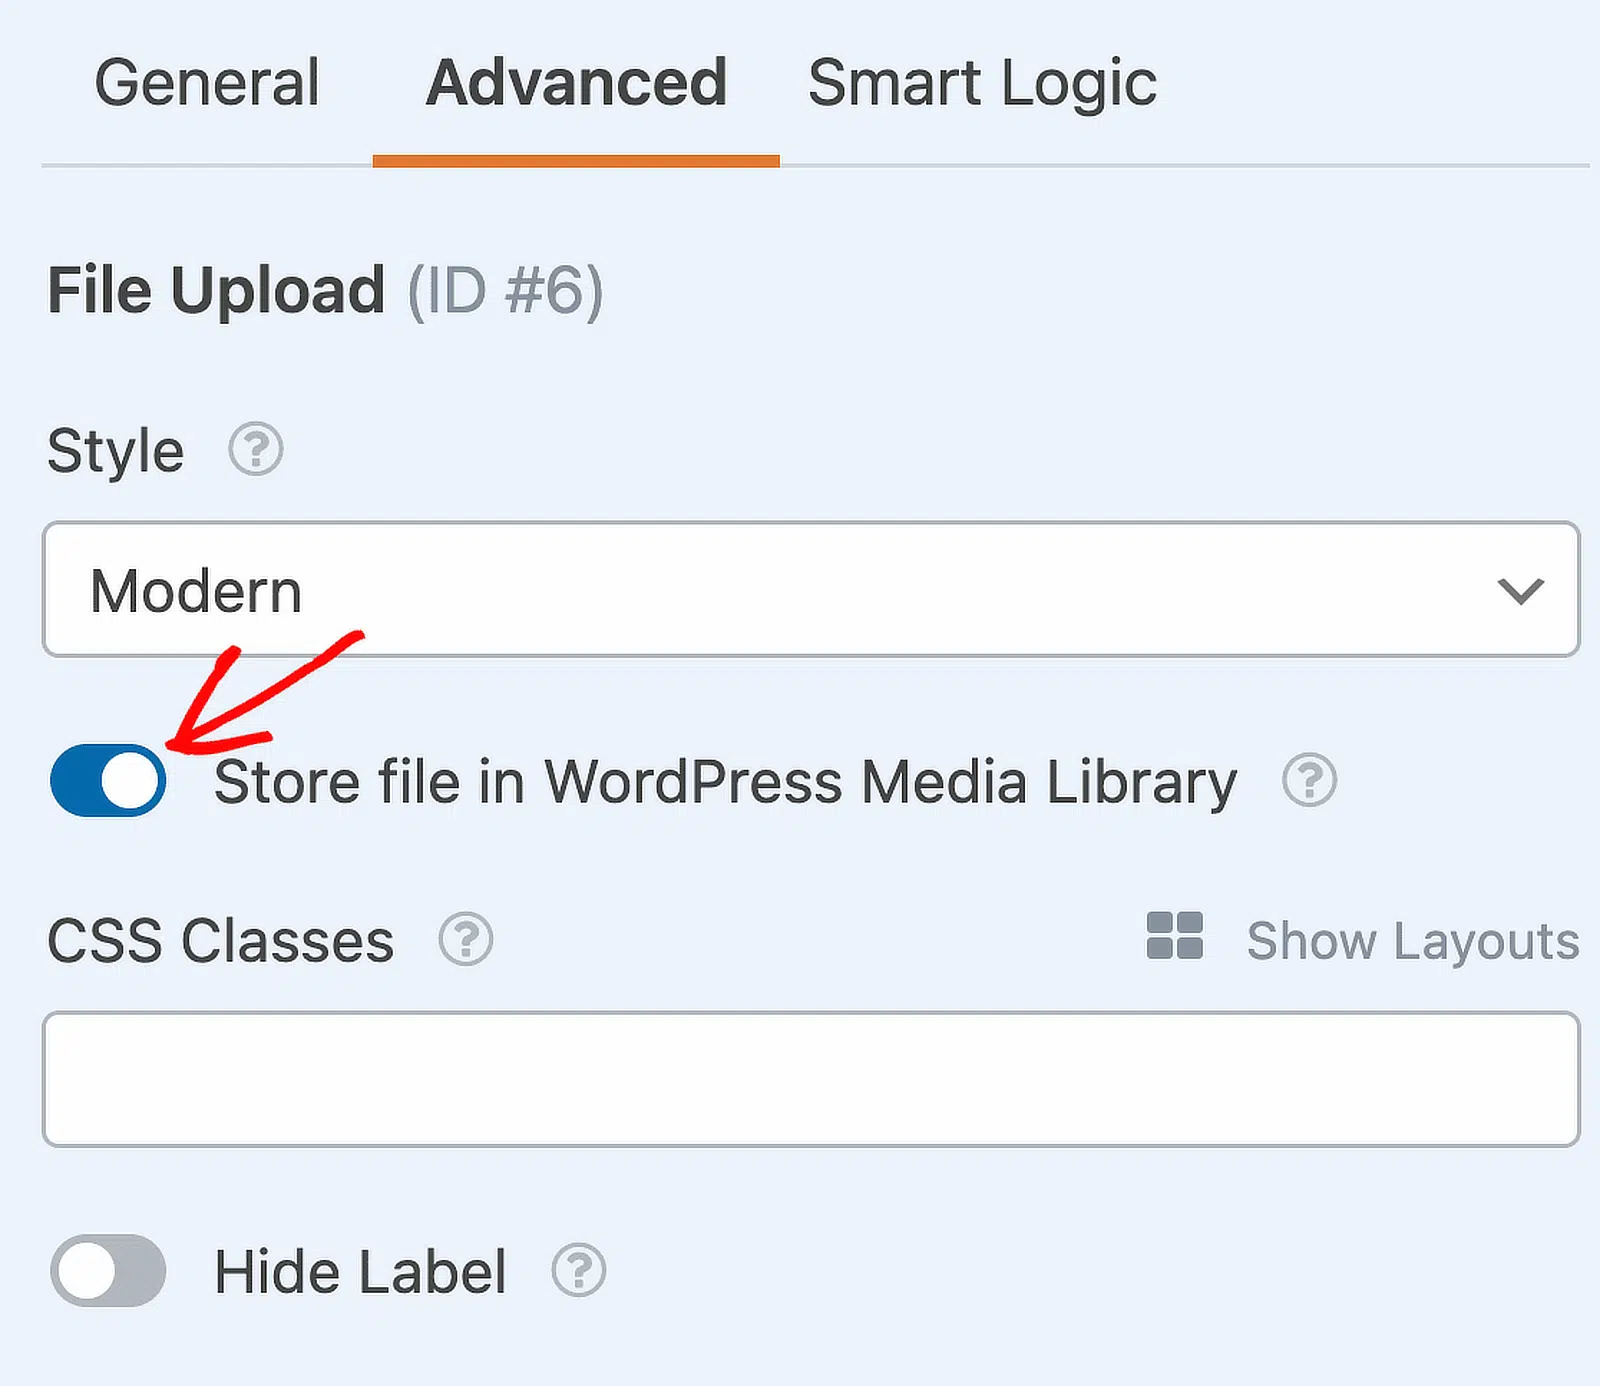
WPForms also allows you to store an uploaded file in your WordPress Media Library. To enable this functionality for your file upload fields, move the toggle toward the ON position next to Store file in WordPress Media Library.
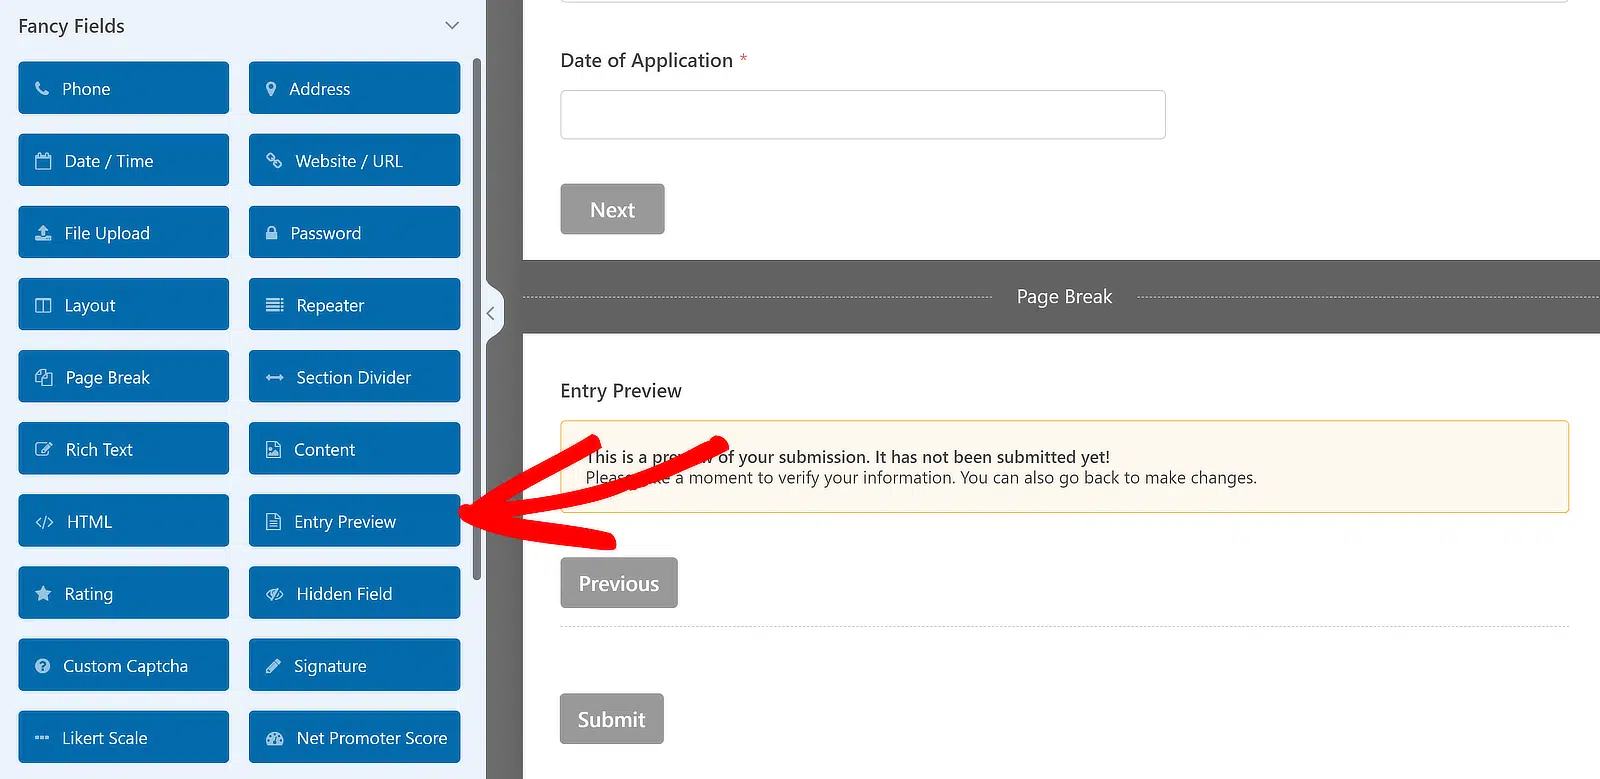
Add an Entry Preview Field
Finally, applicants will certainly want to verify the information they’ve added to each field in the form and have the option to go back and change anything before submitting the application.
You can easily add this functionality to your form by adding the Entry Preview field, which will inform the applicant about verifying any of the information added before submitting the form.
4. Configure the Notification & Confirmation Message
By default, WPForms will send you an email notification to your default WordPress admin email whenever an applicant submits the form. You can check your notification settings by going to Settings » Notifications.

From these options, you can change the subject line, Send To email address, the actual content of the notification, and so on. You can also easily receive the submitted resume and cover letter files as attachments in your notifications.
Simply scroll down to the Advanced section of the notification settings and turn on the Enable File Upload Attachments button. Then, use the dropdown menu to select the file upload fields containing the attachments.

When you’re finished here, I recommend setting up another notification—this one for the applicants who submit the job application form. This way, the applicants will be assured that their materials have been submitted successfully.
Setting up a Second Notification (Optional)
If you don’t want to send a notification to the job applicants, you can skip this part. You can set up the second notification by scrolling to the top of notification settings and clicking on Add New Notification.

Give a name to the new notification and press OK. Because this notification is intended for the person filling out the form, I’ll use the email address provided by the applicant in the form as the Send To Email Address.
Click on the Show Smart Tags link next to the Send To Email Address option (this link will read Hide Smart Tags after you’ve already clicked it) and select the Email field.

When that’s done, edit the other parts of the email like the subject line and From Name so that it’s appropriate and relevant from the applicant’s point of view. Scroll down further and edit the email message.

The on-page confirmation message is another area that you can use to provide further details about the next steps for the job application. To check the confirmation message, click Confirmations while inside Settings.
Use the text editor on the right to change the confirmation message. You can even add a link to redirect people to a page about your company’s background to help candidates learn more about you.

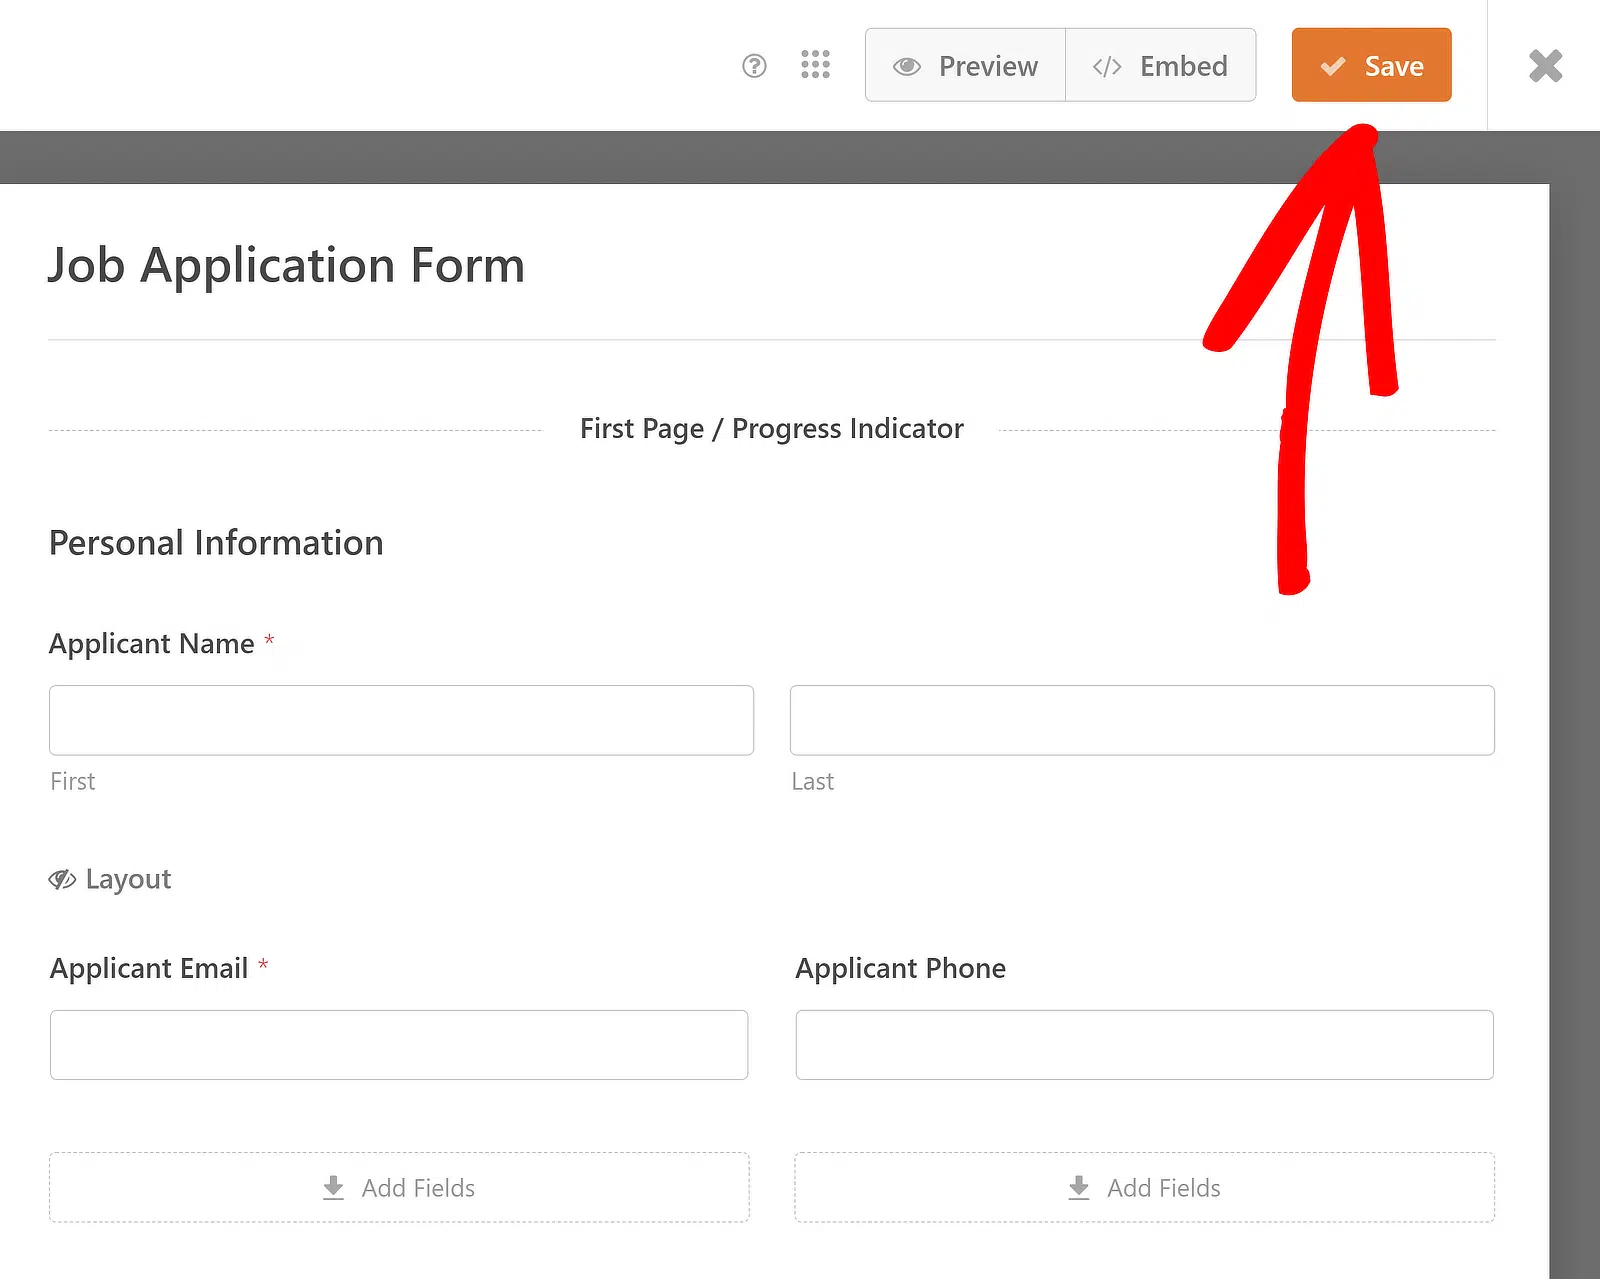
With that, you’re all done customizing your job application form. However, don’t forget that you need to save all your progress. Therefore, after making your changes, click the Save button to save all of your form edits.
5. Add Your Job Application Form to Your Website
The fastest way to publish your WordPress job application form is via the WPForms embed wizard. To begin, click on the Embed button (which is right next to Save at the top).

Once you’ve done that, select whether you’d like to embed the form on an existing page or a new one. For illustrative purposes, I’ll use go with the Create New Page option (though they’re both similar steps).

After that, you’ll see a prompt asking you to name your page. The name you enter here will be used as the H1 of your form page when you publish it. When you’ve entered the name, press Let’s Go.

You’ll find yourself in your WordPress block editor with the form embedded inside. From this point, you can preview your form to take one final look. When you’re happy, go ahead and press the Publish button.

To view application form entries after submitting them, check out this complete guide to form entries. For example, you can:
- View, search, filter, print, and delete any application form entries.
- Export all of your job applications in a CSV file.
Create Your Job Application Form Now 🙂
FAQ: More Questions about Job Application Forms
Job application forms are a popular topic of interest among our readers. Here are some quick answers to a few of the most commonly asked questions:
How do I create an application form in WordPress?
To create an application form in WordPress, use the WPForms plugin. Install and activate the plugin, then select the Job Application Form template.
Customize the form fields as needed, and add the Repeater field to allow multiple entries for sections like work experience or education. Finally, embed the form on your desired page using the WPForms block.
How do I add a job post in WordPress?
Adding a job post in WordPress is simple with WPForms. Create a new post or page, then use the WPForms block to embed your job application form.
Fill in the job details, such as title, description, and requirements, and publish the post. This allows candidates to apply directly through your site.
How do I create a recruitment website on WordPress?
To create a recruitment website on WordPress, start by choosing a recruitment theme. Install WPForms to manage job application forms efficiently.
Use the Repeater field for detailed candidate information. Create pages for job listings, application forms, and company information. Customize the site with SEO and security plugins, then publish your recruitment site.
Next, Take Your WordPress Forms to the Next Level
You’ve probably realized by now that WPForms is an extremely versatile form builder. If you want to learn more, here are some articles displaying other awesome capabilities you get with WPForms:
- If your job application is lengthy, and you want to break the form up into easier-to-digest sections, be sure to check out how to create a multi-part form in WordPress.
- We also have more tips on creating a refer-a-friend form and adding incentives.
- If an employee leaves, you can easily get their feedback by asking these exit survey questions.
- Take a look at our suggestions for embedding job application forms on educational websites.
Ready to build your form? Get started today with the easiest WordPress form builder plugin. WPForms Pro includes lots of free templates and offers a 14-day money-back guarantee.
If this article helped you out, please follow us on Facebook and Twitter for more free WordPress tutorials and guides.

