Do you want to learn how to add WPForms to a page in WordPress?
WPForms is the most user-friendly WordPress form builder plugin. It allows you to embed online forms on any page of your website without the need for code. You can use it to create beautiful, professional forms, surveys, and more.
In this post, we’ll guide you on how to add WPForms to a page in WordPress.
Create Your WordPress Form Now
How Do I Add WPForms to a Page in WordPress?
Adding WPForms to a page in WordPress is quick and easy. Follow along with the steps below and you’ll have everything up and running in no time!
Step 1: Install and Activate WPForms
The first thing you’ll need to do is install and activate the WPForms plugin. If you face any difficulty in the plugin installation process, you can check out this step-by-step guide on how to install a plugin in WordPress.
Step 2: Create a New Form
Once you’ve successfully installed and activated WPForms, you’ll need to create a new contact form using WPForms.
To do that, head over to your WordPress dashboard and click WPForms » Add New.

Now, a form setup screen will open. Here you need to add a name to your form and select the form template you want to use. WPForms has 2,000+ form templates that you can search and select. They’re all fully customizable so you can use them as-is or modify them to be exactly what you need.
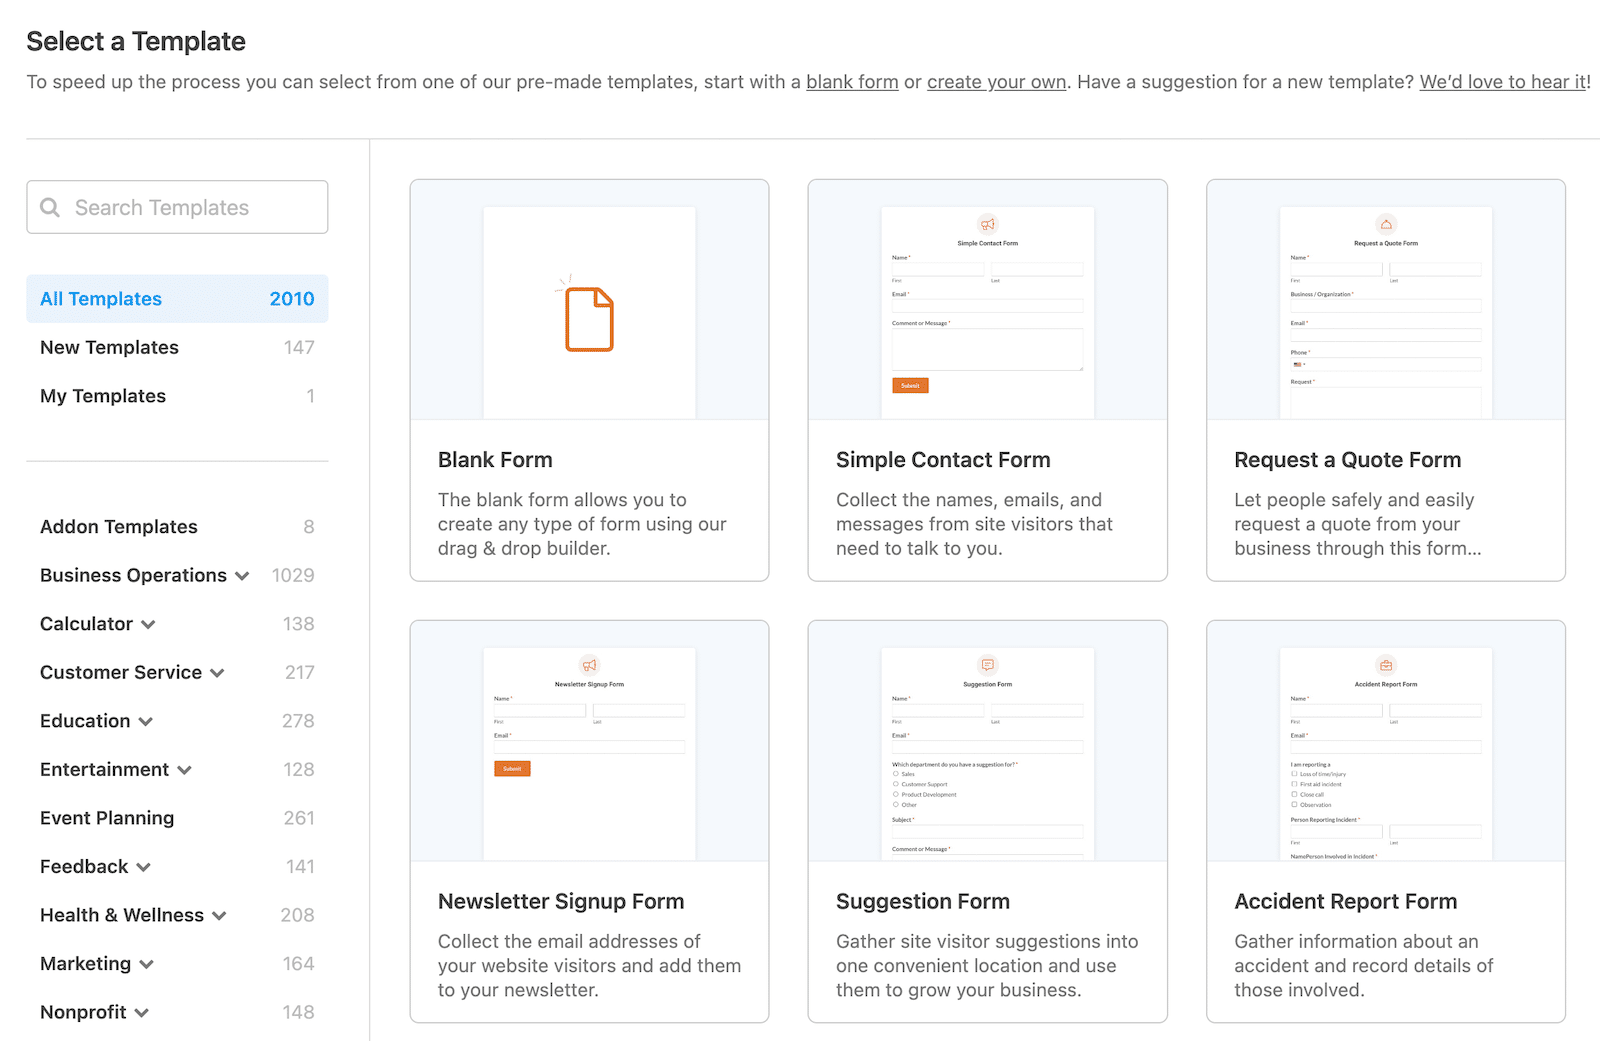
Here we’ll choose a Simple Contact Form Template.
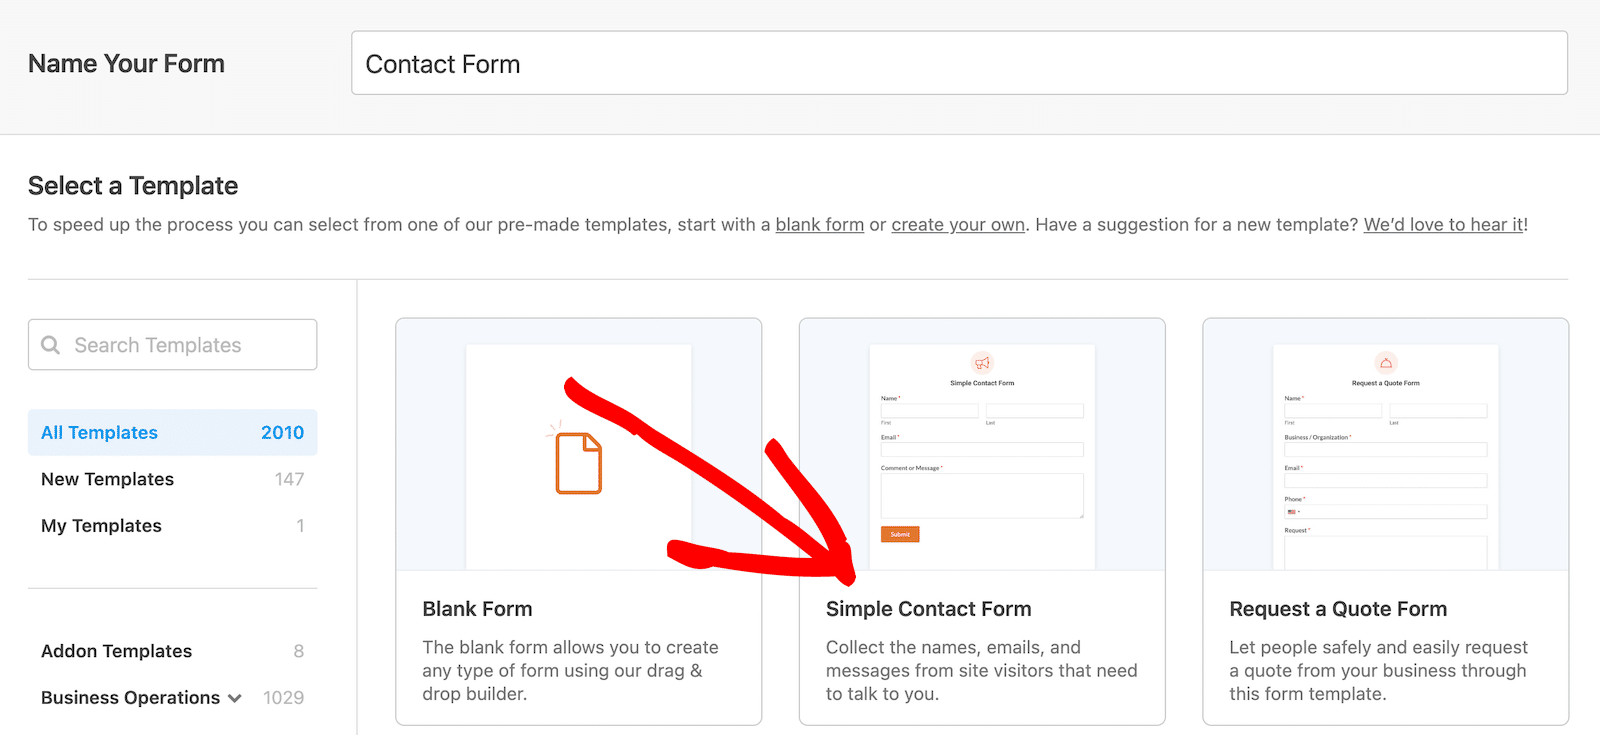
Once you click on the template, you’ll be redirected to the WPForms form builder dashboard.
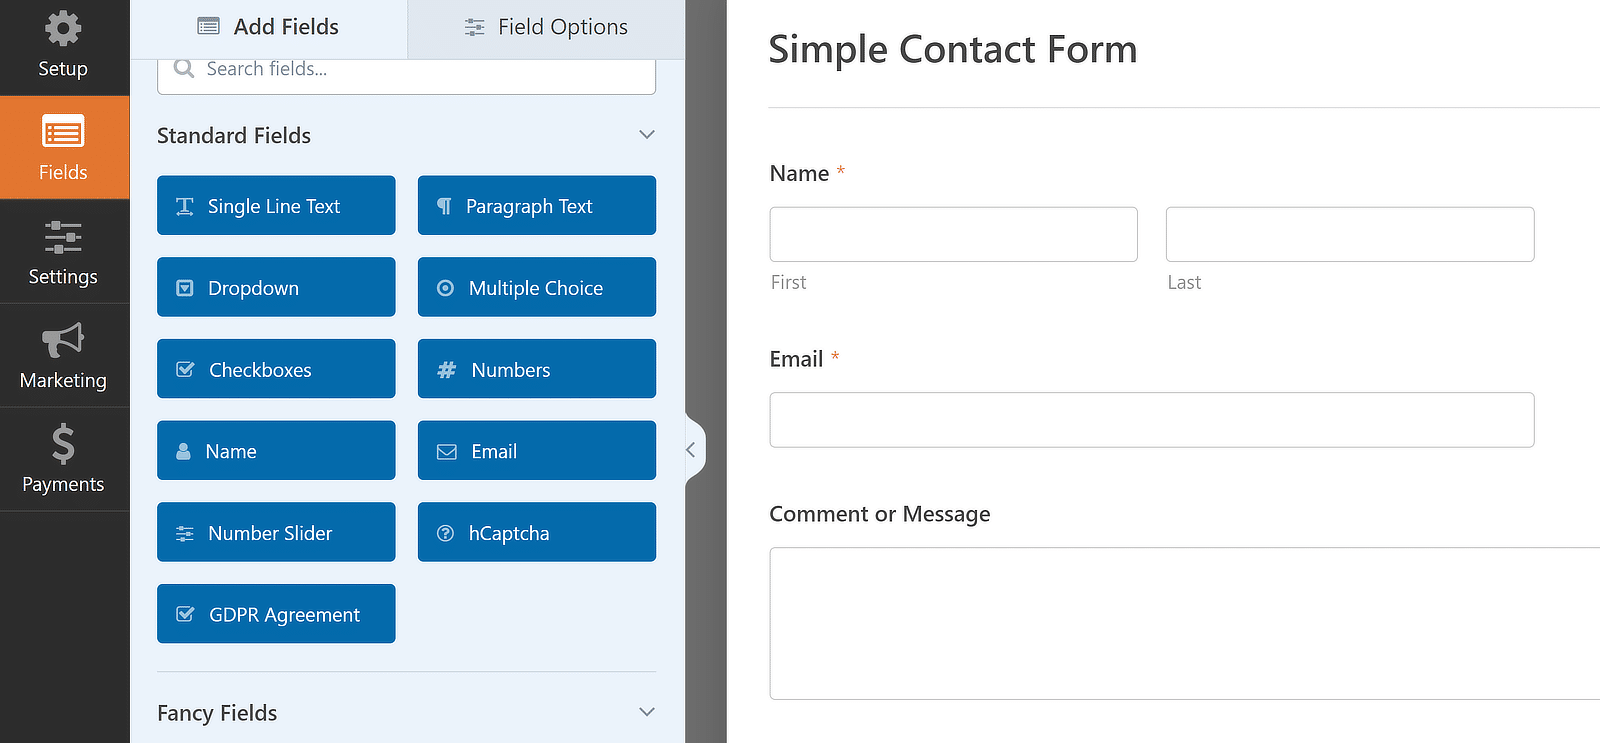
You can view your contact form on the right, and the left side contains the additional form field options.
WPForms comes with an easy drag-and-drop builder that lets you drag form fields and drop them into your contact form. If your form is a long one, it might be a good idea to let users preview their entries before submitting them.
You can also add, remove, and edit form fields with a single click.
WPForms Form Settings
With WPForms, you also get the flexibility to configure the following form settings:
- Configure form general settings: You can change the form title, description, and submit button text. Also, to stop contact form spam, you can enable the hCaptcha and anti-spam features of WPForms.
- Customize form notifications settings: You can add email addresses that will receive notifications about form submissions. Also, you can add multiple form notifications to send your customers a notification email receipt once they fill out your form.
- Configure form confirmations settings: You can customize the confirmation message users will receive from you once they submit their order form. You can show your users a personalized message, display a beautiful Thank You page, or redirect them to a different website.
Once you’re done with all the customization options, don’t forget to click on the Save button at the top right corner of the page. Also, you can preview your form by clicking on the Preview button.

Now, we’ll see how you can embed your form into a page on your WordPress website.
With WPForms, you can add your form to a page in a few different ways. We’re going to look at 2 of them here.
Step 3: Add WPForms to a Page in WordPress With the Embed Wizard (Method 1)
WPForms has a built-in Embed button that allows you to add your form on any website page without switching the tab or closing the form window.
You can add your contact form directly from the form builder dashboard. To add your form, click on the Embed button at the top of the form builder.

Clicking the embed button will open a popup window with 2 form embedding options.
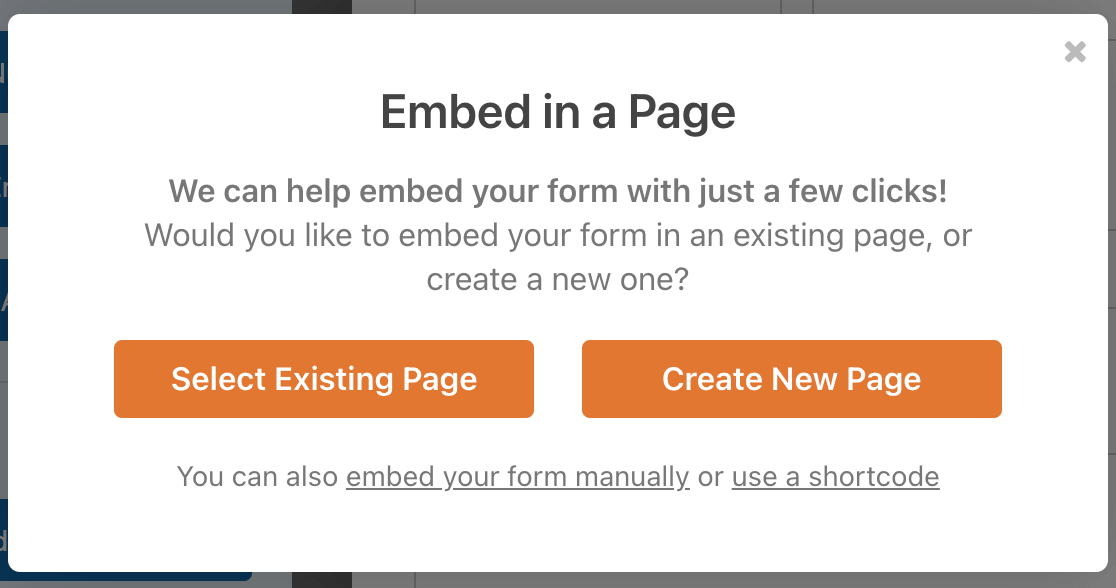
- Select Existing Page: This option allows you to choose from the existing pages of your websites.
- Create New Page: If you want to display your form on a new page, you can use this option to create a new page and then add your form.
Choose the option that’s best for you. If you create a new page, you’ll also need to enter a title for it.

Then click the Let’s Go button. Your form will automatically be added to your page and all you have to do is click Publish or Update.
Step 4: Add WPForms to a Page in WordPress With the Block Editor (Method 2)
In this method, we’ll use the WPForms block to embed the contact form on a page.
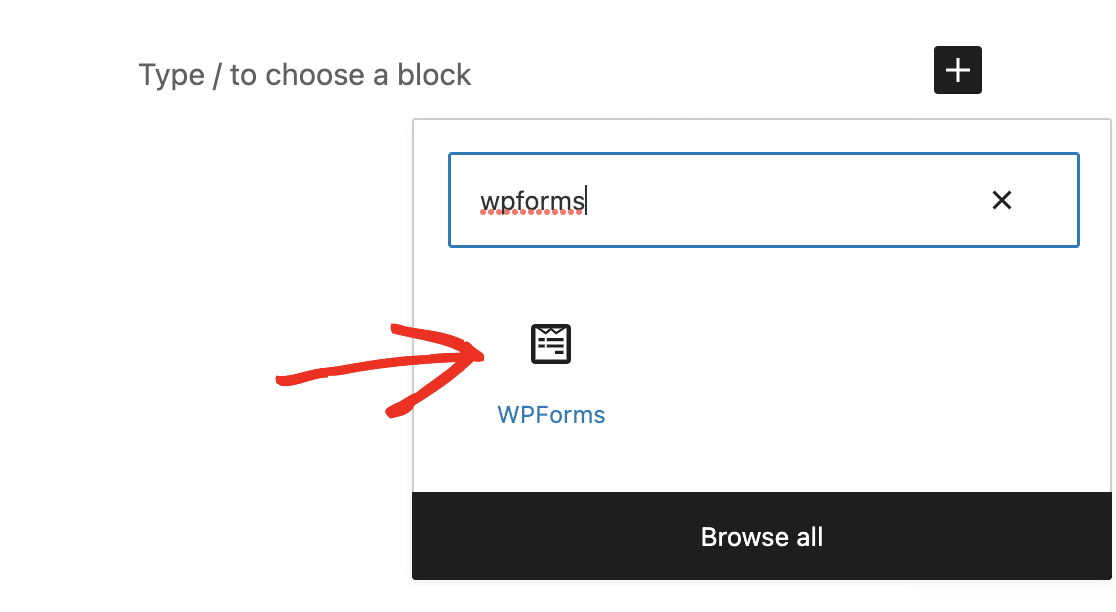
First, open the page where you want to add your contact form. Then click on the plus (+) icon and choose the WPForms block from the available options.
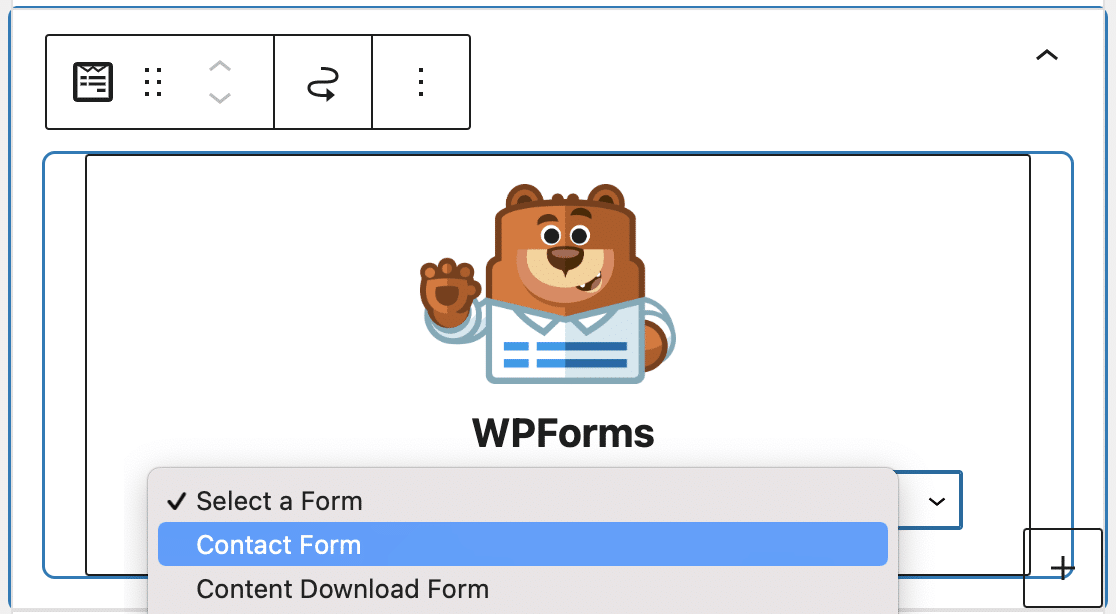
Now, select your form and update the page from the dropdown.
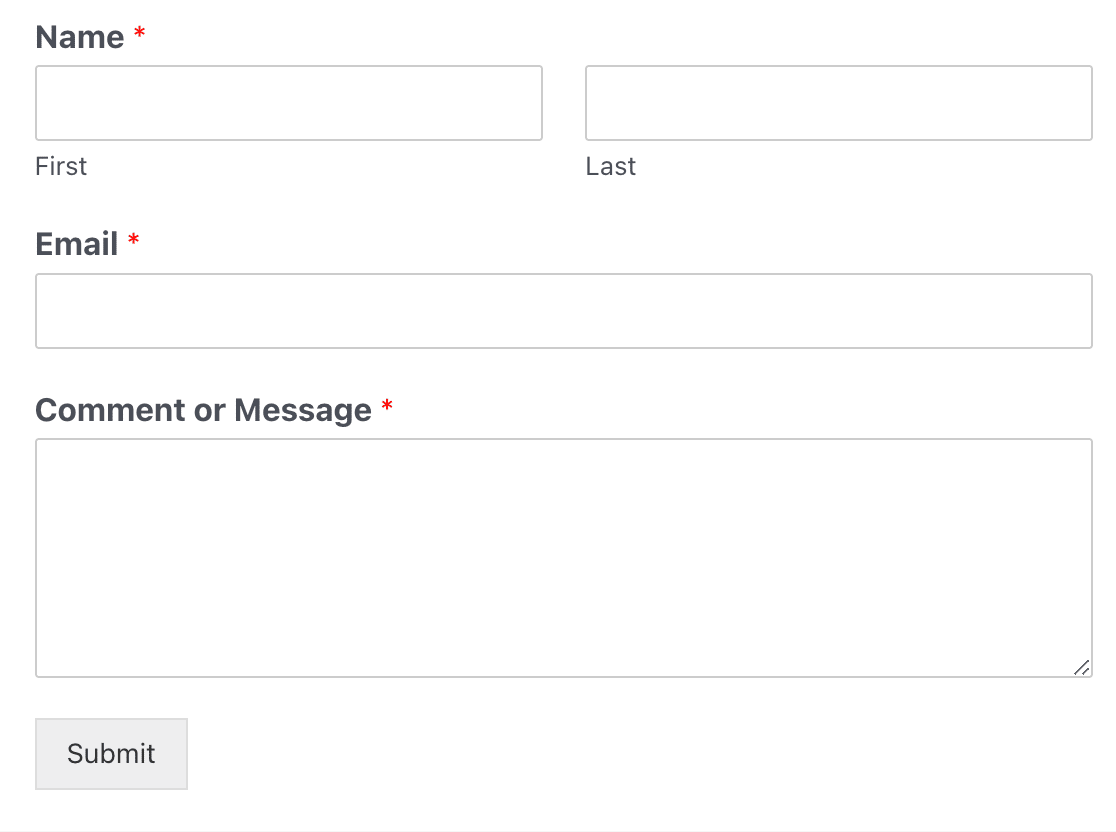
This is how a Simple Contact Form looks on a live page.
Now your form is reading to go and users can start filling it out! There’s just one more thing to check out.
Especially for large sites with lots of forms, it can be hard to keep track of everywhere you’ve published your contact form. WPForms helps fix this by showing your forms’ locations.
To view where your contact form is embedded, go to WPForms » All Forms. Then open the Screen Options at the top of the page and make sure the Locations checkbox is selected.

This will add a column to the table with all your forms that shows the number of places you’ve added each form. Click on it to reveal all the locations for a specific form.
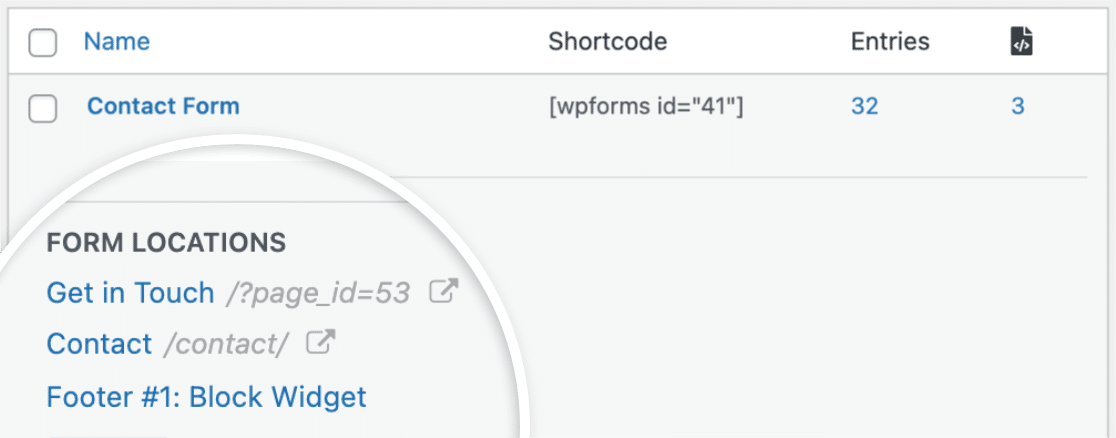
This way, you can always easily see which page your contact form is on.
Next, Create a Divi Contact Form
And there you’ve it! This is how easy it’s to add WPForms to a page in WordPress. Furthermore, if you want, you can also add your contact form to any WordPress post or even as a sidebar widget.
And if you’ve got a website built with the Divi builder, then you might be interested in learning our detailed tutorial on how to create a Divi contact form with WPForms.
WPForms Pro includes awesome features and functionalities that will enhance your form-building experience on your website. You can create powerful online forms like surveys and polls, online donation forms, job application forms, and many more online contact forms.
Create Your WordPress Form Now
Ready to build your form? Get started today with the easiest WordPress form builder plugin. WPForms Pro includes lots of free templates and offers a 14-day money-back guarantee.
If this article helped you out, please follow us on Facebook and Twitter for more free WordPress tutorials and guides.





Is there a way to embed the form to generate a code to embed in an external page (not wordpress) ?
Hey Daniel – I apologise but this is not possible out of the box. This is because WPForms is a WordPress plugin and you will need a WordPress site to make in order to use the WPForms.
Thanks.
How do I feature the “Request Button” Popup next to my add to cart button of my product page?
Thanks
Hey Mohamamd — In order to make sure we answer your question as thoroughly as possible and avoid any confusion, could you please contact our team?
If you have a WPForms license, you have access to our email support, so please submit a support ticket. Otherwise, we provide limited complimentary support in the WPForms Lite WordPress.org support forum.
Thanks.
Does wpforms contact form send emails if it was on a local website?
Hi Hazem,
Yes, notification emails can be received and sent to the submitter if the site is hosted on local environment.
Can you embed a created WPform into a tab menu? If so how?
Hey Dave — In order to make sure we answer your question as thoroughly as possible and avoid any confusion, could you please contact our team?
If you have a WPForms license, you have access to our email support, so please submit a support ticket. Otherwise, we provide limited complimentary support in the WPForms Lite WordPress.org support forum.
Thanks.
How can I add a form to all my pages at once?
Hey Lucy, I am sorry but it is not possible to add a form to all pages at once, a closer workaround would be to add to create a short and add it to your page templates as outlined here.
I hope this helps.
Thank you for this guide, it is very clear and straightforward even for someone new to Wordpress like me. What I don’t understand is how I receive the response if someone completes and submits my form – I don’t have a clue and the tutorial is entirely silent on this essential topic. Sincerely, Mike
Hey Michael – You can take a look at our documentation here to setup form notification emails. In case you’d like to improve the email delivery, here’s a blog post that you can checkout.
Is there a way to add a conversational form to a specific page? In my case I want to insert it in my home page (or at least turning the conversational form my home page)
Hey Joao – We currently don’t have the feature to embed Conversational Forms to a specific page, though it’s on our feature request tracker. As an alternative, you can consider using the Leads Form addon that allows you to create an interactive form to capture leads on your WordPress website.
Buongiorno, pur avendo inserito correttamente le email di chi deve ricevere la notifica e essere certo che le email sono corrette separandole con una virgola …. la email vengono ricevute solo dall’admin.
Come mai ?
Hey Riccardo – Sorry that it’s not working for you as expected. We’ll be glad to help you with this. For the paid users, we recommend reaching out to our team by submitting a support ticket here. Or, if you are using our lite version, please feel free to raise a support thread here.
Thanks.
how do i download and manually install Likert scale?
Hey Sheena – If you’d like to use the Likert Scale field, you’ll need to install the Survey and Polls addon. For more details, please take a look at our documentation here.
Is there a way to embed a form into a woocommerce product page?
Hey Catamara – unfortunately we don’t have a way to embed a form into Woo product page right now. However, I’ve made a note on our feature request list so we can keep it on our radar! Thanks 🙂
Hi there,
I’ve installed the Webform and it is functional, but none of the enquiries are getting to my email address, please can you help?
Hey Tash- I am so sorry to hear that you are facing email delivery issue. To fix this, you can follow this doc.
Hope this helps. Let me know if you have any other questions. Thanks 🙂