
AI Summary
Think about the last marketing email that actually made you stop and read it. I’d bet it felt like it was written for you, not blasted out to a list of 50,000 strangers.
The average inbox is brutal, and a generic “Dear Customer, check out our sale” gets deleted in about half a second, while a message that uses your name, or shows up at exactly the right moment earns the open.
The good news is you don’t need an enterprise marketing team to pull this off. Below are 12 email personalization examples you can borrow, from quick subject-line tweaks to behavior-based automations.
Clever Email Personalization Examples
Email personalization means tailoring an email to the individual getting it, using what you already know about them. Here are some great examples of how to personalize your marketing emails.
- 1. Personalize With the Subscriber's Name
- 2. Recommend Products Based on Browsing and Purchase History
- 3. Trigger Emails From Real-Time Behavior
- 4. Recover Abandoned Carts
- 5. Celebrate Birthdays, Anniversaries, and Milestones
- 6. Personalize by Location (and Even the Weather)
- 7. Send an Annual "Year in Review" Recap
- 8. Let Subscribers Choose What They Hear About
- 9. Automate Segmentation Based on Behavior
- 10. Use Dynamic Content Blocks
- 11. Personalize the Emails Your Forms Send Automatically
- 12. Personalize Your "From" Name and Sender Identity
- Email Personalization Best Practices
- How to Measure Your Email Personalization
1. Personalize With the Subscriber’s Name
A subscriber’s first name is the oldest trick in the book, and it still works because it makes a mass email feel personal. You’ve seen it a hundred times, and “Hey Sarah, we saved your cart” reads very differently from “Dear Valued Customer.”
Most email tools let you drop a merge tag like {first_name} into the subject line or greeting. The real trick is collecting a clean first name in the first place, which is where your signup form matters.

If the name field is one open text box, you’ll end up with “sarah,” “SARAH,” and “sarah m.” all mixed together, so a proper Name field with separate first and last inputs saves you a cleanup headache later.
You can personalize the automated emails your own forms send, too, using smart tags. I’ll cover exactly how in example 11.
2. Recommend Products Based on Browsing and Purchase History
Netflix emails you about a show because it matches what you’ve already watched, and Amazon nudges you about the thing you looked at twice last week but never bought.
The engine behind it is behavior data, meaning what someone clicked, viewed, or purchased. Your email platform or store connects those actions to a profile and picks products to feature automatically.
Even a small site can run a simple version of this, like emailing everyone who bought a camera a week later with a few lens recommendations.

3. Trigger Emails From Real-Time Behavior
Some of the best personalized emails aren’t scheduled at all, they fire the moment someone does, or doesn’t do, something.
Duolingo is famous for this, and if you skip your language practice, that owl will email you a guilt trip that somehow works.
Behavior-triggered emails land because the timing itself is the personalization, such as a welcome email the minute someone subscribes, or a nudge the day before a free trial ends.

4. Recover Abandoned Carts
If you sell anything online, cart abandonment emails are some of the highest-return personalization you can set up.
Someone added an item, got distracted, and left, and a well-timed reminder showing the exact product they left behind brings a surprising number of them back.
The good ones include the item, a photo, and sometimes a small incentive to finish checking out. If you want to see how different brands word these, we put together a whole post of cart abandonment email examples worth borrowing from.

5. Celebrate Birthdays, Anniversaries, and Milestones
People open birthday emails, and a “Happy birthday, here’s 15% off” message feels like a small gift rather than a sales pitch. The same goes for anniversaries, like the date someone signed up or made their first purchase with you.
You only need one piece of data to start, which is a date. Ask for a birthday on your signup form and keep it optional so you don’t scare people off, then let your email tool send the offer automatically each year without you lifting a finger.

6. Personalize by Location (and Even the Weather)
Where someone lives changes what’s relevant to them, so location is one of the most useful things you can personalize around.
A store can promote its nearest branch, an event organizer can email only the people close enough to attend, and clothing brand UNIQLO has even sent emails showing the recipient’s local weather forecast next to matching product picks.
To personalize by location, you first need location data. The WPForms Geolocation addon, a Pro feature, collects and stores a visitor’s geolocation alongside their form entry, so you can see their city, zip code, country, and a map right next to what they submitted.

From there, you can segment your list by region and send location-specific offers. And if you want the map on your contact form itself, here’s how to add a contact form map.
7. Send an Annual “Year in Review” Recap
Once a year, Spotify emails everyone a recap of their listening, complete with top songs, total minutes, and favorite genres, and people post it all over social media.
It works because it’s about the subscriber, not the product. You don’t need Spotify’s data science team to try a smaller version.
A fitness app can recap someone’s workouts for the year, a SaaS tool can show how much time a customer saved, and a store can total up a loyal shopper’s orders.

8. Let Subscribers Choose What They Hear About
Sometimes the best way to personalize is to simply ask, so let people pick the topics they care about when they subscribe, and every email after that becomes more relevant on its own.
A publisher can let readers choose content categories, and a store can let shoppers follow specific product lines. This is where your signup form does the heavy lifting.
Add a checkbox or dropdown of interests, then map those choices to groups in your email tool. If you use Mailchimp, here’s exactly how to let users select Mailchimp Groups in your form.
Connecting forms to Mailchimp uses a marketing integration, which is available on the WPForms Plus plan and up, and it’s one of the easiest ways to grow your email list with data you can actually use.

9. Automate Segmentation Based on Behavior
Self-selection works, but not everyone will bother to do it. The alternative is to segment people automatically based on what they do on your site. Someone reading ten articles about Labradors probably wants your dog content, whether or not they ever fill out a preference form.
OptinMonster is built for exactly this, and its page-level targeting lets you show a different signup offer depending on the page someone is viewing, then add them to the matching segment automatically.

So a visitor reading about Labradors sees a Labrador-specific optin and joins that group, with no extra questions asked. You can even connect your WordPress forms with OptinMonster to create a contact form popup that does the same thing.
10. Use Dynamic Content Blocks
Dynamic content brings personalization inside a single email. Instead of building five versions of a newsletter, you build one where certain blocks swap out based on who opens it.
The same campaign can show a men’s product block to some readers and a women’s block to others, or change the header image based on where someone lives.
It takes more setup than a simple merge tag, but it means one campaign can feel tailored to every segment at once, without you managing a pile of separate sends.
11. Personalize the Emails Your Forms Send Automatically
Every time someone submits a form on your site, WPForms can send them a personalized confirmation or thank-you email using smart tags, which are little placeholders that pull in whatever the person typed.
By default, WPForms sends a notification to you, the site owner, with the submission details. To send a personalized email to the person who filled out the form instead, you add a second notification.
From the form builder, go to Settings » Notifications. Leave the default admin notification alone and click Add New Notification.

In the new notification, clear out {admin_email} in the Send To Email Address field so it doesn’t come back to you. Then click Show Smart Tags and choose Email to insert the tag for the address the user entered on your form.

Now personalize the subject line by adding the Name smart tag, which greets people by name and makes an automated message feel genuinely human.

Do the same in the message body, mixing your own copy with smart tags for anything the person submitted.

That’s a genuinely personal email going out automatically on every single submission. If you’d like more than one, here’s how to create multiple form notifications.
Sending this separate email to the user requires a second notification, which is available on WPForms Basic and higher.
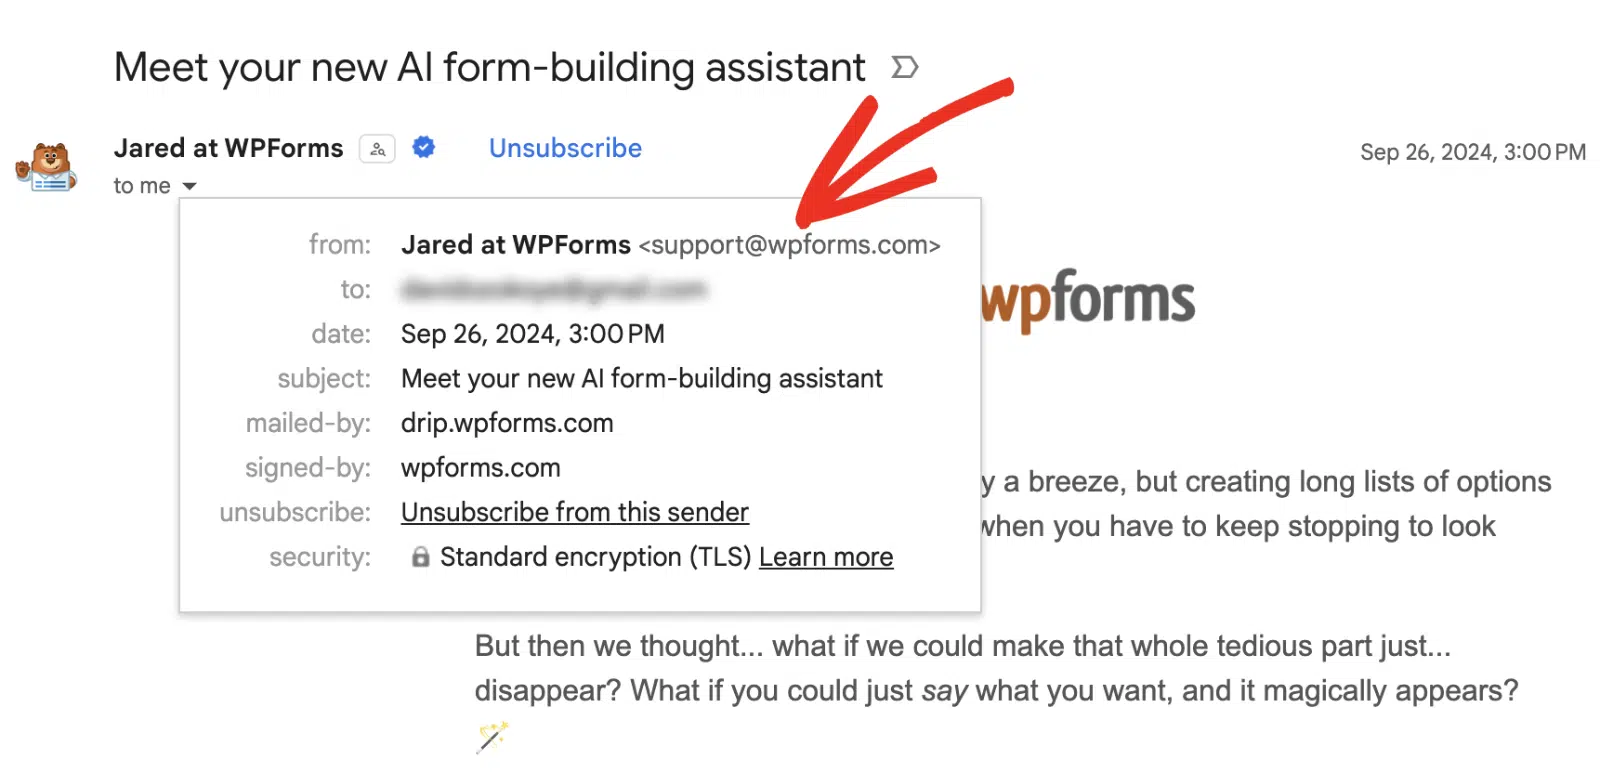
12. Personalize Your “From” Name and Sender Identity
An email from “Jared at WPForms” feels more personal than one from a faceless “WPForms Marketing Team,” and HubSpot once even ran an A/B test for this.
An email from a real team member earned a 0.96% click-through rate versus 0.73% from the company name, which added up to hundreds more clicks on the same list.
A recognizable sender name and a consistent logo tell people the email is really from you, which helps both your open rates and your deliverability.
You can set your own From Name in the WPForms notification settings, and you can take it further by adding a custom header image to your email template so every message carries your branding.
Email Personalization Best Practices
- Collect data with a reason: Only ask for information you’ll actually use to personalize. A birthday field makes sense if you send birthday offers, but asking “just because” only hurts your conversion rate.
- Keep your data clean: A “Hi {first_name}” that goes out as “Hi ,” looks worse than no personalization at all, so validate your form fields and set fallback values.
- Don’t be creepy: Referencing someone’s behavior is powerful, but there’s a line. “We saw you looking at this” can feel like surveillance, so keep the tone helpful rather than watchful.
- Segment before you scale: Even two or three segments beat sending everyone the same thing. Start simple and split your list further as it grows.
- Match the tool to the job: Your website form collects the data, but the sending happens in your email platform. If you’re still choosing one, here’s a rundown of the best email marketing service options.
How to Measure Your Email Personalization
Most email platforms report open and click rates out of the box, and comparing one personalized campaign against a generic one tells you quickly whether the extra effort pays off.
One gap most people miss is that the transactional emails your WordPress site sends, like those personalized form confirmations from example 11, don’t always show up in your marketing platform’s reports.
To track opens and clicks on those, I use WP Mail SMTP, which logs your WordPress emails and shows open and click stats right in your dashboard. It also makes sure those emails actually reach the inbox instead of landing in spam.

FAQs on Email Personalization
Email personalization comes up a lot when people start building their list. Here are quick answers to the questions I hear most about personalized email examples and how to set them up.
How do you personalize an email?
Start by collecting useful data through your signup or contact forms, then use your email platform’s merge tags and segmentation to tailor the content.
That can mean adding a first name, sending based on behavior, or swapping content blocks by segment. The 12 examples above walk through the most effective ways to do it.
What is an example of a personalized email?
A cart abandonment email that shows the exact product you left behind is a classic example, as is a birthday discount or a “year in review” recap like Spotify Wrapped. Even a simple form confirmation email that greets you by name counts as personalization.
Why is email personalization important?
Generic emails get ignored, while relevant ones get opened. Personalization consistently lifts open and click rates because it respects the reader’s attention, and it turns a one-way blast into something much closer to a real conversation.
What data do you need to personalize your emails?
You can start with almost nothing beyond a first name and an email address. As you grow, form fields, purchase history, and behavior data like the pages someone visits let you personalize much further. The key is collecting that data cleanly right at the point of signup.
Next, Turn Your Form Data Into Personalized Emails
Ready to put this into practice? Build a signup form that collects the right data and connects to your email tool, then layer in the tactics above.
If you’re just getting started, our guide on how to create an email newsletter walks you through the basics, and these lead generation plugins can help you grow the list you’re personalizing for in the first place.
Start Collecting Smarter Form Data
Ready to build your form? Get started today with the easiest WordPress form builder plugin. WPForms Pro includes lots of free templates and offers a 14-day money-back guarantee.
If this article helped you out, please follow us on Facebook and Twitter for more free WordPress tutorials and guides.


But how can the styling of the HTML email be cusomized?
Hi Allie,
This depends on what styles you’d like to change. We have built-in options, for example, to add a header image or change the background color of emails.
If that’s not what you have in mind, please get in touch so we can better address what you’re looking for.
If you have a WPForms license, you have access to our email support, so please submit a support ticket.
Otherwise, we provide limited complimentary support in the WPForms Lite WordPress.org support forum.
Thanks 🙂
Hi, wondering if this is an added feature yet? Can we have full control over the HTML notification emails that are sent out? It is not enough to just add a header image and change the background color. I’d love if we could truly stylize the email sent out by even adding custom HTML ourselves and more finer visual controls for the emails.
Hi Sasha, thanks for reaching out to us!
I apologize at moment we don’t have an update regarding this feature. However, we do allow HTML in the notification body, and if you’d like to make modifications to that you can do this right in the form builder under Settings > Notifications.
In case it helps, here is our detailed tutorial of how to use HTML in the notification settings, as well as how to change styles with a custom email header file..
I’ve noted your interest in this feature and added your email to our list to receive updates about this feature.
If you ever have questions, please feel free to reach out to us by submitting a support ticket from the email account you purchased the license.
Thanks and have a good one!