AI Summary
Do you want to harness the power of a form builder with conditional logic?
Conditional logic lets you set rules on how a form should behave based on the user’s selections and entries. It means you can show and hide fields as needed, send different confirmations and email notifications, and much more.
In this post, we’ll look at different ways you can use forms with logic to improve user experience.
Add Conditional Logic to WordPress Forms
What Are Conditional Logic Forms?
A conditional logic form is a dynamic form that changes based on the user input. For example, a survey form might use conditional logic to show different questions to different users based on their previous answers.
When used correctly, conditional logic is a powerful tool that can improve user experience by only showing form fields most relevant to them.
Ways to Use Conditional Logic to Create Killer Forms
WPForms is a drag-and-drop form builder with exciting conditional logic capabilities, so if you’re ready to start learning how to use that to make killer smart forms for your WordPress website, let’s jump right in.
In This Article
1. Show Only the Most Relevant Information
An easy way to make a big impact with conditional logic is by using it to show the most relevant information. It helps to avoid needlessly long forms.
Here’s an example of a job application form that asks applicants to first select the role for which they’re applying.
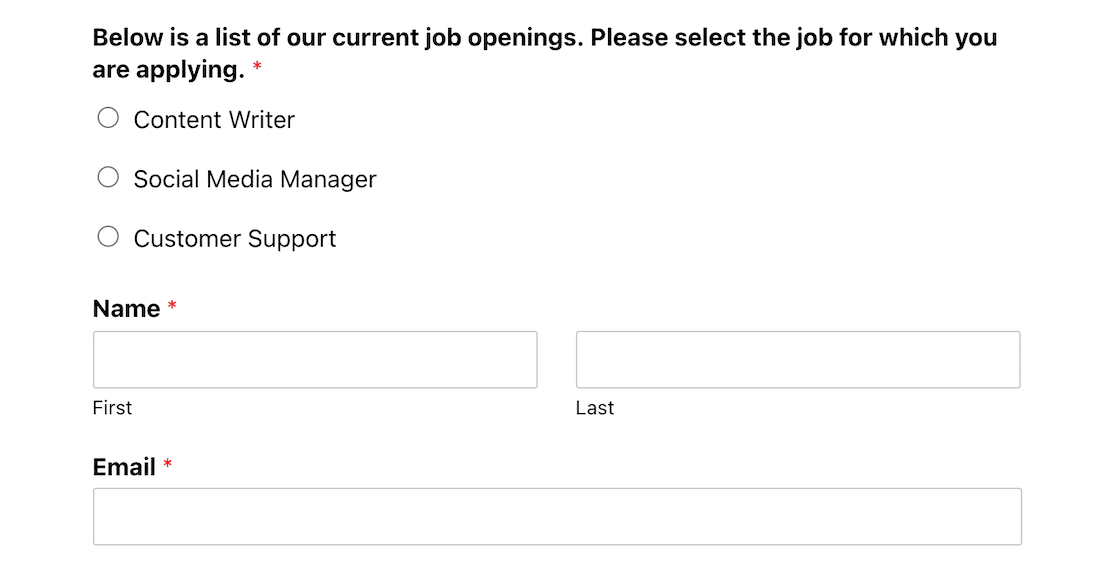
The rest of the form looks pretty basic, but look at what happens when you select the radio button for one of those positions to apply.
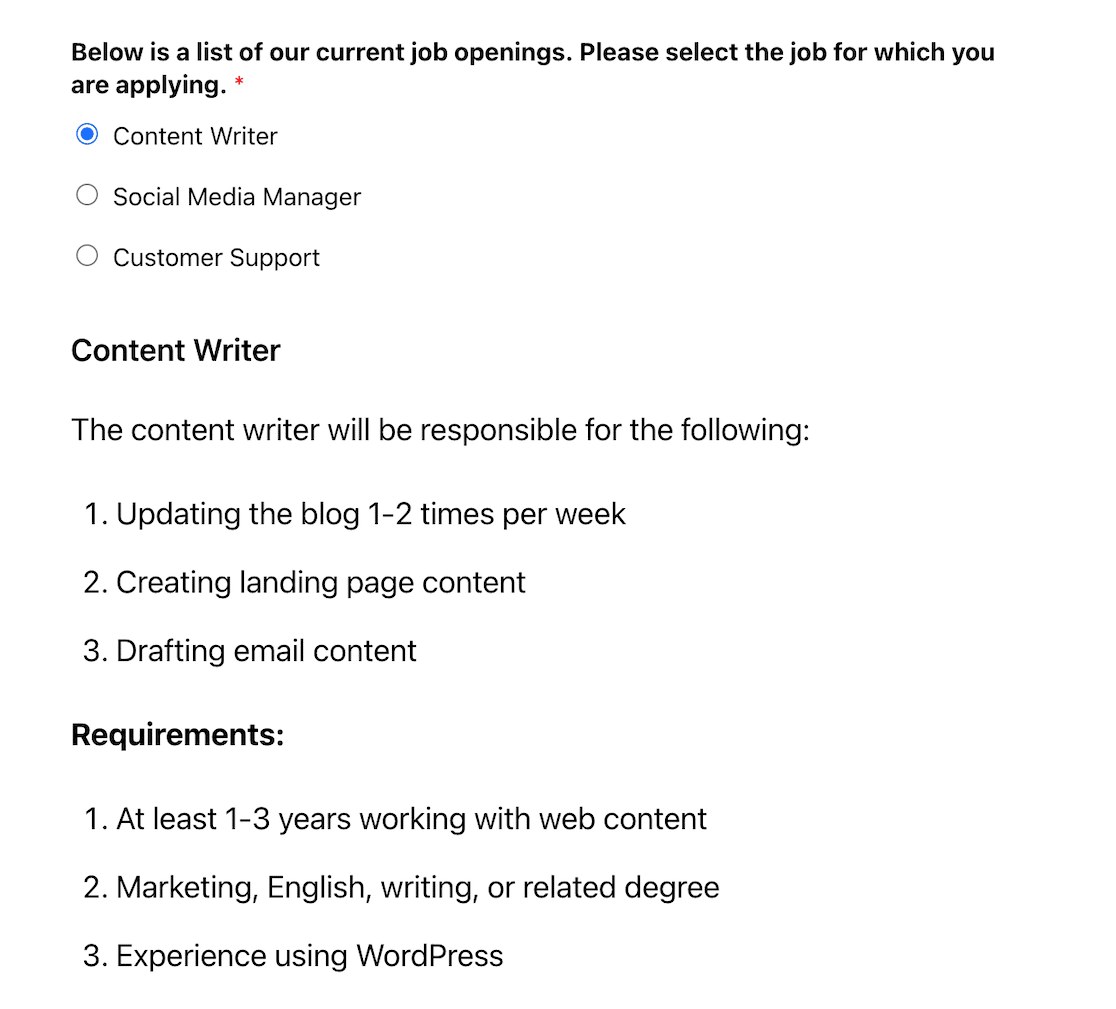
A brief job description and the requirements that are specific to that position appear. At the bottom of the form, there are role-specific questions that the applicant must answer to apply.
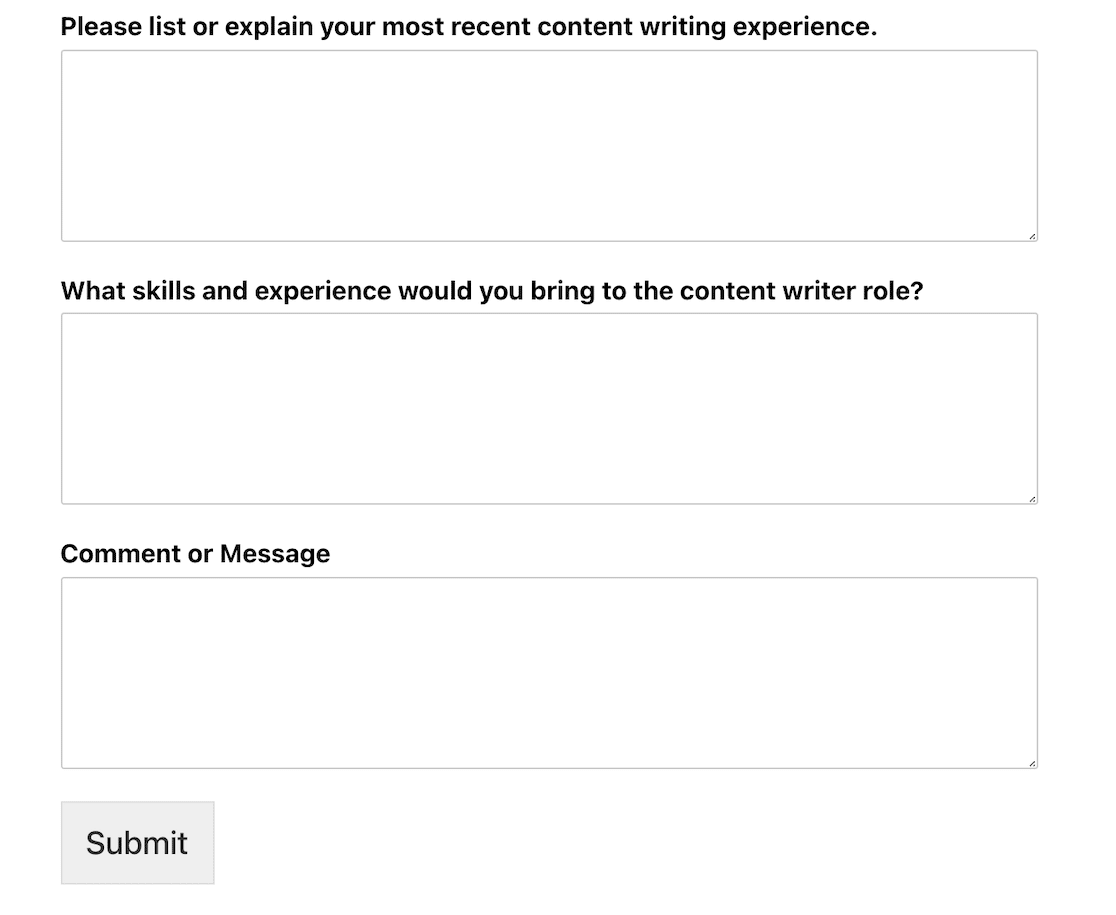
How does this happen? Through conditional logic, which can significantly enhance your hiring process. Let’s look at the settings for this form to see how it works.
In the form builder, you can see that the question asking which role interests them is a Multiple Choice field. Next, we’ve used the Content field to add more information about each role.
To make the Content field appear with the instructions for the selected role, just click on the field to go into its Field Options and then select the Smart Logic tab. From there, you can enable Conditional Logic and create a rule to show the appropriate Content field when a specific role is selected using the Multiple Choices field.
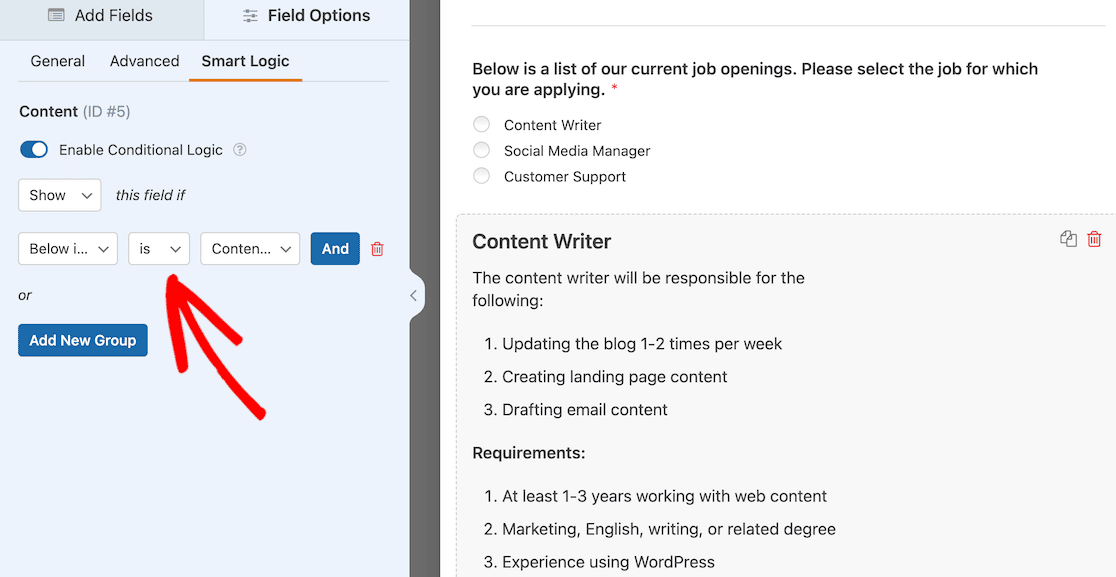
You can add unique instructions for each role by inserting multiple instances of the Content field and then repeating the same process above.
2. Collect Additional Feedback in Surveys
Let’s say you’ve built a super simple customer survey using WPForms. It’s something customers can complete in less than a minute.
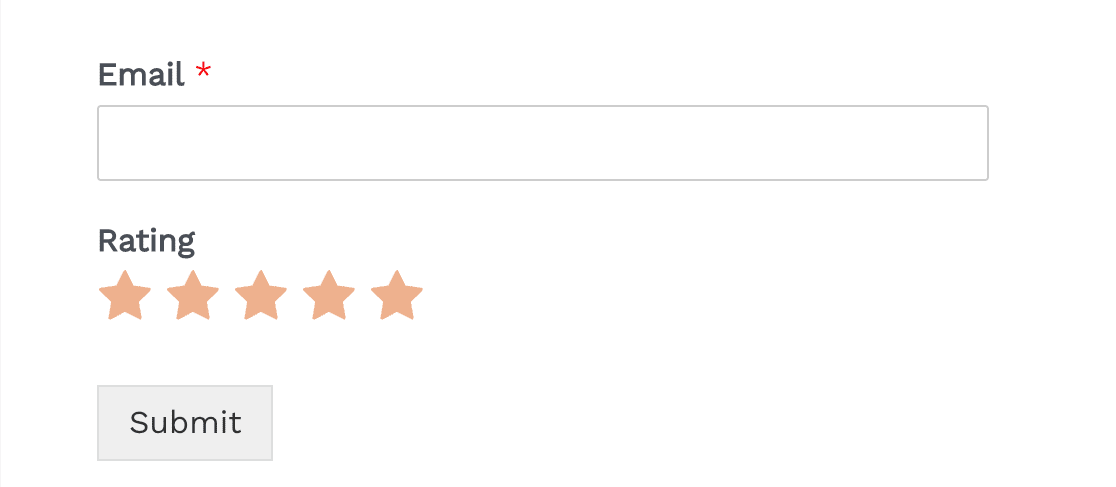
But maybe you want a little more information depending on the kind of rating a user gives. Whether a user gives you a low rating or a high one, it’d be valuable information to learn what you need to fix and what you’re doing well.
We can set up this feedback form so that conditional logic triggers one set of questions if someone answers one way and another set of questions if they answer another way.
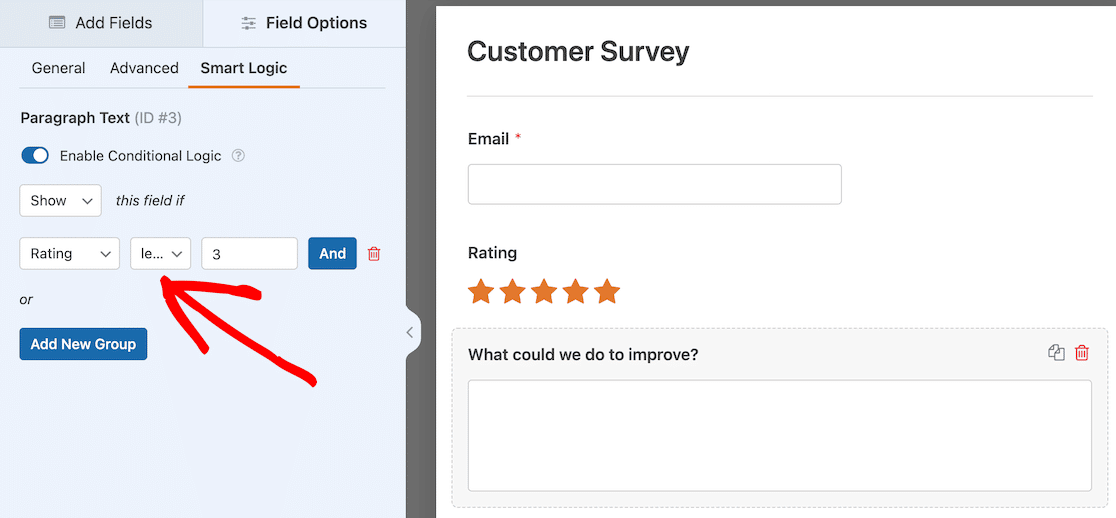
To set that up, you’ll go into your form builder and add a Paragraph field with the follow-up question you want to ask.

Since this is a question you’d ask if you get a low score, we’ll set that up as a conditional field.
With the field settings open for that question, we click on the Smart Logic tab in the field settings on the left.
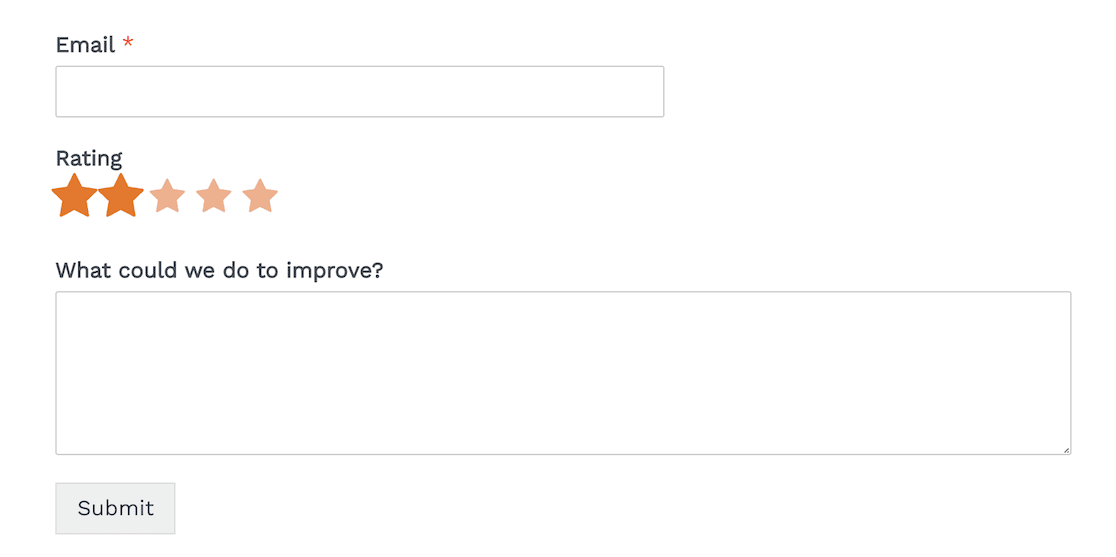
Then we use the toggle to enable Conditional Logic and set the rules. We want that rule to say that if the rating field receives a score less than 3 stars (i.e. 1 or 2 stars), the “what could we do to improve?” question will display.
Next, we’ll set up a similar rule for ratings higher than 2.
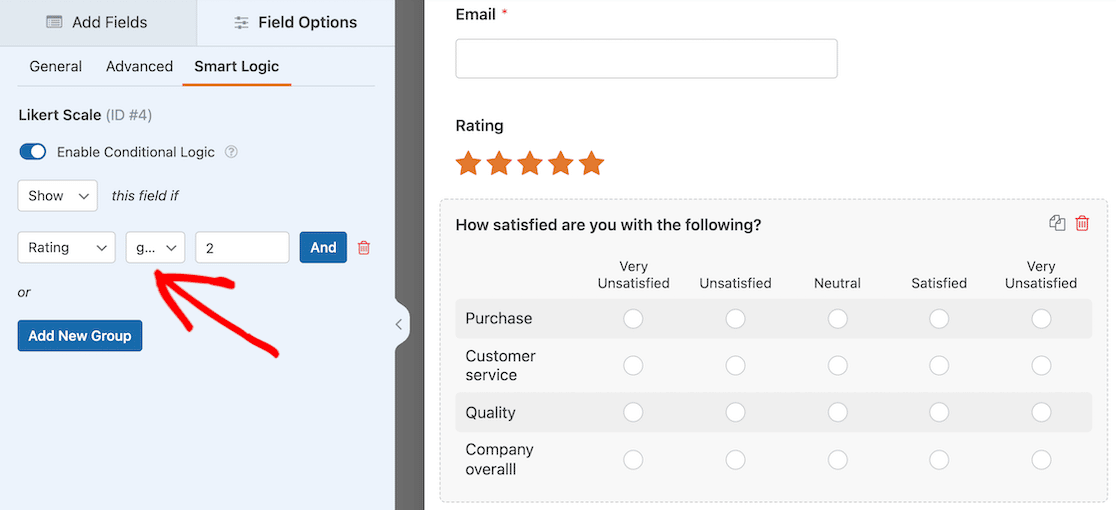
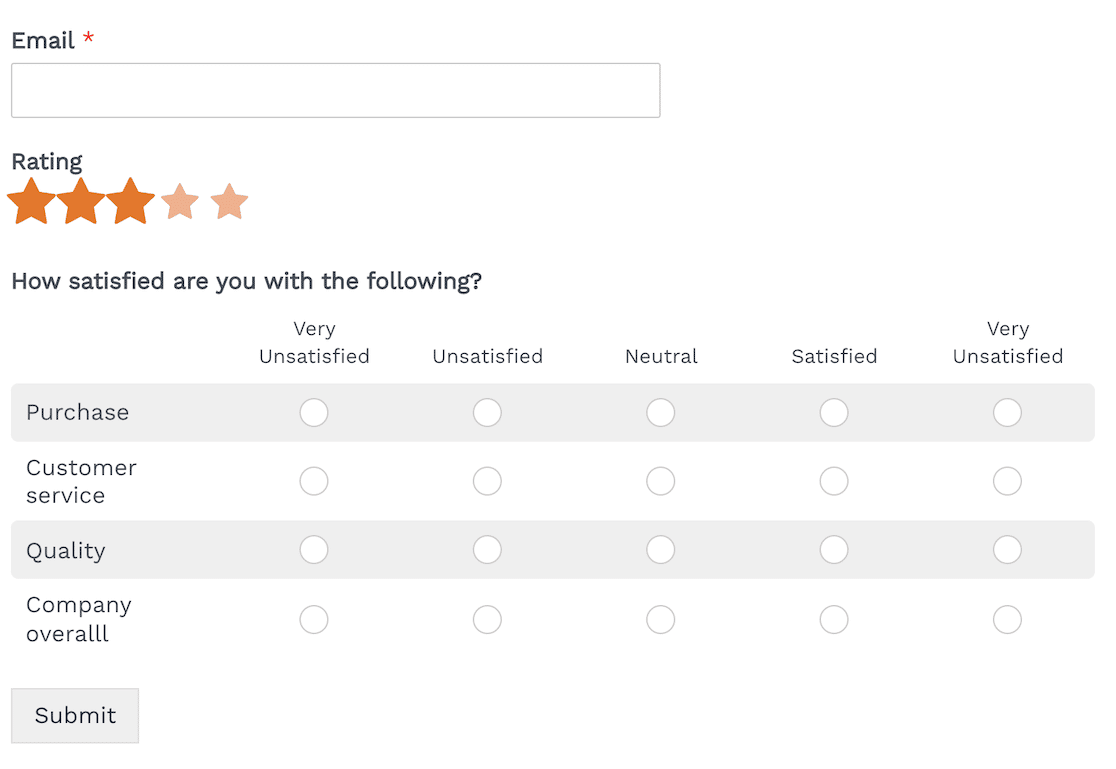
For positive feedback, we’ve created a Likert Scale to ask respondents how satisfied they are with specific aspects of the business. In the field settings for the Likert Scale, we’ve selected the Smart Logic tab at the top.
This time we set the rule to show this option if the rating is greater than 2. This means a rating of 3-5 is considered positive, and those users will see the Likert Scale question appear as soon as they give their rating.
Once satisfied with your conditional logic options, you can publish your survey.
Here you see that someone who gives a rating of 3 or above sees the Likert Scale.
Someone who rates 2 or below will see the improvement question instead.
The survey is still very simple, but conditional logic means that users will only see the information that’s most relevant to them.
3. Set Up Alternate Confirmations
On every form you create with WPForms, you can set up a default confirmation response. After every form submission, then, the user will receive that response.
But what if you want to use different confirmations based on the information the user provided on the form?
That’s when you can use conditional logic to set up alternate confirmations. It’s easy to do with our user-friendly online form builder.
Let’s walk through an example in which we’re going to create an alternate confirmation that will only be sent to users who indicate that they have billing questions.
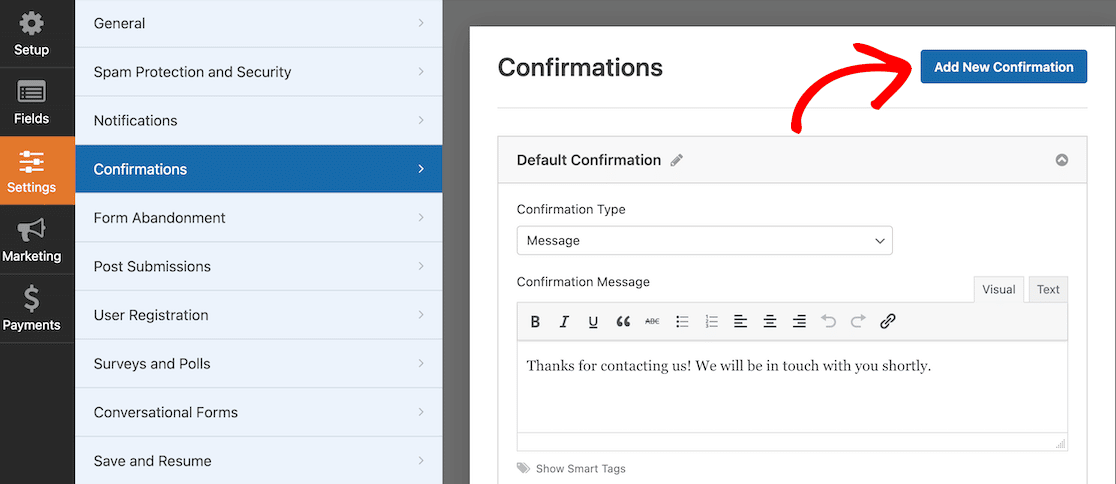
With your form open in the WPForms form builder, click Settings » Confirmations in the lefthand menu. At the top, click on the Add New Confirmation button.
Next, you’ll need to give your new confirmation a name. Users won’t see what you name it. It just streamlines your internal workflows.
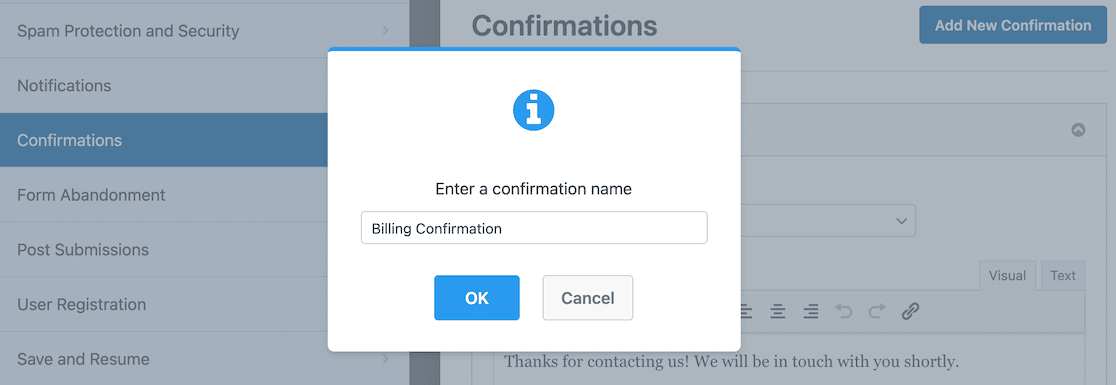
Once you’ve named the confirmation and confirmed it, a new confirmation appears above your default. In our example, we’ve created a new billing confirmation for users who indicated on the form that they have billing questions.
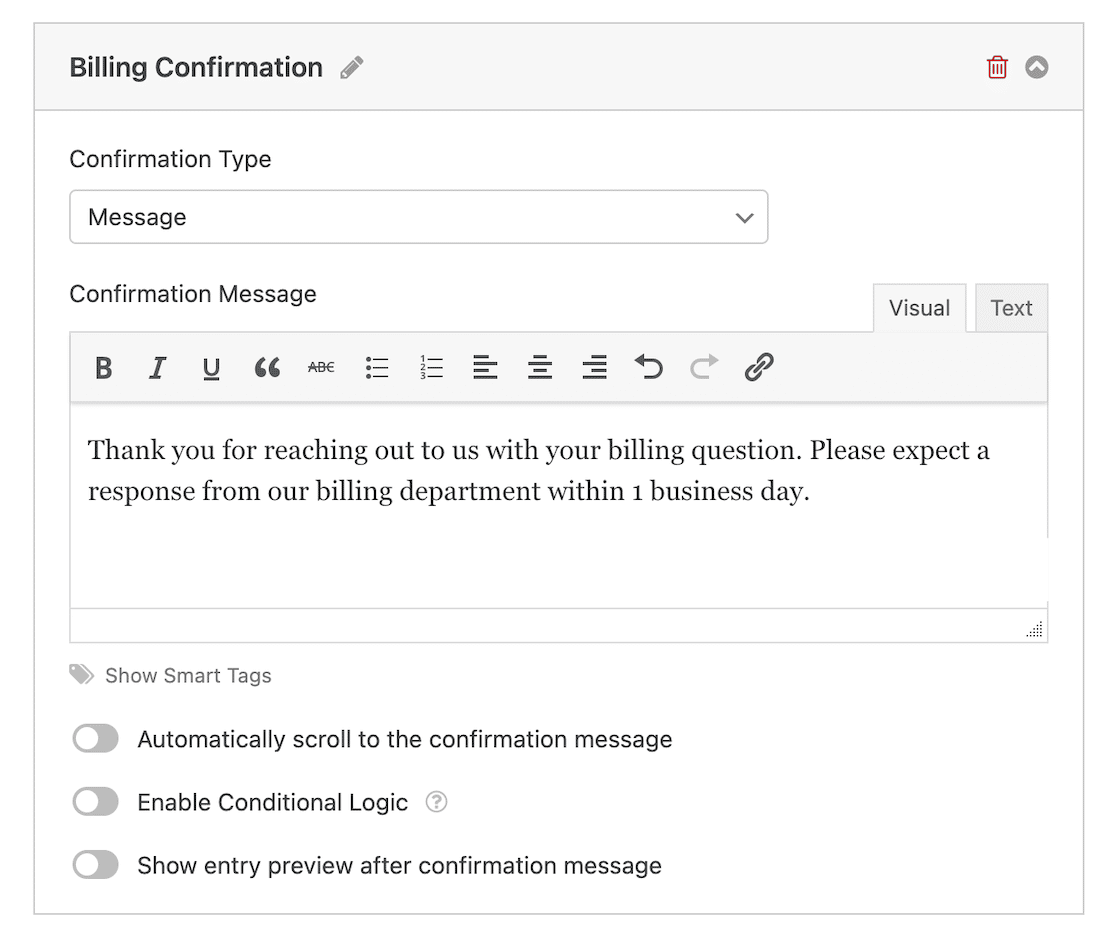
You can see that we’ve tailored the message to let customers know what to expect once they’ve submitted the form.
Next, we’re going to set up the conditional logic. To do this, you need to set the toggle button next to the option to Enable Conditional Logic.
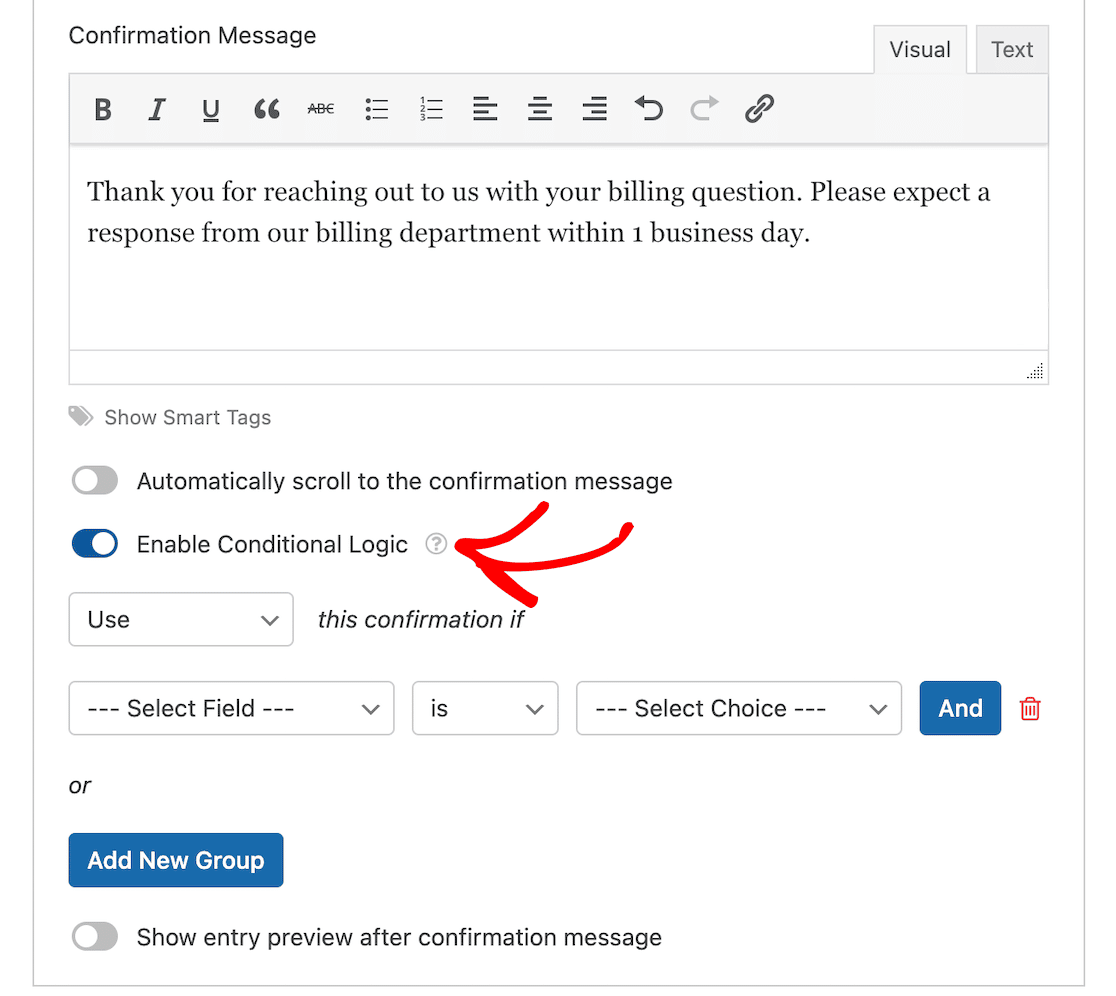
When you do that, you get options for when to send this specific confirmation. The field types you see will depend on what’s on your form.
We want this confirmation to go to users who indicated on the corresponding contact form that their question is about billing.

And that’s it! Once you save the form, this confirmation message will go out to everyone who meets the criteria you’ve set up with your conditional logic. You can add as many confirmations and conditions as you need.
4. Create a Multi-Contact Form
Building off of our last example, what if you could set up your form so notifications always reached the right people? Instead of one inbox receiving all messages, billing questions could go to billing, sales questions could go to sales, and so on.
Rather than creating new forms for every department, you can make that happen with conditional logic.
First, you have to make sure there’s a field on your form to let users indicate where they want to direct their questions. An easy way to achieve that is with a dropdown list.
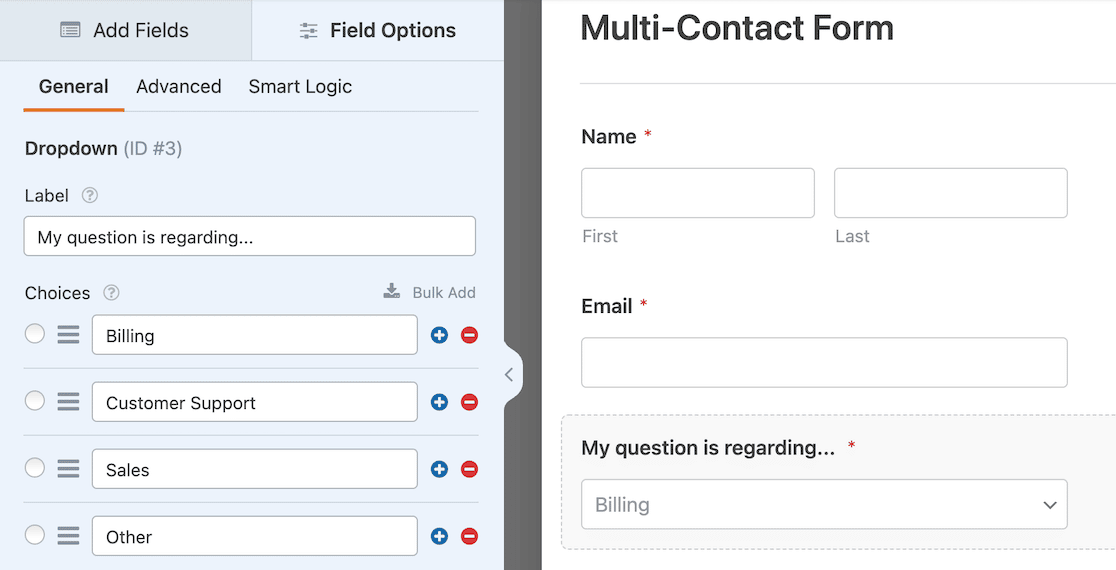
This field will be the basis for your conditional logic settings and tell the form where to send each message.
With your form open in the WPForms form builder, click Settings » Notifications in the lefthand menu. At the top, click on the Add New Notification button. When you do that, you’ll get a prompt to name your notification.
In this case, we want to notify the billing department when someone has a billing question, so we’ll call it that. The name is just for your organizational purposes and isn’t public.
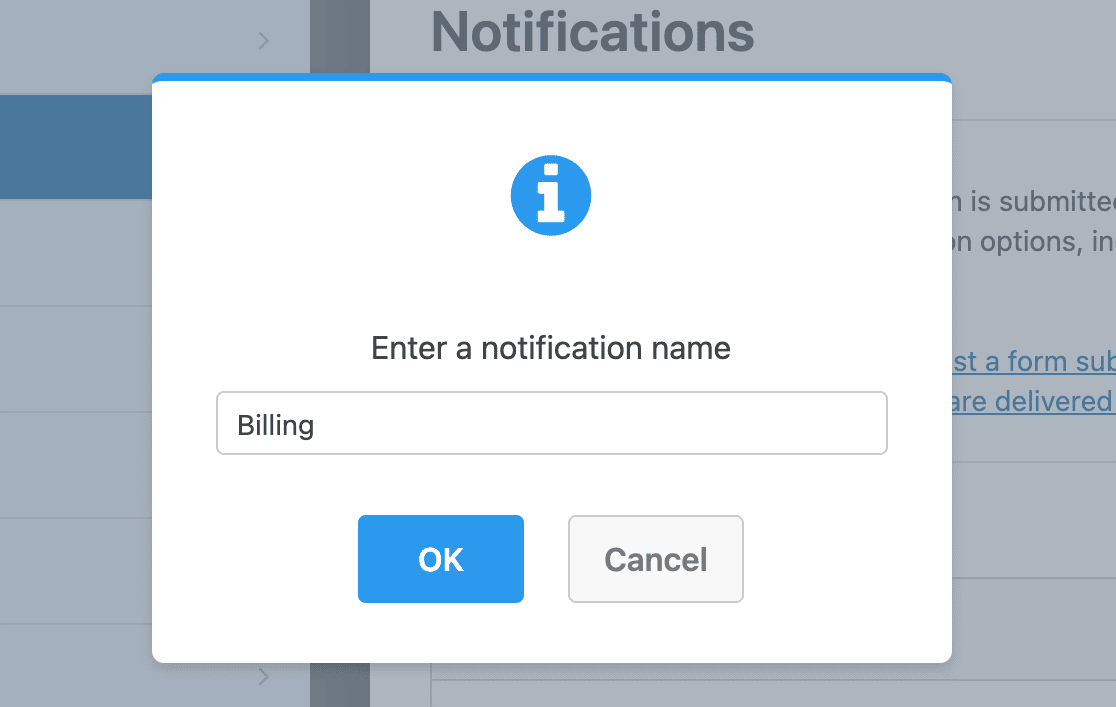
When your new notification is set up, the first thing you can do is enter an email address for that notification. In our example, we used a billing email address since it’s for billing questions.
You can also adjust any of the other form fields if you like.
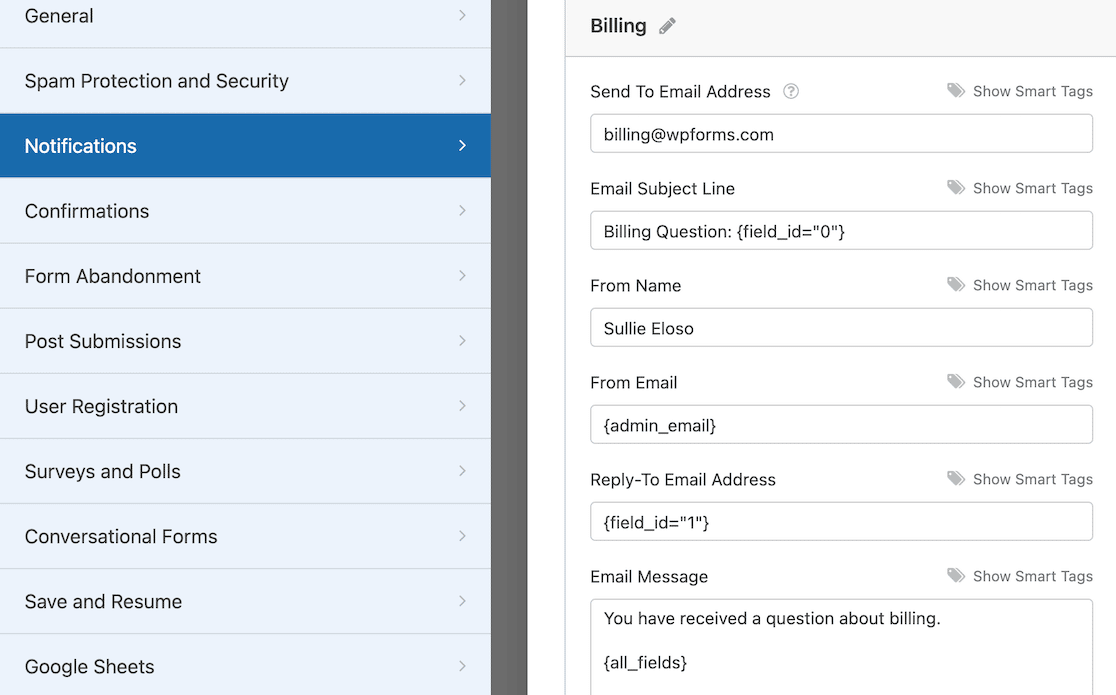
Below the last notifications field for the Email Message, you’ll find the toggle switch to enable conditional logic. Once you do that, you can set the conditions.
In our example, we want to notify the billing department when someone indicates on our contact form that they have a billing question.
We can also customize the email message to match the nature of the inquiry.
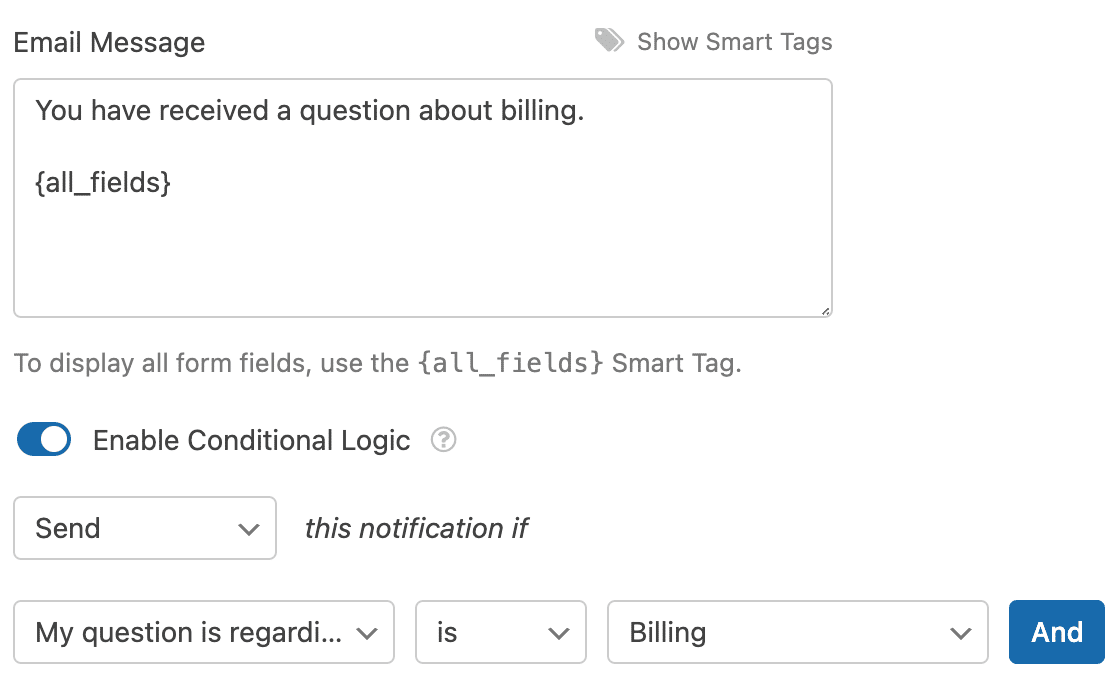
That’s all there is to it. You can add a new confirmation message for every department corresponding to your contact form and use conditional logic to make sure the right team always gets the message.
5. Set Up Lead Routing
Using a similar process to the multi-contact form setup above, you can also set up lead routing with conditional logic.
Let’s say you have a form that you’re using to capture leads on a landing page or popup on your site.
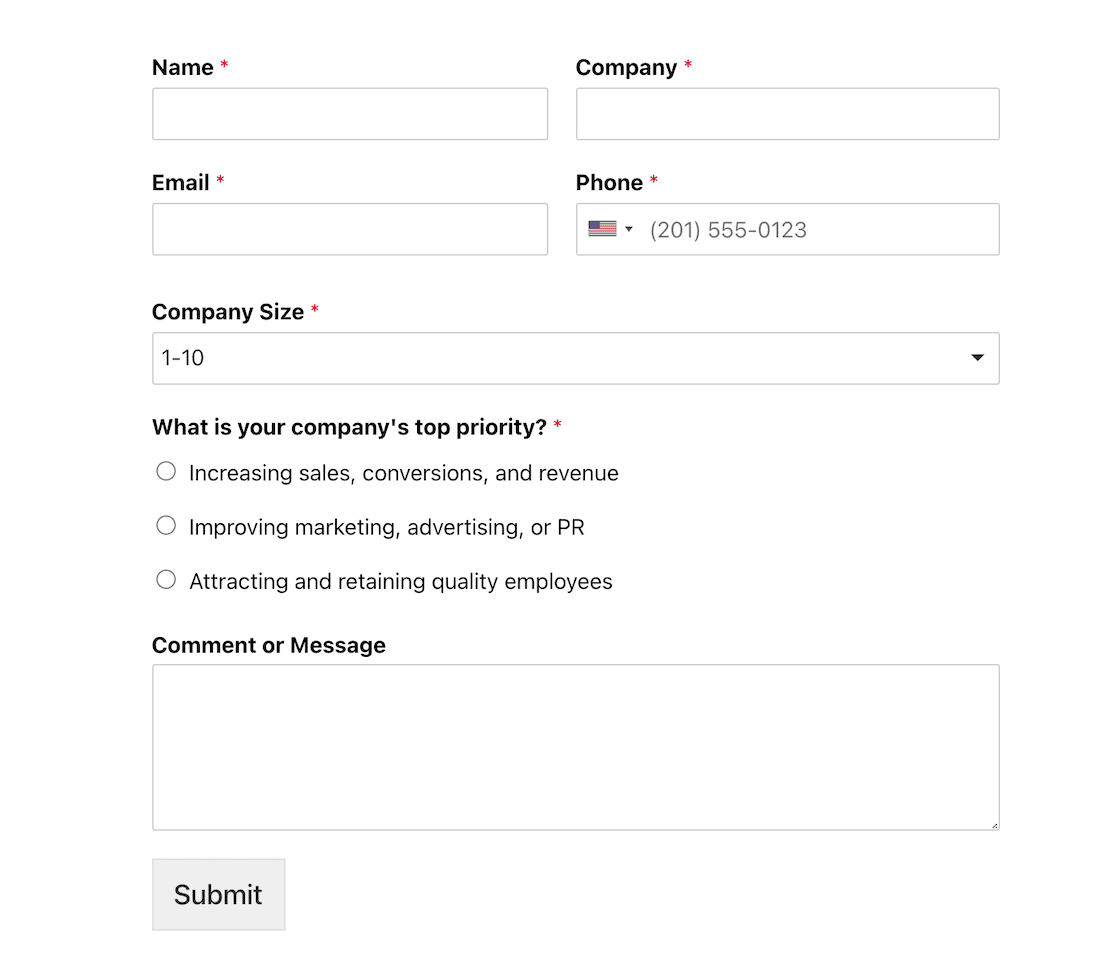
You want the right team to receive the lead based on the response. To get started, follow the steps from the previous example with the multi-contact form. Go to Settings » Notifications, and click on Add New Notification.
In the case of our form, we will need 3 notifications to route the leads. Let’s start with sales.
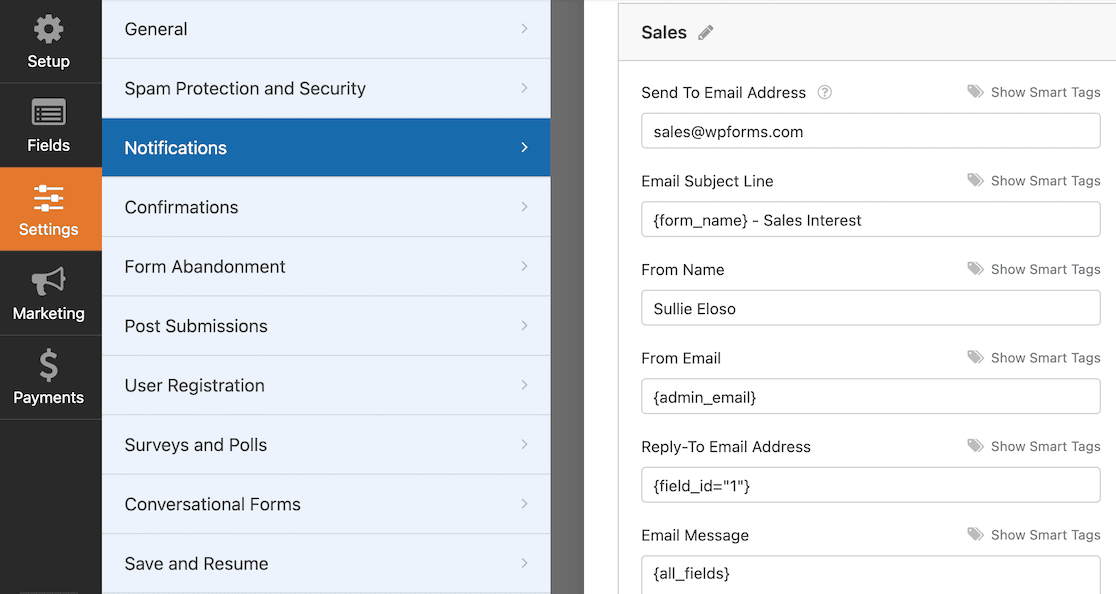
Ensure the Send To Email Address field contains an email address for your sales team.
Next, you’ll enable conditional logic at the bottom of your new notification.

Repeat those steps for each lead type on your form, and know that the message will always get to the right team. Customers and prospects will love the reduced response time!
6. Send Users to a Specific Confirmation Page
Suppose you have a survey form where users can indicate their interest in joining your organization or getting more information.
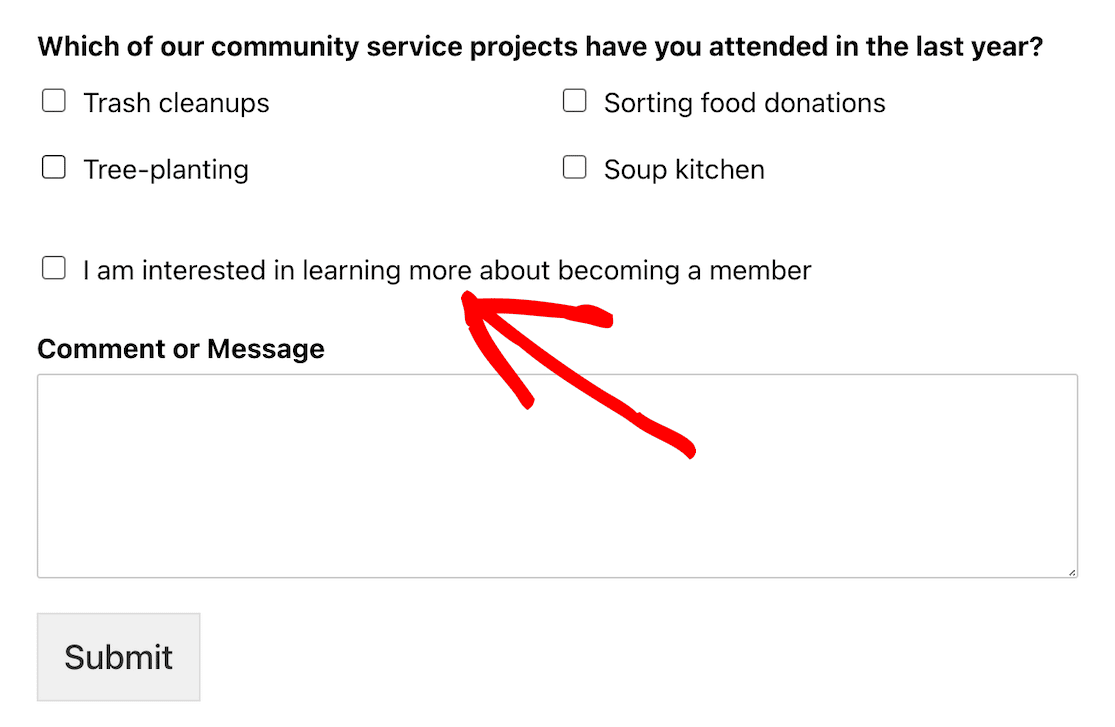
In that case, a specific confirmation page can direct them to more information or resources.
Once again, we’ll get started by going to Settings » Confirmations » Add New Confirmation in your form settings. Give your new confirmation a name.

The default confirmation is a message, but if you want to send users to a specific page, you’ll need to change that confirmation type setting.
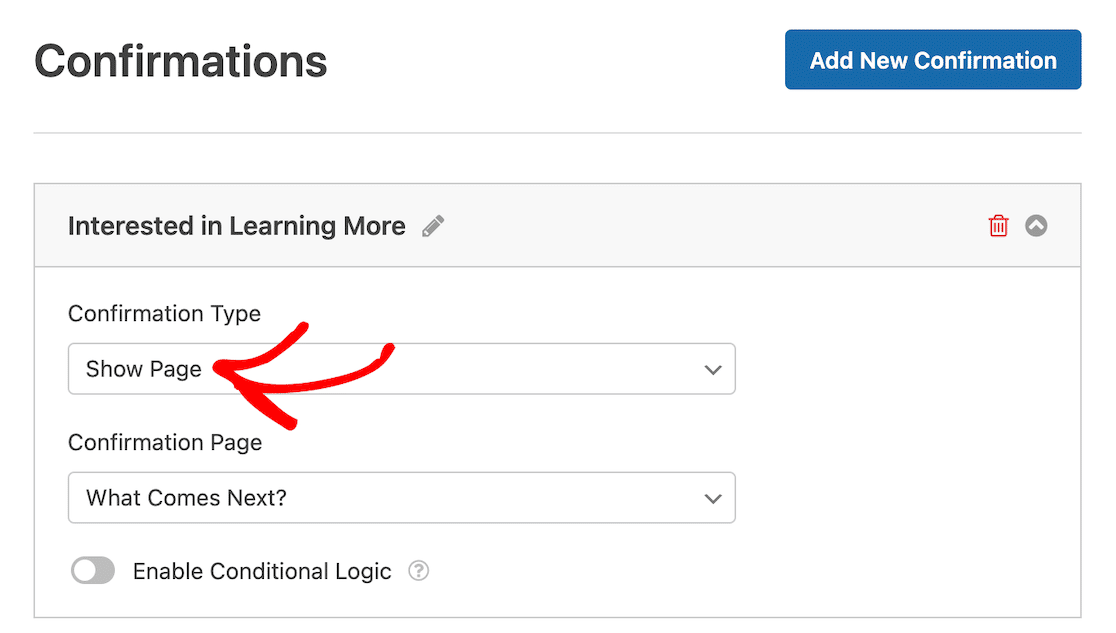
After you change the confirmation type to Show Page, you’ll be able to select which page from your WordPress site you want to use for the confirmation page.
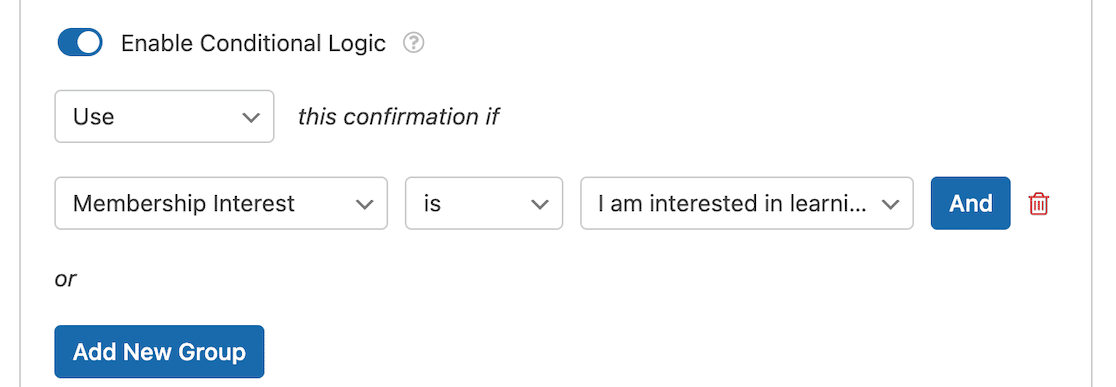
After enabling conditional logic, you can configure the settings. In this example, we want the user to land on this confirmation page after selecting the checkbox on the form saying that they’re interested in learning more about becoming a member.
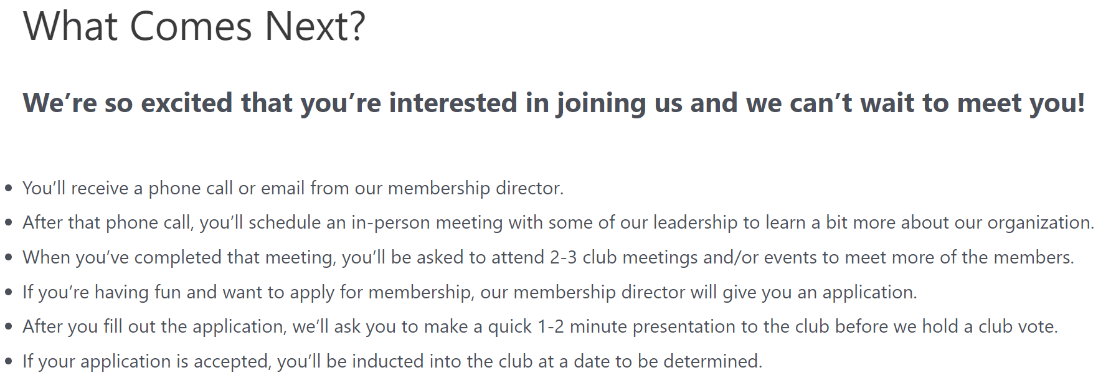
After you save those settings, all users interested in learning more will be redirected to a landing page letting them know what comes next.
7. Show Age-Appropriate Form Fields
You might sometimes find that not all of your form response options are age-appropriate for everyone who might respond. One use case we can look at is our reading program book log form template.
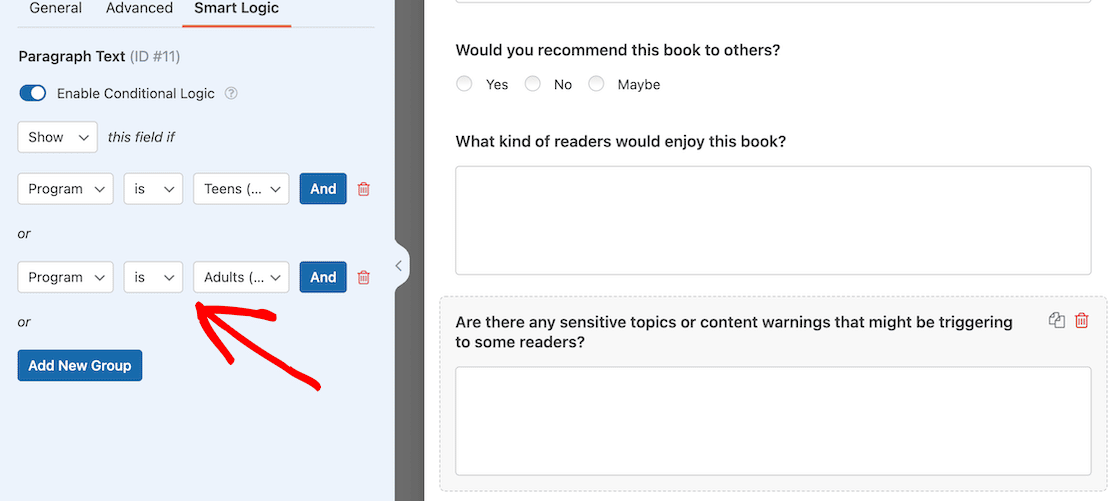
Because you ask kids and adults different questions about their books, we needed to set up different questions. One of those was whether there were any content warnings they’d give people before they read a particular book.
That’s not a question that will apply or make sense to children, so we can apply conditional logic so that it only displays when someone selects either the teen or adult program.
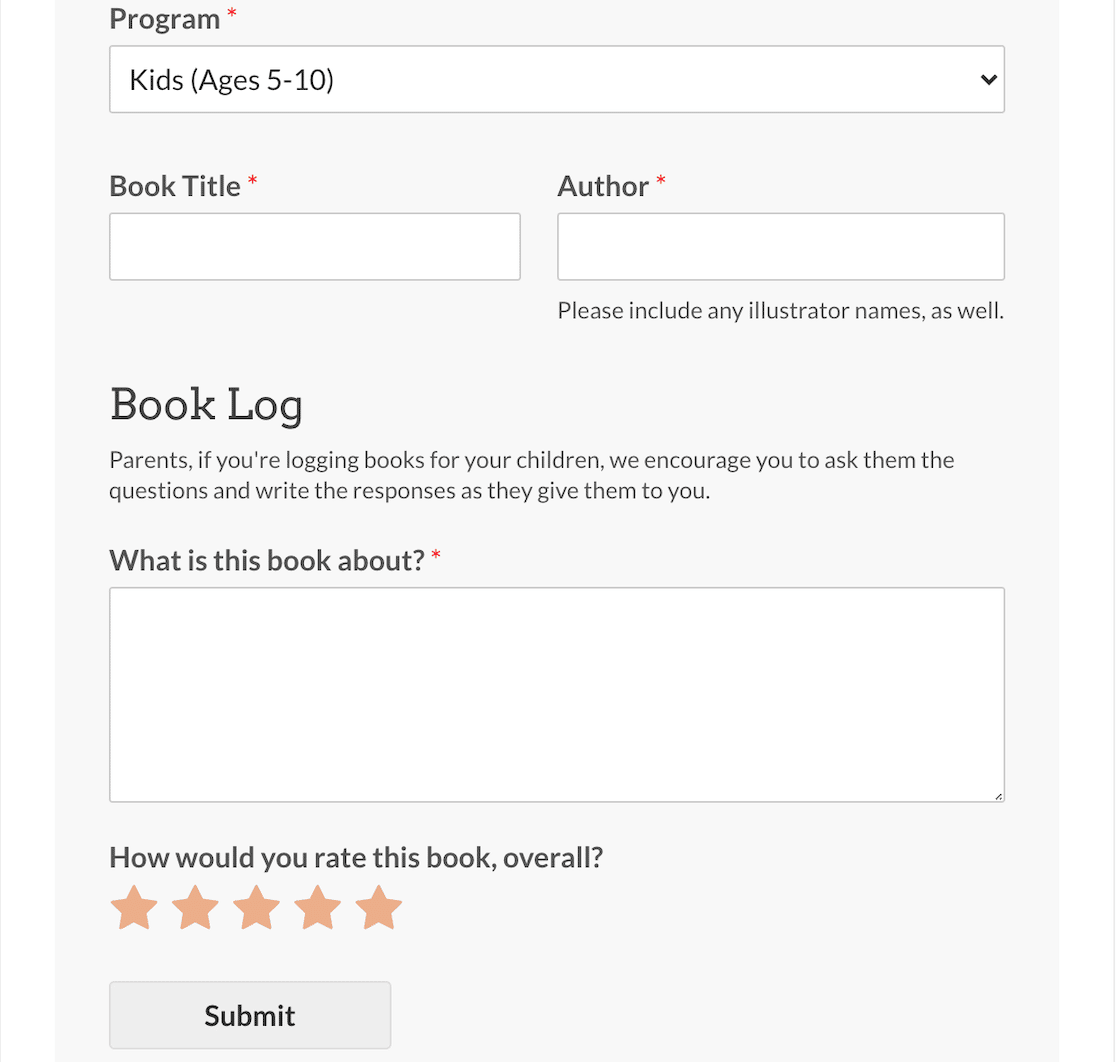
When the form is live, you can see that when the children’s program is selected, the form is very basic and something parents can easily ask their children and fill out.
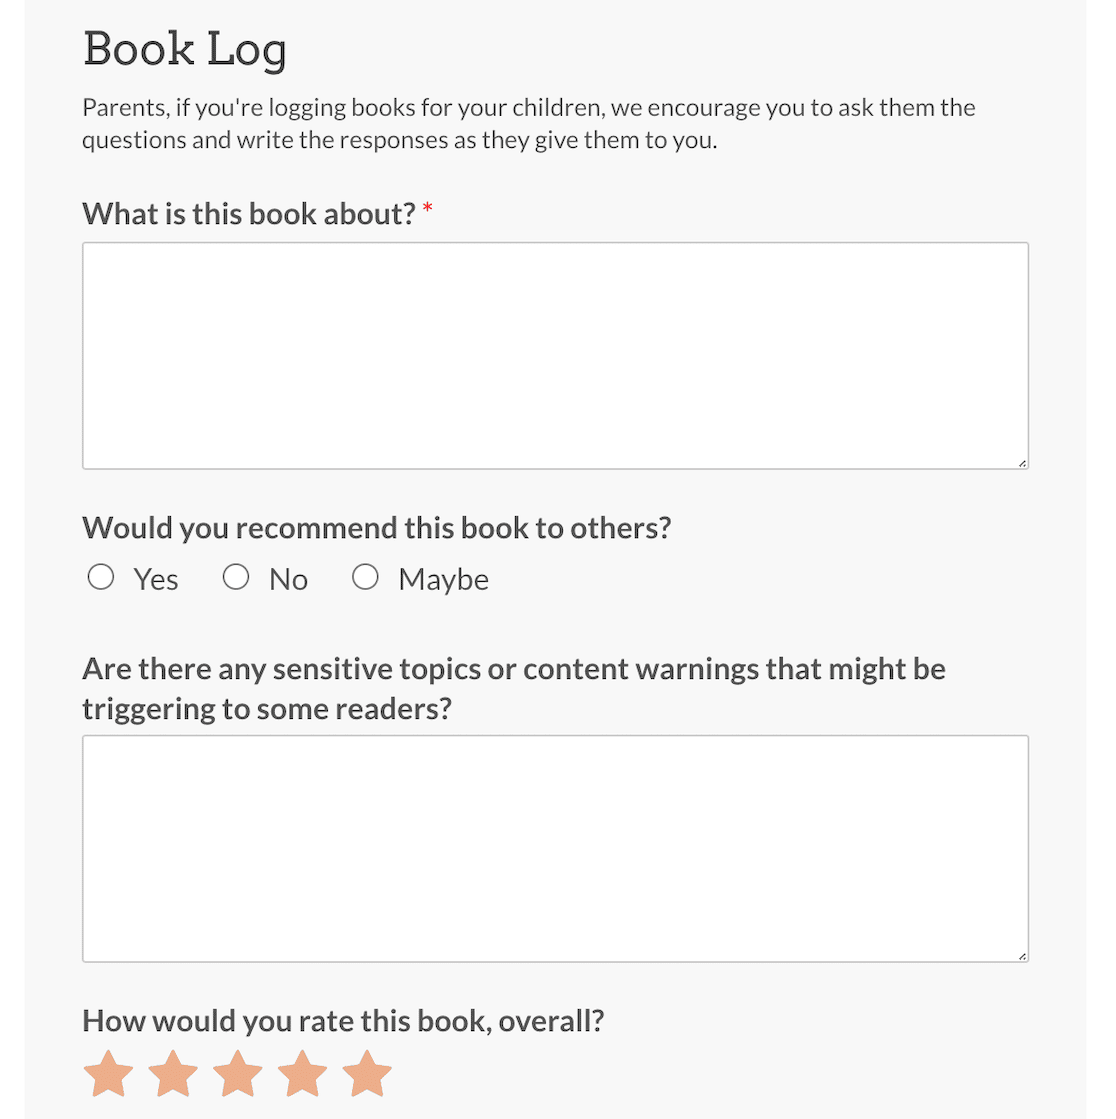
But when the adult program is selected, the form becomes more complex.
And that’s it! Now that you know how to use conditional logic in different ways, you’re ready to create killer dynamic forms for your users.
Next, Connect Your Survey to Google Sheets
Now that you know how to use conditional logic to collect all the right information at the right time, you can use WPForms integrations to organize it.
Use the Google Sheets addon for WPForms to connect your forms to Google Sheets and automatically populate those spreadsheets with the data collected from your survey results.
And if you want even more functionality, you can connect your WPForms to various third-party apps with Uncanny Automator.
Add Conditional Logic to WordPress Forms
Ready to build your form? Get started today with the easiest WordPress form builder plugin. WPForms Pro includes lots of free templates and offers a 14-day money-back guarantee.
If this article helped you out, please follow us on Facebook and Twitter for more free WordPress tutorials and guides.

